Murky Mill: Difference between revisions
(Per proposal.) |
(updated page) |
||
| Line 1: | Line 1: | ||
{{Levelbox | {{Levelbox | ||
|image=[[File:Murky Mill.png]] | |||
|image=[[File:Murky Mill.png | |||
|code=1 - 5 | |code=1 - 5 | ||
|world=[[Lake Orangatanga]] | |world=[[Lake Orangatanga]] | ||
| Line 9: | Line 8: | ||
|after=[[Belcha's Barn|>>]] | |after=[[Belcha's Barn|>>]] | ||
}} | }} | ||
'''Murky Mill''' is the fifth [[level]] | '''Murky Mill''' is the fifth [[level]] in ''[[Donkey Kong Country 3: Dixie Kong's Double Trouble!]]'' and of the first world, [[Lake Orangatanga]]. | ||
[[Dixie Kong]] and [[Kiddy Kong]] | ==Summary== | ||
Murky Mill takes place inside of a poorly lit interior of a windmill. [[Dixie Kong|Dixie]] and [[Kiddy Kong|Kiddy]] are transformed into [[Ellie the Elephant]] for most of the level. Ellie can pick up [[barrel]]s and [[Steel Barrel]]s with her trunk and throw them at enemies in her way. There are many [[Sneek]]s in the level. Ellie is required to defeat the ones under direct light, because upon seeing one, Ellie gets scared and quickly turns around. If a Sneek is not under direct light, Ellie can get by them. [[Re-Koil]]s make their first appearance in the level, and both red and green [[Buzz (enemy)|Buzz]]es are another enemy in the level. | |||
== | ==Layout== | ||
The level begins next to an elevator that the Kongs must ride up in order to reach a [[DK Barrel]] and a small doorway with an [[Animal Barrel]] in it. Upon entering this barrel, the Kongs are turned into Ellie the Elephant, who must continue through the level by traveling east past some Sneeks. On the way, she also passes [[banana]]s, the [[K-O-N-G Letters|letter K]], and a Banana Bunch. After dodging a lone Re-koil, the elephant finds a small gap with a moving platform and a banana bunch in it. At the bottom of the gap, there is an area to the west that she must travel along. Here, she can find a Sneek with a lamp shining light on it. Once she defeats it with the nearby barrel, she passes a few Re-Koils and another Sneek under direct light, who is lifted by a raised platform. If Ellie jumps into the light over this Sneek, she can find a green [[Extra Life Balloon]]. The letter O is located shorly after here above a jumping Re-Koil. Another gap follows here with a moving platform in it. Once Ellie reaches the bottom of it, she must travel east past | The level begins next to an elevator that the Kongs must ride up in order to reach a [[DK Barrel]] and a small doorway with an [[Animal Barrel]] in it. Upon entering this barrel, the Kongs are turned into Ellie the Elephant, who must continue through the level by traveling east past some Sneeks. On the way, she also passes [[banana]]s, the [[K-O-N-G Letters|letter K]], and a Banana Bunch. After dodging a lone Re-koil, the elephant finds a small gap with a moving platform and a banana bunch in it. At the bottom of the gap, there is an area to the west that she must travel along. Here, she can find a Sneek with a lamp shining light on it. Once she defeats it with the nearby barrel, she passes a few Re-Koils and another Sneek under direct light, who is lifted by a raised platform. If Ellie jumps into the light over this Sneek, she can find a green [[Extra Life Balloon]]. The letter O is located shorly after here above a jumping Re-Koil. Another gap follows here with a moving platform in it. Once Ellie reaches the bottom of it, she must travel east past the sixth Sneek, who is under another light, to reach the [[Star Barrel]]. | ||
At this point in the level, Ellie must continue in order to find a Buzz above a trapdoor and a [[Steel Keg|steel keg]] that can be used to defeat a Sneek under light located nearby. A small platform ahead of here can lead the elephant down to an area with a DK Barrel and a steel keg able to be utilized to defeat a Sneek later in the level, or to beat the [[Koin]] standing nearby. An elevator is next to the steel keg that can lift Ellie up to an additional area with a red Buzz and a Sneek under a lamp. She can discover more red Buzzes in a nearby gap with some small elevators in it. The elevators can help her safely reach the bottom of the gap, where there is a path leading past a few Re-Koils and to a Sneek under direct light. The letter N is just ahead, followed by a Sneek with light shining on it. A barrel is next to the Sneek that Ellie can only reach if she sucks it towards herself with her trunk. An additional gap is placed immediately after the Sneek, and at the bottom, she can discover two separate passages. The passage on the left leads to an [[Auto Fire Barrel]] that can shoot her to a higher area with some green Buzzes, a steel keg, and a [[Bonus Barrel]]. The area to her right contains a red Buzz and a lamp that shines over two Sneeks. A nearby barrel must be used to defeat them. Once she passes these foes, she approaches some Re-Koils and the letter G above a ledge that she must drop down. At the bottom of the ledge, there are two Sneeks next to the light shining from a lamp on the ceiling. A [[No Animal Sign]] follows, and once the elephant passes it, she is turned back into the Kongs, and a [[Bear Coin]] appears. The [[Level Flag]] is nearby. | At this point in the level, Ellie must continue in order to find a Buzz above a trapdoor and a [[Steel Keg|steel keg]] that can be used to defeat a Sneek under light located nearby. A small platform ahead of here can lead the elephant down to an area with a DK Barrel and a steel keg able to be utilized to defeat a Sneek later in the level, or to beat the [[Koin]] standing nearby. An elevator is next to the steel keg that can lift Ellie up to an additional area with a red Buzz and a Sneek under a lamp. She can discover more red Buzzes in a nearby gap with some small elevators in it. The elevators can help her safely reach the bottom of the gap, where there is a path leading past a few Re-Koils and to a Sneek under direct light. The letter N is just ahead, followed by a Sneek with light shining on it. A barrel is next to the Sneek that Ellie can only reach if she sucks it towards herself with her trunk. An additional gap is placed immediately after the Sneek, and at the bottom, she can discover two separate passages. The passage on the left leads to an [[Auto Fire Barrel]] that can shoot her to a higher area with some green Buzzes, a steel keg, and a [[Bonus Barrel]]. The area to her right contains a red Buzz and a lamp that shines over two Sneeks. A nearby barrel must be used to defeat them. Once she passes these foes, she approaches some Re-Koils and the letter G above a ledge that she must drop down. At the bottom of the ledge, there are two Sneeks next to the light shining from a lamp on the ceiling. A [[No Animal Sign]] follows, and once the elephant passes it, she is turned back into the Kongs, and a [[Bear Coin]] appears. The [[Level Flag]] is nearby. | ||
== | By completing the level, the Kongs can access the world's [[Swanky's Sideshow]] (or [[Swanky's Dash]] in the [[Game Boy Advance]] remake) and the boss level, [[Belcha's Barn]]. | ||
==Enemies== | |||
{|class="dktable-brown" width=10% | |||
|- | |||
!Name | |||
!Count | |||
|- | |||
|align="center" |[[File:Buzz DKC3 green.png]] [[File:Buzz DKC3 red.png]]<br>[[Buzz (enemy)|Buzz]] | |||
|11 (green)<br>5 (red)<br>'''Total:''' 16 | |||
|- | |||
|align="center" |[[File:Rekoil DKC3.png]]<br>[[Re-Koil]] | |||
|8 | |||
|- | |||
|align="center" |[[File:Sneek DKC3.png]]<br>[[Sneek]] | |||
|14 | |||
|} | |||
==Items and objects== | |||
{|class="dktable-brown" width=35% | |||
|- | |||
!Sprite | |||
!Name | |||
!Count | |||
|- | |||
|[[File:Banana DKC SNES.png]] | |||
|[[Banana]] | |||
|147 | |||
|- | |||
|[[File:Bear Coin.png]] | |||
|[[Bear Coin]] | |||
|3 | |||
|- | |||
|[[File:DK Barrel.png]] | |||
|[[DK Barrel]] | |||
|2 | |||
|- | |||
|[[File:Green Extra Life Balloon DKC3.png]] | |||
|[[Green Balloon]] | |||
|1 (hidden above the fifth Sneek) | |||
|} | |||
===K-O-N-G Letters=== | ===K-O-N-G Letters=== | ||
*K: | *K: Under the first light, which is after the second Sneek. | ||
*O: | *O: Above the third Re-Koil, who is almost immediately before the Star Barrel. | ||
*N: | *N: Shortly before a fork-in-the-road found near the end of the level. | ||
*G: | *G: Floating above a ledge, near two Re-Koils, right before the No Animal Sign. | ||
===DK Coin=== | |||
{|class="dktable-brown" | |||
!Image | |||
!Description | |||
|- | |||
|[[File:Murky Mill GBA Koin.png]] | |||
|Shortly after Ellie passes the Star Barrel, she can find a Steel Barrel next to a vertically-moving platform. To the right, Dixie can find the [[Koin]]. She must throw the Steel Barrel into the opening above for it to bounce off the wall behind Koin and hit him from behind. This causes Koin to be defeated, and the Kongs are rewarded the [[DK Coin]]. | |||
|} | |||
==Secrets== | |||
===Bonus Levels=== | ===Bonus Levels=== | ||
{|class="dktable-brown" | |||
!Image | |||
!Type and description | |||
|- | |||
|[[File:Murky Mill Bonus Level 1.png]] | |||
|'''Bash the Baddies!'''<br>After the Star Barrel, Ellie must pass a Buzz flying over a trapdoor, pick up a nearby Steel Barrel, and use it to defeat the Buzz. By falling through the trapdoor, Ellie is caught into a [[Bonus Barrel]]. In the [[Bonus Level]], Ellie has 25 seconds to defeat four Buzzes, who move in circles, using barrels which regenerate. After Ellie defeats the enemies, the [[Bonus Coin]] appears. | |||
|- | |||
|[[File:Murky Mill GBA Bonus Level 2.png]] | |||
|'''Find the Coin!'''<br>Shortly after the letter N, Ellie must go down an elevator platform and take the path to the left. She must enter an Auto-Fire Barrel that shoots her up to an area with two Buzzes and a Steel Barrel. The lower Buzz is hovering over the Bonus Barrel, so Ellie must use her suction to move the Steel Barrel onto the Buzz and then enter the Bonus Barrel. In the Bonus Level, Ellie has 15 seconds to reach the Bonus Coin at the end. The Bonus Level takes place on a straightforward path, and Ellie must avoid two pairs of Buzzes that are encircling the path. | |||
|} | |||
===Warp Barrel=== | ===Warp Barrel=== | ||
At the start of the level, when the Kongs reach the top of the elevator, they must use a [[Team-up]] throw to the top-left corner, where a [[Warp Barrel]] is hidden. It takes them to the level exit. | |||
==Gallery== | ==Gallery== | ||
===Super Nintendo Entertainment System=== | |||
<gallery> | <gallery> | ||
Murky Mill DKC3 shot 2.png|Ellie | Murky Mill DKC3 shot 2.png|Ellie standing under the letter K | ||
Murky Mill DKC3 GBA.png|The Kongs ride up the elevator at the | Murky Mill DKC3 Sneek in dark.png|Ellie encounters a Sneek in the dark | ||
Murky Mill DKC3 Sneeks and a barrel.png|Ellie holding a barrel at two Sneeks | |||
</gallery> | |||
===Game Boy Advance=== | |||
<gallery> | |||
Murky Mill DKC3 GBA.png|The Kongs ride up the elevator at the start | |||
Murky Mill GBA red Buzz.png|Ellie encounters a red Buzz | |||
Murky Mill GBA Re-Koil.png|Ellie holding a barrel at a Re-Koil | |||
</gallery> | </gallery> | ||
| Line 55: | Line 120: | ||
|ItaM=Black Mill | |ItaM=Black Mill | ||
}} | }} | ||
==Trivia== | |||
*[[List of Donkey Kong Country 3: Dixie Kong's Double Trouble! pre-release and unused content|Earlier versions]] of the game show that Murky Mill would have been in [[Kremwood Forest]], while [[Squeals on Wheels]] was originally in Lake Orangatanga.<ref>[[Nintendo Power]] #90, pages 26, 28, 30-31</ref><ref>Nintendo Power #91, page 55</ref> | |||
==References == | |||
<references/> | |||
{{DKC3}} | {{DKC3}} | ||
[[Category:Buildings]] | [[Category:Buildings]] | ||
[[Category:Donkey Kong Country 3: Dixie Kong's Double Trouble! Levels]] | [[Category:Donkey Kong Country 3: Dixie Kong's Double Trouble! Levels]] | ||
Revision as of 21:32, October 25, 2019
Template:Levelbox Murky Mill is the fifth level in Donkey Kong Country 3: Dixie Kong's Double Trouble! and of the first world, Lake Orangatanga.
Summary
Murky Mill takes place inside of a poorly lit interior of a windmill. Dixie and Kiddy are transformed into Ellie the Elephant for most of the level. Ellie can pick up barrels and Steel Barrels with her trunk and throw them at enemies in her way. There are many Sneeks in the level. Ellie is required to defeat the ones under direct light, because upon seeing one, Ellie gets scared and quickly turns around. If a Sneek is not under direct light, Ellie can get by them. Re-Koils make their first appearance in the level, and both red and green Buzzes are another enemy in the level.
Layout
The level begins next to an elevator that the Kongs must ride up in order to reach a DK Barrel and a small doorway with an Animal Barrel in it. Upon entering this barrel, the Kongs are turned into Ellie the Elephant, who must continue through the level by traveling east past some Sneeks. On the way, she also passes bananas, the letter K, and a Banana Bunch. After dodging a lone Re-koil, the elephant finds a small gap with a moving platform and a banana bunch in it. At the bottom of the gap, there is an area to the west that she must travel along. Here, she can find a Sneek with a lamp shining light on it. Once she defeats it with the nearby barrel, she passes a few Re-Koils and another Sneek under direct light, who is lifted by a raised platform. If Ellie jumps into the light over this Sneek, she can find a green Extra Life Balloon. The letter O is located shorly after here above a jumping Re-Koil. Another gap follows here with a moving platform in it. Once Ellie reaches the bottom of it, she must travel east past the sixth Sneek, who is under another light, to reach the Star Barrel.
At this point in the level, Ellie must continue in order to find a Buzz above a trapdoor and a steel keg that can be used to defeat a Sneek under light located nearby. A small platform ahead of here can lead the elephant down to an area with a DK Barrel and a steel keg able to be utilized to defeat a Sneek later in the level, or to beat the Koin standing nearby. An elevator is next to the steel keg that can lift Ellie up to an additional area with a red Buzz and a Sneek under a lamp. She can discover more red Buzzes in a nearby gap with some small elevators in it. The elevators can help her safely reach the bottom of the gap, where there is a path leading past a few Re-Koils and to a Sneek under direct light. The letter N is just ahead, followed by a Sneek with light shining on it. A barrel is next to the Sneek that Ellie can only reach if she sucks it towards herself with her trunk. An additional gap is placed immediately after the Sneek, and at the bottom, she can discover two separate passages. The passage on the left leads to an Auto Fire Barrel that can shoot her to a higher area with some green Buzzes, a steel keg, and a Bonus Barrel. The area to her right contains a red Buzz and a lamp that shines over two Sneeks. A nearby barrel must be used to defeat them. Once she passes these foes, she approaches some Re-Koils and the letter G above a ledge that she must drop down. At the bottom of the ledge, there are two Sneeks next to the light shining from a lamp on the ceiling. A No Animal Sign follows, and once the elephant passes it, she is turned back into the Kongs, and a Bear Coin appears. The Level Flag is nearby.
By completing the level, the Kongs can access the world's Swanky's Sideshow (or Swanky's Dash in the Game Boy Advance remake) and the boss level, Belcha's Barn.
Enemies
| Name | Count |
|---|---|
Buzz |
11 (green) 5 (red) Total: 16 |
Re-Koil |
8 |
Sneek |
14 |
Items and objects
| Sprite | Name | Count |
|---|---|---|
| Banana | 147 | |
| Bear Coin | 3 | |
| DK Barrel | 2 | |
| Green Balloon | 1 (hidden above the fifth Sneek) |
K-O-N-G Letters
- K: Under the first light, which is after the second Sneek.
- O: Above the third Re-Koil, who is almost immediately before the Star Barrel.
- N: Shortly before a fork-in-the-road found near the end of the level.
- G: Floating above a ledge, near two Re-Koils, right before the No Animal Sign.
DK Coin
| Image | Description |
|---|---|

|
Shortly after Ellie passes the Star Barrel, she can find a Steel Barrel next to a vertically-moving platform. To the right, Dixie can find the Koin. She must throw the Steel Barrel into the opening above for it to bounce off the wall behind Koin and hit him from behind. This causes Koin to be defeated, and the Kongs are rewarded the DK Coin. |
Secrets
Bonus Levels
| Image | Type and description |
|---|---|

|
Bash the Baddies! After the Star Barrel, Ellie must pass a Buzz flying over a trapdoor, pick up a nearby Steel Barrel, and use it to defeat the Buzz. By falling through the trapdoor, Ellie is caught into a Bonus Barrel. In the Bonus Level, Ellie has 25 seconds to defeat four Buzzes, who move in circles, using barrels which regenerate. After Ellie defeats the enemies, the Bonus Coin appears. |

|
Find the Coin! Shortly after the letter N, Ellie must go down an elevator platform and take the path to the left. She must enter an Auto-Fire Barrel that shoots her up to an area with two Buzzes and a Steel Barrel. The lower Buzz is hovering over the Bonus Barrel, so Ellie must use her suction to move the Steel Barrel onto the Buzz and then enter the Bonus Barrel. In the Bonus Level, Ellie has 15 seconds to reach the Bonus Coin at the end. The Bonus Level takes place on a straightforward path, and Ellie must avoid two pairs of Buzzes that are encircling the path. |
Warp Barrel
At the start of the level, when the Kongs reach the top of the elevator, they must use a Team-up throw to the top-left corner, where a Warp Barrel is hidden. It takes them to the level exit.
Gallery
Super Nintendo Entertainment System
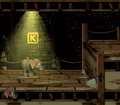
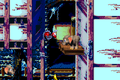
Ellie standing under the letter K
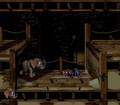
Ellie encounters a Sneek in the dark
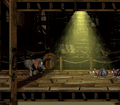
Ellie holding a barrel at two Sneeks


Game Boy Advance
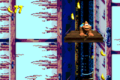
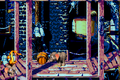
The Kongs ride up the elevator at the start
Ellie encounters a red Buzz
Ellie holding a barrel at a Re-Koil


Names in other languages
| Language | Name | Meaning |
|---|---|---|
| Japanese | コワガリエリー Kowagari Erī |
Timid Ellie |
| German | Moder-Mühle |
Mold Mill |
| Italian | Mulino Nero |
Black Mill |
| Spanish | El Molino Oscuro |
The Dark Mill |
Trivia
- Earlier versions of the game show that Murky Mill would have been in Kremwood Forest, while Squeals on Wheels was originally in Lake Orangatanga.[1][2]
References
- ^ Nintendo Power #90, pages 26, 28, 30-31
- ^ Nintendo Power #91, page 55