List of extras in Donkey Kong Country Returns: Difference between revisions
(→Image gallery: derp) Tag: Mobile edit |
LinkTheLefty (talk | contribs) mNo edit summary |
||
| (25 intermediate revisions by 15 users not shown) | |||
| Line 1: | Line 1: | ||
{{italic title|List of extras in ''Donkey Kong Country Returns''}} | {{italic title|List of extras in ''Donkey Kong Country Returns''}} | ||
{{see also|List of extras in Donkey Kong Country: Tropical Freeze}} | {{see also|List of extras in Donkey Kong Country: Tropical Freeze}} | ||
As with other games developed by [[Retro Studios]], namely the '' | As with other games developed by [[Retro Studios]], namely the [[metroidwiki:Metroid Prime (series)|''Metroid Prime'' series]], ''[[Donkey Kong Country Returns]]'' rewards players with a series of extra content once they complete certain tasks throughout the game, such as collecting all [[Puzzle Piece (Donkey Kong Country series)|Puzzle Pieces]], defeating a world's boss, or beating the game on Mirror Mode. The optional content comes in the form of images, music, dioramas and (only in the [[Donkey Kong Country Returns 3D|Nintendo 3DS version]]) cinematic video clips, and can be accessed through the "EXTRAS" section of a game file. | ||
==Diorama gallery== | ==Diorama gallery== | ||
Dioramas are inanimate three-dimensional models logging various scenes from [[Donkey Kong|Donkey]] and [[Diddy Kong]]'s journey on [[Donkey Kong Island]], starting with the Jungle and ending with the Volcano. Each diorama is based on one of the eight main worlds; the conditions to unlock it are defeating the boss and collecting all [[Puzzle Piece (Donkey Kong Country series)|Puzzle Pieces]] from the Key Temple level of that world for the first time. Unlocked dioramas can be viewed in their appointed gallery, and can be rotated and zoomed in or out. | Dioramas are inanimate three-dimensional models logging various scenes from [[Donkey Kong|Donkey]] and [[Diddy Kong]]'s journey on [[Donkey Kong Island]], starting with the Jungle and ending with the Volcano. Each diorama is based on one of the eight main worlds; the conditions to unlock it are defeating the boss and collecting all [[Puzzle Piece (Donkey Kong Country series)|Puzzle Pieces]] from the Key Temple level of that world for the first time. Unlocked dioramas can be viewed in their appointed gallery, and can be rotated and zoomed in or out. | ||
| Line 25: | Line 24: | ||
*'''Golden Temple''' – contains numerous early ideas for the last level of the game, the [[Golden Temple]]; to unlock the entire gallery, all Puzzle Pieces must be collected in the Golden Temple; | *'''Golden Temple''' – contains numerous early ideas for the last level of the game, the [[Golden Temple]]; to unlock the entire gallery, all Puzzle Pieces must be collected in the Golden Temple; | ||
*'''Bonus Gallery''' – contains miscellaneous artworks; to unlock the entire gallery, Tiki Tong must be defeated. | *'''Bonus Gallery''' – contains miscellaneous artworks; to unlock the entire gallery, Tiki Tong must be defeated. | ||
Rows detailing concepts that were either partially used or had undergone significant changes are in white, and sections of completely discarded ideas are in light gray. | |||
{{br}} | {{br}} | ||
{|width=100% | {|class="wikitable dk"width=100% | ||
|- | |- | ||
! | !colspan="3"|Critters 1 Gallery | ||
|- | |- | ||
!Name!!Description!!Unlock criteria | |||
|- | |- | ||
| align="center" style="background:# | |align="center"style="background:#fff"|[[File:Frogoon.png|270px]]<br>'''Frogoon''' | ||
| style="background:# | |style="background:#fff"|Concept artwork of a [[Frogoon]]. Compared to its final version, the enemy has a more wrinkled, flabby appearance, as well as purple lumps scattered on its skin. Its eyes are also smaller and sunk into the face. | ||
| | |style="background:#fff"width=20%|Collecting all Puzzle Pieces in [[King of Cling]] | ||
|- | |- | ||
| | |style="background:#fff"align="center"|[[File:Awkconcept.png|270px]]<br>'''Awk''' | ||
| style="background:# | |style="background:#fff"|Two stances of a full-fledged [[Awk]] (idle and agitated), under some smaller sketches of the same enemy: one shows an Awk hatching from an egg (which never happens in-game), the other is a perspective sheet with two Awk poses, and the rest depict an early Awk with a masked, fowl-like appearance. | ||
| | |style="background:#fff"width=20%|Collecting all Puzzle Pieces in [[Canopy Cannons]] | ||
|- | |- | ||
| | |style="background:#fff"align="center"|{{anchor|Pinchly & Pal}}[[File:Crabs Concept Art.png|270px]]<br>'''Pinchly & Pal''' | ||
| style="background: | |style="background:#fff"|Two pirate-clad crabs lying on the shoreline. One is a [[Pinchly]] found commonly throughout the [[Beach]] area, and the other is "Pal", an unused crab with a sneering expression wielding a sword for a pincer. | ||
| | |style="background:#fff"width=20%|Collecting all Puzzle Pieces in [[Sloppy Sands]] | ||
|- | |- | ||
| align="center | |align="center"|[[File:Snaggle.png|270px]]<br>'''Snaggles''' | ||
| | |A [[Snaggles]] basking in light beams. | ||
| | |width=20%|Collecting all Puzzle Pieces in [[Peaceful Pier]] | ||
|- | |- | ||
| align="center | |align="center"|[[File:DKCR Concept Art Squid.png|270px]]<br>'''Squiddicus''' | ||
| | |Front view of [[Squiddicus]], partially raising its tentacles over the stormy black sea. Two seagulls can be seen flying away from Squiddicus. | ||
| | |width=20%|Collecting all Puzzle Pieces in [[Stormy Shore]] | ||
|- | |- | ||
| align="center | |align="center"|[[File:StiltsDKCR.png|270px]]<br>'''Stilts''' | ||
| | |A few stances of a [[Stilts (enemy)|Stilts]] over a plain gray background. The drawing on the right depicts the enemy in its default state, standing on top of the stilts. The bottom left stance shows the enemy without them, while the one above is featherless and appears to run agitatedly. | ||
| | |width=20%|Collecting all Puzzle Pieces in [[Button Bash]] | ||
|- | |- | ||
| align="center | |align="center"|[[File:Humzee.png|270px]]<br>'''Humzee''' | ||
| | |Illustration of [[Humzee]], the minuscule {{wp|hummingbird}} enemy species from [[Button Bash]], over a dark gray background. | ||
| | |width=20%|Collecting all Puzzle Pieces in [[Mast Blast]] | ||
|- | |- | ||
| align="center | |align="center"|[[File:Squeeklyfamily.png|270px]]<br>'''Squeekly Family''' | ||
| | |The [[Big Squeekly]] sleeping with three of [[Squeekly|its smaller relatives]] inside a cavern. | ||
| | |width=20%|Collecting all Puzzle Pieces in [[Crowded Cavern]] | ||
|- | |- | ||
| align="center | |align="center"|[[File:Skittler.png|270px]]<br>'''Skittler''' | ||
| | |Close-up of a brown [[Skittler]] hanging down from a thread over a wooden-looking background. | ||
| | |width=20%|Collecting all Puzzle Pieces in [[Springy Spores]] | ||
|- | |- | ||
|align="center"|[[File:Animalfriendsdkcr.png|270px]]<br>'''Animal Friends''' | |||
|Group picture of all passive critters on Donkey Kong Island that were hypnotized by the Tiki Tak Tribe into stealing DK's [[banana hoard]]. | |||
|width=20%|Collecting all Puzzle Pieces in [[Switcheroo]] | |||
|- | |- | ||
! | !colspan="3"|Critters 2 Gallery | ||
|- | |- | ||
!Name!!Description!!Unlock criteria | |||
|- | |- | ||
| | |style="background:#fff"align="center"|{{anchor|Squid Shot}}[[File:Squidly.png|270px]]<br>'''Squid Shot''' | ||
| style="background:# | |style="background:#fff"|A [[Squid Shot]] launches a shell-less [[Squidly]] through one of its cannons. Compared to its final version, the Squid Shot appears to be a tower-like structure manned by a visible, crab-like character. It features one cannon on each side, positioned at different levels. | ||
| | |style="background:#fff"width=20%|Collecting all Puzzle Pieces in [[Blowhole Bound]] | ||
|- | |- | ||
| | |style="background:#fff"align="center"|[[File:Toothberry1.png|270px]]<br>'''Cageberry & Pals''' | ||
| style="background: | |style="background:#fff"|A single [[Cageberry]] accompanied by two [[Toothberry|Toothberries]], none of which feature a nose like their final versions. | ||
| | |style="background:#fff"width=20%|Collecting all Puzzle Pieces in [[Itty Bitty Biters]] | ||
|- | |- | ||
| align="center | |align="center"|[[File:TikiPop.png|270px]]<br>'''Tiki Pop''' | ||
| | |Illustration of a [[Tiki Pop]] carrying a fuse-burning [[bomb]]. | ||
| | |width=20%|Collecting all Puzzle Pieces in [[Grip 'n' Trip]] | ||
|- | |- | ||
| align="center | |align="center"|[[File:MoleMiner.png|270px]]<br>'''Mole Guards''' | ||
| | |Profile and front depictions of two [[Mole Guard]]s, along with their signature bomb in the middle. | ||
| | |width=20%|Collecting all Puzzle Pieces in [[Bombs Away (level)|Bombs Away]] | ||
|- | |- | ||
| | |style="background:#fff"align="center"|[[File:Buzzbite.png|270px]]<br>'''Buzzbite''' | ||
| style="background:# | |style="background:#fff"|A dizzy [[Buzzbite]] on a ledge, next to a moving Buzzbite below. In the game, Buzzbites circle continuously around platforms without ever entering a dizzy state. | ||
| | |style="background:#fff"width=20%|Collecting all Puzzle Pieces in [[Flutter Flyaway]] | ||
|- | |- | ||
| | |style="background:#fff"align="center"|[[File:ChompDKCR.png|270px]]<br>'''The Chomp Family''' | ||
| style="background:# | |style="background:#fff"|Members from the [[Chomp (Donkey Kong Country series)|Chomp]]-related group of enemies, imposed on a light-gray background. Starting from left, these are the [[green Chomp]], [[shooting Chomp]], [[Ape-Eating Plant|hungry plant]] and a regular Chomp. The hungry plant appears to be facing up, while in the actual game, they are only found hanging down from forest canopies. | ||
| | |style="background:#fff"width=20%|Collecting all Puzzle Pieces in [[Muncher Marathon]] | ||
|- | |- | ||
| | |style="background:#fff"align="center"|[[File:Skellirex.png|270px]]<br>'''Skellirex''' | ||
| style="background:# | |style="background:#fff"|A [[Skellirex]] standing near a forested area. Unlike its final version, this Skellirex lacks the crest on the back of its skull. | ||
| | |style="background:#fff"width=20%|Collecting all Puzzle Pieces in [[Tippy Shippy]] | ||
|- | |- | ||
| | |style="background:#fff"align="center"|[[File:Boneheady.png|270px]]<br>'''Bonehead Jed''' | ||
| style="background: | |style="background:#fff"|A [[Bonehead Jed]] maneuvering a tar-filled cart in what appears to be a desolate canyon setting, resembling the [[Cliff]]. In this artwork, the enemy is shown spitting a blob of tar, which does not happen in-game. | ||
| | |style="background:#fff"width=20%|Collecting all Puzzle Pieces in [[Clifftop Climb]] | ||
|- | |- | ||
| align="center | |align="center"|[[File:Kowalee DKCR concept.png|270px]]<br>'''Kowalee''' | ||
|The [[Kowalee]], an enemy that pilots a propeller carriage and attacks by tossing bombs. The cloudy scenery behind it is reminiscent of [[Golden Temple]], where Kowalees can be found in-game. The colors on the enemy appear to be less saturated here than in the actual game. | |||
| | |width=20%|Collecting all Puzzle Pieces in [[Gear Getaway]] | ||
|- | |- | ||
|style="background:#fff"align="center"|[[File:Readybotsdk.png|270px]]<br>'''Ready-Bots''' | |||
|style="background:#fff"|The main robotic patrol of the [[Factory (Donkey Kong Country Returns)|Factory]], consisting of an electrified [[Pogobot]], a flame-throwing [[Pyrobot]], and an unknown floating green robot shooting buzzsaws. Only the former two appear in the game and also retain the explicit abilities shown in the artwork. | |||
|style="background:#fff"width=20%|Collecting all Puzzle Pieces in [[Music Madness]] | |||
|- | |- | ||
! | !colspan="3"|Tiki Gallery | ||
|- | |- | ||
!Name!!Description!!Unlock criteria | |||
|- | |- | ||
| align="center | |align="center"|[[File:ScreamingPillar.png|270px]]<br>'''Screaming Pillar''' | ||
| | |Front view of four different stances of a [[Screaming Pillar]] awaking and toppling. The Screaming Pillar sleeps, notices its foundation crumbling, screams as it is about to fall and then finally collapses on the ground. | ||
| | |width=20%|Collecting all Puzzle Pieces in [[Sunset Shore]] | ||
|- | |- | ||
| align="center | |align="center"|[[File:Tikibuzzca.png|270px]]<br>'''Tiki Buzz''' | ||
| | |Artwork of a wooded area with flat tree branches and a few totems lying in the corner. The focus of the picture is the [[Tiki Buzz]]. | ||
| | |width=20%|Collecting all Puzzle Pieces in [[Mole Patrol]] | ||
|- | |- | ||
| align="center | |align="center"|[[File:Tikitankca.png|270px]]<br>'''Tiki Tank''' | ||
| | |A pair of [[Tiki Tank]]s in a grove. One is standing upright, while the other lies dizzily upside down. In the game, their sturdy reinforcements prevent any direct attack onto them, but if flipped over with a ground pound, their vulnerable underside is revealed, as shown in the artwork. | ||
| | |width=20%|Collecting all Puzzle Pieces in [[Longshot Launch]] | ||
|- | |- | ||
| align="center | |align="center"|[[File:TikiBoing.png|270px]]<br>'''Tiki Boing''' | ||
| | |Two stances of a [[Tiki Boing]], contracting and springing, over a smoky green background. | ||
| | |width=20%|Collecting all Puzzle Pieces in [[Weighty Way]] | ||
|- | |- | ||
| align="center | |align="center"|[[File:TikiTorch.png|270px]]<br>'''Tiki Torch''' | ||
| | |A [[Tiki Torch]] set on fire, with its mouth wide open, and a muted one that is extinguished and expelling fumes. | ||
| | |width=20%|Collecting all Puzzle Pieces in [[Boulder Roller]] | ||
|- | |- | ||
| align="center | |align="center"|[[File:Tikipilot.png|270px]]<br>'''Tiki Pilot''' | ||
| | |The [[Tiki Pilot]] holding its staff and emitting strange, wavy fumes. The character is illustrated over a green background, similarly to the Tiki Boings in a previous artwork. | ||
| | |width=20%|Collecting all Puzzle Pieces in [[Handy Hazards]] | ||
|- | |- | ||
| | |style="background:#fff"align="center"|[[File:Tikilineup.png|270px]]<br>'''Tiki Lineup''' | ||
| style="background:# | |style="background:#fff"|Several dancing Tiki drum characters lined up to bounce a {{wp|piranha}}-like fish. Among them is a [[Tiki Goon]], but the rest do not appear in the game in any form. The smaller drums around the Tiki Goon display a specific appearance, the most distinguishing traits being the oblong mouths, red pupils and bright sclera, along with the feather tufts on their sides and their short skirts. | ||
| | |style="background:#fff"width=20%|Collecting all Puzzle Pieces in [[Hot Rocket]] | ||
|- | |- | ||
| | |style="background:#ccc"align="center"|{{anchor|Early Lava Tiki}}[[File:Lavatiki.png|270px]]<br>'''Early Lava Tiki''' | ||
| style="background:# | |style="background:#ccc"|Two stances of a completely unused lava-based enemy that bears a resemblance to [[Tiki Boing]]s. The enemy is composed of a few segments with pointy, rugose margins, and appears to expel magma when active and fumes when idle, dripping lava through its eyes and in-between the segments. | ||
| | |style="background:#ccc"width=20%|Collecting all Puzzle Pieces in [[Roasting Rails]] | ||
|- | |- | ||
| | |style="background:#ccc"align="center"|[[File:TikiExtremes.png|270px]]<br>'''Tiki Extremes''' | ||
| style="background: | |style="background:#ccc"|Picture of a somber, sentient-looking drum standing between two living torches in a ritualic composition. None of these elements are seen in the actual game. | ||
|width=20% rowspan=2|Beating the game on Mirror Mode | |||
|- | |- | ||
|align="center"|[[File:Tikitongstoryboard.png|270px]]<br>'''Tiki Tong Storyboard''' | |||
|Short storyboard for the game's post-final battle cutscene. Donkey Kong is blasted through the Tiki Tong Tower, and as the tower looks up perplexed, it is suddenly squashed by the Moon, brought down by DK. | |||
|- | |- | ||
! | !colspan=3|'''Boss Gallery''' | ||
|- | |- | ||
!Name!!Description!!Unlock criteria | |||
|- | |- | ||
| align="center" | |align="center"|[[File:Muglyconcept.png|270px]]<br>'''Mugly''' | ||
|Standard pose of [[Mugly]] over a gray background. | |||
|width=20%|Collecting all Puzzle Pieces in [[Poppin' Planks]] | |||
The shoreline background used here is also used for the ''[[List of extras in Donkey Kong Country Returns#Pinchly & Pal|Pinchly & Pal]]'' and ''[[List of extras in Donkey Kong Country Returns#Squid Shot|Squid Shot]]'' artworks. | |- | ||
| | |align="center"|[[File:Scurvycrewconcept.png|270px]]<br>'''Scurvy Crew''' | ||
|The members of the [[Scurvy Crew]] pose in a tower formation. A notable difference from this artwork during the game is that the positions of the blue and orange crabs in the tower are switched, while Cap'n Greenbeard keeps his top position.<br>The shoreline background used here is also used for the ''[[List of extras in Donkey Kong Country Returns#Pinchly & Pal|Pinchly & Pal]]'' and ''[[List of extras in Donkey Kong Country Returns#Squid Shot|Squid Shot]]'' artworks. | |||
|width=20%|Collecting all Puzzle Pieces in [[Wonky Waterway]] | |||
|- | |- | ||
| align="center | |align="center"|[[File:Stuconcept.png|270px]]<br>'''Stu''' | ||
|[[Stu]] grinning and flying in his golden cauldron, on a white background. | |||
| | |width=20%|Collecting all Puzzle Pieces in [[Rickety Rails]] | ||
|- | |- | ||
| align="center | |align="center"|[[File:Minermaxconcept.png|270px]]<br>'''Mole Miner Max''' | ||
|[[Mole Miner Max]] commanding a troop of [[Mole Miner]]s while standing atop a coal wagon. | |||
| | |width=20%|Collecting all Puzzle Pieces in [[Vine Valley (level)|Vine Valley]] | ||
|- | |- | ||
| align="center | |align="center"|[[File:MoleMiner1.png|270px]]<br>'''Mole Miners''' | ||
|Sketch of the speeding [[The Mole Train|Mole Train]], an important vehicle used by Mole Miners and headed by Mole Miner Max. In this artwork, he is shown furiously emerging from the train's cab with a clenched fist, while a few other moles peer from several parts of the train. | |||
| | |width=20%|Collecting all Puzzle Pieces in [[Clingy Swingy]] | ||
|- | |- | ||
| align="center | |align="center"|[[File:Mangorubyconcept.png|270px]]<br>'''Mangoruby''' | ||
|The two states of [[Mangoruby]] — inactive and electrified. | |||
| | |width=20%|Collecting all Puzzle Pieces in [[Sticky Situation]] | ||
|- | |- | ||
| | |style="background:#fff"align="center"|[[File:Thuglyconcept.png|270px]]<br>'''Thugly''' | ||
| style="background:# | |style="background:#fff"|[[Thugly]], in the same pose as Mugly in his concept artwork. A remarkable difference between this representation and the enemy's final appearance is in the exoskeleton, which appears to be a curved shell with {{wp|Naval mine|mine}}-like bulges instead of a segmented plate formation. Additionally, Thugly's tongue is olive-colored here, rather than dark gray. | ||
| | |style="background:#fff"width=20%|Collecting all Puzzle Pieces in [[Foggy Fumes]] | ||
|- | |- | ||
| align="center | |align="center"|[[File:DKCR Artwork Stampfobot 0815.png|270px]]<br>'''Colonel Pluck''' | ||
|[[Colonel Pluck]] maneuvering his [[Stompybot 3000]]. | |||
| | |width=20%|Collecting all Puzzle Pieces in [[Furious Fire]] | ||
|- | |- | ||
| align="center | |align="center"|[[File:Tikitongtowerconcept.png|140px]]<br>'''Tiki Tong Tower''' | ||
|The Tiki Tong Tower rising above the erupting [[volcano]] and drenched in billows of smoke. | |||
| | |width=20%|Collecting all Puzzle Pieces in [[Moving Melters]] and defeating Tiki Tong | ||
|- | |- | ||
| | |style="background:#fff"align="center"|[[File:Tikitongconcept.png|270px]]<br>'''Tiki Tong''' | ||
| style="background:# | |style="background:#fff"|[[Tiki Tong]]'s head seen from frontal and side angles, along with his hands positioned at different angles each. The right hand, which is seen from behind, appears to have three red incrustations, as opposed to a single red button in the middle like in the character's in-game appearance. | ||
| | |style="background:#fff"width=20%|Collecting all Puzzle Pieces in [[Red Red Rising]] and defeating Tiki Tong | ||
|- | |- | ||
! colspan=3 | !colspan=3|'''Worlds Gallery''' | ||
|- | |- | ||
! | !Name!!Description!!Unlock criteria | ||
! | |||
! | |||
|- | |- | ||
| | |style="background:#fff"align="center"|{{anchor|Jungle Waterfalls}}[[File:Dkcr concept art-13.jpg|270px]]<br>'''Jungle Waterfalls''' | ||
| style="background:# | |style="background:#fff"|A large lineup of cascades in a bright jungle grove. Profound green spots of vegetation stifle through the waterfalls and the surrounding banks. Donkey Kong is seen capering on some platforms in front of the waterfalls, having exited a cavern with red metallic beams. | ||
| | |style="background:#fff"width=20%|Collecting all Puzzle Pieces in [[Tree Top Bop]] | ||
|- | |- | ||
| | |style="background:#fff"align="center"|{{anchor|Jungle Statues}}[[File:Dkcr concept art-2.jpg|270px]]<br>'''Jungle Statues''' | ||
| style="background:# | |style="background:#fff"|Donkey Kong and Diddy Kong walk into a jungle delta, home to a large number of lily pads. A big serpent-like statue lies fixed in the dense vegetation, consisting of bamboos and ferns. | ||
| | |style="background:#fff"width=20%|Collecting all Puzzle Pieces in [[Crazy Cart]] | ||
|- | |- | ||
| align="center | |align="center"|{{anchor|Ship Attack!}}{{anchor|Ship Attack}}[[File:Dkcr concept art-16.jpg|270px]]<br>'''Ship Attack!''' | ||
|Scene of a naval conflict between several galleons, occurring near land. Donkey Kong, swinging on a rope, narrowly avoids a cannonball that is damaging a ship spar. The artwork is enclosed by a darkened ring edge, creating tension and a unique atmosphere.<br>The two levels that approach this level theme are [[Cannon Cluster]] and [[Mast Blast]]. | |||
|width=20%|Collecting all Puzzle Pieces in [[Cannon Cluster]] | |||
The two levels that approach this level theme are [[Cannon Cluster]] and [[Mast Blast]]. | |||
| | |||
|- | |- | ||
| | |style="background:#ccc"align="center"|{{anchor|Undersea Adventures}}[[File:Dkcr concept art-3.jpg|140px]]<br>'''Undersea Adventures''' | ||
| style="background:# | |style="background:#ccc"|An underwater scene that captures Donkey Kong riding a red ''{{wp|Dunkleosteus}}'' through a submerged forest. A school of piranhas swim in the opposite direction, in front of a spindly trunk. Donkey Kong has a thin snorkel pipe in his mouth, even though he never uses one while swimming in other games.<br>Despite what the artwork depicts, there are no underwater levels in ''Donkey Kong Country Returns'', as the game lacks a swimming mechanic. | ||
|style="background:#ccc"width=20%|Collecting all Puzzle Pieces in [[Tidal Terror]] | |||
Despite what the artwork depicts, there are no underwater levels in ''Donkey Kong Country Returns'', as the game lacks a swimming mechanic. | |||
| | |||
|- | |- | ||
| align="center | |align="center"|[[File:Dkcr concept art-5.jpg|270px]]<br>'''Ruins''' | ||
|DK prepares to enjoy a banana in a ruinated settlement, hosting statues and other structures with a heavy resemblance to {{wp|Aztec}} architecture. The artwork is presented at an {{wp|Dutch angle|oblique angle}} and is a basis for the game's [[Ruins]] world. | |||
| | |width=20%|Collecting all Puzzle Pieces in [[Damp Dungeon]] | ||
|- | |- | ||
| | |style="background:#ccc"align="center"|{{anchor|Bamboo Forest}}[[File:Dkcr concept art-10.jpg|270px]]<br>'''Bamboo Forest''' | ||
| style="background:# | |style="background:#ccc"|Donkey Kong traverses a dense bamboo forest, followed by Diddy who stands on a clump of leaves. Numerous thin vines are rigged between the bamboos, and {{wp|Morpho|morpho butterflies}} are scattered through the area. This location is not playable in the game. | ||
| | |style="background:#ccc"width=20%|Collecting all Puzzle Pieces in [[Tippin' Totems]] | ||
|- | |- | ||
| align="center | |align="center"|{{anchor|Cliff Spires}}[[File:Dkcr concept art-1.jpg|270px]]<br>'''Cliff Spires''' | ||
|A scenery with some fossil crags under a dark cloudy sky, reminiscent of the [[Cliff]] area of Donkey Kong Island. The stone formations tower above a forested region. Wooden platforms and bridges are adjoined to the stone walls, and small bursts of vegetation are grown through clefts. Donkey Kong walks up the fossil of a huge placoderm fish, which leads above a pit. Other fossils encrusted in the stone include {{wp|eurypterid}}s and {{wp|Ammonoidea|ammonite}} shells. | |||
| | |width=20%|Collecting all Puzzle Pieces in [[Crumble Canyon]] | ||
|- | |- | ||
| | |style="background:#ccc"align="center"|[[File:Dkcr concept art-19.jpg|270px]]<br>'''Ferndozer''' | ||
| style="background:# | |style="background:#ccc"|The natural environment around an industrial area is being ravaged by a [[Ferndozer]]. Only a vast terrain of cut tree trunks, among red pipes and girders, has been left behind after the deforestation. Three other Ferndozers can be seen on a ridge in the far background.<br>Although this artwork seems to be linked to the [[Factory (Donkey Kong Country Returns)|Factory]] world of the game, no Ferndozers are encountered there, being completely discarded ideas. As seen in [[Media:Dkcr concept art-7.jpg|another concept artwork]], Donkey Kong was intended to control at least one Ferndozer. | ||
|style="background:#ccc"width=20%|Collecting all Puzzle Pieces in [[Wigglevine Wonders]] | |||
Although this artwork seems to be linked to the | |||
| | |||
|- | |- | ||
| | |style="background:#fff"align="center"|{{anchor|Factory Entrance}}[[File:Dkcr concept art-14.jpg|270px]]<br>'''Factory Entrance''' | ||
| style="background:# | |style="background:#fff"|The entrance to a factory in the middle of a forest, producing a bulk of studded barrels. The factory appears to be branded under the name "Barrel &/or Barrel", which is displayed at its top. A system of red pipes converge into the building, which is built out of pieces and components that are reminiscent of [[Nintendo Entertainment System|NES]] hardware. The artwork also contains an homage to the arcade ''Donkey Kong'' — a large reconstruction of [[Mario]]'s sprite from that game is inlaid within the eastern wall.<br>Like in the previous artwork, this factory is shown to have a specific red hue coating its components. The place in the picture does not appear in the game, but is likely a basis for the [[Factory (Donkey Kong Country Returns)|Factory]] world. | ||
|style="background:#fff"width=20%|Collecting all Puzzle Pieces in [[Slammin' Steel]] | |||
Like in the previous artwork, this factory is shown to have a specific red hue coating its components. The place in the picture does not appear in the game, but is likely a basis for the [[Factory (Donkey Kong Country Returns)|Factory]] world. | |||
| | |||
|- | |- | ||
| | |style="background:#fff"align="center"|{{anchor|Volcano Eruptions}}[[File:Volcanoeruptions.png|270px]]<br>'''Volcano Eruptions''' | ||
| style="background:# | |style="background:#fff"|Starry, "worm's-eye" scene with Donkey Kong escaping volcanic debris caused by an eruption. He scurries across rock platforms raised by lava geysers, and heads towards a jaw-looking structure. A similar situation is present in the level [[Red Red Rising]], where DK has to jump platforms that rise above the lava. | ||
| | |style="background:#fff"width=20%|Collecting all Puzzle Pieces in [[Bobbing Basalt]] | ||
|- | |- | ||
! colspan=3 | !colspan=3|'''Kong Gallery''' | ||
|- | |- | ||
! | !Name!!Description!!Unlock criteria | ||
! | |||
! | |||
|- | |- | ||
| | |style="background:#fff"align="center"|{{anchor|Hut Exterior}}[[File:Hutexterior.png|270px]]<br>'''Hut Exterior''' | ||
| style="background:# | |style="background:#fff"|Donkey Kong standing in front of [[DK's Tree House|his hut]], located in a wide open space within the jungle. The house is built on stilts and raised high above the ground, being reachable via a bouncy [[tire]] on the left. Another tire acting as a swing lies hanged from a palm tree on the right. A fuming [[volcano]] appears on the skyline behind the dense green jungle.<br>A very similar scenery can be observed at the beginning of [[Jungle Hijinxs (Donkey Kong Country Returns)|Jungle Hijinxs]], the first level of the game. | ||
|style="background:#fff"width=20%|Collecting all Puzzle Pieces in [[Jungle Hijinxs (Donkey Kong Country Returns)|Jungle Hijinxs]] | |||
A very similar scenery can be observed at the beginning of [[Jungle Hijinxs (Donkey Kong Country Returns)|Jungle Hijinxs]], the first level of the game. | |||
| | |||
|- | |- | ||
| | |style="background:#fff"align="center"|{{anchor|Island Vista}}[[File:Dkcr concept art-12.jpg|140px]]<br>'''Island Vista''' | ||
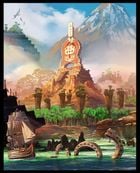
| style="background:# | |style="background:#fff"|Picturesque and lively landscape with Mesoamerican ruins surrounded by lowland vegetation. A snowy peak rises far in the background, bleared by mist and clouds, along with a few {{wp|Pterodactylus|pterodactyls}} soaring over a stone rooftop with overgrown thicket in the top-left corner. On the surrounding waters, there is a ship sailing next to a large stone serpent, and a few ridged outcrops are visible behind them. The central structure of the picture is an 8-bit DK monument holding a Wii Remote, erected on a Mayan pyramid. | ||
| | |style="background:#fff"width=20%|Collecting all Puzzle Pieces in [[Temple Topple]] | ||
|- | |- | ||
| align="center | |align="center"|[[File:Tutorialpigconcept.png|270px]]<br>'''Tutorial Pig''' | ||
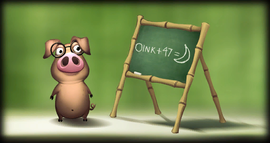
|The [[Professor Chops|Tutorial Pig]] standing near a blackboard with nonsense written on it. The character's ears appear to be more splayed than in his in-game appearance. | |||
| | |width=20%|Collecting all Puzzle Pieces in [[Prehistoric Path]] | ||
|- | |- | ||
| align="center | |align="center"|{{anchor|Home Sweet Home}}[[File:Dktreehouse.png|270px]]<br>'''Home Sweet Home''' | ||
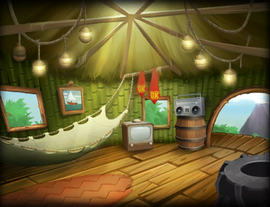
|The inside of [[DK's Tree House]] in its renewed appearance, borrowing the aspect of a {{wp|rondavel}} hut. The furniture is made of lanterns hanging from ceiling poles, a wall picture, tires, a carpet, a hammock, a TV and a boombox. | |||
| | |width=20%|Collecting all Puzzle Pieces in [[Precarious Plateau]] | ||
|- | |- | ||
| | |style="background:#fff"align="center"|[[File:CrankyShopPicture.png|270px]]<br>'''Cranky's Shop''' | ||
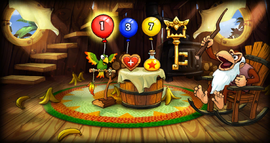
| style="background:# | |style="background:#fff"|Visualization of [[Cranky Kong's Shop]], where [[Cranky Kong|Cranky]] sells items to the player. [[Squawks the Parrot]], the [[Map Key]] and all other items appear on the table beside Cranky. However, in the picture, there is only one, differently-colored balloon for each amount of lives, instead of the same number as that amount. | ||
| | |style="background:#fff"width=20%|Collecting all Puzzle Pieces in [[Cog Jog (level)|Cog Jog]] | ||
|- | |- | ||
| align="center | |align="center"|{{anchor|Family Portrait}}[[File:Kongportrait.png|270px]]<br>'''Family Portrait''' | ||
|A portrait of Donkey Kong and Diddy Kong, smiling. The portrait is framed and placed within [[DK's Tree House]], therefore being one of the two artworks in the Image Gallery to be used directly in the game. | |||
| | |width=20%|Collecting all Puzzle Pieces in [[Smokey Peak]] | ||
|- | |- | ||
| align="center | |align="center"|{{anchor|Petroglyph}}[[File:Petroglyph.png|270px]]<br>'''Petroglyph''' | ||
|A petroglyph remake of [[25m]] from the arcade ''[[Donkey Kong (game)|Donkey Kong]]'' game, which is used to decorate the columns in temple levels such as [[Platform Panic]] and [[Shifty Smashers]]. This is the second artwork from the Image Gallery to be integrated as it is in the game. | |||
| | |width=20% rowspan=4|Beating the game on Mirror Mode | ||
|- | |- | ||
| align="center | |align="center"|{{anchor|Mole Carts}}[[File:Molercarts.png|270px]]<br>'''Mole Carts''' | ||
|Sketch of two moles popping out of minecarts and taking Donkey Kong by surprise. [[Mole Miner]]s with this behavior are found and fought during [[the Mole Train]] boss stage. | |||
|- | |- | ||
| | |style="background:#ccc"align="center"|{{anchor|Steamy Adventure}}[[File:Dkcr_concept_art-6.jpg|270px]]<br>'''Steamy Adventure''' | ||
| style="background:# | |style="background:#ccc"|The Kongs are chased by an enormous red-headed vulture through a misty cliffside. Diddy soars on his jetpack and tries to hold off the enemy with his Peanut [[Popgun]]s, while DK is on the ground, running away and leaving some banana peels behind. This concept is not integrated in the game. | ||
|- | |- | ||
| | |style="background:#fff"align="center"|{{anchor|Volcanic Ascension}}[[File:Dkcr_concept_art-17.jpg|270px]]<br>'''Volcanic Ascension''' | ||
| style="background:# | |style="background:#fff"|The Kongs ascend a volcanic slope, on the background of a steaming crater and blackened ashes. Columns of volcanic steam also rise towards the horizon, in tandem with an erupting volcano over a clear, blue starry skyline.<br>Along with other concept artworks (''[[List of extras in Donkey Kong Country Returns#Volcano Eruptions|Volcano Eruptions]]'' and ''[[List of extras in Donkey Kong Country Returns#Angry Banana|Angry Banana]]''), this illustration might have been one of the preliminary concepts used for the [[Volcano]] world. | ||
Along with other concept artworks (''[[List of extras in Donkey Kong Country Returns#Volcano Eruptions|Volcano Eruptions]]'' and ''[[List of extras in Donkey Kong Country Returns#Angry Banana|Angry Banana]]''), this illustration might have been one of the preliminary concepts used for the [[Volcano]] world. | |||
|- | |- | ||
! colspan=3 | !colspan=3|'''Golden Temple Gallery''' | ||
|- | |- | ||
! | !Name!!Description!!Unlock criteria | ||
! | |||
! | |||
|- | |- | ||
| align="center | |align="center"|[[File:Goldentemple.png|270px]]<br>'''Golden Bananas''' | ||
|The beginning of the level, visualized with a gateway, a golden girder, an arc of collectible bananas and a floating island soaked by a waterfall. Several gigantic bananas can be seen drifting in the clouds over which the scene takes place. This visualization is the closest to the final version of the level, although one element not seen in-game is the girder platform, which might have been a reference to the arcade ''Donkey Kong''. | |||
| | |width=20% rowspan=10|Collecting all Puzzle Pieces in the [[Golden Temple]] | ||
|- | |- | ||
| | |style="background:#fff"align="center"|{{anchor|Banana Coaster}}[[File:Bananacoaster.png|270px]]<br>'''Banana Coaster''' | ||
| style="background:# | |style="background:#fff"|Giant banana landforms risen above a forested area. A coaster is entwined around several of these bananas, leading into the background. The picture suggests that the final level would have contained a Mine Cart sequence. | ||
|- | |- | ||
| | |style="background:#ccc"align="center"|{{anchor|Paper Cutouts}}[[File:Paperdklevel.png|270px]]<br>'''Paper Cutouts''' | ||
| style="background:# | |style="background:#ccc"|Envisagement with a {{wp|Cutout animation|cutout}} aesthetic. The layout is similar to that seen in the first Golden Temple artwork, featuring a starting point (barring any gateway), a girder platform, floating bananas and a continuing ground. The setting appears to be a beach, with a grove of palm trees located next to it, under a clear sky. | ||
|- | |- | ||
| | |style="background:#ccc"align="center"|{{anchor|Wacky Blocks}}[[File:Wackyblocks.png|270px]]<br>'''Wacky Blocks''' | ||
| style="background:# | |style="background:#ccc"|An erratic dimension reminiscent of the [[Mushroom Kingdom]], whose elements, disorderly arranged around stout trees and vines, are based on various objects from ''[[Super Mario Bros. 3]]'', such as [[Semisolid Platform|colored blocks]], [[Grass Land]] bushes, and spotted [[mushroom]]s. | ||
|- | |- | ||
| | |style="background:#fff"align="center"|{{anchor|Pudding Wonderland}}[[File:Puddingwonderland.png|270px]]<br>'''Pudding Wonderland''' | ||
| style="background:# | |style="background:#fff"|A sky world with enormous banana summits emerging from pudding-like clouds. Wafers in both flat and stick shapes form a pathway above the clouds. One of the wafer sticks has a cherry on top.<br>The wafer sticks are present in the final rendition of Golden Temple as platforms, although the scenery in the image as a whole only tangentially resembles the level. | ||
The wafer sticks are present in the final rendition of Golden Temple as platforms, although the scenery in the image as a whole only tangentially resembles the level. | |||
|- | |- | ||
| | |style="background:#ccc"align="center"|{{anchor|Virtual Boy Tracks}}[[File:Dkcr_concept_art-8.jpg|270px]]<br>'''Virtual Boy Tracks''' | ||
| style="background:# | |style="background:#ccc"|Dynamic picture with Donkey Kong on a Mine Cart track, avoiding a shooting fireball. The image has [[Virtual Boy]]-inspired visuals, something that is not integrated in the final version of the game. | ||
|- | |- | ||
| | |style="background:#fff"align="center"|[[File:Gtemple.png|270px]]<br>'''Golden Temple''' | ||
| style="background:# | |style="background:#fff"|The altar inside the Golden Temple, consisting of an Aztec pyramidal structure that holds a light-shedding [[Golden Banana]]. The roof is decorated with palm trees and grass. Donkey Kong can be seen beating his chest near the Golden Banana, which appears to be smaller than its final appearance. Close to the pyramidal structure, there are two smoking columns rising above the chasm. The walls of the surrounding ravine display reliefs of apes dancing around the altar. | ||
|- | |- | ||
| | |style="background:#ccc"align="center"|{{anchor|Crackers and Pudding}}[[File:Crackerpudding.png|270px]]<br>'''Crackers and Pudding''' | ||
| style="background:# | |style="background:#ccc"|A sweet-themed world with hills made out of pudding, bananas and cookies coated with whipped cream. | ||
|- | |- | ||
| align="center | |align="center"|{{anchor|Temple Entrance}}[[File:Goldentemp.png|270px]]<br>'''Temple Entrance''' | ||
|Donkey Kong placing the [[Rare Orb]]s onto the gate that opens the Golden Temple. | |||
|- | |- | ||
| | |style="background:#fff"align="center"|{{anchor|Temple Exterior}}[[File:Goldentem2.png|270px]]<br>'''Temple Exterior''' | ||
| style="background:# | |style="background:#fff"|The exterior of the Golden Temple, located on a mountainous platform just as in the game. However, compared to its final appearance, the area surrounding the temple appears to be narrower and devoid of any vegetation. | ||
|- | |- | ||
! colspan=3 | !colspan=3|'''Bonus Gallery''' | ||
|- | |- | ||
! | !Name!!Description!!Unlock criteria | ||
! | |||
! | |||
|- | |- | ||
| | |style="background:#fff"align="center"|[[File:Rambiconcept.png|270px]]<br>'''Rambi''' | ||
| style="background:# | |style="background:#fff"|Artist's rendition of [[Rambi]], in which he has an additional smaller horn, more distant eyes, and inverted body proportions, making him look closer to a realistic {{wp|rhinoceros}}. His in-game version, however, retains [[Rare Ltd.|Rareware]]'s original design. | ||
| | |width=20% rowspan=10|Defeating [[Tiki Tong]] | ||
|- | |- | ||
| | |style="background:#fff"align="center"|{{anchor|Beach Bridge}}[[File:Dkcr_concept_art-18.jpg|270px]]<br>'''Beach Bridge''' | ||
| style="background:# | |style="background:#fff"|A natural bridge arching around a bright seaside scenery. A running DK prepares to cross it, while two big crabs await him there. Stubby stalactite formations hang from the underside of the bridge; similarly, there are stalagmites further ahead, to the left.<br>The game does not present a similar layout or decoration in any of its levels, although a [[Beach]] world inhabited by [[Snippys|crabs]] exists in the game. | ||
The game does not present a similar layout or decoration in any of its levels, although a [[Beach]] world inhabited by [[ | |||
|- | |- | ||
| | |style="background:#ccc"align="center"|{{anchor|Eel Fight}}[[File:Dkcr_concept_art-4.jpg|140px]]<br>'''Eel Fight''' | ||
| style="background:# | |style="background:#ccc"|Donkey and Diddy Kong, engaged in a battle with a huge moray eel monster wrapped around a lighthouse. The monster has two crossed patches on the side of its head, where it is possibly supposed to be hit. DK appears in several instances throughout the picture, climbing and attacking the eel, while Diddy appears only once, fighting the eel with his Popguns while hovering with the barrel jet. Neither the fight nor the eel itself are incorporated in any form in the game. | ||
|- | |- | ||
| | |style="background:#fff"align="center"|{{anchor|Amber Tracks}}[[File:Dkcr_concept_art-15.jpg|270px]]<br>'''Amber Tracks''' | ||
| style="background:# | |style="background:#fff"|A long railtrack cutting through a colossal {{wp|amber}} cavern, seen from a low perspective. Prehistoric arthropods are trapped inside the amber walls. The track leads into a glowing orange area located past the fossil chamber.<br>This environment does not appear in the game, but the prehistoric and mine cart themes present in [[Prehistoric Path]], a level in the [[Cliff]] world, might have been carried over from this concept artwork. | ||
This environment does not appear in the game, but the prehistoric and mine cart themes present in [[Prehistoric Path]], a level in the [[Cliff]] world, might have been carried over from this concept artwork. | |||
|- | |- | ||
| align="center | |align="center"|[[File:BopapodamusSS.png|270px]]<br>'''Bopapodamus''' | ||
|A [[Bopapodamus]] perched on a wooden pole, in front of a pale green background. | |||
|- | |- | ||
| | |style="background:#ccc"align="center"|{{anchor|Tree Top Village}}[[File:Treetopdkcr.png|270px]]<br>'''Tree Top Village''' | ||
| style="background:# | |style="background:#ccc"|A lush village built in the heights of a redwood forest and a possible homage to [[Tree Top Town|some]] [[Rope Bridge Rumble|levels]] from the original ''[[Donkey Kong Country]]''. Homes are carved into tree trunks and are surrounded by circular footpaths. Numerous stairways, bridges and ropes weave between houses, with torches affixed to them. Multiple decorations, such as bells and wind chimes, hang from ropes. Houses and torches light powerfully, but the area is otherwise gloomy.<br>This area in particular is not explored in the actual game, but it is remotely similar to various areas in the [[Forest (Donkey Kong Country Returns)|Forest]], especially those that contain suspended houses. | ||
This area in particular is not explored in the actual game, but it is remotely similar to various areas in the | |||
|- | |- | ||
| | |style="background:#fff"align="center"|{{anchor|Dusky Cliffs}}[[File:Duskycliff.png|270px]]<br>'''Dusky Cliffs''' | ||
| style="background:# | |style="background:#fff"|A serene cliff scene at twilight. Close to the observer is a boardwalk illuminated by a few torches, as well as rock walls with large ammonite remnants surrounding the area. Donkey Kong and Diddy Kong are resting on an elevated platform on the right side. The backdrop is a landscape with rugged crags, marked by riggings of ropes and wooden balconies. The central crag hosts a cluster of strange big drums, as well as an obscured {{wp|ichthyosaur}} fossil underneath. The sky, albeit a calm shade of blue, seems to be cloudy, with a few light beams coming from cloud ruptures.<br>Sceneries like in this artwork are common in the [[Cliff]] section of the game, and most of them are cloudy as well, though none take place at dusk. | ||
Sceneries like in this artwork are common in the [[Cliff]] section of the game, and most of them are cloudy as well, though none take place at dusk. | |||
|- | |- | ||
| | |style="background:#ccc"align="center"|{{anchor|Old School}}[[File:Dkfactoryart.png|270px]]<br>'''Old School''' | ||
| style="background:# | |style="background:#ccc"|A compact array of constructions based on [[Nintendo Entertainment System|NES]] and [[Super Nintendo Entertainment System|SNES]] components and controllers, creating an "old school" feeling. The area shares the location with a forest peeking its vegetation in several parts and is likely related to a previous concept artwork, ''[[List of extras in Donkey Kong Country Returns#Factory Entrance|Factory Entrance]]'', depicting an early look of the Factory world. | ||
|- | |- | ||
| | |style="background:#fff"align="center"|{{anchor|Angry Banana}}[[File:Dkcr_concept_art-11.jpg|270px]]<br>'''Angry Banana''' | ||
| style="background:# | |style="background:#fff"|Dynamic scene of an "Angry Banana" towering a lava land and spitting large balls of fire. The hill upon which the banana stands sinks into a lake of magma, spread with unstable stone pillars. One of them is toppled by a swooping fireball—Donkey Kong can be seen leaping from it. As in other artworks related to the [[Volcano]], the sky is starry and contrasts with the glowing red scenery; however, a significant part of the back plane, including a small patch of vegetation, is obscured by thick clouds of smoke. | ||
|- | |- | ||
| align="center | |align="center"|{{anchor|Temple Monument}}[[File:Templemoument.png|270px]]<br>'''Temple Monument''' | ||
|Artwork of a monument that resembles the four statues around the [[Golden Temple]], though seemingly much bigger. It looms over an area with dense vegetation, in front of a clear skyline flown by birds. Patches on its surface layer reveal that the statue is made out of gold. | |||
|} | |} | ||
===Names in other languages=== | |||
{{main|List of Donkey Kong Country Returns image extras names in other languages}} | |||
==Music gallery== | ==Music gallery== | ||
{{ | {{media missing|section=yes}} | ||
Part of the game's soundtrack is available in the music gallery, which contains eight music sets linked to one of the eight main worlds of the game. A set can be unlocked by defeating the boss of its corresponding world. | Part of the game's soundtrack is available in the music gallery, which contains eight music sets linked to one of the eight main worlds of the game. A set can be unlocked by defeating the boss of its corresponding world. | ||
| Line 407: | Line 368: | ||
[[File:MovieGallery.jpg|thumb]] | [[File:MovieGallery.jpg|thumb]] | ||
The movie gallery allows the player to rewatch the game's cutscenes and is exclusive to ''[[Donkey Kong Country Returns 3D]]''. Movies can be unlocked by collecting [[Puzzle Piece (Donkey Kong Country series)|Puzzle Pieces]] in the first eight levels of the [[Cloud (world)|Cloud]] world, which is also exclusive to the Nintendo 3DS version. | The movie gallery allows the player to rewatch the game's cutscenes and is exclusive to ''[[Donkey Kong Country Returns 3D]]''. Movies can be unlocked by collecting [[Puzzle Piece (Donkey Kong Country series)|Puzzle Pieces]] in the first eight levels of the [[Cloud (world)|Cloud]] world, which is also exclusive to the Nintendo 3DS version. | ||
{|class="wikitable dk"width=100% | |||
{|class=" | |||
|- | |- | ||
! Movie title !! Duration !! Plot !! Unlocked at | !Movie title!!Duration!!Plot!!Unlocked at | ||
|- | |- | ||
| align="center" | '''''Opening''''' | |align="center"|'''''Opening''''' | ||
| align="center" | 01:59 | |align="center"|01:59 | ||
|The volcano on Donkey Kong Island suddenly erupts, spawning the Tiki Tak Tribe, who immediately begin hypnotizing the local animals into stealing Donkey Kong's [[ | |The volcano on Donkey Kong Island suddenly erupts, spawning the Tiki Tak Tribe, who immediately begin hypnotizing the local animals into stealing Donkey Kong's [[banana hoard]]. Diddy is the first to discover its disappearance and quickly goes inside [[DK's Tree House]] to notify him about the situation. DK treads outside to see the animals scuttling away with the bananas and yells at them angrily, when he is pushed back inside by Kalimba Tiki, one of the tribe's higher-ups. The antagonist then attempts to hypnotize DK, who proves to be immune. | ||
| align="center" | [[Crushin' Columns]] | |align="center"|[[Crushin' Columns]] | ||
|- | |- | ||
| align="center" | '''''Pre-Battle''''' | |align="center"|'''''Pre-Battle''''' | ||
| align="center" | 01:21 | |align="center"|01:21 | ||
|DK and Diddy Kong discover the | |DK and Diddy Kong discover the banana hoard after gaining consciousness inside the Tiki Tong Tower at the top of the Volcano. The seven commanders of the Tiki Tak Tribe suddenly appear from behind the bananas and assemble around Tiki Tong, the supreme commander. The Tiki higher-ups begin alimenting him with bananas from the pile, resulting in a yellow mash that coats and turns the tikis into a pair of wooden hands that Tiki Tong will use during his showdown. | ||
| align="center" | [[Gushin' Geysers]] | |align="center"|[[Gushin' Geysers]] | ||
|- | |- | ||
| align="center" | '''''Pre-Battle (DK)''''' | |align="center"|'''''Pre-Battle (DK)''''' | ||
| align="center" rowspan=2 | 01:21 | |align="center"rowspan=2|01:21 | ||
| rowspan=2 | Two versions of the previous cutscene, each barring either Diddy or DK. | |rowspan=2|Two versions of the previous cutscene, each barring either Diddy or DK. | ||
| align="center" rowspan=2 | [[Spiky Surprise]] | |align="center"rowspan=2|[[Spiky Surprise]] | ||
|- | |- | ||
| align="center" | '''''Pre-Battle (Diddy)''''' | |align="center"|'''''Pre-Battle (Diddy)''''' | ||
|- | |- | ||
| align="center" | '''''Post-Battle''''' | |align="center"|'''''Post-Battle''''' | ||
| align="center" | 01:07 | |align="center"|01:07 | ||
|After defeating Tiki Tong, Donkey and Diddy are powerfully blasted to the moon. Before crashing, DK hits the moon with a fist punch, causing it to drop down on the Tiki Tong Tower and destroy it. This subsequently releases a large stream of bananas from the volcano, which shower the entire Donkey Kong Island. Followed along by a swarm of bananas, Donkey Kong and his pal land back in the island's jungle, where they watch the raining bananas in the sky and rejoice. The cutscene ends with a long shot of Donkey Kong beating his chest victoriously and the freed volcano behind him. | |After defeating Tiki Tong, Donkey and Diddy are powerfully blasted to the moon. Before crashing, DK hits the moon with a fist punch, causing it to drop down on the Tiki Tong Tower and destroy it. This subsequently releases a large stream of bananas from the volcano, which shower the entire Donkey Kong Island. Followed along by a swarm of bananas, Donkey Kong and his pal land back in the island's jungle, where they watch the raining bananas in the sky and rejoice. The cutscene ends with a long shot of Donkey Kong beating his chest victoriously and the freed volcano behind him. | ||
| align="center" | [[Mischievous Moles]] | |align="center"|[[Mischievous Moles]] | ||
|- | |- | ||
| align="center" | '''''Post-Battle (DK)''''' | |align="center"|'''''Post-Battle (DK)''''' | ||
| align="center" rowspan=2 | 01:10 | |align="center"rowspan=2|01:10 | ||
| rowspan=2 |Two versions of the previous cutscene, the first starring only DK, the second only Diddy Kong. In the cutscene with Diddy, he causes the moon to fall by plummeting headfirst into it, instead of using his fist. He is then caught by Donkey Kong just before he lands back on earth. | |rowspan=2|Two versions of the previous cutscene, the first starring only DK, the second only Diddy Kong. In the cutscene with Diddy, he causes the moon to fall by plummeting headfirst into it, instead of using his fist. He is then caught by Donkey Kong just before he lands back on earth. | ||
| align="center" rowspan=2 | [[Topsy Turvy]] | |align="center"rowspan=2|[[Topsy Turvy]] | ||
|- | |- | ||
| align="center" | '''''Post-Battle (Diddy)''''' | |align="center"|'''''Post-Battle (Diddy)''''' | ||
|- | |- | ||
| align="center" | '''''Golden Temple''''' | |align="center"|'''''Golden Temple''''' | ||
| align="center" | 00:29 | |align="center"|00:29 | ||
|The post-credits cutscene, where it is revealed how the [[Golden Temple]] made its appearance. During the raining of bananas on Donkey Kong Island, one banana hits and presses a button on a monkey monument, located on a small secluded cliff. Following this, three other monuments emerge from the ground, all of them forming a square perimeter. Inside it, the fabled temple rises out from the earth accompanied by a bright surge of light. The cutscene ends with the camera comprising the entire shot of the temple surrounded by palm trees. | |The post-credits cutscene, where it is revealed how the [[Golden Temple]] made its appearance. During the raining of bananas on Donkey Kong Island, one banana hits and presses a button on a monkey monument, located on a small secluded cliff. Following this, three other monuments emerge from the ground, all of them forming a square perimeter. Inside it, the fabled temple rises out from the earth accompanied by a bright surge of light. The cutscene ends with the camera comprising the entire shot of the temple surrounded by palm trees. | ||
| align="center" | [[Tar Ball Fall]] | |align="center"|[[Tar Ball Fall]] | ||
|- | |- | ||
| align="center" | '''''Inside Temple''''' | |align="center"|'''''Inside Temple''''' | ||
| align="center" | 00:34 | |align="center"|00:34 | ||
|Donkey and Diddy Kong walk up a corridor inside the Golden Temple, when they reach the altar. Here lies afloat a [[Golden Banana]], at which they gaze in awe for a moment before heading towards it hastily. Donkey Kong takes hold of the fruit and peels it to taste the insides. By doing this, both of them are immediately warped to the temple's realm, commencing the [[Golden Temple|final level of the game]]. | |Donkey and Diddy Kong walk up a corridor inside the Golden Temple, when they reach the altar. Here lies afloat a [[Golden Banana]], at which they gaze in awe for a moment before heading towards it hastily. Donkey Kong takes hold of the fruit and peels it to taste the insides. By doing this, both of them are immediately warped to the temple's realm, commencing the [[Golden Temple|final level of the game]]. | ||
| align="center" | [[Robo Factory]] | |align="center"|[[Robo Factory]] | ||
|- | |- | ||
| align="center" | '''''Inside Temple (DK)''''' | |align="center"|'''''Inside Temple (DK)''''' | ||
| align="center" rowspan=2 | 00:34 | |align="center"rowspan=2|00:34 | ||
| rowspan=2 |The same cutscene as before, excluding either Diddy or DK. | |rowspan=2|The same cutscene as before, excluding either Diddy or DK. | ||
| align="center" rowspan=2 | [[Lavawheel Volcano]] | |align="center" rowspan=2 | [[Lavawheel Volcano]] | ||
|- | |- | ||
| align="center" | '''''Inside Temple (Diddy)''''' | |align="center"|'''''Inside Temple (Diddy)''''' | ||
|} | |} | ||
{{DKCR}} | {{DKCR}} | ||
[[Category:Lists|Extras in Donkey Kong Country Returns]] | [[Category:Lists|Extras in Donkey Kong Country Returns]] | ||
[[Category:Donkey Kong Country Returns]] | [[Category:Donkey Kong Country Returns|*]] | ||
Latest revision as of 17:54, March 7, 2024
As with other games developed by Retro Studios, namely the Metroid Prime series, Donkey Kong Country Returns rewards players with a series of extra content once they complete certain tasks throughout the game, such as collecting all Puzzle Pieces, defeating a world's boss, or beating the game on Mirror Mode. The optional content comes in the form of images, music, dioramas and (only in the Nintendo 3DS version) cinematic video clips, and can be accessed through the "EXTRAS" section of a game file.
Diorama gallery[edit]
Dioramas are inanimate three-dimensional models logging various scenes from Donkey and Diddy Kong's journey on Donkey Kong Island, starting with the Jungle and ending with the Volcano. Each diorama is based on one of the eight main worlds; the conditions to unlock it are defeating the boss and collecting all Puzzle Pieces from the Key Temple level of that world for the first time. Unlocked dioramas can be viewed in their appointed gallery, and can be rotated and zoomed in or out.
Image gallery[edit]
The image gallery is divided into eight sub-galleries, each related to one subject, such as Tikis, bosses, or the various worlds of the game. Released during the development of the game, these artworks show various ideas that were accepted or discarded for the final product. A large part of the gallery can be gradually updated by collecting Puzzle Pieces, but some artworks require, for example, defeating the final boss or beating the game on Mirror Mode. The sub-galleries are as follows:
- Critters 1 and Critters 2 Gallery – both galleries contain artworks presenting the many species that inhabit Donkey Kong Island, most of them malevolent;
- Tiki Gallery – contains artworks related to the Tiki Tak Tribe;
- Boss Gallery – contains artworks related to the eight bosses of the game;
- Worlds Gallery – comprises landscapes and paysages on the island, or up-close scenes of the Kongs exploring certain parts of it;
- Kong Gallery – contains artworks focused on the Kongs, their partners and their travels;
- Golden Temple – contains numerous early ideas for the last level of the game, the Golden Temple; to unlock the entire gallery, all Puzzle Pieces must be collected in the Golden Temple;
- Bonus Gallery – contains miscellaneous artworks; to unlock the entire gallery, Tiki Tong must be defeated.
Rows detailing concepts that were either partially used or had undergone significant changes are in white, and sections of completely discarded ideas are in light gray.
| Critters 1 Gallery | ||
|---|---|---|
| Name | Description | Unlock criteria |
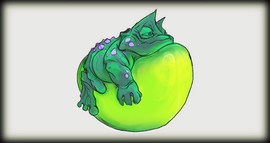 Frogoon |
Concept artwork of a Frogoon. Compared to its final version, the enemy has a more wrinkled, flabby appearance, as well as purple lumps scattered on its skin. Its eyes are also smaller and sunk into the face. | Collecting all Puzzle Pieces in King of Cling |
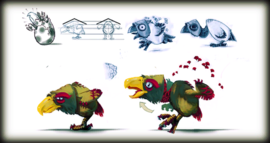 Awk |
Two stances of a full-fledged Awk (idle and agitated), under some smaller sketches of the same enemy: one shows an Awk hatching from an egg (which never happens in-game), the other is a perspective sheet with two Awk poses, and the rest depict an early Awk with a masked, fowl-like appearance. | Collecting all Puzzle Pieces in Canopy Cannons |
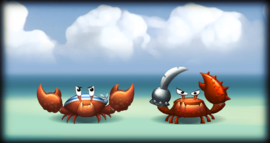 Pinchly & Pal |
Two pirate-clad crabs lying on the shoreline. One is a Pinchly found commonly throughout the Beach area, and the other is "Pal", an unused crab with a sneering expression wielding a sword for a pincer. | Collecting all Puzzle Pieces in Sloppy Sands |
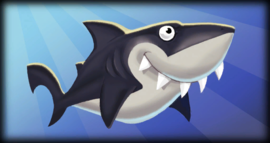 Snaggles |
A Snaggles basking in light beams. | Collecting all Puzzle Pieces in Peaceful Pier |
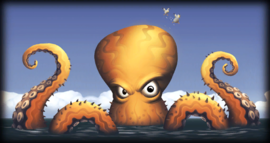 Squiddicus |
Front view of Squiddicus, partially raising its tentacles over the stormy black sea. Two seagulls can be seen flying away from Squiddicus. | Collecting all Puzzle Pieces in Stormy Shore |
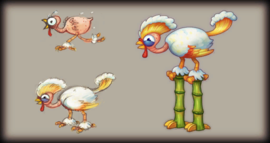 Stilts |
A few stances of a Stilts over a plain gray background. The drawing on the right depicts the enemy in its default state, standing on top of the stilts. The bottom left stance shows the enemy without them, while the one above is featherless and appears to run agitatedly. | Collecting all Puzzle Pieces in Button Bash |
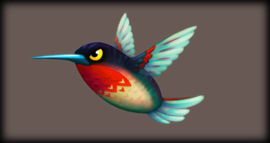 Humzee |
Illustration of Humzee, the minuscule hummingbird enemy species from Button Bash, over a dark gray background. | Collecting all Puzzle Pieces in Mast Blast |
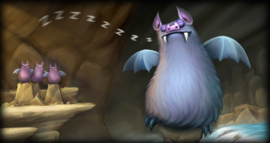 Squeekly Family |
The Big Squeekly sleeping with three of its smaller relatives inside a cavern. | Collecting all Puzzle Pieces in Crowded Cavern |
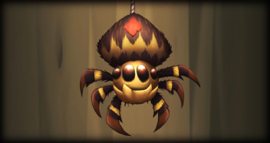 Skittler |
Close-up of a brown Skittler hanging down from a thread over a wooden-looking background. | Collecting all Puzzle Pieces in Springy Spores |
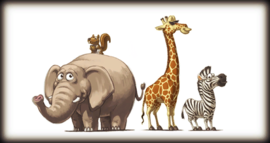 Animal Friends |
Group picture of all passive critters on Donkey Kong Island that were hypnotized by the Tiki Tak Tribe into stealing DK's banana hoard. | Collecting all Puzzle Pieces in Switcheroo |
| Critters 2 Gallery | ||
| Name | Description | Unlock criteria |
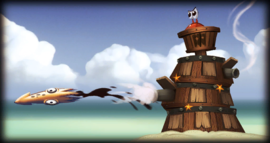 Squid Shot |
A Squid Shot launches a shell-less Squidly through one of its cannons. Compared to its final version, the Squid Shot appears to be a tower-like structure manned by a visible, crab-like character. It features one cannon on each side, positioned at different levels. | Collecting all Puzzle Pieces in Blowhole Bound |
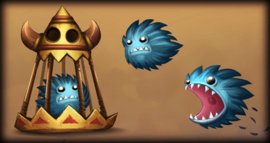 Cageberry & Pals |
A single Cageberry accompanied by two Toothberries, none of which feature a nose like their final versions. | Collecting all Puzzle Pieces in Itty Bitty Biters |
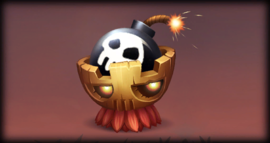 Tiki Pop |
Illustration of a Tiki Pop carrying a fuse-burning bomb. | Collecting all Puzzle Pieces in Grip 'n' Trip |
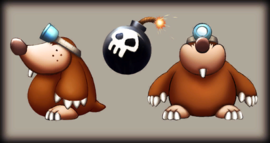 Mole Guards |
Profile and front depictions of two Mole Guards, along with their signature bomb in the middle. | Collecting all Puzzle Pieces in Bombs Away |
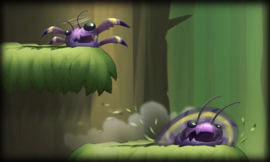 Buzzbite |
A dizzy Buzzbite on a ledge, next to a moving Buzzbite below. In the game, Buzzbites circle continuously around platforms without ever entering a dizzy state. | Collecting all Puzzle Pieces in Flutter Flyaway |
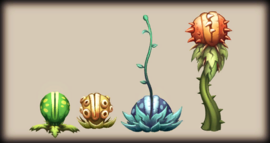 The Chomp Family |
Members from the Chomp-related group of enemies, imposed on a light-gray background. Starting from left, these are the green Chomp, shooting Chomp, hungry plant and a regular Chomp. The hungry plant appears to be facing up, while in the actual game, they are only found hanging down from forest canopies. | Collecting all Puzzle Pieces in Muncher Marathon |
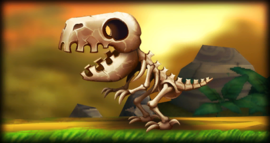 Skellirex |
A Skellirex standing near a forested area. Unlike its final version, this Skellirex lacks the crest on the back of its skull. | Collecting all Puzzle Pieces in Tippy Shippy |
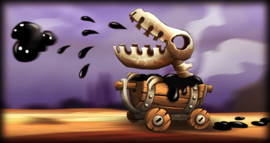 Bonehead Jed |
A Bonehead Jed maneuvering a tar-filled cart in what appears to be a desolate canyon setting, resembling the Cliff. In this artwork, the enemy is shown spitting a blob of tar, which does not happen in-game. | Collecting all Puzzle Pieces in Clifftop Climb |
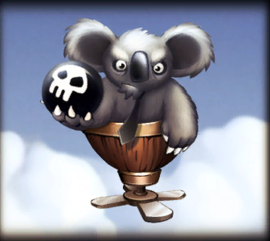 Kowalee |
The Kowalee, an enemy that pilots a propeller carriage and attacks by tossing bombs. The cloudy scenery behind it is reminiscent of Golden Temple, where Kowalees can be found in-game. The colors on the enemy appear to be less saturated here than in the actual game. | Collecting all Puzzle Pieces in Gear Getaway |
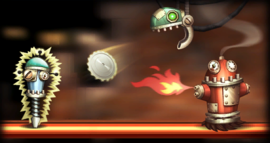 Ready-Bots |
The main robotic patrol of the Factory, consisting of an electrified Pogobot, a flame-throwing Pyrobot, and an unknown floating green robot shooting buzzsaws. Only the former two appear in the game and also retain the explicit abilities shown in the artwork. | Collecting all Puzzle Pieces in Music Madness |
| Tiki Gallery | ||
| Name | Description | Unlock criteria |
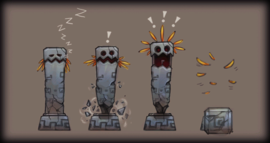 Screaming Pillar |
Front view of four different stances of a Screaming Pillar awaking and toppling. The Screaming Pillar sleeps, notices its foundation crumbling, screams as it is about to fall and then finally collapses on the ground. | Collecting all Puzzle Pieces in Sunset Shore |
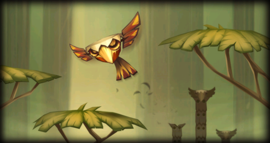 Tiki Buzz |
Artwork of a wooded area with flat tree branches and a few totems lying in the corner. The focus of the picture is the Tiki Buzz. | Collecting all Puzzle Pieces in Mole Patrol |
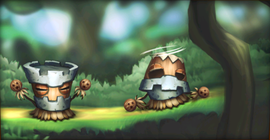 Tiki Tank |
A pair of Tiki Tanks in a grove. One is standing upright, while the other lies dizzily upside down. In the game, their sturdy reinforcements prevent any direct attack onto them, but if flipped over with a ground pound, their vulnerable underside is revealed, as shown in the artwork. | Collecting all Puzzle Pieces in Longshot Launch |
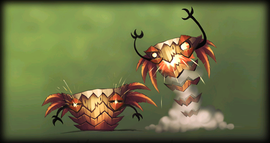 Tiki Boing |
Two stances of a Tiki Boing, contracting and springing, over a smoky green background. | Collecting all Puzzle Pieces in Weighty Way |
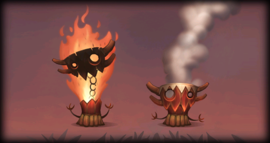 Tiki Torch |
A Tiki Torch set on fire, with its mouth wide open, and a muted one that is extinguished and expelling fumes. | Collecting all Puzzle Pieces in Boulder Roller |
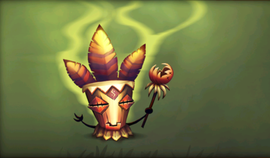 Tiki Pilot |
The Tiki Pilot holding its staff and emitting strange, wavy fumes. The character is illustrated over a green background, similarly to the Tiki Boings in a previous artwork. | Collecting all Puzzle Pieces in Handy Hazards |
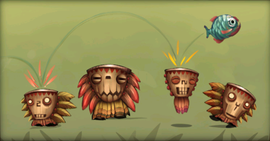 Tiki Lineup |
Several dancing Tiki drum characters lined up to bounce a piranha-like fish. Among them is a Tiki Goon, but the rest do not appear in the game in any form. The smaller drums around the Tiki Goon display a specific appearance, the most distinguishing traits being the oblong mouths, red pupils and bright sclera, along with the feather tufts on their sides and their short skirts. | Collecting all Puzzle Pieces in Hot Rocket |
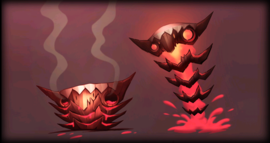 Early Lava Tiki |
Two stances of a completely unused lava-based enemy that bears a resemblance to Tiki Boings. The enemy is composed of a few segments with pointy, rugose margins, and appears to expel magma when active and fumes when idle, dripping lava through its eyes and in-between the segments. | Collecting all Puzzle Pieces in Roasting Rails |
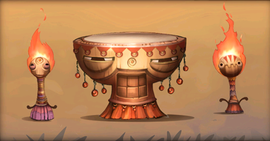 Tiki Extremes |
Picture of a somber, sentient-looking drum standing between two living torches in a ritualic composition. None of these elements are seen in the actual game. | Beating the game on Mirror Mode |
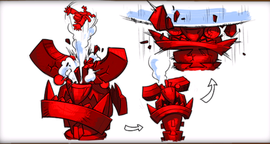 Tiki Tong Storyboard |
Short storyboard for the game's post-final battle cutscene. Donkey Kong is blasted through the Tiki Tong Tower, and as the tower looks up perplexed, it is suddenly squashed by the Moon, brought down by DK. | |
| Boss Gallery | ||
| Name | Description | Unlock criteria |
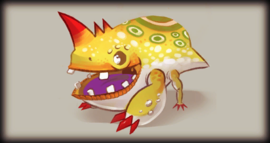 Mugly |
Standard pose of Mugly over a gray background. | Collecting all Puzzle Pieces in Poppin' Planks |
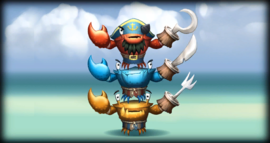 Scurvy Crew |
The members of the Scurvy Crew pose in a tower formation. A notable difference from this artwork during the game is that the positions of the blue and orange crabs in the tower are switched, while Cap'n Greenbeard keeps his top position. The shoreline background used here is also used for the Pinchly & Pal and Squid Shot artworks. |
Collecting all Puzzle Pieces in Wonky Waterway |
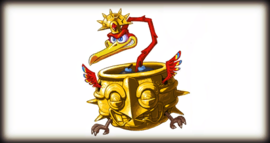 Stu |
Stu grinning and flying in his golden cauldron, on a white background. | Collecting all Puzzle Pieces in Rickety Rails |
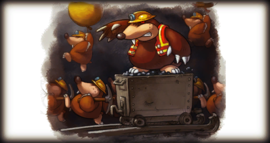 Mole Miner Max |
Mole Miner Max commanding a troop of Mole Miners while standing atop a coal wagon. | Collecting all Puzzle Pieces in Vine Valley |
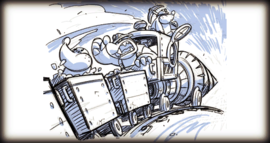 Mole Miners |
Sketch of the speeding Mole Train, an important vehicle used by Mole Miners and headed by Mole Miner Max. In this artwork, he is shown furiously emerging from the train's cab with a clenched fist, while a few other moles peer from several parts of the train. | Collecting all Puzzle Pieces in Clingy Swingy |
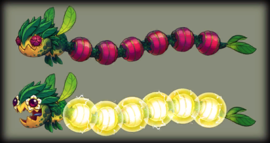 Mangoruby |
The two states of Mangoruby — inactive and electrified. | Collecting all Puzzle Pieces in Sticky Situation |
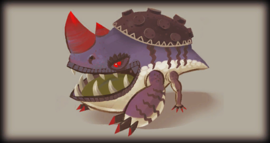 Thugly |
Thugly, in the same pose as Mugly in his concept artwork. A remarkable difference between this representation and the enemy's final appearance is in the exoskeleton, which appears to be a curved shell with mine-like bulges instead of a segmented plate formation. Additionally, Thugly's tongue is olive-colored here, rather than dark gray. | Collecting all Puzzle Pieces in Foggy Fumes |
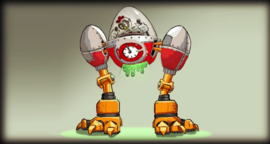 Colonel Pluck |
Colonel Pluck maneuvering his Stompybot 3000. | Collecting all Puzzle Pieces in Furious Fire |
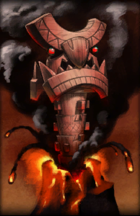 Tiki Tong Tower |
The Tiki Tong Tower rising above the erupting volcano and drenched in billows of smoke. | Collecting all Puzzle Pieces in Moving Melters and defeating Tiki Tong |
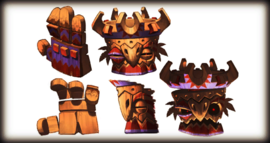 Tiki Tong |
Tiki Tong's head seen from frontal and side angles, along with his hands positioned at different angles each. The right hand, which is seen from behind, appears to have three red incrustations, as opposed to a single red button in the middle like in the character's in-game appearance. | Collecting all Puzzle Pieces in Red Red Rising and defeating Tiki Tong |
| Worlds Gallery | ||
| Name | Description | Unlock criteria |
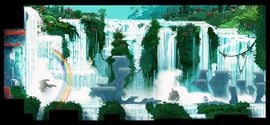 Jungle Waterfalls |
A large lineup of cascades in a bright jungle grove. Profound green spots of vegetation stifle through the waterfalls and the surrounding banks. Donkey Kong is seen capering on some platforms in front of the waterfalls, having exited a cavern with red metallic beams. | Collecting all Puzzle Pieces in Tree Top Bop |
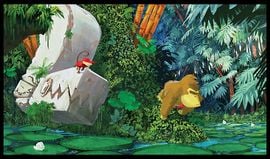 Jungle Statues |
Donkey Kong and Diddy Kong walk into a jungle delta, home to a large number of lily pads. A big serpent-like statue lies fixed in the dense vegetation, consisting of bamboos and ferns. | Collecting all Puzzle Pieces in Crazy Cart |
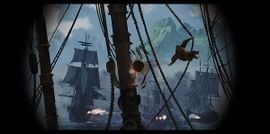 Ship Attack! |
Scene of a naval conflict between several galleons, occurring near land. Donkey Kong, swinging on a rope, narrowly avoids a cannonball that is damaging a ship spar. The artwork is enclosed by a darkened ring edge, creating tension and a unique atmosphere. The two levels that approach this level theme are Cannon Cluster and Mast Blast. |
Collecting all Puzzle Pieces in Cannon Cluster |
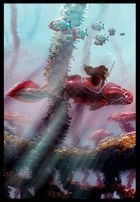 Undersea Adventures |
An underwater scene that captures Donkey Kong riding a red Dunkleosteus through a submerged forest. A school of piranhas swim in the opposite direction, in front of a spindly trunk. Donkey Kong has a thin snorkel pipe in his mouth, even though he never uses one while swimming in other games. Despite what the artwork depicts, there are no underwater levels in Donkey Kong Country Returns, as the game lacks a swimming mechanic. |
Collecting all Puzzle Pieces in Tidal Terror |
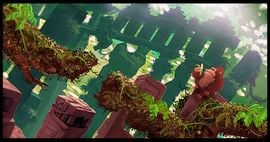 Ruins |
DK prepares to enjoy a banana in a ruinated settlement, hosting statues and other structures with a heavy resemblance to Aztec architecture. The artwork is presented at an oblique angle and is a basis for the game's Ruins world. | Collecting all Puzzle Pieces in Damp Dungeon |
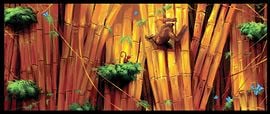 Bamboo Forest |
Donkey Kong traverses a dense bamboo forest, followed by Diddy who stands on a clump of leaves. Numerous thin vines are rigged between the bamboos, and morpho butterflies are scattered through the area. This location is not playable in the game. | Collecting all Puzzle Pieces in Tippin' Totems |
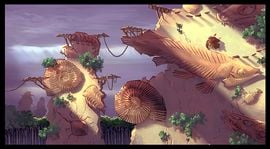 Cliff Spires |
A scenery with some fossil crags under a dark cloudy sky, reminiscent of the Cliff area of Donkey Kong Island. The stone formations tower above a forested region. Wooden platforms and bridges are adjoined to the stone walls, and small bursts of vegetation are grown through clefts. Donkey Kong walks up the fossil of a huge placoderm fish, which leads above a pit. Other fossils encrusted in the stone include eurypterids and ammonite shells. | Collecting all Puzzle Pieces in Crumble Canyon |
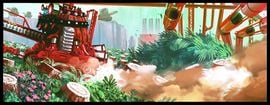 Ferndozer |
The natural environment around an industrial area is being ravaged by a Ferndozer. Only a vast terrain of cut tree trunks, among red pipes and girders, has been left behind after the deforestation. Three other Ferndozers can be seen on a ridge in the far background. Although this artwork seems to be linked to the Factory world of the game, no Ferndozers are encountered there, being completely discarded ideas. As seen in another concept artwork, Donkey Kong was intended to control at least one Ferndozer. |
Collecting all Puzzle Pieces in Wigglevine Wonders |
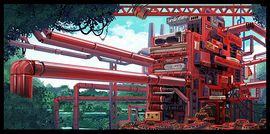 Factory Entrance |
The entrance to a factory in the middle of a forest, producing a bulk of studded barrels. The factory appears to be branded under the name "Barrel &/or Barrel", which is displayed at its top. A system of red pipes converge into the building, which is built out of pieces and components that are reminiscent of NES hardware. The artwork also contains an homage to the arcade Donkey Kong — a large reconstruction of Mario's sprite from that game is inlaid within the eastern wall. Like in the previous artwork, this factory is shown to have a specific red hue coating its components. The place in the picture does not appear in the game, but is likely a basis for the Factory world. |
Collecting all Puzzle Pieces in Slammin' Steel |
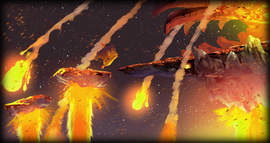 Volcano Eruptions |
Starry, "worm's-eye" scene with Donkey Kong escaping volcanic debris caused by an eruption. He scurries across rock platforms raised by lava geysers, and heads towards a jaw-looking structure. A similar situation is present in the level Red Red Rising, where DK has to jump platforms that rise above the lava. | Collecting all Puzzle Pieces in Bobbing Basalt |
| Kong Gallery | ||
| Name | Description | Unlock criteria |
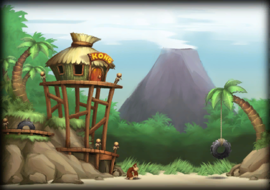 Hut Exterior |
Donkey Kong standing in front of his hut, located in a wide open space within the jungle. The house is built on stilts and raised high above the ground, being reachable via a bouncy tire on the left. Another tire acting as a swing lies hanged from a palm tree on the right. A fuming volcano appears on the skyline behind the dense green jungle. A very similar scenery can be observed at the beginning of Jungle Hijinxs, the first level of the game. |
Collecting all Puzzle Pieces in Jungle Hijinxs |
 Island Vista |
Picturesque and lively landscape with Mesoamerican ruins surrounded by lowland vegetation. A snowy peak rises far in the background, bleared by mist and clouds, along with a few pterodactyls soaring over a stone rooftop with overgrown thicket in the top-left corner. On the surrounding waters, there is a ship sailing next to a large stone serpent, and a few ridged outcrops are visible behind them. The central structure of the picture is an 8-bit DK monument holding a Wii Remote, erected on a Mayan pyramid. | Collecting all Puzzle Pieces in Temple Topple |
 Tutorial Pig |
The Tutorial Pig standing near a blackboard with nonsense written on it. The character's ears appear to be more splayed than in his in-game appearance. | Collecting all Puzzle Pieces in Prehistoric Path |
 Home Sweet Home |
The inside of DK's Tree House in its renewed appearance, borrowing the aspect of a rondavel hut. The furniture is made of lanterns hanging from ceiling poles, a wall picture, tires, a carpet, a hammock, a TV and a boombox. | Collecting all Puzzle Pieces in Precarious Plateau |
 Cranky's Shop |
Visualization of Cranky Kong's Shop, where Cranky sells items to the player. Squawks the Parrot, the Map Key and all other items appear on the table beside Cranky. However, in the picture, there is only one, differently-colored balloon for each amount of lives, instead of the same number as that amount. | Collecting all Puzzle Pieces in Cog Jog |
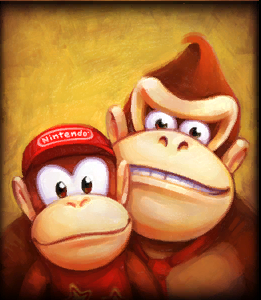 Family Portrait |
A portrait of Donkey Kong and Diddy Kong, smiling. The portrait is framed and placed within DK's Tree House, therefore being one of the two artworks in the Image Gallery to be used directly in the game. | Collecting all Puzzle Pieces in Smokey Peak |
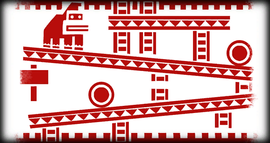 Petroglyph |
A petroglyph remake of 25m from the arcade Donkey Kong game, which is used to decorate the columns in temple levels such as Platform Panic and Shifty Smashers. This is the second artwork from the Image Gallery to be integrated as it is in the game. | Beating the game on Mirror Mode |
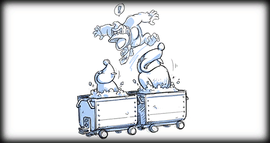 Mole Carts |
Sketch of two moles popping out of minecarts and taking Donkey Kong by surprise. Mole Miners with this behavior are found and fought during the Mole Train boss stage. | |
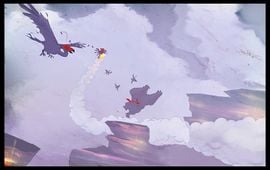 Steamy Adventure |
The Kongs are chased by an enormous red-headed vulture through a misty cliffside. Diddy soars on his jetpack and tries to hold off the enemy with his Peanut Popguns, while DK is on the ground, running away and leaving some banana peels behind. This concept is not integrated in the game. | |
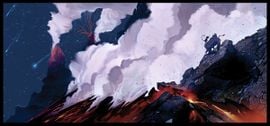 Volcanic Ascension |
The Kongs ascend a volcanic slope, on the background of a steaming crater and blackened ashes. Columns of volcanic steam also rise towards the horizon, in tandem with an erupting volcano over a clear, blue starry skyline. Along with other concept artworks (Volcano Eruptions and Angry Banana), this illustration might have been one of the preliminary concepts used for the Volcano world. | |
| Golden Temple Gallery | ||
| Name | Description | Unlock criteria |
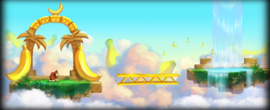 Golden Bananas |
The beginning of the level, visualized with a gateway, a golden girder, an arc of collectible bananas and a floating island soaked by a waterfall. Several gigantic bananas can be seen drifting in the clouds over which the scene takes place. This visualization is the closest to the final version of the level, although one element not seen in-game is the girder platform, which might have been a reference to the arcade Donkey Kong. | Collecting all Puzzle Pieces in the Golden Temple |
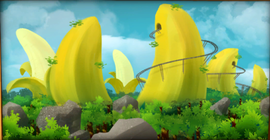 Banana Coaster |
Giant banana landforms risen above a forested area. A coaster is entwined around several of these bananas, leading into the background. The picture suggests that the final level would have contained a Mine Cart sequence. | |
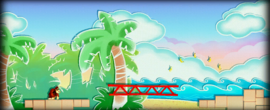 Paper Cutouts |
Envisagement with a cutout aesthetic. The layout is similar to that seen in the first Golden Temple artwork, featuring a starting point (barring any gateway), a girder platform, floating bananas and a continuing ground. The setting appears to be a beach, with a grove of palm trees located next to it, under a clear sky. | |
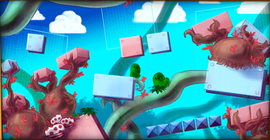 Wacky Blocks |
An erratic dimension reminiscent of the Mushroom Kingdom, whose elements, disorderly arranged around stout trees and vines, are based on various objects from Super Mario Bros. 3, such as colored blocks, Grass Land bushes, and spotted mushrooms. | |
 Pudding Wonderland |
A sky world with enormous banana summits emerging from pudding-like clouds. Wafers in both flat and stick shapes form a pathway above the clouds. One of the wafer sticks has a cherry on top. The wafer sticks are present in the final rendition of Golden Temple as platforms, although the scenery in the image as a whole only tangentially resembles the level. | |
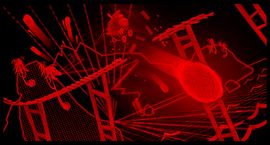 Virtual Boy Tracks |
Dynamic picture with Donkey Kong on a Mine Cart track, avoiding a shooting fireball. The image has Virtual Boy-inspired visuals, something that is not integrated in the final version of the game. | |
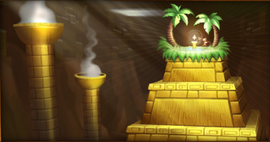 Golden Temple |
The altar inside the Golden Temple, consisting of an Aztec pyramidal structure that holds a light-shedding Golden Banana. The roof is decorated with palm trees and grass. Donkey Kong can be seen beating his chest near the Golden Banana, which appears to be smaller than its final appearance. Close to the pyramidal structure, there are two smoking columns rising above the chasm. The walls of the surrounding ravine display reliefs of apes dancing around the altar. | |
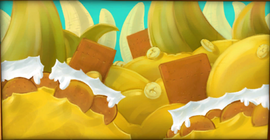 Crackers and Pudding |
A sweet-themed world with hills made out of pudding, bananas and cookies coated with whipped cream. | |
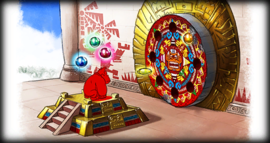 Temple Entrance |
Donkey Kong placing the Rare Orbs onto the gate that opens the Golden Temple. | |
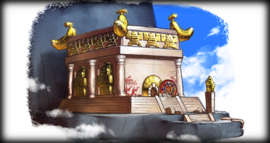 Temple Exterior |
The exterior of the Golden Temple, located on a mountainous platform just as in the game. However, compared to its final appearance, the area surrounding the temple appears to be narrower and devoid of any vegetation. | |
| Bonus Gallery | ||
| Name | Description | Unlock criteria |
Rambi |
Artist's rendition of Rambi, in which he has an additional smaller horn, more distant eyes, and inverted body proportions, making him look closer to a realistic rhinoceros. His in-game version, however, retains Rareware's original design. | Defeating Tiki Tong |
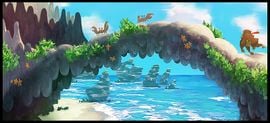 Beach Bridge |
A natural bridge arching around a bright seaside scenery. A running DK prepares to cross it, while two big crabs await him there. Stubby stalactite formations hang from the underside of the bridge; similarly, there are stalagmites further ahead, to the left. The game does not present a similar layout or decoration in any of its levels, although a Beach world inhabited by crabs exists in the game. | |
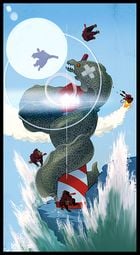 Eel Fight |
Donkey and Diddy Kong, engaged in a battle with a huge moray eel monster wrapped around a lighthouse. The monster has two crossed patches on the side of its head, where it is possibly supposed to be hit. DK appears in several instances throughout the picture, climbing and attacking the eel, while Diddy appears only once, fighting the eel with his Popguns while hovering with the barrel jet. Neither the fight nor the eel itself are incorporated in any form in the game. | |
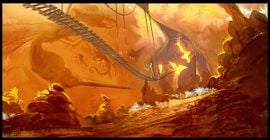 Amber Tracks |
A long railtrack cutting through a colossal amber cavern, seen from a low perspective. Prehistoric arthropods are trapped inside the amber walls. The track leads into a glowing orange area located past the fossil chamber. This environment does not appear in the game, but the prehistoric and mine cart themes present in Prehistoric Path, a level in the Cliff world, might have been carried over from this concept artwork. | |
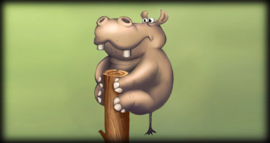 Bopapodamus |
A Bopapodamus perched on a wooden pole, in front of a pale green background. | |
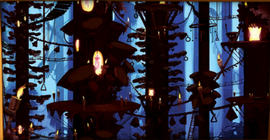 Tree Top Village |
A lush village built in the heights of a redwood forest and a possible homage to some levels from the original Donkey Kong Country. Homes are carved into tree trunks and are surrounded by circular footpaths. Numerous stairways, bridges and ropes weave between houses, with torches affixed to them. Multiple decorations, such as bells and wind chimes, hang from ropes. Houses and torches light powerfully, but the area is otherwise gloomy. This area in particular is not explored in the actual game, but it is remotely similar to various areas in the Forest, especially those that contain suspended houses. | |
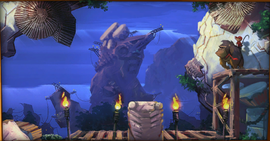 Dusky Cliffs |
A serene cliff scene at twilight. Close to the observer is a boardwalk illuminated by a few torches, as well as rock walls with large ammonite remnants surrounding the area. Donkey Kong and Diddy Kong are resting on an elevated platform on the right side. The backdrop is a landscape with rugged crags, marked by riggings of ropes and wooden balconies. The central crag hosts a cluster of strange big drums, as well as an obscured ichthyosaur fossil underneath. The sky, albeit a calm shade of blue, seems to be cloudy, with a few light beams coming from cloud ruptures. Sceneries like in this artwork are common in the Cliff section of the game, and most of them are cloudy as well, though none take place at dusk. | |
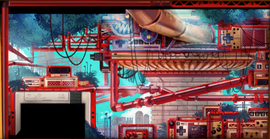 Old School |
A compact array of constructions based on NES and SNES components and controllers, creating an "old school" feeling. The area shares the location with a forest peeking its vegetation in several parts and is likely related to a previous concept artwork, Factory Entrance, depicting an early look of the Factory world. | |
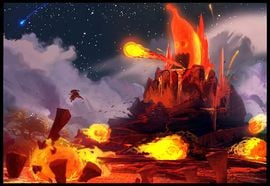 Angry Banana |
Dynamic scene of an "Angry Banana" towering a lava land and spitting large balls of fire. The hill upon which the banana stands sinks into a lake of magma, spread with unstable stone pillars. One of them is toppled by a swooping fireball—Donkey Kong can be seen leaping from it. As in other artworks related to the Volcano, the sky is starry and contrasts with the glowing red scenery; however, a significant part of the back plane, including a small patch of vegetation, is obscured by thick clouds of smoke. | |
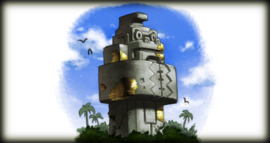 Temple Monument |
Artwork of a monument that resembles the four statues around the Golden Temple, though seemingly much bigger. It looms over an area with dense vegetation, in front of a clear skyline flown by birds. Patches on its surface layer reveal that the statue is made out of gold. | |
Names in other languages[edit]
Music gallery[edit]
| It has been requested that at least one audio and/or video file related to this section be uploaded. Please upload all related music, sound effects, voice clips, or any videos for this section. See the help page for information on how to get started. |
Part of the game's soundtrack is available in the music gallery, which contains eight music sets linked to one of the eight main worlds of the game. A set can be unlocked by defeating the boss of its corresponding world.
Movie gallery[edit]
The movie gallery allows the player to rewatch the game's cutscenes and is exclusive to Donkey Kong Country Returns 3D. Movies can be unlocked by collecting Puzzle Pieces in the first eight levels of the Cloud world, which is also exclusive to the Nintendo 3DS version.
| Movie title | Duration | Plot | Unlocked at |
|---|---|---|---|
| Opening | 01:59 | The volcano on Donkey Kong Island suddenly erupts, spawning the Tiki Tak Tribe, who immediately begin hypnotizing the local animals into stealing Donkey Kong's banana hoard. Diddy is the first to discover its disappearance and quickly goes inside DK's Tree House to notify him about the situation. DK treads outside to see the animals scuttling away with the bananas and yells at them angrily, when he is pushed back inside by Kalimba Tiki, one of the tribe's higher-ups. The antagonist then attempts to hypnotize DK, who proves to be immune. | Crushin' Columns |
| Pre-Battle | 01:21 | DK and Diddy Kong discover the banana hoard after gaining consciousness inside the Tiki Tong Tower at the top of the Volcano. The seven commanders of the Tiki Tak Tribe suddenly appear from behind the bananas and assemble around Tiki Tong, the supreme commander. The Tiki higher-ups begin alimenting him with bananas from the pile, resulting in a yellow mash that coats and turns the tikis into a pair of wooden hands that Tiki Tong will use during his showdown. | Gushin' Geysers |
| Pre-Battle (DK) | 01:21 | Two versions of the previous cutscene, each barring either Diddy or DK. | Spiky Surprise |
| Pre-Battle (Diddy) | |||
| Post-Battle | 01:07 | After defeating Tiki Tong, Donkey and Diddy are powerfully blasted to the moon. Before crashing, DK hits the moon with a fist punch, causing it to drop down on the Tiki Tong Tower and destroy it. This subsequently releases a large stream of bananas from the volcano, which shower the entire Donkey Kong Island. Followed along by a swarm of bananas, Donkey Kong and his pal land back in the island's jungle, where they watch the raining bananas in the sky and rejoice. The cutscene ends with a long shot of Donkey Kong beating his chest victoriously and the freed volcano behind him. | Mischievous Moles |
| Post-Battle (DK) | 01:10 | Two versions of the previous cutscene, the first starring only DK, the second only Diddy Kong. In the cutscene with Diddy, he causes the moon to fall by plummeting headfirst into it, instead of using his fist. He is then caught by Donkey Kong just before he lands back on earth. | Topsy Turvy |
| Post-Battle (Diddy) | |||
| Golden Temple | 00:29 | The post-credits cutscene, where it is revealed how the Golden Temple made its appearance. During the raining of bananas on Donkey Kong Island, one banana hits and presses a button on a monkey monument, located on a small secluded cliff. Following this, three other monuments emerge from the ground, all of them forming a square perimeter. Inside it, the fabled temple rises out from the earth accompanied by a bright surge of light. The cutscene ends with the camera comprising the entire shot of the temple surrounded by palm trees. | Tar Ball Fall |
| Inside Temple | 00:34 | Donkey and Diddy Kong walk up a corridor inside the Golden Temple, when they reach the altar. Here lies afloat a Golden Banana, at which they gaze in awe for a moment before heading towards it hastily. Donkey Kong takes hold of the fruit and peels it to taste the insides. By doing this, both of them are immediately warped to the temple's realm, commencing the final level of the game. | Robo Factory |
| Inside Temple (DK) | 00:34 | The same cutscene as before, excluding either Diddy or DK. | Lavawheel Volcano |
| Inside Temple (Diddy) |


