Sunset Shore: Difference between revisions
mNo edit summary |
m (Text replacement - "dktable-brown" to "wikitable dk") |
||
| (36 intermediate revisions by 19 users not shown) | |||
| Line 1: | Line 1: | ||
{{level | {{level infobox | ||
|title=Sunset Shore | |title=Sunset Shore | ||
|image=[[File:DKCR sunset shore.jpg|250px]] | |image=[[File:DKCR sunset shore.jpg|250px]] | ||
|code=1 - 4 | |code=1-4 | ||
|world= [[Jungle (Donkey Kong Country Returns)]] | |world=[[Jungle (Donkey Kong Country Returns)|Jungle]] | ||
|game=''[[Donkey Kong Country Returns]]'' (''[[Donkey Kong Country Returns 3D|3D]]'') | |game=''[[Donkey Kong Country Returns]]'' (''[[Donkey Kong Country Returns 3D|3D]]'') | ||
|before=[[Tree Top Bop|<<]] | |before=[[Tree Top Bop|<<]] | ||
|after=[[Crazy Cart|>>]] | |after=[[Crazy Cart|>>]] | ||
|track=Palm Tree Groove | |||
}} | }} | ||
'''Sunset Shore''' is the fourth level of ''[[Donkey Kong Country Returns]]'' and ''[[Donkey Kong Country Returns 3D]]'', as well as the fourth level in the [[Jungle (Donkey Kong Country Returns)|Jungle]] world. A key from [[Cranky Kong's Shop]] is required to access it. | '''Sunset Shore''' is the fourth level of ''[[Donkey Kong Country Returns]]'' and ''[[Donkey Kong Country Returns 3D]]'', as well as the fourth level in the [[Jungle (Donkey Kong Country Returns)|Jungle]] world. A key from [[Cranky Kong's Shop]] is required to access it. | ||
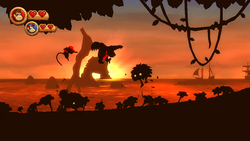
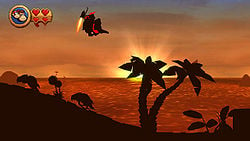
Sunset Shore is unique in that everything in the stage is silhouetted, featuring a red-yellowish sunset in the background. [[Donkey Kong]] and [[Diddy Kong]] both appear as silhouettes along with the objects around them, with only the sunlit background and the [[Kong]]s' clothing completely visible around the shadows. The silhouetted foreground can make enemies and objects harder to notice. | |||
In the [[Donkey Kong Country Returns#Time Attack|Time Attack]] mode of the game, a time of 0:53:00 is needed to get a gold medal, a time of 1:03:00 for silver, and a time of 1:45:00 for bronze. | In the [[Donkey Kong Country Returns#Time Attack|Time Attack]] mode of the game, a time of 0:53:00 is needed to get a gold medal, a time of 1:03:00 for silver, and a time of 1:45:00 for bronze. | ||
== | ==Layout== | ||
[[File: | [[File:Sunshet Shore Tiki Bush DKCR.png|thumb|left|250px|The Kongs travel through the beginning of the level]] | ||
The level begins with a straight pathway leading to the first [[DK Barrel]] in the level and a cracked area of land that can be broken to help the Kongs reach an alcove with the letter K of the [[K-O-N-G Letters]] in it. Eventually, the | The level begins with a straight pathway leading to the first [[DK Barrel]] in the level and a cracked area of land that can be broken to help the Kongs reach an alcove with the letter K of the [[K-O-N-G Letters]] in it. Eventually, the Kongs travel down a hill, and then come across a land bridge with some Awks on it. Two rows of bananas are in the air here. Farther on is another hill that curves downwards. A cracked piece of land is on it with a heart item under it, and Frogoons surround it. The Kongs soon make it to a raised and solid platform with a Mimic on it. Large, stair-like platforms are after it that lead downwards. Bananas move in a circle here, while a Mimic attacks from behind the items. Soon, the Kongs find themselves traveling up a long hill infested with Frogoons, until they reach a bridge. Many more Frogoons are on the bridge, along with three platforms that are positioned vertically. The Kongs can pound in front of them to make them horizontal so they can reach the items above them; the letter O is above the second platform in the middle of the bridge. After the Kongs cross the bridge and head over a raised object, they make their way through a straight and relatively flat area full of more Frogoons. After going up a hill with two long rows of bananas above it, they pass the [[Professor Chops|Tutorial Pig]], who marks the checkpoint. | ||
A few stair-like platforms lead up to the second DK Barrel of the level. A switch is at the top of the level, and following it are some more stair platforms leading downwards. At the bottom of the last stair is a straight area with only some Frogoons on it, along with a cracked piece of land that the Kongs can smash through to reach an alcove in the ground. At the end of this rather flat area, which has some bananas moving in a circle, are some ledges that the Kongs must climb to proceed to a different part of the stage, where there are more Mimics and dandelions, which give an item when blown on. A strange plant is placed just before another bridge that holds the Kongs over the land below. Frogoons, Tiki Goons, and Mimics are on the bridge, along with some vertical platforms that can be made horizontal if the heroes pound in front of them. The bridge is not completely straight; gaps are between some of the bridge parts, with a Frogoon and an alcove, which is covered by a cracked piece of land, with the letter G in it. Ahead of the bridge is a group of bananas that move in a circle and some enemies. At the end of the long, rather empty pathway is a tall structure. If it is pounded into the ground, the mouth of a strange dragon statue located just ahead opens. The primates should journey inside of the statue to access a small room with the [[Slot Machine Barrel]] in it. | A few stair-like platforms lead up to the second DK Barrel of the level. A switch is at the top of the level, and following it are some more stair platforms leading downwards. At the bottom of the last stair is a straight area with only some Frogoons on it, along with a cracked piece of land that the Kongs can smash through to reach an alcove in the ground. At the end of this rather flat area, which has some bananas moving in a circle, are some ledges that the Kongs must climb to proceed to a different part of the stage, where there are more Mimics and dandelions, which give an item when blown on. A strange plant is placed just before another bridge that holds the Kongs over the land below. Frogoons, Tiki Goons, and Mimics are on the bridge, along with some vertical platforms that can be made horizontal if the heroes pound in front of them. The bridge is not completely straight; gaps are between some of the bridge parts, with a Frogoon and an alcove, which is covered by a cracked piece of land, with the letter G in it. Ahead of the bridge is a group of bananas that move in a circle and some enemies. At the end of the long, rather empty pathway is a tall structure. If it is pounded into the ground, the mouth of a strange dragon statue located just ahead opens. The primates should journey inside of the statue to access a small room with the [[Slot Machine Barrel]] in it. | ||
== | |||
==Enemies== | |||
{|class="wikitable dk" width=25% | |||
|- | |||
!Image | |||
!Name | |||
!Amount | |||
|- | |||
|align="center"|[[File:Awk.png|x50px]] | |||
|align="center"|[[Awk]] | |||
|8 | |||
|- | |||
|align="center"|[[File:Frogoon_screenshot.png|x50px]] | |||
|align="center"|[[Frogoon]] | |||
|8 | |||
|- | |||
|align="center"|[[File:Hopgoon.png|x50px]] | |||
|align="center"|[[Hopgoon]] | |||
|16 | |||
|- | |||
|align="center"|[[File:Mimic_DKCR.png|x50px]] | |||
|align="center"|[[Mimic]] | |||
|6 | |||
|- | |||
|align="center"|[[File:TikiGoon.png|x50px]] | |||
|align="center"|[[Tiki Goon]] | |||
|12 | |||
|} | |||
==Items== | |||
{|class="wikitable dk" width=25% | |||
|- | |||
!Image | |||
!Name | |||
!Amount | |||
|- | |||
|align="center"|[[File:BananacoinDKCR.png|x50px]] | |||
|align="center"|[[Banana Coin]] | |||
|16 | |||
|- | |||
|align="center"|[[File:DKBarrelDKCR.png|x50px]] | |||
|align="center"|[[DK Barrel]] | |||
|2 | |||
|- | |||
|align="center"|[[File:Heart.png|x50px]] | |||
|align="center"|[[Heart (item)|Heart]] | |||
|4 | |||
|} | |||
===K-O-N-G Letters=== | |||
{|class="wikitable dk" width=70% | |||
|- | |||
!Image | |||
!Letter | |||
!Location | |||
|- | |||
|align="center"|[[File:DKCR Sunset Shore Letter K.png|250px]] | |||
|align="center"|K | |||
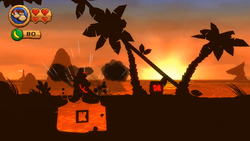
|At the very start, in a gap just before the first [[DK Barrel]]. The gap is covered by a breakable platform, which Donkey Kong can destroy with a [[Ground Pound]], causing him to fall into the letter K below. | |||
|- | |||
|align="center"|[[File:DKCR Sunset Shore Letter O.png|250px]] | |||
|align="center"|O | |||
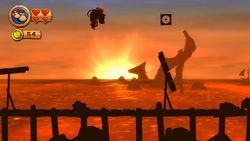
|At the first long bridge, floating above the middle platform. The platform is facing vertically, thus making the letter O hard to reach. The Kongs can either reach it by pounding below the platform, causing it to flip horizontally, or by jumping off a [[Frogoon]] right when it jumps up below the letter O. | |||
|- | |||
|align="center"|[[File:DKCR Sunset Shore Letter N.png|250px]] | |||
|align="center"|N | |||
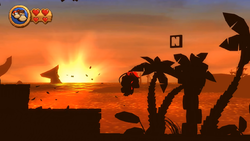
|After crossing the checkpoint, the Kongs must continue up some stair-shaped platforms and pass a DK Barrel. As they go down, the Kongs must gain momentum and jump from the last stair platform to leap at the letter N. If the Kongs took the nearby underground shortcut with the second Puzzle Piece, they must backtrack to the letter. | |||
|- | |||
|align="center"|[[File:DKCR Sunset Shore Letter G.png|250px]] | |||
|align="center"|G | |||
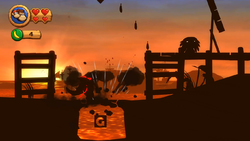
|In a gap during the second bridge portion, the Kongs must continue until finding a cracked platform and then Ground Pound on it to obtain the letter G, just as they did for the letter K. | |||
|} | |||
===Puzzle Pieces=== | ===Puzzle Pieces=== | ||
[[File: | {|class="wikitable dk" width=70% | ||
|- | |||
!Image | |||
!Number | |||
!Location | |||
|- | |||
|align="center"|[[File:DKCR Sunset Shore Puzzle Piece 1.png|250px]] | |||
|align="center"|1 | |||
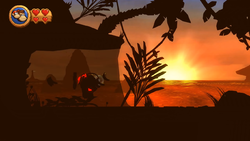
|At the beginning of the level, the Kongs must go left into a hidden with the Puzzle Piece floating in midair between two Banana Bunches. | |||
|- | |||
|align="center"|[[File:DKCR Sunset Shore Puzzle Piece 2.png|250px]] | |||
|align="center"|2 | |||
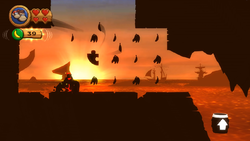
|After passing the checkpoint, the Kongs must stand on a switch for a few seconds and wait. By doing so, the sunset shines brightly and the ground beneath them breaks, dropping them down into a hidden area. The Puzzle Piece is floating in center of an arrangement of Bananas and Banana Bunches. After collecting the items, the Kongs can exit back to the main stage by using an [[Arrow Barrel]]. | |||
|- | |||
|align="center"|[[File:Sunset Shore DKCR Puzzle Piece 3.png|250px]] | |||
|align="center"|3 | |||
|After passing the letter N, the Kongs approach an Awk in front of a wall. They can pass behind the wall to enter a small gap containing the third Puzzle Piece. | |||
|- | |||
|align="center"|[[File:DKCR Sunset Shore Puzzle Piece 4.png|250px]] | |||
|align="center"|4 | |||
|Shortly after collecting the third Puzzle Piece, the Kongs find two vertical-facing platforms next to each other. By pounding them, the platforms are temporarily facing horizontally. The Kongs must quickly go up the platforms to reach the Puzzle Piece floating above the second, higher platform. | |||
|- | |||
|align="center"|[[File:DKCR Sunset Shore Puzzle Piece 5.png|250px]] | |||
|align="center"|5 | |||
|At the end of the level, the Kongs reach a dragon-like statue, and must jump on it by using a tall platform (later used to open a path to the Slot Machine Barrel). On the platform, the Kongs must continue down a slightly-curved path with a Frogoon and a Tiki Goon. The fifth and final Puzzle Piece appears in an area behind the wall next to the Tiki Goon. | |||
|} | |||
==Names in other languages== | ==Names in other languages== | ||
{{ | {{foreign names | ||
|Jap= | |Jap=サンセットかいがん | ||
|JapR= | |JapR=Sansetto Kaigan | ||
|JapM=Sunset Coast | |JapM=Sunset Coast | ||
|Spa=Costa Crepuscular | |Spa=Costa Crepuscular | ||
|SpaM=Twilight Shore | |SpaM=Twilight Shore | ||
|Ita=Sponda | |Ita=Sponda dorata | ||
|ItaM=Golden Shore | |ItaM=Golden Shore | ||
| | |FreA=Rive du Coucher | ||
| | |FreAM=Sunset Shore | ||
|FreE=Rive du Couchant | |||
|FreEM=Sunset Shore | |||
|Ger=Küste im Dämmerlicht | |Ger=Küste im Dämmerlicht | ||
|GerM=Shore in Half-light | |GerM=Shore in Half-light | ||
|Kor=선셋 해안 | |Kor=선셋 해안 | ||
|KorR=Seonset Haean | |KorR=Seonset Haean | ||
|KorM=Sunset Coast | |KorM=Sunset Coast | ||
|Chi=黄昏海岸 | |||
|ChiR=Huánghūn Hǎi'àn | |||
|ChiM=Dusk Coast | |||
}} | |||
{{DKCR}} | {{DKCR}} | ||
[[Category: | [[Category:Beaches]] | ||
[[Category: | [[Category:Jungles]] | ||
[[Category: | [[Category:Secret levels]] | ||
[[Category: | [[Category:Donkey Kong Country Returns levels]] | ||
[[ | [[de:Küste im Dämmerlicht]] | ||
Latest revision as of 14:18, February 3, 2024
| Level | |
|---|---|
| Sunset Shore | |
| |
| Level code | 1-4 |
| World | Jungle |
| Game | Donkey Kong Country Returns (3D) |
| Music track | Palm Tree Groove |
| << Directory of levels >> | |
Sunset Shore is the fourth level of Donkey Kong Country Returns and Donkey Kong Country Returns 3D, as well as the fourth level in the Jungle world. A key from Cranky Kong's Shop is required to access it.
Sunset Shore is unique in that everything in the stage is silhouetted, featuring a red-yellowish sunset in the background. Donkey Kong and Diddy Kong both appear as silhouettes along with the objects around them, with only the sunlit background and the Kongs' clothing completely visible around the shadows. The silhouetted foreground can make enemies and objects harder to notice.
In the Time Attack mode of the game, a time of 0:53:00 is needed to get a gold medal, a time of 1:03:00 for silver, and a time of 1:45:00 for bronze.
Layout[edit]
The level begins with a straight pathway leading to the first DK Barrel in the level and a cracked area of land that can be broken to help the Kongs reach an alcove with the letter K of the K-O-N-G Letters in it. Eventually, the Kongs travel down a hill, and then come across a land bridge with some Awks on it. Two rows of bananas are in the air here. Farther on is another hill that curves downwards. A cracked piece of land is on it with a heart item under it, and Frogoons surround it. The Kongs soon make it to a raised and solid platform with a Mimic on it. Large, stair-like platforms are after it that lead downwards. Bananas move in a circle here, while a Mimic attacks from behind the items. Soon, the Kongs find themselves traveling up a long hill infested with Frogoons, until they reach a bridge. Many more Frogoons are on the bridge, along with three platforms that are positioned vertically. The Kongs can pound in front of them to make them horizontal so they can reach the items above them; the letter O is above the second platform in the middle of the bridge. After the Kongs cross the bridge and head over a raised object, they make their way through a straight and relatively flat area full of more Frogoons. After going up a hill with two long rows of bananas above it, they pass the Tutorial Pig, who marks the checkpoint.
A few stair-like platforms lead up to the second DK Barrel of the level. A switch is at the top of the level, and following it are some more stair platforms leading downwards. At the bottom of the last stair is a straight area with only some Frogoons on it, along with a cracked piece of land that the Kongs can smash through to reach an alcove in the ground. At the end of this rather flat area, which has some bananas moving in a circle, are some ledges that the Kongs must climb to proceed to a different part of the stage, where there are more Mimics and dandelions, which give an item when blown on. A strange plant is placed just before another bridge that holds the Kongs over the land below. Frogoons, Tiki Goons, and Mimics are on the bridge, along with some vertical platforms that can be made horizontal if the heroes pound in front of them. The bridge is not completely straight; gaps are between some of the bridge parts, with a Frogoon and an alcove, which is covered by a cracked piece of land, with the letter G in it. Ahead of the bridge is a group of bananas that move in a circle and some enemies. At the end of the long, rather empty pathway is a tall structure. If it is pounded into the ground, the mouth of a strange dragon statue located just ahead opens. The primates should journey inside of the statue to access a small room with the Slot Machine Barrel in it.
Enemies[edit]
| Image | Name | Amount |
|---|---|---|

|
Awk | 8 |

|
Frogoon | 8 |

|
Hopgoon | 16 |

|
Mimic | 6 |
| Tiki Goon | 12 |
Items[edit]
| Image | Name | Amount |
|---|---|---|
| Banana Coin | 16 | |
| DK Barrel | 2 | |

|
Heart | 4 |
K-O-N-G Letters[edit]
| Image | Letter | Location |
|---|---|---|
|
K | At the very start, in a gap just before the first DK Barrel. The gap is covered by a breakable platform, which Donkey Kong can destroy with a Ground Pound, causing him to fall into the letter K below. |
|
O | At the first long bridge, floating above the middle platform. The platform is facing vertically, thus making the letter O hard to reach. The Kongs can either reach it by pounding below the platform, causing it to flip horizontally, or by jumping off a Frogoon right when it jumps up below the letter O. |
|
N | After crossing the checkpoint, the Kongs must continue up some stair-shaped platforms and pass a DK Barrel. As they go down, the Kongs must gain momentum and jump from the last stair platform to leap at the letter N. If the Kongs took the nearby underground shortcut with the second Puzzle Piece, they must backtrack to the letter. |
|
G | In a gap during the second bridge portion, the Kongs must continue until finding a cracked platform and then Ground Pound on it to obtain the letter G, just as they did for the letter K. |
Puzzle Pieces[edit]
| Image | Number | Location |
|---|---|---|
|
1 | At the beginning of the level, the Kongs must go left into a hidden with the Puzzle Piece floating in midair between two Banana Bunches. |
|
2 | After passing the checkpoint, the Kongs must stand on a switch for a few seconds and wait. By doing so, the sunset shines brightly and the ground beneath them breaks, dropping them down into a hidden area. The Puzzle Piece is floating in center of an arrangement of Bananas and Banana Bunches. After collecting the items, the Kongs can exit back to the main stage by using an Arrow Barrel. |
|
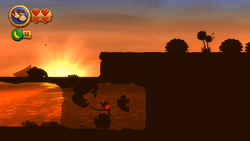
3 | After passing the letter N, the Kongs approach an Awk in front of a wall. They can pass behind the wall to enter a small gap containing the third Puzzle Piece. |
|
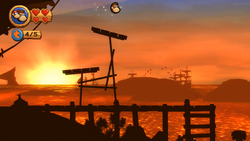
4 | Shortly after collecting the third Puzzle Piece, the Kongs find two vertical-facing platforms next to each other. By pounding them, the platforms are temporarily facing horizontally. The Kongs must quickly go up the platforms to reach the Puzzle Piece floating above the second, higher platform. |
|
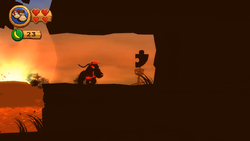
5 | At the end of the level, the Kongs reach a dragon-like statue, and must jump on it by using a tall platform (later used to open a path to the Slot Machine Barrel). On the platform, the Kongs must continue down a slightly-curved path with a Frogoon and a Tiki Goon. The fifth and final Puzzle Piece appears in an area behind the wall next to the Tiki Goon. |
Names in other languages[edit]
| Language | Name | Meaning |
|---|---|---|
| Japanese | サンセットかいがん Sansetto Kaigan |
Sunset Coast |
| Chinese | 黄昏海岸 Huánghūn Hǎi'àn |
Dusk Coast |
| French (NOA) | Rive du Coucher |
Sunset Shore |
| French (NOE) | Rive du Couchant |
Sunset Shore |
| German | Küste im Dämmerlicht |
Shore in Half-light |
| Italian | Sponda dorata |
Golden Shore |
| Korean | 선셋 해안 Seonset Haean |
Sunset Coast |
| Spanish | Costa Crepuscular |
Twilight Shore |
