Klobber Karnage (Donkey Kong Land 2): Difference between revisions
mNo edit summary |
No edit summary |
||
| Line 13: | Line 13: | ||
'''Klobber Karnage''' is the thirty-eighth [[level]] of ''[[Donkey Kong Land 2]]''. It is also the fourth area of the [[Lost World (Donkey Kong Country 2: Diddy's Kong Quest)|Lost World]], and it is located at the base of the mountain that contains the [[Krocodile Kore]], as seen on the map. | '''Klobber Karnage''' is the thirty-eighth [[level]] of ''[[Donkey Kong Land 2]]''. It is also the fourth area of the [[Lost World (Donkey Kong Country 2: Diddy's Kong Quest)|Lost World]], and it is located at the base of the mountain that contains the [[Krocodile Kore]], as seen on the map. | ||
This is the second jungle level in the game. As its name suggests, many [[Klobber]]s fill up this place. Although they cannot harm the [[Kong]]s directly, the Klobbers are still dangerous, as they can push the primates off the edges, thus making them fall into a nearby abyss. This level's [[Barrel Cannon]]s are prominant and essential in progressing through the level; however, they may be a hassle for the monkeys to shoot from one to another, as they make fast 360 degrees rotations. Several [[TNT Barrel]]s make their presence within this level | This is the second jungle level in the game. As its name suggests, many [[Klobber]]s fill up this place. Although they cannot harm the [[Kong]]s directly, the Klobbers are still dangerous, as they can push the primates off the edges, thus making them fall into a nearby abyss. This level's [[Barrel Cannon]]s are prominant and essential in progressing through the level; however, they may be a hassle for the monkeys to shoot from one to another, as they make fast 360 degrees rotations. Several [[TNT Barrel]]s make their presence within this level. | ||
==Level layout== | ==Level layout== | ||
[[File:KlobberKarnage-DKL2-Zinger.png|thumb|left|Diddy throws a barrel at a Zinger]] | |||
To begin the level, the Kongs must walk east along the path. They will come across an abyss to jump over, as well as a Klobber next to a [[TNT Barrel]]. They should defeat the Klobber, and throw the TNT Barrel at a nearby Spiny on a small platform. The monkeys will have to continue through the level from there, and use another Klobber to defeat a Spiny, who will be found occupying a tiny and thin platform. Once they pass this area, they must jump up a small ledge and dodge a few enemies. Then, they will have to drop down a few ledges and beat a few more foes, including the high-bouncing enemies, Kaboings. After this part, they will need to hop up some more ledges and keep away from the nearby Klobbers, who will try to knock them off the ledge. From there, they will have to travel a little farther and come up to a large abyss. Using the aid of a few barrels, they must shoot their way to the other end of the gap. Once they hit ground, they monkeys must hop over three rather wide abysses and reach the Star Barrel afterwards. | To begin the level, the Kongs must walk east along the path. They will come across an abyss to jump over, as well as a Klobber next to a [[TNT Barrel]]. They should defeat the Klobber, and throw the TNT Barrel at a nearby Spiny on a small platform. The monkeys will have to continue through the level from there, and use another Klobber to defeat a Spiny, who will be found occupying a tiny and thin platform. Once they pass this area, they must jump up a small ledge and dodge a few enemies. Then, they will have to drop down a few ledges and beat a few more foes, including the high-bouncing enemies, Kaboings. After this part, they will need to hop up some more ledges and keep away from the nearby Klobbers, who will try to knock them off the ledge. From there, they will have to travel a little farther and come up to a large abyss. Using the aid of a few barrels, they must shoot their way to the other end of the gap. Once they hit ground, they monkeys must hop over three rather wide abysses and reach the Star Barrel afterwards. | ||
At this point, the heroes will have to continue traveling east and walk across a more flattened area, while defeating several enemies. Once they climb up and drop down a few ledges, they must bounce off a Flitter to access another barrel. With it, they must shoot across a wide abyss and use the banana trails to lead them. Once back on land, they will need to keep walking along the path and watch out for more Klobbers. Soon, they will have to jump into another barrel and make their way across a large gap. After they make it across this abyss, they must cross a smaller abyss, followed by yet another abyss. This gap is too large to pass with a normal jump, so the barrels will have to be used again. When they get to the end of this gap, the group will need to drop down a few more ledges and beat some more Klobbers. Finally, they will find the end of the level, and be able to exit after hitting a nearby spring. | At this point, the heroes will have to continue traveling east and walk across a more flattened area, while defeating several enemies. Once they climb up and drop down a few ledges, they must bounce off a Flitter to access another barrel. With it, they must shoot across a wide abyss and use the banana trails to lead them. Once back on land, they will need to keep walking along the path and watch out for more Klobbers. Soon, they will have to jump into another barrel and make their way across a large gap. After they make it across this abyss, they must cross a smaller abyss, followed by yet another abyss. This gap is too large to pass with a normal jump, so the barrels will have to be used again. When they get to the end of this gap, the group will need to drop down a few more ledges and beat some more Klobbers. Finally, they will find the end of the level, and be able to exit after hitting a nearby spring. | ||
== | ==Enemies== | ||
====Bonus | *[[Kruncha]] | ||
*[[Klampon]] | |||
*[[Kaboing]] | |||
*[[Knocka]] | |||
*[[Spiny (Donkey Kong Country 2: Diddy's Kong Quest)|Spiny]] | |||
*[[Zinger]] | |||
==Items== | |||
*[[Banana Coin]]: 3 | |||
*[[Barrel]]s: | |||
**[[DK Barrel]]: 3 | |||
**[[TNT Barrel]]: 2 | |||
*[[DK Coin]]: Obtained by finishing the bonus level. | |||
===K-O-N-G Letters=== | |||
*K: Above an abyss near the second Spiny encountered in the level. | |||
*O: Found after three consecutive Klobbers on a plateau. | |||
*N: Obtained during a barrel blasting segment. | |||
*G: Past the Bonus Barrel and some barrel blasting, the "G" is obtained by jumping off of a Flitter. | |||
<gallery> | |||
KlobberKarnage-DKL2-O.png|The letter O | |||
KlobberKarnage-DKL2-N.png|The letter N | |||
</gallery> | |||
==Bonus Level== | |||
[[File:KlobberKarnage-DKL2-Bonus.png|thumb|Location of the Bonus Barrel]] | |||
*Near the end of the level, the Kongs should enter a barrel that will move up and down. They should also see a Bonus Barrel and a normal barrel. They must simply shoot into the Bonus Barrel in plain sight and begin the Bonus Level. Here, they will have to shoot through several Rotatable Barrels and collect stars, trying not fall into the abyss below. When they obtain all the stars, the DK Coin will appear. | *Near the end of the level, the Kongs should enter a barrel that will move up and down. They should also see a Bonus Barrel and a normal barrel. They must simply shoot into the Bonus Barrel in plain sight and begin the Bonus Level. Here, they will have to shoot through several Rotatable Barrels and collect stars, trying not fall into the abyss below. When they obtain all the stars, the DK Coin will appear. | ||
Revision as of 13:31, March 28, 2019
Template:Levelbox Klobber Karnage is the thirty-eighth level of Donkey Kong Land 2. It is also the fourth area of the Lost World, and it is located at the base of the mountain that contains the Krocodile Kore, as seen on the map.
This is the second jungle level in the game. As its name suggests, many Klobbers fill up this place. Although they cannot harm the Kongs directly, the Klobbers are still dangerous, as they can push the primates off the edges, thus making them fall into a nearby abyss. This level's Barrel Cannons are prominant and essential in progressing through the level; however, they may be a hassle for the monkeys to shoot from one to another, as they make fast 360 degrees rotations. Several TNT Barrels make their presence within this level.
Level layout

To begin the level, the Kongs must walk east along the path. They will come across an abyss to jump over, as well as a Klobber next to a TNT Barrel. They should defeat the Klobber, and throw the TNT Barrel at a nearby Spiny on a small platform. The monkeys will have to continue through the level from there, and use another Klobber to defeat a Spiny, who will be found occupying a tiny and thin platform. Once they pass this area, they must jump up a small ledge and dodge a few enemies. Then, they will have to drop down a few ledges and beat a few more foes, including the high-bouncing enemies, Kaboings. After this part, they will need to hop up some more ledges and keep away from the nearby Klobbers, who will try to knock them off the ledge. From there, they will have to travel a little farther and come up to a large abyss. Using the aid of a few barrels, they must shoot their way to the other end of the gap. Once they hit ground, they monkeys must hop over three rather wide abysses and reach the Star Barrel afterwards.
At this point, the heroes will have to continue traveling east and walk across a more flattened area, while defeating several enemies. Once they climb up and drop down a few ledges, they must bounce off a Flitter to access another barrel. With it, they must shoot across a wide abyss and use the banana trails to lead them. Once back on land, they will need to keep walking along the path and watch out for more Klobbers. Soon, they will have to jump into another barrel and make their way across a large gap. After they make it across this abyss, they must cross a smaller abyss, followed by yet another abyss. This gap is too large to pass with a normal jump, so the barrels will have to be used again. When they get to the end of this gap, the group will need to drop down a few more ledges and beat some more Klobbers. Finally, they will find the end of the level, and be able to exit after hitting a nearby spring.
Enemies
Items
- Banana Coin: 3
- Barrels:
- DK Barrel: 3
- TNT Barrel: 2
- DK Coin: Obtained by finishing the bonus level.
K-O-N-G Letters
- K: Above an abyss near the second Spiny encountered in the level.
- O: Found after three consecutive Klobbers on a plateau.
- N: Obtained during a barrel blasting segment.
- G: Past the Bonus Barrel and some barrel blasting, the "G" is obtained by jumping off of a Flitter.

The letter O
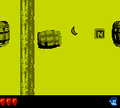
The letter N


Bonus Level

- Near the end of the level, the Kongs should enter a barrel that will move up and down. They should also see a Bonus Barrel and a normal barrel. They must simply shoot into the Bonus Barrel in plain sight and begin the Bonus Level. Here, they will have to shoot through several Rotatable Barrels and collect stars, trying not fall into the abyss below. When they obtain all the stars, the DK Coin will appear.
Names in other languages
| Language | Name | Meaning |
|---|---|---|
| Japanese | クロバーおおあばれ Kurobā Ooabare |
Klobber Rampage |