Bramble Scramble (Donkey Kong Land 2)
| Level | |
|---|---|
| Bramble Scramble | |

| |
| Level code | 3 - 5 |
| World | Krazy Kremland |
| Game | Donkey Kong Land 2 |
| Music track | Stickerbush Symphony |
| << Directory of levels >> | |
Bramble Scramble is the twentieth level of Donkey Kong Land 2 and the fifth level of Krazy Kremland. It takes place in a series of large brambles. For a large part of the level, Diddy Kong and Dixie Kong transform into Squawks, who has to fly his way around them. Besides the Squawks segments, there are some maze-like areas with several ropes.
Layout[edit]

The level begins in front of a Banana Bunch on some wooden planks that hold the Kongs over the sharp brambles. Some more wooden planks are ahead to help them progress safely. A DK Barrel is above one of the sets of planks, while a Krook stands on the planks after it. The primates can bounce on a nearby Flitter to reach a long vine that they must climb up to progress. If they climb down on the vine, they come past a Zinger and then reach a set of wooden planks that support a Click-Clack. The letter K is located in this area. To the right of the same vine, there is a Banana Bunch above more planks. As the heroes climb upwards on this vine, a Zinger flies in their way. Once they pass the foe, they reach a horizontal vine. If they climb to the left on the vine, they can find a Krook, a Banana Coin, and a Banana Bunch, but if they travel to the right, they progress to a Zinger and a short, vertical vine. They must drop down from this vine to land on some wooden planks that hold a Click-Clack. This is followed by some more planks and another Click-Clack. From here, they can reach the remaining part of the previous horizontal vine. As they climb across this, a Zinger tries to attack them. Soon, they make their way to a vertical vine that they must climb down to reach some more wooden planks with a Click-Clack on them. A trio of Zingers fly in their way as they climb down the vine.
An Animal Barrel is located at the bottom of the vine, and if it is entered, the primates are turned into Squawks the Parrot. The parrot can help them progress through a wide path placed among the brambles. As he begins his flight, he encounters a Zinger and a Banana Bunch, and then heads north. There are many bananas and Zingers on the way. At the top of the area, the hero meets a few Flitters, and then heads down another path full of Zingers. There is a fork-in-the-road on the way through here. If Squawks continues downwards, he reaches the letter O, a Banana Coin, and some bananas, but if he travels to the right as he heads down the area, he encounters some more Flitters and a DK Barrel. There are some more Zingers and Flitters north of here, but after they are passed, the parrot reaches a No Animal Sign, which causes him to turn back into the Kongs. As the primates continue forward, they must make sure to land on the wooden planks on top of the brambles. On the way along the platforms, they encounter a Flitter and a Click-Clack, and then reach a vertical vine that is surrounded by a few other vines. The vine to the right of here can help them access an area with a horizontal vine that leads past a Zinger and back to the platform holding the No Animal Sign. The vine to the left helps the Kongs reach some wooden planks with a Click-Clack walking along them. Another vine is northwest of the last vine, and it leads to a Zinger and a hidden Bonus Barrel. If the heroes continue west from here, they reach a long set of wooden planks with the Star Barrel and a DK Barrel above them.

There is a large group of vines ahead of here with many Zingers swarming around them. The letter N is located at the beginning of this vine area. Soon, the primates pass a Flitter and then head towards a vertical vine that they can use to climb past a few Zingers and safely reach a few sections of wooden planks that hold Click-Clacks. The last set of planks are placed under an Animal Barrel that must be entered to turn into Squawks again. The parrot must be used to ascend up a slanted path with a single Zinger at the beginning of it. As the parrot approaches the top of this path, he finds a Zinger guarding a thin passage. After he defeats this Zinger and the two other Zingers located after it, he accesses a large, hidden area that contains a DK Barrel, a Banana Bunch, some more Zingers, and a Video Game Hero Coin. If Squawks heads back to the area that he found the Zinger guarding the thin passage, he can find a wider passage to the west.
As he heads along this curvy path, a few Zinger fly in his way. Eventually, he reaches a DK Barrel and then flies southeast towards a No Animal Sign structured on some wooden planks. If he tries to pass this sign, he is turned back into the Kongs, who must then travel to a large, wide area full of vines, Flitters, and Zingers. As they climb through this area, they discover a Banana Coin and the letter G, which floats above the head of a Krook at the bottom of the area. A Click-Clack patrols the small set of planks that holds this Krook. If the primates make their way east through this large area, they reach some sets of wooden planks that support Click-Clacks. A Banana Bunch is above each set of planks. Eventually, the heroes make their way to a long, vertical vine that they must climb down to reach a set of planks that hold a spring. As they climb down, a few Zingers try to interfere. If Diddy or Dixie jump on the spring, the level is complete.
Enemies[edit]
Items and objects[edit]
The following items and objects appear in the following quantities:
- Banana Coin: 1
- DK Barrel: 4
KONG Letters[edit]

- K: When the Kongs reach the vine after the first Flitter, they must climb down into a hidden area. The letter K is at the bottom.
- O: A DK Barrel is shortly before the first No Animal Sign. Right before here, Squawks must go down a fork in the path to find many bananas, a Banana Coin, and the letter O.
- N: The letter N is next to the second vine after the Star Barrel.
- G: Floating above a Krook at the bottom of an area of vines right after the last No Animal Sign.
Cranky's Video Game Hero Coin[edit]
After the Kongs transform into Squawks a second time, Squawks must fly upwards to eventually come across a fork in the path. Instead of taking the left path, Squawks must take the path to the right, where he encounters three Zingers. Squawks must defeat them to access a hidden area with more Zingers and the Video Game Hero Coin.
Bonus Level[edit]

Bramble Scramble has only one Bonus Level, of the following type:
- Collect the Stars!: After the Kongs pass the first No Animal Sign, they must climb the nearby vines. Upon reaching the third vine, Diddy or Dixie can jump slightly northwest to climb a shorter vine. By climbing it, they can find a Bonus Barrel that is guarded by a Zinger. In the Bonus Level, the Kongs have 25 seconds to collect 31 stars scattered around several vertical and horizontal vines. They must avoid hitting the brambles, or else they lose the challenge. After acquiring the stars, the Kremkoin appears at the bottom-right for the Kongs to collect.
Gallery[edit]
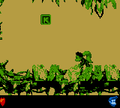
The letter K
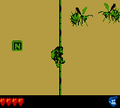
The letter N


Names in other languages[edit]
| Language | Name | Meaning |
|---|---|---|
| Japanese | スコークスライド Sukōkusu Raido |
Squawks Ride |