Lockjaw's Locker (Donkey Kong Land 2)
| Level | |
|---|---|
| Lockjaw's Locker | |

| |
| Level code | 1 - 4 |
| World | Gangplank Galleon |
| Game | Donkey Kong Land 2 |
| Music track | Lockjaw's Saga |
| << Directory of levels >> | |
Lockjaw's Locker is the fourth level in Donkey Kong Land 2 and of the first world, Gangplank Galleon. Lockjaw's Locker takes place in a flooded shipwreck area that Diddy and Dixie must swim through while avoiding the different underwater enemies along the way. There are two Animal Barrels of Enguarde along the way, as well as crates that can be swum through to access hidden areas filled with items.
Layout[edit]
The Kongs begin the level on some large crates and tin barrels that are followed by a trail of bananas that lead into the water. On the other side of the water, the heroes can find a Klomp and a small alcove with a single banana in it. They must swim through the water to progress; as they lower themselves in the water, they approach a few bananas, a Flotsam, and a DK Barrel. A wider area is southwest from the barrel that contains a two more Flotsams and a crate that the primates can swim through to reach a hidden room full of bananas and a Banana Coin. A group of bananas are between two Flotsams, and they are arranged to form an arrow pointing to the south. If they follow the bananas, they come down to a third Flotsam and another arrow made of bananas that points downwards. The letter K and an additional Flotsam are under the bananas, and a trail of bananas placed along a wall is to the right of them. If the heroes continue south from here, they encounter a few more Flotsams and then a slightly smaller area containing a DK Barrel. The area below this barrel consists of an alcove containing an Animal Barrel, which can turn the Kongs into Enguarde when entered, a Lockjaw, and a formation of bananas that create and arrow pointing to the west.

If the arrow is followed, the two friends make their way through a wide passage that contains a few Flotsams. Eventually, they find themselves in an area with a Lockjaw and a Banana Bunch. Another Flotsam and a formation of bananas that create an arrow pointing upwards are above here. As the primates follow this arrow, they come past a crate that they can travel through to reach an enclosed area with a Video Game Hero Coin in it. After they swim slightly farther north from here, they reach another formation of bananas that create an arrow directing the heroes to the right. A Shuri is located to the left of this arrow, and it guards a crate that the heroes can swim through in order to access a hidden area with a Flotsam, some bananas, and a Banana Coin. If the group follows this arrow and heads to the right, they reach a DK Barrel that is surrounded by some bananas and another arrow that is formed by a set of bananas. Above this DK Barrel, the heroes can find the way into a hidden area that contains a Flotsam and the letter O. A Shuri is also in this area around the DK Barrel, being followed by a Lockjaw and then a Flotsam as the heroes travel north. After they pass the Flotsam, they reach a No Animal Sign that turns Enguarde back into the Kongs and leaves behind a Banana Bunch reward, if they had transformed into him earlier in the level. A group of crates that stick out of the water are near here, and the level's Star Barrel sits on them.

If the Kongs head backwards from here onto some additional crates, they can find a hidden Barrel Cannon above them that can blast them to a banana, some other Barrel Cannons, and a Banana Bunch. The last Barrel Cannon here shoots them back to the ground on top of a DK Barrel, which is located immediately after a Neek and the Star Barrel. If the heroes continue from here, they come past a Klomp and another large body of water that they must jump into. As they swim down through here, they encounter some Flotsams and a few bananas, eventually reaching a group of bananas that form the shape of an arrow pointing to the left. Lockjaws, Flotsams, and a Shuri are around the arrow, as well as a crate that the heroes can travel through in the east side of the area to access a hidden section of the level, which contains a Banana Bunch. An Animal Barrel that contains Enguarde is also in the northwest part of the area, and the Kongs turn into the swordfish if they enter it. If the primates head southwest from this large area, they soon reach a formation of bananas that create an arrow pointing down. A wide passage leading to the south is to the left of this arrow, and if the two friends travel through it, they come up to more Flotsams, Lockjaws, and Shuris, as well as a DK Barrel. They can also find a crate on the way down that they can swim through to access a hidden area that consists of several bananas, a few Banana Coins, and the letter N.
There is another set of bananas that are positioned to form that shape of an arrow nearby. It points to the east, where there are most Flotsams, Lockjaws, and Shuris. As they travel across the area, they come past an additional arrow formed by bananas that directs them to the east. Eventually, the primates find a passage leading to the north, which consists of a Flotsam and an arrow made of bananas that points upwards. If the arrow is followed, they enter a wide area containing more Lockjaws, Flotsams, and Shuris. The letter G is located in a small alcove in the top-right corner of the room, and a Banana Bunch is located in a different alcove in the bottom-left corner of it. As the heroes travel to the northwest part of the area, they come up to an arrow composed of bananas that points to the right towards the letter G. If they continue north from here, they reach a smaller room with more underwater foes in it, as well as four bananas that line a wall to the left. A DK Barrel wobbles in an alcove in the bottom-right corner of this area, and an arrow mode of bananas is above it that directs the heroes farther north, where a No Animal Sign can be found on some crates. If Enguarde passes it, he is turned back into the Kongs, who then earn a Banana Bunch for leading him to the sign. Some larger crates stick out of the water ahead near here that the primates can climb on to discover a spring that they can bounce on to complete the level successfully. A hidden area of water with a floating Extra Life Balloon and a Banana Coin are to the left of the spring.
Enemies[edit]
The following enemies appear in the following quantities:


Items and objects[edit]
The following items and objects appear in the following quantities:

Banana Coin (5)

DK Barrel (3)
KONG Letters[edit]

- K: Near the start, as the Kongs swim down, they must swim to a line of bananas against a wall to the right. The letter K is in an alcove on the opposite side.
- O: There is a hidden area above the second DK Barrel that has a Flotsam and the letter O.
- N: After the second Animal Barrel, the Kongs must swim to the bottom-left. They must find a swim-through path within the crates to reach an enclosed room with the letter N and other items.
- G: Shortly before the last DK Barrel, which appears just before the end of the level, the Kongs access a large, open area full of Lockjaws, Flotsams, and Shuris. From here, the letter G is in an alcove at the upper right of the room.
Cranky's Video Game Hero Coin[edit]

From the Star Barrel, the Kongs must jump left into the water, and swim toward a dead-end with some crates. From there, they must continue right until they find a Shuri against a wall. When it moves away, the Kongs must swim against a wall to pass through a small crate and continue to the Video Game Hero Coin.
Warp Barrel[edit]

Right after starting the level, the Kongs must jump into the water and swim along the crates to the right. At the bottom, the Kongs can swim through a hidden path within the crates and travel down a short path before reaching a Warp Barrel in a small area. The warp room is underwater and has a group of bananas shaping a right arrow. The Kongs must continue to an opening in that direction to return into the main level, next to the last No Animal Sign.
Gallery[edit]
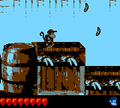
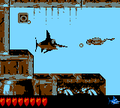
Diddy at the start of the level
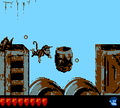
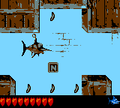
The first Animal Barrel of the level
Enguarde reaches the first No Animal Sign
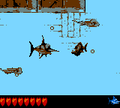
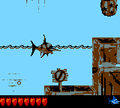
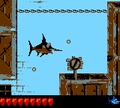
Enguarde swimming in an open area
The letter O
The letter N
Enguarde reaches the second No Animal Sign
The letter G
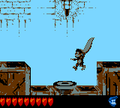
Dixie jumps to the End of Level Target


Names in other languages[edit]
| Language | Name | Meaning |
|---|---|---|
| Japanese | ふなぞこダイビング Funazoko Daibingu |
Ship-Bottom Diving |