Mainbrace Mayhem (Donkey Kong Land 2): Difference between revisions
Scrooge200 (talk | contribs) |
(cleanup; the "Bonus Barrel" is a warp barrel) |
||
| Line 10: | Line 10: | ||
|after=[[Gangplank Galley (Donkey Kong Land 2)|>>]] | |after=[[Gangplank Galley (Donkey Kong Land 2)|>>]] | ||
}} | }} | ||
'''Mainbrace Mayhem''' is the second [[level]] of ''[[Donkey Kong Land 2]]'' | '''Mainbrace Mayhem''' is the second [[level]] of ''[[Donkey Kong Land 2]]'' and of the first world, [[Gangplank Galleon (world)|Gangplank Galleon]]. | ||
Mainbrace Mayhem is a vertical level featuring many ropes and masts that [[Diddy Kong|Diddy]] and [[Dixie Kong|Dixie]] must climb to reach the end, much like the eponymous [[Mainbrace Mayhem (Donkey Kong Country 2: Diddy's Kong Quest)|''Donkey Kong Country 2: Diddy's Kong Quest'' level]]. On the ship yards, the [[Kong]]s encounter [[Click-Clack]]s, [[Neek]]s, and [[Kruncha]]s. Around the rope-climbing segments, the Kongs encounter many [[Zinger]]s and [[Klinger]]s. The Kongs can take some offbeat paths to find various collectible, the [[DK Coin]], and a [[Bonus Barrel]]. | |||
== | ==Layout== | ||
[[File:Mainbrace Mayhem DKL2 shot 2.png|left|160px|thumb|left|Dixie Kong walks towards a Neek]] | [[File:Mainbrace Mayhem DKL2 shot 2.png|left|160px|thumb|left|Dixie Kong walks towards a Neek]] | ||
The level begins on a yard that is connected to a large mast. Another yard is ahead higher up with a [[DK Barrel]] and a Click-Clack on it. After passing a [[barrel]] in the same area, the heroes find a third yard just past a small gap. This yard is tilted upwards. A few Neeks march on it. A set of ropes is ahead near a few more years that stick out of the side of the screen. One [[banana]] is on each of the two yards. If the Kongs climb up the ropes, they can reach a fourth full yard with more bananas and a Click-Clack on it. There is another yard just ahead, but a Zinger is on the edge of it. The letter K is also above the Zinger. If they dodge the insect, they can continue along the area and pass a Click-Clack. After they reach the end of an additional yard with another Click-Clack on it, they can find more ropes to climb up on. Bananas line the left side of the ropes, which lead to a yard with another Click-Clack on it. A tilted yard is next to this with a few Neeks and a DK Barrel on it. There are two additional yards placed on the other side of this platform. The bottom one leads to the letter O and some ropes that can be climbed to reach the [[DK Coin]]. Klingers climb along these ropes. The top yard can assist the heroes in jumping to a set of ropes that they can climb up to reach a tightrope connected to two masts. Bananas are all along the rope. A yard supporting the Star Barrel sticks out of the end of the screen. | The level begins on a yard that is connected to a large mast. Another yard is ahead higher up with a [[DK Barrel]] and a Click-Clack on it. After passing a [[barrel]] in the same area, the heroes find a third yard just past a small gap. This yard is tilted upwards. A few Neeks march on it. A set of ropes is ahead near a few more years that stick out of the side of the screen. One [[banana]] is on each of the two yards. If the Kongs climb up the ropes, they can reach a fourth full yard with more bananas and a Click-Clack on it. There is another yard just ahead, but a Zinger is on the edge of it. The letter K is also above the Zinger. If they dodge the insect, they can continue along the area and pass a Click-Clack. After they reach the end of an additional yard with another Click-Clack on it, they can find more ropes to climb up on. Bananas line the left side of the ropes, which lead to a yard with another Click-Clack on it. A tilted yard is next to this with a few Neeks and a DK Barrel on it. There are two additional yards placed on the other side of this platform. The bottom one leads to the letter O and some ropes that can be climbed to reach the [[DK Coin]]. Klingers climb along these ropes. The top yard can assist the heroes in jumping to a set of ropes that they can climb up to reach a tightrope connected to two masts. Bananas are all along the rope. A yard supporting the Star Barrel sticks out of the end of the screen. | ||
| Line 56: | Line 56: | ||
|3 | |3 | ||
|} | |} | ||
===K-O-N-G Letters=== | ===K-O-N-G Letters=== | ||
{|class="dktable-brown" width=70% | {|class="dktable-brown" width=70% | ||
| Line 72: | Line 63: | ||
!Location | !Location | ||
|- | |- | ||
| align="center" |[[File: | | align="center" |[[File:MMGB-K.png]] | ||
|The letter K is above the first Zinger in the level | |The letter K is above the first Zinger in the level. | ||
|- | |- | ||
| align="center" |[[File: | | align="center" |[[File:MMGB-O.png]] | ||
|The letter O is on | |The letter O is near the Star Barrel and on a yard right above the DK Coin | ||
|- | |- | ||
| align="center" |[[File: | | align="center" |[[File:MMGB-N.png]] | ||
|Shortly before the second-to-last yard, which has two Krunchas on it, the | |Shortly before the second-to-last yard, which has two Krunchas on it, the Kongs must climb left across a long horizontal rope. When they reach the end, the Kongs must jump to a Banana Coin and fall below to a platform with the letter N, along with a few bananas above it. | ||
|- | |- | ||
| align="center" |[[File: | | align="center" |[[File:MMGB-G.png]] | ||
|The letter G is on the second-to-last yard in the level between two Krunchas. | |The letter G is on the second-to-last yard in the level between two Krunchas. | ||
|} | |} | ||
== | ===DK Coin=== | ||
{ | {|class="dktable-brown" width=70% | ||
|- | |||
!Item | |||
!Location | |||
|- | |||
| align="center" | [[File:MMGB-DK Coin.png]] | |||
|Starting from the letter O, the Kongs must jump down from the yard and get on the ropes below. While watching out for Klingers, they should see the [[DK Coin]] to the right. The Kongs must simply jump off the rope to grab it, and then land on the yard below. | |||
|} | |||
==Secrets== | |||
===Bonus Levels=== | |||
{|class="dktable-brown" width=70% | {|class="dktable-brown" width=70% | ||
|- | |- | ||
!Image | !Image | ||
!Type and description | !Type and description | ||
|- | |- | ||
| align="center" | [[File:MMGB-Bonus2.png]] | | align="center" | [[File:MMGB-Bonus2.png]] | ||
|'''Collect the Stars!'''<br>Starting from the Star Barrel, the Kongs must climb east up to a nearby yard, which is crooked. As they go up, they need to jump onto the next yard, still going in the same direction. Once they near the end of this yard, they can find a rope under them that they must jump down to. There are some bananas to the left of here, and if they follow the trail, they make their way to a Bonus Barrel | |'''Collect the Stars!'''<br>Starting from the Star Barrel, the Kongs must climb east up to a nearby yard, which is crooked. As they go up, they need to jump onto the next yard, still going in the same direction. Once they near the end of this yard, they can find a rope under them that they must jump down to. There are some bananas to the left of here, and if they follow the trail, they make their way to a [[Bonus Barrel]]. The [[Kong]]s must jump across several ropes and collect 20 stars within 20 seconds. When all of the objects are obtained, a Kremkoin appears at the end of the stage. | ||
|} | |} | ||
===Warp Barrel=== | |||
After the letter K, Dixie must drop to the right of the next yard and use her [[Helicopter Spin]] to reach a Banana Coin to the right. If she falls to the left of the Banana Coin, she lands into a hidden [[Warp Barrel]]. The warp room takes place on a yard, with a [[No Animal Sign]] at the start. A group of bananas in the shape of a right arrow is hovering above, pointing to the exit. After exiting from the right, the Kongs are warped next to the End of Level Target. | |||
==Gallery== | |||
<gallery> | |||
Mainbrace Mayhem DKL2 start.png|Dixie at the start of the level | |||
Mainbrace Mayhem DKL2 rope jump.png|Diddy jumps between a rope with a Klinger | |||
Mainbrace Mayhem DKL2 Zinger.png|Diddy encounters a Zinger | |||
Mainbrace Mayhem DKL2 end.png|Diddy reaches the end | |||
</gallery> | |||
==Names in other languages== | ==Names in other languages== | ||
Revision as of 17:32, October 14, 2019
Template:Levelbox Mainbrace Mayhem is the second level of Donkey Kong Land 2 and of the first world, Gangplank Galleon.
Mainbrace Mayhem is a vertical level featuring many ropes and masts that Diddy and Dixie must climb to reach the end, much like the eponymous Donkey Kong Country 2: Diddy's Kong Quest level. On the ship yards, the Kongs encounter Click-Clacks, Neeks, and Krunchas. Around the rope-climbing segments, the Kongs encounter many Zingers and Klingers. The Kongs can take some offbeat paths to find various collectible, the DK Coin, and a Bonus Barrel.
Layout

The level begins on a yard that is connected to a large mast. Another yard is ahead higher up with a DK Barrel and a Click-Clack on it. After passing a barrel in the same area, the heroes find a third yard just past a small gap. This yard is tilted upwards. A few Neeks march on it. A set of ropes is ahead near a few more years that stick out of the side of the screen. One banana is on each of the two yards. If the Kongs climb up the ropes, they can reach a fourth full yard with more bananas and a Click-Clack on it. There is another yard just ahead, but a Zinger is on the edge of it. The letter K is also above the Zinger. If they dodge the insect, they can continue along the area and pass a Click-Clack. After they reach the end of an additional yard with another Click-Clack on it, they can find more ropes to climb up on. Bananas line the left side of the ropes, which lead to a yard with another Click-Clack on it. A tilted yard is next to this with a few Neeks and a DK Barrel on it. There are two additional yards placed on the other side of this platform. The bottom one leads to the letter O and some ropes that can be climbed to reach the DK Coin. Klingers climb along these ropes. The top yard can assist the heroes in jumping to a set of ropes that they can climb up to reach a tightrope connected to two masts. Bananas are all along the rope. A yard supporting the Star Barrel sticks out of the end of the screen.
From here, the Kongs can find a platform connected to a mast to their right. It can help them reach a long, tilted yard with some Neeks and a DK Barrel on it. There are two more yards at the top of this platform. While the yard on the right leads to a rope that can be traveled down to reach a Bonus Barrel, the left yard can help them progress to a larger set of ropes that they can climb upwards on. Click-Clacks and Neeks also walk along the yards. A Klinger attacks the primates as they climb the ropes. At the top of the ropes, they can notice another yard with a Neek on it. If they cross this yard, they can find an additional yard and a tightrope that they can climb along to reach some collectibles and the letter N. A long set of ropes can be found at the other side of the previously mentioned yard. It is infested with Klingers, but also has a few bananas on it. When the ropes are climbed, a yard with a pair of Krunchas and the letter G can be found. There is a platform connected to a wooden mast on the other side of it. If the heroes progress from here, they can reach another yard with a spring on it. They complete the level when they bounce on the spring.
Enemies
| Enemy | Count |
|---|---|
Click-Clack |
5 |
| File:Klinger DKL2.png Klinger |
8 |
| File:Kruncha DKL2.png Kruncha |
2 |
Neek |
7 |
Zinger |
3 |
Items and collectables
| Sprite | Name | Count |
|---|---|---|
| Banana Coin | 1 | |
| DK Barrel | 3 |
K-O-N-G Letters
| Letter | Location |
|---|---|

|
The letter K is above the first Zinger in the level. |

|
The letter O is near the Star Barrel and on a yard right above the DK Coin |

|
Shortly before the second-to-last yard, which has two Krunchas on it, the Kongs must climb left across a long horizontal rope. When they reach the end, the Kongs must jump to a Banana Coin and fall below to a platform with the letter N, along with a few bananas above it. |

|
The letter G is on the second-to-last yard in the level between two Krunchas. |
DK Coin
| Item | Location |
|---|---|

|
Starting from the letter O, the Kongs must jump down from the yard and get on the ropes below. While watching out for Klingers, they should see the DK Coin to the right. The Kongs must simply jump off the rope to grab it, and then land on the yard below. |
Secrets
Bonus Levels
| Image | Type and description |
|---|---|

|
Collect the Stars! Starting from the Star Barrel, the Kongs must climb east up to a nearby yard, which is crooked. As they go up, they need to jump onto the next yard, still going in the same direction. Once they near the end of this yard, they can find a rope under them that they must jump down to. There are some bananas to the left of here, and if they follow the trail, they make their way to a Bonus Barrel. The Kongs must jump across several ropes and collect 20 stars within 20 seconds. When all of the objects are obtained, a Kremkoin appears at the end of the stage. |
Warp Barrel
After the letter K, Dixie must drop to the right of the next yard and use her Helicopter Spin to reach a Banana Coin to the right. If she falls to the left of the Banana Coin, she lands into a hidden Warp Barrel. The warp room takes place on a yard, with a No Animal Sign at the start. A group of bananas in the shape of a right arrow is hovering above, pointing to the exit. After exiting from the right, the Kongs are warped next to the End of Level Target.
Gallery
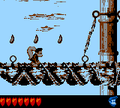
Dixie at the start of the level
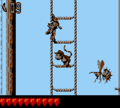
Diddy jumps between a rope with a Klinger
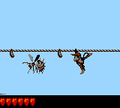
Diddy encounters a Zinger
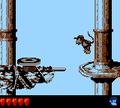
Diddy reaches the end


Names in other languages
| Language | Name | Meaning |
|---|---|---|
| Japanese | メインマストクライシス Meinmasuto Kuraishisu |
Mainmast Crisis |