Low-G Labyrinth: Difference between revisions
No edit summary |
LinkTheLefty (talk | contribs) mNo edit summary |
||
| Line 9: | Line 9: | ||
}} | }} | ||
'''Low-G Labyrinth''' is the twentieth [[level]] in ''[[Donkey Kong Country 3: Dixie Kong's Double Trouble!]]'' and the fifth level of [[Mekanos]]. Low-G Labyrinth takes place within a network of pipes which are filled with a mysterious gas from the [[Kremlings]]<ref>M. Arakawa. ''Donkey Kong Country 3: Dixie Kong's Double Trouble!'' Player's Guide. Page 64. '''''LOW-G LABYRINTH''''' "''The Kremlings have somehow reduced the force of gravity in this maze, which will both slow down and exaggerate all of your movements.''"</ref> that weakens the force of gravity throughout the level. This causes [[Dixie Kong|Dixie]] and [[Kiddy Kong|Kiddy]] to have slower movement and jump speed, although they can jump higher and fall slower. The [[Kong]]s are able to jump high enough to reach some higher platforms as they go through the level. During the second half, the Kongs can transform into [[Quawks]], who must continue flying through the area and avoiding more Buzzes in the path. During the second [[Bonus Level]], the player controls [[Squawks]]. A later level, [[Poisonous Pipeline]], is similar, as it also has a substance affecting how the level is played. | '''Low-G Labyrinth''' is the twentieth [[level]] in ''[[Donkey Kong Country 3: Dixie Kong's Double Trouble!]]'' and the fifth level of [[Mekanos]]. Low-G Labyrinth takes place within a network of pipes which are filled with a mysterious gas from the [[Kremlings]]<ref>M. Arakawa. ''Donkey Kong Country 3: Dixie Kong's Double Trouble!'' Player's Guide. Page 64. '''''LOW-G LABYRINTH''''' "''The Kremlings have somehow reduced the force of gravity in this maze, which will both slow down and exaggerate all of your movements.''"</ref> that weakens the force of gravity throughout the level. This causes [[Dixie Kong|Dixie]] and [[Kiddy Kong|Kiddy]] to have slower movement and jump speed, although they can jump higher and fall slower. The [[Kong]]s are able to jump high enough to reach some higher platforms as they go through the level. During the second half, the Kongs can transform into [[Quawks]], who must continue flying through the area and avoiding more Buzzes in the path. During the second [[Bonus Level]], the player controls [[Squawks]]. A later level, [[Poisonous Pipeline]], is similar, as it also has a substance affecting how the level is played. | ||
==Layout== | ==Layout== | ||
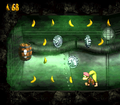
As the level begins, the Kongs must bust the DK Barrel, then move onto a challenge of leaping vertically up long pipe sets, finding a red Buzz sitting below [[KONG Letters|the letter K]]. The next challenge is more vertical leaping, going up past green Buzzes, jumping for the following sides of the pipe as the Kongs advance: left,right, left, and right. The player should then move right to time a leap over three vertically stacked green Buzzes, then defeat a Krimp before going down to the pipe below. To the right are some Bananas, while to the left is another hole to fall down to find more red Buzz sets to hop on by. This brings the Kongs to a hole where a green Buzz hovers, so the player must time their fall through to go for the ledge on the right, finding the letter O, followed by a back and forth set of ledges to use while dodging all the green Buzzes. Now the player must move right to hop on three green Buzzes, busting the Star Barrel. | As the level begins, the Kongs must bust the DK Barrel, then move onto a challenge of leaping vertically up long pipe sets, finding a red Buzz sitting below [[KONG Letters|the letter K]]. The next challenge is more vertical leaping, going up past green Buzzes, jumping for the following sides of the pipe as the Kongs advance: left,right, left, and right. The player should then move right to time a leap over three vertically stacked green Buzzes, then defeat a Krimp before going down to the pipe below. To the right are some Bananas, while to the left is another hole to fall down to find more red Buzz sets to hop on by. This brings the Kongs to a hole where a green Buzz hovers, so the player must time their fall through to go for the ledge on the right, finding the letter O, followed by a back and forth set of ledges to use while dodging all the green Buzzes. Now the player must move right to hop on three green Buzzes, busting the Star Barrel. | ||
| Line 16: | Line 15: | ||
From here the player finds the Quawks [[Animal Barrel]]. They should fly carefully upwards between two red Buzzes, bust the DK Barrel, and then grab the Barrel to drop on a green Buzz, allowing them access to the pipe leading downwards. The player must then grab the Barrel and fly along the roof, killing a green Buzz. Quawks should then fly above the dual green Buzzes to find Banana trails to use as guides as to where to fly to avoid the descending green Buzzes, arriving at the letter N on the left side of the pipe. The bird must then fly up above two green Buzzes, entering a pipe with two red Buzzes to bypass. Quawks must then fly left between two red Buzzes, plucking a [[Iron Barrel|Steel Barrel]] from the ground before flying upwards to use it on a green Buzz to get the Red Balloon and [[bear coin]] it guarded, and then continue the upwards flight path to reach an [[Blast Barrel|Auto-Fire Barrel]] that shoots Quawks past two red Buzzes. He should then grab a Barrel to use on one of the green Buzzes on the left, then fly past the remaining green Buzz to go up to the next pipe where a no Quawks Sign is, turning Quawks into a Steel Barrel. Just past here is a pipeline with several red and green Buzzes. If the Kongs continue left, they can find the letter G. By continuing further left, past five Buzzes, they can go into an hidden area with an [[Invincibility Barrel]] and three bear coins. The right-side path is the main path, and the Kongs must jump in a zigzag pattern between five red Buzzes, each with a banana between them, to reach the [[Level Flag]] at the end. | From here the player finds the Quawks [[Animal Barrel]]. They should fly carefully upwards between two red Buzzes, bust the DK Barrel, and then grab the Barrel to drop on a green Buzz, allowing them access to the pipe leading downwards. The player must then grab the Barrel and fly along the roof, killing a green Buzz. Quawks should then fly above the dual green Buzzes to find Banana trails to use as guides as to where to fly to avoid the descending green Buzzes, arriving at the letter N on the left side of the pipe. The bird must then fly up above two green Buzzes, entering a pipe with two red Buzzes to bypass. Quawks must then fly left between two red Buzzes, plucking a [[Iron Barrel|Steel Barrel]] from the ground before flying upwards to use it on a green Buzz to get the Red Balloon and [[bear coin]] it guarded, and then continue the upwards flight path to reach an [[Blast Barrel|Auto-Fire Barrel]] that shoots Quawks past two red Buzzes. He should then grab a Barrel to use on one of the green Buzzes on the left, then fly past the remaining green Buzz to go up to the next pipe where a no Quawks Sign is, turning Quawks into a Steel Barrel. Just past here is a pipeline with several red and green Buzzes. If the Kongs continue left, they can find the letter G. By continuing further left, past five Buzzes, they can go into an hidden area with an [[Invincibility Barrel]] and three bear coins. The right-side path is the main path, and the Kongs must jump in a zigzag pattern between five red Buzzes, each with a banana between them, to reach the [[Level Flag]] at the end. | ||
{{br}} | {{br}} | ||
==Enemies== | ==Enemies== | ||
*[[Buzz (enemy)|Buzz]] (red and green) | *[[Buzz (enemy)|Buzz]] (red and green) | ||
| Line 22: | Line 22: | ||
==Items and objects== | ==Items and objects== | ||
The following items and objects appear in the following quantities: | The following items and objects appear in the following quantities: | ||
<gallery> | <gallery> | ||
Bear Coin.png|[[Bear coin]] (5) | Bear Coin.png|[[Bear coin]] (5) | ||
| Line 29: | Line 28: | ||
Red Extra Life Balloon DKC3.png|[[Red Balloon]] (1) | Red Extra Life Balloon DKC3.png|[[Red Balloon]] (1) | ||
</gallery> | </gallery> | ||
===K-O-N-G Letters=== | ===K-O-N-G Letters=== | ||
[[File:LowGLabyrinth-SNES-N.png|thumb|The letter N]] | [[File:LowGLabyrinth-SNES-N.png|thumb|The letter N]] | ||
| Line 37: | Line 35: | ||
*'''G:''' Above a pair of Buzzes moving vertically, up and to the right of the pipe with Koin. | *'''G:''' Above a pair of Buzzes moving vertically, up and to the right of the pipe with Koin. | ||
{{br}} | {{br}} | ||
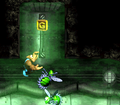
===DK Coin=== | ===DK Coin=== | ||
[[File:Low-G Labyrinth Koin.png|thumb|The Koin of Low-G Labyrinth]] | [[File:Low-G Labyrinth Koin.png|thumb|The Koin of Low-G Labyrinth]] | ||
As Quawks, when he encounters two red Buzzes at the top of a narrow path, he must continue flying up. Instead of going right, Quawks must go left and continue up a tunnel. Quawks must then cross the No Animal Sign to the left to transform into a [[Iron Barrel|Steel Barrel]]. The Kongs must pick it up and jump across the gap to Koin. They must stand on Koin's shield and throw the Steel Barrel at the wall to the right, causing it to bounce off and hit Koin. This causes him to be defeated, and the Kongs obtain the [[DK Coin]]. | As Quawks, when he encounters two red Buzzes at the top of a narrow path, he must continue flying up. Instead of going right, Quawks must go left and continue up a tunnel. Quawks must then cross the No Animal Sign to the left to transform into a [[Iron Barrel|Steel Barrel]]. The Kongs must pick it up and jump across the gap to Koin. They must stand on Koin's shield and throw the Steel Barrel at the wall to the right, causing it to bounce off and hit Koin. This causes him to be defeated, and the Kongs obtain the [[DK Coin]]. | ||
{{br}} | {{br}} | ||
==Bonus Levels== | ==Bonus Levels== | ||
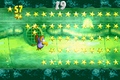
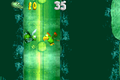
{{multiframe|[[File:Low-G Labyrinth Bonus Level 1.png|200px]] [[File:Low-G Labyrinth Bonus Level 2.png|200px]]|size=420|The first and second Bonus Levels respectively}} | {{multiframe|[[File:Low-G Labyrinth Bonus Level 1.png|200px]] [[File:Low-G Labyrinth Bonus Level 2.png|200px]]|size=420|The first and second Bonus Levels respectively}} | ||
Low-G Labyrinth has two [[Bonus room|Bonus | Low-G Labyrinth has two [[Bonus room|Bonus Level]]s, listed by type: | ||
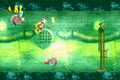
*'''''Collect 80 Stars!''''': Just before the Kongs get to play as Quawks, there is a stack of three green Buzzes. The Kongs can either use the [[Team-up]] ability or transform into Quawks to enter into the [[Bonus Barrel]] above. In the Game Boy Advance version, Kiddy jumps lower while Dixie is on his back, making it impossible to enter without losing a Kong. In the Bonus Level, Quawks or the Kongs (depending on who entered the Bonus Barrel) have 25 seconds to collect all 80 [[Star (Donkey Kong franchise)|star]]s in a wide, narrow pipeline. Once all the stars are collected, the [[Bonus Coin (Donkey Kong franchise)|Bonus Coin]] appears at the rightmost corner on the floor. After collecting it, Quawks or the Kongs are sent back into the main level, directly to the Star Barrel. | |||
*'''''Collect 80 Stars!''''': Just before the Kongs get to play as Quawks, there is a stack of three green Buzzes. The Kongs can either use the [[Team-up]] ability or transform into Quawks to enter into the [[Bonus Barrel]] above. In the Game Boy Advance version, Kiddy jumps lower while Dixie is on his back, making it impossible to enter without losing a Kong. In the Bonus Level, Quawks or the Kongs (depending on who entered the Bonus Barrel) have 25 seconds to collect all 80 [[Star (Donkey Kong | |||
*'''''Bash the Baddies!''''': Just after the letter N, there is a three-way fork. The bottom path is blocked by a Buzz moving back and forth horizontally at a fast pace. Quawks must defeat the Buzz with a barrel (the nearest barrel is found by taking the north path in the fork) to safely move go down the path. By continuing left and then up in the path, Quawks can enter the Bonus Barrel. During the Bonus Level, Quawks is transformed into Squawks. Squawks has 40 seconds to fly through the area and defeat ten green Buzzes by spitting coconuts at them. When every Buzz is defeated, a Bonus Coin appears at the end for Squawks to collect. The player goes back to controlling Quawks in the main level. | *'''''Bash the Baddies!''''': Just after the letter N, there is a three-way fork. The bottom path is blocked by a Buzz moving back and forth horizontally at a fast pace. Quawks must defeat the Buzz with a barrel (the nearest barrel is found by taking the north path in the fork) to safely move go down the path. By continuing left and then up in the path, Quawks can enter the Bonus Barrel. During the Bonus Level, Quawks is transformed into Squawks. Squawks has 40 seconds to fly through the area and defeat ten green Buzzes by spitting coconuts at them. When every Buzz is defeated, a Bonus Coin appears at the end for Squawks to collect. The player goes back to controlling Quawks in the main level. | ||
{{br}} | {{br}} | ||
==Gallery== | ==Gallery== | ||
===Super Nintendo Entertainment System=== | ===Super Nintendo Entertainment System=== | ||
Revision as of 19:40, January 2, 2024
| Level | |
|---|---|
| Low-G Labyrinth | |
  The Kongs jumping between two red Buzzes in the Game Boy Advance version | |
| Level code | 4 - 5 |
| World | Mekanos |
| Game | Donkey Kong Country 3: Dixie Kong's Double Trouble! |
| Music track | Pokey Pipes |
| << Directory of levels >> | |
Low-G Labyrinth is the twentieth level in Donkey Kong Country 3: Dixie Kong's Double Trouble! and the fifth level of Mekanos. Low-G Labyrinth takes place within a network of pipes which are filled with a mysterious gas from the Kremlings[1] that weakens the force of gravity throughout the level. This causes Dixie and Kiddy to have slower movement and jump speed, although they can jump higher and fall slower. The Kongs are able to jump high enough to reach some higher platforms as they go through the level. During the second half, the Kongs can transform into Quawks, who must continue flying through the area and avoiding more Buzzes in the path. During the second Bonus Level, the player controls Squawks. A later level, Poisonous Pipeline, is similar, as it also has a substance affecting how the level is played.
Layout
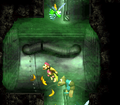
As the level begins, the Kongs must bust the DK Barrel, then move onto a challenge of leaping vertically up long pipe sets, finding a red Buzz sitting below the letter K. The next challenge is more vertical leaping, going up past green Buzzes, jumping for the following sides of the pipe as the Kongs advance: left,right, left, and right. The player should then move right to time a leap over three vertically stacked green Buzzes, then defeat a Krimp before going down to the pipe below. To the right are some Bananas, while to the left is another hole to fall down to find more red Buzz sets to hop on by. This brings the Kongs to a hole where a green Buzz hovers, so the player must time their fall through to go for the ledge on the right, finding the letter O, followed by a back and forth set of ledges to use while dodging all the green Buzzes. Now the player must move right to hop on three green Buzzes, busting the Star Barrel.

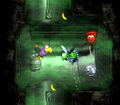
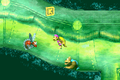
From here the player finds the Quawks Animal Barrel. They should fly carefully upwards between two red Buzzes, bust the DK Barrel, and then grab the Barrel to drop on a green Buzz, allowing them access to the pipe leading downwards. The player must then grab the Barrel and fly along the roof, killing a green Buzz. Quawks should then fly above the dual green Buzzes to find Banana trails to use as guides as to where to fly to avoid the descending green Buzzes, arriving at the letter N on the left side of the pipe. The bird must then fly up above two green Buzzes, entering a pipe with two red Buzzes to bypass. Quawks must then fly left between two red Buzzes, plucking a Steel Barrel from the ground before flying upwards to use it on a green Buzz to get the Red Balloon and bear coin it guarded, and then continue the upwards flight path to reach an Auto-Fire Barrel that shoots Quawks past two red Buzzes. He should then grab a Barrel to use on one of the green Buzzes on the left, then fly past the remaining green Buzz to go up to the next pipe where a no Quawks Sign is, turning Quawks into a Steel Barrel. Just past here is a pipeline with several red and green Buzzes. If the Kongs continue left, they can find the letter G. By continuing further left, past five Buzzes, they can go into an hidden area with an Invincibility Barrel and three bear coins. The right-side path is the main path, and the Kongs must jump in a zigzag pattern between five red Buzzes, each with a banana between them, to reach the Level Flag at the end.
Enemies
Items and objects
The following items and objects appear in the following quantities:

Bear coin (5)

DK Barrel (3)

Red Balloon (1)


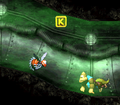
K-O-N-G Letters

- K: Above a red Buzz.
- O: Near a green Buzz in a segment where the heroes are going down the pipes.
- N: Obtainable as Quawks in a part of the level where pairs of Buzz fly up and down a vertically aligned pipe.
- G: Above a pair of Buzzes moving vertically, up and to the right of the pipe with Koin.
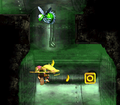
DK Coin

As Quawks, when he encounters two red Buzzes at the top of a narrow path, he must continue flying up. Instead of going right, Quawks must go left and continue up a tunnel. Quawks must then cross the No Animal Sign to the left to transform into a Steel Barrel. The Kongs must pick it up and jump across the gap to Koin. They must stand on Koin's shield and throw the Steel Barrel at the wall to the right, causing it to bounce off and hit Koin. This causes him to be defeated, and the Kongs obtain the DK Coin.
Bonus Levels


Low-G Labyrinth has two Bonus Levels, listed by type:
- Collect 80 Stars!: Just before the Kongs get to play as Quawks, there is a stack of three green Buzzes. The Kongs can either use the Team-up ability or transform into Quawks to enter into the Bonus Barrel above. In the Game Boy Advance version, Kiddy jumps lower while Dixie is on his back, making it impossible to enter without losing a Kong. In the Bonus Level, Quawks or the Kongs (depending on who entered the Bonus Barrel) have 25 seconds to collect all 80 stars in a wide, narrow pipeline. Once all the stars are collected, the Bonus Coin appears at the rightmost corner on the floor. After collecting it, Quawks or the Kongs are sent back into the main level, directly to the Star Barrel.
- Bash the Baddies!: Just after the letter N, there is a three-way fork. The bottom path is blocked by a Buzz moving back and forth horizontally at a fast pace. Quawks must defeat the Buzz with a barrel (the nearest barrel is found by taking the north path in the fork) to safely move go down the path. By continuing left and then up in the path, Quawks can enter the Bonus Barrel. During the Bonus Level, Quawks is transformed into Squawks. Squawks has 40 seconds to fly through the area and defeat ten green Buzzes by spitting coconuts at them. When every Buzz is defeated, a Bonus Coin appears at the end for Squawks to collect. The player goes back to controlling Quawks in the main level.
Gallery
Super Nintendo Entertainment System
The letter K
The letter O
Dixie and Kiddy jump up to a platform

Quawks flying up to the first Bonus Barrel
Quawks carrying a Steel Barrel next to a Buzz,
The hidden area near the end of the level with some bananas, bear coins, and the Invincibility Barrel
The letter G


Game Boy Advance
The letter K
Dixie reaches the end of the level
The first Bonus Level
The second Bonus Level


Names in other languages
| Language | Name | Meaning |
|---|---|---|
| Japanese | ふわふわダクト Fuwafuwa dakuto |
Floaty Duct |
| German | Laues Labyrinth |
Tepid Maze |
| Italian | Labirinto Anti-Grav |
Anti-Gravity Labyrinth |
| Spanish | Laberinto Ingrávido |
No-G Labyrinth |
References
- ^ M. Arakawa. Donkey Kong Country 3: Dixie Kong's Double Trouble! Player's Guide. Page 64. LOW-G LABYRINTH "The Kremlings have somehow reduced the force of gravity in this maze, which will both slow down and exaggerate all of your movements."