Bazza's Blockade: Difference between revisions
m (Text replacement - "Category:Bodies of water" to "Category:Aquatic areas") |
No edit summary |
||
| (9 intermediate revisions by 4 users not shown) | |||
| Line 1: | Line 1: | ||
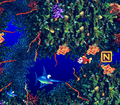
{{ | {{level infobox | ||
|image=[[File:Bazzas Blockade DKC3.png]] | |image=[[File:Bazzas Blockade DKC3.png]] | ||
|code=3 - 1 | |code=3 - 1 | ||
|world=[[Cotton Top Cove]] | |world=[[Cotton Top Cove]] | ||
|game=''[[Donkey Kong Country 3: Dixie Kong's Double Trouble!]] | |game=''[[Donkey Kong Country 3: Dixie Kong's Double Trouble!]] | ||
| | |track=Water World<br>Cavern Caprice (GBA only) | ||
|before=[[Arich's Ambush|<<]] | |before=[[Arich's Ambush|<<]] | ||
|after=[[Rocket Barrel Ride|>>]] | |after=[[Rocket Barrel Ride|>>]] | ||
}} | }} | ||
'''Bazza's Blockade''' is the eleventh [[level]] in ''[[Donkey Kong Country 3: Dixie Kong's Double Trouble!]]'' and the first level of [[Cotton Top Cove]]. In this level, an indefinite number of [[Bazza]]s swim in and out of the holes in the coral reef | '''Bazza's Blockade''' is the eleventh [[level]] in ''[[Donkey Kong Country 3: Dixie Kong's Double Trouble!]]'' and the first level of [[Cotton Top Cove]]. In this level, an indefinite number of [[Bazza]]s swim in and out of the holes in the coral reef. [[Dixie Kong|Dixie]] and [[Kiddy Kong|Kiddy]] must exercise timing to swim by them. To the left of the letter N, the [[Kong]]s can optionally transform into [[Enguarde]] from its [[Animal Barrel]], or by entering the second Bonus Level. | ||
==Layout== | ==Layout== | ||
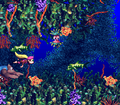
At the beginning of the level, the Kongs swim out of a cave and down towards a [[DK Barrel]] and a school of Bazzas traveling across a wide area. The [[ | [[File:Bazza's Blockade GBA Enguarde.png|thumb|left|Bazza's Blockade in the Game Boy Advance version]] | ||
At the beginning of the level, the Kongs swim out of a cave and down towards a [[DK Barrel]] and a school of Bazzas traveling across a wide area. The [[KONG Letters|letter K]] is in the uppermost part of this area. Soon, the apes travel north past a Koco and to another group of Bazzas that swim over two [[Banana Bunch]]es. They can find more Kocos in their path as they travel through a thin, curvy passage. Eventually, the path leads them south towards some more groups of Bazzas. The second group swims over a small alcove that contains a [[Bonus Barrel]]. There are more schools of Bazzas as the Kongs continue up the path to the north. This time, each row of Bazzas is close together. Soon, the primates find a slightly wider path leading east, with one row of Bazzas swimming across it. After they dodge these barracuda enemies, they encounter some Kocos and the letter O. A thin, U-shaped passage follows here, and a [[Star Barrel]] is at the bottom of it. | |||
Bazzas also swim across this curved pathway. Once the Kongs pass the foes, they continue up to a DK Barrel and more rows of Bazzas, some of which that are close together. A much thinner path leading to the east is at the top of this area, and Bazzas travel through it. If the Kongs survive this potion of the level, they head south through an area containing a few more schools of Bazzas. An additional school is ahead, just before a pathway to the north that leads past two more rows of Bazzas and to another thin passage. Another group of Bazzas swims through the thin passage, which can lead the Kongs to the left or right. If they head left, they can find a wider area with a Bonus Barrel, but if they travel right, they can progress farther into the level, where there is another wide area that contains a few Kocos, the letter N, and an Animal Barrel containing Enguarde. | Bazzas also swim across this curved pathway. Once the Kongs pass the foes, they continue up to a DK Barrel and more rows of Bazzas, some of which that are close together. A much thinner path leading to the east is at the top of this area, and Bazzas travel through it. If the Kongs survive this potion of the level, they head south through an area containing a few more schools of Bazzas. An additional school is ahead, just before a pathway to the north that leads past two more rows of Bazzas and to another thin passage. Another group of Bazzas swims through the thin passage, which can lead the Kongs to the left or right. If they head left, they can find a wider area with a Bonus Barrel, but if they travel right, they can progress farther into the level, where there is another wide area that contains a few Kocos, the letter N, and an Animal Barrel containing Enguarde. | ||
If the apes swim east from here, they reach a pathway leading downwards. The pathway consists of four more Bazza schools and a DK Barrel. Farther ahead of here, the Kongs can find some Bazzas that swim through their path. If they are dodged, the Kongs access a wide area that holds a single Bounty Bass, who Enguarde can defeat to earn a [[ | If the apes swim east from here, they reach a pathway leading downwards. The pathway consists of four more Bazza schools and a DK Barrel. Farther ahead of here, the Kongs can find some Bazzas that swim through their path. If they are dodged, the Kongs access a wide area that holds a single Bounty Bass, who Enguarde can defeat to earn a [[bear coin]]. After the apes pass more Bazzas as they head to the south, they pass a [[No Animal Sign]]. If they pass the sign with Enguarde, the [[Animal Friend]] disappears and they are given the letter G. The entrance to a cave is nearby. Inside the cave, they can find the [[Level Flag]] and a [[Koin]]. | ||
{{br}} | {{br}} | ||
==Enemies== | ==Enemies== | ||
The following enemies appear in the following capacities: | |||
<gallery> | |||
Bazza DKC3.png|[[Bazza]] (indefinite) | |||
Bounty Bass DKC3.png|[[Bounty Bass]] (1) | |||
Koco DKC3 green.png|[[Koco]] (green) (8) | |||
Koco DKC3 red.png|Koco (red) (4) | |||
</gallery> | |||
==Items and objects== | ==Items and objects== | ||
The following items and objects appear in the following capacities: | |||
<gallery> | |||
Bear Coin.png|[[Bear coin]] (3) | |||
DK Barrel.png|[[DK Barrel]] (3) | |||
</gallery> | |||
|[[Bear | |||
|[[DK Barrel]] | |||
===K-O-N-G Letters=== | ===K-O-N-G Letters=== | ||
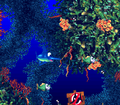
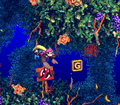
[[File:BazzasBlockcade-SNES-O.png|thumb|The location of the letter O]] | |||
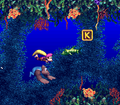
*'''K:''' Above the first school of Bazzas. | |||
*'''O:''' Shortly before the Star Barrel in an area containing a few Kocos. | |||
*'''N:''' The Kongs can find the letter N near an Animal Barrel. | |||
*'''G:''' The Kongs can earn the letter G by crossing the No Animal Sign as Enguarde | |||
{{br}} | |||
===DK Coin=== | ===DK Coin=== | ||
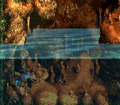
[[File:Bazza's Blockade GBA Koin.png|thumb|Koin's appearance in Bazza's Blockade in the Game Boy Advance version]] | |||
At the end of the level, the Kongs enter a cave area. The [[Koin]] is on a platform to the right of the Level Flag. Dixie or Kiddy must pick up a [[Iron Barrel|Steel Barrel]] behind the Koin, stand on its shield, and throw it at the right wall. The Steel Barrel bounces off the wall and hits Koin in the side, defeating him and rewarding the [[DK Coin]] to the Kongs. | |||
{{br}} | |||
==Bonus Levels== | ==Bonus Levels== | ||
{ | {{multiframe|[[File:Bazza's Blockade GBA Bonus Level 1.png|200px]] [[File:Bazza's Blockade Bonus Level 2.png|200px]]|size=420|The first and second Bonus Levels respectively}} | ||
Bazza's Blockade has two Bonus Levels, listed by type: | |||
*'''''Find the Coin!''''': After the letter K, the Kongs encounter many Bazzas swimming across the top of a large alcove. They must swim under the Bazzas to enter a [[Bonus Barrel]] below. In the [[Bonus Level]], the Kongs have 15 seconds to swim through a narrow passage and avoid several Bazzas and a Lurchin along the way. The [[Bonus Coin (Donkey Kong franchise)|Bonus Coin]] is located at the end of the path. | |||
*'''''Bash the Baddies!''''': Shortly after the Star Barrel, the Kongs can find a narrow passage to their left and right. Dixie and Kiddy must swim down a path to the left to go into a wider area and then swim into a Bonus Barrel. Upon starting the Bonus Level, the Kongs are transformed into Enguarde, who has to defeat the Kocos swimming in and out of holes in the coral reefs. Once every Koco is defeated, the Bonus Coin appears at the top of the area. | |||
|[[File:Bazza's Blockade GBA Bonus Level 1.png]] | {{br}} | ||
==Gallery== | ==Gallery== | ||
<gallery> | <gallery> | ||
Bazza's Blockade K.png|The letter K | |||
Bazzas Blockade DKC3 shot 2.png|The Kongs discover Enguarde's Animal Barrel | |||
Bazzas Blockade DKC3 shot 3.png|The Kongs approach some Bazzas | Bazzas Blockade DKC3 shot 3.png|The Kongs approach some Bazzas | ||
Bazzas Blockade DKC3 shot 5.png|Kiddy and Dixie encounter a Bazza | Bazzas Blockade DKC3 shot 5.png|Kiddy and Dixie encounter a Bazza | ||
| Line 95: | Line 62: | ||
Bazza's Blockade DKC3 Bounty Bass defeated.png|Enguarde defeats a Bounty Bass | Bazza's Blockade DKC3 Bounty Bass defeated.png|Enguarde defeats a Bounty Bass | ||
Bazza's Blockade DKC3 No Animal Sign.png|Enguarde approaching the No Animal Sign | Bazza's Blockade DKC3 No Animal Sign.png|Enguarde approaching the No Animal Sign | ||
Bazza's Blockade N.png|The letter N | |||
Bazza's Blockade G.png|The letter G | |||
Bazzas Blockade DKC3 shot 4.png|The Kongs in a cave at the end of the level | Bazzas Blockade DKC3 shot 4.png|The Kongs in a cave at the end of the level | ||
Bazza's Blockade Bonus Level 1.png|The first bonus level | Bazza's Blockade Bonus Level 1.png|The first bonus level | ||
BazzasBlockade-GBA-K.png|The letter K in the Game Boy Advance version | |||
Bazza's Blockade GBA first Bonus Barrel.png|Dixie goes to the first Bonus Barrel in the Game Boy Advance version | |||
BazzasBlockade-GBA-K.png|The letter K | |||
Bazza's Blockade GBA first Bonus Barrel.png|Dixie goes to the first Bonus Barrel | |||
</gallery> | </gallery> | ||
| Line 111: | Line 75: | ||
|JapR=Bazzā no mizuumi | |JapR=Bazzā no mizuumi | ||
|JapM=Bazza's Lake | |JapM=Bazza's Lake | ||
| | |Fre=Blocus de Bazza | ||
| | |FreM=Bazza's Blockade | ||
|Ger=Bazzas Blockade | |Ger=Bazzas Blockade | ||
|GerM=Bazza's Blockade | |GerM=Bazza's Blockade | ||
|Ita=Barriera di Bazza | |Ita=Barriera di Bazza | ||
|ItaM=Bazza Barrier | |ItaM=Bazza Barrier | ||
|Spa=El bloqueo de Bazza | |||
|SpaM=The Bazza Blockade | |||
}} | }} | ||
{{DKC3}} | {{DKC3}} | ||
[[Category:Aquatic areas]] | [[Category:Aquatic areas]] | ||
[[Category:Donkey Kong Country 3: Dixie Kong's Double Trouble! | [[Category:Donkey Kong Country 3: Dixie Kong's Double Trouble! levels]] | ||
Latest revision as of 17:00, January 20, 2024
| Level | |
|---|---|
| Bazza's Blockade | |

| |
| Level code | 3 - 1 |
| World | Cotton Top Cove |
| Game | Donkey Kong Country 3: Dixie Kong's Double Trouble! |
| Music track | Water World Cavern Caprice (GBA only) |
| << Directory of levels >> | |
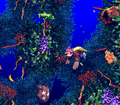
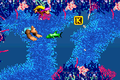
Bazza's Blockade is the eleventh level in Donkey Kong Country 3: Dixie Kong's Double Trouble! and the first level of Cotton Top Cove. In this level, an indefinite number of Bazzas swim in and out of the holes in the coral reef. Dixie and Kiddy must exercise timing to swim by them. To the left of the letter N, the Kongs can optionally transform into Enguarde from its Animal Barrel, or by entering the second Bonus Level.
Layout[edit]

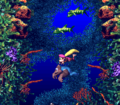
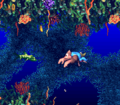
At the beginning of the level, the Kongs swim out of a cave and down towards a DK Barrel and a school of Bazzas traveling across a wide area. The letter K is in the uppermost part of this area. Soon, the apes travel north past a Koco and to another group of Bazzas that swim over two Banana Bunches. They can find more Kocos in their path as they travel through a thin, curvy passage. Eventually, the path leads them south towards some more groups of Bazzas. The second group swims over a small alcove that contains a Bonus Barrel. There are more schools of Bazzas as the Kongs continue up the path to the north. This time, each row of Bazzas is close together. Soon, the primates find a slightly wider path leading east, with one row of Bazzas swimming across it. After they dodge these barracuda enemies, they encounter some Kocos and the letter O. A thin, U-shaped passage follows here, and a Star Barrel is at the bottom of it.
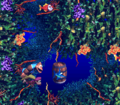
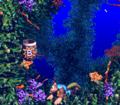
Bazzas also swim across this curved pathway. Once the Kongs pass the foes, they continue up to a DK Barrel and more rows of Bazzas, some of which that are close together. A much thinner path leading to the east is at the top of this area, and Bazzas travel through it. If the Kongs survive this potion of the level, they head south through an area containing a few more schools of Bazzas. An additional school is ahead, just before a pathway to the north that leads past two more rows of Bazzas and to another thin passage. Another group of Bazzas swims through the thin passage, which can lead the Kongs to the left or right. If they head left, they can find a wider area with a Bonus Barrel, but if they travel right, they can progress farther into the level, where there is another wide area that contains a few Kocos, the letter N, and an Animal Barrel containing Enguarde.
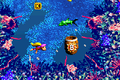
If the apes swim east from here, they reach a pathway leading downwards. The pathway consists of four more Bazza schools and a DK Barrel. Farther ahead of here, the Kongs can find some Bazzas that swim through their path. If they are dodged, the Kongs access a wide area that holds a single Bounty Bass, who Enguarde can defeat to earn a bear coin. After the apes pass more Bazzas as they head to the south, they pass a No Animal Sign. If they pass the sign with Enguarde, the Animal Friend disappears and they are given the letter G. The entrance to a cave is nearby. Inside the cave, they can find the Level Flag and a Koin.
Enemies[edit]
The following enemies appear in the following capacities:

Bazza (indefinite)

Bounty Bass (1)

Koco (green) (8)

Koco (red) (4)


Items and objects[edit]
The following items and objects appear in the following capacities:


K-O-N-G Letters[edit]

- K: Above the first school of Bazzas.
- O: Shortly before the Star Barrel in an area containing a few Kocos.
- N: The Kongs can find the letter N near an Animal Barrel.
- G: The Kongs can earn the letter G by crossing the No Animal Sign as Enguarde
DK Coin[edit]

At the end of the level, the Kongs enter a cave area. The Koin is on a platform to the right of the Level Flag. Dixie or Kiddy must pick up a Steel Barrel behind the Koin, stand on its shield, and throw it at the right wall. The Steel Barrel bounces off the wall and hits Koin in the side, defeating him and rewarding the DK Coin to the Kongs.
Bonus Levels[edit]


Bazza's Blockade has two Bonus Levels, listed by type:
- Find the Coin!: After the letter K, the Kongs encounter many Bazzas swimming across the top of a large alcove. They must swim under the Bazzas to enter a Bonus Barrel below. In the Bonus Level, the Kongs have 15 seconds to swim through a narrow passage and avoid several Bazzas and a Lurchin along the way. The Bonus Coin is located at the end of the path.
- Bash the Baddies!: Shortly after the Star Barrel, the Kongs can find a narrow passage to their left and right. Dixie and Kiddy must swim down a path to the left to go into a wider area and then swim into a Bonus Barrel. Upon starting the Bonus Level, the Kongs are transformed into Enguarde, who has to defeat the Kocos swimming in and out of holes in the coral reefs. Once every Koco is defeated, the Bonus Coin appears at the top of the area.
Gallery[edit]
The letter K
The Kongs discover Enguarde's Animal Barrel
The Kongs approach some Bazzas
Kiddy and Dixie encounter a Bazza
The Kongs swim near a Star Barrel
The Kongs discover the second Bonus Barrel
Enguarde defeats a Bounty Bass
Enguarde approaching the No Animal Sign
The letter N
The letter G
The Kongs in a cave at the end of the level
The first bonus level
The letter K in the Game Boy Advance version
Dixie goes to the first Bonus Barrel in the Game Boy Advance version


Names in other languages[edit]
| Language | Name | Meaning |
|---|---|---|
| Japanese | バッザーの湖 Bazzā no mizuumi |
Bazza's Lake |
| French | Blocus de Bazza |
Bazza's Blockade |
| German | Bazzas Blockade |
Bazza's Blockade |
| Italian | Barriera di Bazza |
Bazza Barrier |
| Spanish | El bloqueo de Bazza |
The Bazza Blockade |