Donkey Kong Land III: Difference between revisions
7feetunder (talk | contribs) m (→Bosses) |
Wonder Time! (talk | contribs) (→Cheat codes: Quite frankly, I think it would be pretty obvious that DKL 3 came after DKL2 Xp) |
||
| (120 intermediate revisions by 37 users not shown) | |||
| Line 1: | Line 1: | ||
{{italic title}} | {{italic title}} | ||
{{ | {{game infobox | ||
|image=[[File: | |image=[[File:Donkey Kong Land 3 Box Art.jpg|250px]]<br>[[File:Dinky and Dixie Kong GBC cover art.jpg|250px]] | ||
|developer=[[Rare Ltd.|Rareware]] | |developer=[[Rare Ltd.|Rareware]] | ||
|publisher=[[Nintendo]] | |publisher=[[Nintendo]] | ||
| | |release='''Game Boy:'''<br>{{release|USA|October 1, 1997<ref>[https://web.archive.org/web/20110615021610/http://www.nintendo.com/consumer/gameslist/gamelist.jsp?revealed=false&dsie=&dc=false&sh=donkey%20kong%20land&gf=&pf=&wifi=false&ww=&dw=&mic=&pap=&vc=&man=&rf=&nf=&pp=&sf=&ef= Nintendo - Customer Service | Game List]. ''support.nintendo.com''. Retrieved March 16, 2023.</ref>|Europe|November 1997<ref name=Rareware>Rare. [https://web.archive.org/web/19980705000419/http://www.rare.co.uk/recent/games/dkc3/ ''Donkey Kong Country 3'']. ''Rarewhere'' (Internet Archive: Wayback Machine). Retrieved February 18, 2015.</ref>}} '''Game Boy Color:'''<br>{{release|Japan|January 28, 2000}} '''Virtual Console (3DS):'''<br>{{release|Japan|May 7, 2014|Europe|October 30, 2014|Australia|October 31, 2014|USA|February 26, 2015}} | ||
|genre=Platformer | |genre=[[Genre#Platform games|Platformer]] | ||
|modes= | |modes=Single player | ||
|ratings={{ratings|esrb=K-A|cero=A}} | |ratings={{ratings|esrb=K-A|cero=A}} | ||
|platforms=[[Game Boy]], [[Game Boy Color]] | |platforms=[[Game Boy]], [[Game Boy Color]], [[Virtual Console]] ([[Nintendo 3DS]]) | ||
|media={{media|gb=1|gbc=1|3dsdl=1}} | |media={{media|gb=1|gbc=1|3dsdl=1}} | ||
|input={{input|gb=1|gbc=1|3ds=1}} | |input={{input|gb=1|gbc=1|3ds=1}} | ||
}} | }} | ||
'''''Donkey Kong Land III''''' ( | '''''Donkey Kong Land III''''' (also formatted as '''''Donkey Kong Land 3''''')<ref>[http://web.archive.org/web/19980704233323/http://www.rare.co.uk:80/retro/backcat/gamepages/dkl3.html ''Donkey Kong Land 3'' on Rareware's official website (Wayback Machine)]</ref> is a [[Genre#Platform games|platform game]] for the [[Game Boy]] developed by [[Rare Ltd.|Rareware]] and published by [[Nintendo]] in 1997. It is closely based on the [[Super Nintendo Entertainment System|SNES]] game ''[[Donkey Kong Country 3: Dixie Kong's Double Trouble!]]'', as it repurposes that game's graphical assets and thus features the same characters, enemies, and [[level]] environments. It also stars [[Dixie Kong]] and [[Kiddy Kong]]. ''Donkey Kong Land III'' is the third and final entry of the [[Donkey Kong Land (series)|''Donkey Kong Land'' series]]. Like its two predecessors, ''Donkey Kong Land III'' is housed on a yellow cartridge and has specific [[Super Game Boy]] enhancements, including a unique border of pocket watches. | ||
The original Game Boy | The original Game Boy version was never released in Japan, and it instead received a [[Game Boy Color]] [[Reissue#Ports|port]] in 2000. It is not dual-compatible with original Game Boy units, as evident from the transparent cartridge where it is contained. However, on September 9, 2020, a [[List of Donkey Kong Land III pre-release and unused content#Japanese Game Boy prototype|Japanese prototype of the Game Boy version]] was leaked. The Game Boy Color port was never released outside Japan. | ||
Like its two predecessors, ''Donkey Kong Land III'' was released on the [[Nintendo 3DS]]'s [[Virtual Console#Nintendo 3DS|Virtual Console]]. The Game Boy Color port was released in Japan on May 7, 2014, while the original Game Boy version was released in Europe and Australia in October 2014 and North America in February 2015. | |||
==Story== | ==Story== | ||
Announcements of a contest to find the fabled [[Lost World (Donkey Kong Land III)|Lost World]], which was said to have dominated legends for centuries, attracted "would-be" explorers all over the world to seize the long awaited chance of fame and fortune. [[Donkey Kong]], [[Diddy Kong]], and [[King K. Rool|Baron K. Roolenstein]] all hear of the contest, and the Kongs set out leaving [[Dixie Kong]] with her cousin, [[Kiddy Kong]]. Dixie wants to prove herself just as worthy as the other participants, so she decides to participate in the contest and takes Kiddy along with her. Kiddy is not that aware about what is going on and decides to follow Dixie into the jungle. | |||
Dixie and Kiddy | After traveling through the worlds, Dixie and Kiddy are confronted by Baron K. Roolenstein at the end of [[Tin Can Valley]]. To access the Lost World, Dixie and Kiddy must collect every [[DK Coin]] and [[Watch (Donkey Kong Land III)|Watch]]. Within the Lost World itself, the Kongs must collect all the DK Coins and the final Watch to engage in the final boss battle against Baron K. Roolenstein. When the Kongs defeat him, they are crowned as the victors of the contest. Baron K. Roolenstein then concedes the remaining six Watches and allows the Kongs to try out the [[#Time Attack mode|Time Attack]] mode. | ||
==Gameplay== | ==Gameplay== | ||
''Donkey Kong Land III'' | ''Donkey Kong Land III'' plays very similarly to ''Donkey Kong Land 2''. The player controls two different characters, Dixie and Kiddy, and only one [[Kong]] appears on-screen at a time. Dixie and Kiddy retain most of their abilities from ''Donkey Kong Country 3: Dixie Kong's Double Trouble!'' Dixie can use her [[Helicopter Spin]] to whirl her ponytail on the ground or glide in midair. Kiddy is heavier and stronger and can defeat strong enemies such as [[Krumple]]s by jumping on them, whereas Dixie cannot. In each world, the Kongs must complete the levels in order until reaching the world boss, whom the Kongs must defeat to unlock the next world. | ||
As the Kongs explore a level, they must avoid enemies along the way and collect items such as [[banana]]s and [[bear coin]]s along the way. Every [[Bonus Level]] is accessed from a [[Bonus Barrel]], and the reward for completing a Bonus Level's objective is a [[Bonus Coin (Donkey Kong franchise)|Bonus Coin]]. Some levels have an [[Animal Barrel]], which transform the Kongs into the pictured [[Animal Friend]], whose abilities are often required to complete a level or to reach hidden areas. Each Animal Friend has their own set of abilities. | |||
' | Each world has a [[Wrinkly Refuge]], where [[Wrinkly Kong]] saves the player's progress, and a [[Sheepy Shop]], which is run by a [[Bear (Donkey Kong Land III)|Bear]]. If Dixie and Kiddy have enough Bonus Coins, the Bar allows them to play the [[cards]] memorization minigame if they have at least a number of Bonus Coins. The Kongs are rewarded a [[Watch (Donkey Kong Land III)|Watch]] for the first time they complete a challenge in a world. In most levels, there is a [[Koin]] guarding the [[DK Coin]], except for underwater levels, where the DK Coin appears by itself like in ''Donkey Kong Land 2''. The Kongs are required to obtain every DK Coin and Watch to access the final World, the Lost World. | ||
{{br|left}} | {{br|left}} | ||
{|width=100% cellspacing=0 border=2 cellpadding=3 style="border-collapse:collapse;background:white" | ==Characters== | ||
|-style="background: | ===Playable characters=== | ||
!Image | {|width=100% cellspacing=0 border=2 cellpadding=3 class="wikitable dk"style="border-collapse:collapse;background:white" | ||
!Name | |- | ||
!Description | !colspan=2|Image | ||
!width=7% rowspan=2|Name | |||
!rowspan=2|Description | |||
|- | |||
!width=4%|GB | |||
!width=4%|GBC | |||
|- | |||
|align="center"|[[File:Dixie Kong DKL2.png]] | |||
|align="center"|[[File:Dixie Kong DKL3c sprite.png]] | |||
|align="center"|[[Dixie Kong]] | |||
|Dixie Kong is one of the two main protagonists. She can perform a [[Helicopter Spin]] to hover above pits and to spin into enemies. | |||
|- | |||
|align="center"|[[File:Kiddy Kong DKLIII.png]] | |||
|align="center"|[[File:Kiddy Kong DKL3c sprite.png]] | |||
|align="center"|[[Kiddy Kong]] | |||
|Kiddy is the younger cousin and sidekick of Dixie. He is the heavier Kong and can defeat stronger enemies such as Krumples with a jump attack. | |||
|} | |||
===Supporting characters=== | |||
{|width=100% cellspacing=0 border=2 cellpadding=3 class="wikitable dk"style="border-collapse:collapse;background:white" | |||
|- | |||
!colspan=2|Image | |||
!width=7% rowspan=2|Name | |||
!rowspan=2|Description | |||
|- | |||
!width=4%|GB | |||
!width=4%|GBC | |||
|- | |||
|align="center"|[[File:Wrinkly Kong DKLIII.png]] | |||
|align="center"|[[File:Wrinkly Kong DKL3c sprite.png]] | |||
|align="center"|[[Wrinkly Kong]] | |||
|Wrinkly is the only supporting [[Kong]] in the game. She resides in [[Wrinkly Refuge]], with one appearing in each world. The Kongs can visit Wrinkly to have their game progress saved, always free of charge. | |||
|- | |- | ||
| align="center" | | |align="center"|[[File:Bear DKLIII.png]] | ||
|align="center"|[[File:Bear Sprite DKL3JP.png]] | |||
| | |align="center"|[[Bear (Donkey Kong Land III)|Bear]] | ||
|Bears operate a [[Sheepy Shop]] in every world, where the Kongs can play [[cards]] if they have collected enough [[Bonus Coin (Donkey Kong franchise)|Bonus Coin]]s. The Kongs can spend [[bear coin]]s for level hints or to use a Bear's teleportation device, which warps them to the [[Northern Kremisphere]] map. | |||
|} | |||
===Animal Friends=== | |||
All four Animal Friends in the game have previously appeared in ''[[Donkey Kong Country 3: Dixie Kong's Double Trouble!]]'' | |||
{|width=100% cellspacing=0 border=2 cellpadding=3 class="wikitable dk"style="border-collapse:collapse;background:white" | |||
|- | |- | ||
| | !colspan=2|Image | ||
! | !width=7% rowspan=2|Name | ||
| | !rowspan=2|Description | ||
!width=7% rowspan=2|First level appearance | |||
!width=7% rowspan=2|Last level appearance | |||
|- | |- | ||
!width=4%|GB | |||
! | !width=4%|GBC | ||
|- | |- | ||
| align="center" | | |align="center"|[[File:Ellie the Elephant DKLIII.png]] | ||
|align="center"|[[File:DKL3 GBC Ellie sprite.png]] | |||
| | |align="center"|[[Ellie]] | ||
|Unlike her previous appearance, Ellie the elephant can spray unlimited water projectiles from her trunk but cannot carry a barrel using her trunk. Ellie no longer runs away when she sees a Sneek. | |||
|align="center"|[[Footloose Falls]] | |||
|align="center"|[[Rainforest Rumble]] | |||
|- | |- | ||
| align="center" | | |align="center"|[[File:Enguarde DKL2 sprite.png]] | ||
|align="center"|[[File:Enguarde DKL3C sprite.png]] | |||
| | |align="center"|[[Enguarde]] | ||
|Enguarde the swordfish is the aquatic Animal Friend of the game, and he can defeat enemies by stabbing them with his bill. Unlike ''Donkey Kong Land 2'', Enguarde can no longer perform a super stab. | |||
|align="center"|[[Seabed Shanty]] | |||
|align="center"|[[Deep Reef Grief]] | |||
|- | |- | ||
| align="center" | | |align="center"|[[File:Squawks DKL2 sprite.png]] | ||
|align="center"|[[File:Squawks DKL3c sprite.png]] | |||
| | |align="center"|[[Squawks]] | ||
|Squawks the parrot can fly around the area and use a nut-spitting attack to defeat enemies in his path, including [[Buzz (enemy)|Buzz]]es. | |||
|align="center"|[[Minky Mischief]] | |||
|align="center"|[[Ghoulish Grotto]] | |||
|- | |- | ||
| align="center" | | |align="center"|[[File:Squitter DKL2 sprite.png]] | ||
|align="center"|[[File:DKLIII GBC Squitter sprite.png]] | |||
| | |align="center"|[[Squitter]] | ||
|Squitter the spider can use a web spit attack and create web platforms to get over abysses or to gain height. | |||
|align="center"|[[Koco Channel]] | |||
|align="center"|[[Haunted Hollows]] | |||
|} | |} | ||
=== | ==Enemies== | ||
{|width=100% cellspacing=0 border=2 cellpadding=3 style="border-collapse:collapse;background:white" | ===Kremlings=== | ||
|-style= | {|width=100% cellspacing=0 border=2 cellpadding=3 class="wikitable dk"style="border-collapse:collapse;background:white" | ||
!Image | |-style= | ||
!Name | !colspan=2|Image | ||
!Description | !width=7% rowspan=2|Name | ||
!rowspan=2|Description | |||
!width=7% rowspan=2|First level appearance | |||
!width=7% rowspan=2|Last level appearance | |||
|- | |||
!width=4%|GB | |||
!width=4%|GBC | |||
|- | |||
|align="center"|[[File:Bazuka DKLIII sprite.png]] | |||
|align="center"|[[File:DKLIII GBC Bazuka sprite.png]] | |||
|align="center"|[[Bazuka]] | |||
|Bazukas appear in later levels of the game. They carry a large bazooka to shoot regular [[barrel]]s at the Kongs. Unlike ''Donkey Kong Country 3: Dixie Kong's Double Trouble!'', Bazukas cannot be defeated because there are no [[TNT Barrel]]s, which are used to defeat Bazukas in their debut appearance. | |||
|align="center"|[[Jungle Jeopardy]] | |||
|align="center"|[[Barrel Boulevard]] | |||
|- | |||
|align="center"|[[File:Klasp DKLIII sprite.png]] | |||
|align="center"|[[File:Klasp DKL3c sprite.png]] | |||
|align="center"|[[Klasp]] | |||
|Enemies who hide in an explosive TNT Barrel. They always hang from a rope and move back and forth in a fixed pattern. Dixie or Kiddy must avoid moving into a Klasp otherwise it explodes on them, injuring the Kong in play; this is otherwise the only way for the Kongs to defeat Klasps. | |||
|align="center"|[[Jetty Jitters]] | |||
|align="center"|[[Barrel Boulevard]] | |||
|- | |- | ||
| align="center" | | |align="center"|[[File:Kobble DKLIII sprite.png]] | ||
|align="center"|[[File:Kobble DKL3c sprite.png]] | |||
| | |align="center"|[[Kobble]] | ||
|Kobbles are the basic Kremling grunt enemies. The Kongs can defeat them with any attack, but they must still avoid being hit by one. | |||
|align="center"|[[Red Wharf]] | |||
|align="center"|[[Ghoulish Grotto]] | |||
|- | |- | ||
| align="center" | | |align="center"|[[File:Koin DKLIII sprite.png]] | ||
|align="center"|[[File:DKL3 GBC Koin sprite.png]] | |||
| | |align="center"|[[Koin]] | ||
|A Koin appears in most levels and guards a [[DK Coin]], which is attached to their shield. It wears a bucket on its head to protect itself from jump attacks. To defeat a Koin, the Kongs must pick up a nearby [[Iron Barrel|Steel Barrel]] and throw it behind Koin at a wall; the Steel Barrel rebounds and hits Koin from behind, which defeats it and rewards the DK Coin to the Kongs. | |||
|align="center"|[[Red Wharf]] | |||
|align="center"|[[Ghoulish Grotto]] | |||
|- | |- | ||
| align="center" | | |align="center"|[[File:Kopter DKLIII sprite.png]] | ||
|align="center"|[[File:DKLIII GBC Kopter sprite.png]] | |||
| | |align="center"|[[Kopter]] | ||
|Kopters carry two large helicopter blades which they spin to hover in the air. Unlike ''Donkey Kong Country 3: Dixie Kong's Double Trouble!'', the Kongs can defeat a Kopter by jumping on it. | |||
|align="center"|[[Footloose Falls]] | |||
|align="center"|[[Ghoulish Grotto]] | |||
|- | |- | ||
| align="center" | | |align="center"|[[File:Krimp DKLIII sprite.png]] | ||
|align="center"|[[File:Krimp DKL3c sprite.png]] | |||
| | |align="center"|[[Krimp]] | ||
|They are small Kremlings with large teeth. Krimps move back and forth, repeatedly opening and closing their mouth. The Kongs cannot roll into Krimp from the front, else it bites and injures the Kong. To defeat a Krimp, the Kongs must either jump on it or roll into it from behind. | |||
|align="center"|[[Koco Channel]] | |||
|align="center"|[[Rainforest Rumble]] | |||
|- | |- | ||
| align="center" | | |align="center"|[[File:Krumple DKLIII sprite.png]] | ||
|align="center"|[[File:Krumple DKL3c sprite.png]] | |||
| | |align="center"|[[Krumple]] | ||
|Krumples are strong, muscular Kremlings that Dixie cannot defeat directly, although Kiddy can defeat a Krumple by jumping on it. Krumples can also be defeated by an Animal Friend or a barrel. | |||
|align="center"|[[Jetty Jitters]] | |||
|align="center"|[[Ghoulish Grotto]] | |||
|- | |- | ||
| align="center" | | |align="center"|[[File:Knocka DKLIII sprite.png]] | ||
|align="center"|[[File:Knocka DKL3c sprite.png]] | |||
| | |align="center"|[[Knocka|Krusha]] | ||
|Krushas are the direct successor to [[Klobber]]s, as both are Kremlings who hide in a barrel. When Dixie or Kiddy approach a Krusha, it pops out and runs after the Kong. Krushas cannot hurt the Kongs directly, and they attempt to knock them into a pit or a hazard. Dixie or Kiddy can jump on a Krusha to force it back into its barrel. The Kong can then pick up the barrel containing Krusha and throw it to defeat the enemy. | |||
|align="center"|[[Liftshaft Lottery]] | |||
|align="center"|[[Barrel Boulevard]] | |||
|- | |- | ||
| align="center" | | |align="center"|[[File:Kuchuka DKLIII sprite.png]] | ||
|align="center"|[[File:DKLIII GBC Kuchuka sprite.png]] | |||
| | |align="center"|[[Kuchuka]] | ||
|Kuchukas are idle Kremlings who hide inside a barrel, and they attack by throwing small bombs at the Kongs. Like Bazukas, they cannot be defeated because there are no [[TNT Barrels]], and must be avoided by the Kongs. | |||
|align="center"|[[Stalagmite Frights]] | |||
|align="center"|[[Ghoulish Grotto]] | |||
|- | |- | ||
| align="center" | | |align="center"|[[File:Rekoil DKLIII sprite.png]] | ||
|align="center"|[[File:Re-Koil DKL3c sprite.png]] | |||
| | |align="center"|[[Re-Koil|Rekoil]] | ||
|Rekoils bounce on their tail either in one spot or back and forth. The Kongs can defeat them with a jump attack. | |||
|align="center"|[[Total Rekoil]] | |||
|align="center"|[[Ghoulish Grotto]] | |||
|- | |- | ||
| align="center" | | |align="center"|[[File:Skidda DKLIII sprite.png]] | ||
|align="center"|[[File:DKLIII GBC Skidda sprite.png]] | |||
| | |align="center"|[[Skidda]] | ||
|Skidda are Kremlings who only appear in snow levels. They slide across the icy ground and can be defeated from any attack. | |||
|align="center"|[[Black Ice Blitz]] | |||
|align="center"|[[Tundra Blunda]] | |||
|} | |} | ||
== | ===Other enemies=== | ||
[[File: | {|width=100% cellspacing=0 border=2 cellpadding=3 class="wikitable dk"style="border-collapse:collapse;background:white" | ||
|- | |||
!colspan=2|Image | |||
!width=7% rowspan=2|Name | |||
!rowspan=2|Description | |||
!width=7% rowspan=2|First level appearance | |||
!width=7% rowspan=2|Last level appearance | |||
|- | |||
!width=4%|GB | |||
!width=4%|GBC | |||
|- | |||
|align="center"|[[File:Bazza DKLIII sprite.png]] | |||
|align="center"|[[File:Bazza DKL3c sprite.png]] | |||
|align="center"|[[Bazza]] | |||
|Bazzas are barracudas who indefinitely swim in a straight line from one hole to the next. They can be defeated by Enguarde's stab. | |||
|align="center"|[[Seabed Shanty]] | |||
|align="center"|[[Deep Reef Grief]] | |||
|- | |||
|align="center"|[[File:Booty Bird DKLIII sprite.png]] | |||
|align="center"|[[File:Booty Bird DKL3c sprite.png]] | |||
|align="center"|[[Booty Bird]] | |||
|They are fat birds with an item stored in their belly, such as a bear coin. To obtain the item, the Kongs must defeat the Booty Bird. | |||
|align="center"|[[Ford Knocks]] | |||
|align="center"|[[Bazuka Bombard]] | |||
|- | |- | ||
|align="center"|[[File:Bounty Bass DKLIII sprite.png]] | |||
| | |align="center"|[[File:Bounty Bass DKL3c sprite.png]] | ||
! | |align="center"|[[Bounty Bass]] | ||
|Bounty Basses are fat fish enemies found in the coral levels. Unlike their appearance in ''Donkey Kong Country 3: Dixie Kong's Double Trouble!'', Bounty Basses do not contain an item. Like the other underwater enemies, Bounty Basses can be defeated by Enguarde. | |||
|align="center"|[[Seabed Shanty]] | |||
|align="center"|[[Haunted Hollows]] | |||
|- | |- | ||
|align="center" | | |align="center"|[[File:Bristles DKLIII sprite.png]] | ||
|align="center"|[[File:Bristles DKL3c sprite.png]] | |||
|align="center"|[[Bristles]] | |||
|Bristles are porcupine enemies whose quills protect them from jump attacks. Dixie or Kiddy can defeat them by rolling in front. | |||
|align="center"|[[Liftshaft Lottery]] | |||
|align="center"|[[Ghoulish Grotto]] | |||
|- | |- | ||
|align="center" | | |align="center"|[[File:Buzz DKLIII sprite.png]] | ||
|align="center"|[[File:Buzz DKL3c sprite.png]] | |||
|align="center"|[[Buzz (enemy)|Buzz]] | |||
|Buzzes are mechanical wasps who appear throughout the game. They are invulnerable to both Dixie's and Kiddy's attacks, and Buzzes can be defeated from a barrel or an Animal Friend. | |||
|align="center"|[[Ford Knocks]] | |||
|align="center"|[[Ghoulish Grotto]] | |||
|- | |- | ||
|align="center" | | |align="center"|[[File:Karbine DKLIII sprite.png]] | ||
|align="center"|[[File:DKLIII GBC Karbine sprite.png]] | |||
|align="center"|[[Karbine]] | |||
|They are owl-like robotic enemies that wield large carbines (hence their name). Karbines are always in the background, shooting fireballs at Dixie and Kiddy. The Kongs must avoid being hit by the fireballs. | |||
|align="center"|[[Karbine Kaos]] | |||
|align="center"|[[Barrel Boulevard]] | |||
|- | |- | ||
|align="center" | | |align="center"|[[File:Koco DKLIII sprite.png]] | ||
|align="center"|[[File:Koco DKL3c sprite.png]] | |||
|align="center"|[[Koco]] | |||
|Kocos are clownfish enemies who swim around aimlessly. They can be defeated by Enguarde. | |||
|align="center"|[[Seabed Shanty]] | |||
|align="center"|[[Haunted Hollows]] | |||
|- | |- | ||
|align="center" | | |align="center"|[[File:Lemguin DKLIII sprite.png]] | ||
|align="center"|[[File:Lemguin DKL3c sprite.png]] | |||
|align="center"|[[Lemguin]] | |||
|Lemguins jump out of underground holes and slide on the icy ground, just like penguins do. Their beak and even their back side are the parts of their body that harm the Kongs. They can be defeated by stomping them on the top. | |||
|align="center"|[[Polar Pitfalls]] | |||
|align="center"|[[Tundra Blunda]] | |||
|- | |- | ||
|align="center" | | |align="center"|[[File:Lurchin DKLIII sprite.png]] | ||
|align="center"|[[File:Lurchin DKL3c sprite.png]] | |||
|align="center"|[[Lurchin]] | |||
|They are urchin enemies with spiky shells to protect themselves, even from Enguarde's stab. Lurchins have a squish core, which they repeatedly open and close their shell within. Enguarde can defeat a Lurchin by stabbing it in the center. | |||
|align="center"|[[Seabed Shanty]] | |||
|align="center"|[[Haunted Hollows]] | |||
|- | |- | ||
|align="center" | | |align="center"|[[File:Minky DKLIII sprite.png]] | ||
|align="center"|[[File:Minky DKL3c sprite.png]] | |||
|align="center"|[[Minkey|Minky]] | |||
|Minkys are monkeys who throw acorns to attack the Kongs. Minkys cannot be defeated, and the Kongs must avoid taking damage from their acorns. | |||
|align="center"|[[Minky Mischief]] | |||
|align="center"|[[Simian Shimmy]] | |||
|- | |- | ||
|align="center"|[[File:Nid DKLIII sprite.png]] | |||
| | |align="center"|[[File:Nid DKL3c sprite.png]] | ||
|align="center"|[[Nid]] | |||
|Nids are jumping spiders with a plank of wood on their back. If Dixie or Kiddy sit on a Nid, it bounces them to a higher area. Nids are more like an ally because they are required for the Kongs to progress. | |||
|align="center"|[[Minky Mischief]] | |||
|align="center"|[[Simian Shimmy]] | |||
|- | |- | ||
|align="center" | | |align="center"|[[File:Niknak DKLIII sprite.png]] | ||
|align="center"|[[File:Knik-Knak DKL3c sprite.png]] | |||
|align="center"|[[Knik-Knak|Niknak]] | |||
|Niknaks are beetle enemies which stay in one spot while in midair. The Kongs can jump from them to get across gaps. | |||
|align="center"|[[Ford Knocks]] | |||
|align="center"|[[Rainforest Rumble]] | |||
|- | |- | ||
|align="center" | | |align="center"|[[File:Sneek DKLIII sprite.png]] | ||
|align="center"|[[File:Sneek DKL3c sprite.png]] | |||
|align="center"|[[Sneek]] | |||
|Sneeks are rats and one of weakest enemies in the game. They walk aimlessly on the ground, and the Kongs can defeat them with any attack. | |||
|align="center"|[[Red Wharf]] | |||
|align="center"|[[Ghoulish Grotto]] | |||
|} | |||
==Bosses== | |||
{|width=100% cellspacing=0 border=2 cellpadding=3 class="wikitable dk"style="border-collapse:collapse;background:white" | |||
|- | |- | ||
!colspan=2|Image | |||
!width=7% rowspan=2|Name | |||
!rowspan=2|Description | |||
|- | |- | ||
!width=4%|GB | |||
!width=4%|GBC | |||
|- | |- | ||
|align="center" | | |align="center"|[[File:Barbos DKLIII sprite.png]] | ||
|align="center"|[[File:Barbos DKL3c sprite.png]] | |||
|align="center"|[[Barbos]] | |||
|Barbos is a large Lurchin and the first boss of the game, and it is fought at '''[[Barbos Bastion]]''' from [[Cape Codswallop]]. The Kongs transform into Enguarde for the battle. Barbos attacks by releasing three Lurchins, one of which stops in front of Enguarde. He must stab the Lurchin once it is open, causing the Lurchin to bounce off the wall and hit Barbos. | |||
|- | |- | ||
|align="center" | | |align="center"|[[File:Bleak DKLIII sprite.png]] | ||
|align="center"|[[File:DKLIII GBC Bleak sprite.png]] | |||
|align="center"|[[Bleak]] | |||
|Bleak is a large snowman and the second boss, and he is fought at '''[[Bleak Magic]]''' from [[Primate Plains]]. During the battle, Bleaks stand in one spot, shooting large snowballs from his hat at the Kongs. Dixie or Kiddy can attack Bleak by throwing a barrel at him. After being hit four times, Bleak gets defeated. | |||
|- | |- | ||
|align="center" | | |align="center"|[[File:Arich DKLIII sprite.png]] | ||
|align="center"|[[File:DKLIII GBC Arich sprite.png]] | |||
|align="center"|[[Arich]] | |||
|Arich is a large spider and the third boss, and it is fought at '''[[Arich Attack]]''' from [[Blackforest Plateau]]. Arich attacks by either descending at the Kongs or by spitting small balls of venom at them. The Kongs must jump on Arich four times to defeat it. | |||
|- | |- | ||
|align="center"|[[File:KAOS DKL3 sprite.png]] | |||
| | |align="center"|[[File:KAOS DKL3C sprite.png]] | ||
|align="center"|[[KAOS]] | |||
|KAOS is a robot programmed by K. Rool to destroy Dixie and Kiddy. It is the fourth boss and is fought at '''[[Krazy Kaos]]''' from [[Great Ape Lakes]]. During the battle, KAOS attempts to roast the Kongs by releasing flames from below. The Kongs must quickly run under KAOS before it releases a flame from its pipe. After some time, KAOS stops in the center of the arena and starts to send out blade-like platforms. This gives Dixie and Kiddy a chance to attack KAOS, by jumping on his head. The Kongs must quickly jump from the platforms before KAOS sends out a punching glove to knock them off. | |||
|- | |- | ||
|align="center" | | |align="center"|[[File:Baron K Roolenstein DKLIII.png]] | ||
|align="center"|[[File:Baron K Roolenstein DKL3c sprite.png]] | |||
|align="center"|[[King K. Rool#Donkey Kong Land III|K .Rool]] | |||
|K .Rool is the main antagonist of the game. He is the fifth and last boss who is fought twice: first at '''[[K Rool Duel]]''' in [[Tin Can Valley]], and later at '''[[K Rools Last Stand]]''' in the [[Lost World (Donkey Kong Land III)|Lost World]]. | |||
During the first battle, K .Rool tries to attack the Kongs by shooting electric beams at them, and he also uses his jetpack to fly around the area. To attack K .Rool, Dixie or Kiddy must throw a barrel at him. K .Rool gets defeated after being hit four times. In the second battle, K .Rool retains most of his attacks except that he also throws bombs. When K .Rool is defeated again, the Kongs complete their adventure. | |||
|} | |||
==Items and objects== | |||
{{more images|section=yes|Need image for Watch and version differences}} | |||
{|width=100% cellspacing=0 border=2 cellpadding=3 class="wikitable dk"style="border-collapse:collapse;background:white" | |||
|- | |- | ||
!colspan=2|Image | |||
!width=7% rowspan=2|Name | |||
!rowspan=2|Description | |||
|- | |- | ||
!width=4%|GB | |||
!width=4%|GBC | |||
|- | |- | ||
|align="center" | | |align="center"|[[File:DKL3 Banana.png]] | ||
|align="center"|[[File:DKL3 Banana GBC.png]] | |||
|align="center"|[[Banana]] | |||
|There are numerous bananas floating in every level. If the Kongs collect 100 bananas, they get an [[extra life]], and the counter resets to zero. | |||
|- | |- | ||
|align="center" | | |align="center"|[[File:DKL3 Banana Bunch.png]] | ||
|align="center"|[[File:DKL3 Banana Bunch GBC.png]] | |||
|align="center"|[[Banana Bunch]] | |||
|By collecting a Banana Bunch, Dixie or Kiddy are rewarded ten bananas. Banana Bunches are less common than regular bananas. | |||
|- | |- | ||
|align="center" | | |align="center"|{{no image|40px}} | ||
|align="center"|[[File:Bear Coin DKLIII Sprite.png]] | |||
|align="center"|[[Bear coin]]s | |||
|Collectable currency that Dixie and Kiddy can use at the [[Sheepy Shop]] for Bear's teleportation service or to play [[cards]] for the first time. | |||
|- | |- | ||
|align="center" | | |align="center"|{{no image|40px}} | ||
|align="center"|[[File:Bonus Coin DKL3C Sprite.png]] | |||
|align="center"|[[Bonus Coin (Donkey Kong franchise)|Bonus Coin]]s | |||
|One appears at the end of every [[Bonus Level]] or by completing its objective. The Kongs are required to collect them to play the cards challenge in each world. | |||
|- | |- | ||
|align="center"|{{no image|40px}} | |||
| | |align="center"|[[File:DKL3 DK Coin GBC.png]] | ||
|align="center"|[[DK Coin]]s | |||
|They are large, golden coins with the "DK" logo. A DK Coin is guarded by a Koin in every level (except underwater levels, where the DK Coin is found by itself). Dixie and Kiddy are required to collect the DK Coins to enter the Lost World. | |||
|- | |- | ||
|align="center" | | |align="center"|[[File:DKL2 GB Extra Life Balloon sprite.png]] | ||
|align="center"|[[File:Life Balloon DKL3c sprite.png]] | |||
|align="center"|[[Red Balloon|Extra Life Balloon]]s | |||
|These balloons grant an extra life to the Kongs if they collect it. They are usually hidden or in hard-to-reach areas. | |||
|- | |- | ||
| | |colspan=2 align="center"|[[File:DKL3 Letter K.png]][[File:DKL3 Letter O.png]][[File:DKL3 Letter N.png]][[File:DKL3 Letter G.png]] | ||
|align="center"rowspan=2|[[KONG Letters]] | |||
|rowspan=2|A set of four letters found in every level, in order from K to G. If the Kongs collect all four KONG Letters, they earn an extra life. | |||
|- | |- | ||
| | |colspan=2 align="center"|[[File:Letter K DKL3c.png]][[File:Letter O DKL3c.png]][[File:Letter N DKL3c.png]][[File:Letter G DKL3c.png]] | ||
|- | |- | ||
|align="center" | | |align="center"|{{no image|40px}} | ||
|align="center"|[[File:DKL3 Watch GBC.png]] | |||
|align="center"|[[Watch (Donkey Kong Land III)|Watch]] | |||
|The Kongs are rewarded a Watch for completing a cards challenge the first time for each world. Like DK Coins, the Watches are also required for entering the Lost World. | |||
|} | |||
===Barrels=== | |||
{|width=100% cellspacing=0 border=2 cellpadding=3 class="wikitable dk"style="border-collapse:collapse;background:white" | |||
|- | |- | ||
!colspan=2|Image | |||
!width=7% rowspan=2|Name | |||
!rowspan=2|Description | |||
|- | |- | ||
!width=4%|GB | |||
!width=4%|GBC | |||
|- | |- | ||
| | |colspan=2 align="center"|[[File:DKL2 GB Enguarde Barrel sprite.png]][[File:DKL2 GB Squitter Barrel sprite.png]][[File:DKL2 GB Squawks Barrel sprite.png]][[File:DKLIII GB Ellie Barrel sprite.png]] | ||
|rowspan=2 align="center"|[[Animal Barrel]]s | |||
|rowspan=2|By entering an Animal Barrel, the Kongs are transformed into the pictured Animal Friend. | |||
|- | |- | ||
|colspan=2 align="center"|[[File:DKLIII GBC Enguarde Barrel.png]][[File:DKLIII GBC Squitter Barrel.png]][[File:DKLIII GBC Squawks Barrel.png]][[File:DKLIII GBC Ellie Barrel.png]] | |||
|- | |- | ||
|align="center" | | |align="center"|{{no image|40px}} | ||
|align="center"|[[File:DKL3 Barrel GBC.png]] | |||
|align="center"|[[Barrel]]s | |||
|These are objects that the Kongs can pick up and throw to attack enemies If a barrel is thrown on the ground, it rolls until hitting a wall. | |||
|- | |- | ||
|align="center" | | |align="center"|[[File:DKL2 GB Barrel Cannon sprite.png]] | ||
|align="center"|[[File:DKL3 Barrel Cannon GBC.png]] | |||
|align="center"|[[Barrel Cannon]]s | |||
|These barrels have an opening in the top and are found in midair. The Kongs can blast from them to reach higher areas or to get across gaps. Barrel Cannons often appear in midair. | |||
|- | |- | ||
|align="center" | | |align="center"|{{no image|40px}} | ||
|align="center"|[[File:DKL3 Booster Barrel GBC.png]] | |||
|align="center"|[[Booster Barrel]]s | |||
|When Dixie or Kiddy enter a Booster Barrel, it blasts up like a rocket, and upon reaching a certain height, usually at a platform, the Booster Barrel blasts out the active Kong. Booster Barrels only appear in a few levels, all of which they appear throughout. | |||
|- | |- | ||
|align="center" | | |align="center"|[[File:DKL2 GB DK Barrel sprite.png]] | ||
|align="center"|[[File:DK Barrel DKL3c sprite.png]] | |||
|align="center"|[[DK Barrel]]s | |||
|Like ''Donkey Kong Land 2'', every DK Barrel in the game appears in midair. If Dixie or Kiddy are missing their partner, they can jump at a DK Barrel to release the missing Kong. The DK Barrels have no effect if both Kongs are present. | |||
|- | |- | ||
|align="center" | | |align="center"|[[File:DKLIII Boo Barrel sprite.png]] | ||
|align="center"|[[File:Ghost Barrel - DKL3 Sprite.png]] | |||
|align="center"|[[Boo Barrel|Ghost Barrel]]s | |||
|Ghost Barrels appear in cave areas, and they are similar to [[Blast Barrel|Auto-Fire Barrel]]s except they constantly vanish and reappear. Some Boo Barrels point in the direction of a Buzz, and the Kongs must wait for these Boo Barrels to disappear to avoid being blasted into a Buzz. | |||
|- | |- | ||
|align="center" | | |align="center"|[[File:DKLIII Steel Keg sprite.png]] | ||
|align="center"|[[File:Steel Barrel DKL3c sprite.png]] | |||
|align="center"|[[Iron Barrel|Steel Barrel]]s | |||
|Steel Barrels are similar to regular barrels except they can bounce off walls. A Steel Barrel is required to defeat the Koin of a level. | |||
|- | |- | ||
|align="center" | | |align="center"|[[File:DKLIII Tracker Barrel sprite.png]] | ||
|align="center"|[[File:DKL3 Tracker Barrel GBC.png]] | |||
|align="center"|[[Tracker Barrel]]s | |||
|A type of Barrel Cannon which the player can move left or right as it automatically blasts Dixie or Kiddy in midair. It automatically follows the Kongs until they land. | |||
|- | |- | ||
|align="center"|{{no image|40px}} | |||
|- style=background:#D3D3D3 align=center | |align="center"|[[File:DKL3 Warp Barrel.png]] | ||
|align="center"|[[Warp Barrel]]s | |||
|Warp Barrels take the Kongs to the end of a level. They are found at the start in just the Cape Codswallop levels. Warp Barrels are invisible and are only revealed when the Kongs enter one. | |||
|} | |||
==Levels== | |||
[[File:Northern Kremisphere DKL3.png|thumb|200px|The overworld map of the Northern Kremisphere in ''Donkey Kong Land III''.]] | |||
There are six worlds in ''Donkey Kong Land III'', and each of them have six levels and a boss level. Each level has a similar theme to those from ''[[Donkey Kong Country 3: Dixie Kong's Double Trouble!]]'' There are two [[Bonus Level]]s in every regular level. | |||
{|border="1"cellspacing=0 border=2 cellpadding=3 class="wikitable dk"align="left"style="background:whitesmoke"width=85% | |||
!colspan=5 style="background:saddlebrown;color:white"align=center|<big>Levels and Bonus Areas</big> | |||
|- | |||
!colspan=5 style="background:saddlebrown;color:white"align=center|{{color-link|Cape Codswallop|white}} | |||
|-style=background:#D3D3D3 align=center | |||
!width=5%|# | !width=5%|# | ||
!width=35%|Level | !width=35%|Level | ||
!width=30%|Type of level | !width=30%|Type of level | ||
!width= | !width=30%|Music theme | ||
|- | |- | ||
|align="center" | | |align="center"|1||align="center"|[[Red Wharf]]||align="center"|Stilt||align="center"|Stilt Village | ||
|- | |- | ||
|align="center" | | |align="center"|2||align="center"|[[Seabed Shanty]]||align="center"|Coral||align="center"|Water World | ||
|- | |- | ||
|align="center" | | |align="center"|3||align="center"|[[Ford Knocks]]||align="center"|Stilt||align="center"|Stilt Village | ||
|- | |- | ||
|align="center" | | |align="center"|4||align="center"|[[Total Rekoil]]||align="center"|Mill||align="center"|Mill Fever | ||
|- | |- | ||
|align="center" | | |align="center"|5||align="center"|[[Koco Channel]]||align="center"|River||align="center"|Enchanted Riverbank | ||
|- | |- | ||
|align="center" | | |align="center"|6||align="center"|[[Liftshaft Lottery]]||align="center"|Mill||align="center"|Mill Fever | ||
|- | |- | ||
|align="center" | | |align="center"|7||align="center"|BOSS LEVEL: [[Barbos Bastion]]||align="center"|Coral||align="center"|Big Boss Blues | ||
|- | |- | ||
|} | !colspan=5 style="background:saddlebrown;color:white"align=center|{{color-link|Primate Plains|white}} | ||
|-style=background:#D3D3D3 align=center | |||
== | !width=5%|# | ||
=== | !width=35%|Level | ||
!width=30%|Type of level | |||
| | !width=30%|Music theme | ||
|- | |||
|align="center"|8||align="center"|[[Coral Quarrel]]||align="center"|Coral||align="center"|Water World | |||
|- | |||
|align="center"|9||align="center"|[[Minky Mischief]]||align="center"|Tree||align="center"|Treetop Tumble | |||
|- | |- | ||
| align="center" |[[ | |align="center"|10||align="center"|[[Jetty Jitters]]||align="center"|Stilt||align="center"|Stilt Village | ||
| | |||
|- | |- | ||
| align="center" | | |align="center"|11||align="center"|[[Black Ice Blitz]]||align="center"|Snow||align="center"|Hot Pursuit | ||
| | |||
| | |||
| | |||
|- | |- | ||
| align="center" |[[ | |align="center"|12||align="center"|[[Riverbank Riot]]||align="center"|River||align="center"|Enchanted Riverbank | ||
| | |||
|- | |- | ||
| align="center" | | |align="center"|13||align="center"|[[Miller Instinct]]||align="center"|Mill||align="center"|Mill Fever | ||
| | |||
| | |||
| | |||
|- | |- | ||
| align="center" | | |align="center"|14||align="center"|BOSS LEVEL: [[Bleak Magic]]||align="center"|Snow||align="center"|Big Boss Blues | ||
| | |||
| align="center"| | |||
| align="center"| | |||
|- | |- | ||
!colspan=5 style="background:saddlebrown;color:white"align=center|{{color-link|Blackforest Plateau|white}} | |||
! | |-style=background:#D3D3D3 align=center | ||
| | !width=5%|# | ||
!width=35%|Level | |||
!width=30%|Type of level | |||
!width=30%|Music theme | |||
|- | |- | ||
| align="center" |[[ | |align="center"|15||align="center"|[[Rocketeer Rally]]||align="center"|Falls||align="center"|Cascade Capers | ||
| | |||
| align="center"| | |||
| align="center"| | |||
|- | |- | ||
| align="center" | | |align="center"|16||align="center"|[[Vertigo Verge]]||align="center"|Cliff||align="center"|Rockface Rumble | ||
| | |||
| align="center" |[[ | |||
| align="center" | | |||
| | |||
| | |||
|- | |- | ||
| align="center" |[[ | |align="center"|17||align="center"|[[Polar Pitfalls]]||align="center"|Snow||align="center"|Cascade Capers | ||
| | |||
| align="center" | | |||
| align="center" | | |||
|- | |- | ||
| align="center" |[[ | |align="center"|18||align="center"|[[Surface Tension]]||align="center"|River||align="center"|Enchanted Riverbank | ||
| | |||
| align="center" | | |||
| align="center" | | |||
|- | |- | ||
| align="center" |[[ | |align="center"|19||align="center"|[[Tundra Blunda]]||align="center"|Snow||align="center"|Cascade Capers | ||
| | |||
| align="center" | | |||
| align="center" | | |||
|- | |- | ||
| align="center" |[[ | |align="center"|20||align="center"|[[Redwood Rampage]]||align="center"|Tree||align="center"|Treetop Tumble | ||
| | |||
| align="center" | | |||
| align="center" | | |||
|- | |- | ||
| align="center" | | |align="center"|21||align="center"|BOSS LEVEL: [[Arich Attack]]||align="center"|Tree||align="center"|Big Boss Blues | ||
| align="center" | | |||
| align="center" | | |||
|- | |- | ||
!colspan=5 style="background:saddlebrown;color:white"align=center|{{color-link|Great Ape Lakes|white}} | |||
! | |-style=background:#D3D3D3 align=center | ||
| | !width=5%|# | ||
!width=35%|Level | |||
!width=30%|Type of level | |||
!width=30%|Music theme | |||
|- | |- | ||
| align="center" |[[ | |align="center"|22||align="center"|[[Jungle Jeopardy]]||align="center"|Jungle||align="center"|Jungle Jitter | ||
| | |||
| align="center" | | |||
| align="center" | | |||
|- | |- | ||
| align="center" |[[ | |align="center"|23||align="center"|[[Footloose Falls]]||align="center"|Falls||align="center"|Cascade Capers | ||
| | |||
| align="center" | | |||
| align="center" | | |||
|- | |- | ||
| align="center" |[[ | |align="center"|24||align="center"|[[Deep Reef Grief]]||align="center"|Coral||align="center"|Water World | ||
| | |||
| align="center" | | |||
| align="center" | | |||
|- | |- | ||
| align="center" |[[ | |align="center"|25||align="center"|[[Karbine Kaos]]||align="center"|Machine||align="center"|Nuts and Bolts | ||
| | |||
| align="center" | | |||
| align="center" | | |||
|- | |- | ||
| align="center" | | |align="center"|26||align="center"|[[Simian Shimmy]]||align="center"|Tree||align="center"|Treetop Tumble | ||
| | |||
| align="center" |[[ | |||
| align="center" | | |||
| | |||
| | |||
|- | |- | ||
| align="center" |[[ | |align="center"|27||align="center"|[[Rockface Chase]]||align="center"|Cliff||align="center"|Rockface Rumble | ||
| | |||
| align="center" | | |||
| align="center" | | |||
|- | |- | ||
| align="center" | | |align="center"|28||align="center"|BOSS LEVEL: [[Krazy Kaos]]||align="center"|Machine||align="center"|Big Boss Blues | ||
| | |||
| align="center" | | |||
| align="center" | | |||
|- | |- | ||
!colspan=5 style="background:saddlebrown;color:white"align=center|{{color-link|Tin Can Valley|white}} | |||
! | |-style=background:#D3D3D3 align=center | ||
| | !width=5%|# | ||
!width=35%|Level | |||
!width=30%|Type of level | |||
!width=30%|Music theme | |||
|- | |- | ||
| align="center" |[[ | |align="center"|29||align="center"|[[Tropical Tightropes]]||align="center"|Jungle||align="center"|Jungle Jitter | ||
| | |||
| align="center" | | |||
| align="center" | | |||
|- | |- | ||
| align="center" |[[ | |align="center"|30||align="center"|[[Clifftop Critters]]||align="center"|Cliff||align="center"|Rockface Rumble | ||
| | |||
| align="center" | | |||
| align="center" | | |||
|- | |- | ||
| align="center" |[[ | |align="center"|31||align="center"|[[Rickety Rapids]]||align="center"|Falls||align="center"|Cascade Capers | ||
| | |||
| align="center" | | |||
| align="center" | | |||
|- | |- | ||
| align="center" |[[ | |align="center"|32||align="center"|[[Bazuka Bombard]]||align="center"|Machine||align="center"|Nuts and Bolts | ||
| | |||
| align="center" | | |||
| align="center" | | |||
|- | |- | ||
| align="center" |[[ | |align="center"|33||align="center"|[[Ugly Ducting]]||align="center"|Tube||align="center"|Cavern Caprice | ||
| | |||
| align="center" | | |||
| align="center" | | |||
|- | |- | ||
| align="center" |[[ | |align="center"|34||align="center"|[[Stalagmite Frights]]||align="center"|Cave||align="center"|Cavern Caprice | ||
| | |||
| align="center" | | |||
| align="center" | | |||
|- | |- | ||
| align="center" | | |align="center"|35||align="center"|BOSS LEVEL: [[K Rool Duel]]{{sic}}||align="center"|Tube||align="center"|Big Boss Blues | ||
| | |||
| align="center" | | |||
| align="center" | | |||
|- | |- | ||
!colspan=5 style="background:saddlebrown;color:white"align=center|{{color-link|Lost World (Donkey Kong Land III)|white|The Lost World}} | |||
! | |-style=background:#D3D3D3 align=center | ||
| | !width=5%|# | ||
!width=35%|Level | |||
!width=30%|Type of level | |||
!width=30%|Music theme | |||
|- | |- | ||
| align="center" |[[ | |align="center"|36||align="center"|[[Whiplash Dash]]||align="center"|Tube||align="center"|Hot Pursuit | ||
| | |||
| align="center" | | |||
| align="center" | | |||
|- | |- | ||
| align="center" | | |align="center"|37||align="center"|[[Kuchuka Karnage]]||align="center"|Machine||align="center"|Nuts and Bolts | ||
| | |||
| align="center" |[[ | |||
| align="center" | | |||
| | |||
| | |||
|- | |- | ||
| align="center" |[[ | |align="center"|38||align="center"|[[Haunted Hollows]]||align="center"|Cave||align="center"|Cavern Caprice | ||
| | |||
|- | |- | ||
| align="center" |[[ | |align="center"|39||align="center"|[[Rainforest Rumble]]||align="center"|Jungle||align="center"|Jungle Jitter | ||
| | |||
|- | |- | ||
| align="center" |[[ | |align="center"|40||align="center"|[[Barrel Boulevard]]||align="center"|Machine||align="center"|Nuts and Bolts | ||
| | |||
|- | |- | ||
| align="center" |[[ | |align="center"|41||align="center"|[[Ghoulish Grotto]]||align="center"|Cave||align="center"|Cavern Caprice | ||
| | |||
|- | |- | ||
| align="center" | | |align="center"|42||align="center"|BOSS LEVEL: [[K Rools Last Stand]]{{sic}}||align="center"|Cave||align="center"|Big Boss Blues | ||
| | |||
|} | |} | ||
{{br|left}} | |||
==Time Attack mode== | ==Time Attack mode== | ||
[[File:Time Attack GB menu.png|thumb|The Time Attack menu]] | [[File:Time Attack GB menu.png|thumb|The Time Attack menu]] | ||
[[File:Time Attack.png|thumb|left|[[Dixie Kong]] walking in Polar Pitfalls in the Time Attack mode]] | [[File:Time Attack.png|thumb|left|[[Dixie Kong]] walking in Polar Pitfalls in the Time Attack mode]] | ||
The player can unlock the Time Attack mode by completing the game with every [[Bonus Coin]], every [[DK Coin]], and by defeating Baron K. Roolenstein in the Lost World. | The player can unlock the Time Attack mode by completing the game with every [[Bonus Coin (Donkey Kong franchise)|Bonus Coin]], every [[DK Coin]], and by defeating Baron K. Roolenstein in the Lost World. This earns them a 97% [[completion]] score, and from the file select screen, the player always starts on the Time Attack menu from the save file in which they unlocked it. The player can select the "RE-ENTER GAME" option at the bottom to play the main game. | ||
Time Attack lists twelve levels on a wooden dashboard. Each of these levels do not appear under their usual name but rather named after their theme, such as "Cave" or "Machine". The objective of Time Attack is for [[Dixie Kong]] or [[Kiddy Kong]] to complete a level within a time limit. Once this is done in every level, the player completes the game entirely, with a 103% ranking. | Time Attack lists twelve levels on a wooden dashboard. Each of these levels do not appear under their usual name but rather named after their theme, such as "Cave" or "Machine". The objective of Time Attack is for [[Dixie Kong]] or [[Kiddy Kong]] to complete a level within a time limit. Once this is done in every level, the player completes the game entirely, with a 103% ranking. | ||
| Line 524: | Line 601: | ||
When the player starts the level, an on-screen timer appears at the bottom of the screen, keeping track of their time as move through the level. If the player completes the level under the default time or their previous time, it overwrites the previous time. If the player finishes a level below the default time, an exclamation mark appears next to the level's name. | When the player starts the level, an on-screen timer appears at the bottom of the screen, keeping track of their time as move through the level. If the player completes the level under the default time or their previous time, it overwrites the previous time. If the player finishes a level below the default time, an exclamation mark appears next to the level's name. | ||
In the Game Boy version, the most recent time is displayed on the bottom of the screen (unless the player exits a level with {{button|gb|start}}+{{button|gb|select}} or loses a life). | In the Game Boy version, the most recent time is displayed on the bottom of the screen (unless the player exits a level with {{button|gb|start}}+{{button|gb|select}} or loses a life). This was removed from the Game Boy Color version, a holdover from the [[List of Donkey Kong Land III pre-release and unused content#Japanese_Game_Boy_prototype|Japanese prototype]], which did not have enough ROM space to include this feature, and wasn't restored in the final release despite more available ROM space. | ||
{{br|left}} | {{br|left}} | ||
===Levels and times=== | ===Levels and times=== | ||
{|class="sortable" width=30% cellspacing=0 border=1 cellpadding=3 style="border-collapse:collapse;" | {|class="sortable"width=30% cellspacing=0 border=1 cellpadding=3 class="wikitable dk"style="border-collapse:collapse;" | ||
|-style="background:#D3D3D3;" | |-style="background:#D3D3D3;" | ||
!Theme | !Theme | ||
| Line 533: | Line 610: | ||
!Time | !Time | ||
|- | |- | ||
| align="center" |Stilt | |align="center"|Stilt | ||
| align="center" |[[Ford Knocks]] | |align="center"|[[Ford Knocks]] | ||
| align="center" |0:48.00 | |align="center"|0:48.00 | ||
|- | |- | ||
| align="center" |Mill | |align="center"|Mill | ||
| align="center" |[[Liftshaft Lottery]] | |align="center"|[[Liftshaft Lottery]] | ||
| align="center" |1:30.00 | |align="center"|1:30.00 | ||
|- | |- | ||
| align="center" |Snow | |align="center"|Snow | ||
| align="center" |[[Polar Pitfalls]] | |align="center"|[[Polar Pitfalls]] | ||
| align="center" |0:53.00 | |align="center"|0:53.00 | ||
|- | |- | ||
| align="center" |River | |align="center"|River | ||
| align="center" |[[Riverbank Riot]] | |align="center"|[[Riverbank Riot]] | ||
| align="center" |0:55.00 | |align="center"|0:55.00 | ||
|- | |- | ||
| align="center" |Coral | |align="center"|Coral | ||
| align="center" |[[Seabed Shanty]] | |align="center"|[[Seabed Shanty]] | ||
| align="center" |1:20.00 | |align="center"|1:20.00 | ||
|- | |- | ||
| align="center" |Tree | |align="center"|Tree | ||
| align="center" |[[Simian Shimmy]] | |align="center"|[[Simian Shimmy]] | ||
| align="center" |1:22.00 | |align="center"|1:22.00 | ||
|- | |- | ||
| align="center" |Cliff | |align="center"|Cliff | ||
| align="center" |[[Clifftop Critters]] | |align="center"|[[Clifftop Critters]] | ||
| align="center" |1:20.00 | |align="center"|1:20.00 | ||
|- | |- | ||
| align="center" |Machine | |align="center"|Machine | ||
| align="center" |[[Bazuka Bombard]] | |align="center"|[[Bazuka Bombard]] | ||
| align="center" |1:40.00 | |align="center"|1:40.00 | ||
|- | |- | ||
| align="center" |Falls | |align="center"|Falls | ||
| align="center" |[[Rickety Rapids]] | |align="center"|[[Rickety Rapids]] | ||
| align="center" |2:00.00 | |align="center"|2:00.00 | ||
|- | |- | ||
| align="center" |Cave | |align="center"|Cave | ||
| align="center" |[[Stalagmite Frights]] | |align="center"|[[Stalagmite Frights]] | ||
| align="center" |1:45.00 | |align="center"|1:45.00 | ||
|- | |- | ||
| align="center" |Jungle | |align="center"|Jungle | ||
| align="center" |[[Tropical Tightropes]] | |align="center"|[[Tropical Tightropes]] | ||
| align="center" |0:58.00 | |align="center"|0:58.00 | ||
|- | |- | ||
| align="center" |Tube | |align="center"|Tube | ||
| align="center" |[[Whiplash Dash]] | |align="center"|[[Whiplash Dash]] | ||
| align="center" |0:46.00 | |align="center"|0:46.00 | ||
|} | |} | ||
| Line 588: | Line 665: | ||
|width=160 | |width=160 | ||
|image1=Wrinkly Refuge DKL3.png | |image1=Wrinkly Refuge DKL3.png | ||
|caption1= | |caption1=English | ||
|image2=Wrinkly Refuge DKL3c.png | |image2=Wrinkly Refuge DKL3c.png | ||
|caption2= | |caption2=Japanese | ||
}} | }} | ||
While the Game Boy Color version of ''Donkey Kong Land III'' is a direct colored [[reissue|port]] of the original Game Boy release, it features a few differences. | |||
'''General changes:''' | '''General changes:''' | ||
*The player's | *The player's latest time is no longer displayed on [[#Time Attack mode|Time Attack]]. | ||
* | *Since the Game Boy Color has a faster CPU than the original Game Boy, the game has less slowdown. An example is in [[Clifftop Critters]], where less lag eliminates the possibility of the Kongs losing a life from falling too far down. | ||
**Additionally, the title screen's [[Jetty Jitters]] demo is not synchronized, and the Kongs cannot reach the end of the level. This is because of timing differences between the Game Boy and Game Boy Color, which has a faster CPU. | **Additionally, the title screen's [[Jetty Jitters]] demo is not synchronized, and the Kongs cannot reach the end of the level. This is because of timing differences between the Game Boy and Game Boy Color, which has a faster CPU. | ||
*In the original version, there was a bug where Dixie and Kiddy could enter the Lost World without enough [[DK Coin]]s; this was fixed for the Game Boy Color version. | *In the original version, there was a bug where Dixie and Kiddy could enter the Lost World without enough [[DK Coin]]s; this was fixed for the Game Boy Color version. | ||
'''Graphical changes:''' | '''Graphical changes:''' | ||
*The splash screen and title screen were slightly redesigned. | *The splash screen and title screen were slightly redesigned. | ||
* | *The world maps are no longer animated: the water and smoke no longer move, the mills no longer turn, and lights no longer flash from the interior of [[Wrinkly Refuge]] and [[Sheepy Shop]]. This is a holdover from the [[List of Donkey Kong Land III pre-release and unused content#Japanese_Game_Boy_prototype|Japanese prototype]], which did not have enough ROM space to include coding for the map animations, and wasn't restored in the final release despite more available ROM space. | ||
* | *[[Bear (Donkey Kong Land III)|Bear]] does not have any animation frames. | ||
*The | *The text appears on-screen one character at a time, unlike the original version, which displays all the text at once. | ||
*The screen no longer darkens when paused, making it less clear for when the game is paused. | |||
{{br}} | {{br}} | ||
=== | ===Revision differences=== | ||
Two versions of this game are known to exist for the North American release. | Two versions of this game are known to exist for the North American release. They can be distinguished from their two title screens. | ||
{{multiple image | {{multiple image | ||
|align=center | |align=center | ||
| Line 614: | Line 691: | ||
|image1=DKL3 Title Screen.png | |image1=DKL3 Title Screen.png | ||
|caption1=v1.0 | |caption1=v1.0 | ||
|image2=DKL3 Title Screen | |image2=DKL3 Title Screen rev1.png | ||
|caption2=v1.1 | |||
}} | |||
In both v1.1 and the Japanese version, a pit was added at the very end of [[Tundra Blunda]]. This was likely done to fix a minor bug that prevents the Steel Barrel from getting stuck if Kiddy goes to the very end and throws it. | |||
{{multiple image | |||
|align=center | |||
|direction=horizontal | |||
|width=160 | |||
|image1=Tundra Blunda end v1.png | |||
|caption1=v1.0 | |||
|image2=Tundra Blunda end v2.png | |||
|caption2=v1.1 | |caption2=v1.1 | ||
}} | }} | ||
==Cheat codes== | ==Cheat codes== | ||
Like its | Like its predecessor, ''Donkey Kong Land III'' has cheat codes that the player can input from the title screen by entering a certain button combination. When the player enters a cheat, a sound effect. The game uses the D-Pad for its button combination unlike ''Donkey Kong Land 2'', which uses the {{button|GB|A}} and {{button|GB|B}} buttons. Both versions of ''Donkey Kong Land III'' feature the same cheat codes: | ||
*Pressing {{button|Paddown}}, {{button|Paddown}}, {{button|Padup}}, {{button|Padleft}}, {{button|Padright}} grants Dixie and Kiddy fifty [[extra life|extra lives]]. | |||
*Pressing {{button|Padup}}, {{button|Padup}}, {{button|Paddown}}, {{button|Padleft}}, {{button|Padright}} allows the player to play [[cards]] after exiting from the title screen. | |||
*Pressing {{button|Padup}}, {{button|Paddown}}, {{button|Padleft}}, {{button|Padleft}}, {{button|Paddown}}, {{button|Padup}}, {{button|Padright}} unlocks every area, except for the Lost World initially. The [[Watch (Donkey Kong Land III)|Watch]]es, [[Bonus Coin (Donkey Kong franchise)|Bonus Coin]]s, and DK Coins are not unlocked. Once the Lost World is reachable, every level in this world is unlocked. | |||
*Pressing | *Pressing either {{button|Padleft}}, {{button|Padup}}, {{button|Paddown}}, or {{button|GB|Select}} changes the level shown in the title screen's gameplay demo (which plays after the title screen's music ends). The Kongs eventually die in every gameplay demo, except for the default [[Jetty Jitters]] demo in the original Game Boy version. The demo changes based on the number of times that the player presses the buttons: | ||
*Pressing | **First time: [[Rickety Rapids]] | ||
*Pressing | **Second time: [[Whiplash Dash]] | ||
*Pressing either | **Third time: [[Deep Reef Grief]] | ||
** | **Fourth time: Resets to Jetty Jitters | ||
** | |||
** | |||
** | |||
==Staff== | ==Staff== | ||
| Line 640: | Line 724: | ||
==Pre-release and unused content== | ==Pre-release and unused content== | ||
{{main|List of Donkey Kong Land III pre-release and unused content}} | {{main|List of Donkey Kong Land III pre-release and unused content}} | ||
==Reception== | ==Reception== | ||
{|class="wikitable | {| class="wikitable reviews" | ||
!colspan="4" style="font-size:120%; text-align: center; background-color:silver"|Reviews | !colspan="4"style="font-size:120%; text-align: center; background-color:silver"|Reviews | ||
|-style="background-color:#E6E6E6" | |-style="background-color:#E6E6E6" | ||
|Release | |Release | ||
| Line 662: | Line 734: | ||
|Comment | |Comment | ||
|- | |- | ||
|Nintendo 3DS | |[[Nintendo 3DS]] | ||
|Dave Frear, [http://www.nintendolife.com/reviews/3ds-eshop/donkey_kong_land_iii_gameboy Nintendo Life] | |Dave Frear, [http://www.nintendolife.com/reviews/3ds-eshop/donkey_kong_land_iii_gameboy Nintendo Life] | ||
|9/10 | |9/10 | ||
| Line 670: | Line 742: | ||
|Joe Merrick, [https://www.nintendo-insider.com/donkey-kong-land-iii-review/ Nintendo Insider] | |Joe Merrick, [https://www.nintendo-insider.com/donkey-kong-land-iii-review/ Nintendo Insider] | ||
|8/10 | |8/10 | ||
|align="left"|"''Donkey Kong Land III is a decent enough platformer, but it feels somewhat half-hearted. | |align="left"|"''Donkey Kong Land III is a decent enough platformer, but it feels somewhat half-hearted. There's less to do outside the stages and they aren't quite as creative as you'd expect from the series. That's not to say it is bad, as it does what it provides extremely well, rather that it falls short of expectation. There's still fun to be had, and it's definitely worth playing if you're a fan of the series.'" | ||
|- | |- | ||
|Nintendo 3DS | |Nintendo 3DS | ||
|Bryan Rose, [http://www.nintendoworldreport.com/review/40030/donkey-kong-land-iii-3ds-review-mini Nintendo World Report] | |Bryan Rose, [http://www.nintendoworldreport.com/review/40030/donkey-kong-land-iii-3ds-review-mini Nintendo World Report] | ||
|7/10 | |7/10 | ||
|align="left"|"'' | |align="left"|"''I've come to the same conclusion with Donkey Kong Land 3 as I have with its predecessor. It's a relatively fun game for a few hours, with tons of leeway for replay. The graphics were more annoying than DKL2, enough to impede gameplay, but in the end I still had fun with the game. It provides a few hours of enjoyable gameplay, and again it's a nice trip down memory lane.'" | ||
|- | |- | ||
!colspan="4" style="background-color:silver; font-size:120%; text-align: center;"|Aggregators | !colspan="4"style="background-color:silver; font-size:120%; text-align: center;"|Aggregators | ||
|-style="background-color:#E6E6E6" | |-style="background-color:#E6E6E6" | ||
|colspan=2|Compiler | |colspan=2|Compiler | ||
| Line 688: | Line 760: | ||
===Sales=== | ===Sales=== | ||
According to [[Rare Ltd.|Rareware]]'s website, 600,000 copies of ''Donkey Kong Land III'' had been produced as of | According to [[Rare Ltd.|Rareware]]'s website, 600,000 copies of ''Donkey Kong Land III'' had been produced as of 1998.<ref name=Rareware/> | ||
== | ==Gallery== | ||
{{main-gallery|Donkey Kong Land III}} | |||
<gallery> | |||
DKL3 Logo English NA.png|North American logo | |||
Game Over DKL3.png|[[Game Over]] (Game Boy) | |||
Coral Quarrel DKL3c.png|[[Coral Quarrel]] (Game Boy Color) | |||
DKL3 Title Screen rev1.png|Title screen running on [[Super Game Boy]] | |||
</gallery> | |||
==Media== | |||
{{main-media}} | |||
==Quotes== | |||
{{main|List of Donkey Kong Land III quotes}} | |||
==Names in other languages== | |||
{{foreign names | {{foreign names | ||
|Jap=ドンキーコング | |Jap=ドンキーコング{{ruby|GB|ジービー}} ディンキーコング{{ruby|&|アンド}}ディクシーコング | ||
|JapR=Donkī Kongu Jībī Dinkī Kongu ando Dikushī Kongu | |JapR=Donkī Kongu Jībī Dinkī Kongu ando Dikushī Kongu | ||
|JapM=Donkey Kong GB: Dinky Kong and Dixie Kong | |JapM=Donkey Kong GB: Dinky Kong and Dixie Kong | ||
| Line 698: | Line 785: | ||
==Trivia== | ==Trivia== | ||
*Despite his name being featured in the title, [[Donkey Kong]] does not appear in ''Donkey Kong Land III''. However, he is mentioned in the manual's story. Aside from ''[[Diddy Kong Racing]]'', this game is the only | *Despite his name being featured in the title, [[Donkey Kong]] does not appear in ''Donkey Kong Land III''. However, he is mentioned in the manual's story. Aside from ''[[Diddy Kong Racing]]'' and [[Diddy Kong Racing DS|its DS remake]], this game is the only title of the ''Donkey Kong'' series that he does not appear in. | ||
*The game's soundtrack consists of 8-bit re-orchestrations of the music from ''Donkey Kong Country 3''. However, the tracks "Frosty Frolics" and "Pokey Pipes" do not appear; the snow and pipe levels use "Cascade Capers" and "Cavern Caprice" instead, respectively. In addition, "Rocket Run" is programmed into the game—however, it is unused and can only be accessed by [http://www.youtube.com/watch?v=_Ac8Ru3u91w ROM hacking]. | *The game's soundtrack consists of 8-bit re-orchestrations of the music from ''Donkey Kong Country 3''. However, the tracks "Frosty Frolics" and "Pokey Pipes" do not appear; the snow and pipe levels use "Cascade Capers" and "Cavern Caprice" instead, respectively. In addition, "Rocket Run" is programmed into the game—however, it is unused and can only be accessed by [http://www.youtube.com/watch?v=_Ac8Ru3u91w ROM hacking]. | ||
==References== | ==References== | ||
{{NIWA|StrategyWiki=1}} | |||
<references/> | <references/> | ||
{{DKL3}} | {{DKL3}} | ||
{{ | {{Donkey Kong games}} | ||
{{GB}} | {{GB}} | ||
{{GBC}} | |||
[[Category:Games]] | [[Category:Games]] | ||
[[Category:Game Boy | [[Category:Game Boy games]] | ||
[[Category:Game Boy Color | [[Category:Game Boy Color games]] | ||
[[Category:1997 games]] | [[Category:1997 games]] | ||
[[Category:2000 games]] | [[Category:2000 games]] | ||
[[Category:Donkey Kong Land III|*]] | [[Category:Donkey Kong Land III|*]] | ||
[[Category:Platforming | [[Category:Platforming games]] | ||
[[Category:Player's Choice]] | [[Category:Player's Choice]] | ||
[[de:Donkey Kong Land III]] | [[de:Donkey Kong Land III]] | ||
[[it:Donkey Kong Land III]] | |||
Latest revision as of 20:13, April 7, 2024
| Donkey Kong Land III | |||||
|---|---|---|---|---|---|
  For alternate box art, see the game's gallery. | |||||
| Developer | Rareware | ||||
| Publisher | Nintendo | ||||
| Platform(s) | Game Boy, Game Boy Color, Virtual Console (Nintendo 3DS) | ||||
| Release date | Game Boy: Game Boy Color: Virtual Console (3DS): | ||||
| Genre | Platformer | ||||
| Rating(s) |
| ||||
| Mode(s) | Single player | ||||
| Media | Game Boy:
Game Boy Color:
Nintendo 3DS: | ||||
| Input | Game Boy:
Game Boy Color:
Nintendo 3DS:
| ||||
Donkey Kong Land III (also formatted as Donkey Kong Land 3)[3] is a platform game for the Game Boy developed by Rareware and published by Nintendo in 1997. It is closely based on the SNES game Donkey Kong Country 3: Dixie Kong's Double Trouble!, as it repurposes that game's graphical assets and thus features the same characters, enemies, and level environments. It also stars Dixie Kong and Kiddy Kong. Donkey Kong Land III is the third and final entry of the Donkey Kong Land series. Like its two predecessors, Donkey Kong Land III is housed on a yellow cartridge and has specific Super Game Boy enhancements, including a unique border of pocket watches.
The original Game Boy version was never released in Japan, and it instead received a Game Boy Color port in 2000. It is not dual-compatible with original Game Boy units, as evident from the transparent cartridge where it is contained. However, on September 9, 2020, a Japanese prototype of the Game Boy version was leaked. The Game Boy Color port was never released outside Japan.
Like its two predecessors, Donkey Kong Land III was released on the Nintendo 3DS's Virtual Console. The Game Boy Color port was released in Japan on May 7, 2014, while the original Game Boy version was released in Europe and Australia in October 2014 and North America in February 2015.
Story[edit]
Announcements of a contest to find the fabled Lost World, which was said to have dominated legends for centuries, attracted "would-be" explorers all over the world to seize the long awaited chance of fame and fortune. Donkey Kong, Diddy Kong, and Baron K. Roolenstein all hear of the contest, and the Kongs set out leaving Dixie Kong with her cousin, Kiddy Kong. Dixie wants to prove herself just as worthy as the other participants, so she decides to participate in the contest and takes Kiddy along with her. Kiddy is not that aware about what is going on and decides to follow Dixie into the jungle.
After traveling through the worlds, Dixie and Kiddy are confronted by Baron K. Roolenstein at the end of Tin Can Valley. To access the Lost World, Dixie and Kiddy must collect every DK Coin and Watch. Within the Lost World itself, the Kongs must collect all the DK Coins and the final Watch to engage in the final boss battle against Baron K. Roolenstein. When the Kongs defeat him, they are crowned as the victors of the contest. Baron K. Roolenstein then concedes the remaining six Watches and allows the Kongs to try out the Time Attack mode.
Gameplay[edit]
Donkey Kong Land III plays very similarly to Donkey Kong Land 2. The player controls two different characters, Dixie and Kiddy, and only one Kong appears on-screen at a time. Dixie and Kiddy retain most of their abilities from Donkey Kong Country 3: Dixie Kong's Double Trouble! Dixie can use her Helicopter Spin to whirl her ponytail on the ground or glide in midair. Kiddy is heavier and stronger and can defeat strong enemies such as Krumples by jumping on them, whereas Dixie cannot. In each world, the Kongs must complete the levels in order until reaching the world boss, whom the Kongs must defeat to unlock the next world.
As the Kongs explore a level, they must avoid enemies along the way and collect items such as bananas and bear coins along the way. Every Bonus Level is accessed from a Bonus Barrel, and the reward for completing a Bonus Level's objective is a Bonus Coin. Some levels have an Animal Barrel, which transform the Kongs into the pictured Animal Friend, whose abilities are often required to complete a level or to reach hidden areas. Each Animal Friend has their own set of abilities.
Each world has a Wrinkly Refuge, where Wrinkly Kong saves the player's progress, and a Sheepy Shop, which is run by a Bear. If Dixie and Kiddy have enough Bonus Coins, the Bar allows them to play the cards memorization minigame if they have at least a number of Bonus Coins. The Kongs are rewarded a Watch for the first time they complete a challenge in a world. In most levels, there is a Koin guarding the DK Coin, except for underwater levels, where the DK Coin appears by itself like in Donkey Kong Land 2. The Kongs are required to obtain every DK Coin and Watch to access the final World, the Lost World.
Characters[edit]
Playable characters[edit]
| Image | Name | Description | |
|---|---|---|---|
| GB | GBC | ||
| Dixie Kong | Dixie Kong is one of the two main protagonists. She can perform a Helicopter Spin to hover above pits and to spin into enemies. | ||
| Kiddy Kong | Kiddy is the younger cousin and sidekick of Dixie. He is the heavier Kong and can defeat stronger enemies such as Krumples with a jump attack. | ||
Supporting characters[edit]
| Image | Name | Description | |
|---|---|---|---|
| GB | GBC | ||
| Wrinkly Kong | Wrinkly is the only supporting Kong in the game. She resides in Wrinkly Refuge, with one appearing in each world. The Kongs can visit Wrinkly to have their game progress saved, always free of charge. | ||
| Bear | Bears operate a Sheepy Shop in every world, where the Kongs can play cards if they have collected enough Bonus Coins. The Kongs can spend bear coins for level hints or to use a Bear's teleportation device, which warps them to the Northern Kremisphere map. | ||
Animal Friends[edit]
All four Animal Friends in the game have previously appeared in Donkey Kong Country 3: Dixie Kong's Double Trouble!
| Image | Name | Description | First level appearance | Last level appearance | |
|---|---|---|---|---|---|
| GB | GBC | ||||
| Ellie | Unlike her previous appearance, Ellie the elephant can spray unlimited water projectiles from her trunk but cannot carry a barrel using her trunk. Ellie no longer runs away when she sees a Sneek. | Footloose Falls | Rainforest Rumble | ||
| Enguarde | Enguarde the swordfish is the aquatic Animal Friend of the game, and he can defeat enemies by stabbing them with his bill. Unlike Donkey Kong Land 2, Enguarde can no longer perform a super stab. | Seabed Shanty | Deep Reef Grief | ||
| Squawks | Squawks the parrot can fly around the area and use a nut-spitting attack to defeat enemies in his path, including Buzzes. | Minky Mischief | Ghoulish Grotto | ||
| Squitter | Squitter the spider can use a web spit attack and create web platforms to get over abysses or to gain height. | Koco Channel | Haunted Hollows | ||
Enemies[edit]
Kremlings[edit]
| Image | Name | Description | First level appearance | Last level appearance | |
|---|---|---|---|---|---|
| GB | GBC | ||||
| Bazuka | Bazukas appear in later levels of the game. They carry a large bazooka to shoot regular barrels at the Kongs. Unlike Donkey Kong Country 3: Dixie Kong's Double Trouble!, Bazukas cannot be defeated because there are no TNT Barrels, which are used to defeat Bazukas in their debut appearance. | Jungle Jeopardy | Barrel Boulevard | ||
| Klasp | Enemies who hide in an explosive TNT Barrel. They always hang from a rope and move back and forth in a fixed pattern. Dixie or Kiddy must avoid moving into a Klasp otherwise it explodes on them, injuring the Kong in play; this is otherwise the only way for the Kongs to defeat Klasps. | Jetty Jitters | Barrel Boulevard | ||
| Kobble | Kobbles are the basic Kremling grunt enemies. The Kongs can defeat them with any attack, but they must still avoid being hit by one. | Red Wharf | Ghoulish Grotto | ||
| Koin | A Koin appears in most levels and guards a DK Coin, which is attached to their shield. It wears a bucket on its head to protect itself from jump attacks. To defeat a Koin, the Kongs must pick up a nearby Steel Barrel and throw it behind Koin at a wall; the Steel Barrel rebounds and hits Koin from behind, which defeats it and rewards the DK Coin to the Kongs. | Red Wharf | Ghoulish Grotto | ||
| Kopter | Kopters carry two large helicopter blades which they spin to hover in the air. Unlike Donkey Kong Country 3: Dixie Kong's Double Trouble!, the Kongs can defeat a Kopter by jumping on it. | Footloose Falls | Ghoulish Grotto | ||
| Krimp | They are small Kremlings with large teeth. Krimps move back and forth, repeatedly opening and closing their mouth. The Kongs cannot roll into Krimp from the front, else it bites and injures the Kong. To defeat a Krimp, the Kongs must either jump on it or roll into it from behind. | Koco Channel | Rainforest Rumble | ||
| Krumple | Krumples are strong, muscular Kremlings that Dixie cannot defeat directly, although Kiddy can defeat a Krumple by jumping on it. Krumples can also be defeated by an Animal Friend or a barrel. | Jetty Jitters | Ghoulish Grotto | ||
| Krusha | Krushas are the direct successor to Klobbers, as both are Kremlings who hide in a barrel. When Dixie or Kiddy approach a Krusha, it pops out and runs after the Kong. Krushas cannot hurt the Kongs directly, and they attempt to knock them into a pit or a hazard. Dixie or Kiddy can jump on a Krusha to force it back into its barrel. The Kong can then pick up the barrel containing Krusha and throw it to defeat the enemy. | Liftshaft Lottery | Barrel Boulevard | ||
| Kuchuka | Kuchukas are idle Kremlings who hide inside a barrel, and they attack by throwing small bombs at the Kongs. Like Bazukas, they cannot be defeated because there are no TNT Barrels, and must be avoided by the Kongs. | Stalagmite Frights | Ghoulish Grotto | ||
| Rekoil | Rekoils bounce on their tail either in one spot or back and forth. The Kongs can defeat them with a jump attack. | Total Rekoil | Ghoulish Grotto | ||
| Skidda | Skidda are Kremlings who only appear in snow levels. They slide across the icy ground and can be defeated from any attack. | Black Ice Blitz | Tundra Blunda | ||
Other enemies[edit]
| Image | Name | Description | First level appearance | Last level appearance | |
|---|---|---|---|---|---|
| GB | GBC | ||||
| Bazza | Bazzas are barracudas who indefinitely swim in a straight line from one hole to the next. They can be defeated by Enguarde's stab. | Seabed Shanty | Deep Reef Grief | ||
| Booty Bird | They are fat birds with an item stored in their belly, such as a bear coin. To obtain the item, the Kongs must defeat the Booty Bird. | Ford Knocks | Bazuka Bombard | ||
| Bounty Bass | Bounty Basses are fat fish enemies found in the coral levels. Unlike their appearance in Donkey Kong Country 3: Dixie Kong's Double Trouble!, Bounty Basses do not contain an item. Like the other underwater enemies, Bounty Basses can be defeated by Enguarde. | Seabed Shanty | Haunted Hollows | ||
| Bristles | Bristles are porcupine enemies whose quills protect them from jump attacks. Dixie or Kiddy can defeat them by rolling in front. | Liftshaft Lottery | Ghoulish Grotto | ||
| Buzz | Buzzes are mechanical wasps who appear throughout the game. They are invulnerable to both Dixie's and Kiddy's attacks, and Buzzes can be defeated from a barrel or an Animal Friend. | Ford Knocks | Ghoulish Grotto | ||
| Karbine | They are owl-like robotic enemies that wield large carbines (hence their name). Karbines are always in the background, shooting fireballs at Dixie and Kiddy. The Kongs must avoid being hit by the fireballs. | Karbine Kaos | Barrel Boulevard | ||
| Koco | Kocos are clownfish enemies who swim around aimlessly. They can be defeated by Enguarde. | Seabed Shanty | Haunted Hollows | ||
| Lemguin | Lemguins jump out of underground holes and slide on the icy ground, just like penguins do. Their beak and even their back side are the parts of their body that harm the Kongs. They can be defeated by stomping them on the top. | Polar Pitfalls | Tundra Blunda | ||
| Lurchin | They are urchin enemies with spiky shells to protect themselves, even from Enguarde's stab. Lurchins have a squish core, which they repeatedly open and close their shell within. Enguarde can defeat a Lurchin by stabbing it in the center. | Seabed Shanty | Haunted Hollows | ||
| Minky | Minkys are monkeys who throw acorns to attack the Kongs. Minkys cannot be defeated, and the Kongs must avoid taking damage from their acorns. | Minky Mischief | Simian Shimmy | ||
| Nid | Nids are jumping spiders with a plank of wood on their back. If Dixie or Kiddy sit on a Nid, it bounces them to a higher area. Nids are more like an ally because they are required for the Kongs to progress. | Minky Mischief | Simian Shimmy | ||
| Niknak | Niknaks are beetle enemies which stay in one spot while in midair. The Kongs can jump from them to get across gaps. | Ford Knocks | Rainforest Rumble | ||
| Sneek | Sneeks are rats and one of weakest enemies in the game. They walk aimlessly on the ground, and the Kongs can defeat them with any attack. | Red Wharf | Ghoulish Grotto | ||
Bosses[edit]
| Image | Name | Description | |
|---|---|---|---|
| GB | GBC | ||
| Barbos | Barbos is a large Lurchin and the first boss of the game, and it is fought at Barbos Bastion from Cape Codswallop. The Kongs transform into Enguarde for the battle. Barbos attacks by releasing three Lurchins, one of which stops in front of Enguarde. He must stab the Lurchin once it is open, causing the Lurchin to bounce off the wall and hit Barbos. | ||
| Bleak | Bleak is a large snowman and the second boss, and he is fought at Bleak Magic from Primate Plains. During the battle, Bleaks stand in one spot, shooting large snowballs from his hat at the Kongs. Dixie or Kiddy can attack Bleak by throwing a barrel at him. After being hit four times, Bleak gets defeated. | ||
| Arich | Arich is a large spider and the third boss, and it is fought at Arich Attack from Blackforest Plateau. Arich attacks by either descending at the Kongs or by spitting small balls of venom at them. The Kongs must jump on Arich four times to defeat it. | ||
| KAOS | KAOS is a robot programmed by K. Rool to destroy Dixie and Kiddy. It is the fourth boss and is fought at Krazy Kaos from Great Ape Lakes. During the battle, KAOS attempts to roast the Kongs by releasing flames from below. The Kongs must quickly run under KAOS before it releases a flame from its pipe. After some time, KAOS stops in the center of the arena and starts to send out blade-like platforms. This gives Dixie and Kiddy a chance to attack KAOS, by jumping on his head. The Kongs must quickly jump from the platforms before KAOS sends out a punching glove to knock them off. | ||
| K .Rool | K .Rool is the main antagonist of the game. He is the fifth and last boss who is fought twice: first at K Rool Duel in Tin Can Valley, and later at K Rools Last Stand in the Lost World.
During the first battle, K .Rool tries to attack the Kongs by shooting electric beams at them, and he also uses his jetpack to fly around the area. To attack K .Rool, Dixie or Kiddy must throw a barrel at him. K .Rool gets defeated after being hit four times. In the second battle, K .Rool retains most of his attacks except that he also throws bombs. When K .Rool is defeated again, the Kongs complete their adventure. | ||
Items and objects[edit]
It has been requested that more images be uploaded for this section. Remove this notice only after the additional image(s) have been added. Reason: Need image for Watch and version differences
| Image | Name | Description | |
|---|---|---|---|
| GB | GBC | ||
| Banana | There are numerous bananas floating in every level. If the Kongs collect 100 bananas, they get an extra life, and the counter resets to zero. | ||
| Banana Bunch | By collecting a Banana Bunch, Dixie or Kiddy are rewarded ten bananas. Banana Bunches are less common than regular bananas. | ||
| Bear coins | Collectable currency that Dixie and Kiddy can use at the Sheepy Shop for Bear's teleportation service or to play cards for the first time. | ||
| Bonus Coins | One appears at the end of every Bonus Level or by completing its objective. The Kongs are required to collect them to play the cards challenge in each world. | ||
| DK Coins | They are large, golden coins with the "DK" logo. A DK Coin is guarded by a Koin in every level (except underwater levels, where the DK Coin is found by itself). Dixie and Kiddy are required to collect the DK Coins to enter the Lost World. | ||
| Extra Life Balloons | These balloons grant an extra life to the Kongs if they collect it. They are usually hidden or in hard-to-reach areas. | ||
| KONG Letters | A set of four letters found in every level, in order from K to G. If the Kongs collect all four KONG Letters, they earn an extra life. | ||
| Watch | The Kongs are rewarded a Watch for completing a cards challenge the first time for each world. Like DK Coins, the Watches are also required for entering the Lost World. | ||
Barrels[edit]
| Image | Name | Description | |
|---|---|---|---|
| GB | GBC | ||
| Animal Barrels | By entering an Animal Barrel, the Kongs are transformed into the pictured Animal Friend. | ||
| Barrels | These are objects that the Kongs can pick up and throw to attack enemies If a barrel is thrown on the ground, it rolls until hitting a wall. | ||
| Barrel Cannons | These barrels have an opening in the top and are found in midair. The Kongs can blast from them to reach higher areas or to get across gaps. Barrel Cannons often appear in midair. | ||
| Booster Barrels | When Dixie or Kiddy enter a Booster Barrel, it blasts up like a rocket, and upon reaching a certain height, usually at a platform, the Booster Barrel blasts out the active Kong. Booster Barrels only appear in a few levels, all of which they appear throughout. | ||
| DK Barrels | Like Donkey Kong Land 2, every DK Barrel in the game appears in midair. If Dixie or Kiddy are missing their partner, they can jump at a DK Barrel to release the missing Kong. The DK Barrels have no effect if both Kongs are present. | ||
| Ghost Barrels | Ghost Barrels appear in cave areas, and they are similar to Auto-Fire Barrels except they constantly vanish and reappear. Some Boo Barrels point in the direction of a Buzz, and the Kongs must wait for these Boo Barrels to disappear to avoid being blasted into a Buzz. | ||
| Steel Barrels | Steel Barrels are similar to regular barrels except they can bounce off walls. A Steel Barrel is required to defeat the Koin of a level. | ||
| Tracker Barrels | A type of Barrel Cannon which the player can move left or right as it automatically blasts Dixie or Kiddy in midair. It automatically follows the Kongs until they land. | ||
| Warp Barrels | Warp Barrels take the Kongs to the end of a level. They are found at the start in just the Cape Codswallop levels. Warp Barrels are invisible and are only revealed when the Kongs enter one. | ||
Levels[edit]

There are six worlds in Donkey Kong Land III, and each of them have six levels and a boss level. Each level has a similar theme to those from Donkey Kong Country 3: Dixie Kong's Double Trouble! There are two Bonus Levels in every regular level.
| Levels and Bonus Areas | ||||
|---|---|---|---|---|
| Cape Codswallop | ||||
| # | Level | Type of level | Music theme | |
| 1 | Red Wharf | Stilt | Stilt Village | |
| 2 | Seabed Shanty | Coral | Water World | |
| 3 | Ford Knocks | Stilt | Stilt Village | |
| 4 | Total Rekoil | Mill | Mill Fever | |
| 5 | Koco Channel | River | Enchanted Riverbank | |
| 6 | Liftshaft Lottery | Mill | Mill Fever | |
| 7 | BOSS LEVEL: Barbos Bastion | Coral | Big Boss Blues | |
| Primate Plains | ||||
| # | Level | Type of level | Music theme | |
| 8 | Coral Quarrel | Coral | Water World | |
| 9 | Minky Mischief | Tree | Treetop Tumble | |
| 10 | Jetty Jitters | Stilt | Stilt Village | |
| 11 | Black Ice Blitz | Snow | Hot Pursuit | |
| 12 | Riverbank Riot | River | Enchanted Riverbank | |
| 13 | Miller Instinct | Mill | Mill Fever | |
| 14 | BOSS LEVEL: Bleak Magic | Snow | Big Boss Blues | |
| Blackforest Plateau | ||||
| # | Level | Type of level | Music theme | |
| 15 | Rocketeer Rally | Falls | Cascade Capers | |
| 16 | Vertigo Verge | Cliff | Rockface Rumble | |
| 17 | Polar Pitfalls | Snow | Cascade Capers | |
| 18 | Surface Tension | River | Enchanted Riverbank | |
| 19 | Tundra Blunda | Snow | Cascade Capers | |
| 20 | Redwood Rampage | Tree | Treetop Tumble | |
| 21 | BOSS LEVEL: Arich Attack | Tree | Big Boss Blues | |
| Great Ape Lakes | ||||
| # | Level | Type of level | Music theme | |
| 22 | Jungle Jeopardy | Jungle | Jungle Jitter | |
| 23 | Footloose Falls | Falls | Cascade Capers | |
| 24 | Deep Reef Grief | Coral | Water World | |
| 25 | Karbine Kaos | Machine | Nuts and Bolts | |
| 26 | Simian Shimmy | Tree | Treetop Tumble | |
| 27 | Rockface Chase | Cliff | Rockface Rumble | |
| 28 | BOSS LEVEL: Krazy Kaos | Machine | Big Boss Blues | |
| Tin Can Valley | ||||
| # | Level | Type of level | Music theme | |
| 29 | Tropical Tightropes | Jungle | Jungle Jitter | |
| 30 | Clifftop Critters | Cliff | Rockface Rumble | |
| 31 | Rickety Rapids | Falls | Cascade Capers | |
| 32 | Bazuka Bombard | Machine | Nuts and Bolts | |
| 33 | Ugly Ducting | Tube | Cavern Caprice | |
| 34 | Stalagmite Frights | Cave | Cavern Caprice | |
| 35 | BOSS LEVEL: K Rool Duel[sic] | Tube | Big Boss Blues | |
| The Lost World | ||||
| # | Level | Type of level | Music theme | |
| 36 | Whiplash Dash | Tube | Hot Pursuit | |
| 37 | Kuchuka Karnage | Machine | Nuts and Bolts | |
| 38 | Haunted Hollows | Cave | Cavern Caprice | |
| 39 | Rainforest Rumble | Jungle | Jungle Jitter | |
| 40 | Barrel Boulevard | Machine | Nuts and Bolts | |
| 41 | Ghoulish Grotto | Cave | Cavern Caprice | |
| 42 | BOSS LEVEL: K Rools Last Stand[sic] | Cave | Big Boss Blues | |
Time Attack mode[edit]


The player can unlock the Time Attack mode by completing the game with every Bonus Coin, every DK Coin, and by defeating Baron K. Roolenstein in the Lost World. This earns them a 97% completion score, and from the file select screen, the player always starts on the Time Attack menu from the save file in which they unlocked it. The player can select the "RE-ENTER GAME" option at the bottom to play the main game.
Time Attack lists twelve levels on a wooden dashboard. Each of these levels do not appear under their usual name but rather named after their theme, such as "Cave" or "Machine". The objective of Time Attack is for Dixie Kong or Kiddy Kong to complete a level within a time limit. Once this is done in every level, the player completes the game entirely, with a 103% ranking.
When the player starts the level, an on-screen timer appears at the bottom of the screen, keeping track of their time as move through the level. If the player completes the level under the default time or their previous time, it overwrites the previous time. If the player finishes a level below the default time, an exclamation mark appears next to the level's name.
In the Game Boy version, the most recent time is displayed on the bottom of the screen (unless the player exits a level with ![]() +
+![]() or loses a life). This was removed from the Game Boy Color version, a holdover from the Japanese prototype, which did not have enough ROM space to include this feature, and wasn't restored in the final release despite more available ROM space.
or loses a life). This was removed from the Game Boy Color version, a holdover from the Japanese prototype, which did not have enough ROM space to include this feature, and wasn't restored in the final release despite more available ROM space.
Levels and times[edit]
| Theme | Level | Time |
|---|---|---|
| Stilt | Ford Knocks | 0:48.00 |
| Mill | Liftshaft Lottery | 1:30.00 |
| Snow | Polar Pitfalls | 0:53.00 |
| River | Riverbank Riot | 0:55.00 |
| Coral | Seabed Shanty | 1:20.00 |
| Tree | Simian Shimmy | 1:22.00 |
| Cliff | Clifftop Critters | 1:20.00 |
| Machine | Bazuka Bombard | 1:40.00 |
| Falls | Rickety Rapids | 2:00.00 |
| Cave | Stalagmite Frights | 1:45.00 |
| Jungle | Tropical Tightropes | 0:58.00 |
| Tube | Whiplash Dash | 0:46.00 |
Version differences[edit]


While the Game Boy Color version of Donkey Kong Land III is a direct colored port of the original Game Boy release, it features a few differences.
General changes:
- The player's latest time is no longer displayed on Time Attack.
- Since the Game Boy Color has a faster CPU than the original Game Boy, the game has less slowdown. An example is in Clifftop Critters, where less lag eliminates the possibility of the Kongs losing a life from falling too far down.
- Additionally, the title screen's Jetty Jitters demo is not synchronized, and the Kongs cannot reach the end of the level. This is because of timing differences between the Game Boy and Game Boy Color, which has a faster CPU.
- In the original version, there was a bug where Dixie and Kiddy could enter the Lost World without enough DK Coins; this was fixed for the Game Boy Color version.
Graphical changes:
- The splash screen and title screen were slightly redesigned.
- The world maps are no longer animated: the water and smoke no longer move, the mills no longer turn, and lights no longer flash from the interior of Wrinkly Refuge and Sheepy Shop. This is a holdover from the Japanese prototype, which did not have enough ROM space to include coding for the map animations, and wasn't restored in the final release despite more available ROM space.
- Bear does not have any animation frames.
- The text appears on-screen one character at a time, unlike the original version, which displays all the text at once.
- The screen no longer darkens when paused, making it less clear for when the game is paused.
Revision differences[edit]
Two versions of this game are known to exist for the North American release. They can be distinguished from their two title screens.


In both v1.1 and the Japanese version, a pit was added at the very end of Tundra Blunda. This was likely done to fix a minor bug that prevents the Steel Barrel from getting stuck if Kiddy goes to the very end and throws it.


Cheat codes[edit]
Like its predecessor, Donkey Kong Land III has cheat codes that the player can input from the title screen by entering a certain button combination. When the player enters a cheat, a sound effect. The game uses the D-Pad for its button combination unlike Donkey Kong Land 2, which uses the ![]() and
and ![]() buttons. Both versions of Donkey Kong Land III feature the same cheat codes:
buttons. Both versions of Donkey Kong Land III feature the same cheat codes:
- Pressing
 , ,
, ,  ,
,  ,
,  grants Dixie and Kiddy fifty extra lives.
 - Pressing , , , , allows the player to play cards after exiting from the title screen.
- Pressing , , , , , , unlocks every area, except for the Lost World initially. The Watches, Bonus Coins, and DK Coins are not unlocked. Once the Lost World is reachable, every level in this world is unlocked.
- Pressing either , , , or
 changes the level shown in the title screen's gameplay demo (which plays after the title screen's music ends). The Kongs eventually die in every gameplay demo, except for the default Jetty Jitters demo in the original Game Boy version. The demo changes based on the number of times that the player presses the buttons:
- First time: Rickety Rapids
- Second time: Whiplash Dash
- Third time: Deep Reef Grief
- Fourth time: Resets to Jetty Jitters
Staff[edit]
- Main article: List of Donkey Kong Land III staff
Glitches[edit]
- Main article: List of Donkey Kong Land III glitches
Pre-release and unused content[edit]
Reception[edit]
| Reviews | |||
|---|---|---|---|
| Release | Reviewer, Publication | Score | Comment |
| Nintendo 3DS | Dave Frear, Nintendo Life | 9/10 | "Rare have once again stuck a lot of content into the game, providing good value for your money. Like the rest of the series it features a varied collection of enemies and locations for you to work your way through. It may not do anything new but it does do things well. Donkey Kong Land III is a good looking, great sounding Game Boy title, but more importantly it's a lot of fun to play. The best of the DKL trilogy and one of the best options for 3DS-owning platform fans.'" |
| Nintendo 3DS | Joe Merrick, Nintendo Insider | 8/10 | "Donkey Kong Land III is a decent enough platformer, but it feels somewhat half-hearted. There's less to do outside the stages and they aren't quite as creative as you'd expect from the series. That's not to say it is bad, as it does what it provides extremely well, rather that it falls short of expectation. There's still fun to be had, and it's definitely worth playing if you're a fan of the series.'" |
| Nintendo 3DS | Bryan Rose, Nintendo World Report | 7/10 | "I've come to the same conclusion with Donkey Kong Land 3 as I have with its predecessor. It's a relatively fun game for a few hours, with tons of leeway for replay. The graphics were more annoying than DKL2, enough to impede gameplay, but in the end I still had fun with the game. It provides a few hours of enjoyable gameplay, and again it's a nice trip down memory lane.'" |
| Aggregators | |||
| Compiler | Platform / Score | ||
| GameRankings | 81.25% | ||
Sales[edit]
According to Rareware's website, 600,000 copies of Donkey Kong Land III had been produced as of 1998.[2]
Gallery[edit]
- For this subject's image gallery, see Gallery:Donkey Kong Land III.
North American logo
Game Over (Game Boy)
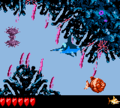
Coral Quarrel (Game Boy Color)

Title screen running on Super Game Boy


Media[edit]
- For a complete list of media for this subject, see List of Donkey Kong Land III media.
Quotes[edit]
- Main article: List of Donkey Kong Land III quotes
Names in other languages[edit]
| Language | Name | Meaning |
|---|---|---|
| Japanese | ドンキーコング Donkī Kongu Jībī Dinkī Kongu ando Dikushī Kongu |
Donkey Kong GB: Dinky Kong and Dixie Kong |
Trivia[edit]
- Despite his name being featured in the title, Donkey Kong does not appear in Donkey Kong Land III. However, he is mentioned in the manual's story. Aside from Diddy Kong Racing and its DS remake, this game is the only title of the Donkey Kong series that he does not appear in.
- The game's soundtrack consists of 8-bit re-orchestrations of the music from Donkey Kong Country 3. However, the tracks "Frosty Frolics" and "Pokey Pipes" do not appear; the snow and pipe levels use "Cascade Capers" and "Cavern Caprice" instead, respectively. In addition, "Rocket Run" is programmed into the game—however, it is unused and can only be accessed by ROM hacking.
References[edit]
- ^ Nintendo - Customer Service | Game List. support.nintendo.com. Retrieved March 16, 2023.
- ^ a b Rare. Donkey Kong Country 3. Rarewhere (Internet Archive: Wayback Machine). Retrieved February 18, 2015.
- ^ Donkey Kong Land 3 on Rareware's official website (Wayback Machine)
| Game Boy games | |
|---|---|
| Super Mario franchise | Alleyway (1989) • Baseball (1989) • Super Mario Land (1989) • Golf (1989) • Dr. Mario (1990) • Super Mario Land 2: 6 Golden Coins (1992) • Donkey Kong (1994) • Mario's Picross (1995) • Picross 2 (1996) |
| Donkey Kong franchise | Donkey Kong (1994) • Donkey Kong Land (1995) • Donkey Kong Land 2 (1996) • Donkey Kong Land III (1997) |
| Yoshi franchise | Yoshi (1991) • Yoshi's Cookie (1992) • Tetris Attack (1996) |
| Wario franchise | Wario Land: Super Mario Land 3 (1994) • Wario Blast: Featuring Bomberman! (1994) • Wario Land II (1998) |
| Miscellaneous | Tetris (1989) • The Legend of Zelda: Link's Awakening (1993) • Game & Watch Gallery (1997) • Game & Watch Gallery 2 (1997) |
| Game Boy Color games | |
|---|---|
| Super Mario franchise | Super Mario Bros. Deluxe (1999) • Mario Golf (1999) • Mario Tennis (2000) • Mobile Golf (2001) • Mario Family (2001) |
| Donkey Kong franchise | Donkey Kong GB: Dinky Kong & Dixie Kong (2000) • Donkey Kong Country (2000) |
| Wario franchise | Wario Land II* (1998) • Wario Land 3 (2000) |
| Other | Game & Watch Gallery 2* (1998) • The Legend of Zelda: Link's Awakening DX* (1998) • Game & Watch Gallery 3* (1999) |