Windy Well (Donkey Kong Country 2: Diddy's Kong Quest): Difference between revisions
mNo edit summary |
No edit summary |
||
| Line 58: | Line 58: | ||
==Names in Other Languages== | ==Names in Other Languages== | ||
{{foreignname | {{foreignname | ||
|Jap=かぜのこうざん | |||
|JapR=Kaze no Kōzan | |||
|JapM=Wind Mine | |||
|Spa=Pozo Ventoso | |Spa=Pozo Ventoso | ||
|SpaM=Literal translation | |SpaM=Literal translation | ||
Revision as of 15:16, May 27, 2013
Template:LevelboxDKL2 2 Windy Well is the twenty-ninth level of the game Donkey Kong Country 2: Diddy's Kong Quest (thirty-first of the Game Boy Advance remake) Donkey Kong Land 2. It is also the second area (fourth in the Game Boy Advance remake) of K. Rool's Keep.
Taking place in the final mine shaft of the games, the Kongs will notice strong winds that pull them up through the level when they jump. The wind in this level will become very important to the Kongs' quest, as it is needed to reach the top of the shaft. Although helping them though, the wind also can be a disadvantage, as it will not allow them to backtrack when they are at a certain floor. Because of this, they are unable to reach certain Bonus Barrels that are already passed, as well as the DK Coin. Kutlass, Kannons, Krooks, Klobbers, Zingers, Click-Clacks, Flitters, Spinys, a single Klampon and a single Kruncha all dwell in this mine. In Donkey Kong Land 2, the level is well populated by Zingers, as well as a few Neeks and Spinies.
Level Layout
Donkey Kong Country 2
When they start the level, the heroes must cross a few gaps and try not to fall off the small platforms between them, as the Click-Clacks on them can be quite an obstacles. Soon, they monkeys must jump up and be lifted upwards by the strong winds. When they get on the platform above, the heroes must ascend again and sneak between some Zingers to get to another platform. Here, they will have to dodge a Kutlass and cross a gap. They will then get to a hook, which must be hopped off of for the wind to pick them up again.
The Kongs must travel around many Zingers as they come up to the next platform, where they must then jump between several Zingers without being pulled into them by the winds. The group must make their way east, and jump off of a hook to journey even higher. When they avoid all the Zingers and get to the next platform, they will need to jump up again and travel higher. This time, they will meet only a few Zingers, although they will encounter a Krook, too, and he can be a big hazard if they aren't careful.
At the platform above this foe, the Kongs must ascend to a barrel and shoot up to a few more platforms. The monkeys' time on solid ground won't last long through, because they will have to jump yet again and wind travel to another platform. They will have to go west from here, however, there is a large wall of three Zingers blocking their path. So, they should carefully float under these foes with the wind, and get to the next platform. Jumping here will cause the wind to pick them up again, and drag them to an area cluttered with all kinds of Zingers. Once these foes are all passed, the monkeys will land on a platform with the Star Barrel on it.
Halfway through the level, the Kongs must climb up a few more platforms and watch ot for a couple of Krooks. Soon, they will have to journey east, although there are several Zingers in the way. They must jump between the foes as they move back and fourth. This would normally be easily, however, the wind will pull the heroes up to the top Zinger, so it can be tricky. Once passed this area, the heroes must jump up again to get to glide up to another platform. Several prizes float above them at this point, but they shouldn't get them, and instead travel west, where they will have to cling onto some hooks, then jump off. The wind will pick them up and take them to a higher floor. When they travel upwards, though, they must be careful, as there are Krooks hanging around on the sides. The heroes must try to avoid the hooks thrown at them, and shortly after get to the platform above. Here, they should follow the banana trail to another platform, and then jump at this point to be lifted up by the wind again.
As the Kongs ascend, they will encounter many Zingers flying all around. They need to use their skills to get away from the wasps, and then land on a small platform. Right after landing on it, though, they should hop again and by pulled higher. They will have to make their way to the platform in the far corner of the area then, and hop west.
The wind will pick them up, by not pull them too high. Instead, it will keep them at a certain level, as the heroes slide under the nearby group of Zingers. After passing these foes, they must make a turn in direction, and ascend north. As they go, they will need to watch out for several Zingers and finally make it back up to land. But, they have to jump again here, and travel higher into the mine shaft. Four Krooks will be throwing their weapons at the Kongs as they float upwards, followed by a swarm of Zingers that must be avoided at all cost. Finally, though, Diddy Kong and Dixie Kong will make it to the highest platform, where they must walk east and cross a small gap. The End of Level Target is nearby, and they should hit it to exit the level.
Donkey Kong Land 2
At the beginning of this mine shaft level, the Kongs must jump up to the platform to the right and jump again. The wind will suddenly begin to pull them upwards. When they land on the platform above, they must hop to a few more platforms and jump again. This time, they will be lifted into an area filled with a few Zingers. They should carefully maneuver around the wasps and get to the next platform, then grab onto a hook nearby. When they jump off of the hook, the wind will pick them up again and drag them farther up the shaft. After they get around the several Zingers in the air, the monkeys must climb up a few more platforms, while beating some Neeks.
Soon, the wind will pull them upwards again, and they will need to watch out for even more Zingers. Once at the next platform, the heroes must climb a little higher and jump to catch a gust of wind. This wind won't take them very far upwards, but it can help them get over a large gap to the left. As they travel, though, there are a few Zingers in their path that they will have to slip under. After that, they should cling onto some hooks and make their way to a higher are, where they will need to lift off and wind-travel to the right, where they will grab onto another hook. Once the Kongs jump off of this hook, they will be lifted up at a far distance through the air. Many Zingers are swarming through the area, too, and they will stop at nothing to beat the heroes. Eventually, the monkeys will stop at a platform and be able to break open the Star Barrel.
From there, the group will have to jump and be dragged by the wind to another area. Here, they must jump up a few other platforms and watch out for a few enemies, including a lone Kannon. The must then lift off to a few higher platforms and dodge several Zingers on the way. Soon, they will be at a long platform, where they must grab onto a hook and leap off to be pulled upward by the wind again. The heroes must travel east through the air and sneak under a Zinger to get to the next platform, which has another hook that will need to be jumped off of to catch the wind. This time, the wind will again, not take them too far upwards. Therefore, the monkeys must get under a lone Zinger, and finally get on a nearby platform. They should hop up the platforms above this and follow a banana trail to the last platform of that area, where they will have to life off into the air again.
The monkeys will have to avoid some more Zingers as they go up, until they get to the letter N, and the wind lets them go. At this point, the group must make their way up a few platforms to get to a hook. When they jump off of this, the wind will pick them up again, and lead them into a Zinger-filled area. They will have to maneuver around all of them, until finally ascending to the very top platform of the level. Here, they will see a spring, and it will let them exit the level with hit.
Secrets
Donkey Kong Country 2
Bonus Levels
- A little while before the Star Barrel, the group will pass a Krook and land on a platform with a DK Barrel above it. They monkeys should head left from there and end up on a platform with a Kruncha and a Banana Coin. If they cartwheel under the platform with the Kruncha on it, they will go around a Zinger and onto a lower platform with the Bonus Barrel on it. The monkeys will have to enter the barrel to get in the Bonus Level. Here, they must jump up to the banana trail above and by blown upwards to a hook. From there, they must bounce off a several Flitters to land on a platform with the Kremkoin on it.
- At the very end of the level, they Kongs will notice a Kutlass and a Klobber on a platform under the End of Level Target. They should go around the platform they are on to reach the foes, and beat the Klobber. With the barrel this enemy was in, the monkeys must defeat the Kutlass nearby, and enter the Bonus Barrel behind him. It will take them to the Bonus Level, where they must grab onto Squawks the Parrot and ride through the bramble area. There are stars placed in the center of the bonus that must be collected. When all is obtained, the heroes must grab the Kremkoin.
DK Coin
After the Kongs pass a few Krooks in mid-air, they will be a on long platform with three bananas above them. Normally, they would jump up to grab the bananas and be pulled upwards by the wind, but this time, they should jump off the platform to the right. Then, they must slowly be pulled by upwards by the wind, while will lead them up to a few Zingers. The monkeys must head east in the air avoid touching one of the foes. If they go far enough east, they will come up to the DK Coin, and then be able to get back up on the platform above.
Golden Feather (Game Boy Advance Only)
At the start of the level, the heroes must get to the platform with the first DK Barrel above it. They should not jump up to hit the barrel, but instead cartwheel under it. They will grab the Golden Feather when they do this, and then be shot back to the platform by a Blast Barrel.
Donkey Kong Land 2
Bonus Level(s)
- After the Kongs are lifted to the area by the third gust of wind, they will see a lone banana floating to the right of the platform they are on. They should walk up to it and fall off the platform, then continue right to find the hidden Bonus Barrel. In it's Bonus Level, the monkeys must use three barrels to shoot themselves up to many stars. When all the stars are collected, the Kremkoin will appear.
DK Coin
Once the Kongs pass the Star Barrel, they must jump up and be pulled to the next platform by the strong winds. From here, they should jump up a few long platforms to the left. On the second platform up, they will find a Spiny, as well as the DK Coin.
Names in Other Languages
Gallery
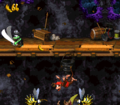
The Kongs float up to another floor.
- Windy place65.jpg
Diddy and Dixie near the End of Level Target.

Trivia
- In the Game Boy Advance remake of Donkey Kong Country 2, this level and the next level, Castle Crush, have switched positions, with Clapper's Cavern between them.