Temple Tempest: Difference between revisions
mNo edit summary |
m (Text replacement - "<br />" to "<br>") |
||
| (34 intermediate revisions by 16 users not shown) | |||
| Line 1: | Line 1: | ||
{{ | {{DKC level infobox | ||
|image=[[File:Temple Tempest.png]] | |||
|image=[[File:Temple Tempest.png | |code=3 - 4 (SNES & GBC)<br>3 - 6 (GBA) | ||
|code=3 - 4 (SNES | |||
|world=[[Vine Valley (world)|Vine Valley]] | |world=[[Vine Valley (world)|Vine Valley]] | ||
|game=''[[Donkey Kong Country]] | |game=''[[Donkey Kong Country]] | ||
| | |before2=[[Forest Frenzy|<<]] | ||
|after2=[[Orang-utan Gang|>>]] | |||
| | |before3=[[Clam City|<<]] | ||
| | |after3=[[Bumble B. Rumble|>>]] | ||
| | |track=Voices of the Temple | ||
| | |||
}} | }} | ||
'''Temple Tempest''' is the fourteenth level of ''[[Donkey Kong Country]]'' | '''Temple Tempest''' is the fourteenth level of ''[[Donkey Kong Country]]'' and the fourth level of [[Vine Valley (world)|Vine Valley]]. In the [[Game Boy Advance]] version, Temple Tempest was made the sixth and last regular level of Vine Valley and the sixteenth level overall, pushing [[Orang-utan Gang|the previous]] [[Clam City|two levels]] backward. Similarly to [[Millstone Mayhem]], the previous temple level, Temple Tempest has many [[Gnawty|Gnawties]] riding [[millstone]]s. However, unlike before, the millstone-riding Gnawtys at first stay in one spot, and when [[Donkey Kong]] and [[Diddy Kong]] pass a Gnawty, it starts to move after the [[Kong]]s. That millstone Gnawty continues to chase them until it reaches a wall. The Kongs also encounter regular Gnawtys and blue Kritters along the way. An [[animal crate]] for [[Expresso the Ostrich]] appears at the end of the first [[Bonus Level]]. By freeing Expresso, the Kongs can ride him for the rest of the level. | ||
==Layout== | |||
{{multiframe|[[File:TempleTempest-GBC-2.png]] [[File:TempleTempest-GBA-2.png|180px]]|Temple Tempest's appearance in the Game Boy Color version (top), which gives it a nighttime setting, and in the Game Boy Advance version (bottom)|align=left|size=200}} | |||
At the beginning of the level, the Kongs exit a tunnel and encounter a few Gnawties, who walk down several stair-like structures. A rope hangs over an abyss after here that the primates can swing along to grab the [[KONG Letters|letter K]] and reach the other end of the obstacle, where a [[DK Barrel]], a Gnawty, and a millstone are located. If they pass the millstone, it begins to chase them along the flat pathway. After crossing a small gap and climbing up a ledge, the heroes reach an area safe from the millstone, where they can find a wide abyss that they can cross by swinging on a nearby rope. They can find another millstone on the other side of the pit that chases them down a few small, stair-like structures when passed under. They can find a wide abyss that they are able to cross with the aid of a rope after the stair-like structures. A ledge follows the pit, and once they climb to the top of it, they are safe from the millstone. A third millstone is located immediately after here, and it pursues the primates down more stair-like structures with Gnawties walking along them. After passing these foes, the Kongs reach an abyss that is wider than the previous pits. They must swing along two ropes located within it to cross. As they jump between the two ropes, they approach the letter O. Once the pit is crossed, the primates encounter more Gnawties marching up stair-like structures. A tall, raised piece of ground is ahead of here that the heroes can climb to the top of with a nearby rope. The level's [[Star Barrel|Continue Barrel]] stands on top of the raised area. | |||
After the Continue Barrel, the Kongs reach a second DK Barrel and a few more small, stair-like structures that several Kritters hop along. At the top of the stairs, they can find a millstone inside of an alcove with a rope above it. With the help of the rope, the duo is able to jump over the millstone and progress to a small pit that they can cross with a rope. As they travel through this area, the millstone found in the abyss passes them. It continues to pursue the two friends as they head over two smaller alcoves, both containing Zingers. Once they jump over the gaps, they find another wide abyss with three ropes dangling above it. The rope in the center of the pit is surrounded by many [[banana]]s that form the shape of an arrow pointing downwards. The primates can use the rope to cross the abyss and then progress towards a [[tire]] that can help them bounce onto a tall piece of ground. The millstone ceases to chase them when it runs into this raised area. A pathway with several small, stair-like structures along it is ahead, and many Kritters hop down these structures. The Kongs can pound on a piece of the ground in this area to reveal the letter N. Once they walk all the way across the stair-like structures, they find a small pit that they can cross with the help of a platform that supports a tire. Another tire is located ahead of here on a flat stretch of land. It can be used to reach a platform positioned above another millstone that begins to chase the heroes when they jump to the other side of it. | |||
As it pursues them, the duo travels over a wide abyss that contains two small platforms, both carrying bouncy tires. On the other side of the abyss, the heroes can find a tire in the center of the area that they are able to use to reach a Banana Bunch placed high in the air. Farther ahead of the tire, a wide abyss can be found, and it holds two small platforms that both support a tire. A Zinger flies between them. Once the heroes cross the pit, they find a large, triangular alcove with another tire in it. Once the millstone reaches this alcove, it falls inside of it and remains there. If the primates travel to the east from here, they find several stair-like structures and a sign that indicates that the level is near complete. A millstone is located in a small pit ahead of here. Once it is passed, it chases the heroes up more stair-like structures that are infested with Kritters. Using a rope, the primates can cross a wide abyss near here that the millstone falls into when it reaches it. An exit sign is located on the other end of the pit. If they enter the tunnel ahead of here, they complete the level. | |||
== | ==Enemies== | ||
The following enemies appear, in the following quantities: | |||
<gallery> | |||
Gnawty.png|[[Gnawty]] (14) | |||
Gnawty-brown-DKC.png|Gnawty ([[millstone]]) (6) | |||
Klaptrap DKC.png|[[Klaptrap]] (1, in a Bonus Level) | |||
Kritter-blue-DKC.png|[[Kritter]] (blue) (12) | |||
Necky.png|[[Necky]] (9, in a Bonus Level) | |||
Zinger DKC.png|[[Zinger]] (3) | |||
</gallery> | |||
==Items and objects== | |||
The following items and objects appear, in the following quantities: | |||
[[ | <gallery> | ||
Banana DKC SNES.png|[[Banana]] (57) | |||
DK Barrel DKC.png|[[DK Barrel]] (2) | |||
Rambi Token Sprite SNES.png|[[Rambi]] [[animal token|Token]] (1){{footnote|main|a}} | |||
Red Balloon DKC SNES.png|[[Red Balloon|Life Balloon]] (1) | |||
</gallery> | |||
{{footnote|note|a|The Rambi token is located in the upper left corner of the entrance. On the small platform, the Kong must jump on a Gnawty to gain enough height.}} | |||
===K-O-N-G Letters=== | ===K-O-N-G Letters=== | ||
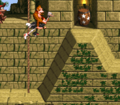
*K: | [[File:Temple Tempest 6.png|thumb|The location of the letter G]] | ||
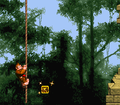
*O: The | *'''K:''' When the Kongs reach the first abyss, they must grab the bottom of a long rope to collect the letter K in the center of it. | ||
*N: | *'''O:''' The letter O is between two swinging ropes over the last abyss before the Continue Barrel. | ||
*G: | *'''N:''' After the second Bonus Level, the Kongs must jump from a pillar to land on an item cache with the letter N. | ||
*'''G:''' From the last rope, when it stops at the level exit, the Kongs must drop beneath the rope to fall down to the letter G. A [[Blast Barrel]] blasts them back up to the rope. | |||
===Key items=== | |||
*'''[[Photograph]]''' (Game Boy Advance version): A camera icon is hidden in front of the first millstone from the Continue Barrel. The Kongs must go in front of the millstone for the Gnawty to move right, and then return to the starting point to collect the [[photograph]]. The photograph depicts a [[Chomps Jr.]] on the second page of the [[Scrapbook (Donkey Kong Country series)|scrapbook]]. | |||
{{br}} | |||
===Bonus Levels=== | ===Bonus Levels=== | ||
{{multiframe|[[File:Donkey Kong Country (USA) (Rev 2)027.png|200px]] [[File:TempleTempestBonus2.png|200px]]|size=420|The first and second Bonus Levels respectively}} | |||
Temple Tempest has two Bonus Levels, listed by their type in the Game Boy Advance version: | |||
*'''''Find the Exit!''''': After the letter K, the Kongs must pick up a [[DK Barrel]] and carry it by two Gnawties as a millstone Gnawty chases after them. The Kongs must jump over a gap and throw the DK Barrel into a wall to the right to make an opening into a Bonus Level. There, the Kongs must bounce across nine Neckys to cross a large gap to the right. If the Kongs jump on eight Neckys in a row, they earn an [[extra life]]. To the very right is a small platform with an Expresso Crate, a [[Red Balloon|Life Balloon]], and the exit. | |||
* | *'''''Bash the Baddies!''''': Shortly after the Continue Barrel, the Kongs must climb on three vertical ropes. The middle one has a group of bananas in the shape of a down arrow. The Kongs must follow the direction to drop down into a [[Bonus Barrel]]. In the Bonus Area, the Kongs must jump onto a Klaptrap ten times. The Klaptrap releases a Banana Bunch each time it is hit. When Klaptrap is first hit, the Banana Bunch represents one banana, but it increases by one more banana each time Klaptrap is hit. Once Klaptrap is defeated, the Kongs are rewarded a [[Rambi]] [[animal token|Token]]. They return to the main level after winning or losing the Bonus Level. | ||
==Gallery== | ==Gallery== | ||
<gallery> | <gallery> | ||
TempleTempestLetterK.png|The location of the letter K | |||
TempleTempestLetterO.png|The location of the letter O | |||
TempleTempestLetterN.png|The location of the letter N | |||
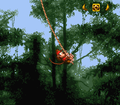
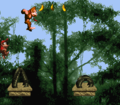
Temple Tempest 2.png|The Kongs approach some Gnawties in the beginning portion of the level. | Temple Tempest 2.png|The Kongs approach some Gnawties in the beginning portion of the level. | ||
Temple Tempest 3.png|Donkey | Temple Tempest 3.png|Donkey Kong rides Expresso toward the Continue Barrel of the level | ||
Temple Tempest 4.png|The Kongs | Temple Tempest 4.png|The Kongs cross a wide abyss with the use of a few tires | ||
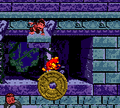
Temple Tempest.png| | Temple Tempest 5.png|Diddy Kong and Expresso dash towards several blue Kritters. | ||
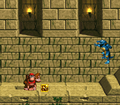
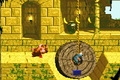
TempleTempest-GBC-1.png|Diddy standing above a millstone Gnawty in the [[Game Boy Color]] version; the enemy only moves when Diddy passes it. | |||
TempleTempest-GBA-1.png|The location of the photograph in the Game Boy Advance version | |||
</gallery> | </gallery> | ||
| Line 52: | Line 76: | ||
{{foreign names | {{foreign names | ||
|Jap=ノーティのいせき2 | |Jap=ノーティのいせき2 | ||
|JapR= | |JapR=Nōti no Iseki 2 | ||
|JapM=Gnawty's Ruin #2 | |JapM=Gnawty's Ruin #2 | ||
|Spa=Templo Tempestad | |Spa=Templo Tempestad | ||
|SpaM= | |SpaM=Temple Tempest | ||
|Fre=Tempête du Temple (SNES)<br>Temple Tempête (GBC) | |||
|FreM=Temple Tempest (SNES)<br>Tempest Temple (GBC) | |||
|Ger=Bembel Tempel (SNES)<br>Tempo-Tempel (GBC/GBA) | |||
|GerM=Tempo Temple (GBC/GBA) | |||
|Ita=Tempio Tremendo | |||
|ItaM=Terrible Temple | |||
}} | |||
{{DKC}} | {{DKC}} | ||
{{DKC | {{DKC levels}} | ||
[[Category:Temples | [[Category:Temples]] | ||
[[Category:Donkey Kong Island]] | [[Category:Donkey Kong Island]] | ||
[[Category:Donkey Kong Country | [[Category:Donkey Kong Country levels]] | ||
Latest revision as of 12:33, April 1, 2024
| Level | |
|---|---|
| Temple Tempest | |

| |
| Level code | 3 - 4 (SNES & GBC) 3 - 6 (GBA) |
| World | Vine Valley |
| Game | Donkey Kong Country |
| Music track | Voices of the Temple |
| << Directory of levels (SNES & GBC) >> | |
| << Directory of levels (GBA) >> | |
Temple Tempest is the fourteenth level of Donkey Kong Country and the fourth level of Vine Valley. In the Game Boy Advance version, Temple Tempest was made the sixth and last regular level of Vine Valley and the sixteenth level overall, pushing the previous two levels backward. Similarly to Millstone Mayhem, the previous temple level, Temple Tempest has many Gnawties riding millstones. However, unlike before, the millstone-riding Gnawtys at first stay in one spot, and when Donkey Kong and Diddy Kong pass a Gnawty, it starts to move after the Kongs. That millstone Gnawty continues to chase them until it reaches a wall. The Kongs also encounter regular Gnawtys and blue Kritters along the way. An animal crate for Expresso the Ostrich appears at the end of the first Bonus Level. By freeing Expresso, the Kongs can ride him for the rest of the level.
Layout[edit]


At the beginning of the level, the Kongs exit a tunnel and encounter a few Gnawties, who walk down several stair-like structures. A rope hangs over an abyss after here that the primates can swing along to grab the letter K and reach the other end of the obstacle, where a DK Barrel, a Gnawty, and a millstone are located. If they pass the millstone, it begins to chase them along the flat pathway. After crossing a small gap and climbing up a ledge, the heroes reach an area safe from the millstone, where they can find a wide abyss that they can cross by swinging on a nearby rope. They can find another millstone on the other side of the pit that chases them down a few small, stair-like structures when passed under. They can find a wide abyss that they are able to cross with the aid of a rope after the stair-like structures. A ledge follows the pit, and once they climb to the top of it, they are safe from the millstone. A third millstone is located immediately after here, and it pursues the primates down more stair-like structures with Gnawties walking along them. After passing these foes, the Kongs reach an abyss that is wider than the previous pits. They must swing along two ropes located within it to cross. As they jump between the two ropes, they approach the letter O. Once the pit is crossed, the primates encounter more Gnawties marching up stair-like structures. A tall, raised piece of ground is ahead of here that the heroes can climb to the top of with a nearby rope. The level's Continue Barrel stands on top of the raised area.
After the Continue Barrel, the Kongs reach a second DK Barrel and a few more small, stair-like structures that several Kritters hop along. At the top of the stairs, they can find a millstone inside of an alcove with a rope above it. With the help of the rope, the duo is able to jump over the millstone and progress to a small pit that they can cross with a rope. As they travel through this area, the millstone found in the abyss passes them. It continues to pursue the two friends as they head over two smaller alcoves, both containing Zingers. Once they jump over the gaps, they find another wide abyss with three ropes dangling above it. The rope in the center of the pit is surrounded by many bananas that form the shape of an arrow pointing downwards. The primates can use the rope to cross the abyss and then progress towards a tire that can help them bounce onto a tall piece of ground. The millstone ceases to chase them when it runs into this raised area. A pathway with several small, stair-like structures along it is ahead, and many Kritters hop down these structures. The Kongs can pound on a piece of the ground in this area to reveal the letter N. Once they walk all the way across the stair-like structures, they find a small pit that they can cross with the help of a platform that supports a tire. Another tire is located ahead of here on a flat stretch of land. It can be used to reach a platform positioned above another millstone that begins to chase the heroes when they jump to the other side of it.
As it pursues them, the duo travels over a wide abyss that contains two small platforms, both carrying bouncy tires. On the other side of the abyss, the heroes can find a tire in the center of the area that they are able to use to reach a Banana Bunch placed high in the air. Farther ahead of the tire, a wide abyss can be found, and it holds two small platforms that both support a tire. A Zinger flies between them. Once the heroes cross the pit, they find a large, triangular alcove with another tire in it. Once the millstone reaches this alcove, it falls inside of it and remains there. If the primates travel to the east from here, they find several stair-like structures and a sign that indicates that the level is near complete. A millstone is located in a small pit ahead of here. Once it is passed, it chases the heroes up more stair-like structures that are infested with Kritters. Using a rope, the primates can cross a wide abyss near here that the millstone falls into when it reaches it. An exit sign is located on the other end of the pit. If they enter the tunnel ahead of here, they complete the level.
Enemies[edit]
The following enemies appear, in the following quantities:

Gnawty (14)

Gnawty (millstone) (6)

Klaptrap (1, in a Bonus Level)

Kritter (blue) (12)

Necky (9, in a Bonus Level)

Zinger (3)


Items and objects[edit]
The following items and objects appear, in the following quantities:

Banana (57)

DK Barrel (2)

Life Balloon (1)


a - The Rambi token is located in the upper left corner of the entrance. On the small platform, the Kong must jump on a Gnawty to gain enough height.
K-O-N-G Letters[edit]

- K: When the Kongs reach the first abyss, they must grab the bottom of a long rope to collect the letter K in the center of it.
- O: The letter O is between two swinging ropes over the last abyss before the Continue Barrel.
- N: After the second Bonus Level, the Kongs must jump from a pillar to land on an item cache with the letter N.
- G: From the last rope, when it stops at the level exit, the Kongs must drop beneath the rope to fall down to the letter G. A Blast Barrel blasts them back up to the rope.
Key items[edit]
- Photograph (Game Boy Advance version): A camera icon is hidden in front of the first millstone from the Continue Barrel. The Kongs must go in front of the millstone for the Gnawty to move right, and then return to the starting point to collect the photograph. The photograph depicts a Chomps Jr. on the second page of the scrapbook.
Bonus Levels[edit]
_(Rev_2)027.png)

Temple Tempest has two Bonus Levels, listed by their type in the Game Boy Advance version:
- Find the Exit!: After the letter K, the Kongs must pick up a DK Barrel and carry it by two Gnawties as a millstone Gnawty chases after them. The Kongs must jump over a gap and throw the DK Barrel into a wall to the right to make an opening into a Bonus Level. There, the Kongs must bounce across nine Neckys to cross a large gap to the right. If the Kongs jump on eight Neckys in a row, they earn an extra life. To the very right is a small platform with an Expresso Crate, a Life Balloon, and the exit.
- Bash the Baddies!: Shortly after the Continue Barrel, the Kongs must climb on three vertical ropes. The middle one has a group of bananas in the shape of a down arrow. The Kongs must follow the direction to drop down into a Bonus Barrel. In the Bonus Area, the Kongs must jump onto a Klaptrap ten times. The Klaptrap releases a Banana Bunch each time it is hit. When Klaptrap is first hit, the Banana Bunch represents one banana, but it increases by one more banana each time Klaptrap is hit. Once Klaptrap is defeated, the Kongs are rewarded a Rambi Token. They return to the main level after winning or losing the Bonus Level.
Gallery[edit]
The location of the letter K
The location of the letter O
The location of the letter N
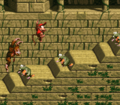
The Kongs approach some Gnawties in the beginning portion of the level.
Donkey Kong rides Expresso toward the Continue Barrel of the level
The Kongs cross a wide abyss with the use of a few tires

Diddy Kong and Expresso dash towards several blue Kritters.
Diddy standing above a millstone Gnawty in the Game Boy Color version; the enemy only moves when Diddy passes it.
The location of the photograph in the Game Boy Advance version


Names in other languages[edit]
| Language | Name | Meaning |
|---|---|---|
| Japanese | ノーティのいせき2 Nōti no Iseki 2 |
Gnawty's Ruin #2 |
| French | Tempête du Temple (SNES) Temple Tempête (GBC) |
Temple Tempest (SNES) Tempest Temple (GBC) |
| German | Bembel Tempel (SNES) Tempo-Tempel (GBC/GBA) |
Tempo Temple (GBC/GBA) |
| Italian | Tempio Tremendo |
Terrible Temple |
| Spanish | Templo Tempestad |
Temple Tempest |