Millstone Mayhem: Difference between revisions
(tensing correctly, fixing major) |
m (Text replacement - "<br />" to "<br>") |
||
| (70 intermediate revisions by 35 users not shown) | |||
| Line 1: | Line 1: | ||
{{level | {{level infobox | ||
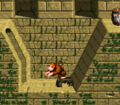
|image=[[File:Millstone Mayhem SNES.png]] | |||
|image=[[ | |code=2-5 | ||
|code=2 - 5 | |world=[[Monkey Mines]] | ||
|game=''[[Donkey Kong Country]] | |game=''[[Donkey Kong Country]] | ||
|before=[[Stop & Go Station|<<]] | |before=[[Stop & Go Station|<<]] | ||
|after=[[ | |after=[[Necky's Nuts|>>]] | ||
|track=Voices of the Temple | |||
}} | }} | ||
'''Millstone Mayhem''' is the tenth level in the | '''Millstone Mayhem''' is the tenth level in ''[[Donkey Kong Country]]'' and the fifth and last regular level of [[Monkey Mines]]. It is a temple-themed level featuring [[millstone]]-riding [[Gnawty|Gnawties]] as the main enemy and obstacle. Millstone Gnawties cannot be defeated and must be avoided. The recurring enemies include blue [[Kritter]]s, [[Slippa]]s, and a few perched [[Necky]]s. During the second half, [[Donkey Kong]] and [[Diddy Kong]] can use a [[tire (object)|tire]] to bounce up to a hidden area with [[Winky]]'s [[animal crate]]. | ||
==Layout== | |||
{{multiframe|[[File:Millstone Mayhem GBC.png]] [[File:MillstoneMayhem-GBA-1.png|180px]]|Millstone Mayhem's appearance in the Game Boy Color version, top, and Game Boy Advance version, bottom|align=left|size=200}} | |||
The Kongs begin the level by exiting a large tunnel and approaching a slanted wall with a tire in front of it. They can use the item to reach the top of the wall and then head down a pathway with several long, stair-like structures that a few Krushas walk along. Two [[TNT Barrel|TNT Drum]]s sit at the beginning of the pathway. A [[DK Barrel]] also wobbles next to a small ledge with a millstone being piloted by a Gnawty on it. The millstone moves up and down, so the heroes can dash under it as it moves over their heads. After passing a thin abyss with a Barrel Cannon in it, the primates approach a Kritter and a millstone that they must run under. The [[KONG Letters|letter O]] floats ahead of here near a small ledge with several Kritters to the right of it. A millstone moves on top of a large alcove nearby that the primates must run through to pass under the obstacle. The Kongs can find another millstone proceeding in a vertical path above another alcove containing a TNT Drum ahead of here. A few Krushas march down the stair-like structures ahead of here, which is followed by another small alcove with a millstone rolling from left to right above it. Once the primates sneak through the alcove and pass the Gnawty-controlled obstacle, they approach a broad alcove consisting of several jumping Kritters. A DK Barrel wobbles ahead of the gap with two small abyss after it. The level's [[Star Barrel|Continue Barrel]] hovers over the carved, stone platform between the two pits. | |||
After crossing the abyss following this barrel, the heroes access a long pathway holding a TNT Drum, a Slippa, and another millstone that moves back and forth in a vertical path. Once they pass under it, they reach another abyss that they can cross to reach a large structure containing many small, stair-like structures covered in a few Slippas. A piece of the ground is here that they can break to reveal a tire that is useful in reaching a high platform nearby. It leads to a high part of the temple, located after an abyss with a millstone moving above it. An [[animal crate]] containing Winky can be found here. If the primates are not in possession of the tire when they come up to the abyss, they can ride on a moving platform to reach an area with an alcove full of Slippas in it. The letter N and an abyss can be found after the alcove. | |||
After the duo crosses the pit, they approach a millstone moving over a ledge with another DK Barrel near it. A Necky stands on a statue ahead of here, throwing nuts at the group. The heroes can find two small alcoves ahead of the bird enemy, and both of them contain Slippas. A millstone rolls back and forth over the gaps, but once it is passed, the Kongs can safely progress to another abyss and then to an additional pair of small alcoves with an egg-throwing Necky between them. The letter G hovers over the foe's head. The primates can find another millstone ahead, which travels over a large abyss with several Slippas within it. They come to another millstone above a pit after running down several stair-like structures. A sign indicating that the level is near complete stands at the other side of the abyss on top of a small ledge. After jumping over a millstone with the use of a tire sticking out of the ground, the primates approach an abyss containing two Banana Bunches that float above a Zinger. An exit sign follows a few stair-like structures nearby, and once the heroes enter the tunnel ahead of it, they finish the level. | |||
{{br|left}} | |||
==Enemies== | |||
The following enemies appear, in the following quantities, and enemies marked in '''bold''' first appear in the level: | |||
[[ | <gallery> | ||
Gnawty-brown-DKC.png|'''[[Gnawty]] (millstone)''' (12) | |||
Kritter-blue-DKC.png|[[Kritter]] (blue) (7) | |||
Krusha DKC blue.png|[[Krusha]] (5) | |||
Necky perched DKC.png|[[Necky]] (perched) (2) | |||
Slippa DKC.png|[[Slippa]] (12) | |||
Zinger-orange-DKC.png|[[Zinger]] (1) | |||
</gallery> | |||
==Items and objects== | |||
<gallery> | |||
Green Balloon DKC SNES.png|[[Green Balloon|2-Up Balloon]] (1){{footnote|main|a}} | |||
DK Barrel DKC.png|[[DK Barrel]] (4) | |||
Enguarde Token Sprite SNES.png|[[Enguarde]] [[Animal token|token]] (1){{footnote|main|b}} | |||
Tire DKC.png|[[Tire (object)|Tire]] (2) | |||
TNT Barrel DKC.png|[[TNT Barrel|TNT Drum]] (3) | |||
</gallery> | |||
{{footnote|note|a|The 2-Up Balloon is a reward for completing the third Bonus Level.}} | |||
{{footnote|note|b|The Enguarde token is a reward for completing the second Bonus Level.}} | |||
===K-O-N-G Letters=== | |||
[[File:Millstone Mayhem K.png|thumb|The location of the letter K]] | |||
*'''K:''' The letter K is in the first Bonus Level, where the Kongs must blast up the rightmost row to reach it. | |||
*'''O:''' After the second millstone Gnawty, the letter O is hovering over an area with two blue Kritters. | |||
*'''N:''' After the second millstone Gnawty from the Continue Barrel, the letter N floats to the right of a small area with three Slippas. The Kongs can also free Winky from his animal crate and go off the right ledge to land into the letter N. | |||
*'''G:''' The letter G is above the second perched Necky. | |||
{{br}} | |||
==Bonus Levels== | |||
[[File:Millstone Mayhem SNES 8.png|thumb|The second Bonus Level of Millstone Mayhem]] | |||
Millstone Mayhem has three Bonus Levels, listed by their type in the Game Boy Advance version: | |||
*'''''Collect the Prizes!''''': At the start of the level, the Kongs must bounce from a tire stuck in the ground to land onto a elevated platform, which the first [[Bonus Barrel]] is above. In the [[Bonus Level]], the Kongs can blast up three columns, each with ten bananas and an item above. The leftmost column has a DK Barrel above it, the middle column has a Banana Bunch above it, and the rightmost column has the letter K above it. The Kongs can exit the Bonus Level by missing the Barrel Cannon as they fall back down. | |||
*'''''Spell it Out!''''': After the first millstone Gnawty, the Kongs must go into a gap and blast from a [[Blast Barrel]] to land on a ground patch and release a round tire. They must roll it past a few blue Kritters, another millstone-riding Gnawty and the letter O. When the Kongs encounter the third millstone Gnawty, they must bounce from the tire to enter the second Bonus Barrel above it. In the Bonus Level, the Kongs must spell out the word "[[Rare Ltd.|RARE]]" from four letters rotating in a circular motion. A Kritter head appears between each letter, and if the Kongs jump at it, the letters rotate faster. An [[Enguarde]] [[animal token|Token]] is the reward for correctly hitting the letters in order. The Kongs exit the Bonus Level after winning or losing the challenge. | |||
*'''''Stop the Barrel!''''': After the second Bonus Level is the fourth millstone Gnawty, who vertically moves up and down on a TNT Drum. The lead Kong must grab the TNT Drum and continue with it. They must jump over two Krushas along the way. After the Krushas is the fifth millstone Gnawty, who is moving back and forth over an alcove. With the TNT Drum, the Kongs must break the right wall in the alcove to enter the third and last Bonus Level. In the Bonus Level, the Kongs must observe a [[Green Balloon|2-Up Balloon]] as it quickly moves between four barrels. When it stops moving, the Kongs must jump at the barrel that it stopped in to win the 2-Up Balloon as a prize. The Kongs automatically leave the Bonus Level after either winning or losing at the Bonus Level. | |||
==Warp Barrel== | ==Warp Barrel== | ||
To find the [[Warp Barrel]], when the Kongs reach the small pit shortly after the first millstone, they should jump into it to land in a Barrel Cannon that blasts them upwards. They should land on a distinguished piece of the ground to release a tire from it. If they push the tire back to the beginning of the level before the first ledge, they should be able to bounce high in the air on it and reach a Warp Barrel that takes them to a sign near the end of the level. | |||
In the [[Donkey Kong Country (Game Boy Advance)|Game Boy Advance version]], the Warp Barrel is repositioned. At the start of the level, past the first millstone, there is a small pit with a [[Barrel Cannon]] in it. The Kongs must jump into the barrel and then go left, leading them into the Warp Barrel. | |||
==Gallery== | |||
===Super Nintendo Entertainment System=== | |||
<gallery> | |||
Millstone Mayhem SNES 2.png|Donkey Kong bounces on a tire at the beginning of the level. | |||
Millstone Mayhem K.png|The first Bonus Level | |||
Millstone Mayhem SNES 4.png|Donkey Kong prepares to throw a TNT Drum at a millstone. | |||
Millstone Mayhem SNES 5.png|The Kongs look down into an abyss with two Banana Bunches and a Zinger. | |||
Millstone Mayhem DKC Kongs and Winky.png|The Kongs and Winky in a latter part of the level | |||
Millstone Mayhem O.png|The location of the letter O | |||
Millstone Mayhem N.png|The location of the letter N | |||
Millstone Mayhem Bonus 3.png|The third Bonus Level | |||
Millstone Mayhem SNES 6.png|The characters dash under a Millstone | |||
Millstone Mayhem SNES 3.png|The Kongs free Winky from its animal crate | |||
Millstone Mayhem SNES 7.png|The location of the letter G | |||
Millstone Mayhem artwork render.png|Artwork render of Millstone Mayhem | |||
Millstone Mayhem design.jpg|Design sheet for the level by [[Gregg Mayles]]<ref>@Ghoulyboy (11:09, September 12, 2015). [https://twitter.com/Ghoulyboy/status/642762092278382592 Last bunch of #DKCrevealed levels before I move onto some unused stuff. It's a Barrels, Ice and Temple combo.] ''Twitter.'' Retrieved July 23, 2018.</ref> | |||
</gallery> | |||
===Game Boy Color=== | |||
<gallery> | |||
MillstoneMayhem-GBC-1.png | |||
MillstoneMayhem-GBC-2.png | |||
MillstoneMayhem-GBC-3.png | |||
</gallery> | |||
== | ===Game Boy Advance=== | ||
<gallery> | |||
MillstoneMayhem-GBA-2.png | |||
Millstone Mayhem GBA.png|Diddy pushed the tire into a position to reach the Bonus Barrel | |||
MillstoneMayhem-GBA-3.png|The Kongs in the third Bonus Level | |||
</gallery | </gallery> | ||
==Names in | ==Names in other languages== | ||
{{ | {{foreign names | ||
|Jap=ノーティのいせき | |||
| | |JapR=Nōti no iseki | ||
| | |JapM=Gnawty's Ruin | ||
| | |||
|Spa=Peligro de Piedras | |Spa=Peligro de Piedras | ||
|SpaM=" | |SpaM=Stone Danger | ||
< | |Fre=Moulin Maboule | ||
|FreM=Mad Mill | |||
|Ger=Bad Mühlstein (SNES)<br>Mühlstein-Mambo (GBA) | |||
|GerM=''Bad'' Millstone ("''Bad''" - not the English adjective "bad" - is part of German spa town names)<br>Millstone Mambo | |||
|Ita=Frantoia Frantuma | |||
|ItaM=Oil Mill Crush | |||
}} | |||
==Trivia== | |||
*[[Mark Stevenson]] stated that the temple background first used in this level was originally an indoor location with "torchlights and stuff", but was changed to its final appearance as [[Tim Stamper]] felt there were too many indoor environments already. Stevenson stated that he was not fully satisfied with the redesign.<ref>GameXplain (November 22, 2021). [https://www.youtube.com/watch?v=1TDcFCu4rJs#t=10m10s Talking to Kiddy Kong's Creator for DKC3's 25th Anniversary! (Kiddy Origins, DK64 & More!)]. ''YouTube''. Retrieved November 22, 2021</ref> | |||
==References== | |||
<references/> | |||
{{DKC}} | {{DKC}} | ||
[[Category: | {{DKC levels}} | ||
[[Category:Donkey Kong | [[Category:Temples]] | ||
[[Category:Donkey Kong Country levels]] | |||
[[Category:Donkey Kong Island]] | [[Category:Donkey Kong Island]] | ||
Latest revision as of 12:19, April 1, 2024
| Level | |
|---|---|
| Millstone Mayhem | |

| |
| Level code | 2-5 |
| World | Monkey Mines |
| Game | Donkey Kong Country |
| Music track | Voices of the Temple |
| << Directory of levels >> | |
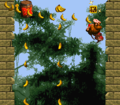
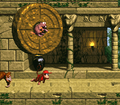
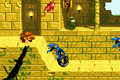
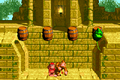
Millstone Mayhem is the tenth level in Donkey Kong Country and the fifth and last regular level of Monkey Mines. It is a temple-themed level featuring millstone-riding Gnawties as the main enemy and obstacle. Millstone Gnawties cannot be defeated and must be avoided. The recurring enemies include blue Kritters, Slippas, and a few perched Neckys. During the second half, Donkey Kong and Diddy Kong can use a tire to bounce up to a hidden area with Winky's animal crate.
Layout[edit]


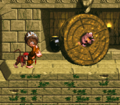
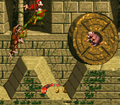
The Kongs begin the level by exiting a large tunnel and approaching a slanted wall with a tire in front of it. They can use the item to reach the top of the wall and then head down a pathway with several long, stair-like structures that a few Krushas walk along. Two TNT Drums sit at the beginning of the pathway. A DK Barrel also wobbles next to a small ledge with a millstone being piloted by a Gnawty on it. The millstone moves up and down, so the heroes can dash under it as it moves over their heads. After passing a thin abyss with a Barrel Cannon in it, the primates approach a Kritter and a millstone that they must run under. The letter O floats ahead of here near a small ledge with several Kritters to the right of it. A millstone moves on top of a large alcove nearby that the primates must run through to pass under the obstacle. The Kongs can find another millstone proceeding in a vertical path above another alcove containing a TNT Drum ahead of here. A few Krushas march down the stair-like structures ahead of here, which is followed by another small alcove with a millstone rolling from left to right above it. Once the primates sneak through the alcove and pass the Gnawty-controlled obstacle, they approach a broad alcove consisting of several jumping Kritters. A DK Barrel wobbles ahead of the gap with two small abyss after it. The level's Continue Barrel hovers over the carved, stone platform between the two pits.
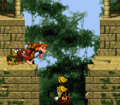
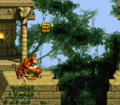
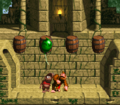
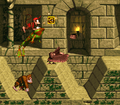
After crossing the abyss following this barrel, the heroes access a long pathway holding a TNT Drum, a Slippa, and another millstone that moves back and forth in a vertical path. Once they pass under it, they reach another abyss that they can cross to reach a large structure containing many small, stair-like structures covered in a few Slippas. A piece of the ground is here that they can break to reveal a tire that is useful in reaching a high platform nearby. It leads to a high part of the temple, located after an abyss with a millstone moving above it. An animal crate containing Winky can be found here. If the primates are not in possession of the tire when they come up to the abyss, they can ride on a moving platform to reach an area with an alcove full of Slippas in it. The letter N and an abyss can be found after the alcove.
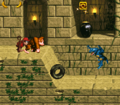
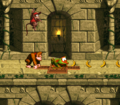
After the duo crosses the pit, they approach a millstone moving over a ledge with another DK Barrel near it. A Necky stands on a statue ahead of here, throwing nuts at the group. The heroes can find two small alcoves ahead of the bird enemy, and both of them contain Slippas. A millstone rolls back and forth over the gaps, but once it is passed, the Kongs can safely progress to another abyss and then to an additional pair of small alcoves with an egg-throwing Necky between them. The letter G hovers over the foe's head. The primates can find another millstone ahead, which travels over a large abyss with several Slippas within it. They come to another millstone above a pit after running down several stair-like structures. A sign indicating that the level is near complete stands at the other side of the abyss on top of a small ledge. After jumping over a millstone with the use of a tire sticking out of the ground, the primates approach an abyss containing two Banana Bunches that float above a Zinger. An exit sign follows a few stair-like structures nearby, and once the heroes enter the tunnel ahead of it, they finish the level.
Enemies[edit]
The following enemies appear, in the following quantities, and enemies marked in bold first appear in the level:


Items and objects[edit]

2-Up Balloon (1)a

DK Barrel (4)

Tire (2)

TNT Drum (3)


a - The 2-Up Balloon is a reward for completing the third Bonus Level.
b - The Enguarde token is a reward for completing the second Bonus Level.
K-O-N-G Letters[edit]

- K: The letter K is in the first Bonus Level, where the Kongs must blast up the rightmost row to reach it.
- O: After the second millstone Gnawty, the letter O is hovering over an area with two blue Kritters.
- N: After the second millstone Gnawty from the Continue Barrel, the letter N floats to the right of a small area with three Slippas. The Kongs can also free Winky from his animal crate and go off the right ledge to land into the letter N.
- G: The letter G is above the second perched Necky.
Bonus Levels[edit]

Millstone Mayhem has three Bonus Levels, listed by their type in the Game Boy Advance version:
- Collect the Prizes!: At the start of the level, the Kongs must bounce from a tire stuck in the ground to land onto a elevated platform, which the first Bonus Barrel is above. In the Bonus Level, the Kongs can blast up three columns, each with ten bananas and an item above. The leftmost column has a DK Barrel above it, the middle column has a Banana Bunch above it, and the rightmost column has the letter K above it. The Kongs can exit the Bonus Level by missing the Barrel Cannon as they fall back down.
- Spell it Out!: After the first millstone Gnawty, the Kongs must go into a gap and blast from a Blast Barrel to land on a ground patch and release a round tire. They must roll it past a few blue Kritters, another millstone-riding Gnawty and the letter O. When the Kongs encounter the third millstone Gnawty, they must bounce from the tire to enter the second Bonus Barrel above it. In the Bonus Level, the Kongs must spell out the word "RARE" from four letters rotating in a circular motion. A Kritter head appears between each letter, and if the Kongs jump at it, the letters rotate faster. An Enguarde Token is the reward for correctly hitting the letters in order. The Kongs exit the Bonus Level after winning or losing the challenge.
- Stop the Barrel!: After the second Bonus Level is the fourth millstone Gnawty, who vertically moves up and down on a TNT Drum. The lead Kong must grab the TNT Drum and continue with it. They must jump over two Krushas along the way. After the Krushas is the fifth millstone Gnawty, who is moving back and forth over an alcove. With the TNT Drum, the Kongs must break the right wall in the alcove to enter the third and last Bonus Level. In the Bonus Level, the Kongs must observe a 2-Up Balloon as it quickly moves between four barrels. When it stops moving, the Kongs must jump at the barrel that it stopped in to win the 2-Up Balloon as a prize. The Kongs automatically leave the Bonus Level after either winning or losing at the Bonus Level.
Warp Barrel[edit]
To find the Warp Barrel, when the Kongs reach the small pit shortly after the first millstone, they should jump into it to land in a Barrel Cannon that blasts them upwards. They should land on a distinguished piece of the ground to release a tire from it. If they push the tire back to the beginning of the level before the first ledge, they should be able to bounce high in the air on it and reach a Warp Barrel that takes them to a sign near the end of the level.
In the Game Boy Advance version, the Warp Barrel is repositioned. At the start of the level, past the first millstone, there is a small pit with a Barrel Cannon in it. The Kongs must jump into the barrel and then go left, leading them into the Warp Barrel.
Gallery[edit]
Super Nintendo Entertainment System[edit]
Donkey Kong bounces on a tire at the beginning of the level.
The first Bonus Level
Donkey Kong prepares to throw a TNT Drum at a millstone.
The Kongs look down into an abyss with two Banana Bunches and a Zinger.
The Kongs and Winky in a latter part of the level
The location of the letter O
The location of the letter N
The third Bonus Level
The characters dash under a Millstone
The Kongs free Winky from its animal crate
The location of the letter G
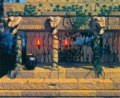
Artwork render of Millstone Mayhem
![Design sheet for the level by Gregg Mayles[1]](https://mario.wiki.gallery/images/thumb/7/7a/Millstone_Mayhem_design.jpg/120px-Millstone_Mayhem_design.jpg)
Design sheet for the level by Gregg Mayles[1]


![Design sheet for the level by Gregg Mayles[1]](/File:Millstone_Mayhem_design.jpg)
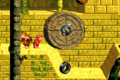
Game Boy Color[edit]


Game Boy Advance[edit]
Diddy pushed the tire into a position to reach the Bonus Barrel
The Kongs in the third Bonus Level


Names in other languages[edit]
| Language | Name | Meaning |
|---|---|---|
| Japanese | ノーティのいせき Nōti no iseki |
Gnawty's Ruin |
| French | Moulin Maboule |
Mad Mill |
| German | Bad Mühlstein (SNES) Mühlstein-Mambo (GBA) |
Bad Millstone ("Bad" - not the English adjective "bad" - is part of German spa town names) Millstone Mambo |
| Italian | Frantoia Frantuma |
Oil Mill Crush |
| Spanish | Peligro de Piedras |
Stone Danger |
Trivia[edit]
- Mark Stevenson stated that the temple background first used in this level was originally an indoor location with "torchlights and stuff", but was changed to its final appearance as Tim Stamper felt there were too many indoor environments already. Stevenson stated that he was not fully satisfied with the redesign.[2]
References[edit]
- ^ @Ghoulyboy (11:09, September 12, 2015). Last bunch of #DKCrevealed levels before I move onto some unused stuff. It's a Barrels, Ice and Temple combo. Twitter. Retrieved July 23, 2018.
- ^ GameXplain (November 22, 2021). Talking to Kiddy Kong's Creator for DKC3's 25th Anniversary! (Kiddy Origins, DK64 & More!). YouTube. Retrieved November 22, 2021