Rickety Rapids: Difference between revisions
m (Text replacement - "Category:Bodies of Water" to "Category:Bodies of water") |
LinkTheLefty (talk | contribs) mNo edit summary Tag: Disambiguation links |
||
| (13 intermediate revisions by 5 users not shown) | |||
| Line 1: | Line 1: | ||
{{ | {{level infobox | ||
|image=[[File:Rickety Rapids.png]] | |image=[[File:Rickety Rapids.png]] | ||
|code=5-3 | |code=5-3 | ||
| Line 7: | Line 7: | ||
|after=[[Bazuka Bombard|>>]] | |after=[[Bazuka Bombard|>>]] | ||
}} | }} | ||
'''Rickety Rapids''' is the twenty-seventh level of ''[[Donkey Kong Land III]]'' and the third level | '''Rickety Rapids''' is the twenty-seventh level of ''[[Donkey Kong Land III]]'' and the third level of [[Tin Can Valley]]. Similarly to [[Footloose Falls]], Rickety Rapids is a waterfall level where [[Dixie Kong|Dixie]] and [[Kiddy Kong|Kiddy]] transform into [[Ellie]], and both have [[Tracker Barrel]]s and [[Booster Barrel]]s. Ellie's [[Animal Barrel]] is available at the start of the level; the [[Kong]]s must turn around and jump to the right corner at the start to become Ellie. Beyond the [[No Animal Sign]], the Kongs must go up the waterfall using Tracker Barrels and Booster Barrels. There are [[banana]] trails hinting to [[Bonus Barrel]]s and groups of bananas shaping arrows guiding the path to the end. Oftentimes, a brief detour in the opposite direction of the banana arrow can lead to hidden items or [[Bonus Level]]s. | ||
==Layout== | ==Layout== | ||
From the start of this watery level, the Kongs must travel west while dodging a few enemies. They will soon, come up to a Tracker Barrel. It must be used to blast across a small gap. After passing several | From the start of this watery level, the Kongs must travel west while dodging a few enemies. They will soon, come up to a Tracker Barrel. It must be used to blast across a small gap. After passing several [[Krumple]]s afterwards, the heroes will need to hop into another Tracker Barrel. This time, they will have to shoot over a [[Buzz]] and then land in a Booster Barrel. This barrel will blast the Kongs high in the air, where they will need to move to the right and land on a safe area. Carrying on, they must head east over to the next Tracker Barrel. It will shoot them over another gap, then to another barrel. That barrel will take the monkeys back on land. There, they will need to walk a little farther to yet another Tracker Barrel. It will, as usual, shoot them over a wide pit. On the other end, the monkeys will need to avoid a few more enemies and leap into the next Tracker Barrel. They should head to a Booster Barrel with it. This barrel will take them to another Tracker Barrel. They will have to blast to the west at this point, still using a few more Tracker Barrels. Once they are finally back on land, the group must head a little farther west to find the [[Star Barrel]]. | ||
Halfway through the level, the heroes must cross two small gaps with a Tracker Barrel. If they walk a little farther, they will have to use another Tracker Barrel. They should use it to blast to a Booster Barrel, which will take them up to the next Tracker Barrel. There, the monkeys will need to shoot over a few Buzzes and reach another Tracker Barrel. This barrel will soon take them to a Booster Barrel. Finally, this barrel will take the monkeys back on safe ground, and not over the dangerous falls. After the Kongs are on land, they must head east and surpass more obstacles to encounter another wide abyss. With the Tracker Barrel nearby, they must blast over some more Buzzes and make it over the abyss. When the heroes are on the other end, they will have to hop into another Tracker Barrel. It will shoot them to a Booster Barrel, which will lead the monkeys to a higher area on a large platform. From there, they must journey west and avoid several Krumples and a Kopter. Eventually, they will need to use a Tracker Barrel to get over a small gap, and then leap into a Booster Barrel to reach a high platform. At that point, the Dixie and Kiddy must travel east. Walking a longer distance than usual, they must cross a small gap with a Tracker Barrel and dodge Buzzes and | Halfway through the level, the heroes must cross two small gaps with a Tracker Barrel. If they walk a little farther, they will have to use another Tracker Barrel. They should use it to blast to a Booster Barrel, which will take them up to the next Tracker Barrel. There, the monkeys will need to shoot over a few Buzzes and reach another Tracker Barrel. This barrel will soon take them to a Booster Barrel. Finally, this barrel will take the monkeys back on safe ground, and not over the dangerous falls. After the Kongs are on land, they must head east and surpass more obstacles to encounter another wide abyss. With the Tracker Barrel nearby, they must blast over some more Buzzes and make it over the abyss. When the heroes are on the other end, they will have to hop into another Tracker Barrel. It will shoot them to a Booster Barrel, which will lead the monkeys to a higher area on a large platform. From there, they must journey west and avoid several Krumples and a [[Kopter]]. Eventually, they will need to use a Tracker Barrel to get over a small gap, and then leap into a Booster Barrel to reach a high platform. At that point, the Dixie and Kiddy must travel east. Walking a longer distance than usual, they must cross a small gap with a Tracker Barrel and dodge Buzzes and [[Knocka]]s. Soon, they will find a large abyss, and it can only be crossed with a Tracker Barrel. So, they should get in the barrel and blast over a few Buzzes to get over it. On the other end, the heroes will find the [[Level Flag|End of Level Flag]]. | ||
==Enemies== | ==Enemies== | ||
| Line 26: | Line 22: | ||
==Items and objects== | ==Items and objects== | ||
The following items and objects appear in the following quantities: | |||
*[[DK Barrel]]: 4 | *[[DK Barrel]]: 4 | ||
*[[Bear coin]]: 1 | *[[Bear coin]]: 1 | ||
*[[Red Balloon|Extra Life Balloon]]: 1 | *[[Red Balloon|Extra Life Balloon]]: 1 | ||
===K-O-N-G Letters=== | ===K-O-N-G Letters=== | ||
*K: Directly in front of Kongs at the start of the level. | *K: Directly in front of Kongs at the start of the level. | ||
| Line 36: | Line 32: | ||
*G: In between a gap near some Krumple. | *G: In between a gap near some Krumple. | ||
== | ===DK Coin=== | ||
[[File:Rickety Rapids DKL3 Koin.png|thumb|The DK Coin of Rickety Rapids]] | |||
Just before the [[Level Flag|End of Level Flag]] is a [[Iron Barrel|Steel Barrel]]. The Kongs must pick it up and jump over the End of Level Flag to find [[Koin]]. They must throw the Steel Barrel at the edge of the screen, causing it to bounce off and roll into Koin from behind. Koin is defeated and the Kongs are rewarded the [[DK Coin]]. | |||
{{br}} | |||
| | |||
=== | ==Bonus Levels== | ||
[[File:Rickety Rapids DKL3 Bonus Level 2.png|thumb|The second Bonus Level of Rickety Rapids]] | |||
Rickety Rapids has two [[Bonus room|Bonus Level]]s, listed by type: | |||
*'''Find the Token!''': Right before the [[Star Barrel]] is a small gap with some bananas between it. If the Kongs jump through the gap, they land in a Tracker Barrel, which they must move to the west and blast up into a [[Bonus Barrel]]. In the [[Bonus Level]], the Kongs have 30 seconds to collect the [[Bonus Coin (Donkey Kong franchise)|Bonus Coin]] at the end. They must hop up a few brittle cloud platforms, akin to those from Footloose Falls, to reach a Booster Barrel. The barrel takes them to a Tracker Barrel, which the Kongs must move left in and blast over a Buzz to enter another Booster Barrel leading them into another Tracker Barrel. The Kongs must move the Tracker Barrel to the left to reach the Bonus Coin. | |||
*'''Collect the Stars!''': Shortly after the letter G, the Kongs blast to a high area with a Booster Barrel. There is a formation of bananas which form an arrow pointing east. Instead of taking that direction, the Kongs must go west instead. They soon come across a Bonus Barrel. In the second Bonus Level, the Kongs have 20 seconds to travel up the area and collect six [[star (Donkey Kong franchise)|star]]s, which can reached by a [[Spinner Barrel|Rotatable Barrel]], followed by some [[Blast Barrel]]s and a Tracker Barrel at the end. Once the Kongs reach the highest platform, which is where the Bonus Coin appears, they should have all six stars. | |||
| | |||
==Gallery== | ==Gallery== | ||
| Line 70: | Line 55: | ||
==Names in other languages== | ==Names in other languages== | ||
{{foreign names | {{foreign names | ||
|Jap= | |Jap=ながれに気をつけろ | ||
|JapR=Nagare ni | |JapR=Nagare ni Ki o tsukero | ||
|JapM=Be Careful of the Flow | |JapM=Be Careful of the Flow | ||
}} | }} | ||
{{DKL3}} | {{DKL3}} | ||
[[Category: | [[Category:Aquatic areas]] | ||
[[Category:Donkey Kong Land III | [[Category:Mountains]] | ||
[[Category:Donkey Kong Land III levels]] | |||
Latest revision as of 21:32, January 2, 2024
| Level | |
|---|---|
| Rickety Rapids | |

| |
| Level code | 5-3 |
| World | Tin Can Valley |
| Game | Donkey Kong Land III |
| << Directory of levels >> | |
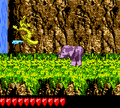
Rickety Rapids is the twenty-seventh level of Donkey Kong Land III and the third level of Tin Can Valley. Similarly to Footloose Falls, Rickety Rapids is a waterfall level where Dixie and Kiddy transform into Ellie, and both have Tracker Barrels and Booster Barrels. Ellie's Animal Barrel is available at the start of the level; the Kongs must turn around and jump to the right corner at the start to become Ellie. Beyond the No Animal Sign, the Kongs must go up the waterfall using Tracker Barrels and Booster Barrels. There are banana trails hinting to Bonus Barrels and groups of bananas shaping arrows guiding the path to the end. Oftentimes, a brief detour in the opposite direction of the banana arrow can lead to hidden items or Bonus Levels.
Layout[edit]
From the start of this watery level, the Kongs must travel west while dodging a few enemies. They will soon, come up to a Tracker Barrel. It must be used to blast across a small gap. After passing several Krumples afterwards, the heroes will need to hop into another Tracker Barrel. This time, they will have to shoot over a Buzz and then land in a Booster Barrel. This barrel will blast the Kongs high in the air, where they will need to move to the right and land on a safe area. Carrying on, they must head east over to the next Tracker Barrel. It will shoot them over another gap, then to another barrel. That barrel will take the monkeys back on land. There, they will need to walk a little farther to yet another Tracker Barrel. It will, as usual, shoot them over a wide pit. On the other end, the monkeys will need to avoid a few more enemies and leap into the next Tracker Barrel. They should head to a Booster Barrel with it. This barrel will take them to another Tracker Barrel. They will have to blast to the west at this point, still using a few more Tracker Barrels. Once they are finally back on land, the group must head a little farther west to find the Star Barrel.
Halfway through the level, the heroes must cross two small gaps with a Tracker Barrel. If they walk a little farther, they will have to use another Tracker Barrel. They should use it to blast to a Booster Barrel, which will take them up to the next Tracker Barrel. There, the monkeys will need to shoot over a few Buzzes and reach another Tracker Barrel. This barrel will soon take them to a Booster Barrel. Finally, this barrel will take the monkeys back on safe ground, and not over the dangerous falls. After the Kongs are on land, they must head east and surpass more obstacles to encounter another wide abyss. With the Tracker Barrel nearby, they must blast over some more Buzzes and make it over the abyss. When the heroes are on the other end, they will have to hop into another Tracker Barrel. It will shoot them to a Booster Barrel, which will lead the monkeys to a higher area on a large platform. From there, they must journey west and avoid several Krumples and a Kopter. Eventually, they will need to use a Tracker Barrel to get over a small gap, and then leap into a Booster Barrel to reach a high platform. At that point, the Dixie and Kiddy must travel east. Walking a longer distance than usual, they must cross a small gap with a Tracker Barrel and dodge Buzzes and Knockas. Soon, they will find a large abyss, and it can only be crossed with a Tracker Barrel. So, they should get in the barrel and blast over a few Buzzes to get over it. On the other end, the heroes will find the End of Level Flag.
Enemies[edit]
Items and objects[edit]
The following items and objects appear in the following quantities:
- DK Barrel: 4
- Bear coin: 1
- Extra Life Balloon: 1
K-O-N-G Letters[edit]
- K: Directly in front of Kongs at the start of the level.
- O: Above a Buzz found shortly past the No Animal Sign.
- N: At the point in the level where a banana arrow points east, head west to find the "N" Letter.
- G: In between a gap near some Krumple.
DK Coin[edit]

Just before the End of Level Flag is a Steel Barrel. The Kongs must pick it up and jump over the End of Level Flag to find Koin. They must throw the Steel Barrel at the edge of the screen, causing it to bounce off and roll into Koin from behind. Koin is defeated and the Kongs are rewarded the DK Coin.
Bonus Levels[edit]

Rickety Rapids has two Bonus Levels, listed by type:
- Find the Token!: Right before the Star Barrel is a small gap with some bananas between it. If the Kongs jump through the gap, they land in a Tracker Barrel, which they must move to the west and blast up into a Bonus Barrel. In the Bonus Level, the Kongs have 30 seconds to collect the Bonus Coin at the end. They must hop up a few brittle cloud platforms, akin to those from Footloose Falls, to reach a Booster Barrel. The barrel takes them to a Tracker Barrel, which the Kongs must move left in and blast over a Buzz to enter another Booster Barrel leading them into another Tracker Barrel. The Kongs must move the Tracker Barrel to the left to reach the Bonus Coin.
- Collect the Stars!: Shortly after the letter G, the Kongs blast to a high area with a Booster Barrel. There is a formation of bananas which form an arrow pointing east. Instead of taking that direction, the Kongs must go west instead. They soon come across a Bonus Barrel. In the second Bonus Level, the Kongs have 20 seconds to travel up the area and collect six stars, which can reached by a Rotatable Barrel, followed by some Blast Barrels and a Tracker Barrel at the end. Once the Kongs reach the highest platform, which is where the Bonus Coin appears, they should have all six stars.
Gallery[edit]
Ellie defeats a Rekoil
Ellie blasts out of a Tracker Barrel
Ellie defeats a Krumple

Ellie defeats a Buzz

Dixie blasts to the letter O
Dixie blasts between two Buzzes


Names in other languages[edit]
| Language | Name | Meaning |
|---|---|---|
| Japanese | ながれに気をつけろ Nagare ni Ki o tsukero |
Be Careful of the Flow |