Minky Mischief: Difference between revisions
mNo edit summary |
(updated) |
||
| Line 6: | Line 6: | ||
|after=[[Jetty Jitters|>>]] | |after=[[Jetty Jitters|>>]] | ||
}} | }} | ||
'''Minky Mischief''' is the eighth level in | '''Minky Mischief''' is the eighth level in ''[[Donkey Kong Land III]]'' and the second level of [[Primate Plains]], where it is located in the eastern woods. It is the first level set within hollow trees. | ||
==Summary== | |||
Minky Mischief takes place inside large, hollow trees which the Kongs must ascend. It is reminiscent of the ''[[Donkey Kong Country 3: Dixie Kong's Double Trouble!]]'' level, [[Barrel Shield Bust-Up]], as [[Minkey]]s as the main enemy of both levels. [[Dixie Kong|Dixie]] and [[Kiddy Kong|Kiddy]] can hide behind [[Barrel Shield]]s to protect themselves from the nuts thrown by Minkeys. The [[Kong]]s also encounter some [[Nid]]s, who bounce them to [[Nid]]s that help the [[Kong]]s progress up the level. During most of the latter half, the Kongs are transformed into [[Squawks the Parrot]], who makes his first appearance in the level. Squawks can defeat [[Buzz (enemy)|Buzz]]es along the way and locate secrets such as a [[Red Balloon]], a [[Bear Coin]], and even [[Bonus Barrel]]s. | |||
==Layout== | |||
== | |||
At the beginning of the level, the heroes exit a narrow trunk to climb up several short branches. With the help of some Nids, they make it to an entryway into another tree trunk. There, they climb up a long rope while avoiding the restless Minkeys. At the top of this rope, they travel to the left and cross into another tree. In this tree, they hop up some bark platforms and cross back into the other tree. Walking to the other end of this tree, they follow bananas down a branch-filled area and enter the bottom of a different tree. Leaving that tree from the right, they climb down some more branches and enter yet another tree trunk. Moving down its bark platforms, they find a pathway to the [[Star Barrel]]. | At the beginning of the level, the heroes exit a narrow trunk to climb up several short branches. With the help of some Nids, they make it to an entryway into another tree trunk. There, they climb up a long rope while avoiding the restless Minkeys. At the top of this rope, they travel to the left and cross into another tree. In this tree, they hop up some bark platforms and cross back into the other tree. Walking to the other end of this tree, they follow bananas down a branch-filled area and enter the bottom of a different tree. Leaving that tree from the right, they climb down some more branches and enter yet another tree trunk. Moving down its bark platforms, they find a pathway to the [[Star Barrel]]. | ||
About halfway through the level, the group climb downwards through another tree trunk to find an [[Animal Barrel]] with Squawks. Once they turn into the parrot, Squawks flies upwards through the next tree and dodge or defeat many Buzzes. Upon exiting the tree, he maneuver around some branches to enter another area of the same tree. Now flying up through the rest of the tree, the parrot must watch out for more Buzzes and cross into the next tree. This time, he heads downwards and move along a branch to enter another tree. From there, the bird exits just to the right and maneuver around more branches and Buzzes in his way. Going back into the tree to his left at the bottom of the area, he continues downwards and pass a few more enemies to find a [[No Animal Sign]] in a branch. It turns him back into the Kongs, who needs to use the aid of a Nid to grab onto a high-up rope. While climbing up this rope, they are greeted by more Minkeys. Avoiding each one, they reach the top of the tree and cross into another to find a flagpole. If they touch the flagpole, the level ends. | About halfway through the level, the group climb downwards through another tree trunk to find an [[Animal Barrel]] with Squawks. Once they turn into the parrot, Squawks flies upwards through the next tree and dodge or defeat many Buzzes. Upon exiting the tree, he maneuver around some branches to enter another area of the same tree. Now flying up through the rest of the tree, the parrot must watch out for more Buzzes and cross into the next tree. This time, he heads downwards and move along a branch to enter another tree. From there, the bird exits just to the right and maneuver around more branches and Buzzes in his way. Going back into the tree to his left at the bottom of the area, he continues downwards and pass a few more enemies to find a [[No Animal Sign]] in a branch. It turns him back into the Kongs, who needs to use the aid of a Nid to grab onto a high-up rope. While climbing up this rope, they are greeted by more Minkeys. Avoiding each one, they reach the top of the tree and cross into another to find a flagpole. If they touch the flagpole, the level ends. | ||
== | ==Enemies== | ||
== | *[[Buzz (enemy)|Buzz]] | ||
* | *[[Bristles]] | ||
*Near | *[[Minky]] | ||
*[[Nid]] | |||
*[[Sneek]] | |||
==Items and objects== | |||
*[[Bear Coin]]: 1 | |||
*[[DK Barrel]]: 3 | |||
*[[Red Balloon]]: 1 | |||
===K-O-N-G Letters=== | |||
*K: In between two Buzzes | |||
*O: Above the first Bristles encountered in the level | |||
*N: Near a Buzz going in between two trees | |||
*G: Shortly after Squawks transforms back into Dixie or Kiddy, a Nid bounces the Kongs high up to the letter G | |||
===DK Coin=== | ===DK Coin=== | ||
{|class="dktable-brown" | |||
!Image | |||
!Location | |||
|- | |||
|[[File:Minky Mischief DKL3 Koin.png]] | |||
|After the letter G, Dixie or Kiddy must climb up a large rope and then walk out to the right of the hollow tree. The Kong must jump at a banana to the left to be caught into a hidden Barrel Cannon above, which blasts them to another Barrel Cannon that blasts them left into a hidden area with the [[Koin]] and a [[Steel Barrel]] on a platform above him. The Kong must throw the Steel Barrel at the wall on either side of the tree for it to bounce off and roll into Koin below, defeating him and rewarding the [[DK Coin]] to the Kongs. | |||
|} | |||
==Bonus Levels== | |||
{|class="dktable-brown" | |||
!Image | |||
!Type and description | |||
|- | |||
|[[File:Minky Mischief DKL3 Bonus Level 1.png]] | |||
|'''''Collect the Stars!'''''<br>After the letter O, the Kongs must go down from some branches outside the large trees and then drop from some platforms in a hollow tree. The Kongs must then go into a gap to enter a small area with a Buzz and the first [[Bonus Barrel]]. In the [[Bonus Level]], the Kongs have 20 seconds to collect 22 [[Star (Donkey Kong Country series)|star]]s. They must first jump up some platforms and jump from a few Nids in a hollow tree. When the Kongs reach the top, they must go left into an open area and go down from some tree branches, collecting stars along the way. Each of the stars are in groups of three except the first one. When the Kongs collect every star, the [[Bonus Coin]] appears at the bottom of their fall, on the left side of the Bonus Level. | |||
|- | |||
|[[File:Minky Mischief DKL3 Bonus Level 2.png]] | |||
|'''''Find the Token!'''''<br>Near the end of the level, Squawks can find a group of bananas forming a right arrow. Instead of going in that direction, Squawks must fly up the hollow trunk, between three Buzzes along the way, and then up to a platform which the [[Bonus Barrel]] hovers over slightly. In the [[Bonus Level]], Squawks passes a No Animal Sign and transforms back into the Kongs. Dixie or Kiddy have 40 seconds to find the [[Bonus Coin]]. They must climb vertical ropes and avoid some Buzzes in hollow trees along the way. The Bonus Coin is hovering over the tip of a tree branch. | |||
|} | |||
==Gallery== | |||
<gallery> | |||
Minky Mischief DKL3 Nid.png|Kiddy standing next to a Nid | |||
Minky Mischief DKL3 Letter K.png|Dixie at the letter K | |||
Minky Mischief DKL3 Star Barrel.png|Dixie approaches the Star Barrel | |||
Minky Mischief DKL3 Squawks and Buzz.png|Squawks flies past a Buzz | |||
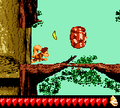
Minky Mischief DKL3 Bear Coin.png|Squawks flies up to a Bear Coin | |||
</gallery> | |||
==Names in other languages== | ==Names in other languages== | ||
Revision as of 00:17, November 14, 2019
Template:Levelbox Minky Mischief is the eighth level in Donkey Kong Land III and the second level of Primate Plains, where it is located in the eastern woods. It is the first level set within hollow trees.
Summary
Minky Mischief takes place inside large, hollow trees which the Kongs must ascend. It is reminiscent of the Donkey Kong Country 3: Dixie Kong's Double Trouble! level, Barrel Shield Bust-Up, as Minkeys as the main enemy of both levels. Dixie and Kiddy can hide behind Barrel Shields to protect themselves from the nuts thrown by Minkeys. The Kongs also encounter some Nids, who bounce them to Nids that help the Kongs progress up the level. During most of the latter half, the Kongs are transformed into Squawks the Parrot, who makes his first appearance in the level. Squawks can defeat Buzzes along the way and locate secrets such as a Red Balloon, a Bear Coin, and even Bonus Barrels.
Layout
At the beginning of the level, the heroes exit a narrow trunk to climb up several short branches. With the help of some Nids, they make it to an entryway into another tree trunk. There, they climb up a long rope while avoiding the restless Minkeys. At the top of this rope, they travel to the left and cross into another tree. In this tree, they hop up some bark platforms and cross back into the other tree. Walking to the other end of this tree, they follow bananas down a branch-filled area and enter the bottom of a different tree. Leaving that tree from the right, they climb down some more branches and enter yet another tree trunk. Moving down its bark platforms, they find a pathway to the Star Barrel.
About halfway through the level, the group climb downwards through another tree trunk to find an Animal Barrel with Squawks. Once they turn into the parrot, Squawks flies upwards through the next tree and dodge or defeat many Buzzes. Upon exiting the tree, he maneuver around some branches to enter another area of the same tree. Now flying up through the rest of the tree, the parrot must watch out for more Buzzes and cross into the next tree. This time, he heads downwards and move along a branch to enter another tree. From there, the bird exits just to the right and maneuver around more branches and Buzzes in his way. Going back into the tree to his left at the bottom of the area, he continues downwards and pass a few more enemies to find a No Animal Sign in a branch. It turns him back into the Kongs, who needs to use the aid of a Nid to grab onto a high-up rope. While climbing up this rope, they are greeted by more Minkeys. Avoiding each one, they reach the top of the tree and cross into another to find a flagpole. If they touch the flagpole, the level ends.
Enemies
Items and objects
- Bear Coin: 1
- DK Barrel: 3
- Red Balloon: 1
K-O-N-G Letters
- K: In between two Buzzes
- O: Above the first Bristles encountered in the level
- N: Near a Buzz going in between two trees
- G: Shortly after Squawks transforms back into Dixie or Kiddy, a Nid bounces the Kongs high up to the letter G
DK Coin
| Image | Location |
|---|---|

|
After the letter G, Dixie or Kiddy must climb up a large rope and then walk out to the right of the hollow tree. The Kong must jump at a banana to the left to be caught into a hidden Barrel Cannon above, which blasts them to another Barrel Cannon that blasts them left into a hidden area with the Koin and a Steel Barrel on a platform above him. The Kong must throw the Steel Barrel at the wall on either side of the tree for it to bounce off and roll into Koin below, defeating him and rewarding the DK Coin to the Kongs. |
Bonus Levels
| Image | Type and description |
|---|---|

|
Collect the Stars! After the letter O, the Kongs must go down from some branches outside the large trees and then drop from some platforms in a hollow tree. The Kongs must then go into a gap to enter a small area with a Buzz and the first Bonus Barrel. In the Bonus Level, the Kongs have 20 seconds to collect 22 stars. They must first jump up some platforms and jump from a few Nids in a hollow tree. When the Kongs reach the top, they must go left into an open area and go down from some tree branches, collecting stars along the way. Each of the stars are in groups of three except the first one. When the Kongs collect every star, the Bonus Coin appears at the bottom of their fall, on the left side of the Bonus Level. |

|
Find the Token! Near the end of the level, Squawks can find a group of bananas forming a right arrow. Instead of going in that direction, Squawks must fly up the hollow trunk, between three Buzzes along the way, and then up to a platform which the Bonus Barrel hovers over slightly. In the Bonus Level, Squawks passes a No Animal Sign and transforms back into the Kongs. Dixie or Kiddy have 40 seconds to find the Bonus Coin. They must climb vertical ropes and avoid some Buzzes in hollow trees along the way. The Bonus Coin is hovering over the tip of a tree branch. |
Gallery
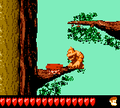
Kiddy standing next to a Nid
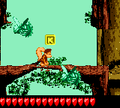
Dixie at the letter K
Dixie approaches the Star Barrel
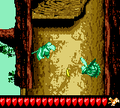
Squawks flies past a Buzz
Squawks flies up to a Bear Coin


Names in other languages
| Language | Name | Meaning |
|---|---|---|
| Japanese | ミンキーのいたずら Minkī no Itazura |
Minkey's Mischief |