Bazuka Bombard: Difference between revisions
Fawfulfury65 (talk | contribs) mNo edit summary |
LinkTheLefty (talk | contribs) mNo edit summary |
||
| (35 intermediate revisions by 21 users not shown) | |||
| Line 1: | Line 1: | ||
{{level | {{more images|Bonus Levels}} | ||
{{level infobox | |||
|image=[[ | |image=[[File:Bazuka Bombard.png]] | ||
|code=5 - 4 | |code=5-4 | ||
|game=''[[Donkey Kong Land III]]'' | |game=''[[Donkey Kong Land III]]'' | ||
|before=[[Rickety Rapids|<<]] | |before=[[Rickety Rapids|<<]] | ||
|after=[[Ugly Ducting|>>]] | |after=[[Ugly Ducting|>>]] | ||
}} | }} | ||
'''Bazuka Bombard''' is the twenty-eighth level in | '''Bazuka Bombard''', named '''Machine''' in the [[Donkey Kong Land III#Time Attack mode|Time Attack]] mode, is the twenty-eighth level in ''[[Donkey Kong Land III]]'' and the fourth level of [[Tin Can Valley]]. It takes place inside a factory where, like other factory levels, they must ride up small elevators and jump from several platforms. Despite the level's name, only three [[Bazuka]]s appear in the level. Ironically, [[Karbine]]s are the main enemy of Bazuka Bombard, and are more common than in their titular level, [[Karbine Kaos]]. The Karbines launch fireballs from afar that must be avoided. | ||
==Layout== | |||
From the start of the level, the heroes will have to travel across the first floor of the factory and pass a few enemies, including a Bazuka. After passing a lone Knocka and crossing a small gap, the monkeys will see an elevator hovering up and down. Riding on the device, they should move to another elevator. With this, they will need to ride up to a few platforms jutting out of the walls. Jumping back and fourth to each one, the group will soon reach the next floor of the factory, and have to head west. They will come up to many, many different enemies in their path at this point, including Buzzes and Sneeks. After running under several Buzzes, the heroes will have to watch out for a Karbine and jump onto an elevator. They will be lead to another elevator, and this one will guide them to a barrel, which will shoot them to a higher floor. From there, the monkeys will have to jump into another barrel and blast through a short chain of barrels to [[KONG Letters|the letter O]]. After that, the Kongs will find themselves going through another chain of barrels, then being shot by the [[Star Barrel]]. | |||
Halfway through the level, the group will need to bounce on a [[Knik-Knak|NikNak]] to cross a small pit and then head to a barrel past a few Karbines. The barrel will shoot them to more platforms, each one jutting out of the wall. Once the heroes make their way up the area with these platforms, without being hit by the Karbine behind them, they will need to travel west again. Climbing up a few ledges, the apes will be greeted by two dangerous Bazukas. Avoiding these foes can be tough, as they will blast barrels from their cannons very quickly and on short notice. After passing the second Bazuka in this area, the Kongs will have to cross a small pit and grab the letter N nearby. At that point, the heroes will have to trudge into another barrel and blast to more platforms. Jumping around each platform, they will make it up to the next area, and also grab the letter G. Once this is done, the Kongs will have to travel west again and pass a few more enemies. After passing a Karbine, the monkeys will see a flagpole. Touching it will end the level. | |||
== | ==Enemies== | ||
*[[Bazuka]] | |||
*[[Bristles]] | |||
*[[Karbine]] | |||
*[[Kobble]] | |||
*[[Krumple]] | |||
*[[Knik-Knak|Niknak]] | |||
*[[Re-Koil|Rekoil]] | |||
*[[Sneek]] | |||
==Items and objects== | |||
The following items and objects appear in the following quantities: | |||
*[[Bear coin]]: 1 | |||
*[[DK Barrel]]: 4 | |||
===K-O-N-G Letters=== | |||
*K: East of the first Bristles, is guarded by a nearby Bazuka. | |||
*O: A Barrel Cannon near a pool of molten lava will launch the heroes near the "O" Letter. | |||
*N: Found after jumping over a molten lava pool near a Bazuka. | |||
*G: Found on a platform shortly after the "N" Letter. | |||
===DK Coin=== | |||
[[File:Bazuka Bombard DKL3 Koin.png|thumb|The Koin of Bazuka Bombard]] | |||
After the letter G, the Kongs find a [[Iron Barrel|Steel Barrel]]. They must pick it up and carry it to the [[Koin]], found shortly before the Level Flag. The Kongs must avoid it from being destroyed by a Karbine's fireball. If the Kongs throw the Steel Barrel into a wall, it bounce off and hits Koin in the back, defeating him and rewarding the [[DK Coin]] to the Kongs. | |||
{{br}} | |||
== | ==Bonus Levels== | ||
Bazuka Bombard has two [[Bonus room|Bonus Levels]], listed by type: | |||
*When the | *'''''Collect the Stars!''''': When the Kongs go the third elevator, they must jump to the fourth elevator and jump to a [[Bonus Barrel]] at the right. In the [[Bonus Level]], the Kongs have twenty seconds to collect eleven [[star (Donkey Kong franchise)|star]]s. To do so, the Kongs must jump into an Auto-Fire Barrel to automatically blast between a chain of Barrel Cannons and collect stars along the way. After all stars are collected, the [[Bonus Coin (Donkey Kong franchise)|Bonus Coin]] appears, which the Kongs are forcefully blasted into at the end. | ||
*After the | *'''''Bash the Baddies!''''': After the Star Barrel and the second [[bear coin]], the Kongs encounter two Bazukas on top of two small areas, on a path ascending northwest. With [[Dixie Kong|Dixie]] in the lead, she must jump to the right and use her [[Helicopter Spin]]. At that time, the Bazuka will fire a barrel out of his cannon. When the barrel hovers under Dixie she must bounce on it to land into the second Bonus Barrel. In the Bonus Level, the Kongs have twenty seconds to defeat two Sneeks, Rekoils, and Booty Birds. At the end, after the Kongs jump into an abyss, they must travel over a few tubs of boiling lava. Once every enemy is defeated, the Bonus Coin appears nearby. | ||
== | ==Gallery== | ||
<gallery> | |||
Bazuka Bombard DKL3 Karbine.png|A Karbine shoots a big fireball at Dixie | |||
Bazuka Bombard DKL3 Bonus Barrel 1.png|Dixie jumping to the first Bonus Barrel | |||
BazukaBombard-G.png|The letter G | |||
</gallery> | |||
==Names in other languages== | |||
{{foreign names | |||
|Jap=タルタルパニック | |||
|JapR=Taru Taru Panikku | |||
|JapM=Barrel Barrel Panic | |||
}} | |||
{{DKL3}} | {{DKL3}} | ||
[[Category:Donkey Kong | [[Category:Donkey Kong Land III levels]] | ||
[[Category:Factories]] | |||
[[Category:Northern Kremisphere]] | |||
Latest revision as of 20:05, January 2, 2024
It has been requested that more images be uploaded for this article. Remove this notice only after the additional image(s) have been added. Reason: Bonus Levels
| Level | |
|---|---|
| Bazuka Bombard | |

| |
| Level code | 5-4 |
| Game | Donkey Kong Land III |
| << Directory of levels >> | |
Bazuka Bombard, named Machine in the Time Attack mode, is the twenty-eighth level in Donkey Kong Land III and the fourth level of Tin Can Valley. It takes place inside a factory where, like other factory levels, they must ride up small elevators and jump from several platforms. Despite the level's name, only three Bazukas appear in the level. Ironically, Karbines are the main enemy of Bazuka Bombard, and are more common than in their titular level, Karbine Kaos. The Karbines launch fireballs from afar that must be avoided.
Layout[edit]
From the start of the level, the heroes will have to travel across the first floor of the factory and pass a few enemies, including a Bazuka. After passing a lone Knocka and crossing a small gap, the monkeys will see an elevator hovering up and down. Riding on the device, they should move to another elevator. With this, they will need to ride up to a few platforms jutting out of the walls. Jumping back and fourth to each one, the group will soon reach the next floor of the factory, and have to head west. They will come up to many, many different enemies in their path at this point, including Buzzes and Sneeks. After running under several Buzzes, the heroes will have to watch out for a Karbine and jump onto an elevator. They will be lead to another elevator, and this one will guide them to a barrel, which will shoot them to a higher floor. From there, the monkeys will have to jump into another barrel and blast through a short chain of barrels to the letter O. After that, the Kongs will find themselves going through another chain of barrels, then being shot by the Star Barrel.
Halfway through the level, the group will need to bounce on a NikNak to cross a small pit and then head to a barrel past a few Karbines. The barrel will shoot them to more platforms, each one jutting out of the wall. Once the heroes make their way up the area with these platforms, without being hit by the Karbine behind them, they will need to travel west again. Climbing up a few ledges, the apes will be greeted by two dangerous Bazukas. Avoiding these foes can be tough, as they will blast barrels from their cannons very quickly and on short notice. After passing the second Bazuka in this area, the Kongs will have to cross a small pit and grab the letter N nearby. At that point, the heroes will have to trudge into another barrel and blast to more platforms. Jumping around each platform, they will make it up to the next area, and also grab the letter G. Once this is done, the Kongs will have to travel west again and pass a few more enemies. After passing a Karbine, the monkeys will see a flagpole. Touching it will end the level.
Enemies[edit]
Items and objects[edit]
The following items and objects appear in the following quantities:
K-O-N-G Letters[edit]
- K: East of the first Bristles, is guarded by a nearby Bazuka.
- O: A Barrel Cannon near a pool of molten lava will launch the heroes near the "O" Letter.
- N: Found after jumping over a molten lava pool near a Bazuka.
- G: Found on a platform shortly after the "N" Letter.
DK Coin[edit]

After the letter G, the Kongs find a Steel Barrel. They must pick it up and carry it to the Koin, found shortly before the Level Flag. The Kongs must avoid it from being destroyed by a Karbine's fireball. If the Kongs throw the Steel Barrel into a wall, it bounce off and hits Koin in the back, defeating him and rewarding the DK Coin to the Kongs.
Bonus Levels[edit]
Bazuka Bombard has two Bonus Levels, listed by type:
- Collect the Stars!: When the Kongs go the third elevator, they must jump to the fourth elevator and jump to a Bonus Barrel at the right. In the Bonus Level, the Kongs have twenty seconds to collect eleven stars. To do so, the Kongs must jump into an Auto-Fire Barrel to automatically blast between a chain of Barrel Cannons and collect stars along the way. After all stars are collected, the Bonus Coin appears, which the Kongs are forcefully blasted into at the end.
- Bash the Baddies!: After the Star Barrel and the second bear coin, the Kongs encounter two Bazukas on top of two small areas, on a path ascending northwest. With Dixie in the lead, she must jump to the right and use her Helicopter Spin. At that time, the Bazuka will fire a barrel out of his cannon. When the barrel hovers under Dixie she must bounce on it to land into the second Bonus Barrel. In the Bonus Level, the Kongs have twenty seconds to defeat two Sneeks, Rekoils, and Booty Birds. At the end, after the Kongs jump into an abyss, they must travel over a few tubs of boiling lava. Once every enemy is defeated, the Bonus Coin appears nearby.
Gallery[edit]
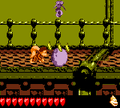
A Karbine shoots a big fireball at Dixie
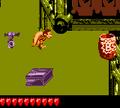
Dixie jumping to the first Bonus Barrel
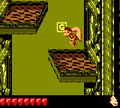
The letter G


Names in other languages[edit]
| Language | Name | Meaning |
|---|---|---|
| Japanese | タルタルパニック Taru Taru Panikku |
Barrel Barrel Panic |