Mast Blast: Difference between revisions
m (→Enemies: I'll come back to this page) |
m (Text replacement - "dktable-brown" to "wikitable dk") |
||
| (18 intermediate revisions by 10 users not shown) | |||
| Line 1: | Line 1: | ||
{{ | {{level infobox | ||
|image=[[File:MastBlast.png|250px]] | |image=[[File:MastBlast.png|250px]] | ||
|code=3-3 | |code=3-3 | ||
| Line 6: | Line 5: | ||
|game=''[[Donkey Kong Country Returns]]'' (''[[Donkey Kong Country Returns 3D|3D]]'') | |game=''[[Donkey Kong Country Returns]]'' (''[[Donkey Kong Country Returns 3D|3D]]'') | ||
|before=[[Button Bash|<<]] | |before=[[Button Bash|<<]] | ||
| | |before_alt=[[Damp Dungeon|**]] | ||
|after=[[Itty Bitty Biters|>>]] | |after=[[Itty Bitty Biters|>>]] | ||
| | |track=Mast Blast | ||
}} | }} | ||
'''Mast Blast''' is the eighteenth level in ''[[Donkey Kong Country Returns]]'' and ''[[Donkey Kong Country Returns 3D]]'', as well as the third level in the [[Ruins]] world. | '''Mast Blast''' is the eighteenth level in ''[[Donkey Kong Country Returns]]'' and ''[[Donkey Kong Country Returns 3D]]'', as well as the third level in the [[Ruins]] world. | ||
==Summary== | |||
Mast Blast takes place at a beach outside of the ruins, and [[Donkey Kong]] and [[Diddy Kong]] must travel across three different ships. At the start, the [[Kong]]s must use some [[Barrel Cannon]]s to move across and slide down some stone walkways. The Kongs eventually enter a beach area, where a pirate ship follows after them, shooting cannonballs at them throughout the level. The cannonballs are able to break crates, some of which have explosives inside them. The Kongs can launch to the ship from a Barrel Cannon once the crates obscuring it are gone. The Kongs can go inside some ships and travel on many ship yards while they are outside. | |||
Inside the ship, some red walls are in the way, and the Kongs can destroy them by performing a [[Kong Roll]]. Advancing to the upper parts of the ship reveals that the ship is battling another ship. The Kongs must continue to another Barrel Cannon to go onto a larger pirate ship. The second ship is under heavy fire, so the Kongs must dodge the cannonballs while navigating the ship deck and masts. They can cling to the bottom of the masts. The end of the level is at the top of the ship. | |||
In the [[Donkey Kong Country Returns#Time Attack|Time Attack]] mode | In the [[Donkey Kong Country Returns#Time Attack|Time Attack]] mode, a time of 1:37:00 is needed to get a gold medal, a time of 2:06:00 for silver, and a time of 2:40:00 for bronze. | ||
== | ==Layout== | ||
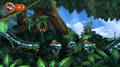
[[File:MastBlast1.png|thumb|left|250px|Donkey Kong and Diddy Kong approach a Tiki Torch]] | [[File:MastBlast1.png|thumb|left|250px|Donkey Kong and Diddy Kong approach a Tiki Torch]] | ||
At the beginning of the level, the Kongs come up to a straight pathway in a ruins area. Just after passing a [[DK Barrel]], the Kongs can find a [[Barrel Cannon]] that can shoot them to an Auto Fire Barrel and then onto another platform. This stone bridge-like platform curves downwards and leads the primates to a few small platforms with Tiki Goons on them. After treading up a tilted platform, the Kongs can reach another Barrel Cannon that shoots them farther into the background, where a Tiki Torch can be found. Behind the Kongs is also a small platform with a dandelion on it; the plant gives the heroes a [[Puzzle Piece (Donkey Kong Country Returns)|Puzzle Piece]] if blown on. Farther ahead are some tilted platforms with Tiki Goons on them that the Kongs can slide down. Another Barrel Cannon is at the end of this area, and it blasts the primates closer to the foreground, where they find another slanted platform leading to a Barrel Cannon. This cannon shoots them to the final stone platform, which is tilted down towards a Barrel Cannon that blasts the heroes to a beach area. At the Kongs arrival in this area, they pass the [[Tutorial Pig]] who marks the checkpoint. | At the beginning of the level, the Kongs come up to a straight pathway in a ruins area. Just after passing a [[DK Barrel]], the Kongs can find a [[Barrel Cannon]] that can shoot them to an Auto Fire Barrel and then onto another platform. This stone bridge-like platform curves downwards and leads the primates to a few small platforms with Tiki Goons on them. After treading up a tilted platform, the Kongs can reach another Barrel Cannon that shoots them farther into the background, where a Tiki Torch can be found. Behind the Kongs is also a small platform with a dandelion on it; the plant gives the heroes a [[Puzzle Piece (Donkey Kong Country Returns)|Puzzle Piece]] if blown on. Farther ahead are some tilted platforms with Tiki Goons on them that the Kongs can slide down. Another Barrel Cannon is at the end of this area, and it blasts the primates closer to the foreground, where they find another slanted platform leading to a Barrel Cannon. This cannon shoots them to the final stone platform, which is tilted down towards a Barrel Cannon that blasts the heroes to a beach area. At the Kongs arrival in this area, they pass the [[Professor Chops|Tutorial Pig]] who marks the checkpoint. | ||
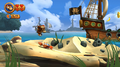
[[File: | [[File:DKCR Mast Blast 2.png|thumb|250px|Donkey Kong baits a cannon to aim for some explosives]] | ||
There are some | There are some Snippys, spikes, and crates full of explosives farther ahead. The letter O of the [[KONG Letters|K-O-N-G Letters]] can be found above the first explosive crate, and a heart is located right next to it. Here, a ship starts firing cannonballs directly at the Kongs. A raised piece of land with some crates on it is also just up ahead, and a Snippys and a Pinchly are nearby. Immediately after these foes are a few rectangular, explosive crates covering a gap with a Barrel Cannon in it. If the Kongs use the cannonballs shooting from the ship in the background here, they can find their way into the cannon, which blasts them into the hull of the ship. Inside the ship, they find themselves inside a small room. A red gate is in front of the room's exit, but the primates can break it away with a [[Roll Attack|Barrel Roll]] or [[Cartwheel Attack]]. Four Snippys are lined up just after this on the tilted ship, followed by a few crates. Another red gate is right in front of another crate, so the primates can roll into it to move it out of the way. When they hit it, the gate is locked in place on the wall, so they can use it as a platform to travel up a narrow area. As the Kongs continue up the slanted area, they encounter some stray cannonballs that roll towards them. A moving platform is above them to use in order to access the outside areas of the ship, where the Kongs come up to some crab enemies. Just before they get to the stern, a red gate attached to the ship's mast blocks their way. After a roll attack, the mast breaks off and falls into the sea. On the stern past the foes, they can find the letter N in a small room that can only be accessed by pounding on a red gate again. Right after this is a Tutorial Pig who marks the checkpoint. | ||
After the Tutorial Pig is a Barrel Cannon that shoots the primates to what appears to be the fleet's command ship and into a pirate Pinchly. After the Kongs smash through this ship's helm that is in their way, they can advance to a sail covered in a green, grassy turf. Below this sail are crates, some of which that can be destroyed by cannonballs being shot by the ship in the background to access a [[Bonus Level]], and crab enemies. The primates can climb on the turf on the first sail to reach an Auto Fire Barrel that blasts them to a yard. This yard tilts with their weight on it, so they can tilt it to a side to be able to reach the turf on the above sail to grab the letter G. They can also tilt it to reach the neighboring yard, which is slightly longer. This mast features a Pinchly and some [[Banana Coin]]s, as well as a Barrel Cannon that shoots the primates to the mast above when entered. When the heroes reach this mast, it is struck by a cannonball, causing part of the ship to fall. This allows the Kongs to reach some hanging platforms on the ship, which they can jump onto to progress; below these platforms is another yard with a crate full of explosives on it. Using the hanging platforms, the heroes can reach a rope that can be used to reach a Barrel Cannon. The Barrel Cannon blasts them to other cannons; when they reach the final Barrel Cannon, the cannon begins to fall with the damaged ship. After the barrel shoots them into the air, part of the ship smashes into the ship in the background, causing it to sink as well. The primates end up landing on the sunken ship's floating crow's nest, where the [[Slot Machine Barrel]] is located. Hitting the barrel causes the level to become completed. | After the Tutorial Pig is a Barrel Cannon that shoots the primates to what appears to be the fleet's command ship and into a pirate Pinchly. After the Kongs smash through this ship's helm that is in their way, they can advance to a sail covered in a green, grassy turf. Below this sail are crates, some of which that can be destroyed by cannonballs being shot by the ship in the background to access a [[Bonus Level]], and crab enemies. The primates can climb on the turf on the first sail to reach an Auto Fire Barrel that blasts them to a yard. This yard tilts with their weight on it, so they can tilt it to a side to be able to reach the turf on the above sail to grab the letter G. They can also tilt it to reach the neighboring yard, which is slightly longer. This mast features a Pinchly and some [[Banana Coin]]s, as well as a Barrel Cannon that shoots the primates to the mast above when entered. When the heroes reach this mast, it is struck by a cannonball, causing part of the ship to fall. This allows the Kongs to reach some hanging platforms on the ship, which they can jump onto to progress; below these platforms is another yard with a crate full of explosives on it. Using the hanging platforms, the heroes can reach a rope that can be used to reach a Barrel Cannon. The Barrel Cannon blasts them to other cannons; when they reach the final Barrel Cannon, the cannon begins to fall with the damaged ship. After the barrel shoots them into the air, part of the ship smashes into the ship in the background, causing it to sink as well. The primates end up landing on the sunken ship's floating crow's nest, where the [[Slot Machine Barrel]] is located. Hitting the barrel causes the level to become completed. | ||
==Enemies== | ==Enemies== | ||
{| class=" | {|class="wikitable dk" | ||
! | !Image | ||
!Name | |||
!Count | !Count | ||
|- | |- | ||
|[[ | |align="center"|[[File:Pinchly Render.png|x50px]] | ||
| | |align="center"|[[Pinchly]] | ||
|5 | |||
|- | |- | ||
|[[File: | |align="center"|[[File:Snaps_closeup.png|x50px]] | ||
| | |align="center"|[[Snippys]] | ||
|21 | |||
|- | |- | ||
|[[File:TikiGoon.png|x50px]] | |align="center"|[[File:TikiGoon.png|x50px]] | ||
| | |align="center"|[[Tiki Goon]] | ||
|3 | |||
|- | |- | ||
|[[Tiki Torch]] | |align="center"|[[File:Tiki_Torch.png|x50px]] | ||
| | |align="center"|[[Tiki Torch]] | ||
|2 | |||
|} | |} | ||
==Items and | ==Items and objects== | ||
{|class=" | {|class="wikitable dk"width=15% | ||
|- | |- | ||
! | !Image | ||
!Name | !Name | ||
!Count | !Count | ||
|- | |- | ||
|[[File:BananacoinDKCR.png|x50px]] | |align="center"|[[File:BananacoinDKCR.png|x50px]] | ||
|[[Banana Coin]] | |align="center"|[[Banana Coin]] | ||
|8 | |8 | ||
|- | |- | ||
|[[File:DKBarrelDKCR.png|x50px]] | |align="center"|[[File:DKBarrelDKCR.png|x50px]] | ||
|[[DK Barrel]] | |align="center"|[[DK Barrel]] | ||
|1 | |1 | ||
|- | |- | ||
|[[File:BalloonDKCR.png|x50px]] | |align="center"|[[File:Heart.png|x50px]] | ||
|[[ | |align="center"|[[Heart (item)|Heart]] | ||
|8 | |||
|- | |||
|align="center"|[[File:BalloonDKCR.png|x50px]] | |||
|align="center"|[[Red Balloon]] | |||
|1 | |1 | ||
|} | |} | ||
===K-O-N-G Letters=== | ===K-O-N-G Letters=== | ||
{|class=" | {|class="wikitable dk"width=70% | ||
|- | |- | ||
!Image | !Image | ||
!Letter | |||
!Location | !Location | ||
|- | |- | ||
|K | |align="center"|[[File:DKCR Mast Blast Letter K.png|250px]] | ||
|Shortly after the first Puzzle Piece, the | |align="center"|K | ||
|Shortly after the first Puzzle Piece, the Kongs slide down a slanted pathway. At the edge, they can jump over a gap to reach the letter K. | |||
|- | |- | ||
|O | |align="center"|[[File:DKCR Mast Blast Letter O.png|250px]] | ||
| | |align="center"|O | ||
|Shortly after the third Puzzle Piece, the Kongs can find the letter O above a crate filled with explosives. | |||
|- | |- | ||
| align="center" | [[File:MastBlastN.png| | |align="center"|[[File:MastBlastN.png|250px]] | ||
| | |align="center"|N | ||
|Just left of the second checkpoint, the Kongs must Ground Pound a red floorboard under them to go into a small area with the letter N. | |||
|- | |- | ||
|G | |align="center"|[[File:DKCR Mast Blast Letter G.png|250px]] | ||
|When the Kongs reach the first yard on the second ship, they | |align="center"|G | ||
|When the Kongs reach the first yard on the second ship, they must cling onto the Climbing Grass beneath the above sail to reach the letter G. | |||
|} | |} | ||
===Puzzle Pieces=== | ===Puzzle Pieces=== | ||
{|class=" | {|class="wikitable dk" width=70% | ||
|- | |- | ||
!Image | |||
!Number | !Number | ||
!Location | !Location | ||
|- | |- | ||
|1 | |align="center"|[[File:DKCR Mast Blast Puzzle Piece 1.png|250px]] | ||
|Near the start | |align="center"|1 | ||
|Near the start, when the Kongs shoot into the background a second time, they must go left to find a dandelion on a small platform. If they blow on it, a Puzzle Piece appears. | |||
|- | |- | ||
|2 | |align="center"|[[File:DKCR Mast Blast Puzzle Piece 2.png|250px]] | ||
| | |align="center"|2 | ||
|Right after the Kongs land on the beach area, they must go left to three crates stacked onto each other. To get onto the stack, the Kongs must jump from a nearby Snippys for boosted jump. If they pound down through every crate, the Kongs can find the second Puzzle Piece. | |||
|- | |- | ||
|3 | |align="center"|[[File:DKCR Mast Blast Puzzle Piece 3.png|250px]] | ||
|Before the Kongs shoot to the first ship, they can find a rectangular crate on top of a small gap. If they smash the crate, they can | |align="center"|3 | ||
|Before the Kongs shoot to the first ship, they can find a rectangular crate on top of a small gap. If they smash the crate, they can obtain the Puzzle Piece. | |||
|- | |- | ||
|4 | |align="center"|[[File:DKCR Mast Blast Puzzle Piece 4.png|250px]] | ||
|The fourth Puzzle Piece is | |align="center"|4 | ||
|The fourth Puzzle Piece is at the end of the second ship, which is shown just as the Kongs blast to the ship. To reach it, the Kongs must go onto the first sail and roll jump to the back area of the ship. If they travel down the area, they can find the Puzzle Piece. | |||
|- | |- | ||
|5 | |align="center"|[[File:MastBlastBonus.png|250px]] | ||
|If the | |align="center"|5 | ||
|If the Kongs drop to the bottom of the second ship, they must make the ship in the background shoot its cannonballs at two stacked explosive crates on top of each other. When the crates are gone, they can enter the gap to enter a Bonus Level. There, they have 30 seconds to collect 47 bananas, one [[Red Balloon]], and two Banana Coins around one small platform and two moving platforms, which are respectively above and below the small platform. When the Kongs collect every item, a Puzzle Piece appears. | |||
|- | |- | ||
|6 | |align="center"|[[File:DKCR Mast Blast Puzzle Piece 6.png|250px]] | ||
|On the yard under the letter G, | |align="center"|6 | ||
|On the yard under the letter G, the Kongs must roll jump to the right to land on two explosive crates. They must do it again to land on the front area of the ship, where they can find a Puzzle Piece. | |||
|- | |- | ||
|7 | |align="center"|[[File:DKCR Mast Blast Puzzle Piece 7.png|250px]] | ||
|When the Kongs reach | |align="center"|7 | ||
|When the Kongs reach two hanging platforms on top of the second ship, they must jump down to a hidden yard, which has a crate filled with dynamite. They must get a cannonball to shoot at it so that it explodes, releasing a Puzzle Piece. | |||
|} | |} | ||
== | ==Gallery== | ||
<gallery> | |||
| | Mast Blast jungle.png|The Kongs in a jungle area | ||
Mast Blast Pinchley.png|Donkey Kong jumps over a Pinchley | |||
Mast Blast cling.png|Donkey Kong clinging on Climbing Grass under a yard | |||
| | Mast Blast moving platform.png|Donkey Kong stands on a swinging platform | ||
</gallery> | |||
==Names in other languages== | ==Names in other languages== | ||
| Line 130: | Line 148: | ||
|Spa=Veleros Plataneros | |Spa=Veleros Plataneros | ||
|SpaM=Banana Ships | |SpaM=Banana Ships | ||
| | |FreA=Mâts & Canons | ||
| | |FreAM=Masts & Cannons | ||
|Ger=Mastenschießerei | |Ger=Mastenschießerei | ||
|GerM=Mast Blast[ing] | |GerM=Mast Blast[ing] | ||
| Line 141: | Line 159: | ||
}} | }} | ||
{{DKCR}} | {{DKCR}} | ||
[[Category: | [[Category:Pirate areas]] | ||
[[Category: | [[Category:Temples]] | ||
[[Category: | [[Category:Donkey Kong Country Returns levels]] | ||
Latest revision as of 14:21, February 3, 2024
| Level | |
|---|---|
| Mast Blast | |

| |
| Level code | 3-3 |
| World | Ruins |
| Game | Donkey Kong Country Returns (3D) |
| Music track | Mast Blast |
| ** << Directory of levels >> | |
Mast Blast is the eighteenth level in Donkey Kong Country Returns and Donkey Kong Country Returns 3D, as well as the third level in the Ruins world.
Summary[edit]
Mast Blast takes place at a beach outside of the ruins, and Donkey Kong and Diddy Kong must travel across three different ships. At the start, the Kongs must use some Barrel Cannons to move across and slide down some stone walkways. The Kongs eventually enter a beach area, where a pirate ship follows after them, shooting cannonballs at them throughout the level. The cannonballs are able to break crates, some of which have explosives inside them. The Kongs can launch to the ship from a Barrel Cannon once the crates obscuring it are gone. The Kongs can go inside some ships and travel on many ship yards while they are outside.
Inside the ship, some red walls are in the way, and the Kongs can destroy them by performing a Kong Roll. Advancing to the upper parts of the ship reveals that the ship is battling another ship. The Kongs must continue to another Barrel Cannon to go onto a larger pirate ship. The second ship is under heavy fire, so the Kongs must dodge the cannonballs while navigating the ship deck and masts. They can cling to the bottom of the masts. The end of the level is at the top of the ship.
In the Time Attack mode, a time of 1:37:00 is needed to get a gold medal, a time of 2:06:00 for silver, and a time of 2:40:00 for bronze.
Layout[edit]

At the beginning of the level, the Kongs come up to a straight pathway in a ruins area. Just after passing a DK Barrel, the Kongs can find a Barrel Cannon that can shoot them to an Auto Fire Barrel and then onto another platform. This stone bridge-like platform curves downwards and leads the primates to a few small platforms with Tiki Goons on them. After treading up a tilted platform, the Kongs can reach another Barrel Cannon that shoots them farther into the background, where a Tiki Torch can be found. Behind the Kongs is also a small platform with a dandelion on it; the plant gives the heroes a Puzzle Piece if blown on. Farther ahead are some tilted platforms with Tiki Goons on them that the Kongs can slide down. Another Barrel Cannon is at the end of this area, and it blasts the primates closer to the foreground, where they find another slanted platform leading to a Barrel Cannon. This cannon shoots them to the final stone platform, which is tilted down towards a Barrel Cannon that blasts the heroes to a beach area. At the Kongs arrival in this area, they pass the Tutorial Pig who marks the checkpoint.

There are some Snippys, spikes, and crates full of explosives farther ahead. The letter O of the K-O-N-G Letters can be found above the first explosive crate, and a heart is located right next to it. Here, a ship starts firing cannonballs directly at the Kongs. A raised piece of land with some crates on it is also just up ahead, and a Snippys and a Pinchly are nearby. Immediately after these foes are a few rectangular, explosive crates covering a gap with a Barrel Cannon in it. If the Kongs use the cannonballs shooting from the ship in the background here, they can find their way into the cannon, which blasts them into the hull of the ship. Inside the ship, they find themselves inside a small room. A red gate is in front of the room's exit, but the primates can break it away with a Barrel Roll or Cartwheel Attack. Four Snippys are lined up just after this on the tilted ship, followed by a few crates. Another red gate is right in front of another crate, so the primates can roll into it to move it out of the way. When they hit it, the gate is locked in place on the wall, so they can use it as a platform to travel up a narrow area. As the Kongs continue up the slanted area, they encounter some stray cannonballs that roll towards them. A moving platform is above them to use in order to access the outside areas of the ship, where the Kongs come up to some crab enemies. Just before they get to the stern, a red gate attached to the ship's mast blocks their way. After a roll attack, the mast breaks off and falls into the sea. On the stern past the foes, they can find the letter N in a small room that can only be accessed by pounding on a red gate again. Right after this is a Tutorial Pig who marks the checkpoint.
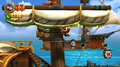
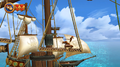
After the Tutorial Pig is a Barrel Cannon that shoots the primates to what appears to be the fleet's command ship and into a pirate Pinchly. After the Kongs smash through this ship's helm that is in their way, they can advance to a sail covered in a green, grassy turf. Below this sail are crates, some of which that can be destroyed by cannonballs being shot by the ship in the background to access a Bonus Level, and crab enemies. The primates can climb on the turf on the first sail to reach an Auto Fire Barrel that blasts them to a yard. This yard tilts with their weight on it, so they can tilt it to a side to be able to reach the turf on the above sail to grab the letter G. They can also tilt it to reach the neighboring yard, which is slightly longer. This mast features a Pinchly and some Banana Coins, as well as a Barrel Cannon that shoots the primates to the mast above when entered. When the heroes reach this mast, it is struck by a cannonball, causing part of the ship to fall. This allows the Kongs to reach some hanging platforms on the ship, which they can jump onto to progress; below these platforms is another yard with a crate full of explosives on it. Using the hanging platforms, the heroes can reach a rope that can be used to reach a Barrel Cannon. The Barrel Cannon blasts them to other cannons; when they reach the final Barrel Cannon, the cannon begins to fall with the damaged ship. After the barrel shoots them into the air, part of the ship smashes into the ship in the background, causing it to sink as well. The primates end up landing on the sunken ship's floating crow's nest, where the Slot Machine Barrel is located. Hitting the barrel causes the level to become completed.
Enemies[edit]
| Image | Name | Count |
|---|---|---|

|
Pinchly | 5 |

|
Snippys | 21 |
| Tiki Goon | 3 | |
| Tiki Torch | 2 |
Items and objects[edit]
| Image | Name | Count |
|---|---|---|
| Banana Coin | 8 | |
| DK Barrel | 1 | |

|
Heart | 8 |
| Red Balloon | 1 |
K-O-N-G Letters[edit]
| Image | Letter | Location |
|---|---|---|

|
K | Shortly after the first Puzzle Piece, the Kongs slide down a slanted pathway. At the edge, they can jump over a gap to reach the letter K. |

|
O | Shortly after the third Puzzle Piece, the Kongs can find the letter O above a crate filled with explosives. |

|
N | Just left of the second checkpoint, the Kongs must Ground Pound a red floorboard under them to go into a small area with the letter N. |

|
G | When the Kongs reach the first yard on the second ship, they must cling onto the Climbing Grass beneath the above sail to reach the letter G. |
Puzzle Pieces[edit]
| Image | Number | Location |
|---|---|---|

|
1 | Near the start, when the Kongs shoot into the background a second time, they must go left to find a dandelion on a small platform. If they blow on it, a Puzzle Piece appears. |

|
2 | Right after the Kongs land on the beach area, they must go left to three crates stacked onto each other. To get onto the stack, the Kongs must jump from a nearby Snippys for boosted jump. If they pound down through every crate, the Kongs can find the second Puzzle Piece. |

|
3 | Before the Kongs shoot to the first ship, they can find a rectangular crate on top of a small gap. If they smash the crate, they can obtain the Puzzle Piece. |

|
4 | The fourth Puzzle Piece is at the end of the second ship, which is shown just as the Kongs blast to the ship. To reach it, the Kongs must go onto the first sail and roll jump to the back area of the ship. If they travel down the area, they can find the Puzzle Piece. |

|
5 | If the Kongs drop to the bottom of the second ship, they must make the ship in the background shoot its cannonballs at two stacked explosive crates on top of each other. When the crates are gone, they can enter the gap to enter a Bonus Level. There, they have 30 seconds to collect 47 bananas, one Red Balloon, and two Banana Coins around one small platform and two moving platforms, which are respectively above and below the small platform. When the Kongs collect every item, a Puzzle Piece appears. |

|
6 | On the yard under the letter G, the Kongs must roll jump to the right to land on two explosive crates. They must do it again to land on the front area of the ship, where they can find a Puzzle Piece. |

|
7 | When the Kongs reach two hanging platforms on top of the second ship, they must jump down to a hidden yard, which has a crate filled with dynamite. They must get a cannonball to shoot at it so that it explodes, releasing a Puzzle Piece. |
Gallery[edit]
The Kongs in a jungle area
Donkey Kong jumps over a Pinchley
Donkey Kong clinging on Climbing Grass under a yard
Donkey Kong stands on a swinging platform


Names in other languages[edit]
| Language | Name | Meaning |
|---|---|---|
| Japanese | パイレーツふたたび Pairētsu Futatabi |
Pirates Again |
| Chinese | 海盗再临 Hǎidào Zàilín |
Pirates Return |
| French (NOA) | Mâts & Canons |
Masts & Cannons |
| German | Mastenschießerei |
Mast Blast[ing] |
| Italian | Nave boccadafuoco |
Fire-Mouth Ship |
| Spanish | Veleros Plataneros |
Banana Ships |