Fast Barrel Blast: Difference between revisions
Green Star (talk | contribs) (Is it just me, or does actually using the barrels look insanely difficult? Rewritten.) |
No edit summary |
||
| (10 intermediate revisions by 7 users not shown) | |||
| Line 1: | Line 1: | ||
{{ | {{level infobox | ||
|image=[[File:Fast Barrel Blast.png]] | |image=[[File:Fast Barrel Blast.png]] | ||
|code=4-4 | |code=4-4 | ||
|game=''[[Donkey Kong Land]]'' | |game=''[[Donkey Kong Land]]'' | ||
| | |track=Airship | ||
|before=[[Balloon Barrage|<<]] | |before=[[Balloon Barrage|<<]] | ||
|after=[[Skyscraper Caper|>>]] | |after=[[Skyscraper Caper|>>]] | ||
}} | }} | ||
'''Fast Barrel Blast'''<ref>''Donkey Kong Land'' instruction booklet, page 19.</ref> is the twenty-seventh level in ''[[Donkey Kong Land]]'' and the fourth level of [[Big Ape City]]. | '''Fast Barrel Blast'''<ref>''Donkey Kong Land'' instruction booklet, page 19.</ref> is the twenty-seventh level in ''[[Donkey Kong Land]]'' and the fourth level of [[Big Ape City]]. Fast Barrel Blast takes place inside of a blimp that largely features [[Barrel Cannon]]s, which move faster than in other levels. Some items such as a [[Kong Token]] or [[KONG Letters]] can be collected by launching [[Donkey Kong]] or [[Diddy Kong]] with precise timing. Sometimes, the Kongs can shoot over the Barrel Cannons to take a shortcut in the level. | ||
Fast Barrel Blast | |||
==Layout== | ==Layout== | ||
| Line 16: | Line 13: | ||
When the level begins, the [[Kong]]s may collect a few [[banana]]s and bounce off of a few [[Kritter]]s before landing in a [[barrel]]. This shoots them up to a ledge, where they must defeat a [[Mini-Necky]] before jumping down another ledge. After this is a large abyss which can only be crossed by shooting the Kongs out of barrels, sometimes with precise aiming and timing. After this, they must simply avoid a few [[Zinger]]s before reaching the [[Continue Point]]. | When the level begins, the [[Kong]]s may collect a few [[banana]]s and bounce off of a few [[Kritter]]s before landing in a [[barrel]]. This shoots them up to a ledge, where they must defeat a [[Mini-Necky]] before jumping down another ledge. After this is a large abyss which can only be crossed by shooting the Kongs out of barrels, sometimes with precise aiming and timing. After this, they must simply avoid a few [[Zinger]]s before reaching the [[Continue Point]]. | ||
Following this, the Kongs must fire themselves out of more barrels before reaching a couple of [[Slippa]]s and another barrel. The Kongs must fire themselves out of the second barrel and bounce off of a tire to reach the next. They must continue over the gap before avoiding a few enemies. A tire embedded in the ground allows them to reach the next barrel. After this section, the Kongs encounter a [[Hogwash the Flying Pig|Hogwash]] they may bounce off of as well. Upon completing this section, they must simply hop down to find a portal they may enter the complete the level. | Following this, the Kongs must fire themselves out of more barrels before reaching a couple of [[Slippa]]s and another barrel. The Kongs must fire themselves out of the second barrel and bounce off of a [[Tire (object)|tire]] to reach the next. They must continue over the gap before avoiding a few enemies. A tire embedded in the ground allows them to reach the next barrel. After this section, the Kongs encounter a [[Hogwash the Flying Pig|Hogwash]] they may bounce off of as well. Upon completing this section, they must simply hop down to find a portal they may enter the complete the level. | ||
{{br|left}} | {{br|left}} | ||
| Line 27: | Line 24: | ||
*[[Zinger]] | *[[Zinger]] | ||
==Items== | ==Items and objects== | ||
The following items and objects appear in the following quantities: | |||
*[[DK Barrel]]s: 3 | *[[DK Barrel]]s: 3 | ||
*[[Kong Token]]s: 2 | *[[Kong Token]]s: 2 | ||
=== | ===KONG Letters=== | ||
*K: Above a barrel cannon that's used to cross an abyss. | *K: Above a barrel cannon that's used to cross an abyss. | ||
*O: Found in a barrel blasting segment. | *O: Found in a barrel blasting segment. | ||
| Line 38: | Line 37: | ||
==Bonus Areas== | ==Bonus Areas== | ||
[[File:FastBarrelBlast-G.png|thumb|The second Bonus Area]] | |||
Fast Barrel Blast has two [[Bonus room|Bonus Areas]]: | |||
| | *Shortly after a Mini-Necky at the start, the Kongs must jump down a large ledge while following a banana trail. By doing so, the Kongs land onto a weak spot of the ground, causing a [[rope]] to rise out. By grabbing it, the Kongs are taken to the first Bonus Area. There, the Kongs must jump on a button to release their Kong Tokens from a Barrel Cannon individually. They earn an [[extra life]] for each Kong Token they catch. Once they run out of tokens, the Kongs return into the main level. | ||
*At the end of the level, instead of continuing down a ledge leading to the portal, the Kongs must instead go to the left end. They must do a roll jump to land in a [[Blast Barrel]] which blasts them to a Bonus Area. The area takes place in a jungle, where the Kongs must avoid three [[Mincer]]s encircling the path. Afterward, the Kongs can bounce from a half tire stuck in the ground to reach the letter G above. A cave opening is next to the tire, and by entering it the Kongs return into the main level. | |||
==Gallery== | ==Gallery== | ||
| Line 61: | Line 55: | ||
|JapM=Blimp 2 | |JapM=Blimp 2 | ||
|Spa=Barriles y despegues | |Spa=Barriles y despegues | ||
|SpaM=Barrels and launches}} | |SpaM=Barrels and launches | ||
|Ita=Il colpo della botte veloce<ref>''[[Donkey Kong Land]]'' Italian booklet, pag. 19</ref> | |||
|ItaM=The fast barrel bang | |||
}} | |||
==References== | ==References== | ||
| Line 67: | Line 64: | ||
{{DKL}} | {{DKL}} | ||
[[Category:Donkey Kong Land | [[Category:Airship areas]] | ||
[[Category:Donkey Kong Land levels]] | |||
Latest revision as of 15:09, December 15, 2023
| Level | |
|---|---|
| Fast Barrel Blast | |
| |
| Level code | 4-4 |
| Game | Donkey Kong Land |
| Music track | Airship |
| << Directory of levels >> | |
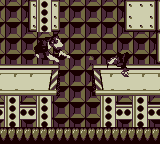
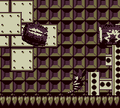
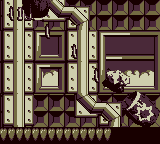
Fast Barrel Blast[1] is the twenty-seventh level in Donkey Kong Land and the fourth level of Big Ape City. Fast Barrel Blast takes place inside of a blimp that largely features Barrel Cannons, which move faster than in other levels. Some items such as a Kong Token or KONG Letters can be collected by launching Donkey Kong or Diddy Kong with precise timing. Sometimes, the Kongs can shoot over the Barrel Cannons to take a shortcut in the level.
Layout[edit]
When the level begins, the Kongs may collect a few bananas and bounce off of a few Kritters before landing in a barrel. This shoots them up to a ledge, where they must defeat a Mini-Necky before jumping down another ledge. After this is a large abyss which can only be crossed by shooting the Kongs out of barrels, sometimes with precise aiming and timing. After this, they must simply avoid a few Zingers before reaching the Continue Point.
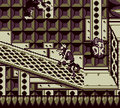
Following this, the Kongs must fire themselves out of more barrels before reaching a couple of Slippas and another barrel. The Kongs must fire themselves out of the second barrel and bounce off of a tire to reach the next. They must continue over the gap before avoiding a few enemies. A tire embedded in the ground allows them to reach the next barrel. After this section, the Kongs encounter a Hogwash they may bounce off of as well. Upon completing this section, they must simply hop down to find a portal they may enter the complete the level.
Enemies[edit]
Items and objects[edit]
The following items and objects appear in the following quantities:
- DK Barrels: 3
- Kong Tokens: 2
KONG Letters[edit]
- K: Above a barrel cannon that's used to cross an abyss.
- O: Found in a barrel blasting segment.
- N: Also located in a barrel blasting segment.
- G: In the second bonus stage.
Bonus Areas[edit]
Fast Barrel Blast has two Bonus Areas:
- Shortly after a Mini-Necky at the start, the Kongs must jump down a large ledge while following a banana trail. By doing so, the Kongs land onto a weak spot of the ground, causing a rope to rise out. By grabbing it, the Kongs are taken to the first Bonus Area. There, the Kongs must jump on a button to release their Kong Tokens from a Barrel Cannon individually. They earn an extra life for each Kong Token they catch. Once they run out of tokens, the Kongs return into the main level.
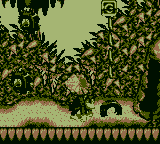
- At the end of the level, instead of continuing down a ledge leading to the portal, the Kongs must instead go to the left end. They must do a roll jump to land in a Blast Barrel which blasts them to a Bonus Area. The area takes place in a jungle, where the Kongs must avoid three Mincers encircling the path. Afterward, the Kongs can bounce from a half tire stuck in the ground to reach the letter G above. A cave opening is next to the tire, and by entering it the Kongs return into the main level.
Gallery[edit]
Names in other languages[edit]
| Language | Name | Meaning |
|---|---|---|
| Japanese | 飛行船2 Hikōsen2 |
Blimp 2 |
| Italian | Il colpo della botte veloce[2] |
The fast barrel bang |
| Spanish | Barriles y despegues |
Barrels and launches |
References[edit]
- ^ Donkey Kong Land instruction booklet, page 19.
- ^ Donkey Kong Land Italian booklet, pag. 19
