Capsule Toy Machine: Difference between revisions
Nintendo101 (talk | contribs) mNo edit summary |
|||
| (41 intermediate revisions by 12 users not shown) | |||
| Line 1: | Line 1: | ||
{{about|a collectible toy dispenser from [[Donkey Kong Country: Tropical Freeze]]|information about a type of device in [[Mario Party 5]]|[[Capsule machine]]}} | {{about|a collectible toy dispenser from [[Donkey Kong Country: Tropical Freeze]]|information about a type of device in [[Mario Party 5]]|[[Capsule machine]]}} | ||
{{quote|Been spendin' all your [[Banana Coin|coins]] on these cool capsule toys?|Funky Kong}} | {{quote|Been spendin' all your [[Banana Coin|coins]] on these cool capsule toys?|Funky Kong}} | ||
[[File: | [[File:Capsule Toy Machine.jpg|thumb|270px|Funky Kong introduces the Capsule Toy Machine to the [[Kong]]s.]] | ||
The '''Capsule Toy Machine''' is a {{wp| | The '''Capsule Toy Machine''' is a {{wp|gashapon}} machine in ''[[Donkey Kong Country: Tropical Freeze]]'' and its Nintendo Switch [[Donkey Kong Country: Tropical Freeze (Nintendo Switch)|port]] that yields figurines enclosed in capsules. It is owned by [[Funky Kong]], who claims to have found it "a while ago", and is put on display in his shop, [[Funky's Fly 'n' Buy]]. | ||
The figurines themselves are miniature representations of the main characters and the [[ | The figurines themselves are miniature representations of the main characters and the [[Snowmads]]. Only a few figurines can be obtained at the beginning of the game, but six more figurines are added to the machine for each boss defeated. Each figurine costs five [[Banana Coin]]s. Figurines are dispensed at random, and the player can get duplicates. Once the player obtains all unique figurines available before beating the next boss, Funky will say that he is out of stock and will not let the player buy any more figurines until new ones are added. Similarly, when the Kongs own all distinct figurines, Funky Kong refuses to sell any more to them, instead asking if they are interested in trading later. | ||
==Figurines gallery== | ==Figurines gallery== | ||
The player can view the obtained toys in the "Figurines" gallery by choosing the | The player can view the obtained toys in the "Figurines" gallery by choosing the "[[List of extras in Donkey Kong Country: Tropical Freeze|EXTRAS]]" option. Each of them is placed on a stand resembling part of a wooden barrel. The player can study these figurines by zooming in and out of them, or by rotating the camera around them. Figurines are divided into categories: | ||
*'''Kong Family''' – contains figurines | *'''Kong Family''' – contains figurines of the [[Kong]]s, as well as [[Rambi the Rhino]], [[Professor Chops]], the [[Mine Cart|Mine Cart]], and the [[Rocket Barrel]]; in the [[Nintendo Switch]] version of the game, this category also contains a figurine of [[Tawks]]; | ||
*'''Bosses''' – contains figurines | *'''Bosses''' – contains figurines of all the bosses of the game; | ||
*'''Snowmads 1''' – contains figurines | *'''Snowmads 1''' – contains figurines of penguin-based [[Snowmads]]; | ||
*'''Snowmads 2''' – contains figurines | *'''Snowmads 2''' – contains figurines of hare, owl, and lemming-based Snowmads; | ||
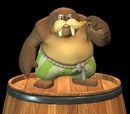
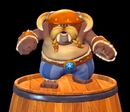
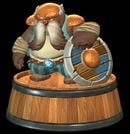
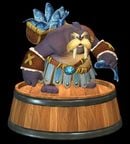
*'''Snowmads 3''' – contains figurines | *'''Snowmads 3''' – contains figurines of heavy-type Snowmads, like [[Waldough]] and [[Big Sphen]]. | ||
The following table lists all figurines and the condition to make them available in the shop. | The following table lists all figurines and the condition to make them available in the shop. | ||
{|class="expandable wikitable" align="center" | {|class="expandable wikitable dk" align="center" | ||
!colspan=3 | Kong Family | !colspan=3 | Kong Family | ||
|- | |- | ||
| Line 24: | Line 23: | ||
!Availability criteria | !Availability criteria | ||
|- | |- | ||
|[[File: | |[[File:DK Toy.jpeg|130px]] | ||
| align="center" | [[Donkey Kong]] | | align="center" | [[Donkey Kong]] | ||
| align="center" | Default | | align="center" | Default | ||
|- | |- | ||
|[[File: | |[[File:Diddy Toy.jpg|130px]] | ||
| align="center" | [[Diddy Kong]] | | align="center" | [[Diddy Kong]] | ||
| align="center" | Beat [[Pompy]] in [[Lost Mangroves]] | | align="center" | Beat [[Pompy]] in [[Lost Mangroves]] | ||
|- | |- | ||
|[[File: | |[[File:Dixie Toy.jpg|130px]] | ||
| align="center" | [[Dixie Kong]] | | align="center" | [[Dixie Kong]] | ||
| align="center" | Beat Pompy in Lost Mangroves | | align="center" | Beat Pompy in Lost Mangroves | ||
|- | |- | ||
|[[File: | |[[File:Cranky toy.jpg|130px]] | ||
| align="center" | [[Cranky Kong]] | | align="center" | [[Cranky Kong]] | ||
| align="center" | Beat [[Ba-Boom]] in [[Bright Savannah]] | | align="center" | Beat [[Ba-Boom]] in [[Bright Savannah]] | ||
|- | |- | ||
|[[File:Funky | |[[File:Funky Toy.jpg|130px]]<br><center><small>Wii U version</small></center><br>[[File:FunkyKongToySwitch.png|130px]]<br><center><small>Nintendo Switch version</small></center> | ||
| align="center" | [[Funky Kong]] | | align="center" | [[Funky Kong]] | ||
| align="center" | Default | | align="center" | Default | ||
|- | |- | ||
|[[File: | |[[File:Rambi Toy.jpg|130px]] | ||
| align="center" | [[Rambi the Rhino|Rambi the Rhinoceros]] | | align="center" | [[Rambi the Rhino|Rambi the Rhinoceros]] | ||
| align="center" | Beat [[Skowl]] in [[Autumn Heights]] | | align="center" | Beat [[Skowl]] in [[Autumn Heights]] | ||
|- | |- | ||
|[[File: | |[[File:ProfChops.jpg|130px]] | ||
| align="center" | [[Professor Chops]] | | align="center" | [[Professor Chops]] | ||
| align="center" | | | align="center" | Beat [[Secret Seclusion]] | ||
|- | |- | ||
|[[File: | |[[File:Mine Cart.jpg|130px]] | ||
| align="center" | [[Cart|Mine Cart]] | | align="center" | [[Mine Cart|Mine Cart]] | ||
| align="center" | Beat Pompy in Lost Mangroves | | align="center" | Beat Pompy in Lost Mangroves | ||
|- | |- | ||
|[[File: | |[[File:RocketBarrelToy.jpg|130px]] | ||
| align="center" | [[Rocket Barrel]] | | align="center" | [[Rocket Barrel]] | ||
| align="center" | | | align="center" | Beat [[Bashmaster]] in [[Juicy Jungle]] | ||
|- | |||
|[[File:Tawks Toy.png|130px]] | |||
| align="center" | [[Tawks]] | |||
| align="center" | Default<br>(Nintendo Switch version exclusive, only in [[Donkey Kong Country: Tropical Freeze#Differences in the Nintendo Switch version|Funky Mode]]) | |||
|- | |- | ||
!colspan=3 | Bosses | !colspan=3 | Bosses | ||
| Line 66: | Line 69: | ||
!Availability criteria | !Availability criteria | ||
|- | |- | ||
|[[File: | |[[File:PompyToy.jpg|130px]] | ||
| align="center" | [[Pompy|Pompy, the Presumptuous]] | | align="center" | [[Pompy|Pompy, the Presumptuous]] | ||
| align="center" | Beat Pompy in Lost Mangroves | | align="center" | Beat Pompy in Lost Mangroves | ||
|- | |- | ||
|[[File: | |[[File:SkowlToy.jpg|130px]] | ||
| align="center" | [[Skowl|Skowl, the Startling]] | | align="center" | [[Skowl|Skowl, the Startling]] | ||
| align="center" | Beat Skowl in Autumn Heights | | align="center" | Beat Skowl in Autumn Heights | ||
|- | |- | ||
|[[File:Ba- | |[[File:Ba-Boom.jpg|130px]] | ||
| align="center" | [[Ba-Boom|Ba-Boom, the Boisterous]] | | align="center" | [[Ba-Boom|Ba-Boom, the Boisterous]] | ||
| align="center" | Beat Ba-Boom in Bright Savannah | | align="center" | Beat Ba-Boom in Bright Savannah | ||
|- | |- | ||
|[[File: | |[[File:FuguToy.jpg|130px]] | ||
| align="center" | [[Fugu|Fugu, the Frightening]] | | align="center" | [[Fugu|Fugu, the Frightening]] | ||
| align="center" | Beat Fugu in Sea Breeze Cove | | align="center" | Beat [[Fugu]] in [[Sea Breeze Cove]] | ||
|- | |- | ||
|[[File: | |[[File:Bashmaster Toy.jpg|130px]] | ||
| align="center" | [[Bashmaster|Bashmaster, the Unbreakable]] | | align="center" | [[Bashmaster|Bashmaster, the Unbreakable]] | ||
| align="center" | Beat Bashmaster in Juicy Jungle | | align="center" | Beat Bashmaster in Juicy Jungle | ||
|- | |- | ||
|[[File: | |[[File:LordFredrik.jpg|130px]] | ||
| align="center" | [[Lord Fredrik|Lord Fredrik, the Snowmad King]] | | align="center" | [[Lord Fredrik|Lord Fredrik, the Snowmad King]] | ||
| align="center" | | | align="center" | Beat [[Lord Fredrik]] on [[Donkey Kong Island (world)|Donkey Kong Island]] | ||
|- | |- | ||
!colspan=3 | Snowmads 1 | !colspan=3 | Snowmads 1 | ||
| Line 102: | Line 105: | ||
|[[File:Speedy Tuck.png|130px]] | |[[File:Speedy Tuck.png|130px]] | ||
| align="center" | [[Speedy Tucks]] | | align="center" | [[Speedy Tucks]] | ||
| align="center" | | | align="center" | Beat Bashmaster in Juicy Jungle | ||
|- | |- | ||
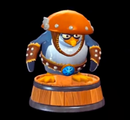
|[[File:Tuff Tucks.png|130px]] | |[[File:Tuff Tucks.png|130px]] | ||
| Line 108: | Line 111: | ||
| align="center" | Beat Pompy in Lost Mangroves | | align="center" | Beat Pompy in Lost Mangroves | ||
|- | |- | ||
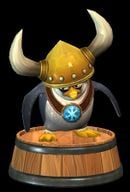
|[[File: | |[[File:PointyTucks.jpg|130px]] | ||
| align="center" | [[Pointy Tucks]] | | align="center" | [[Pointy Tucks]] | ||
| align="center" | Beat Skowl in Autumn Heights | | align="center" | Beat Skowl in Autumn Heights | ||
| Line 116: | Line 119: | ||
| align="center" | Beat Ba-Boom in Bright Savannah | | align="center" | Beat Ba-Boom in Bright Savannah | ||
|- | |- | ||
|[[File: | |[[File:Archy Toy.jpg|130px]] | ||
| align="center" | [[Archy]] | | align="center" | [[Archy]] | ||
| align="center" | Beat Skowl in Autumn Heights | | align="center" | Beat Skowl in Autumn Heights | ||
| Line 122: | Line 125: | ||
|[[File:Boom Bird.png|130px]] | |[[File:Boom Bird.png|130px]] | ||
| align="center" | [[Boom Bird]] | | align="center" | [[Boom Bird]] | ||
| align="center" | | | align="center" | Beat Bashmaster in Juicy Jungle | ||
|- | |- | ||
|[[File:Painguin Tuck.png|130px]] | |[[File:Painguin Tuck.png|130px]] | ||
| Line 130: | Line 133: | ||
|[[File:Papa Painguin.png|130px]] | |[[File:Papa Painguin.png|130px]] | ||
| align="center" | [[Papa Painguin]] | | align="center" | [[Papa Painguin]] | ||
| align="center" | | | align="center" | Beat Bashmaster in Juicy Jungle | ||
|- | |- | ||
|[[File:Soary.png|130px]] | |[[File:Soary.png|130px]] | ||
| align="center" | [[Soary]] | | align="center" | [[Soary]] | ||
| align="center" | | | align="center" | Beat Fugu in Sea Breeze Cove | ||
|- | |- | ||
!colspan=3 | Snowmads 2 | !colspan=3 | Snowmads 2 | ||
| Line 142: | Line 145: | ||
!Availability criteria | !Availability criteria | ||
|- | |- | ||
|[[File: | |[[File:FluffToy.jpg|130px]] | ||
| align="center" | [[Fluff]] | | align="center" | [[Fluff (enemy)|Fluff]] | ||
| align="center" | Default | | align="center" | Default | ||
|- | |- | ||
| Line 152: | Line 155: | ||
|[[File:Harey DKCTF.png|130px]] | |[[File:Harey DKCTF.png|130px]] | ||
| align="center" | [[Harey]] | | align="center" | [[Harey]] | ||
| align="center" | | | align="center" | Beat Lord Fredrik on Donkey Kong Island | ||
|- | |- | ||
|[[File:HaroldDKCTF.png|130px]] | |[[File:HaroldDKCTF.png|130px]] | ||
| align="center" | [[Harold (enemy)|Harold]] | | align="center" | [[Harold (enemy)|Harold]] | ||
| align="center" | | | align="center" | Beat Bashmaster in Juicy Jungle | ||
|- | |- | ||
|[[File:Lemmington.png|130px]] | |[[File:Lemmington.png|130px]] | ||
| Line 162: | Line 165: | ||
| align="center" | Beat Fugu in Sea Breeze Cove | | align="center" | Beat Fugu in Sea Breeze Cove | ||
|- | |- | ||
|[[File: | |[[File:HootzToy.jpg|130px]] | ||
| align="center" | [[Hootz]] | | align="center" | [[Hootz]] | ||
| align="center" | Beat Skowl in Autumn Heights | | align="center" | Beat Skowl in Autumn Heights | ||
| Line 188: | Line 191: | ||
!Availability criteria | !Availability criteria | ||
|- | |- | ||
|[[File: | |[[File:Waldough Toy.jpg|130px]] | ||
| align="center" | [[Waldough]] | | align="center" | [[Waldough]] | ||
| align="center" | Default | | align="center" | Default | ||
| Line 196: | Line 199: | ||
| align="center" | Beat Fugu in Sea Breeze Cove | | align="center" | Beat Fugu in Sea Breeze Cove | ||
|- | |- | ||
|[[File: | |[[File:Walbrick Toy.jpg|130px]] | ||
| align="center" | [[Walbrick]] | | align="center" | [[Walbrick]] | ||
| align="center" | Beat Ba-Boom in Bright Savannah | | align="center" | Beat Ba-Boom in Bright Savannah | ||
|- | |- | ||
|[[File: | |[[File:ChopsSockyChooks.jpg|130px]] | ||
| align="center" | [[Chum Chucker Charlie]] | | align="center" | [[Chum Chucker Charlie]] | ||
| align="center" | | | align="center" | Beat Lord Fredrik on Donkey Kong Island | ||
|- | |- | ||
|[[File: | |[[File:FishPoker.jpg|130px]] | ||
| align="center" | [[Fish Poker Pops]] | | align="center" | [[Fish Poker Pops]] | ||
| align="center" | | | align="center" | Beat Lord Fredrik on Donkey Kong Island | ||
|- | |- | ||
|[[File:Big Sphen.png|130px]] | |[[File:Big Sphen.png|130px]] | ||
| align="center" | [[Big Sphen]] | | align="center" | [[Big Sphen]] | ||
| align="center" | | | align="center" | Beat Lord Fredrik on Donkey Kong Island | ||
|} | |} | ||
| Line 217: | Line 220: | ||
|Jap=シャカポン | |Jap=シャカポン | ||
|JapR=Shakapon | |JapR=Shakapon | ||
|JapM=Play on [[ | |JapM=Play on "{{wp|gashapon}}" | ||
|Spa=Máquina de juguetes<ref>[http://www.guiasnintendo.com/2b_WIIU/donkey_tropical_freeze/donkey_tropical_freeze_sp/tienda.html Guía, trucos y ayuda de Donkey Kong Country: Tropical Freeze]. ''Guías Nintendo''. Retrieved June 12, 2018. ([http://web.archive.org/web/20200219231329/http://www.guiasnintendo.com/2b_WIIU/donkey_tropical_freeze/donkey_tropical_freeze_sp/tienda.html Archived] February 19, 2020, 23:12:29 UTC via Wayback Machine.)</ref> | |||
|SpaM=Toy machine | |||
|Ita=Pupazzetto | |||
|ItaM=Little toy | |||
}} | }} | ||
{{ | ==References== | ||
[[Category:Donkey Kong Country: Tropical Freeze | <references/> | ||
{{DKCTF}} | |||
[[Category:Donkey Kong Country: Tropical Freeze objects]] | |||
Latest revision as of 21:50, February 20, 2024
- This article is about a collectible toy dispenser from Donkey Kong Country: Tropical Freeze. For information about a type of device in Mario Party 5, see Capsule machine.
- “Been spendin' all your coins on these cool capsule toys?”
- —Funky Kong
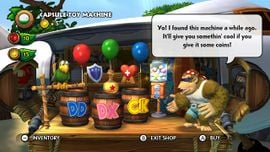
The Capsule Toy Machine is a gashapon machine in Donkey Kong Country: Tropical Freeze and its Nintendo Switch port that yields figurines enclosed in capsules. It is owned by Funky Kong, who claims to have found it "a while ago", and is put on display in his shop, Funky's Fly 'n' Buy.
The figurines themselves are miniature representations of the main characters and the Snowmads. Only a few figurines can be obtained at the beginning of the game, but six more figurines are added to the machine for each boss defeated. Each figurine costs five Banana Coins. Figurines are dispensed at random, and the player can get duplicates. Once the player obtains all unique figurines available before beating the next boss, Funky will say that he is out of stock and will not let the player buy any more figurines until new ones are added. Similarly, when the Kongs own all distinct figurines, Funky Kong refuses to sell any more to them, instead asking if they are interested in trading later.
Figurines gallery[edit]
The player can view the obtained toys in the "Figurines" gallery by choosing the "EXTRAS" option. Each of them is placed on a stand resembling part of a wooden barrel. The player can study these figurines by zooming in and out of them, or by rotating the camera around them. Figurines are divided into categories:
- Kong Family – contains figurines of the Kongs, as well as Rambi the Rhino, Professor Chops, the Mine Cart, and the Rocket Barrel; in the Nintendo Switch version of the game, this category also contains a figurine of Tawks;
- Bosses – contains figurines of all the bosses of the game;
- Snowmads 1 – contains figurines of penguin-based Snowmads;
- Snowmads 2 – contains figurines of hare, owl, and lemming-based Snowmads;
- Snowmads 3 – contains figurines of heavy-type Snowmads, like Waldough and Big Sphen.
The following table lists all figurines and the condition to make them available in the shop.
| Kong Family | ||
|---|---|---|
| Figurine | Name | Availability criteria |
|
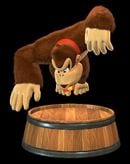
Donkey Kong | Default |
|
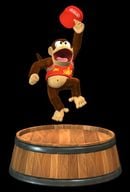
Diddy Kong | Beat Pompy in Lost Mangroves |
|
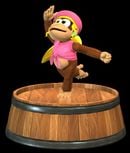
Dixie Kong | Beat Pompy in Lost Mangroves |
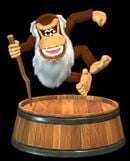
|
Cranky Kong | Beat Ba-Boom in Bright Savannah |
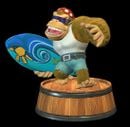 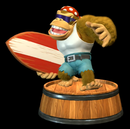 |
Funky Kong | Default |
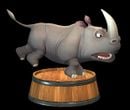
|
Rambi the Rhinoceros | Beat Skowl in Autumn Heights |
|
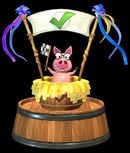
Professor Chops | Beat Secret Seclusion |
|
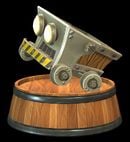
Mine Cart | Beat Pompy in Lost Mangroves |
|
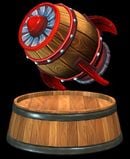
Rocket Barrel | Beat Bashmaster in Juicy Jungle |
|
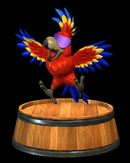
Tawks | Default (Nintendo Switch version exclusive, only in Funky Mode) |
| Bosses | ||
| Figurine | Name | Availability criteria |
|
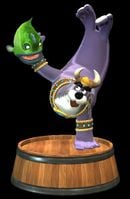
Pompy, the Presumptuous | Beat Pompy in Lost Mangroves |
|
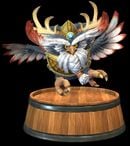
Skowl, the Startling | Beat Skowl in Autumn Heights |
|
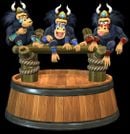
Ba-Boom, the Boisterous | Beat Ba-Boom in Bright Savannah |
|
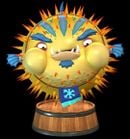
Fugu, the Frightening | Beat Fugu in Sea Breeze Cove |
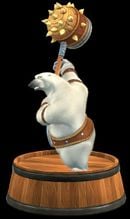
|
Bashmaster, the Unbreakable | Beat Bashmaster in Juicy Jungle |
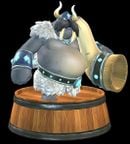
|
Lord Fredrik, the Snowmad King | Beat Lord Fredrik on Donkey Kong Island |
| Snowmads 1 | ||
| Figurine | Name | Availability criteria |
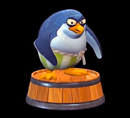
|
Tucks | Default |
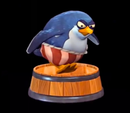
|
Speedy Tucks | Beat Bashmaster in Juicy Jungle |
|
Tuff Tucks | Beat Pompy in Lost Mangroves |
|
Pointy Tucks | Beat Skowl in Autumn Heights |
|
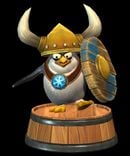
Trench Tucks | Beat Ba-Boom in Bright Savannah |
|
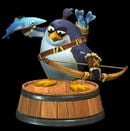
Archy | Beat Skowl in Autumn Heights |
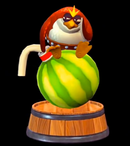
|
Boom Bird | Beat Bashmaster in Juicy Jungle |
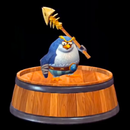
|
Painguin Tucks | Beat Pompy in Lost Mangroves |
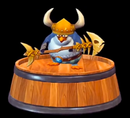
|
Papa Painguin | Beat Bashmaster in Juicy Jungle |
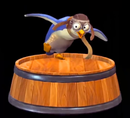
|
Soary | Beat Fugu in Sea Breeze Cove |
| Snowmads 2 | ||
| Figurine | Name | Availability criteria |

|
Fluff | Default |
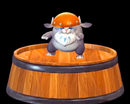
|
Tuff Fluff | Beat Fugu in Sea Breeze Cove |
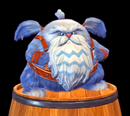
|
Harey | Beat Lord Fredrik on Donkey Kong Island |

|
Harold | Beat Bashmaster in Juicy Jungle |
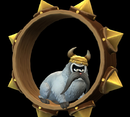
|
Lemmington | Beat Fugu in Sea Breeze Cove |
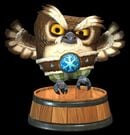
|
Hootz | Beat Skowl in Autumn Heights |
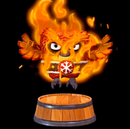
|
Hot Hootz | Beat Ba-Boom in Bright Savannah |
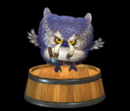
|
Puffton | Beat Ba-Boom in Bright Savannah |
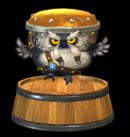
|
Tuffton | Beat Fugu in Sea Breeze Cove |
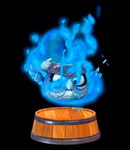
|
Blue Hootz | Beat Skowl in Autumn Heights |
| Snowmads 3 | ||
| Figurine | Name | Availability criteria |
|
Waldough | Default |
|
Walnut | Beat Fugu in Sea Breeze Cove |
|
Walbrick | Beat Ba-Boom in Bright Savannah |
|
Chum Chucker Charlie | Beat Lord Fredrik on Donkey Kong Island |
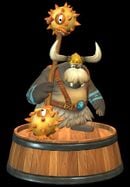
|
Fish Poker Pops | Beat Lord Fredrik on Donkey Kong Island |
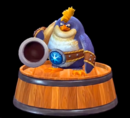
|
Big Sphen | Beat Lord Fredrik on Donkey Kong Island |
Names in other languages[edit]
| Language | Name | Meaning |
|---|---|---|
| Japanese | シャカポン Shakapon |
Play on "gashapon" |
| Italian | Pupazzetto |
Little toy |
| Spanish | Máquina de juguetes[1] |
Toy machine |
References[edit]
- ^ Guía, trucos y ayuda de Donkey Kong Country: Tropical Freeze. Guías Nintendo. Retrieved June 12, 2018. (Archived February 19, 2020, 23:12:29 UTC via Wayback Machine.)