Tricky Temple: Difference between revisions
m (→Level layout: fix image name) |
(dk wiki) |
||
| Line 1: | Line 1: | ||
{{ | {{Levelbox | ||
|image=[[File:Tricky Temple.png]] | |||
|image=[[File:Tricky Temple.png | |||
|code=2-1 | |code=2-1 | ||
|game=''[[Donkey Kong Land]] | |game=''[[Donkey Kong Land]] | ||
| Line 7: | Line 6: | ||
|before=[[Wild Sting Fling|<<]] | |before=[[Wild Sting Fling|<<]] | ||
}} | }} | ||
'''Tricky Temple''' is the tenth level of ''[[Donkey Kong Land]]'' | '''Tricky Temple''' is the tenth level of ''[[Donkey Kong Land]]'' and the first level of [[Kremlantis]]. | ||
Tricky Temple is the first temple level in the game. Like the temple levels from ''[[Donkey Kong Country]]'', [[Donkey Kong]] and [[Diddy Kong]] must jump across several gaps and up to several ledges. [[Kritter]]s and [[Slippa]]s are common enemies, [[Army|Armies]] make their second appearance, and [[Krusha]]s first appear in the level. [[Rambi the Rhino]] appears in the [[Bonus Level]] but cannot be taken into the main level. | |||
== | ==Layout== | ||
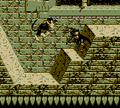
[[File:Tricky Temple DKL | [[File:Tricky Temple DKL Slippa.png|thumb|left|160px|Diddy encounters a Slippa]] | ||
From the start of the level, the heroes must travel east. They will jump up a rather small ledge and then jump down to the other side of it. Here, they need to climb up two more ledges, one with a Kremling on it, and then walk a little farther. They will meet the game's first Krusha, who is too strong to beat with [[Diddy Kong]], therefore, Donkey Kong must defeat him. After this, the Kongs must jump down a few ledges, some with Kremlings on them, and continue on, where they'll get to the [[K-O-N-G Letters|letter K]]. They need to keep going east from there, and dodge a few enemies, then jump up a small ledge. At this point, the Kongs need to go down a few ledges, and also grab a [[Kong Token]] on the way. Without touching the Kremling above, they need to leap up another ledge and move on. They will later hop up more ledges and go over a gap, where they will find the first Slippa in the level. After it is defeated, the group should jump up all the ledges. At some point, they will have to avoid two Kremlings, who are bouncing one ledge to the next. When the Kongs pass them, they must fall down another ledge, which is too large to get back up. If the Kongs continue east, they'll get to the [[Continue Point]]. | From the start of the level, the heroes must travel east. They will jump up a rather small ledge and then jump down to the other side of it. Here, they need to climb up two more ledges, one with a Kremling on it, and then walk a little farther. They will meet the game's first Krusha, who is too strong to beat with [[Diddy Kong]], therefore, Donkey Kong must defeat him. After this, the Kongs must jump down a few ledges, some with Kremlings on them, and continue on, where they'll get to the [[K-O-N-G Letters|letter K]]. They need to keep going east from there, and dodge a few enemies, then jump up a small ledge. At this point, the Kongs need to go down a few ledges, and also grab a [[Kong Token]] on the way. Without touching the Kremling above, they need to leap up another ledge and move on. They will later hop up more ledges and go over a gap, where they will find the first Slippa in the level. After it is defeated, the group should jump up all the ledges. At some point, they will have to avoid two Kremlings, who are bouncing one ledge to the next. When the Kongs pass them, they must fall down another ledge, which is too large to get back up. If the Kongs continue east, they'll get to the [[Continue Point]]. | ||
From there, they need to drop down another large ledge and hop across a small gap. | From there, they need to drop down another large ledge and hop across a small gap. A [[Red Balloon]] floats between the sides of the abyss, so they should act fast and get it, before it rises too high. After that, the heroes must keep going and avoid some Kremlings. Soon, they will have to drop down a small ledge and jump across another gap. Here, they will see a lone [[tire]], which they should bounce off of to reach the top of the next high ledge. From this point, the group needs to jump across another gap, and get up a few small ledges. Nasty Kremlings will be bouncing down these ledges, so they must be careful. Eventually, when the Kongs are up the ledges, they must hop across several abysses. Enemies are placed between each gap to attack them, but can easily be beat with a simple jump. When this part is over, the heroes must defeat an Army, and then grab onto the rope nearby. It will automatically begin to swing them to the other side of a large abyss. Then, they should collect all the bananas they see, and walk more eastward to a portal, which will take them out of the level. | ||
{{br|left}} | {{br|left}} | ||
==Bonus | ==Enemies== | ||
*Near the end of the level and before the only rope in the level, the Kongs | *[[Army]]: 1 | ||
*[[Gnawty]]: 4 | |||
*[[Krusha]]: 1 | |||
*[[Kritter]]: 15 (3 more in a Bonus Level) | |||
*[[Slippa]]: 4 (4 more in a Bonus Level) | |||
==Items== | |||
*[[Barrel]]s: 1 | |||
*[[DK Barrel]]s: 3 | |||
*[[Kong Token]]: 1 | |||
*[[Red Balloon]]: 1 | |||
*[[Tire]]: 1 | |||
===K-O-N-G Letters=== | |||
*K: Found on the ground near some [[Banana]]s. | |||
*O: On a raised platform between two jumping Kritters. | |||
*N: On another raised platform, under one Kritter. | |||
*G: Hovering within jump distance of the rope swing at the end. | |||
==Bonus Level== | |||
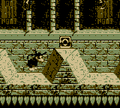
[[File:Tricky Temple DKL Bonus Barrel location.png|thumb|Diddy ducks next to the Auto-Fire Barrel leading to the Bonus Level]] | |||
{|class="wikitable" | |||
!Image | |||
!Location | |||
|- | |||
|[[File:Tricky Temple DKL Bonus Level.png]] | |||
|Near the end of the level and before the only rope in the level, the Kongs must go through an area with many abysses. They must jump into the abyss after a Kritter to be caught in an [[Auto-Fire Barrel]] that takes them to the [[Bonus Level]]. The Bonus Level takes place in an industrial-like area with metallic floors. At the start, the Kongs can optionally break a [[Animal Crate|Rambi Crate]] to ride Rambi. There are many bananas that the Kongs can collect along the way. There are three Kritters and four Slippas that the Kongs encounter along the way. At the end, the Kongs must jump into a Barrel Cannon, which blasts them into an Auto-Fire Barrel that takes them back into the main level. Rambi is left behind when the Kongs enter the Barrel Cannon. | |||
|} | |||
{{br}} | |||
==Gallery== | |||
<gallery> | |||
Tricky Temple DKL start.png|Diddy jumping up to a Kritter | |||
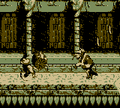
Tricky Temple DKL Krusha.png|Diddy carrying a barrel toward a Krusha | |||
Tricky Temple DKL letter O.png|Diddy goes to the letter O | |||
</gallery> | |||
==Names in other languages== | ==Names in other languages== | ||
| Line 28: | Line 61: | ||
|Spa=Templo intrincado | |Spa=Templo intrincado | ||
|SpaM=Intricate temple}} | |SpaM=Intricate temple}} | ||
{{DKL}} | {{DKL}} | ||
[[Category:Temples and Shrines]] | [[Category:Temples and Shrines]] | ||
[[Category:Donkey Kong Land Levels]] | [[Category:Donkey Kong Land Levels]] | ||
Revision as of 16:20, October 18, 2019
Template:Levelbox Tricky Temple is the tenth level of Donkey Kong Land and the first level of Kremlantis.
Tricky Temple is the first temple level in the game. Like the temple levels from Donkey Kong Country, Donkey Kong and Diddy Kong must jump across several gaps and up to several ledges. Kritters and Slippas are common enemies, Armies make their second appearance, and Krushas first appear in the level. Rambi the Rhino appears in the Bonus Level but cannot be taken into the main level.
Layout

From the start of the level, the heroes must travel east. They will jump up a rather small ledge and then jump down to the other side of it. Here, they need to climb up two more ledges, one with a Kremling on it, and then walk a little farther. They will meet the game's first Krusha, who is too strong to beat with Diddy Kong, therefore, Donkey Kong must defeat him. After this, the Kongs must jump down a few ledges, some with Kremlings on them, and continue on, where they'll get to the letter K. They need to keep going east from there, and dodge a few enemies, then jump up a small ledge. At this point, the Kongs need to go down a few ledges, and also grab a Kong Token on the way. Without touching the Kremling above, they need to leap up another ledge and move on. They will later hop up more ledges and go over a gap, where they will find the first Slippa in the level. After it is defeated, the group should jump up all the ledges. At some point, they will have to avoid two Kremlings, who are bouncing one ledge to the next. When the Kongs pass them, they must fall down another ledge, which is too large to get back up. If the Kongs continue east, they'll get to the Continue Point.
From there, they need to drop down another large ledge and hop across a small gap. A Red Balloon floats between the sides of the abyss, so they should act fast and get it, before it rises too high. After that, the heroes must keep going and avoid some Kremlings. Soon, they will have to drop down a small ledge and jump across another gap. Here, they will see a lone tire, which they should bounce off of to reach the top of the next high ledge. From this point, the group needs to jump across another gap, and get up a few small ledges. Nasty Kremlings will be bouncing down these ledges, so they must be careful. Eventually, when the Kongs are up the ledges, they must hop across several abysses. Enemies are placed between each gap to attack them, but can easily be beat with a simple jump. When this part is over, the heroes must defeat an Army, and then grab onto the rope nearby. It will automatically begin to swing them to the other side of a large abyss. Then, they should collect all the bananas they see, and walk more eastward to a portal, which will take them out of the level.
Enemies
- Army: 1
- Gnawty: 4
- Krusha: 1
- Kritter: 15 (3 more in a Bonus Level)
- Slippa: 4 (4 more in a Bonus Level)
Items
- Barrels: 1
- DK Barrels: 3
- Kong Token: 1
- Red Balloon: 1
- Tire: 1
K-O-N-G Letters
- K: Found on the ground near some Bananas.
- O: On a raised platform between two jumping Kritters.
- N: On another raised platform, under one Kritter.
- G: Hovering within jump distance of the rope swing at the end.
Bonus Level

| Image | Location |
|---|---|

|
Near the end of the level and before the only rope in the level, the Kongs must go through an area with many abysses. They must jump into the abyss after a Kritter to be caught in an Auto-Fire Barrel that takes them to the Bonus Level. The Bonus Level takes place in an industrial-like area with metallic floors. At the start, the Kongs can optionally break a Rambi Crate to ride Rambi. There are many bananas that the Kongs can collect along the way. There are three Kritters and four Slippas that the Kongs encounter along the way. At the end, the Kongs must jump into a Barrel Cannon, which blasts them into an Auto-Fire Barrel that takes them back into the main level. Rambi is left behind when the Kongs enter the Barrel Cannon. |
Gallery
Diddy jumping up to a Kritter
Diddy carrying a barrel toward a Krusha
Diddy goes to the letter O


Names in other languages
| Language | Name | Meaning |
|---|---|---|
| Japanese | クリッターの遺跡 Kurittā no iseki |
Kritter Ruins |
| Spanish | Templo intrincado |
Intricate temple |