Stormy Shore: Difference between revisions
No edit summary |
m (Text replacement - "dktable-brown" to "wikitable dk") |
||
| (48 intermediate revisions by 26 users not shown) | |||
| Line 1: | Line 1: | ||
{{level | {{level infobox | ||
|image=[[File:DKCR Stormy Shore 2.png|250px]] | |||
|image=[[File: | |code=2-5 | ||
|code=2 - 5 | |world=[[Beach]] | ||
|game=''[[Donkey Kong Country Returns]]'' (''[[Donkey Kong Country Returns 3D|3D]]'') | |game=''[[Donkey Kong Country Returns]]'' (''[[Donkey Kong Country Returns 3D|3D]]'') | ||
|before=[[Cannon Cluster|<<]] | |before=[[Cannon Cluster|<<]] | ||
| | |before_alt=[[Blowhole Bound|**]] | ||
|after=[[Tidal Terror|>>]] | |||
}} | }} | ||
'''Stormy Shore''' is the twelfth level of ''[[Donkey Kong Country Returns]]'' and ''[[Donkey Kong Country Returns 3D]]''. It is also the fifth area of the [[Beach]] world. | '''Stormy Shore''' is the twelfth level of ''[[Donkey Kong Country Returns]]'' and ''[[Donkey Kong Country Returns 3D]]''. It is also the fifth area of the [[Beach]] world. | ||
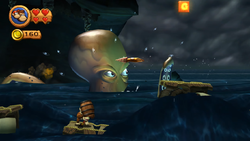
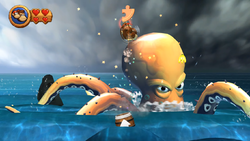
Stormy Shore introduces [[Squiddicus]], a huge octopus that first appears in the background. Throughout much of the level, the Kongs have to dodge Squiddicus, who sticks its | Stormy Shore introduces [[Squiddicus]], a huge octopus that first appears in the background. Throughout much of the level, the Kongs have to dodge Squiddicus, who sticks its arms in front of the primates and tries to knock them into the water. Since the heroes cannot swim, it is vital for them to stay on the floating platforms for the whole level. The weather becomes very stormy later in the level and the water causes the floating platforms to constantly shift around. Other than Squiddicus, the enemies in this level include electric jellyfish enemies known as [[Jellybob (Donkey Kong Country Returns)|Jellybobs]], [[Snippys]], [[Pinchly]]s, [[Squidly]]s, and [[Electrasquid]]s. | ||
In the [[Donkey Kong Country Returns#Time Attack|Time Attack]] mode of the game, a time of 1:11:00 is needed to get a gold medal, a time of 1:26:00 for silver, and a time of 2:00:00 for bronze. | In the [[Donkey Kong Country Returns#Time Attack|Time Attack]] mode of the game, a time of 1:11:00 is needed to get a gold medal, a time of 1:26:00 for silver, and a time of 2:00:00 for bronze. | ||
==Layout== | |||
The level begins on a beach that leads over to a pier with a Pinchly and a small pillar on it. If the Kongs pound the pillar into the ground, another pillar appears nearby with a [[banana]]. A treasure chest with a [[Banana|Banana Bunch]] in it is at the end of the bridge, and a Snippys and a dandelion follow. As the Kongs head into a nearby tunnel they approach two gaps, one of which that has a Jellybob in it. Another gap, placed next to a wall with a [[climbing grass|green surface]] on it, is near here, and a Jellybob jumps out of it. The Kongs can climb up the area with the turf, traveling up past a trail of bananas. The letter K of the [[KONG Letters|K-O-N-G Letters]] is between this wall and the one across from it higher up. This other wall has green as well, which they must jump to and climb in order to progress to another platform with the first [[DK Barrel]] in the level on it. A Pinchly and some Squidlys attack the Kongs as they travel along the road ahead. Three gaps are along the way, each with a Jellybob in it. A small curved pathway is after these pits that leads under some more Squidlys and Banana Bunches. The [[Professor Chops|Tutorial Pig]] and the checkpoint are at the end of the hill. | |||
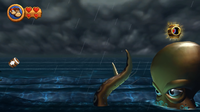
[[File:DKCR Stormy Shore 1.png|thumb|250px|left|The Kongs meet Squiddicus for the first time]] | |||
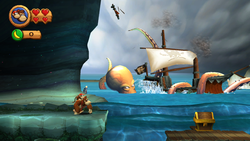
The letter O is high in the air just before a small gap after the checkpoint and a Pinchly. As they head down a solid platform with some bananas on it, they are able to witness Squiddicus, a giant octopus, destroy a ship in the background. Once the enemy notices the primates, it tries to attack them, destroying platforms that they stand on too long. The platforms after this are composed of wood and float on top of the wavy water. Once they cross four of these wooden platforms that are moved up and down by the waves, they come up to a banana trail that includes a large Banana Bunch. The trail leads them onto a solid, curved pier with some Squidlys flying above it. A [[Red Balloon]] is also floating upwards at the end of this pier, which has some more platforms being pushed around by the giant waves ahead of it. | |||
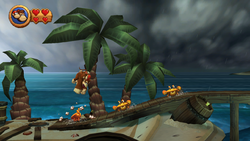
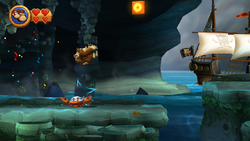
[[File: | [[File:DKCR Stormy Shore 3.png|thumb|250px|The Kongs defeat some Pinchlys on a pier]] | ||
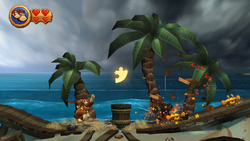
Between two of these platforms is a [[Barrel Cannon]] floating atop the waves. The Kongs must shoot to the following platform when the waves tilt it in the correct direction. A pier is after the second platform that has the second DK Barrel on it. A pillar found nearby makes another pillar appear next to it in a small beach area being followed by another pier when it is pounded on. Two Snippys walk along the pier ahead. Some more platforms being moved around by waves float in the water nearby, and each of them appear as a part of a ship. The third platform is much bigger than the others in this area, as it appears as a giant mast that holds two yards that can be stood on. The bottom yard has bananas and a Pinchly on it, while the top one holds the letter N. Three more ship platforms follow this with [[Banana Coin]]s and bananas above them. A Red Balloon and a curved pathway, which has a trio of Snippys along it, are located just before the Tutorial Pig and the second checkpoint. | |||
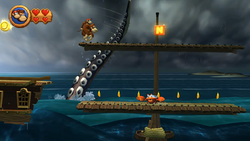
[[File: | [[File:DKCR Stormy Shore 4.png|thumb|left|250px|The Kongs evade the Squiddicus's arms]] | ||
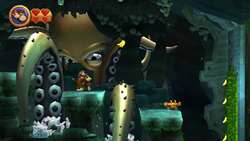
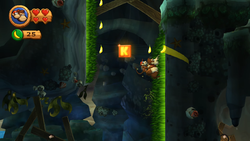
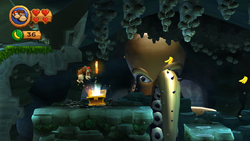
Two gaps are after the checkpoint. When the Kongs approach them, Squiddicus sticks its arms in them and waves the arms up and down, making the heroes jump over an even bigger obstacle. A wall with some turf on it is ahead. As they climb it, the giant octopus foe sticks its arms in the Kongs' path, forcing them to have to jump to the wall covered in turf across from them to get around. Once they climb up the cliff, they find a treasure chest with a [[Puzzle Piece (Donkey Kong Country Returns)|Puzzle Piece]] in it and a few gaps nearby. Squiddicus also moves its arms around in these gaps. They must evade the arms to reach a passage leading downwards. They can climb down the passage safely by using the turf found on the walls. Bananas and Banana Bunches line the beginning and end parts of the turf, but Squiddicus also puts its arms in the Kongs' way as they climb down. To move around the behemoth arms, they have to jump from wall-to-wall. | |||
[[File: | [[File:DKCR Stormy Shore 5.png|thumb|250px|Donkey Kong holding onto a ship]] | ||
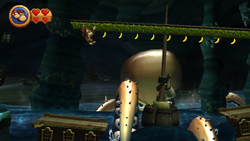
Once they reach the bottom of the passage, they find a [[barrel]], two Snippys with a Pinchly between them, and a sandbag hanging from above. A trio of treasure chests are also placed behind the crab foes that contain items. A gap is ahead, which Squiddicus sticks its arms in. In order to cross it, the heroes must use the turf-covered ceiling above it. Another gap with arms moving in it is shortly after that the Kongs must also climb across with turf. Once they drop from the turf, evading another attack from the arms that appear directly in their path if they continue along the turf too long, they reach a few more ship parts floating on wavy water. A solid platform with a Snippys and a treasure chest containing a Banana Coin are between the first two ship platforms, which are followed by a large, floating ship mast the holds a long yard with turf along it. The Kongs must climb across this while dodging arms from Squiddicus to reach one more ship platform that is located just before a solid pathway with a Pinchly, the Tutorial Pig, and the third checkpoint. | |||
[[File:DKCR Stormy Shore 6.png|thumb|left|The Slot Machine Barrel is over the Squiddicus]] | |||
From the checkpoint, there is a barrel located at the exit of the tunnel area. Outside of the tunnel is more wavy water with wooden ship pieces floating on it. As the heroes jump along several of these small platforms, Squidlys attack them. They can bounce the duo to Banana Coins and the letter G found high in the air. The last two ship platforms in the area are larger than the previous, and a sparkling Jellybob jumps between them. If the Jellybob is defeated, five Banana Coins and a Red Balloon appears. If Donkey and Diddy continue, they reach a Barrel Cannon that can shoot them into the level's [[Slot Machine Barrel]]. Before Squiddicus attacks them, they must shoot into the barrel to complete the level. | |||
{{br}} | |||
[[File: | ==Enemies== | ||
{|class="wikitable dk"width=25% | |||
|- | |||
!Image | |||
!Name | |||
!Amount | |||
|- | |||
|align="center"|[[File:Jellybob.png|x50px]] | |||
|align="center"|[[Jellybob (Donkey Kong Country Returns)|Jellybob]] | |||
|6 | |||
|- | |||
|align="center"|[[File:Pinchly Render.png|x50px]] | |||
|align="center"|[[Pinchly]] | |||
|5 | |||
|- | |||
|align="center"|[[File:Snaps_closeup.png|x50px]] | |||
|align="center"|[[Snippys]] | |||
|10 | |||
|- | |||
|align="center"|[[File:DKCR_Concept_Art_Squid.png|x50px]] | |||
|align="center"|[[Squiddicus]] | |||
|1 | |||
|- | |||
|align="center"|[[File:Squidly_DKCR.png|x50px]] | |||
|align="center"|[[Squidly]] | |||
|11 | |||
|} | |||
==Items== | |||
{|class="wikitable dk"width=25% | |||
|- | |||
!Image | |||
!Name | |||
!Amount | |||
|- | |||
|align="center"|[[File:BananacoinDKCR.png|x50px]] | |||
|align="center"|[[Banana Coin]] | |||
|15 | |||
|- | |||
|align="center"|[[File:BarrelDKCR.png|x50px]] | |||
|align="center"|[[Barrel]] | |||
|3 | |||
|- | |||
|align="center"|[[File:DKBarrelDKCR.png|x50px]] | |||
|align="center"|[[DK Barrel]] | |||
|2 | |||
|- | |||
|align="center"|[[File:Heart.png|x50px]] | |||
|align="center"|[[Heart (item)|Heart]] | |||
|2 | |||
|- | |||
|align="center"|[[File:BalloonDKCR.png|x50px]] | |||
|align="center"|[[Red Balloon]] | |||
|3 | |||
|} | |||
===K-O-N-G Letters=== | |||
{|class="wikitable dk"width=70% | |||
|- | |||
!Image | |||
!Letter | |||
!Location | |||
|- | |||
|align="center"|[[File:DKCR Stormy Shore Letter K.png|250px]] | |||
|align="center"|K | |||
|Between the first two walls covered in green surfaces. | |||
|- | |||
|align="center"|[[File:DKCR Stormy Shore Letter O.png|250px]] | |||
|align="center"|O | |||
|Right after the first checkpoint, the Kongs must jump from a ledge just after a small gap to reach the letter O over an abyss. | |||
|- | |||
|align="center"|[[File:DKCR Stormy Shore Letter N.png|250px]] | |||
|align="center"|N | |||
|In the first part of the level where the Kongs must move across platforms along a ship mast, the letter N is on the top yard. | |||
|- | |||
|align="center"|[[File:DKCR Stormy Shore Letter G.png|250px]] | |||
|align="center"|G | |||
|Shortly after the third checkpoint, the Kongs must bounce off a Squidly to reach the letter G, which is high in the air outside of the tunnel area. | |||
|} | |||
===Puzzle Pieces=== | ===Puzzle Pieces=== | ||
[[File: | {|class="wikitable dk"width=70% | ||
|- | |||
!Image | |||
!Number | |||
!Location | |||
|- | |||
|align="center"|[[File:DKCR Stormy Shore Puzzle Piece 1.png|250px]] | |||
|align="center"|1 | |||
|After collecting the letter K, the Kongs must continue climbing up the left wall, just before the first DK Barrel, to get on top of a large structure with the Puzzle Piece. | |||
|- | |||
|align="center"|[[File:DKCR Stormy Shore Bonus Room.png|250px]] | |||
|align="center"|2 | |||
|If the Kongs pound a certain part of the ground near the first DK Barrel, they fall through the floor and land in a small, underground area with a doorway to the [[Bonus Level]]. The Kongs must collect eighty bananas, two Banana Coins, and a Red Balloon within 30 seconds for the Puzzle Piece to appear. | |||
|- | |||
|align="center"|[[File:DKCR Stormy Shore Puzzle Piece 3.png|250px]] | |||
|align="center"|3 | |||
|When the Kongs reach the Barrel Cannon floating on the wavy water shortly after the first checkpoint, they can shoot upwards when it is correctly aimed to grab a Puzzle Piece. | |||
|- | |||
|align="center"|[[File:DKCR Stormy Shore Puzzle Piece 4.png|250px]] | |||
|align="center"|4 | |||
|Shortly after the third Puzzle Piece is a pillar sticking out of the ground at the end of a pier. The Kongs can pound it for another pillar to appear in a nearby small beach area with the fourth Puzzle Piece. | |||
|- | |||
|align="center"|[[File:DKCR Stormy Shore Puzzle Piece 5.png|250px]] | |||
|align="center"|5 | |||
|After the second checkpoint, there is a treasure chest at the top of a grass wall that contains the final Puzzle Piece. | |||
|} | |||
==Names in | ==Names in other languages== | ||
{{ | {{foreign names | ||
|Jap= | |Jap={{hover|大海|たいかい}}の{{hover|八本|はっぽん}}{{hover|足|あし}} | ||
|JapR=Taikai no | |JapR={{nowrap|Taikai no Happon Ashi}} | ||
|JapM=Eight | |JapM=Eight Legs of the Ocean;「大海」can also be read as「おおうみ」(''ō umi'', great sea). | ||
| | |SpaA=Pulpo Peleonero | ||
| | |SpaAM=Fighter Octopus | ||
| | |SpaE=Pulpo Peleón | ||
| | |SpaEM=Bully Octopus | ||
|FreA=Mer Tentaculaire | |||
|FreAM=Tentacular Sea | |||
|Ger=Stürmische See | |Ger=Stürmische See | ||
|GerM=Stormy Sea | |GerM=Stormy Sea | ||
|Ita=Riva tempesta | |||
|ItaM=Tempest Shore | |||
|Chi=大海的八只脚 | |||
|ChiR=Dàhǎi De Bāzhī Jiǎo | |||
|ChiM=Eight Legs of the Sea | |||
}} | |||
{{DKCR}} | {{DKCR}} | ||
[[Category: | [[Category:Aquatic areas]] | ||
[[Category: | [[Category:Underground areas]] | ||
[[Category:Donkey Kong Country Returns | [[Category:Donkey Kong Country Returns levels]] | ||
Latest revision as of 14:20, February 3, 2024
| Level | |
|---|---|
| Stormy Shore | |
| |
| Level code | 2-5 |
| World | Beach |
| Game | Donkey Kong Country Returns (3D) |
| ** << Directory of levels >> | |
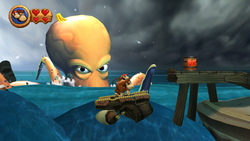
Stormy Shore is the twelfth level of Donkey Kong Country Returns and Donkey Kong Country Returns 3D. It is also the fifth area of the Beach world.
Stormy Shore introduces Squiddicus, a huge octopus that first appears in the background. Throughout much of the level, the Kongs have to dodge Squiddicus, who sticks its arms in front of the primates and tries to knock them into the water. Since the heroes cannot swim, it is vital for them to stay on the floating platforms for the whole level. The weather becomes very stormy later in the level and the water causes the floating platforms to constantly shift around. Other than Squiddicus, the enemies in this level include electric jellyfish enemies known as Jellybobs, Snippys, Pinchlys, Squidlys, and Electrasquids.
In the Time Attack mode of the game, a time of 1:11:00 is needed to get a gold medal, a time of 1:26:00 for silver, and a time of 2:00:00 for bronze.
Layout[edit]
The level begins on a beach that leads over to a pier with a Pinchly and a small pillar on it. If the Kongs pound the pillar into the ground, another pillar appears nearby with a banana. A treasure chest with a Banana Bunch in it is at the end of the bridge, and a Snippys and a dandelion follow. As the Kongs head into a nearby tunnel they approach two gaps, one of which that has a Jellybob in it. Another gap, placed next to a wall with a green surface on it, is near here, and a Jellybob jumps out of it. The Kongs can climb up the area with the turf, traveling up past a trail of bananas. The letter K of the K-O-N-G Letters is between this wall and the one across from it higher up. This other wall has green as well, which they must jump to and climb in order to progress to another platform with the first DK Barrel in the level on it. A Pinchly and some Squidlys attack the Kongs as they travel along the road ahead. Three gaps are along the way, each with a Jellybob in it. A small curved pathway is after these pits that leads under some more Squidlys and Banana Bunches. The Tutorial Pig and the checkpoint are at the end of the hill.
The letter O is high in the air just before a small gap after the checkpoint and a Pinchly. As they head down a solid platform with some bananas on it, they are able to witness Squiddicus, a giant octopus, destroy a ship in the background. Once the enemy notices the primates, it tries to attack them, destroying platforms that they stand on too long. The platforms after this are composed of wood and float on top of the wavy water. Once they cross four of these wooden platforms that are moved up and down by the waves, they come up to a banana trail that includes a large Banana Bunch. The trail leads them onto a solid, curved pier with some Squidlys flying above it. A Red Balloon is also floating upwards at the end of this pier, which has some more platforms being pushed around by the giant waves ahead of it.
Between two of these platforms is a Barrel Cannon floating atop the waves. The Kongs must shoot to the following platform when the waves tilt it in the correct direction. A pier is after the second platform that has the second DK Barrel on it. A pillar found nearby makes another pillar appear next to it in a small beach area being followed by another pier when it is pounded on. Two Snippys walk along the pier ahead. Some more platforms being moved around by waves float in the water nearby, and each of them appear as a part of a ship. The third platform is much bigger than the others in this area, as it appears as a giant mast that holds two yards that can be stood on. The bottom yard has bananas and a Pinchly on it, while the top one holds the letter N. Three more ship platforms follow this with Banana Coins and bananas above them. A Red Balloon and a curved pathway, which has a trio of Snippys along it, are located just before the Tutorial Pig and the second checkpoint.
Two gaps are after the checkpoint. When the Kongs approach them, Squiddicus sticks its arms in them and waves the arms up and down, making the heroes jump over an even bigger obstacle. A wall with some turf on it is ahead. As they climb it, the giant octopus foe sticks its arms in the Kongs' path, forcing them to have to jump to the wall covered in turf across from them to get around. Once they climb up the cliff, they find a treasure chest with a Puzzle Piece in it and a few gaps nearby. Squiddicus also moves its arms around in these gaps. They must evade the arms to reach a passage leading downwards. They can climb down the passage safely by using the turf found on the walls. Bananas and Banana Bunches line the beginning and end parts of the turf, but Squiddicus also puts its arms in the Kongs' way as they climb down. To move around the behemoth arms, they have to jump from wall-to-wall.
Once they reach the bottom of the passage, they find a barrel, two Snippys with a Pinchly between them, and a sandbag hanging from above. A trio of treasure chests are also placed behind the crab foes that contain items. A gap is ahead, which Squiddicus sticks its arms in. In order to cross it, the heroes must use the turf-covered ceiling above it. Another gap with arms moving in it is shortly after that the Kongs must also climb across with turf. Once they drop from the turf, evading another attack from the arms that appear directly in their path if they continue along the turf too long, they reach a few more ship parts floating on wavy water. A solid platform with a Snippys and a treasure chest containing a Banana Coin are between the first two ship platforms, which are followed by a large, floating ship mast the holds a long yard with turf along it. The Kongs must climb across this while dodging arms from Squiddicus to reach one more ship platform that is located just before a solid pathway with a Pinchly, the Tutorial Pig, and the third checkpoint.
From the checkpoint, there is a barrel located at the exit of the tunnel area. Outside of the tunnel is more wavy water with wooden ship pieces floating on it. As the heroes jump along several of these small platforms, Squidlys attack them. They can bounce the duo to Banana Coins and the letter G found high in the air. The last two ship platforms in the area are larger than the previous, and a sparkling Jellybob jumps between them. If the Jellybob is defeated, five Banana Coins and a Red Balloon appears. If Donkey and Diddy continue, they reach a Barrel Cannon that can shoot them into the level's Slot Machine Barrel. Before Squiddicus attacks them, they must shoot into the barrel to complete the level.
Enemies[edit]
| Image | Name | Amount |
|---|---|---|

|
Jellybob | 6 |

|
Pinchly | 5 |

|
Snippys | 10 |

|
Squiddicus | 1 |

|
Squidly | 11 |
Items[edit]
| Image | Name | Amount |
|---|---|---|
| Banana Coin | 15 | |
| Barrel | 3 | |
| DK Barrel | 2 | |

|
Heart | 2 |
| Red Balloon | 3 |
K-O-N-G Letters[edit]
Puzzle Pieces[edit]
| Image | Number | Location |
|---|---|---|
|
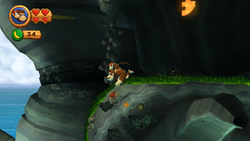
1 | After collecting the letter K, the Kongs must continue climbing up the left wall, just before the first DK Barrel, to get on top of a large structure with the Puzzle Piece. |
|
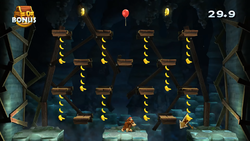
2 | If the Kongs pound a certain part of the ground near the first DK Barrel, they fall through the floor and land in a small, underground area with a doorway to the Bonus Level. The Kongs must collect eighty bananas, two Banana Coins, and a Red Balloon within 30 seconds for the Puzzle Piece to appear. |
|
3 | When the Kongs reach the Barrel Cannon floating on the wavy water shortly after the first checkpoint, they can shoot upwards when it is correctly aimed to grab a Puzzle Piece. |
|
4 | Shortly after the third Puzzle Piece is a pillar sticking out of the ground at the end of a pier. The Kongs can pound it for another pillar to appear in a nearby small beach area with the fourth Puzzle Piece. |
|
5 | After the second checkpoint, there is a treasure chest at the top of a grass wall that contains the final Puzzle Piece. |
Names in other languages[edit]
| Language | Name | Meaning |
|---|---|---|
| Japanese | 大海の八本足 Taikai no Happon Ashi |
Eight Legs of the Ocean;「大海」can also be read as「おおうみ」(ō umi, great sea). |
| Chinese | 大海的八只脚 Dàhǎi De Bāzhī Jiǎo |
Eight Legs of the Sea |
| French (NOA) | Mer Tentaculaire |
Tentacular Sea |
| German | Stürmische See |
Stormy Sea |
| Italian | Riva tempesta |
Tempest Shore |
| Spanish (NOA) | Pulpo Peleonero |
Fighter Octopus |
| Spanish (NOE) | Pulpo Peleón |
Bully Octopus |
