Mountain Mayhem: Difference between revisions
mNo edit summary |
(updated) |
||
| Line 1: | Line 1: | ||
{{levelbox | {{levelbox | ||
|image=[[File:Mountain Mayhem.png]] | |||
|image=[[File:Mountain Mayhem.png | |||
|code=3-2 | |code=3-2 | ||
|game=''[[Donkey Kong Land]] | |game=''[[Donkey Kong Land]] | ||
| Line 8: | Line 7: | ||
|before=[[Pot Hole Panic (Donkey Kong Land)|<<]] | |before=[[Pot Hole Panic (Donkey Kong Land)|<<]] | ||
}} | }} | ||
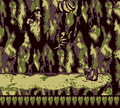
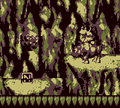
'''Mountain Mayhem''' is the eighteenth level in | '''Mountain Mayhem''' is the eighteenth level in ''[[Donkey Kong Land]]'' and the second level of [[Monkey Mountains & Chimpanzee Clouds]]. | ||
Mountain Mayhem is the first level to take place at a mountain range. Along the way, [[Donkey Kong]] and [[Diddy Kong]] must jump from many platforms over pits while avoiding [[boulder]]s that fall from openings in the rocky walls. Both [[Animal Friends]] appear in the level: [[Rambi the Rhino|Rambi]]'s [[Animal Crate]] is halfway into the level, while [[Expresso the Ostrich|Expresso]] only appears in a [[Bonus Level]]. Rambi helps the [[Kong]]s by defeating the jumping [[Kritter]]s, [[Slippa]]s, and [[Gnawty|Gnawties]] along the way. | |||
==Overview== | ==Overview== | ||
| Line 17: | Line 16: | ||
Halfway through the level, the heroes must dodge more falling rocks and hop up a few platforms to reach a higher point of the mountain. There, they will have to travel east again. After jumping to many small platforms and dodging more enemies, the animals will begin to leap to the west and keep on hopping to more platforms. Eventually, they will make it to the letter N, and then have to bounce up to a higher area with some more platforms. Finally, they will make it to one big platform, where they must bounce off of a tire to reach one long pathway. As they walk across this, they will encounter several enemies to defeat. After they jump over a few small gaps, the heroes will make their way to a portal. When they jump up to it, it will take them to the [[Track Attack|next level]]. | Halfway through the level, the heroes must dodge more falling rocks and hop up a few platforms to reach a higher point of the mountain. There, they will have to travel east again. After jumping to many small platforms and dodging more enemies, the animals will begin to leap to the west and keep on hopping to more platforms. Eventually, they will make it to the letter N, and then have to bounce up to a higher area with some more platforms. Finally, they will make it to one big platform, where they must bounce off of a tire to reach one long pathway. As they walk across this, they will encounter several enemies to defeat. After they jump over a few small gaps, the heroes will make their way to a portal. When they jump up to it, it will take them to the [[Track Attack|next level]]. | ||
== | ==Enemies== | ||
*Shortly after passing a Krusha and a few Kritters, the Kongs must jump | *[[Gnawty]]: 6 | ||
*[[Kritter]]: 5 | |||
*[[Krusha]]: 1 | |||
*[[Mincer]]: 1 | |||
*[[Slippa]]: 7 | |||
*[[Zinger]]: 3 | |||
==Items and objects== | |||
*[[DK Barrel]]s: 4 | |||
*[[Kong Token]]: 3 | |||
*[[TNT Barrel]]: 1 | |||
===K-O-N-G Letters=== | |||
*K: Above a Slippa | |||
*O: In the first bonus room—go to the far upper left area with Expresso to obtain the "O" | |||
*N: Found on a platform with rocks falling on it | |||
*G: In the last bonus room, circled by a Mincer | |||
==Bonus Areas== | |||
{|class="dktable-brown" | |||
!Image | |||
!Description | |||
|- | |||
|[[File:MountainMayhem-5.png]] | |||
|Shortly after passing a Krusha and a few Kritters, the Kongs must jump from ledge and follow a banana trail down to land on a dark patch in the ground. This causes the patch to break open, and the Kongs must grab an ascending [[rope]] to travel up to the first [[Bonus Area]]. The area takes on a ship deck, where the Kongs must cross a ship area and use a few cloud platforms to get over the gaping holes. Afterwards, they should break open a crate to find [[Expresso the Ostrich]]. With him, they can fly up to some high masts and collect [[Kong Token]]s and backtrack to find the letter O. The Kongs can exit from the right of the Bonus Level or by falling down into a gap; they cannot take Expresso with them either way. | |||
|- | |||
|[[File:MountainMayhem-7.png]] | |||
|Shortly after the letter N, the Kongs must use a tire to reach a high ledge. Instead of bouncing from it, the Kongs must go left and jump up a ledge to enter an Auto-Fire Barrel leading to the second Bonus Area. The Bonus Area simply consists of a Mincer circling the letter G in a construction site area. The Kongs can enter an Auto-Fire Barrel to the right to leave the area. | |||
|} | |||
==Gallery== | ==Gallery== | ||
<gallery> | <gallery> | ||
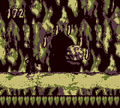
MountainMayhem-1.png|Diddy jumps toward a Zinger and a Banana Bunch. | MountainMayhem-1.png|Diddy jumps toward a Zinger and a Banana Bunch. | ||
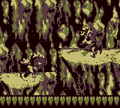
MountainMayhem-2.png|Diddy approaches a grotto which spawns falling | MountainMayhem-2.png|Diddy approaches a grotto which spawns falling boulders. | ||
MountainMayhem-3.png|Diddy carries a TNT Barrel toward a Krusha. | MountainMayhem-3.png|Diddy carries a TNT Barrel toward a Krusha. | ||
MountainMayhem-4.png|Donkey Kong crouches near a falling boulder. | MountainMayhem-4.png|Donkey Kong crouches near a falling boulder. | ||
MountainMayhem-6.png|Donkey Kong, riding on Rambi, waits for a boulder to fall down so that he can proceed. | MountainMayhem-6.png|Donkey Kong, riding on Rambi, waits for a boulder to fall down so that he can proceed. | ||
</gallery> | </gallery> | ||
Revision as of 17:51, October 28, 2019
Template:Levelbox Mountain Mayhem is the eighteenth level in Donkey Kong Land and the second level of Monkey Mountains & Chimpanzee Clouds.
Mountain Mayhem is the first level to take place at a mountain range. Along the way, Donkey Kong and Diddy Kong must jump from many platforms over pits while avoiding boulders that fall from openings in the rocky walls. Both Animal Friends appear in the level: Rambi's Animal Crate is halfway into the level, while Expresso only appears in a Bonus Level. Rambi helps the Kongs by defeating the jumping Kritters, Slippas, and Gnawties along the way.
Overview
From the start of the level, the Kongs must travel east and jump over a Zinger. If they continue on, they will have to avoid more enemies and also need to watch out for a rock falling out of a cave. After that, they will need to hop up some platforms and begin to walk west. They will have to defeat several kinds of enemies as they travel this way, along with some falling rocks. When they jump up all the platforms in this direction, they will have to climb up to a higher part of the mountain and journey east. While they progress through the level at this point, they must hop to many platforms, some being quite small. Soon, they will make it to a ledge, and they should drop down to find a barrel. When they go in it, they will be shot to a higher area, where a crate can be found. Breaking it will reveal the Animal Friend, Rambi. The heroes should ride on their friend and continue west. After avoiding some more falling rocks, the group will find the level's first and only Continue Point.
Halfway through the level, the heroes must dodge more falling rocks and hop up a few platforms to reach a higher point of the mountain. There, they will have to travel east again. After jumping to many small platforms and dodging more enemies, the animals will begin to leap to the west and keep on hopping to more platforms. Eventually, they will make it to the letter N, and then have to bounce up to a higher area with some more platforms. Finally, they will make it to one big platform, where they must bounce off of a tire to reach one long pathway. As they walk across this, they will encounter several enemies to defeat. After they jump over a few small gaps, the heroes will make their way to a portal. When they jump up to it, it will take them to the next level.
Enemies
Items and objects
- DK Barrels: 4
- Kong Token: 3
- TNT Barrel: 1
K-O-N-G Letters
- K: Above a Slippa
- O: In the first bonus room—go to the far upper left area with Expresso to obtain the "O"
- N: Found on a platform with rocks falling on it
- G: In the last bonus room, circled by a Mincer
Bonus Areas
| Image | Description |
|---|---|

|
Shortly after passing a Krusha and a few Kritters, the Kongs must jump from ledge and follow a banana trail down to land on a dark patch in the ground. This causes the patch to break open, and the Kongs must grab an ascending rope to travel up to the first Bonus Area. The area takes on a ship deck, where the Kongs must cross a ship area and use a few cloud platforms to get over the gaping holes. Afterwards, they should break open a crate to find Expresso the Ostrich. With him, they can fly up to some high masts and collect Kong Tokens and backtrack to find the letter O. The Kongs can exit from the right of the Bonus Level or by falling down into a gap; they cannot take Expresso with them either way. |

|
Shortly after the letter N, the Kongs must use a tire to reach a high ledge. Instead of bouncing from it, the Kongs must go left and jump up a ledge to enter an Auto-Fire Barrel leading to the second Bonus Area. The Bonus Area simply consists of a Mincer circling the letter G in a construction site area. The Kongs can enter an Auto-Fire Barrel to the right to leave the area. |
Gallery
Diddy jumps toward a Zinger and a Banana Bunch.
Diddy approaches a grotto which spawns falling boulders.
Diddy carries a TNT Barrel toward a Krusha.
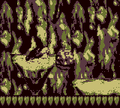
Donkey Kong crouches near a falling boulder.
Donkey Kong, riding on Rambi, waits for a boulder to fall down so that he can proceed.


Names in other languages
| Language | Name | Meaning |
|---|---|---|
| Japanese | モンキー・マウンテン1 Monkī Maunten1 |
Monkey Mountain 1 |
| Spanish | Locura en la montaña |
Madness in the mountain |