Cannon Cluster: Difference between revisions
mNo edit summary |
m (Text replacement - "dktable-brown" to "wikitable dk") |
||
| (16 intermediate revisions by 10 users not shown) | |||
| Line 1: | Line 1: | ||
{{about|the level in ''Donkey Kong Country Returns''|the level in ''[[Super Mario 3D World]]''|[[Cosmic Cannon Cluster]]}} | {{about|the level in ''Donkey Kong Country Returns''|the level in ''[[Super Mario 3D World]]''|[[Cosmic Cannon Cluster]]}} | ||
{{ | {{level infobox | ||
|image=[[File:DKCR Cannon Cluster 1.png|260px]] | |||
|image=[[File: | |||
|code=2-4 | |code=2-4 | ||
|world=[[Beach]] | |world=[[Beach]] | ||
| Line 8: | Line 7: | ||
|before=[[Peaceful Pier|<<]] | |before=[[Peaceful Pier|<<]] | ||
|after=[[Stormy Shore|>>]] | |after=[[Stormy Shore|>>]] | ||
| | |track=Mast Blast | ||
}} | }} | ||
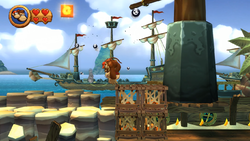
'''Cannon Cluster''' is the eleventh level in ''[[Donkey Kong Country Returns]]'' and ''[[Donkey Kong Country Returns 3D]]'', as well as the fourth level in the [[Beach]] world. | '''Cannon Cluster''' is the eleventh level in ''[[Donkey Kong Country Returns]]'' and ''[[Donkey Kong Country Returns 3D]]'', as well as the fourth level in the [[Beach]] world. With a [[Map Key]], the Kongs can unlock another level, [[Stormy Shore]]. | ||
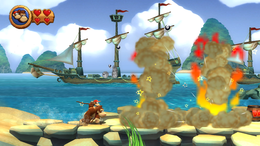
Located on the ocean shore of [[Donkey Kong Island | Located on the ocean shore of [[Donkey Kong Island]], Cannon Cluster features many pirate ships that shoot cannonballs at [[Donkey Kong|Donkey]] and [[Diddy Kong]]. In many areas of the stage, the [[Kong]]s must dodge the cannonballs by simply running past them or taking shelter under large boards. Additionally, many wooden crates appear around the level, some of which block the Kongs' path or contain collectibles. The level is not entirely a beach area however; various piers and shipwrecks are also featured. Near the piers, [[Jellybob (Donkey Kong Country Returns)|Jellybob]]s often jump out attempting to attack the Kongs. [[Pinchly]]s and [[Snippys]] are found along the beach areas of the level. | ||
In the [[Donkey Kong Country Returns#Time Attack|Time Attack]] mode | In the [[Donkey Kong Country Returns#Time Attack|Time Attack]] mode, a time of 0:50:00 is needed to get a gold medal, a time of 1:01:00 for silver, and a time of 1:23:00 for bronze. | ||
==Overview== | ==Overview== | ||
The level begins on a flat bridge that leads onto a beach area. When the Kongs head over the beach, they encounter a | The level begins on a flat bridge that leads onto a beach area. When the Kongs head over the beach, they encounter a Snippys and a platform that can be pounded into the ground to reveal a similar platform nearby. There is another Snippys farther ahead, followed by some more after a pair of crates. After the Kongs head down a small hill, they come across a flat area that is constantly being shot by cannonballs from the ships in the background. Before a raised area right after the section of land that the cannonballs hit is a [[DK Barrel]]. If the Kongs climb up the ledge next to it, they enter an area with a few bridges that lead over water. Gaps are in them, and Jellybobs jump out of them. A larger gap is after the second Jellybob, which holds the letter K of the [[KONG Letters|K-O-N-G Letters]] and a Tiki Buzz in it. A raised section of the bridge is above this gap and the letter with a treasure chest, some [[banana]]s, and a [[Banana Coin]] on it. After another gap in the bridge placed near a Pinchly is a long, flat area of the bridge that is placed slightly above the sand. Cannonballs shoot in this area that the heroes must avoid. A gap with water inside of it is following this section of cannonballs with a Tiki Buzz in it. | ||
[[File:DKCR Cannon Cluster 2.png|thumb|250px|left|The primates approach a gap with a Jellybob in it]] | |||
[[File: | On the other side of the gap is a raised bridge that is on top of the sand from the beach. The Kongs can jump off of the end of this bridge to reach the beach area, where there are some Snippys and a treasure chest. Farther ahead of them, and also immediately before them, are some wooden platforms that can be pounded into the ground to reveal a similar platform nearby. One of these platforms has a fan next to it that makes a section of ground rise when blown on. After this fan is a small gap with a Jellybob in it. On the other side of the gap is a bridge that leads back onto land. The Kongs can find crates here, followed by a raised area that is being shot by cannonballs. A wooden board is above a treasure chest here that they can take shelter under from the cannonballs; the letter O is on top of the board. The Kongs must progress onto a large wooden object and climb across it before they are shot by too many cannonballs, allowing them to reach the [[Professor Chops|Tutorial Pig]] with the checkpoint on a straight, flat bridge. | ||
On the other side of the gap is a raised bridge that is on top of the sand from the beach. The Kongs can jump off of the end of this bridge to reach the beach area, where there are some | |||
From the checkpoint, a gap located immediately after a lone [[barrel]] can be found with a Jellybob in it. On the other side of the gap is a vessel part that floats on top of the water. Another floating ship part is after the gap placed nearby, which has a Jellybob in it like most pits in the level. On this vessel section is a wooden crate, and above the gap right after it is the letter N. A Jellybob jumps out of the gap under the letter. There is yet another floating ship part on the other side of this gap with three bananas above it. The gap that is located after this ship part has another Jellybob in it and leads to a small, buoyant platform. The Kongs can reach an area of land near this floating platform, which has some crates on it. After the crates is a flat area that is shot by many cannonballs from the background. At the end of this area is a wall that the Kongs must go under by pounding a few crates apart to access an alcove below it. They can reach the letter G by jumping off of these crates. When they get under the wall, they come up to a curvy area of land covered with Pinchly enemies. Farther ahead of them is an area that is constantly being shot by cannonballs. They must run across this part of the level while trying to avoid the cannonballs to reach a raised piece of ground that can aid them in reaching a large, wooden ship part. Above an abyss next to the vessel is the level's [[Slot Machine Barrel]]; the level is completed when it is hit. | From the checkpoint, a gap located immediately after a lone [[barrel]] can be found with a Jellybob in it. On the other side of the gap is a vessel part that floats on top of the water. Another floating ship part is after the gap placed nearby, which has a Jellybob in it like most pits in the level. On this vessel section is a wooden crate, and above the gap right after it is the letter N. A Jellybob jumps out of the gap under the letter. There is yet another floating ship part on the other side of this gap with three bananas above it. The gap that is located after this ship part has another Jellybob in it and leads to a small, buoyant platform. The Kongs can reach an area of land near this floating platform, which has some crates on it. After the crates is a flat area that is shot by many cannonballs from the background. At the end of this area is a wall that the Kongs must go under by pounding a few crates apart to access an alcove below it. They can reach the letter G by jumping off of these crates. When they get under the wall, they come up to a curvy area of land covered with Pinchly enemies. Farther ahead of them is an area that is constantly being shot by cannonballs. They must run across this part of the level while trying to avoid the cannonballs to reach a raised piece of ground that can aid them in reaching a large, wooden ship part. Above an abyss next to the vessel is the level's [[Slot Machine Barrel]]; the level is completed when it is hit. | ||
==Enemies== | ==Enemies== | ||
{|class="wikitable dk" width=25% | |||
|- | |||
!Image | |||
!Name | |||
!Amount | |||
== | |- | ||
|align="center"|[[File:Jellybob.png|x50px]] | |||
|align="center"|[[Jellybob (Donkey Kong Country Returns)|Jellybob]] | |||
|6 | |||
|- | |||
|align="center"|[[File:Pinchly Render.png|x50px]] | |||
|align="center"|[[Pinchly]] | |||
|4 | |||
|- | |||
|align="center"|[[File:Snaps_closeup.png|x50px]] | |||
|align="center"|[[Snippys]] | |||
|7 | |||
|- | |||
|align="center"|[[File:TikiBuzz.png|x50px]] | |||
|align="center"|[[Tiki Buzz]] | |||
|2 | |||
|} | |||
==Items== | |||
{|class="wikitable dk" width=25% | |||
|- | |||
!Image | |||
!Name | |||
!Amount | |||
|- | |||
|align="center"|[[File:BananacoinDKCR.png|x50px]] | |||
|align="center"|[[Banana Coin]] | |||
|8 | |||
|- | |||
|align="center"|[[File:BarrelDKCR.png|x50px]] | |||
|align="center"|[[Barrel]] | |||
|2 | |||
|- | |||
|align="center"|[[File:DKBarrelDKCR.png|x50px]] | |||
|align="center"|[[DK Barrel]] | |||
|1 | |||
|- | |||
|align="center"|[[File:Heart.png|x50px]] | |||
|align="center"|[[Heart (item)|Heart]] | |||
|1 | |||
|- | |||
|align="center"|[[File:BalloonDKCR.png|x50px]] | |||
|align="center"|[[Red Balloon]] | |||
|1 | |||
|} | |||
===K-O-N-G Letters=== | ===K-O-N-G Letters=== | ||
[[File: | {|class="wikitable dk" width=70% | ||
|- | |||
!Image | |||
!Letter | |||
!Location | |||
|- | |||
|align="center"|[[File:DKCR Cannon Cluster Letter K.png|250px]] | |||
|align="center"|K | |||
|The letter K is in a wide gap located in a bridge area at the start. The Kongs must jump on a Tiki Buzz surrounding the letter K to safely collect it without falling into the pit. | |||
|- | |||
|align="center"|[[File:DKCR Cannon Cluster Puzzle Piece 5 Letter O.png|250px]] | |||
|align="center"|O | |||
|At an area of land that the cannonballs shoot at just before the checkpoint, the letter O is on a wooden board. | |||
|- | |||
|align="center"|[[File:DKCR Cannon Cluster Letter N.png|250px]] | |||
|align="center"|N | |||
|During the part where ship parts are floating above the water, the Kongs must jump off a crate to reach the letter N above a Jellybob. | |||
|- | |||
|align="center"|[[File:DKCR Cannon Cluster Letter G.png|250px]] | |||
|align="center"|G | |||
|When the Kongs reach the crates right after the second-to-last area of cannonballs, they must jump on them to reach the letter G. | |||
|} | |||
===Puzzle Pieces=== | ===Puzzle Pieces=== | ||
[[File: | {|class="wikitable dk" width=70% | ||
|- | |||
!Image | |||
!Number | |||
!Location | |||
|- | |||
|align="center"|[[File:DKCR Cannon Cluster Puzzle Piece 1.png|250px]] | |||
|align="center"|1 | |||
|At the start, the Kongs can find a wooden platform sticking out of the sand. They must Ground Pound it to make another appear nearby. If they pound it into the ground, the previous wooden platform pops back out of the ground with a [[Puzzle Piece (Donkey Kong Country Returns)|Puzzle Piece]] on it. | |||
|- | |||
|align="center"|[[File:DKCR Cannon Cluster Puzzle Piece 2.png|250px]] | |||
|align="center"|2 | |||
|Just before the letter K is a platform surrounded by two Jellybobs. There, the Kongs must blow at a flower to reveal the second Puzzle Piece. | |||
|- | |||
|align="center"|[[File:DKCR Cannon Cluster Puzzle Piece 3.png|250px]] | |||
|align="center"|3 | |||
|After the next set of cannonballs after the letter K is a wooden platform sticking out of the sand. If they pound on it, another one appears behind them on a raised bridge area. If they stand on this wooden platform they can find a Puzzle Piece high in the air that they can reach by jumping from the platform. | |||
|- | |||
|align="center"|[[File:DKCR Cannon Cluster Bonus Room 1.png|250px]] | |||
|align="center"|4 | |||
|The Kongs must pound the next wooden platform after the previous one, where they found the third Puzzle Piece, to make another wooden platform appear next to a fan. The Kongs should stand on the object and blow on the fan to make a section of land rise from the ground. They can use the land to reach a [[Barrel Cannon]] that shoots them into a [[Bonus Level]]. The Kongs have 30 seconds to move along two large, moving platforms and collect 47 bananas, two [[Banana Coin]]s, and a [[Red Balloon]]. After Donkey Kong and Diddy collect these items, the Puzzle Piece appears. | |||
|- | |||
|align="center"|[[File:DKCR Cannon Cluster Puzzle Piece 5.png|250px]] | |||
|align="center"|5 | |||
|The Kongs must Ground Pound two crates right before the letter O to reveal a Puzzle Piece. | |||
|- | |||
|align="center"|[[File:DKCR Cannon Cluster Puzzle Piece 6.png|250px]] | |||
|align="center"|6 | |||
|After the checkpoint, the Kongs must pick up a barrel and break open a wooden structure behind them. They can go inside a room with a Puzzle Piece, which is visible in the ship. | |||
|- | |||
|align="center"|[[File:DKCR Cannon Cluster Bonus Room 2.png|250px]] | |||
|align="center"|7 | |||
|In the area after the letter G is a barrel that is placed near some [[Pinchly]]s. The Kongs must pick it up and carry it by an area of cannonballs to find a wooden ship part right before the Slot Machine Barrel. With the barrel, the Kongs can smash a wall on the wooden object to reveal a passage into a Bonus Level. There, they have 30 seconds to move from a trampoline platform to collect some floating Banana Coins and bananas. After the Kongs collect all these items, the seventh and final Puzzle Piece appears. | |||
|} | |||
==Names in other languages== | ==Names in other languages== | ||
| Line 55: | Line 138: | ||
|Spa=Cañones en la Costa | |Spa=Cañones en la Costa | ||
|SpaM=Cannons at the Coast | |SpaM=Cannons at the Coast | ||
| | |FreA=Baie Bombardée | ||
| | |FreAM=Bombarded Bay | ||
|Ger=Volles Rohr! | |Ger=Volles Rohr! | ||
|GerM=Full Blast}} | |GerM=Full Blast | ||
|Ita=Porto bombarda | |||
|ItaM=Bombard Port | |||
|Chi=加农炮炮击 | |||
|ChiR=Jiānóngpào Pàojī | |||
|ChiM=Cannon Attack | |||
}} | |||
{{DKCR}} | {{DKCR}} | ||
[[Category:Beaches]] | [[Category:Beaches]] | ||
[[Category:Donkey Kong Country Returns | [[Category:Pirate areas]] | ||
[[Category:Donkey Kong Country Returns levels]] | |||
Latest revision as of 14:18, February 3, 2024
- This article is about the level in Donkey Kong Country Returns. For the level in Super Mario 3D World, see Cosmic Cannon Cluster.
| Level | |
|---|---|
| Cannon Cluster | |
| |
| Level code | 2-4 |
| World | Beach |
| Game | Donkey Kong Country Returns (3D) |
| Music track | Mast Blast |
| << Directory of levels >> | |
Cannon Cluster is the eleventh level in Donkey Kong Country Returns and Donkey Kong Country Returns 3D, as well as the fourth level in the Beach world. With a Map Key, the Kongs can unlock another level, Stormy Shore.
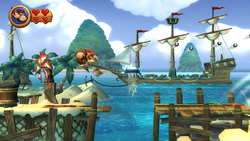
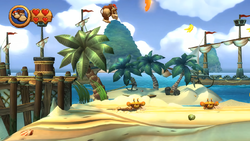
Located on the ocean shore of Donkey Kong Island, Cannon Cluster features many pirate ships that shoot cannonballs at Donkey and Diddy Kong. In many areas of the stage, the Kongs must dodge the cannonballs by simply running past them or taking shelter under large boards. Additionally, many wooden crates appear around the level, some of which block the Kongs' path or contain collectibles. The level is not entirely a beach area however; various piers and shipwrecks are also featured. Near the piers, Jellybobs often jump out attempting to attack the Kongs. Pinchlys and Snippys are found along the beach areas of the level.
In the Time Attack mode, a time of 0:50:00 is needed to get a gold medal, a time of 1:01:00 for silver, and a time of 1:23:00 for bronze.
Overview[edit]
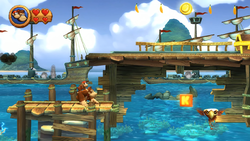
The level begins on a flat bridge that leads onto a beach area. When the Kongs head over the beach, they encounter a Snippys and a platform that can be pounded into the ground to reveal a similar platform nearby. There is another Snippys farther ahead, followed by some more after a pair of crates. After the Kongs head down a small hill, they come across a flat area that is constantly being shot by cannonballs from the ships in the background. Before a raised area right after the section of land that the cannonballs hit is a DK Barrel. If the Kongs climb up the ledge next to it, they enter an area with a few bridges that lead over water. Gaps are in them, and Jellybobs jump out of them. A larger gap is after the second Jellybob, which holds the letter K of the K-O-N-G Letters and a Tiki Buzz in it. A raised section of the bridge is above this gap and the letter with a treasure chest, some bananas, and a Banana Coin on it. After another gap in the bridge placed near a Pinchly is a long, flat area of the bridge that is placed slightly above the sand. Cannonballs shoot in this area that the heroes must avoid. A gap with water inside of it is following this section of cannonballs with a Tiki Buzz in it.
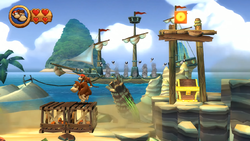
On the other side of the gap is a raised bridge that is on top of the sand from the beach. The Kongs can jump off of the end of this bridge to reach the beach area, where there are some Snippys and a treasure chest. Farther ahead of them, and also immediately before them, are some wooden platforms that can be pounded into the ground to reveal a similar platform nearby. One of these platforms has a fan next to it that makes a section of ground rise when blown on. After this fan is a small gap with a Jellybob in it. On the other side of the gap is a bridge that leads back onto land. The Kongs can find crates here, followed by a raised area that is being shot by cannonballs. A wooden board is above a treasure chest here that they can take shelter under from the cannonballs; the letter O is on top of the board. The Kongs must progress onto a large wooden object and climb across it before they are shot by too many cannonballs, allowing them to reach the Tutorial Pig with the checkpoint on a straight, flat bridge.
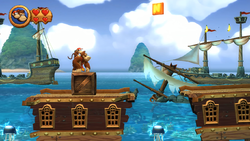
From the checkpoint, a gap located immediately after a lone barrel can be found with a Jellybob in it. On the other side of the gap is a vessel part that floats on top of the water. Another floating ship part is after the gap placed nearby, which has a Jellybob in it like most pits in the level. On this vessel section is a wooden crate, and above the gap right after it is the letter N. A Jellybob jumps out of the gap under the letter. There is yet another floating ship part on the other side of this gap with three bananas above it. The gap that is located after this ship part has another Jellybob in it and leads to a small, buoyant platform. The Kongs can reach an area of land near this floating platform, which has some crates on it. After the crates is a flat area that is shot by many cannonballs from the background. At the end of this area is a wall that the Kongs must go under by pounding a few crates apart to access an alcove below it. They can reach the letter G by jumping off of these crates. When they get under the wall, they come up to a curvy area of land covered with Pinchly enemies. Farther ahead of them is an area that is constantly being shot by cannonballs. They must run across this part of the level while trying to avoid the cannonballs to reach a raised piece of ground that can aid them in reaching a large, wooden ship part. Above an abyss next to the vessel is the level's Slot Machine Barrel; the level is completed when it is hit.
Enemies[edit]
| Image | Name | Amount |
|---|---|---|

|
Jellybob | 6 |

|
Pinchly | 4 |

|
Snippys | 7 |

|
Tiki Buzz | 2 |
Items[edit]
| Image | Name | Amount |
|---|---|---|
| Banana Coin | 8 | |
| Barrel | 2 | |
| DK Barrel | 1 | |

|
Heart | 1 |
| Red Balloon | 1 |
K-O-N-G Letters[edit]
Puzzle Pieces[edit]
| Image | Number | Location |
|---|---|---|
|
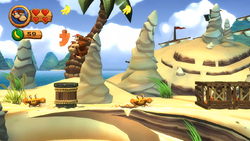
1 | At the start, the Kongs can find a wooden platform sticking out of the sand. They must Ground Pound it to make another appear nearby. If they pound it into the ground, the previous wooden platform pops back out of the ground with a Puzzle Piece on it. |
|
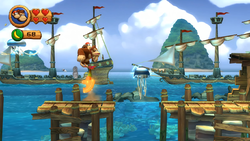
2 | Just before the letter K is a platform surrounded by two Jellybobs. There, the Kongs must blow at a flower to reveal the second Puzzle Piece. |
|
3 | After the next set of cannonballs after the letter K is a wooden platform sticking out of the sand. If they pound on it, another one appears behind them on a raised bridge area. If they stand on this wooden platform they can find a Puzzle Piece high in the air that they can reach by jumping from the platform. |
|
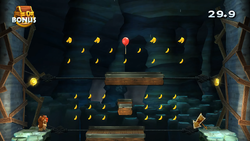
4 | The Kongs must pound the next wooden platform after the previous one, where they found the third Puzzle Piece, to make another wooden platform appear next to a fan. The Kongs should stand on the object and blow on the fan to make a section of land rise from the ground. They can use the land to reach a Barrel Cannon that shoots them into a Bonus Level. The Kongs have 30 seconds to move along two large, moving platforms and collect 47 bananas, two Banana Coins, and a Red Balloon. After Donkey Kong and Diddy collect these items, the Puzzle Piece appears. |
|
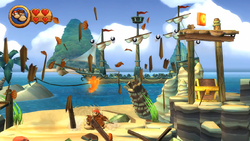
5 | The Kongs must Ground Pound two crates right before the letter O to reveal a Puzzle Piece. |
|
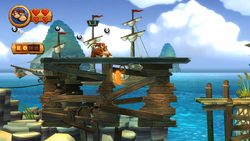
6 | After the checkpoint, the Kongs must pick up a barrel and break open a wooden structure behind them. They can go inside a room with a Puzzle Piece, which is visible in the ship. |
|
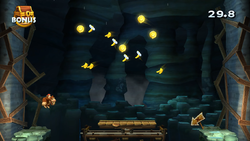
7 | In the area after the letter G is a barrel that is placed near some Pinchlys. The Kongs must pick it up and carry it by an area of cannonballs to find a wooden ship part right before the Slot Machine Barrel. With the barrel, the Kongs can smash a wall on the wooden object to reveal a passage into a Bonus Level. There, they have 30 seconds to move from a trampoline platform to collect some floating Banana Coins and bananas. After the Kongs collect all these items, the seventh and final Puzzle Piece appears. |
Names in other languages[edit]
| Language | Name | Meaning |
|---|---|---|
| Japanese | キャノンアタック Kyanon Atakku |
Cannon Attack |
| Chinese | 加农炮炮击 Jiānóngpào Pàojī |
Cannon Attack |
| French (NOA) | Baie Bombardée |
Bombarded Bay |
| German | Volles Rohr! |
Full Blast |
| Italian | Porto bombarda |
Bombard Port |
| Spanish | Cañones en la Costa |
Cannons at the Coast |
