Misty Mine: Difference between revisions
(merged.) |
|||
| (25 intermediate revisions by 11 users not shown) | |||
| Line 1: | Line 1: | ||
{{ | {{rewrite-expand|add captions to the gallery images}} | ||
{{DKC level infobox | |||
|image=[[File:Misty Mines SNES.png]] | |image=[[File:Misty Mines SNES.png]] | ||
|code=6 - 3 | |code=6 - 3 | ||
|game=''[[Donkey Kong Country]] | |game=''[[Donkey Kong Country]] | ||
| | |track=Misty Menace (SNES and GBA)<br>Mine Cart Madness (GBC) | ||
| | |before4=[[Manic Mincers|<<]] | ||
| | |after4=[[Loopy Lights|>>]] | ||
| | |before5=[[Manic Mincers|<<]] | ||
|after5=[[Necky Nutmare|>>]] | |||
}} | }} | ||
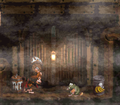
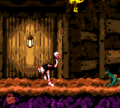
'''Misty Mine''' is the thirty-first level in ''[[Donkey Kong Country]]'' and the third level of [[Chimp Caverns]]. | '''Misty Mine''' is the thirty-first level in ''[[Donkey Kong Country]]'' and the third level of [[Chimp Caverns]]. Misty Mine takes place in a mine with a light fog, although it does not affect the gameplay. There are several [[black drum]]s along the way, which spawn various enemies including [[Gnawty|Gnawties]], [[Slippa]]s, [[Klaptrap]]s, and [[Army|Armies]]. There are also long vertical [[rope]]s which [[Donkey Kong]] and [[Diddy Kong]] can grab onto for the rope to start moving them across a gap. Misty Mine is unique in that all of its [[KONG Letters|K-O-N-G Letters]] are collected in the first [[Bonus Level]] if the [[Kong]]s swing from a rope. There is an [[animal crate]] of [[Expresso the Ostrich]] at the end of the first Bonus Level, and the Kongs can break it open to ride Expresso for the remainder of the main level. Its theme "Misty Menace" is named after the level, though it also plays in [[Stop & Go Station]]. | ||
Misty Mine takes place in a mine with a light fog, although it does not affect the gameplay. There are several [[ | |||
==Layout== | ==Layout== | ||
[[File: | {{multiframe|[[File:MistyMine-GBC-2.png]] [[File:MistyMine-GBA-1.png|180px]]|Misty Mine's appearance in the Game Boy Color version, top, and the Game Boy Advance version, bottom|align=left|size=200}} | ||
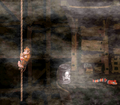
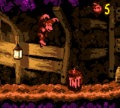
The Kongs begin the level next to a [[TNT Barrel]] with a | The Kongs begin the level next to a [[TNT Barrel|TNT Drum]] with a [[black drum]] which produces Slippas just ahead of it. After they pass the obstacle and the snakes it shoots at them, they can find a [[DK Barrel]] on a higher piece of ground with another Slippa-shooting black drum at the end of it near a second raised piece of land. An alcove with a rope dangling above it is nearby. The primates must use the rope to swing over the alcove, which contains a TNT Drum and a black drum that spawns Gnawties. Two more black drums that release Slippas are ahead, and a wide alcove and a TNT Drum are located between them. Another TNT Drum stands on the edge of a ledge just before a black drum that creates more Slippas. If the primates progress down a small ledge, they can find a black drum above a small gap containing a [[Rambi]] [[animal token|Token]]. Another black drum stands nearby on the edge of a cliff that can be crossed with a straight rope that begins to move to the right when touched. On the opposite side of this abyss, they can find a black drum that shoots Slippas and then a DK Barrel and a TNT Drum next to each other on the edge of a ledge. Two more black drums releasing Slippas stand ahead on the end of long strips of land. The Kongs can find a large pit immediately after the second black drum. After using two ropes to cross the abyss, they duo reaches a long pathway holding a Slippa-shooting black drum and the level's [[Star Barrel|Continue Barrel]]. | ||
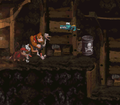
A DK Barrel wobbles above another Klaptrap-shooting | After the primates pass two black drums which release Slippas, they encounter a wide abyss containing a long, straight rope that begins to pull them over it once it is grabbed onto. As the primates glide over the pit, they are brought towards a group of [[banana]]s in a V shape and a DK Barrel. A block drum sits on the other side of the abyss, shooting more Slippa enemies. Several Gnawties march along a long pathway ahead of here, being spawned by a black drum. After climbing up two stair-like structures, the two friends approach a black drum located next to a small abyss with another black drum, which releases Klaptraps, following it. An [[Expresso]] [[animal token|Token]] floats above the enemies. The next black drum, shooting more Klaptraps, can be discovered in a large alcove that also contains a bouncy [[tire]] sticking out of the ground. A TNT Drum stands on the edge of the alcove that can be used to destroy a Klaptrap-shooting black drum placed farther ahead. Once the duo passes over a small, empty alcove near here, they encounter another two black drums that spawn Klaptraps. A DK Barrel wobbles above another Klaptrap-shooting black drum found ahead, which is followed by an abyss containing a floating black drum releasing the same enemies. With the use of this black drum, the two friends can cross the pit and access a higher area supporting another black drum that releases Armies. After passing a wide alcove, the primates reach another black drum that shoots Klaptraps. They can find another alcove next to this that is followed by a black drum that spawns Armies. An abyss is immediately after this obstacle, and once they cross it, they can discover four more Slippa-shooting black drums, each being placed in the ground. Once the Kongs continue past the drums, they approach a trail of bananas and then an [[Exit]] sign with the level's outlet beyond it. After completing the level, the Kongs can access [[Funky's Flights]] and the next level. | ||
==Enemies== | ==Enemies== | ||
An indefinite number of every enemy is spawned from the | An indefinite number of every enemy is spawned from the black drums throughout the level. | ||
<gallery> | |||
Army_DKC_sprite.png|[[Army]] | |||
Gnawty.png|[[Gnawty]] | |||
Klaptrap DKC.png|[[Klaptrap]] | |||
Slippa DKC.png|[[Slippa]] | |||
</gallery> | |||
==Items and objects== | ==Items and objects== | ||
The items and objects appear in the following quantities: | |||
<gallery> | |||
Expresso Token Sprite SNES.png|[[Expresso]] [[Animal token|token]] (2){{footnote|main|a}}{{footnote|main|b}} | |||
Enguarde Token Sprite SNES.png|[[Enguarde]] token (1){{footnote|main|b}} | |||
Rambi Token Sprite SNES.png|[[Rambi]] token (2){{footnote|main|b}}{{footnote|main|c}} | |||
Winky Token Sprite SNES.png|[[Winky]] token (1){{footnote|main|b}} | |||
DK Barrel DKC.png|[[DK Barrel]] (4) | |||
| | TNT_Barrel_DKC.png|[[TNT Barrel|TNT Drum]] (6) | ||
| | </gallery> | ||
| | |||
{{footnote|note|a|The Expresso Token comes after the first Bonus Level, floating in midair over a Klaptrap. Expresso can glide to the Expresso Token to reach it.}} | |||
{{footnote|note|b|An animal token of either of the four types can be rewarded for completing the second Bonus Level.}} | |||
{{footnote|note|c|The Rambi Token is beneath a black drum.}} | |||
===K-O-N-G Letters=== | ===K-O-N-G Letters=== | ||
[[File:Misty Mine KONG Bonus.gif|thumb|Diddy collecting every KONG Letter in the first Bonus Level in the Game Boy Advance version]] | |||
All of the K-O-N-G Letters are found in the first Bonus Level. | All of the K-O-N-G Letters are found in the first Bonus Level. | ||
*The letter K can be collected if the Kongs stay at the top of the rope. | *The letter K can be collected if the Kongs stay at the top of the rope. | ||
*The letter O by sliding to the bottom of the rope. | *The letter O by sliding to the bottom of the rope. | ||
*The letter N can then be collected by climbing back to the top of the rope | *The letter N can then be collected by climbing back to the top of the rope. | ||
*The letter G can be collected by | *The letter G can be collected by sliding to the bottom of the rope. | ||
=== | ===Key items=== | ||
*'''[[Photograph]]''' (Game Boy Advance version only): After the Continue Barrel, the Kongs must pass several Gnawties that are spawned from a black drum. An [[photograph]] is hidden offscreen to the upper-left of a black drum. The Kongs can reach it by either performing a roll jump or by flapping to it with Expresso. The photograph depicts a [[Bitesize]] in the seventeenth page of the [[scrapbook]]. | |||
==Bonus Levels== | ==Bonus Levels== | ||
Misty Mine has two [[Bonus Level]]s, listed by their type in the Game Boy Advance version: | |||
*'''''Find the Exit!''''': After passing the Continue Barrel, the Kongs must grab a long rope and travel to the bottom of it. The rope stops next to a ledge with an opening which leads into the first [[Bonus Level]]. There, the Kongs must ride a rope and climb up and down the rope to collect the K-O-N-G Letters and follow a trail of bananas that are arranged in a circle shape. The rope stops at a small ground platform with an Expresso Crate and the level exit. The Bonus Level can be re-entered more than once. | |||
*'''''Stop the Barrel!''''': Shortly after completing the first Bonus Barrel, the Kongs find a TNT Drum just before a black drum which spawns Klaptraps. The Kongs must jump over the Klaptraps and the black drum and carry the TNT Drum into the right wall of a small alcove shortly after. In the Bonus Level, there are three barrels which alternate between each four types of [[Kong Token]]s. By matching the [[animal token]] on each barrel, the Kongs are awarded that animal token. They return into the main level after either winning or losing the challenge. | |||
==Gallery== | ==Gallery== | ||
<gallery> | <gallery> | ||
Misty Mine-SNES-1.png | Misty Mine-SNES-1.png | ||
| Line 103: | Line 68: | ||
Misty Mine-SNES-3.png | Misty Mine-SNES-3.png | ||
Misty Mine-SNES-4.png | Misty Mine-SNES-4.png | ||
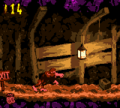
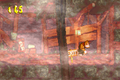
Misty Mine 5.png|The Kongs travel between a pair of black drums | |||
MistyMine-GBC-1.png | MistyMine-GBC-1.png | ||
MistyMine-GBC-3.png | MistyMine-GBC-3.png | ||
MistyMine-GBC-4.png | MistyMine-GBC-4.png | ||
MistyMine-GBC-5.png | MistyMine-GBC-5.png | ||
MistyMine-GBA-2.png | MistyMine-GBA-2.png | ||
MistyMine-GBA-3.png | MistyMine-GBA-3.png | ||
| Line 122: | Line 78: | ||
==Names in other languages== | ==Names in other languages== | ||
{{foreign names | {{foreign names | ||
|Jap=どくガストンネル | |Jap=どくガストンネル | ||
|JapR=Dokugasu tonneru | |JapR=Dokugasu tonneru | ||
| Line 128: | Line 84: | ||
|Spa=Niebla en la Mina | |Spa=Niebla en la Mina | ||
|SpaM=Mist in the Mine | |SpaM=Mist in the Mine | ||
| | |Fre=Mine Brumeuse | ||
| | |FreM=Misty Mine | ||
|Ger=Nebel-Mine | |Ger=Nebel-Mine | ||
|GerM=Mist Mine | |GerM=Mist Mine | ||
| Line 137: | Line 93: | ||
==Trivia== | ==Trivia== | ||
* | *There is a glitch where the Kongs can lose a life. If Diddy does a cartwheel jump at the rope when it goes offscreen, he falls through the floor and loses a life. This glitch is present in neither of the remakes. | ||
{{DKC | {{DKC levels}} | ||
[[Category: | [[Category:Mines]] | ||
[[Category:Donkey Kong Island]] | [[Category:Donkey Kong Island]] | ||
[[Category:Donkey Kong Country | [[Category:Donkey Kong Country levels]] | ||
Revision as of 14:44, January 20, 2024
It has been requested that this article be rewritten and expanded to include more information. Reason: add captions to the gallery images
| Level | |
|---|---|
| Misty Mine | |

| |
| Level code | 6 - 3 |
| Game | Donkey Kong Country |
| Music track | Misty Menace (SNES and GBA) Mine Cart Madness (GBC) |
| << Directory of levels (SNES & GBA) >> | |
| << Directory of levels (GBC) >> | |
Misty Mine is the thirty-first level in Donkey Kong Country and the third level of Chimp Caverns. Misty Mine takes place in a mine with a light fog, although it does not affect the gameplay. There are several black drums along the way, which spawn various enemies including Gnawties, Slippas, Klaptraps, and Armies. There are also long vertical ropes which Donkey Kong and Diddy Kong can grab onto for the rope to start moving them across a gap. Misty Mine is unique in that all of its K-O-N-G Letters are collected in the first Bonus Level if the Kongs swing from a rope. There is an animal crate of Expresso the Ostrich at the end of the first Bonus Level, and the Kongs can break it open to ride Expresso for the remainder of the main level. Its theme "Misty Menace" is named after the level, though it also plays in Stop & Go Station.
Layout


The Kongs begin the level next to a TNT Drum with a black drum which produces Slippas just ahead of it. After they pass the obstacle and the snakes it shoots at them, they can find a DK Barrel on a higher piece of ground with another Slippa-shooting black drum at the end of it near a second raised piece of land. An alcove with a rope dangling above it is nearby. The primates must use the rope to swing over the alcove, which contains a TNT Drum and a black drum that spawns Gnawties. Two more black drums that release Slippas are ahead, and a wide alcove and a TNT Drum are located between them. Another TNT Drum stands on the edge of a ledge just before a black drum that creates more Slippas. If the primates progress down a small ledge, they can find a black drum above a small gap containing a Rambi Token. Another black drum stands nearby on the edge of a cliff that can be crossed with a straight rope that begins to move to the right when touched. On the opposite side of this abyss, they can find a black drum that shoots Slippas and then a DK Barrel and a TNT Drum next to each other on the edge of a ledge. Two more black drums releasing Slippas stand ahead on the end of long strips of land. The Kongs can find a large pit immediately after the second black drum. After using two ropes to cross the abyss, they duo reaches a long pathway holding a Slippa-shooting black drum and the level's Continue Barrel.
After the primates pass two black drums which release Slippas, they encounter a wide abyss containing a long, straight rope that begins to pull them over it once it is grabbed onto. As the primates glide over the pit, they are brought towards a group of bananas in a V shape and a DK Barrel. A block drum sits on the other side of the abyss, shooting more Slippa enemies. Several Gnawties march along a long pathway ahead of here, being spawned by a black drum. After climbing up two stair-like structures, the two friends approach a black drum located next to a small abyss with another black drum, which releases Klaptraps, following it. An Expresso Token floats above the enemies. The next black drum, shooting more Klaptraps, can be discovered in a large alcove that also contains a bouncy tire sticking out of the ground. A TNT Drum stands on the edge of the alcove that can be used to destroy a Klaptrap-shooting black drum placed farther ahead. Once the duo passes over a small, empty alcove near here, they encounter another two black drums that spawn Klaptraps. A DK Barrel wobbles above another Klaptrap-shooting black drum found ahead, which is followed by an abyss containing a floating black drum releasing the same enemies. With the use of this black drum, the two friends can cross the pit and access a higher area supporting another black drum that releases Armies. After passing a wide alcove, the primates reach another black drum that shoots Klaptraps. They can find another alcove next to this that is followed by a black drum that spawns Armies. An abyss is immediately after this obstacle, and once they cross it, they can discover four more Slippa-shooting black drums, each being placed in the ground. Once the Kongs continue past the drums, they approach a trail of bananas and then an Exit sign with the level's outlet beyond it. After completing the level, the Kongs can access Funky's Flights and the next level.
Enemies
An indefinite number of every enemy is spawned from the black drums throughout the level.


Items and objects
The items and objects appear in the following quantities:


a - The Expresso Token comes after the first Bonus Level, floating in midair over a Klaptrap. Expresso can glide to the Expresso Token to reach it.
b - An animal token of either of the four types can be rewarded for completing the second Bonus Level.
c - The Rambi Token is beneath a black drum.
K-O-N-G Letters

All of the K-O-N-G Letters are found in the first Bonus Level.
- The letter K can be collected if the Kongs stay at the top of the rope.
- The letter O by sliding to the bottom of the rope.
- The letter N can then be collected by climbing back to the top of the rope.
- The letter G can be collected by sliding to the bottom of the rope.
Key items
- Photograph (Game Boy Advance version only): After the Continue Barrel, the Kongs must pass several Gnawties that are spawned from a black drum. An photograph is hidden offscreen to the upper-left of a black drum. The Kongs can reach it by either performing a roll jump or by flapping to it with Expresso. The photograph depicts a Bitesize in the seventeenth page of the scrapbook.
Bonus Levels
Misty Mine has two Bonus Levels, listed by their type in the Game Boy Advance version:
- Find the Exit!: After passing the Continue Barrel, the Kongs must grab a long rope and travel to the bottom of it. The rope stops next to a ledge with an opening which leads into the first Bonus Level. There, the Kongs must ride a rope and climb up and down the rope to collect the K-O-N-G Letters and follow a trail of bananas that are arranged in a circle shape. The rope stops at a small ground platform with an Expresso Crate and the level exit. The Bonus Level can be re-entered more than once.
- Stop the Barrel!: Shortly after completing the first Bonus Barrel, the Kongs find a TNT Drum just before a black drum which spawns Klaptraps. The Kongs must jump over the Klaptraps and the black drum and carry the TNT Drum into the right wall of a small alcove shortly after. In the Bonus Level, there are three barrels which alternate between each four types of Kong Tokens. By matching the animal token on each barrel, the Kongs are awarded that animal token. They return into the main level after either winning or losing the challenge.
Gallery

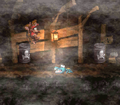
The Kongs travel between a pair of black drums


Names in other languages
| Language | Name | Meaning |
|---|---|---|
| Japanese | どくガストンネル Dokugasu tonneru |
Poison Gas Tunnel |
| French | Mine Brumeuse |
Misty Mine |
| German | Nebel-Mine |
Mist Mine |
| Italian | Nubi in Miniera |
Clouds in Mine |
| Spanish | Niebla en la Mina |
Mist in the Mine |
Trivia
- There is a glitch where the Kongs can lose a life. If Diddy does a cartwheel jump at the rope when it goes offscreen, he falls through the floor and loses a life. This glitch is present in neither of the remakes.