Mine Cart Madness: Difference between revisions
Metalex123 (talk | contribs) |
mNo edit summary |
||
| (31 intermediate revisions by 12 users not shown) | |||
| Line 1: | Line 1: | ||
{{ | {{DKC level infobox | ||
|image=[[File:Mine Cart Madness 7.png]] | |||
|image=[[File:Mine Cart Madness 7.png | |code=5 - 5 (SNES & GBC)<br>5 - 6 (GBA) | ||
|code=5 - 5 (SNES)<br>5 - 6 (GBA) | |||
|game=''[[Donkey Kong Country]] | |game=''[[Donkey Kong Country]] | ||
| | |before2=[[Poison Pond|<<]] | ||
|after2=[[Blackout Basement|>>]] | |||
| | |before3=[[Blackout Basement|<<]] | ||
| | |after3=[[Boss Dumb Drum|>>]] | ||
| | |track=Mine Cart Madness | ||
| | |||
}} | }} | ||
'''Mine Cart Madness''' is the twenty-seventh level of | '''Mine Cart Madness''' is the twenty-seventh level of ''[[Donkey Kong Country]]'' and the fifth level of [[Kremkroc Industries, Inc.]] In the [[Donkey Kong Country (Game Boy Advance)|Game Boy Advance version]], this level switched positions with [[Blackout Basement]], making it the sixth and last level and the twenty-eighth level overall. Similarly to [[Mine Cart Carnage]], the level involves [[Donkey Kong]] and [[Diddy Kong]] riding in a [[Mine Cart]]. A difference is that the [[Kong]]s jump out from a Mine Cart rather than jump with it. The Kongs often have to jump over a short abyss and land into the next Mine Cart to continue. [[Zinger]]s and [[Necky]]s are the main enemies of Mine Cart Madness. A few [[Krash]]es are also in the level except they sit in a non-moving Mine Cart at the start of a track segment, and the Kongs can jump on the Krash to take control of their Mine Cart. The Kongs also encounter three [[Gnawty|Gnawties]] at the start of the level and a fourth one at the end. | ||
==Layout== | |||
{{multiframe|[[File:MineCartMadness-GBC-2.png]] [[File:MineCartMadness-GBA-1.png|180px]]|Mine Cart Madness' appearance in the Game Boy Color version, top, and the Game Boy Advance version, bottom|align=left|size=200}} | |||
At the start of the level, the Kongs must pass or defeat three Gnawties and pass a [[DK Barrel]] along a set of scaffolds, then hop into a Mine Cart to advance throughout the level. They are then pulled past a Necky, then another. Next, the track becomes a dead end and the Kongs must defeat or pass another Necky and hop into the second Mine Cart of the level. Donkey and Diddy Kong must then nab the [[KONG Letters|letter K]] between two Neckys and continue along throughout the level. They can either jump onto the Mine Cart on the shortcut by climbing up a rope, which takes them past the Neckys below, or they can take the hard way with Neckys as obstacles. On the secret path, they can collect many bananas and/or enter the Bonus Barrel above them, while on the lower path, they ride over a small ramp that sends them over some of an abyss. After riding through either of the pathways, Donkey and Diddy must hop over a Zinger to go into the next Mine Cart of the level. After defeating or passing a Necky, they encounter two more Neckys that they can bounce on to collect the letter O. The Kongs must then jump into another Mine Cart, where they temporarily go upwards and must only avoid a single Zinger to move onto the next Mine Cart. After this, they must hop into two more Mine Carts on two short tracks, until they reach a Mine Cart on a longer track, which leads the duo to the [[Star Barrel|Continue Barrel]]. | |||
Halfway throughout the level, the Kongs must fall downwards off of the edge of a track to land in a lower area with a DK Barrel and two Neckes that they must jump over or defeat. Then, they encounter a line full of Mine Carts on short tracks, as well as the letter N after riding in the two Mine Carts on short tracks. They must then hop into another Mine Cart to continue throughout the Mine Cart level. The primates can find a tire high up in the air in which they can jump onto to hop into the second Bonus Barrel. They may ignore it and then avoid two Zingers until they reach the deadline of the track. The Kongs must then jump onto a tire on a nearby platform, which helps them jump into another Mine Cart leading between two Zingers. Afterwards, the Kongs must hop onto another platform, avoid a Zinger, and, optionally, collect the letter G with a tire on the platform. After this, the Kongs must hop into another Mine Cart, which travels a far way downwards until reaching another platform with a tire and a Zinger around it. The Kongs must then hop off this platform and into another Mine Cart containing a Krash on a short track leading the Kongs to another two platform with a tire on each. A Zinger on whom the primates must avoid is also between them. The Kongs must then hop into a Mine Cart containing a Krash, defeat it, then continue along until reaching another short platform supporting a tire. A Zinger flies to the left of it. The Kongs must then hop off this ledge and into another Mine Cart containing a Krash on whom the Kongs must defeat. The Kongs continue upwards in the Mine Cart and must avoid a trio of Zingers. They must then hop out of the Mine Cart and into another Mine Cart with a Krash in it. They must defeat the Krash and continue along throughout the level under a Necky, until reaching another small platform supporting a tire with a Zinger circling around it. The Kongs must avoid this enemy and hop far down and into another Mine Cart with a Krash in it, whom the primates must defeat. The primates are then lead far up and far down in the Mine Cart, making an upside-down U-turn. They can hop into a Barrel Cannon in the middle of the U-turn, found below the exit sign on the track, which leads them to the final Bonus Level. They must then finally jump off of the Mine Cart when they reach the downward part of the U-turn and defeat a Gnawty on a long scaffold. The duo must then hop onto another ledge leading them to the [[exit]] to the [[Blackout Basement|next level]]. | |||
==Enemies== | |||
The following enemies appear in the following quantities: | |||
<gallery> | <gallery> | ||
Gnawty.png|[[Gnawty]] (4) | |||
Krash_DKC.png|[[Krash]] (3) | |||
Necky.png|[[Necky]] (8) | |||
Zinger_DKC.png|[[Zinger]] (13) | |||
</gallery> | </gallery> | ||
== | ==Items and objects== | ||
The following items and objects appear in the following quantities: | |||
<gallery> | <gallery> | ||
DK Barrel DKC.png|[[DK Barrel]] (2) | |||
Rambi Token Sprite SNES.png|[[Rambi]] [[Animal token|token]] (1, in a Bonus Level) | |||
Enguarde Token Sprite SNES.png|[[Enguarde]] token (1) | |||
Red Balloon DKC SNES.png|[[Red Balloon|Life Balloon]] (1, in the first Bonus Level) | |||
</gallery> | </gallery> | ||
===Game Boy Advance=== | ===K-O-N-G Letters=== | ||
[[File:Mine Cart Madness 6.png|thumb|The location of the letter G]] | |||
*'''K:''' When the Kongs enter the second Mine Cart, they must bounce from two Neckys to collect the letter K hovering above and between them. | |||
*'''O:''' After the first Zinger, the Kongs must bounce from two Neckys to reach the letter O in midair. | |||
*'''N:''' After the Continue Barrel, the Kongs must pass two Neckys and enter a Mine Cart on a short track. The letter N is floating in a gap after the second track segment. It can be safely collected if the Kongs jump right as the Mine Cart starts to fall down into the gap. | |||
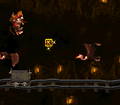
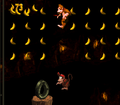
*'''G:''' After completing the second Bonus Level, the Kongs must jump into another Mine Cart and between two Zingers. They must then bounce on a half tire orbited by a Zinger to collect the letter G above. | |||
{{br}} | |||
==Bonus Levels== | |||
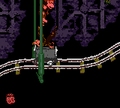
[[File:MineCartMadnessFindTheExit.png|thumb|The first Bonus Level]] | |||
Mine Cart Madness has three Bonus Levels, listed by their type in the Game Boy Advance version: | |||
*'''''Find the Exit!''''': After the letter K, the Kongs must jump up at a rope and climb it. They must then jump right into a Mine Cart which follows a trail of bananas. When the trail of bananas stop, the Kongs can jump up into a [[Bonus Barrel]] hidden off-screen. In the [[Bonus Level]], the Kongs must blast between several [[Barrel Cannon]]s and collect items along the way. The Bonus Level is very similar to the second one of [[Elevator Antics]] except the background is purple, and the last three items are a [[Banana Bunch]], a [[Rambi]] [[animal token|Token]], and lastly a [[Red Balloon|Life Balloon]]. The Kongs can exit from the rightmost opening or by falling down an abyss. | |||
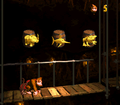
*'''''Stop the Barrel!''''': After the letter N, the Kongs must ride another Mine Cart and jump out at a round [[tire]] floating in midair. They must bounce from it to land into a Bonus Barrel to the right. In the Bonus Level, the Kongs must jump at three barrels so that same [[animal token]]s display on all three. After doing so, the Kongs are rewarded that animal token. The Kongs return into the main level after either winning or losing the challenge. | |||
*'''''Collect the Bananas!''''': After exiting the last Mine Cart, the Kongs must turn around on a platform with a Gnawty and jump left onto a round tire. They must bounce left on the two next tires and then into a Bonus Barrel, which is under the arrow sign pointing the nearby exit. In the Bonus Level, the Kongs must bounce from a round tire on a horizontally-moving platform to collect bananas over a wide abyss. The Kongs can exit the Bonus Level to the right. | |||
==Gallery== | |||
<gallery> | <gallery> | ||
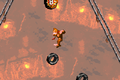
MineCartMadness- | Mine Cart Madness SNES.png|The Kongs jump from one Mine Cart into another | ||
MineCartMadness-GBA-2.png | MineCartMadnessLetterK.png|The letter K | ||
MineCartMadnessLetterO.png|The letter O | |||
MineCartMadnessLetterN.png|The letter N | |||
MineCartMadnessStopTheBarrel.png|The second Bonus Level | |||
Mine Cart Madness 2.png|The Kongs jump at a Necky | |||
Mine Cart Madness 3.png|The Kongs approach the Continue Barrel | |||
Mine Cart Madness 4.PNG|The Kongs hop into a Mine Cart | |||
Mine Cart Madness 5.png|The Kongs jump near a [[Blast Barrel]] that leads to the third and last Bonus Level | |||
MineCartMadnessCollectTheBananas.png|The third Bonus Level | |||
MineCartMadness-GBC-1.png|Donkey Kong jumping over a Necky in the Game Boy Color version | |||
MineCartMadness-GBA-2.png|The location of the third and final Bonus Barrel in the Game Boy Advance version | |||
</gallery> | </gallery> | ||
==Names in other languages== | ==Names in other languages== | ||
{{foreign names | {{foreign names | ||
|Jap=マインカートコースター2 | |Jap=マインカートコースター2 | ||
|JapR=Mainkāto | |JapR=Mainkāto Kōsutā 2 | ||
|JapM=Mine Cart Coaster | |JapM=Mine Cart Coaster 2 | ||
|Spa=Locura en la Mina | |Spa=Locura en la Mina | ||
|SpaM=Madness in the Mine | |SpaM=Madness in the Mine | ||
|Ger=Loren-Leichtsinn (GBA) | |Fre=Folie du Chariot Minier (SNES)<br>Mine Malade (GBC) | ||
|FreM=Madness of the Mine Cart<br>Sick Mine | |||
|Ger=Loren-Leichtsinn (GBC/GBA) | |||
|GerM=Lorry Recklessness | |GerM=Lorry Recklessness | ||
|Ita=Carrelli Pazzi | |||
|ItaM=Crazy Carts | |||
}} | }} | ||
{{DKC | ==Trivia== | ||
[[Category: | *Mine Cart Madness and [[Forest Frenzy]] are the only two levels to have a music theme with the same name. | ||
*In the Japanese version, an extra DK Barrel was added near the midway point. | |||
{{DKC levels}} | |||
[[Category:Mines]] | |||
[[Category:Railways]] | [[Category:Railways]] | ||
[[Category:Donkey Kong Island]] | [[Category:Donkey Kong Island]] | ||
[[Category:Donkey Kong Country | [[Category:Donkey Kong Country levels]] | ||
Latest revision as of 14:37, January 20, 2024
| Level | |
|---|---|
| Mine Cart Madness | |

| |
| Level code | 5 - 5 (SNES & GBC) 5 - 6 (GBA) |
| Game | Donkey Kong Country |
| Music track | Mine Cart Madness |
| << Directory of levels (SNES & GBC) >> | |
| << Directory of levels (GBA) >> | |
Mine Cart Madness is the twenty-seventh level of Donkey Kong Country and the fifth level of Kremkroc Industries, Inc. In the Game Boy Advance version, this level switched positions with Blackout Basement, making it the sixth and last level and the twenty-eighth level overall. Similarly to Mine Cart Carnage, the level involves Donkey Kong and Diddy Kong riding in a Mine Cart. A difference is that the Kongs jump out from a Mine Cart rather than jump with it. The Kongs often have to jump over a short abyss and land into the next Mine Cart to continue. Zingers and Neckys are the main enemies of Mine Cart Madness. A few Krashes are also in the level except they sit in a non-moving Mine Cart at the start of a track segment, and the Kongs can jump on the Krash to take control of their Mine Cart. The Kongs also encounter three Gnawties at the start of the level and a fourth one at the end.
Layout[edit]


At the start of the level, the Kongs must pass or defeat three Gnawties and pass a DK Barrel along a set of scaffolds, then hop into a Mine Cart to advance throughout the level. They are then pulled past a Necky, then another. Next, the track becomes a dead end and the Kongs must defeat or pass another Necky and hop into the second Mine Cart of the level. Donkey and Diddy Kong must then nab the letter K between two Neckys and continue along throughout the level. They can either jump onto the Mine Cart on the shortcut by climbing up a rope, which takes them past the Neckys below, or they can take the hard way with Neckys as obstacles. On the secret path, they can collect many bananas and/or enter the Bonus Barrel above them, while on the lower path, they ride over a small ramp that sends them over some of an abyss. After riding through either of the pathways, Donkey and Diddy must hop over a Zinger to go into the next Mine Cart of the level. After defeating or passing a Necky, they encounter two more Neckys that they can bounce on to collect the letter O. The Kongs must then jump into another Mine Cart, where they temporarily go upwards and must only avoid a single Zinger to move onto the next Mine Cart. After this, they must hop into two more Mine Carts on two short tracks, until they reach a Mine Cart on a longer track, which leads the duo to the Continue Barrel.
Halfway throughout the level, the Kongs must fall downwards off of the edge of a track to land in a lower area with a DK Barrel and two Neckes that they must jump over or defeat. Then, they encounter a line full of Mine Carts on short tracks, as well as the letter N after riding in the two Mine Carts on short tracks. They must then hop into another Mine Cart to continue throughout the Mine Cart level. The primates can find a tire high up in the air in which they can jump onto to hop into the second Bonus Barrel. They may ignore it and then avoid two Zingers until they reach the deadline of the track. The Kongs must then jump onto a tire on a nearby platform, which helps them jump into another Mine Cart leading between two Zingers. Afterwards, the Kongs must hop onto another platform, avoid a Zinger, and, optionally, collect the letter G with a tire on the platform. After this, the Kongs must hop into another Mine Cart, which travels a far way downwards until reaching another platform with a tire and a Zinger around it. The Kongs must then hop off this platform and into another Mine Cart containing a Krash on a short track leading the Kongs to another two platform with a tire on each. A Zinger on whom the primates must avoid is also between them. The Kongs must then hop into a Mine Cart containing a Krash, defeat it, then continue along until reaching another short platform supporting a tire. A Zinger flies to the left of it. The Kongs must then hop off this ledge and into another Mine Cart containing a Krash on whom the Kongs must defeat. The Kongs continue upwards in the Mine Cart and must avoid a trio of Zingers. They must then hop out of the Mine Cart and into another Mine Cart with a Krash in it. They must defeat the Krash and continue along throughout the level under a Necky, until reaching another small platform supporting a tire with a Zinger circling around it. The Kongs must avoid this enemy and hop far down and into another Mine Cart with a Krash in it, whom the primates must defeat. The primates are then lead far up and far down in the Mine Cart, making an upside-down U-turn. They can hop into a Barrel Cannon in the middle of the U-turn, found below the exit sign on the track, which leads them to the final Bonus Level. They must then finally jump off of the Mine Cart when they reach the downward part of the U-turn and defeat a Gnawty on a long scaffold. The duo must then hop onto another ledge leading them to the exit to the next level.
Enemies[edit]
The following enemies appear in the following quantities:


Items and objects[edit]
The following items and objects appear in the following quantities:

DK Barrel (2)

Enguarde token (1)

Life Balloon (1, in the first Bonus Level)

K-O-N-G Letters[edit]

- K: When the Kongs enter the second Mine Cart, they must bounce from two Neckys to collect the letter K hovering above and between them.
- O: After the first Zinger, the Kongs must bounce from two Neckys to reach the letter O in midair.
- N: After the Continue Barrel, the Kongs must pass two Neckys and enter a Mine Cart on a short track. The letter N is floating in a gap after the second track segment. It can be safely collected if the Kongs jump right as the Mine Cart starts to fall down into the gap.
- G: After completing the second Bonus Level, the Kongs must jump into another Mine Cart and between two Zingers. They must then bounce on a half tire orbited by a Zinger to collect the letter G above.
Bonus Levels[edit]

Mine Cart Madness has three Bonus Levels, listed by their type in the Game Boy Advance version:
- Find the Exit!: After the letter K, the Kongs must jump up at a rope and climb it. They must then jump right into a Mine Cart which follows a trail of bananas. When the trail of bananas stop, the Kongs can jump up into a Bonus Barrel hidden off-screen. In the Bonus Level, the Kongs must blast between several Barrel Cannons and collect items along the way. The Bonus Level is very similar to the second one of Elevator Antics except the background is purple, and the last three items are a Banana Bunch, a Rambi Token, and lastly a Life Balloon. The Kongs can exit from the rightmost opening or by falling down an abyss.
- Stop the Barrel!: After the letter N, the Kongs must ride another Mine Cart and jump out at a round tire floating in midair. They must bounce from it to land into a Bonus Barrel to the right. In the Bonus Level, the Kongs must jump at three barrels so that same animal tokens display on all three. After doing so, the Kongs are rewarded that animal token. The Kongs return into the main level after either winning or losing the challenge.
- Collect the Bananas!: After exiting the last Mine Cart, the Kongs must turn around on a platform with a Gnawty and jump left onto a round tire. They must bounce left on the two next tires and then into a Bonus Barrel, which is under the arrow sign pointing the nearby exit. In the Bonus Level, the Kongs must bounce from a round tire on a horizontally-moving platform to collect bananas over a wide abyss. The Kongs can exit the Bonus Level to the right.
Gallery[edit]
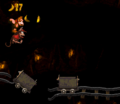
The Kongs jump from one Mine Cart into another
The letter K
The letter O
The letter N
The second Bonus Level
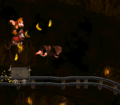
The Kongs jump at a Necky
The Kongs approach the Continue Barrel

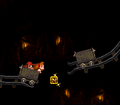
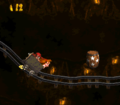
The Kongs hop into a Mine Cart
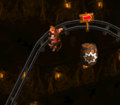
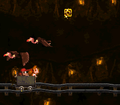
The Kongs jump near a Blast Barrel that leads to the third and last Bonus Level
The third Bonus Level
Donkey Kong jumping over a Necky in the Game Boy Color version
The location of the third and final Bonus Barrel in the Game Boy Advance version


Names in other languages[edit]
| Language | Name | Meaning |
|---|---|---|
| Japanese | マインカートコースター2 Mainkāto Kōsutā 2 |
Mine Cart Coaster 2 |
| French | Folie du Chariot Minier (SNES) Mine Malade (GBC) |
Madness of the Mine Cart Sick Mine |
| German | Loren-Leichtsinn (GBC/GBA) |
Lorry Recklessness |
| Italian | Carrelli Pazzi |
Crazy Carts |
| Spanish | Locura en la Mina |
Madness in the Mine |
Trivia[edit]
- Mine Cart Madness and Forest Frenzy are the only two levels to have a music theme with the same name.
- In the Japanese version, an extra DK Barrel was added near the midway point.