Blackout Basement
Template:DKClevelbox Blackout Basement is the twenty-eighth level in Donkey Kong Country. It is also the sixth and final level of the Kremkroc Industries, Inc. area, and the second (and final) factory-themed level. In the Game Boy Advance version of the game, Blackout Basement is the twenty-seventh level in the game, as well as the fifth level of Kremkroc Industries, Inc (having switched positions with Mine Cart Madness).
In this unique factory level, the Kongs face a never before seen obstacle: lights that flicker on and off throughout the whole level. This causes the level to become increasingly difficult, as the Kongs cannot see anything but themselves, barrels, items, and faint, hard-to-see outlines of platform edges when the lights shut off. To make things worse, the level is filled with many ropes, moving platforms, and even pitfalls, which the heroes can fall into if they aren't careful where they step. Many enemies are also scattered everywhere to bump into the Kongs when they can and cannot see. Enemies in this factory level include Kritters, Klumps, Klaptraps, and Manky Kongs. With the short moments of bright light, the heroes have to make their way cautiously through the level.
In the Game Boy Color version of the level, it never becomes completely dark, just very poorly lit, making platforms and obstacles still somewhat visible.
Overview
At the beginning of the level, the Kongs travel down a long set of stairs with the level's first DK Barrel at the bottom of it. A Kritter marches along a flat piece of ground after a smaller stairway. Another stairway with a Kritter at the top of it can be found after a nearby abyss. The Kongs can find a second pit after the foe with the letter K above it. They come up to more Kritter enemies as they travel down a stairway located after this abyss. The enemies are followed by another abyss that can be crossed with the aid of a stationary platform floating in it. The duo can find a group of bananas on a flat area of ground near here, which is followed by a much wider pit containing three stationary platforms.
An Animal Token of Enguarde hangs under the platform in the middle of this abyss, which is followed by a stairway holding a few Kritters. After climbing the stairs, the Kongs come up to an abyss containing a solid platform with a bouncy tire sticking out of it. The tire can assist them in crossing the abyss and reach a series of platforms that are connected by stairways that Kritters march along. A DK Barrel wobbles on the highest platform, which is then followed by a larger platform with a wide abyss after it. Three platforms float above this abyss, each with a bouncy tire on it that the primates must bounce on to jump higher. On the other side of the pit, the two friends can find a solid area of ground with a small section of it that can be broken to reveal the letter O. The level's Star Barrel floats above and abyss with a platform supporting a tire under it.
After the Kongs cross this abyss, they reach a set of two platforms that are connected by a stairway that holds a Klump. An abyss is ahead of here, but the primates can easily cross it with a rope. On the opposite side of the pit, they can discover another pair of platforms that are connected by a set of stairs supporting a Klump. An abyss stands between these platforms and another, and a smaller platform hovers across it. The duo can use the platform to cross and then reach another abyss consisting of another small platform that moves in a vertical path above it. It can be used to cross the pit and reach a higher area that connects to another piece of ground with a stairway. A Klump travels along the stairs. A rope swings in a wide abyss ahead of here. The Kongs can grab onto it as it swings to glide over the abyss and then reach a large platform with a DK Barrel above it. They can discover a wide pit nearby with two smaller platforms moving in vertical paths above it. With the use of these platforms, they can make their way over the pit and onto another large platform with a bigger abyss after it. This can be crossed with the use of two more small platforms that both pull them across different parts of it.
Two pieces of ground connected by another stairway can be found on the other side of the abyss with a Klaptrap on them. A set of three platforms set up in a similar way to these is located after a small abyss that can be crossed with the help of a small, black platform in it that begins to fall when landed on. Several Klaptraps stomp along the platforms, which are followed by a wide pit that can only be crossed with the use of a few black platforms found above it. These platforms descend and then fall when landed on. The Kongs can find a Steel Keg on the other side of the abyss that is followed by a long series of platforms that are connected by short stairways. After passing a Manky Kong in this area, they head past a sign indicating that the level is near complete and then travel up a longer stairway. At the top of the stairs, they are attacked by a large group of Kritters who march along the ground and on a raised platform with the letter G above it. The enemies are followed by a ledge that drops the duo into a lower area with an exit sign in it. Before passing the sign to complete the level, a Klaptrap attacks the Kongs.
Enemies
- Kritters: 16
- Klap Traps: 5
- Klumps: 4
- Manky Kong: 1
Hidden collectibles and objects
K-O-N-G Letters

- K: After passing a Kritter near the beginning of the level, the Kongs approach the letter K, located above a small pit.
- O: Just before reaching the Star Barrel, the primates cross an abyss using several bouncy tires. After bouncing off of the last tire, they should land on a rectangular mark on the ground to break it and release the hidden letter O.
- N: The Kongs can find the letter N between all of the barrels in the first Bonus Level.
- G: Immediately before the entrance to the second Bonus Level, the Kongs encounter a large group of Kritters with the letter G above them on a raised platform.
Bonus Rooms
- Near the end of the level, the Kongs have to jump along four falling platforms. Under the last platform, they can notice a lone banana. They should fall down to this banana to land in a hidden barrel below it. They are sent by the barrel to a Bonus Room, where they need to shoot through several barrels around an open area, trying to grab as many bananas possible. This must be done while the lights blink on and off. Once they are done collecting, the primates can exit to the right.
- After exiting the first Bonus Room, the heroes are shot into the main level and break an area of the ground. A barrel then pops out of it. They should drop down the ledge, throw the barrel to the left wall, and ride on it as it comes back to them. They will defeat all the enemies along the way, and eventually open up a wall. It leads them to a Bonus Room, where they have to watch as an Extra Life Balloon moves around four barrels. Once it stops, the balloon disappears. If the primates choose the correct barrel that it stopped on, they are given a prize. Afterwards, they exit the bonus automatically. They are also forced out of the room without a prize if they fail to choose the correct barrel.
Photograph (Game Boy Advance version only)
- After exiting the first Bonus Room, the Kongs break a piece of the ground containing a Steel Keg. They should carry this object farther ahead to a Manky Kong. If they defeat this foe with the barrel, they earn a photograph of a Manky Kong in the fourth page of their scrapbook.
Gallery
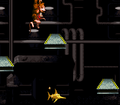
The Enguarde Animal Token lying at the bottom can be reached with a roll jump.
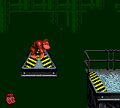
The level in the Game Boy Color version
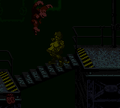
The blackout in the Game Boy Color version

The level in the Game Boy Advance version


Names in other languages
| Language | Name | Meaning |
|---|---|---|
| Japanese | オンボロこうじょう Onboro kōjō |
Worn-out Factory |
| German | Kaos-Keller (GBA) |
Chaos Basement |
| Spanish | Sótano Oscuro |
Dark Basement |