Stop & Go Station
Template:Levelbox Stop & Go Station is the ninth level of the game, Donkey Kong Country. It is also the fourth level in the Monkey Mines area.
This unique level takes place inside a mine shaft. Almost every part of the level is guarded by the invincible and incredibly fast Rock Kroc sentinels. The only way past the Rock Krocs is to deactivate them. To do this, the Kongs must hit barrel switches displaying the word 'GO' to switch them to 'STOP'. This causes the green light in the mine to turn into a red one, and while this red light is on, the Rock Krocs are unable to move, rendering them harmless. However, the light only stays red for a limited amount of time. This is the only level in the game where the Rock Krocs are found, and also marks the first appearance of the Klaptrap enemies. Besides these foes, no other enemies appear in Stop & Go Station.
Level layout

At the beginning of the level, the Kongs exit a small tunnel and make their way towards several small ledges. After dropping down the second ledge, they find a Klaptrap and a barrel switch that displays the word 'Go'. Once they hit it, the Rock Kroc dashing in the small area of land ahead crouches into a ball, allowing the primates to cross. A DK Barrel and another barrel switch is located nearby, and they are followed by several ledges with more Rock Krocs on the edge of them. The Kongs can find a Klaptrap on the top ledge, which is followed by a lower area containing the letter K and a tire that can assist them in crossing a pit and reaching a barrel switch high in the air. Two Rock Krocs race in the small area after here, avoiding another pit found farther ahead.
On the opposite side of this abyss, the heroes can find a flat piece of ground with a Klaptrap on it and a barrel switch above it that they can hit to flip the color of the lights, causing the Rock Krocs to curl into balls if they are not already in their hiding position. An abyss can be found after the barrel switch with a small platform guarded by a Rock Krocs in it. The primates are able to locate a pair of Klaptraps and an additional barrel switch on other other side of the pit. Two more small pits are ahead of here, and the platform surrounded by them holds a pair of Rock Krocs. Another barrel switch is also in the second abyss, which is followed by an additional pit that can only be crossed with the use of a moving platform that is occupied by a Rock Kroc. The Kongs can discover a DK Barrel and another barrel switch on the other end of the drop. They are followed by an additional pit with several ledges after it. Most of the ledges hold Rock Krocs, but others carry Klaptraps. At the top ledge, the heroes can find a small pit containing the letter O and then the level's Star Barrel.

If the Kongs continue forward, they drop down a tall ledge with a barrel next to it, which is supported by a smaller ledge that is followed by a flat area with a Rock Kroc and a barrel switch on it. Another Rock Kroc runs in a lower area located just before a higher area of ground that supports a Klaptrap. The Kongs can find a trio of Klaptraps in a slightly lower area nearby with a wall of bananas in front of it. After climbing a ledge found ahead of the enemies, the primates reach an area containing a DK Barrel and a tire that they can roll towards a barrel switch found high in the air. The tire can help them bounce to the switch, which then causes the Rock Krocs to roll up into a ball for a limited amount of time. A few Klaptraps march around the area, which is followed by a wide abyss containing several small platforms, each being guarded by a Rock Kroc. A Klaptrap attacks the heroes as they access the other end of the abyss. Two alcoves are located ahead of here, and a Klaptrap and the letter N stand in the small space between them.
Another Klaptrap is located just before another abyss with a barrel switch above the beginning of it. Two platforms occupied by Rock Krocs hover in the abyss, moving back and forth in a horizontal path. They can be used to help the heroes cross the abyss and reach an area containing a sign that indicates that the level is near complete. The duo can find two barrel switches along a flat stretch of land ahead of here. Several Rock Krocs cover the pathway. A tire sticks out of the end of the land, which can be used to reach another barrel switch placed high over a slightly lower stretch of land. This land is also infested with Rock Krocs. A tire stands on it that can be rolled under the next barrel switch so that the heroes can bounce up to it. A few ledges are also ahead, leading into a raised area of ground containing a few more Rock Krocs. At the end of this area, the two friends can locate the letter G on a ledge that is followed by a exit sign. If the Kongs walk into the tunnel ahead of here, they complete the level.
Hidden collectibles and objects
K-O-N-G Letters
- K: The Kongs can find the letter K before the third barrel switch in the level, which is placed above the level's first pit.
- O: The letter O hovers in the final abyss before the level's Star Barrel. A super-jump is required to reach it.
- N: After crossing a wide abyss using several small platforms guarded by Rock Krocs, the primates reach two small alcoves with the letter N between them.
- G: The letter G stands on a ledge immediately before the exit sign.
Bonus Levels
- After the level's Star Barrel, the Kongs can notice a barrel laying in plain sight. They should pick it up and carry it through the area, hitting 'Go' barrels when necessary. A wall is near the second Rock Kroc in the area. The primates need to blow this wall away with their barrel to find the entrance to the Bonus Level. There, they have to shoot in a square path with four barrels, collecting many bananas on the way. In the center of the large area, they can grab a Banana Bunch. Once the group collects all they need, they are able to exit from a nearby opening.
- Once the primates exit the first Bonus Level, they can discover a short trail of three bananas in mid-air. They should walk a little farther to find a tire. With the bouncy tire, the heroes should make their way to where the banana trail is and bounce above the top of it. A Barrel Cannon is hidden above them that shoots them to the second Bonus Level. In this special level, the Kongs need to shoot upwards through a barrel that moves in a horizontal path to collect some prizes in the air. After shooting out of it, they fall back downwards. If they miss the barrel upon trying to land in it, they are forced back into the main level.
Warp Barrel
- A Warp Barrel is located at the start of the stage. If the primates are to go backwards at the start, they enter it and are sent near the end of the level, where they can find a sign that indicates that the level is almost complete. Unlike most of the warps in Donkey Kong Country, this warp appears in all versions of the game.
Photograph (Game Boy Advance version only)
- The photograph in this level can be found in the last abyss before the letter O. A roll jump is required to reach it. The photograph gives the Kongs a picture of a Rock Kroc for their scrapbook.
Gallery
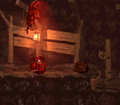
Diddy hits a 'Stop' barrel.
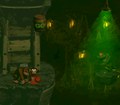
The characters face a chasm.
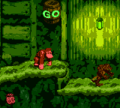
The level in the Game Boy Color version
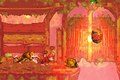
The level in the Game Boy Advance version


Names in other languages
| Language | Name | Meaning |
|---|---|---|
| Japanese | ストップ&ゴー ステーション Sutoppu &(ando) gō sutēshon |
Stop and Go Station |
| German | Ruckzuck-Station (SNES) Stop & Go-Station (GBA) |
Rough literal translation ("ruckzuck" means "in no time", "easily") literal translation |
| Spanish | Barriles Semáforo |
"Semaphore barrels" |