Aerie Fortress: Difference between revisions
(Redirecting to Durian Kingdom) |
m (Reverted edits by 166.198.34.112 (talk) to last revision by PorpleBot) Tags: Rollback Mobile edit Advanced mobile edit |
||
| (24 intermediate revisions by 10 users not shown) | |||
| Line 1: | Line 1: | ||
{{level infobox | |||
|title={{PAGENAME}} | |||
|world=[[Durian Kingdom]] | |||
|image=[[File:Aerie_Fortress.png|250px]] | |||
|code=12-2 | |||
|game=''[[Donkey Kong Jungle Beat]]'' | |||
|before=[[Battle for Storm Hill|<<]] | |||
|after=[[VS. Cactus King|>>]] | |||
}} | |||
'''Aerie Fortress''' is the twenty-fourth level of ''[[Donkey Kong Jungle Beat]]'' and the second area of the [[Durian Kingdom]]. [[Donkey Kong]] utilizes his rope swinging and swimming abilities to make it through the heavily fortified fortress. Similar to the [[Battle for Storm Hill|previous level]], [[Ninjape]]s use a variety of attacks to keep Donkey Kong at bay. This level also features [[Helibird]]s, which help Donkey Kong ascend through the fortress. After biting into the giant durian at the end of this level, the ape heads out to fight [[Ninja Kong]]. | |||
==Level layout== | |||
This level begins with Donkey Kong standing on a platform near a rope. The ape can slide down this rope to reach the deepest part of the area. As he slides down, he comes to some groups of three bananas and some [[Bee (Donkey Kong Jungle Beat)|Bee]]s. A few additional ropes also appear as the ape slides down. At the end of the ropes, there is a large pool of water. In the water, Donkey Kong comes up to some [[Spined Puffer]]s. Above the second fish is a short pathway leading to a few Banana Bunches. To the right of it is the main path, which is cluttered with [[Jelly Fish]]. After going through the twists and turns of the area, a current begins to push the ape backwards, however, he can swim through it to access a bigger area. At the end of this room is a [[Tar Fish]]. If Donkey Kong manages to stun it, he can grab into its back fin and ride it through some walls. The fish eventually jumps onto a platform above the water, leaving the ape off before it explodes. A [[Helper Monkey]] is near here, and it can throw the Kong to a nearby rope. | |||
More ropes are ahead of this one rope, and they lead to the second Helper Monkey. This monkey throws the ape upwards to a bouncy tightrope, which can be jumped off of to reach another Helper Monkey. [[Armored Stinga]]s are near this Helper Monkey to attack the ape, and another rope is above them. Like the rope before, the ape can bounce off of this to jump higher than usual. A group of small yellow fairies is above this rope, and they form a trampoline when hit by a [[Sound Wave Attack]], so the rope can boost Donkey Kong to the mechanism. The trampoline can bounce him into a bigger room with a Helibird. If the ape manages to reach the Helibird in this room, who is located in a high-up nest, he can make his way past a [[Mini Slump Bird]] into a tight passage. While heading through the passage, a blue Ninjape throws its weapons at the Kong to attack. Three more of these ninja enemies appear after the ape flies his Helibird through a U shaped passage. | |||
If the ape continues through here, he can enter a large room full of bananas. The small passage continues from here, however, and takes the ape to some Helper Monkeys. In the area located previously after the trampoline, Donkey Kong is also able to miss his Helibird. If this happens, he must continue on foot through the rest of the room. In this area, a Mini Slump Bird and several Ninjapes appear. Some stair platforms lead the ape out of this room to a wide hallway. Many blue Ninjapes line the ceiling here, throwing their weapons at the Kong. The hallway leads into another room, and in it many black Ninjapes jump out to attack. Some [[Mini Elephant Cannon]]s are also hidden on a small, high platform, and some stairs at the end of the room lead into another hallway. The hallway is occupied by some more blue Ninjapes, as well as a lone Mini Elephant Cannon. A large room is near here and a [[Banandelion]] waits at its entrance. The common plant can fling the Kong to a small platform with a [[Fire Pig Poppo]] on it. | |||
A Helper Monkey is near this foe, and it can throw Donkey Kong to another platform with a second Fire Pig Poppo on it. Another Helper Monkey is near here to throw the ape to the third and final Fire Pig Poppo and the next Helper Monkey. The monkey here can throw Donkey Kong to some more Helper Monkeys, who can then throw the Kong into a higher area, unless he still has his Helibird to fly him up. In this higher area, there are some insect enemies that attack the ape. A large, moving object surrounds this room, and a few gaps are in it. Once the gap in the mechanism moves over the room's exit, the ape can exit the area to find a room with a Helibird in it. The bird can fly the Kong upwards, where there are some Mini Slump Birds and Mini Elephant Cannons. Above these two enemies are a few wooden platforms, some of which are covered in flames. If Donkey Kong heads higher than these platforms, he can find some more Mini Slump Birds and another Helibird to help him out. The walls around this area are covered in flames, but if the ape manages to fly his Helibird between the gap in the top of the room, he can find a new room with a giant durian. There are two sets of six Banana Bunches on the two ends of the area as well. A Helibird also waits to the left end of the room to fly the Kong to the giant durian. Once he bites into the fruit, the level ends. | |||
==Enemies and obstacles== | |||
<gallery> | |||
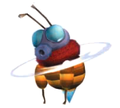
DKJB Bee.png|[[Bee (Donkey Kong Jungle Beat)|Bee]] | |||
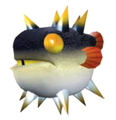
Haribonbon.png|[[Spined Puffer]] | |||
DKJB Jellyfish.png|[[Jelly Fish]] | |||
DKJB Piranha.png|[[Tar Fish]] | |||
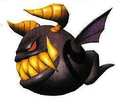
DKJB Black Fairy art.jpg|[[Black Fairy]] | |||
Black Fairy Attack.png|[[Black Fairy|Black Fairy Attack]] | |||
nocoverart.png|[[Cactus]] (Wii only) | |||
Stinga.png|[[Stinga]] (Wii only) | |||
Armored Stinga.png|[[Armored Stinga]] | |||
DKJB Red Roc.png|[[Mini Slump Bird]] | |||
DKJB Blood Pine art.jpg|[[Blood Pine]] | |||
DKJB Ninjape green screenshot.png|[[Ninjape]] (green) | |||
DKJB Ninjape blue screenshot.png|Ninjape (blue) | |||
DKJB Black Ninjape.png|Ninjape (black) | |||
DKJB Tusk Cannon.png|[[Mini Elephant Cannon]] | |||
DKJB Fire Pig Poppo art.jpg|[[Fire Pig Poppo]] | |||
DKJB Ninjape red screenshot.png|Ninjape (red) | |||
nocoverart.png|[[Beehive|Stinga Comb]] | |||
</gallery> | |||
==Names in other languages== | |||
{{foreign names | |||
|Jap={{hover|雷雲|らいうん}}トリノス{{hover|城|じょう}} | |||
|JapR=Raiun Tori no Su Jō | |||
|JapM=Thundercloud Bird's Nest Castle | |||
}} | |||
{{DKJB}} | |||
{{DKJB levels}} | |||
[[Category:Fortresses]] | |||
[[Category:Donkey Kong Jungle Beat levels]] | |||
Latest revision as of 19:37, October 8, 2022
| Level | |
|---|---|
| Aerie Fortress | |
| |
| Level code | 12-2 |
| World | Durian Kingdom |
| Game | Donkey Kong Jungle Beat |
| << Directory of levels >> | |
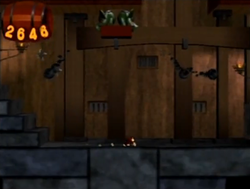
Aerie Fortress is the twenty-fourth level of Donkey Kong Jungle Beat and the second area of the Durian Kingdom. Donkey Kong utilizes his rope swinging and swimming abilities to make it through the heavily fortified fortress. Similar to the previous level, Ninjapes use a variety of attacks to keep Donkey Kong at bay. This level also features Helibirds, which help Donkey Kong ascend through the fortress. After biting into the giant durian at the end of this level, the ape heads out to fight Ninja Kong.
Level layout[edit]
This level begins with Donkey Kong standing on a platform near a rope. The ape can slide down this rope to reach the deepest part of the area. As he slides down, he comes to some groups of three bananas and some Bees. A few additional ropes also appear as the ape slides down. At the end of the ropes, there is a large pool of water. In the water, Donkey Kong comes up to some Spined Puffers. Above the second fish is a short pathway leading to a few Banana Bunches. To the right of it is the main path, which is cluttered with Jelly Fish. After going through the twists and turns of the area, a current begins to push the ape backwards, however, he can swim through it to access a bigger area. At the end of this room is a Tar Fish. If Donkey Kong manages to stun it, he can grab into its back fin and ride it through some walls. The fish eventually jumps onto a platform above the water, leaving the ape off before it explodes. A Helper Monkey is near here, and it can throw the Kong to a nearby rope.
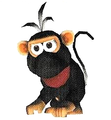
More ropes are ahead of this one rope, and they lead to the second Helper Monkey. This monkey throws the ape upwards to a bouncy tightrope, which can be jumped off of to reach another Helper Monkey. Armored Stingas are near this Helper Monkey to attack the ape, and another rope is above them. Like the rope before, the ape can bounce off of this to jump higher than usual. A group of small yellow fairies is above this rope, and they form a trampoline when hit by a Sound Wave Attack, so the rope can boost Donkey Kong to the mechanism. The trampoline can bounce him into a bigger room with a Helibird. If the ape manages to reach the Helibird in this room, who is located in a high-up nest, he can make his way past a Mini Slump Bird into a tight passage. While heading through the passage, a blue Ninjape throws its weapons at the Kong to attack. Three more of these ninja enemies appear after the ape flies his Helibird through a U shaped passage.
If the ape continues through here, he can enter a large room full of bananas. The small passage continues from here, however, and takes the ape to some Helper Monkeys. In the area located previously after the trampoline, Donkey Kong is also able to miss his Helibird. If this happens, he must continue on foot through the rest of the room. In this area, a Mini Slump Bird and several Ninjapes appear. Some stair platforms lead the ape out of this room to a wide hallway. Many blue Ninjapes line the ceiling here, throwing their weapons at the Kong. The hallway leads into another room, and in it many black Ninjapes jump out to attack. Some Mini Elephant Cannons are also hidden on a small, high platform, and some stairs at the end of the room lead into another hallway. The hallway is occupied by some more blue Ninjapes, as well as a lone Mini Elephant Cannon. A large room is near here and a Banandelion waits at its entrance. The common plant can fling the Kong to a small platform with a Fire Pig Poppo on it.
A Helper Monkey is near this foe, and it can throw Donkey Kong to another platform with a second Fire Pig Poppo on it. Another Helper Monkey is near here to throw the ape to the third and final Fire Pig Poppo and the next Helper Monkey. The monkey here can throw Donkey Kong to some more Helper Monkeys, who can then throw the Kong into a higher area, unless he still has his Helibird to fly him up. In this higher area, there are some insect enemies that attack the ape. A large, moving object surrounds this room, and a few gaps are in it. Once the gap in the mechanism moves over the room's exit, the ape can exit the area to find a room with a Helibird in it. The bird can fly the Kong upwards, where there are some Mini Slump Birds and Mini Elephant Cannons. Above these two enemies are a few wooden platforms, some of which are covered in flames. If Donkey Kong heads higher than these platforms, he can find some more Mini Slump Birds and another Helibird to help him out. The walls around this area are covered in flames, but if the ape manages to fly his Helibird between the gap in the top of the room, he can find a new room with a giant durian. There are two sets of six Banana Bunches on the two ends of the area as well. A Helibird also waits to the left end of the room to fly the Kong to the giant durian. Once he bites into the fruit, the level ends.
Enemies and obstacles[edit]
Names in other languages[edit]
| Language | Name | Meaning |
|---|---|---|
| Japanese | 雷雲トリノス城 Raiun Tori no Su Jō |
Thundercloud Bird's Nest Castle |
