Mario Kart Tour: Difference between revisions
(→Other) |
m (Text replacement - "{{[Mm]ain\|([^{}\n]+){{!}}[^{}\n]+}}" to "{{main|$1}}") |
||
| Line 1: | Line 1: | ||
{{italic title}} | {{italic title}} | ||
{{ | {{distinguish|Super Mario Kart Tour|Mario Tour}} | ||
{{game infobox | |||
|image=[[File:Mario Kart Tour Logo.png|230px]] | |image=[[File:Mario Kart Tour Logo.png|230px]] | ||
|developer=[[Nintendo]]<br>[[Bandai Namco Entertainment|Bandai Namco Studios]]<ref>[https://www.bandainamcostudios.com/en/products/ PRODUCTS | Bandai Namco Studios Inc.]</ref> | |developer=[[Nintendo Entertainment Planning and Development|Nintendo EPD]]<ref name=DICE>[https://www.interactive.org/games/video_game_details.asp?idGame=1702 Academy of Interactive Arts and Science’s entry about ''Mario Kart Tour'']. The directors and producer all work for Nintendo Co., Ltd..</ref><ref>[https://www.nintendo.co.jp/jobs/keyword/57.html Erika Abe’s post on her work for ''Mario Kart Tour''].</ref><ref>{{cite|deadlink=y|url=www.nintendo.co.jp/jobs/keyword/72.html|title=Yoshiki Tate/(ishi's post on his work for ''Mario Kart Tour''|publisher=nintendo.co.jp|accessdate=May 11, 2024|archive=web.archive.org/web/20211203052539/https://www.nintendo.co.jp/jobs/keyword/72.html}}</ref><br>[[Bandai Namco Entertainment|Bandai Namco Studios]]<ref>[https://www.bandainamcostudios.com/en/products/ PRODUCTS | Bandai Namco Studios Inc.]</ref><br>{{wp|DeNA}}<ref>[https://ssl4.eir-parts.net/doc/2432/ir_material3/129543/00.pdf Operating results of DeNA for the second quarter of Fiscal Year 2019]. According to the [https://ssl4.eir-parts.net/doc/2432/ir_material3/129599/00.pdf corresponding Questions and Answers section], DeNA received a share of the revenue of the game, pointing at them being one of the development teams involved.</ref> | ||
|publisher=Nintendo | |publisher=Nintendo | ||
|platforms={{wp|iOS}}, {{wp|Android (operating system)|Android}} | |platforms={{wp|iOS}}, {{wp|iPadOS}}, {{wp|Android (operating system)|Android}} | ||
| | |release=September 25, 2019 | ||
|genre=Racing | |languages={{languages|en_us=y|fr_fr=y|es_es=y|es_latam=y|de=y|it=y|pt_br=y|jp=y|kr=y|zh_simp=y|zh_trad=y}} | ||
|ratings='''iOS:'''<br>4+ - Four years and older<br>'''Android:'''<br>{{ratings|esrb=E|pegi=3|acb=G|usk=0|dejus=L}} | |genre=[[Genre#Racing|Racing]] | ||
|ratings='''iOS & iPadOS:'''<br>4+ - Four years and older<br>'''Android:'''<br>{{ratings|esrb=E|pegi=3|acb=G|usk=0|dejus=L|grac=All|iarc=3+}} | |||
|media={{media|mobiledl=1}} | |media={{media|mobiledl=1}} | ||
|input=Touch controls | |input=Touch controls | ||
|gallery= | |||
}} | }} | ||
'''''Mario Kart Tour''''' is a mobile game in the [[Mario Kart (series)|''Mario Kart'' series]]. | '''''Mario Kart Tour''''' is a mobile game in the [[Mario Kart (series)|''Mario Kart'' series]]. Unlike ''[[Super Mario Run]]'', it is free-to-play from the App Store and Google Play. The game reuses many assets from ''[[Mario Kart 7]]'' and ''[[Mario Kart 8]]'', though its art style is more simple and cartoony. Gameplay mechanics such as gliding, [[underwater driving]], and character-specific [[Special Item (Mario Kart series)|special items]] return from past entries. In addition, the game introduces some features new to the ''Mario Kart'' franchise, such as reverse courses, trick courses, a combo system that grants points based on actions, and the [[Frenzy (Mario Kart Tour)|Frenzy]] mechanic, which allows racers with three item slots to deploy a large amount of any item during a race, including [[Spiny Shell (blue)|Spiny Shell]]s and [[Bullet Bill]]s, at random should said item be in all three slots. | ||
The game officially launched for | The game was first announced during a financial briefing on January 31, 2018.<ref>[https://www.nintendo.co.jp/ir/pdf/2018/180201_2e.pdf Nine Months Financial Results Briefing for Fiscal Year Ending March 2018] (2018). ''Nintendo''. Retrieved May 24, 2019.</ref> On April 23, 2019, [[Nintendo]] opened applications for participating in a closed beta test of the game to Android users in North America and Japan, which began on May 22, 2019, and ended on June 4, 2019.<ref>Romano, Sal (April 24, 2019). [https://gematsu.com/2019/04/mario-kart-tour-android-closed-beta-test-set-for-may-22-to-june-4 ''Mario Kart Tour'' Android closed beta test set for May 22 to June 4]. ''Gematsu''. Retrieved May 22, 2019.</ref> The game officially launched for iOS, iPadOS, and Android devices on September 25, 2019, in 163 territories, which covers nearly the same roster of availability as ''Super Mario Run'', with the exceptions of Belgium and Vietnam, the former of which banned games with loot boxes in 2019 for violating gambling laws.<ref>Gerken, T. (April 26, 2019). "[https://www.bbc.com/news/technology-43906306 Video game loot boxes declared illegal under Belgium gambling laws]". ''BBC News''. Retrieved November 27, 2020.</ref> Users who pre-registered acquired the game a day early. Unlike the previous ''Super Mario'' mobile games, a Nintendo Account is required for it to be playable. | ||
On | On October 31, 2019, Nintendo announced the first multiplayer beta test exclusive to Gold Pass members,<ref>@mariokarttourEN (October 31, 2019). [https://twitter.com/mariokarttourEN/status/1190074083100123137 Multiplayer beta test announcement]. ''Twitter''. Retrieved October 31, 2019.</ref> which began on December 18, 2019, 11:00 p.m. (PT) and ended on December 26, 2019, 9:59 p.m. (PT). On January 21, 2020, Nintendo announced a second multiplayer beta test for all players, regardless of whether they have a Gold Pass subscription or not,<ref>@mariokarttourEN (January 21, 2020). [https://twitter.com/mariokarttourEN/status/1219504952470454272 Second multiplayer beta test announcement]. ''Twitter''. Retrieved January 21, 2020.</ref> which began on January 22, 2020, 11:00 p.m. (PT) and ended on January 28, 2020, 9:59 p.m. (PT). The second multiplayer beta test allowed players to play with each other in their immediate vicinity based on their device's location data. Finally, on March 2, 2020, Nintendo announced that multiplayer would officially be implemented into the game on March 8, 2020, at 8:00 p.m. (PT).<ref name=Multi>@mariokarttourEN (March 2, 2020). [https://twitter.com/mariokarttourEN/status/1234629562308464647?s=20 Multiplayer mode announcement]. ''Twitter''. Retrieved March 2, 2020.</ref> | ||
On September 1, 2022, Nintendo announced that [[Battle Mode]] would be added to the game on October 5, 2022.<ref>@mariokarttourEN (September 1, 2022) [https://twitter.com/mariokarttourEN/status/1565585887303532544 Battle Mode announcement]. ''Twitter''. Retrieved September 15, 2022</ref> It was released in the eponymous [[Battle Tour]]. | |||
The [[list of tours in Mario Kart Tour|tour]] occurring in the game changes every two weeks, changing the selection of courses available. For four years after the game's release, new content was added at the start of each tour, such as new courses, drivers, [[kart]]s, and [[glider]]s. On September 11, 2023, it was announced that the [[Anniversary Tour (2023)|2023 Anniversary Tour]] would be the final tour to introduce new content, with later tours being identical to previous tours from the Battle Tour onwards. | |||
==Gameplay== | ==Gameplay== | ||
[[File:MKT Gameplay Current.png|thumb|left|[[Bowser#Dr. Mario World|Dr. Bowser]] racing on [[Wii Koopa Cape|Wii Koopa Cape T]]]] | |||
The goal of the game is to be in first place at the end of each race, using items obtained by driving through [[Item Box]]es. The game is played in a portrait or landscape position, while the phone's touch controls are used to play the game, such as dragging the finger across the screen to steer the kart. There are three ways the player can make turns. For the phones supporting it, the gyroscope can be used to steer. The player can choose what action is started when tapping and sliding the fingers on the main area of the screen, with the other action being performed by tapping a small circular button at the bottom and then sliding the fingers if needed. The main setting has the driver jumping every time the screen is tapped, allowing the kart to drift by sliding the fingers. In the other configuration, the kart does not jump when tapping the screen, which results in it steering when sliding the fingers on the screen. After steering for a while, the kart starts auto-drifting and charging Mini-Turbos and Super Mini-Turbos, but not Ultra Mini-Turbos that are only charged when drifting. Similarly to ''[[Mario Kart 8 Deluxe]]'' with auto-accelerate and smart-steering enabled, karts accelerate automatically and can steer players away from walls. The intensity of smart-steering can be changed in the game's settings. | The goal of the game is to be in first place at the end of each race and get a high score, using items obtained by driving through [[Item Box]]es. The game is played in a portrait or landscape position, while the phone's touch controls are used to play the game, such as dragging the finger across the screen to steer the kart. There are three ways the player can make turns. For the phones supporting it, the gyroscope can be used to steer. The player can choose what action is started when tapping and sliding the fingers on the main area of the screen, with the other action being performed by tapping a small circular button at the bottom and then sliding the fingers if needed. The main setting has the driver jumping every time the screen is tapped, allowing the kart to drift by sliding the fingers. In the other configuration, the kart does not jump when tapping the screen, which results in it steering when sliding the fingers on the screen. After steering for a while, the kart starts auto-drifting and charging Mini-Turbos and Super Mini-Turbos, but not Ultra Mini-Turbos that are only charged when drifting. Similarly to ''[[Mario Kart 8 Deluxe]]'' with auto-accelerate and smart-steering enabled, karts accelerate automatically and can steer players away from walls. The intensity of smart-steering can be changed in the game's settings. If smart-steering is turned off, the player will be able to access most shortcuts without using [[Dash Mushroom|Mushroom]]s, albeit slower. | ||
The game's mechanics are based on ''[[Mario Kart 7]]'' and | The game's mechanics are based on ''[[Mario Kart 7]]'', and many of its courses (both new and retro) return in ''Mario Kart Tour''. A few features from ''[[Mario Kart 8]]'' that required substantial changes to the game, such as [[Bike]]s, [[ATV]]s, [[anti-gravity]], and 12-player races, are missing, while the 200cc class is present. Other features from ''Mario Kart 8 Deluxe'', such as auto-accelerate, smart-steering, and Ultra Mini-Turbos return. Unlike previous games, the player cannot customize their tires. | ||
When a race is completed, the player will be awarded with [[Grand Star]]s, [[Experience Point|experience points]] for the used driver, kart and glider whose base points are not maxed out and [[coin]]s. If the player finishes in the top three places, the gauge to level up will be filled, while if the placement is 5th or lower, the gauge will be dropped. When the gauge is already empty, however, the player will not | When a race is completed, the player will be awarded with [[Grand Star]]s, [[Experience Point|experience points]] for the used driver, kart, and glider whose base points are not maxed out, and [[coin]]s. If the player finishes in the top three places, the gauge to level up will be filled, while if the placement is 5th or lower, the gauge will be dropped. When the gauge is already empty, however, the player will not level down. Only the points gained in the specific course will be lost, meaning that the first race on each course won't make the player lose experience points even if they arrive in 8th place; similarly, each course has an experience points cap. The more experience points have already been gained on a specific course, the fewer experience points will be awarded by arriving in the first three places until the cap is reached. At that point, only the experience points lost due to arriving in 5th place or lower will be regained when arriving in the first three places. The total amount of experience points gained in a course is never reset and is carried to the following tours, forcing the player to drive in new courses to still keep gaining experience points and leveling up. | ||
{|class="wikitable" style="margin:auto; text-align:center" | Grand Stars are awarded depending on whether a certain point threshold has been reached. Experience points for the driver, kart, and glider are awarded depending on the placement. The coins obtained are those collected during the race, plus one additional coin for every 1,000 points obtained during the race. Each day, it is possible to obtain up to 450 experience points for the drivers, karts, and gliders and up to 300 coins by racing (900 experience points and 600 coins when the player is subscribed to the Gold Pass starting with version 2.4.0). When those limits are reached the player cannot obtain experience points or coins by racing until the next day. In order to continue gaining experience points or collecting coins, the player can use point-boost tickets for the former and can play Coin Rush or get rewards from challenges for the latter. Filling up the gauge to level up gives a reward to the player, increases the points earned when reaching a specific placement in the race and, when level 7 or level 12 are reached, allows the player to buy more items in the shop. Currently, the maximum level the player can reach is 400. | ||
{|class="wikitable"style="margin:auto;text-align:center" | |||
!rowspan=2|Placement | !rowspan=2|Placement | ||
!colspan=3|Experience points for each non-maxed out driver, kart and glider that was used in the race | !colspan=3|Experience points for each non-maxed out driver, kart and glider that was used in the race | ||
| Line 55: | Line 62: | ||
|1||2||3 | |1||2||3 | ||
|} | |} | ||
Another premium item, bought with real-life currency according to a monthly subscription model, is the Gold Pass, which grants access to the 200cc engine class, Gold Races (and multiplayer ranks S to S+6), additional items from Tour Gifts, and Gold Challenges. Players can gain rewards by renewing their Gold Pass subscription, such as ten rubies every month and a regular high end from a gold pipe for every three months of continuous subscription. | |||
Every driver, kart, and glider has favorite courses, on which they offer advantages if they are used. Each course has three tiers for each driver, kart, and glider. Third-tier drivers receive one item from every Item Box, second-tier drivers receive two items and first-tier drivers receive three items. Second-tier karts give a bonus points multiplier of 1.5 and first-tier karts give a bonus points multiplier of 2. Second-tier gliders increase the time between two point-gaining actions to count as a combo and give a combo bonus multiplier of 2 and first-tier gliders increase the combo-time even longer and give a combo bonus multiplier of 3. The player can enter a [[Frenzy]] by obtaining three of the same item at the same time, which allows the player to temporarily use that item an infinite amount of times in addition to granting them invincibility. Super and High-End drivers, karts, and gliders have a higher number of points gained when choosing them and more preferred courses. In addition, drivers have their own special items, similar to ''[[Mario Kart: Double Dash!!]]''{{'}}s item system. Karts have their own driving-related bonus such as increasing the effectiveness of drifting, while gliders increase the likelihood of obtaining a certain item and the points gained when using said item. All drivers, karts, and gliders can be leveled up, and they all come with upgrades once this occurs. Since the 2.6.0 update, drivers, karts, and gliders are able to upgrade a favored course to a favorite course from being leveled up, with Normal items gaining one after reaching level 6, Super items gaining two after reaching levels 3 and 6, and High-End items gaining four after reaching levels 3 and 6. | |||
{|class="wikitable" style="margin:auto; text-align:center" | The courses the player can play depends on the tour, which changes every two weeks. Since the [[{{Tour80}}]], each tour has fifteen cups, and adds new drivers, karts, gliders, and courses. Starting with the [[{{Tour13}}]] until the [[{{Tour79}}|2022 Anniversary Tour]], each tour had twelve cups. Starting with the [[{{Tour4}}|2019 Paris Tour]] until the [[{{Tour12}}]], each tour had eighteen cups. Starting from the [[{{Tour1}}]] until the [[{{Tour3}}|2019 Halloween Tour]], each tour had sixteen cups. During certain tours, mainly ones themed around real-world locations, the game includes one course that is new to the series. Each cup contains three races and one bonus challenge. Bonus challenges require the player to beat a certain goal with a certain character, kart, and glider. Once each of the courses and the bonus challenge are all played and enough Grand Stars are obtained, the player can move on to the next cup. In later tours, cups are automatically unlocked without any requirements. In ''Mario Kart Tour'', cups are named after the playable characters. | ||
===Ranked cup=== | |||
Every week, one of the tour's cups is a ranked cup. In a ranked cup, the player is placed on a leaderboard based on their overall score in the game against nineteen other players. The player gains a reward for finishing in the top 10 and will increase in tier at the end of the week if their end position is near the top, while they will lose one or two tiers if finishing poorly enough above tier 20. Since the [[{{Tour19}}]], tier 25 and up rewards [[points-cap ticket]]s for the top few positions. These tickets, along with the corresponding point-boost tickets, rotate between driver, kart, and glider tickets on a weekly basis. In some tours, drivers replaced coins in the rewards for moving to a higher tier. Currently, the highest tier the player can reach is 99. | |||
{|class="wikitable"style="margin:auto;text-align:center" | |||
|- | |- | ||
!rowspan=2|Placement | !rowspan=2|Placement | ||
!colspan= | !colspan=11|Rewards | ||
|- | |- | ||
!width=9%|From tier 1 | !width=9%|From tier 1 | ||
| Line 80: | Line 82: | ||
!width=9%|From tier 40 | !width=9%|From tier 40 | ||
!width=9%|From tier 45 | !width=9%|From tier 45 | ||
!From tier | !width=9%|From tier 50 | ||
!width=9%|From tier 60 | |||
!width=9%|From tier 80 | |||
!From tier | |||
!From tier | |||
|- | |- | ||
!1 | !1 | ||
|[[Ruby|Rubies]] ×20<br>[[Coin]]s ×1,000<br>[[Point-boost ticket]]s ×3 of each type | |[[Ruby|Rubies]] ×20<br>[[Coin]]s ×1,000<br>[[Point-boost ticket]]s ×3 of each type | ||
|Rubies ×25<br>Coins ×1,100<br>Point-boost tickets ×3 of each type | |Rubies ×25<br>Coins ×1,100<br>Point-boost tickets ×3 of each type | ||
|Rubies | |Rubies ×25<br>Coins ×1,200<br>Point-boost tickets ×3 of each type | ||
|Rubies | |Rubies ×25<br>Coins ×1,200<br>Point-boost tickets ×3<br>[[Points-cap ticket]]s ×1 Normal | ||
|Rubies | |Rubies ×25<br>Coins ×1,500<br>Point-boost tickets ×3<br>Points-cap tickets ×1 Super, ×1 Normal | ||
|Rubies | |Rubies ×25<br>Coins ×1,500<br>Points-cap tickets ×2 High-End, ×2 Super, ×2 Normal | ||
|Rubies | |Rubies ×25<br>Coins ×2,000<br>Points-cap tickets ×4 High-End, ×4 Super, ×4 Normal | ||
|Rubies | |Rubies ×25<br>Coins ×2,000<br>Points-cap tickets ×5 High-End, ×5 Super, x5 Normal | ||
| | |Rubies ×25<br>Coins ×2,000<br>Points-cap tickets ×6 High-End, ×6 Super, ×6 Normal | ||
| | |Rubies ×25<br>Coins ×2,000<br>Points-cap tickets ×7 High-End, ×7 Super, ×7 Normal | ||
| | |Rubies ×30<br>Coins ×2,000<br>Points-cap tickets ×8 High-End, ×8 Super, ×8 Normal | ||
|- | |- | ||
!2 | !2 | ||
| Line 112: | Line 106: | ||
|Rubies ×20<br>Coins ×1,200<br>Point-boost tickets ×2<br>Points-cap tickets ×1 Normal | |Rubies ×20<br>Coins ×1,200<br>Point-boost tickets ×2<br>Points-cap tickets ×1 Normal | ||
|Rubies ×20<br>Coins ×1,200<br>Point-boost tickets ×3<br>Points-cap tickets ×1 Super, ×1 Normal | |Rubies ×20<br>Coins ×1,200<br>Point-boost tickets ×3<br>Points-cap tickets ×1 Super, ×1 Normal | ||
|Rubies ×20<br>Coins ×1,200<br>Points-cap tickets | |Rubies ×20<br>Coins ×1,200<br>Points-cap tickets ×3 High-End, ×3 Super, ×3 Normal | ||
|Rubies ×20<br>Coins ×1,200<br>Points-cap tickets | |Rubies ×20<br>Coins ×1,200<br>Points-cap tickets ×4 High-End, ×4 Super, ×4 Normal | ||
| | |Rubies ×20<br>Coins ×1,500<br>Points-cap tickets ×5 High-End, ×5 Super, ×5 Normal | ||
| | |Rubies ×20<br>Coins ×1,500<br>Points-cap tickets ×6 High-End, ×6 Super, ×6 Normal | ||
| | |Rubies ×20<br>Coins ×1,500<br>Points-cap tickets ×7 High-End, ×7 Super, ×7 Normal | ||
|- | |- | ||
!3 | !3 | ||
| Line 126: | Line 119: | ||
|Rubies ×15<br>Coins ×1,200<br>Point-boost tickets ×1<br>Points-cap tickets ×1 Normal | |Rubies ×15<br>Coins ×1,200<br>Point-boost tickets ×1<br>Points-cap tickets ×1 Normal | ||
|Rubies ×15<br>Coins ×1,200<br>Point-boost tickets ×2<br>Points-cap tickets ×1 Normal | |Rubies ×15<br>Coins ×1,200<br>Point-boost tickets ×2<br>Points-cap tickets ×1 Normal | ||
|Rubies ×15<br>Coins ×1,200<br> | |Rubies ×15<br>Coins ×1,200<br>Points-cap tickets ×2 High-End, ×2 Super, ×2 Normal | ||
|Rubies | |Rubies ×15<br>Coins ×1,200<br>Points-cap tickets ×3 High-End, ×3 Super, ×3 Normal | ||
| | |Rubies ×15<br>Coins ×1,200<br>Points-cap tickets ×4 High-End, ×4 Super, ×4 Normal | ||
| | |Rubies ×15<br>Coins ×1,200<br>Points-cap tickets ×5 High-End, ×5 Super, ×5 Normal | ||
|Rubies ×15<br>Coins ×1,200<br>Points-cap tickets ×6 High-End, ×6 Super, ×6 Normal | |||
|- | |- | ||
!4 | !4 | ||
| Line 139: | Line 132: | ||
|rowspan=3|Rubies ×10<br>Coins ×600<br>Point-boost tickets ×1 | |rowspan=3|Rubies ×10<br>Coins ×600<br>Point-boost tickets ×1 | ||
|rowspan=3|Rubies ×10<br>Coins ×600<br>Point-boost tickets ×1 | |rowspan=3|Rubies ×10<br>Coins ×600<br>Point-boost tickets ×1 | ||
|rowspan=3|Rubies ×10<br>Coins ×600<br> | |rowspan=3|Rubies ×10<br>Coins ×600<br>Points-cap tickets ×1 High-End, ×2 Super, ×2 Normal | ||
|rowspan=3|Rubies ×10<br>Coins ×600<br> | |rowspan=3|Rubies ×10<br>Coins ×600<br>Points-cap tickets ×2 High-End, ×2 Super, ×2 Normal | ||
|rowspan=3| | |rowspan=3|Rubies ×10<br>Coins ×600<br>Points-cap tickets ×3 High-End, ×3 Super, ×3 Normal | ||
|rowspan=3|Rubies ×10<br>Coins ×600<br>Points-cap tickets ×4 High-End, ×4 Super, ×4 Normal | |||
|rowspan=3|Rubies ×10<br>Coins ×600<br>Points-cap tickets ×5 High-End, ×5 Super, ×5 Normal | |||
|- | |- | ||
!5 | !5 | ||
|- | |- | ||
!6 | !6 | ||
|- | |- | ||
!7 | !7 | ||
| Line 158: | Line 149: | ||
|rowspan=4|Rubies ×5<br>Coins ×400 | |rowspan=4|Rubies ×5<br>Coins ×400 | ||
|rowspan=4|Rubies ×5<br>Coins ×400 | |rowspan=4|Rubies ×5<br>Coins ×400 | ||
|rowspan=4|Rubies ×5<br>Coins ×400<br> | |rowspan=4|Rubies ×5<br>Coins ×400<br>Points-cap tickets ×2 Super, ×2 Normal | ||
|rowspan=4|Rubies ×5<br>Coins ×400<br> | |rowspan=4|Rubies ×5<br>Coins ×400<br>Points-cap tickets x1 High-End, ×1 Super, ×2 Normal | ||
|rowspan=4| | |rowspan=4|Rubies ×5<br>Coins ×400<br>Points-cap tickets x1 High-End, ×2 Super, ×2 Normal | ||
|rowspan= | |rowspan=4|Rubies ×5<br>Coins ×400<br>Points-cap tickets x2 High-End, ×2 Super, ×2 Normal | ||
|rowspan=4|Rubies ×5<br>Coins ×400<br>Points-cap tickets ×3 High-End, ×3 Super, ×3 Normal | |||
|- | |- | ||
!8 | !8 | ||
|- | |- | ||
!9 | !9 | ||
|- | |- | ||
!10 | !10 | ||
|- | |- | ||
! | !11–15 | ||
|colspan= | |colspan=4|No reward | ||
| | |? | ||
| | |? | ||
|colspan=1|Points-cap tickets ×1 Normal | |||
|colspan=1|Points-cap tickets ×1 Super, ×1 Normal | |||
|colspan=1|Points-cap tickets ×1 Super, ×1 Normal | |||
|colspan=1|Points-cap tickets ×1 High-end, ×1 Super, ×1 Normal | |||
|colspan=1|Points-cap tickets ×1 High-end, ×1 Super, ×1 Normal | |||
|- | |||
!16–19 | |||
|colspan=11|No reward | |||
|- | |- | ||
!20 | !20 | ||
|colspan= | |colspan=11|No reward | ||
|} | |} | ||
<br> | |||
{|class="wikitable"style="margin:auto;text-align:center" | |||
|- | |||
!rowspan=2|Placement | |||
!colspan=8|Tier change | |||
|- | |||
!From tier 1 | |||
!From tier 21 | |||
!From tier 22 | |||
!From tier 25 | |||
!From tier 30 | |||
!From tier 35 | |||
{|class="wikitable" style="margin:auto; text-align:center" | !From tier 99 | ||
!colspan= | |||
|- | |- | ||
! | !1 | ||
|''+3'' | |||
|''+3'' | |||
|''+3'' | |||
|''+3'' | |||
|''+2'' | |||
|''+1'' | |||
|''0'' | |||
|- | |- | ||
! | !2 | ||
|''+3'' | |||
|''+2'' | |||
|''+2'' | |||
|''+2'' | |||
|''+1'' | |||
|''+1'' | |||
|''0'' | |||
|- | |- | ||
! | !3 | ||
| | |''+3'' | ||
| | |''+1'' | ||
| | |''+1'' | ||
| | |''+1'' | ||
| | |''+1'' | ||
| | |''+1'' | ||
|''0'' | |||
|- | |||
!4 | |||
|''+2'' | |||
|''+1'' | |||
|''+1'' | |||
|''+1'' | |||
|''+1'' | |||
|''0'' | |||
|''-1'' | |||
|- | |- | ||
! | !5 | ||
| | |''+2'' | ||
| | |''+1'' | ||
| | |''+1'' | ||
| | |''+1'' | ||
| | |''+1'' | ||
| | |''0'' | ||
|''-1'' | |||
|- | |- | ||
!6 | |||
|''+2'' | |||
|''+1'' | |||
|''+1'' | |||
|''+1'' | |||
|''0'' | |||
|''-1'' | |||
|''-1'' | |||
|- | |- | ||
! | !7 | ||
| | |''+1'' | ||
| | |''+1'' | ||
| | |''+1'' | ||
| | |''0'' | ||
| | |''0'' | ||
| | |''-1'' | ||
|''-1'' | |||
|- | |- | ||
! | !8 | ||
| | |''+1'' | ||
| | |''+1'' | ||
| | |''0'' | ||
| | |''0'' | ||
| | |''-1'' | ||
| | |''-1'' | ||
|''-1'' | |||
|- | |||
!9 | |||
|''+1'' | |||
|''0'' | |||
|''0'' | |||
|''-1'' | |||
|''-1'' | |||
|''-1'' | |||
|''-1'' | |||
|- | |||
!10 | |||
|''+1'' | |||
|''0'' | |||
|''-1'' | |||
|''-1'' | |||
|''-1'' | |||
|''-1'' | |||
|''-1'' | |||
|- | |||
!11–15 | |||
|''0'' | |||
|''-1'' | |||
|''-1'' | |||
|''-1'' | |||
|''-1'' | |||
|''-1'' | |||
|''-1'' | |||
|- | |||
!16–19 | |||
|''0'' | |||
|''-1'' | |||
|''-1'' | |||
|''-1'' | |||
|''-1'' | |||
|''-1'' | |||
|''-1'' | |||
|- | |- | ||
! | !20 | ||
| | |''0'' | ||
| | |''-1'' | ||
| | |''-2'' | ||
| | |''-2'' | ||
| | |''-2'' | ||
| | |''-2'' | ||
|''-2'' | |||
|} | |} | ||
=== | ===Points=== | ||
{{see also|Mario Kart Tour race points system}} | |||
Points are collected during standard races and are used to gain Grand Stars and to rank players, both overall and in ranked cups. There are three ways of obtaining points in races: base points, bonus points, and position points. | |||
====Base points==== | |||
Base points are given at the beginning of the race and are the sum of the base points of the character, kart and glider selected. They range from 800 to 3020 points (3320 points for [[Mii|Mii Racing Suits]]). The base points can be increased through experience points obtained at the end of the races or through [[point-boost ticket]]s that provide 50 experience points each. The experience points are used to fill a gauge that when filled will increase the base points until the maximum amount has been reached. The amount of experience points needed to fill the gauge increases every time the gauge is filled. Since the Cooking Tour, [[points-cap ticket]]s are added to the game, making it possible to raise the maximum amount of base points of a driver, kart, or glider. | |||
{|class="wikitable"style="margin:auto;text-align:center" | |||
!colspan=7|Base points of drivers and kart parts | |||
|- | |||
!rowspan=2|Amount | |||
!colspan=3|[[File:MKT Icon Drivers.png|x50px]]<br>Drivers | |||
!colspan=3|[[File:MKT Icon Karts.png|x50px]][[File:MKT Icon Gliders.png|x50px]]<br>Karts and gliders | |||
==== | |||
{|class="wikitable" style="margin:auto; text-align:center" | |||
! | |||
! | |||
![[File:MKT Icon | |||
![[File:MKT Icon | |||
|- | |- | ||
! | ![[File:MKT Icon Normal.png|x50px]]<br>Normal | ||
| | ![[File:MKT Icon Rare.png|x50px]]<br>Super | ||
| | ![[File:MKT Icon HighEnd.png|x50px]]<br>High-End | ||
![[File:MKT Icon Normal Kart.png|x50px]]<br>Normal | |||
![[File:MKT Icon Rare Kart.png|x50px]]<br>Super | |||
![[File:MKT Icon HighEnd Kart.png|x50px]]<br>High-End | |||
|- | |||
!Initial | |||
|400 | |400 | ||
|450 | |||
|500 | |||
|200 | |||
|220 | |||
|250 | |||
|- | |||
!Base cap | |||
|600 | |||
|675 | |||
|800 | |||
|300 | |||
|330 | |||
|400 | |400 | ||
|- | |- | ||
|- | |- | ||
! | !First raised cap | ||
! | |648 | ||
|765 | |||
|980 | |||
|324 | |||
|366 | |||
|490 | |||
|- | |||
!Second raised cap | |||
|704 | |||
|870 | |||
|1190 | |||
|352 | |||
|408 | |||
|595 | |||
|- | |- | ||
! | !Top cap (until 2022 Anniversary Tour) | ||
| | |760 | ||
| | |975 | ||
| | |1400 | ||
| | |380 | ||
|450 | |||
|700 | |||
|- | |- | ||
! | !Third raised cap | ||
| | |768 | ||
| | |990 | ||
| | |1430 | ||
| | |384 | ||
|456 | |||
|715 | |||
|- | |- | ||
! | !Top cap (since Battle Tour) | ||
| | |816 | ||
| | |1080 | ||
| | |1610 | ||
| | |408 | ||
| | |492 | ||
|805 | |||
| | |} | ||
| | ====Bonus points==== | ||
| | [[File:MKT Bonus Points.png|thumb|[[Chargin' Chuck]] obtaining bonus points by performing a [[trick|Jump Boost]] as part of a combo]] | ||
| | Bonus points are points awarded every time a special event happens during the race. Said event might be a [[trick|Jump Boost]], gliding for a certain amount of time, finishing the lap in a certain position, hitting opponents or hazards, or various other cases. If a further event happens before about two seconds have passed from the previous one, the combo indicator goes up and the points obtained are increased. The actual time that can pass between one event and the next can be increased by choosing a glider of a higher tier in the course, by choosing a glider of higher rarity, or by leveling up the glider. The number of points given is calculated as follows: | ||
*'''''Points''': (base points of the event × multiplier due to kart tiering in the course × multiplier due to kart rarity and skill level) + combo bonus + bonus point boosts + eventual increase from kart's [[Special skill (Mario Kart Tour)|special skill]] + eventual increase from glider's special skill''<br> | |||
| | The combo bonus is calculated as follows: | ||
*'''''Combo bonus''': multiplier from glider's tiering in the course × Min{combo count - 1 ; (cc of the engine class) / 10}'' | |||
| | For the purpose of the calculation, 200cc is considered the same as 150cc. | ||
The bonus point boost is calculated separately for the driver, kart, and glider chosen that are in the first tier of the course, as follows: | |||
*'''''Bonus point boost''': base points × (skill level - 1) × [(cc of the engine class) / 30000]'' | |||
In this case as well, 200cc is considered the same as 150cc. If more than 200 events happen, the bonus point boost is not applied from the 201st event onward. | |||
====Position points==== | |||
Position points are awarded to the player depending on their placement at the end of the race. They are calculated as follows: | |||
*'''''Position points''': [(position points due to the level of the player + engine class bonus) × position multiplier] + bonus point boosts for position'' | |||
The bonus point boost for position is calculated separately for the driver, kart, and glider chosen that are in the first tier of the course, as follows: | |||
*'''''Bonus point boost for position''': base points × (skill level - 1) × number of events that occurred in the race × position multiplier × [(cc of the engine class) / 30000]'' | |||
As in the other cases, 200cc is considered the same as 150cc. | |||
{|class="wikitable" style="margin:auto; text-align:center" | The engine class bonus is the following: | ||
! | {|class="wikitable"style="margin:auto;text-align:center" | ||
!Engine class | |||
![[File:MKT Icon 50cc.png|x50px]]<br>50cc | |||
![[File:MKT Icon 100cc.png|x50px]]<br>100cc | |||
![[File:MKT Icon 150cc.png|x50px]]<br>150cc | |||
![[File:MKT Icon 200cc.png|x50px]]<br>200cc | |||
|- | |- | ||
! | !Engine class bonus | ||
! | |0 | ||
! | |200 | ||
! | |400 | ||
! | |400 | ||
! | |} | ||
! | The position multiplier depends on the placement at the end of the race and works as follows: | ||
! | {|class="wikitable"style="margin:auto;text-align:center" | ||
! | !Placement | ||
|- | !1 | ||
! | !2 | ||
| | !3 | ||
| | !4 | ||
| | !5 | ||
| | !6 | ||
| | !7 | ||
| | !8 | ||
| | |- | ||
| | !Position multiplier | ||
|1 | |||
|0.85 | |||
|0.75 | |||
|0.65 | |||
|0.55 | |||
|0.45 | |||
|0.35 | |||
|0.2 | |||
|} | |} | ||
====Additional internal data (RaceScoreParam)==== | |||
The following internal data stems from the [[Peach Tour]].<ref>[https://docs.google.com/document/d/1hGF4e9_mIL_HGjthaCGWz4t92Uq7oEd0Uwtge6gl9A0 A human readable transcription of the main content of the ''RaceScoreParam'' container].</ref> | |||
{|class="wikitable" style="margin:auto; text-align:center" | The engine class affects the obtained points in various other ways, as shown by the internal data: | ||
!colspan=5| | {|class="wikitable"style="margin:auto;text-align:center" | ||
!colspan=5|Engine class dependent points-related parameters (EngineLevelParams) | |||
|- | |- | ||
! | !Parameter | ||
| | ![[File:MKT Icon 50cc.png|x50px]]<br>50cc | ||
| | ![[File:MKT Icon 100cc.png|x50px]]<br>100cc | ||
| | ![[File:MKT Icon 150cc.png|x50px]]<br>150cc | ||
| | ![[File:MKT Icon 200cc.png|x50px]]<br>200cc | ||
|- | |- | ||
! | !AddScoreIntervalWhileGlide | ||
|1. | |2.5 | ||
|1. | |2 | ||
| | |1.5 | ||
| | |1.2 | ||
|- | |||
!AddScoreIntervalWhileWater | |||
|7.5 | |||
|6 | |||
|4.5 | |||
|3.6 | |||
|- | |- | ||
! | !AddScoreIntervalWhileItemType018 | ||
| | |2.5 | ||
|2 | |||
|1.5 | |||
|1.2 | |||
|- | |- | ||
! | !AddScoreIntervalWhileDriftKeep | ||
| | |2.5 | ||
| | |2 | ||
|1.5 | |||
|1.2 | |||
|- | |||
!InterimRankBonusRate | |||
|0.5 | |||
|1 | |||
|2 | |||
|2 | |||
|- | |- | ||
! | !ComboNumMax | ||
|5 | |5 | ||
| | |10 | ||
|15 | |||
|15 | |15 | ||
|} | |||
The ''InterimRankBonus'' multiplied by the ''InterimRankBonusRate'' is the amount of points obtained at the end of the first lap or the first two sections of three-sectioned tracks. The ''InterimRankBonus'' has the following values: | |||
{|class="wikitable"style="margin:auto;text-align:center" | |||
!colspan=9|InterimRankBonus | |||
|- | |- | ||
! | !Position | ||
!1st | |||
!2nd | |||
!3rd | |||
!4th | |||
!5th | |||
!6th | |||
!7th | |||
!8th | |||
! | |||
|- | |- | ||
! | !Points | ||
|100 | |||
! | |80 | ||
|60 | |||
|50 | |||
|40 | |||
|30 | |||
|20 | |||
|10 | |||
|} | |||
Finally, the maximum time between events in a combo depends on the base points given by the last action of the combo, with no effect of the combo count, as shown by this combo-related data: | |||
{|class="wikitable"style="margin:auto; text-align:center" | |||
!colspan=5|Combo-related parameters (Combo) | |||
|- | |- | ||
! | !Score | ||
! | |5 | ||
! | |10 | ||
|20 | |||
|30 | |||
|- | |||
!Time | |||
|1.4 | |||
|1.8 | |||
|2.1 | |||
|2.4 | |||
|- | |||
!ComboScoreAdd | |||
|colspan=4|1 | |||
|- | |||
!ComboScoreRate | |||
|colspan=4|0.1 | |||
|} | |} | ||
The combo time is calculated as follows: | |||
''Combo time = Max{Remaining combo time; Combo time of the last action}'' | |||
where the combo time of the last action is calculated as follows: | |||
|- | ''Combo time of the last action = Time × multiplier from glider's tiering in the course × multiplier due to glider rarity and skill level'' | ||
where the multiplier from the tiering is around 1.45 if the course is one of the favorites of the glider and around 1.225 if the course is favored by the glider, being equal to 1 otherwise, and ''Time'' is based on the value reported in the table using intermediate values for intermediate scores (i.e. 1.95 seconds for 15 points and 2.25 seconds for 25 points) and either 1.4 seconds or 2.4 seconds for scores smaller than 5 points and greater than 30 points, respectively. | |||
===Auto Mode=== | |||
Introduced in version 2.6.0, Auto mode is a new option in single-player races that allows the player to spectate in a race fully controlled by the AI. The driver, kart and glider chosen by the player will participate in said race and will be the default AI player followed. The player is able to choose the racer followed by the camera and has control on the relative positioning and zoom of the camera. A button at the bottom allows to take screenshots at the rendering resolution of the game rather than the display resolution of the device. Starting with version 2.8.0, seven additional filters can be applied to the camera. When the race ends, the Coins and event tokens (but not team tokens) collected by the chosen driver are given to the player, along with the obtained experience points of the driver, kart and glider. The experience points of the player will instead remain unaffected, regardless of the outcome of the race. One additional filter, the Pop Art filter, has been added at the start of the [[Princess Tour]]. | |||
====Filters==== | |||
<gallery widths=200px perrow=4 heights=169> | |||
! | MKT Auto Mode No Filter.png|No Filter | ||
! | MKT Auto Mode Blur.png|Blur | ||
MKT Auto Mode Blur x2.png|Blur x2 | |||
MKT Auto Mode Sepia.png|Sepia | |||
MKT Auto Mode Black and White.png|Black and White | |||
MKT Auto Mode Fish-Eye Lens.jpg|Fish-Eye Lens | |||
MKT Auto Mode Smear.png|Smear | |||
MKT Auto Mode Cartoon.png|Cartoon | |||
MKT Auto Mode Pop Art.png|Pop Art | |||
</gallery> | |||
===Collectibles and currencies=== | |||
====Grand Stars==== | |||
[[Grand Star]]s are the main collectibles related to individual tours. Up to five of them can be earned by reaching certain point thresholds in each standard race and up to three of them can be earned by clearing specific goals in each bonus challenge. Furthermore, clearing Tour Challenges and Gold Challenges will reward the players with Grand Stars as well. Finally, using a [[star ticket]] will reward a Grand Star per ticket used. Up until the [[Peach vs. Daisy Tour]], clearing the daily challenge each day did also warrant a Grand Star. | |||
They are used to unlock gifts. In the past, they were also used to unlock cups. When the last gift is obtained, coins are rewarded in place of Grand Stars, and when a new tour starts, the Grand Stars obtained are reset to zero. | |||
====Rubies==== | |||
[[Ruby|Rubies]] are the main premium currency of ''Mario Kart Tour''. They can be purchased with real-life currency at the Shop, but can also be obtained as daily login bonuses, as a player level up bonus, as part of tour gifts, as a reward for the ranked cup, or as a reward for Standard Challenges, Premium Challenges, or special challenges. | |||
Rubies can be used in three different ways: to buy Spotlight items, to buy Mii Racing Suits, or to play Coin Rush mode. | |||
====Coins==== | |||
[[File:MKT Coin Rush.png|thumb|[[Gold Mario]] in Coin Rush during the [[List of tours in Mario Kart Tour#Bangkok Tour|Bangkok Tour]]]] | |||
Coins are collected during a race and rewarded for the number of points obtained during said race, up to 300 per day (600 if the player has the Gold Pass). In a single race, the amount of coins earned is | |||
''Coins earned = coins obtained during the race + floor((total points earned in the race)/1000)'' | |||
The coins obtained during the race are capped at 99, while no cap on the coins obtained through points is known. | |||
Besides the main way of obtaining coins, they can also be obtained in Coin Rush and in several rewards, such as obtaining three challenges on a challenge card in a row, column or diagonal line, in gifts, as daily login bonuses, as player level up bonuses, as a replacement for Grand Stars or items at the maximum level, while waiting for Multiplayer races, as rewards for ranked cup placements and friend ranking. Also, friends can send five greeting coins to each other every day. | |||
In [[Coin Rush (Mario Kart Tour)|Coin Rush]], the player can spend rubies to obtain a great number of coins. Over 300 coins are found in the course. For each tour, another course is available in Coin Rush. Gold Mario is the regular driver, and the [[Gold Standard]] is the regular kart driven. The coins obtained from Coin Rush are multiplied by a certain number, depending on how many rubies a player has spent. | |||
{|class="wikitable"style="margin:auto;text-align:center" | |||
!Coins multiplier | |||
!Rubies | |||
|- | |- | ||
! | !2 | ||
|5 | |||
|- | |- | ||
! | !6 | ||
|15 | |||
|- | |- | ||
! | !10 | ||
|25 | |||
| | |||
|} | |} | ||
During the [[{{Tour19}}]], the Coins Aplenty Event was added to the game. This event gives the player twenty-four hours to obtain a large number of coins from a certain cup, which varies between players. 300 coins are awarded at the end of the first race on each course in the cup during the duration of the event, for a total of 900 guaranteed extra coins from the event; these coins do not count towards the daily cap of 300 coins from races. In addition, the daily cap is ignored on each of these three races, providing three extra opportunities to score coins beyond the cap if it has already been reached. These events are held every Saturday and Tuesdays (the latter day has been added since the [[{{Tour26}}]]). Starting from the [[{{Tour54}}|2021 Autumn Tour]], the number of coins is raised to 500 and held every Saturday, though in the [[{{Tour56}}]], the coin amount returned to 300 and the schedule reverted to every Saturday and Tuesday. | |||
Coins are mainly used in the Daily Selects section of the shop. | |||
==== | ====Tokens==== | ||
[[ | Introduced in the [[{{Tour23}}]], [[event token]]s are a special type of coins that can be collected during events. The way to collect event tokens differs from event to event. The different ways to collect event tokens are: | ||
*Collecting from courses. | |||
*Landing hits with shells. | |||
*Landing hits with Bob-ombs. | |||
*Landing hits with bananas. | |||
*Causing opponents to crash. | |||
*Performing Mini-Turbos. | |||
*Keeping combo bonuses. | |||
Some tours feature a Team Rally event, in which the player can collect team tokens. Team tokens can always be collected from courses, when the player races with a driver that is part of the chosen team. At the end of a race with a driver from the player's team, the player will be rewarded with additional team tokens for every 1,000 points they collected during the race. If the player's team has won the race, the player will get even more additional team tokens as a reward. | |||
Since the [[{{Tour54}}|2021 Autumn Tour]], the Token Aplenty Event is held every Monday (formerly every Tuesday in the 2021 Autumn Tour and the [[{{Tour55}}|2021 Halloween Tour]]). This event is similar to the Coins Aplenty Event, but instead of being rewarded with a fixed amount of coins at the end of the race the player will get a random amount of event tokens (or team tokens, when the event takes place during a Team Rally), ranging from 50 to 300. | |||
Event tokens and team tokens are used in the Token section of the Shop. | |||
{{br}} | |||
==== | ====Pipes==== | ||
Pipes can shoot out a driver, kart, or glider, all of which have their own rarities. A pipe contains a determined probability distribution of Normal, Super, and High-End items, all of which are chosen randomly within their class and rarity. It is possible that a player obtains an item from a pipe that already has been obtained; when this happens, the level gauge of that item will be increased by one unit. Usually, if the pipe is about to shoot out a High-End item, it will be golden instead of green (sometimes, however, it might occur that a green pipe shoots out a High-End item). | |||
As of the [[{{Tour23}}]], the player can shoot out one random regular High-End item from an All-Clear Pipe once in a tour, as soon as they have finished every cup from the tour. The list below shows all of the available items from the All-Clear Pipe as of the [[{{Tour80}}]]. | |||
{|class="wikitable"style="margin:auto;text-align:center" | |||
!colspan=2|High-End items obtainable from the All-Clear Pipe | |||
{| | !Rate (each) | ||
|- | |||
!High-End drivers | |||
|[[Dry Bowser]], [[Metal Mario]], [[Pink Gold Peach]], [[Cat Mario|Cat Peach]], [[Tanooki Mario]], [[Pauline]], [[Princess Peach|Peach (Explorer)]], [[Nabbit]], [[Captain Toad]], [[King Bob-omb]], [[Fire Mario|Fire Rosalina]], [[Tanooki Mario|Tanooki Rosalina]], [[Kamek]], [[Peachette]], [[Yoshi (species)|Black Yoshi]], [[Yoshi (species)|White Yoshi]], [[Princess Peach|Peach (Wintertime)]], [[Cat Mario|Cat Rosalina]], [[Chargin' Chuck]], [[Toadette|Toadette (Explorer)]], [[Cat Mario|Cat Toad]], [[Wario|Wario (Cowboy)]], [[Birdo|Birdo (Black)]], [[Birdo|Birdo (White)]], [[Roving Racers|Gold Koopa (Freerunning)]], [[Penguin Mario|Penguin Luigi]], [[Shy Guy|Shy Guy (Pastry Chef)]], [[Dixie Kong]], [[Funky Kong]], [[Mario|Mario (Aviator)]], [[Toad|Toad (Party Time)]], [[Pauline|Pauline (Party Time)]], [[Bowser Jr.|Bowser Jr. (Pirate)]], [[Mario|Mario (Classic)]], [[Baby Peach|Baby Peach (Cherub)]], [[Princess Daisy|Daisy (Swimwear)]], [[Luigi|Luigi (Classic)]], [[Ice Mario (Super Mario Galaxy)|Ice Mario]], [[Princess Daisy|Daisy (Farmer)]], [[Mario|Mario (Racing)]], [[Lakitu (Mario Kart referee)|Lakitu (Party Time)]], [[Pauline|Pauline (Rose)]] | |||
|rowspan=3|0.5319% | |||
|- | |||
!High-End karts | |||
|[[B Dasher]], [[Badwagon]], [[Carrot Kart]], [[Cat Cruiser]], [[Prancer]], [[Sneeker]], [[Sports Coupe]], [[Circuit Special]], [[Bruiser]], [[Wild Wing]], [[Bumble V]], [[Steel Driver]], [[Goo-Goo Buggy]], [[Macharon]], [[Black B Dasher]], [[Black Circuit]], [[Queen Bee]], [[Gold Train]], [[Black Turbo Yoshi]], [[White Turbo Yoshi]], [[Radish Rider]], [[Inferno Flyer]], [[Wildfire Flyer]], [[Red B Dasher]], [[Platinum Taxi]], [[Glam Bruiser]], [[Wild Black]], [[Wild Pink]], [[Apple Kart]], [[Gilded Prancer]], [[Choco Macharon]], [[P-Wing (kart)|P-Wing]], [[Black Turbo Birdo]], [[White Turbo Birdo]], [[Snow Skimmer]], [[Green Apple Kart]], [[Poison Apple Kart]], [[Dragonfly]], [[Firefly]], [[Dozer Dasher]], [[Clanky Kart]], [[Rose Queen]], [[Banana Master]], [[Offroader]], [[Dreamy Egg]], [[Head Honcho]], [[Pink Wing]], [[Red Taxi]], [[Blue Soda]], [[Dark Buggy]], [[Koopa King]], [[Cact-X]], [[Sushi Racer]], [[Pirate Sushi Racer]], [[Silver Bullet Blaster]], [[Green Circuit]], [[Gilded King]], [[Crawly Kart]], [[Black Dozer]], [[Sunset Cloud]], [[Iron Cucumber]], [[Rose Taxi]], [[Cact-Ice]], [[B Dasher Mk. 2]], [[Sakura Quickshaw]], [[Jet Cruiser]], [[Pink Dozer]], [[Grand Badwagon]], [[Lime Tea Coupe]], [[Sunny Surf Sailer]], [[Kamek's Zoom Broom]], [[Black Cat Cruiser]], [[Cream Cat Cruiser]], [[Vampire Flyer]], [[White Snow Skimmer]], [[Gray Cat Cruiser]], [[Jukebox Buggy]], [[Green Lightning]], [[Cupid's Arrow]], [[Prop Kart]], [[Tropical Truck]] | |||
|- | |- | ||
! | !High-End gliders | ||
|[[Swooper (glider)|Swooper]], [[Cloud Glider]], [[Gold Glider]], [[Pink Gold Paper Glider]], [[Bullet Bill Parachute]], [[Royal Parachute]], [[Dry Bowser Umbrella]], [[Rainy Balloons]], [[Blizzard Balloons]], [[Sunset Balloons]], [[Chocolate Banana Crêpe]], [[Strawberry Crêpe]], [[Wicked Wings]], [[Wonderful Wings]], [[Starchute]], [[Rainbow Starchute]], [[Silver Starchute]], [[Daisy Glider]], [[Butterfly Wings]], [[Butterfly Sunset]], [[Butterfly Prism]], [[Banana Wingtip]], [[Blooper Wingtip]], [[Meteor Balloons]], [[Crimson Crane]], [[Springtime Crane]], [[Pink Gold Meteors]], [[Chocolate Donut]], [[Strawberry Donut]], [[Heart Balloons]], [[Fireworks Parachute]], [[Great Sail]], [[Blizzard Parasol]], [[Black Great Sail]], [[Planet Glider]], [[Dragon Wings]], [[Black Toe-Bean Balloons]], [[Toe-Bean Balloons]], [[Ship's Wheel (glider)|Ship's Wheel]], [[Tropical Glider]], [[8-Bit Star]], [[Manta Glider]], [[Silver Bells]], [[Treasure Map]], [[Flybrary Book]], [[Cheep Cheep Masks]], [[Pretzel Glider]], [[Vampire Wings]], [[Dream Glider]], [[Silver Manta Glider]], [[Calico Parafoil]], [[Cat Parafoil]], [[Rose Parasol]], [[Black Cat Parafoil]], [[Snow Crystals]], [[Surf Master]], [[Silver Surf Master]], [[Starry Great Sail]], [[Tanooki Parafoil]], [[Candlelight Flight (glider)|Candlelight Flight]], [[Piranha Plant Balloons]], [[Candlelight Flight Cake]], [[Luigi Parafoil]], [[Sky-High Flyer]], [[Wicked Topaz]] | |||
| | |||
|} | |} | ||
As of the [[{{Tour45}}]], regular login bonuses are replaced with Today's Challenge in which the player must complete a race on a pre-selected course with a pre-selected driver, kart, and glider. After completing this daily race, the player can shoot out a free pipe launch (except on day 14) which can contain regular items, as well as rubies, coins, and item tickets. The player receives a special blue-colored badge on day 14 as a reward for playing on every day of the given tour. Until the [[{{Tour79}}]], the player received 5 rubies on days 5 and 10, in stead of a free pipe pull. | |||
Since the [[{{Tour66}}]], the player can buy pipe launches in the Token Shop. In some tours, also golden pipes can be bought in the Token Shop. | |||
Since the [[{{Tour80}}]], pipes appear as Tour gifts and Gold Gifts. Some of the pipes that appear as Gold Gifts are golden. | |||
=== | ===Menu=== | ||
{| | {|class="wikitable"style="margin:auto;text-align:center" | ||
!colspan=3|Banners | |||
|- | |- | ||
! | ![[File:MKT Icon Pipe.png|60px]] | ||
![[File:MKT Icon Special Offer.png|60px]] | |||
![[File:MKT Icon Gold Pass.png|60px]] | |||
|- | |- | ||
! | !Pipes | ||
!Special offers | |||
! | !Gold Pass | ||
|} | |} | ||
{|class="wikitable"style="margin:auto; text-align:center" | |||
{| | !colspan=4|Main Menu | ||
|- | |- | ||
! | ![[File:MKT Icon Multiplayer.png|60px]] | ||
![[File:MKT Icon Challenges.png|60px]] | |||
![[File:MKT Icon Tour Gifts.png|60px]] | |||
![[File:MKT Icon Shop.png|60px]] | |||
|- | |- | ||
! | !Multiplayer | ||
!Challenges | |||
! | !Tour Gifts | ||
!Shop | |||
|- | |- | ||
! | ![[File:MKT Icon Drivers.png|60px]] | ||
! | ![[File:MKT Icon Karts.png|60px]] | ||
! | ![[File:MKT Icon Gliders.png|60px]] | ||
! | ![[File:MKT Icon Tickets.png|60px]] | ||
|- | |- | ||
! | !Drivers | ||
! | !Karts | ||
! | !Gliders | ||
! | !Tickets | ||
|- | |- | ||
! | ![[File:MKT CB.png|60px]] | ||
| | ![[File:MKT Icon Friends.png|60px]] | ||
| | ![[File:MKT Icon News.png|60px]] | ||
![[File:MKT Icon Mii.png|60px]] | |||
|- | |- | ||
! | !Profile | ||
! | !Friends | ||
! | !News | ||
! | !Mii | ||
|- | |- | ||
! | ![[File:MKT Icon Gifts.png|60px]] | ||
! | !colspan=2 rowspan=2| | ||
! | ![[File:MKT Icon Settings.png|60px]] | ||
|- | |- | ||
! | !Gifts | ||
!Settings | |||
|} | |} | ||
====Banners==== | |||
On the top of the menu, players can spend [[ruby|rubies]] to fire one of the tour's pipes, purchase [[Ruby#Special offers|special offers]], or subscribe to the Gold Pass. | |||
====Multiplayer==== | |||
{|class="wikitable" style="margin:auto; text-align:center" | [[File:MKTour - Rank Progress.PNG|thumb|Example of progressing towards a higher multiplayer grade.]] | ||
!colspan= | {{multiframe|[[File:MKTour - Rank Icons.png]]|The grading system in multiplayer mode, which continues up to S+9.|align=left|size=148|bg=#15A7F4}} | ||
Multiplayer mode was added to ''Mario Kart Tour'' on March 8, 2020, where up to eight human players can play against each other. Players race against each other in three courses in a chosen cup of the current tour, with the cup changing every 13 minutes, allowing the player to race in cups that have not yet been unlocked. There are four sets of rules that interchange daily: 100cc with default item slots, 100cc with two item slots, 150cc with default item slots, and 150cc with two item slots. Matches are also periodically set to be '''Team Games'''<ref>[https://faq.mariokarttour.com/hc/en-us/articles/4409170914457# How does the Team Game rule work in multiplayer?] ''faq.mariokarttour.com''. Retrieved December 31, 2022. ([https://archive.ph/de6z7 Archived] December 31, 2022, 15:41:10 UTC via archive.today)</ref> (not to be confused with [[Team Rally|Team Rallies]]), wherein players are randomly divided into two teams and their combined standings at the end of a match decide the winning team. In the "With Friends or Others Nearby" mode, the player can set the rules themselves, including the engine class (50cc, 100cc, or 150cc), number of item slots (1, 2, or default), number of teams (none, 2, 3 or 4), number of races (3, 6, or 12), enabling teams, enabling Friendly-Fire Mode for teams, and inclusion of COM racers. The player can also create a Room and invite players to join it with a code. | |||
Introduced in version 3.0.0, [[Battle Mode]] is a mode in multiplayer where players must eliminate each other by popping their balloons. A battle ends if there is only one player remaining, or if the time limit is reached. In the "With Friends or Others Nearby" mode, the rules that the player can set include the number of item slots (1, 2, or default), the option to play with Bob-ombs only or Shells only, number of battles (3, 6, or 12), and inclusion of COM racers. | |||
Multiplayer features a grading system ranging from F to A for regular users, and onward from S to S+9 for Gold Pass subscribers. There are separate grading systems for races and battles. Prior to the version 3.0.0 update in September 2022, the maximum grade was S+6. Until version 3.0.0, multiplayer races were split between Gold Races (exclusive Gold Pass subscribers) and standard races. Gold Races featured additional rule variations (150cc with default item slots, 150cc with two item slots, 200cc with default item slots, and 200cc with one item slot). The player's grade is split up with a green grade for races and a purple grade for battles. | |||
{{br|left}} | |||
When the player is waiting for a multiplayer match to be found, they will earn coins. Up to 100 coins can be earned per day with this method. As of version 3.0.0, the Multiplayer Pipe is available, which the player can fire after having saved up enough points from playing races or battles in Multiplayer mode. | |||
Once every few tours the Kart Pro event will take place (with its first appearance in the [[{{Tour38}}]]), in which the player can earn rewards like badges and rubies by completing challenges on a Kart Pro challenge card, including maintaining a streak of three wins in Standard Races or Gold Races. The amount of rubies the player will get as rewards for completing this challenge card depends on their grade. Grades F to A will receive 5 to 10 rubies, and grades S to S+9 will receive 15 to 21 rubies. As of version 2.9.0, players can maintain their streak if they win 2nd or 3rd place. | |||
Some tours have a 2-Player Challenge event taking place, where the player could team up with another player in the "With Friends or Others Nearby" mode to race against a team of set opponents (such as Rosalina and the five babies in Vs. Rosalina Team) and collect event tokens in a set of three courses. | |||
====Challenges==== | |||
{{see also|List of challenge cards in Mario Kart Tour}} | |||
Challenges are objectives the player can complete to earn various badges and rewards depending on the type, of which there are eight: Standard Challenges, long-term challenges the player accomplishes throughout the course of the game; Tier Challenges (added in the [[{{Tour65}}]]) long-term challenges associated with Ranked Cups; Multiplayer Challenges (added in the [[{{Tour13}}]]), which are long-term challenges for multiplayer mode; Multiplayer Battle Challenges (added in the [[{{Tour80}}]]), which are long-term challenges for multiplayer battle mode; Tour, Tour Multiplayer (added in the [[{{Tour47}}]] as part of the [[List of challenge cards in Mario Kart Tour#Event challenge cards|Summertime Challenges]], later permanent in the [[{{Tour50}}]]), and Gold Challenges, challenges that last for the duration of the tour, the lattermost of which are exclusive to Gold Pass members; and Expert Challenges (added in the [[{{Tour19}}]]), which contain challenges that are harder to succeed than Tour, Gold, and Standard Challenges, and last for twelve weeks. The first set of Tour Challenges unlocks from the tour's beginning, while the second set unlocks after the first week. Some special event challenges are one-offs, such as the their Anniversary Challenges in the [[{{Tour28}}]], while other challenges last for three tours, such as the Summertime Challenges. Completing Standard and Multiplayer Challenges award the player with rubies, while Tour and Gold Challenges award extra Grand Stars and Expert Challenges reward the player only with badges. Completing special event challenges award the player with high amount of rubies or a High-End driver. Each challenge card holds nine challenges aligned in a 3×3 grid, and for every bingo the player acquires (i.e. any horizontal, vertical, or diagonal match), they earn a certain amount of coins. The player also receives a reward upon completing an entire challenge card. | |||
=====Daily challenges===== | |||
Each daily challenge rewarded a Grand Star. The player could have up to three daily challenges available at a time, and upon completing one, a new one would not appear until the following day. Upon entering a new tour, players would receive three daily challenges right away, resulting in a maximum of sixteen daily challenges per two-week tour. The daily challenges were selected at random from the following options: | |||
*Do a Rocket Start. | |||
*Get 1st place in a race. | |||
*Perform a Slipstream. | |||
*Activate Frenzy mode. | |||
*Use a Mushroom. | |||
*Land a hit with a Banana. | |||
*Land a hit with a Red Shell. | |||
*Land a hit with a Green Shell. | |||
*Land a hit with a Bob-omb. | |||
*Land a hit with a Super Horn. | |||
*Join a multiplayer race. | |||
From the [[{{Tour38}}]] onwards, daily challenges are no longer featured. | |||
=====Premium Challenges===== | |||
[[File:MKT Premium Challenge.jpg|thumb|The first Premium Challenge card in the [[{{Tour38}}]].]] | |||
As of the [[{{Tour38}}]], players can purchase a card for $4.99 USD with additional challenges every tour, with the reward for completing all challenges being a High-End driver, kart or glider. Progress on the challenges is shown whether the player has purchased or not, and all completed challenges can be claimed immediately on purchase. Uncompleted challenge cards can be carried over to the next tour, with up to fifteen able to be held at once. | |||
=====Total Points Challenge===== | |||
As of the Snow Tour, the player's total points across all cups can be redeemed for rewards, up to 600,000 points. Among the top rewards are [[points-cap ticket]]s of increasing levels. Starting from the [[{{Tour61}}]], the Total Points Challenge features two challenge cards and goes up to 900,000 points, with more rewards. The [[{{Tour80}}]] later increased the final goal to 999,999 points, which was likely done due to the number of cups being changed from twelve to fifteen. | |||
====Tour Gifts==== | |||
Tour Gifts give the player items if enough Grand Stars are obtained, with the top rewards often being [[level-boost ticket]]s of increasing levels. Part of the rewards can only be claimed by Gold Pass subscribers. | |||
Since the [[{{Tour13}}]], the player could also unlock free pipe launches from the regular pipes of the current tour, if enough Grand Stars were obtained. Since the [[{{Tour80}}]], these are no longer available, due to the pipes being replaced by the Spotlight Shop. | |||
As of version 2.10.0, players who started the game for the first time can unlock these characters in the currently-played tour. | |||
{|class="wikitable"style="margin:auto;text-align:center" | |||
|- | |||
![[File:MKT Icon GrandStar.png|20x20px]] 5 | |||
![[File:MKT Icon GrandStar.png|20x20px]] 10 | |||
![[File:MKT Icon GrandStar.png|20x20px]] 18 | |||
![[File:MKT Icon GrandStar.png|20x20px]] 28 | |||
![[File:MKT Icon GrandStar.png|20x20px]] 38 | |||
![[File:MKT Icon GrandStar.png|20x20px]] 45 | |||
![[File:MKT Icon GrandStar.png|20x20px]] 55 | |||
![[File:MKT Icon GrandStar.png|20x20px]] 65 | |||
|- | |||
|[[File:MKT Artwork Mario.png|75x75px]] | |||
|[[File:NSMBW Peach Artwork.png|75x75px]] | |||
|[[File:Bowser - Mario Party 10.png|75x75px]] | |||
|[[File:Mario Party- Island Tour Luigi Artwork.png|75x75px]] | |||
|[[File:MKT Artwork Daisy.png|75x75px]] | |||
|[[File:SuperMarioParty DonkeyKong.png|75x75px]] | |||
|[[File:Wario MP100.png|75x75px]] | |||
|[[File:Yoshi - Mario Party 10.png|75x75px]] | |||
|- | |||
|style=background:silver|[[Mario]] | |||
|style=background:silver|[[Princess Peach|Peach]] | |||
|style=background:silver|[[Bowser]] | |||
|style=background:silver|[[Luigi]] | |||
|style=background:silver|[[Princess Daisy|Daisy]] | |||
|style=background:silver|[[Donkey Kong]] | |||
|style=background:silver|[[Wario]] | |||
|style=background:silver|[[Yoshi]] | |||
|} | |||
This was revised in version 3.4.1 to include additional characters and items as listed below. | |||
{|class="wikitable"style="margin:auto;text-align:center" | |||
|- | |||
!colspan=2|[[File:MKT Icon GrandStar.png|20x20px]] 5 | |||
!colspan=2|[[File:MKT Icon GrandStar.png|20x20px]] 15 | |||
!colspan=2|[[File:MKT Icon GrandStar.png|20x20px]] 25 | |||
!colspan=2|[[File:MKT Icon GrandStar.png|20x20px]] 35 | |||
!colspan=2|[[File:MKT Icon GrandStar.png|20x20px]] 45 | |||
!colspan=2|[[File:MKT Icon GrandStar.png|20x20px]] 55 | |||
!colspan=2|[[File:MKT Icon GrandStar.png|20x20px]] 65 | |||
![[File:MKT Icon GrandStar.png|20x20px]] 75 | |||
|- | |||
|[[File:MKT Artwork Mario.png|75x75px]] | |||
|[[File:NSMBW Peach Artwork.png|75x75px]] | |||
|[[File:Bowser - Mario Party 10.png|75x75px]] | |||
|[[File:Mario Party- Island Tour Luigi Artwork.png|75x75px]] | |||
|[[File:MKT Artwork Daisy.png|75x75px]] | |||
|[[File:SuperMarioParty DonkeyKong.png|75x75px]] | |||
|[[File:Wario MP100.png|75x75px]] | |||
|[[File:Yoshi - Mario Party 10.png|75x75px]] | |||
|[[File:MKT Icon Launch Pipe Green.png|75x75px]] | |||
|[[File:MKT Icon SuperGliderGold.png|75x75px]] | |||
|[[File:MKT Icon Launch Pipe Green.png|75x75px]] | |||
|[[File:MKT Icon BDasher.png|75x75px]] | |||
|[[File:MKT Icon Launch Pipe Green.png|75x75px]] | |||
|[[File:Metal Mario Artwork - Mario Kart 7.png|75x75px]] | |||
|[[File:MKT Icon Launch Pipe Gold.png|75x75px]] | |||
|- | |||
|style=background:silver|[[Mario]] | |||
|style=background:silver|[[Princess Peach|Peach]] | |||
|style=background:silver|[[Bowser]] | |||
|style=background:silver|[[Luigi]] | |||
|style=background:silver|[[Princess Daisy|Daisy]] | |||
|style=background:silver|[[Donkey Kong]] | |||
|style=background:silver|[[Wario]] | |||
|style=background:silver|[[Yoshi]] | |||
|style=background:silver|[[Pipe Cannon|Pipe]] ×10 | |||
|style=background:silver|[[Gold Glider]] | |||
|style=background:silver|Pipe ×10 | |||
|style=background:silver|[[B Dasher]] | |||
|style=background:silver|Pipe ×10 | |||
|style=background:silver|[[Metal Mario]] | |||
|style=background:silver|Gold Pipe ×10 | |||
|} | |||
====Shop==== | |||
The shop consists of six different sections. | |||
=====Spotlight Shop===== | |||
Introduced in the [[{{Tour80}}]], the Spotlight section consists of selected drivers, karts, and gliders that are in the Spotlight. Spotlight items are available for one week, after which they are replaced. There is also a Daily Spotlight shop, which contains six High-End drivers, six High-End karts, and six High-End gliders, and is renewed each day. Once a day, the player can use a Quick Ticket to change the items in the Daily Spotlight. The player can buy each item up to three times for the cost of 150 rubies for drivers, and 100 rubies for karts and gliders. | |||
Until the [[{{Tour79}}]], the pipe section was available in the shop. A pipe contained a determined amount of Normal, Super, and High-End items, plus featured items. The items were not ordered, so each item, including the featured ones, could be potentially found in any placement within the pipe. The player could reset the pipe at any moment. A new pipe was introduced each week and, since the [[{{Tour3}}|2019 Halloween Tour]], the pipes lasted until the end of the tour. | |||
Usually, a pipe contained the following items, with the spotlight items frequently taking the spot of a High-End item, though Super items could also appear in the spotlight. | |||
{|class="wikitable"style="margin:auto;text-align:center" | |||
!colspan=13|Items obtained from a typical new 100 items pipe | |||
|- | |- | ||
!rowspan=2|Item | !rowspan=2|Item | ||
| Line 962: | Line 834: | ||
!colspan=3|[[File:MKT Icon HighEnd.png|50px]]<br>High-End | !colspan=3|[[File:MKT Icon HighEnd.png|50px]]<br>High-End | ||
|- | |- | ||
! | !Driver | ||
!Kart | !Kart | ||
!Glider | !Glider | ||
! | !Driver | ||
!Kart | !Kart | ||
!Glider | !Glider | ||
! | !Driver | ||
!Kart | !Kart | ||
!Glider | !Glider | ||
|- | |- | ||
!Amount | !Amount | ||
| | |32 | ||
| | |26 | ||
|16 | |||
|9 | |9 | ||
| | |7 | ||
|4 | |4 | ||
| | |2 | ||
| | |2 | ||
| | |2 | ||
|} | |} | ||
Until the [[{{Tour8}}|2020 New Year's Tour]], the pipe typically contained the following items: | |||
{|class="wikitable"style="margin:auto;text-align:center" | |||
!colspan=13|Items obtained from a new pipe | |||
[[ | |||
{|class="wikitable" style="margin:auto; text-align:center" | |||
!colspan= | |||
|- | |- | ||
!rowspan=2 | !rowspan=2|Item | ||
!colspan= | !colspan=3|[[File:MKT Icon Normal.png|50px]]<br>Normal | ||
!colspan=3|[[File:MKT Icon Rare.png|50px]]<br>Super | |||
!colspan=3|[[File:MKT Icon HighEnd.png|50px]]<br>High-End | |||
!colspan=3|[[File:MKT Icon HighEnd.png|50px]]<br>Featured High-End | |||
|- | |- | ||
!Driver | |||
!Kart | |||
!Glider | |||
!Driver | |||
!Kart | |||
!Glider | |||
!Driver | |||
!Kart | |||
!Glider | |||
!Driver | |||
!Kart | |||
!Glider | |||
|- | |- | ||
! | !Amount | ||
|32 | |||
|26 | |||
|16 | |||
|9 | |||
|7 | |||
|4 | |||
|1 | |||
|1 | |||
|1 | |||
|1 | |||
|1 | |||
|1 | |||
|} | |||
Another common variant was the [[special pipe]] holding 50 items, used in special events and frequently not featuring any spotlight item, but rather a slightly different distribution of items to take into account the peculiar items that could be obtained in it. | |||
{|class="wikitable"style="margin:auto;text-align:center" | |||
!colspan=16|Items obtained from a typical new 50 items pipe | |||
|- | |- | ||
! | !rowspan=2|Item | ||
! | !colspan=3|[[File:MKT Icon Normal.png|50px]]<br>Normal | ||
!colspan=3|[[File:MKT Icon Rare.png|50px]]<br>Super | |||
!colspan=3|[[File:MKT Icon HighEnd.png|50px]]<br>High-End | |||
!colspan= | |||
|- | |- | ||
!Driver | !Driver | ||
! | !Kart | ||
!Glider | |||
!Driver | |||
!Kart | |||
!Glider | |||
!Driver | |||
!Kart | |||
!Glider | |||
|- | |- | ||
! | !Amount | ||
|15 | |||
|11 | |||
| | |9 | ||
| | |5 | ||
| | |4 | ||
|3 | |||
|1 | |||
|3 | |1 | ||
|1 | |||
| | |||
| | |||
|} | |} | ||
The probability of obtaining a certain type of item from the pipe is (number of items of that type remaining in the pipe)/(total number of items remaining in the pipe) while the probability of obtaining a specific item is (probability of getting an item of the type of the desired item)/(number of available items of the same type of the desired item). | |||
=====Mii Racing Suit Shop===== | |||
Introduced in the [[{{Tour65}}]], the Mii Racing Suit section consists of 10 different [[Mii]] Racing Suits. The player can buy each Mii Racing Suit up to three times for the cost of 100 rubies. However, the first purchase of some selected Mii Racing Suits costs only 70 rubies. | |||
{|class="wikitable" style="margin:auto; text-align:center" | =====Token Shop===== | ||
! | As of the [[{{Tour23}}]], the Token Shop (formerly known as the Event Shop) appears during events or Team Rallies. The player can buy items in this shop with [[event token]]s or team tokens. In several tours, the Token Shop is upgraded to feature various High-End items, tickets, and other items. Since the [[Samurai Tour]], pipe launches can be bought as well. | ||
{|class="wikitable"style="margin:auto;text-align:center" | |||
!colspan=6|Token Shop's items | |||
|- | |- | ||
! | !colspan=3|Item | ||
| | !Price{{footnote|main|a}} | ||
!Quantity | |||
!Quantity (Team Rally) | |||
|- | |- | ||
! | !colspan=2|Pipe | ||
| | ![[File:MKT Icon Launch Pipe Green.png|60px]] | ||
| | |50-500{{footnote|main|b}} | ||
|31 | |||
|- | | - | ||
| | |||
|} | |||
|- | |||
|- | |- | ||
!colspan=2|[[Item ticket]] | !colspan=2|[[Item ticket]] | ||
| Line 1,081: | Line 947: | ||
|5 | |5 | ||
|10 | |10 | ||
| - | |||
|- | |- | ||
!colspan=2|[[Point-boost ticket]] | !colspan=2|[[Point-boost ticket]] | ||
| Line 1,086: | Line 953: | ||
|10 | |10 | ||
|3 each | |3 each | ||
| - | |||
|- | |- | ||
!colspan=2|[[Star ticket]] | !colspan=2|[[Star ticket]] | ||
![[File:MKT Icon StarTicket.png|60px]] | ![[File:MKT Icon StarTicket.png|60px]] | ||
|20 | |20 | ||
| | |Depends on tour | ||
| - | |||
|- | |- | ||
!colspan=2|[[Coin Rush ticket]] | !colspan=2|[[Coin Rush ticket]] | ||
![[File:MKT Icon CoinRushTicket.png|60px]] | ![[File:MKT Icon CoinRushTicket.png|60px]] | ||
|20 | |20 | ||
|1 | |colspan=2|1 | ||
|- | |- | ||
!rowspan=3|[[Level-boost ticket]] | !rowspan=3|[[Level-boost ticket]] | ||
| Line 1,102: | Line 971: | ||
|50 | |50 | ||
|2 | |2 | ||
|3 each | |||
|- | |- | ||
!Super | !Super | ||
| Line 1,107: | Line 977: | ||
|100 | |100 | ||
|1 | |1 | ||
|2 each | |||
|- | |- | ||
!High-End | !High-End | ||
![[File:MKT Icon Level-boostticket7.png|60px]][[File:MKT Icon Level-boostticket8.png|60px]][[File:MKT Icon Level-boostticket9.png|60px]] | ![[File:MKT Icon Level-boostticket7.png|60px]][[File:MKT Icon Level-boostticket8.png|60px]][[File:MKT Icon Level-boostticket9.png|60px]] | ||
| | |250 | ||
| | | - | ||
|1 each | |||
|- | |- | ||
!rowspan=3|[[Points-cap ticket]] | !rowspan=3|[[Points-cap ticket]] | ||
| Line 1,117: | Line 989: | ||
![[File:MKT Icon Points-capticket1.png|60px]][[File:MKT Icon Points-capticket2.png|60px]][[File:MKT Icon Points-capticket3.png|60px]] | ![[File:MKT Icon Points-capticket1.png|60px]][[File:MKT Icon Points-capticket2.png|60px]][[File:MKT Icon Points-capticket3.png|60px]] | ||
|100 | |100 | ||
|1 | |colspan=2|1 | ||
|- | |- | ||
!Super | !Super | ||
![[File:MKT Icon Points-capticket4.png|60px]][[File:MKT Icon Points-capticket5.png|60px]][[File:MKT Icon Points-capticket6.png|60px]] | ![[File:MKT Icon Points-capticket4.png|60px]][[File:MKT Icon Points-capticket5.png|60px]][[File:MKT Icon Points-capticket6.png|60px]] | ||
|200 | |200 | ||
|1 | |colspan=2|1 | ||
|- | |- | ||
!High-End | !High-End | ||
![[File:MKT Icon Points-capticket7.png|60px]][[File:MKT Icon Points-capticket8.png|60px]][[File:MKT Icon Points-capticket9.png|60px]] | ![[File:MKT Icon Points-capticket7.png|60px]][[File:MKT Icon Points-capticket8.png|60px]][[File:MKT Icon Points-capticket9.png|60px]] | ||
| | |400 | ||
| | | - | ||
|1 | |||
|- | |- | ||
!colspan=2| | !colspan=2|Super driver, kart, or glider | ||
![[File:MKT Icon Drivers.png|60px]][[File:MKT Icon Karts.png|60px]][[File:MKT Icon Gliders.png|60px]] | ![[File:MKT Icon Drivers.png|60px]][[File:MKT Icon Karts.png|60px]][[File:MKT Icon Gliders.png|60px]] | ||
| | |Depends on tour | ||
| | |1 each | ||
|Depends on tour | |||
|- | |- | ||
|- | |- | ||
!colspan=2|High-End driver, kart or glider | !colspan=2|High-End driver, kart, or glider | ||
![[File:MKT Icon Drivers.png|60px]][[File:MKT Icon Karts.png|60px]][[File:MKT Icon Gliders.png|60px]] | ![[File:MKT Icon Drivers.png|60px]][[File:MKT Icon Karts.png|60px]][[File:MKT Icon Gliders.png|60px]] | ||
| | |Depends on tour | ||
| | | - | ||
|Depends on tour | |||
|- | |- | ||
!colspan=2|500 [[Coin]]s | !colspan=2|500 [[Coin]]s | ||
| Line 1,148: | Line 1,019: | ||
|30 | |30 | ||
|5 | |5 | ||
| - | |||
|- | |||
!colspan=2|1000 [[Coin]]s | |||
![[File:MKT Icon Coins 3.png|60px]] | |||
|50 | |||
| - | |||
|10 | |||
|- | |- | ||
!colspan=2|3 [[Ruby|Rubies]] | !colspan=2|3 [[Ruby|Rubies]] | ||
![[File:MKT Icon 1Ruby.png|40px]] | ![[File:MKT Icon 1Ruby.png|40px]] | ||
|50 | |30 | ||
|5 | |colspan=2|5 | ||
|} | |||
{{footnote|note|a|In the Token Shop of the [[{{Tour25}}]], most of the items had lower prices.}} | |||
{{footnote|note|b|The cost for the first pipe is 50 event tokens, increasing with 10 tokens for every subsequent pipe until the sixteenth, then with 50 tokens between the seventeenth and the twenty-first pipes. From the twenty-second pipe onwards, the cost is 500 tokens.}} | |||
As of the [[{{Tour80}}]], the Token Shop no longer has a regular composition. | |||
{|class="wikitable"style="margin:auto; text-align:center" | |||
!colspan=5|Token Shop's items | |||
|- | |- | ||
| | !colspan=3|Item | ||
!Price | |||
!Quantity | |||
|- | |||
!colspan=2|Balloon | |||
= | ![[File:MKT Icon BalloonDefault.png|60px]] | ||
|100{{footnote|main|c}} | |||
|1 | |||
{| | |||
|- | |- | ||
! | !colspan=2|Golden pipe | ||
| | ![[File:MKT Icon Launch Pipe Gold.png|60px]] | ||
| | |200 | ||
| | |1 | ||
|- | |- | ||
! | !colspan=2|Pipe | ||
| | ![[File:MKT Icon Launch Pipe Green.png|60px]] | ||
| | |20-500 | ||
| | |34 | ||
|- | |- | ||
! | !colspan=2|3 [[Ruby|Rubies]] | ||
| | ![[File:MKT Icon 1Ruby.png|40px]] | ||
| | |15 | ||
|5 | |5 | ||
| | |- | ||
!colspan=2|500 [[Coins]] | |||
= | ![[File:MKT Icon Coins 2.png|60px]] | ||
|15 | |||
!2 | |||
| | |||
| | |||
|5 | |5 | ||
|- | |- | ||
!rowspan=3|[[Level-boost ticket]] | |||
!Super | !Super | ||
| | ![[File:MKT Icon Level-boostticket1.png|60px]][[File:MKT Icon Level-boostticket2.png|60px]][[File:MKT Icon Level-boostticket3.png|60px]] | ||
| | |25 | ||
|3 | |3 | ||
|- | |- | ||
! | !Super | ||
| | ![[File:MKT Icon Level-boostticket4.png|60px]][[File:MKT Icon Level-boostticket5.png|60px]][[File:MKT Icon Level-boostticket6.png|60px]] | ||
| | |50 | ||
| | |||
|2 | |2 | ||
|- | |- | ||
! | !High-End | ||
![[File:MKT Icon Level-boostticket7.png|60px]][[File:MKT Icon Level-boostticket8.png|60px]][[File:MKT Icon Level-boostticket9.png|60px]] | |||
|120 | |||
|1 | |1 | ||
|} | |} | ||
{{footnote|note|c|In the [[Battle Tour]], the Token Shop included three different balloons, two of which costed 50 tokens and one 150 tokens.}} | |||
== | =====Daily Selects===== | ||
[[File:MKT Daily Selects.png|thumb|left|The Daily Selects section of the Shop, before the base set was introduced.]] | |||
The Daily Selects section is renewed each day. It consists of four rows, of which the first three each contain three items. The items in the left column are drivers or driver-related tickets, the items in the center column are karts or kart-related tickets, the items in the right column are gliders or glider-related tickets. The last row allows the player to play [[Coin Rush (Mario Kart Tour)|Coin Rush]]. The first row is available to all players and contains only Normal items and [[point-boost ticket]]s, the second row is available to players level 7 and above and contains Normal and Super items along with [[item ticket]]s and [[quick ticket]]s, and the third row is available to players of level 12 and above and contains only Super and High-End items. The first time an item's skill level is maxed out, it is replaced with other items of the same rarity, type and shop rarity until all the items of the corresponding rarity, type and shop rarity have their skill level maxed out, at which point a [[level-boost ticket]] or, since the [[Mii Tour (2022)|2022 Mii Tour]], a [[points-cap ticket]] is sold in place of these items. If the maxed out category has Normal rarity, only Normal tickets will be sold, once a Super item sold in the Daily Selects is maxed out, the tickets will either be Normal or Super, as soon as a High-End item sold in the Daily Selects is maxed out, tickets of all the rarities will be sold. Starting from the 2022 Mii Tour, High-End level-boost tickets can appear on the third row without having to max out items. | |||
{|class="wikitable"style="margin:auto;text-align:center" | |||
!colspan=5|Daily Selects' items | |||
{| | |||
! | |||
|- | |- | ||
| | !rowspan=2, colspan=3|Item | ||
!colspan=2|Price | |||
|- | |- | ||
| | |Base set | ||
|Additional | |||
|- | |- | ||
|[[ | !colspan=2|[[Item ticket]] | ||
![[File:MKT Icon ItemTicket.png|60px]] | |||
| | |colspan=2|50 | ||
|- | |- | ||
|[[ | !colspan=2|[[Point-boost ticket]] | ||
![[File:MKT Icon Point-boostticket1.png|60px]][[File:MKT Icon Point-boostticket2.png|60px]][[File:MKT Icon Point-boostticket3.png|60px]] | |||
|colspan=2|100 | |||
|- | |- | ||
!colspan=2|[[Quick ticket]]<br>(no longer available since the Cooking Tour) | |||
![[File:MKT Icon QuickTicket.png|60px]] | |||
|1,000 | |||
|N/A | |||
|- | |- | ||
!rowspan=2|Normal | |||
!Kart or glider | |||
![[File:MKT Icon Level-boostticket2.png|60px]][[File:MKT Icon Level-boostticket3.png|60px]] | |||
|500 | |||
|1,000 | |||
|- | |- | ||
!Driver | |||
![[File:MKT Icon Level-boostticket1.png|60px]] | |||
|800 | |||
|1,500 | |||
|- | |- | ||
!rowspan=2|Super | |||
!Kart or glider | |||
![[File:MKT Icon Level-boostticket5.png|60px]][[File:MKT Icon Level-boostticket6.png|60px]] | |||
|2,000 | |||
|7,500 | |||
|- | |- | ||
!Driver | |||
| | ![[File:MKT Icon Level-boostticket4.png|60px]] | ||
|3,000 | |||
|9,000 | |||
| | |||
|- | |- | ||
| | !rowspan=2|High-End | ||
!Kart or glider | |||
![[File:MKT Icon Level-boostticket8.png|60px]][[File:MKT Icon Level-boostticket9.png|60px]] | |||
|10,000 | |||
|25,000 | |||
|- | |- | ||
!Driver | |||
![[File:MKT Icon Level-boostticket7.png|60px]] | |||
|12,000 | |||
|30,000 | |||
|- | |- | ||
|[[ | !rowspan=3|[[Points-cap ticket]] | ||
!Normal | |||
![[File:MKT Icon Points-capticket1.png|60px]][[File:MKT Icon Points-capticket2.png|60px]][[File:MKT Icon Points-capticket3.png|60px]] | |||
|2,000 | |||
|N/A | |||
|- | |- | ||
!Super | |||
![[File:MKT Icon Points-capticket4.png|60px]][[File:MKT Icon Points-capticket5.png|60px]][[File:MKT Icon Points-capticket6.png|60px]] | |||
|5,000 | |||
|N/A | |||
|- | |- | ||
!High-End | |||
![[File:MKT Icon Points-capticket7.png|60px]][[File:MKT Icon Points-capticket8.png|60px]][[File:MKT Icon Points-capticket9.png|60px]] | |||
|20,000 | |||
|N/A | |||
|} | |||
Since the [[{{Tour4}}|2019 Paris Tour]], in addition to tickets, only a subset of non-tour-exclusive items can be found as Daily Selects in all of the Tours, here referred to as "Base set". The listed items are most Normal items from the [[{{Tour2}}]] and most items from the [[{{Tour1}}]]. The Quick Ticket was removed and more items were added in the [[{{Tour19}}]] at an increased cost and shop rarity, appearing less frequently in the Daily Selects and being unable to replace the items of the same rarity and type when the skill levels of those were all maxed out. They are marked with an asterisk (*) and referred to here as "Additional". Since the [[{{Tour35}}]], "Additional" prices were reduced to the "Base set" price, but their shop rarity appears unchanged, with them still not being able to replace items of the same rarity and price when the skill levels of the latter are maxed out. In the [[{{Tour65}}]], more items were added in the Daily Selects again; they are marked with two asterisks (**). In the [[{{Tour80}}]], more items were added in the Daily Selects again; they are marked with three asterisks (***). | |||
{|class="wikitable"style="margin:auto;text-align:center" | |||
!Type | |||
!Normal | |||
!Super | |||
!High-End | |||
|- | |- | ||
|[[Mario | !Drivers | ||
|[[Baby Mario]], [[Baby Peach]], [[Baby Daisy]], [[Baby Rosalina]], [[Baby Luigi]]*, [[Koopa Troopa]], [[Shy Guy]], [[Dry Bones]], {{Iggy}}, {{Larry}}, {{Lemmy}}, {{Ludwig}}, {{Morton}}, {{Roy}}, {{Wendy}} | |||
|[[Mario]], [[Princess Peach|Peach]], [[Yoshi]], [[Princess Daisy|Daisy]], [[Toad]], [[Toadette]], [[Rosalina]]*, [[Luigi]]*, [[Toad (species)|Toad (Pit Crew)]]*, [[Yoshi (species)|Red Yoshi]]**, [[Bowser]], [[Donkey Kong]], [[Diddy Kong]], [[Lakitu]]*, [[Bowser Jr.]]*, [[Wario]]*, [[Waluigi]]*, [[King Boo]]*, [[Black Shy Guy]]**, [[Roving Racers|Red Koopa (Freerunning)]], [[Birdo]]**, [[Shy Guy|Pink Shy Guy]]**, [[Birdo|Birdo (Light Blue)]]**, [[Hammer Bro]]**, [[Boomerang Bro]]**, [[Ice Bro]]**, [[Fire Bro]]**, [[Birdo|Birdo (Yellow)]], [[Monty Mole]]** | |||
|[[Metal Mario]], [[Peachette]], [[Pauline]]*, [[Pink Gold Peach]]***, [[Toad|Toad (Party Time)]]***, [[Peach|Peach (Wintertime)]]**, [[Penguin Mario|Penguin Luigi]]***, [[Ice Mario (Super Mario Galaxy)|Ice Mario]]**, [[Baby Peach|Baby Peach (Cherub)]]***, [[Mario|Mario (Classic)]]***, [[Luigi|Luigi (Classic)]]***, [[Yoshi (species)|Black Yoshi]]***, [[Toadette|Toadette (Explorer)]]***, [[Cat Mario|Cat Peach]]**, [[Dry Bowser]], [[Funky Kong]]**, [[Dixie Kong]]** | |||
|- | |- | ||
|[[ | !Karts | ||
|[[Pipe Frame]], [[Birthday Girl]], [[Mushmellow]], [[Koopa Dasher]], [[Biddybuggy]], [[Blue Biddybuggy]]***, [[Cheep Charger]], [[Pink Mushmellow]]**, [[Birthday Girl Rosalina]]***, [[Green Kiddie Kart]]**, [[Red Kiddie Kart]]**, [[Bullet Blaster]], [[Bull's-Eye Banzai]]***, [[Landship]], [[Pipe Buggy]]*, [[Warship]]***, [[Green Cheep Charger]]*** | |||
|[[Mach 8]], [[Daytripper]], [[Turbo Yoshi]], [[Soda Jet]], [[Super Blooper (kart)|Super Blooper]], [[Gold Blooper]]***, [[Royale]]*, [[Cloud 9]]*, [[Poltergust 4000]]*, [[Streamliner]]*, [[White Royale]]***, [[Zucchini]]**, [[Red Streamliner]]***, [[Red Turbo Yoshi]]**, [[Blue Seven]]**, [[Super 1]]***, [[Dasher II]]***, [[Tea Coupe]]***, [[Yellow Turbo Birdo]]**, [[Egg 1]]**, [[Birthday Girl Daisy]]***, [[Cucumber]]**, [[Flame Flyer]], [[Barrel Train]], [[DK Jumbo]]*, [[Chrome DK Jumbo]]***, [[Koopa Clown]]*, [[Dark Clown]]***, [[Para-Wing]]**, [[Turbo Birdo]]**, [[Light-blue Turbo Birdo]]**, [[Bolt Buggy]]*** | |||
|[[B Dasher]], [[Black B Dasher]]***, [[Circuit Special]]*, [[Black Circuit]]***, [[Bumble V]]*, [[Queen Bee]]***, [[Macharon]]**, [[Carrot Kart]]**, [[Wild Wing]]**, [[Radish Rider]]***, [[Wildfire Flyer]]**, [[Red B Dasher]]**, [[Gilded Prancer]]***, [[P-Wing]]**, [[Apple Kart]]***, [[Dozer Dasher]]**, [[Wild Black]]***, [[Prancer]]***, [[Rose Queen]]***, [[Green Apple Kart]]**, [[Choco Macharon]]***, [[Red Taxi]]***, [[Blue Soda]]***, [[Green Circuit]]***, [[Sports Coupe]]**, [[Steel Driver]]**, [[Cat Cruiser]]**, [[White Turbo Yoshi]]***, [[Badwagon]], [[Gold Train]]***, [[Bruiser]]**, [[Snow Skimmer]]***, [[Offroader]]**, [[Banana Master]]**, [[Poison Apple Kart]]***, [[Dark Buggy]]***, [[Pirate Sushi Racer]]***, [[Head Honcho]]***, [[Sushi Racer]]***, [[Gilded King]]***, [[Black Dozer]]*** | |||
|- | |- | ||
|[[ | !Gliders | ||
| | |[[Super Glider]], [[Parachute (glider)|Parachute]], [[Parafoil]], [[Paper Glider]], [[Droplet Glider]], [[BBIA Parafoil]], [[Minion Paper Glider]]**, [[Piston Glider]]**, [[Piranha Plant Parafoil]]* | ||
|[[ | |[[Peach Parasol (glider)|Peach Parasol]], [[Flower Glider]], [[Oilpaper Umbrella]]*, [[Lightning Oilpaper]]*, [[Pink Flower Glider]]**, [[? Block]]**, [[Plaid Ribbon]]***, [[Eggshell Glider]]**, [[Bob-omb Parafoil]], [[Shell Parachute]], [[Wario Wing]]*, [[Waluigi Wing]]*, [[BaNaNa Parafoil]]*, [[Blue Flower Glider]]** | ||
|[[Gold Glider]], [[Strawberry Crêpe]]***, [[Starchute]]**, [[Royal Parachute]]***, [[Fireworks Parachute]]***, [[Crimson Crane]]**, [[Blizzard Balloons]]**, [[Heart Balloons]]**, [[Rainbow Starchute]]***, [[Daisy Glider]]**, [[Pink Gold Paper Glider]]**, [[Butterfly Sunset]]**, [[Chocolate Donut]]***, [[Chocolate Banana Crêpe]]***, [[Strawberry Donut]]**, [[Silver Bells]]***, [[Manta Glider]]***, [[Butterfly Wings]]***, [[Great Sail]]**, [[8-Bit Star]]***, [[Sunset Balloons]]***, [[Swooper (glider)|Swooper]], [[Cloud Glider]]*, [[Rainy Balloons]]***, [[Wicked Wings]]***, [[Banana Wingtip]]***, [[Tropical Glider]]**, [[Dragon Wings]]**, [[Cheep Cheep Masks]]*** | |||
|[[ | |||
|} | |} | ||
====' | =====Tier Shop===== | ||
{| | Since the [[{{Tour29}}|2020 Halloween Tour]], players can buy items in the Tier Shop. The items available in it are replaced every week, and the higher the player's tier, the more items are available for purchase. Until the [[{{Tour79}}]], the top row featured drivers, karts, and gliders that were favorites of at least one course in that week's ranked cup, and often included at least one High-End part. The items unlock based on the player's all-time highest tier and remain unlocked even if their tier drops. Some items can be bought multiple times, though the price increases after the first or second purchase. Previosly, after unlocking super level-boost tickets, there was a chance that High-End level-boost tickets of the same type will appear in place of them. Since the [[{{Tour65}}]], High-End level-boost tickets will appear separately if the player's all-time highest tier is at least 50. | ||
{|class="wikitable"style="margin:auto;text-align:center" | |||
! | !colspan=8|Tier Shop's items | ||
|- | |- | ||
| | !rowspan=2, colspan=3|Item | ||
!rowspan=2|Unlock<br>Rank | |||
!colspan=4|Price | |||
|- | |- | ||
!Initial price | |||
!After first purchase | |||
!After second purchase | |||
!Quantity | |||
|- | |- | ||
| | !rowspan=3|Driver{{footnote|main|1}} | ||
!Normal | |||
!rowspan = 3|[[File:MKT Icon Drivers.png|60px]] | |||
|rowspan = 3|N/A | |||
|800 | |||
|N/A | |||
|N/A | |||
|rowspan = 3|1 | |||
|- | |- | ||
| | !Super | ||
|3,000 | |||
|N/A | |||
|N/A | |||
|- | |- | ||
!High-End | |||
|12,000 | |||
|N/A | |||
|N/A | |||
| | |||
|- | |- | ||
| | !rowspan=3|Kart{{footnote|main|1}} | ||
!Normal | |||
!rowspan=3|[[File:MKT Icon Karts.png|60px]] | |||
|rowspan=3|N/A | |||
|500 | |||
|N/A | |||
|N/A | |||
|rowspan=3|1 | |||
|- | |- | ||
!Super | |||
|2,000 | |||
|N/A | |||
|N/A | |||
| | |||
|- | |- | ||
| | !High-End | ||
|10,000 | |||
|N/A | |||
|N/A | |||
|- | |- | ||
| | !rowspan=3|Glider{{footnote|main|1}} | ||
| | !Normal | ||
!rowspan=3|[[File:MKT Icon Gliders.png|60px]] | |||
|rowspan=3|N/A | |||
|500 | |||
| | |N/A | ||
|N/A | |||
|rowspan=3|1 | |||
|- | |- | ||
| | !Super | ||
|2,000 | |||
|N/A | |||
|N/A | |||
|- | |- | ||
| | !High-End | ||
|10,000 | |||
|N/A | |||
|N/A | |||
|- | |- | ||
|[[ | !rowspan=6|[[Level-boost ticket]] | ||
!Normal glider | |||
![[File:MKT Icon Level-boostticket3.png|60px]] | |||
|5 | |||
|800 | |||
|1,000 | |||
|1,200 | |||
|3 | |||
|- | |- | ||
!Normal kart | |||
| | ![[File:MKT Icon Level-boostticket2.png|60px]] | ||
|10 | |||
|800 | |||
|1,000 | |||
| | |1,200 | ||
|3 | |||
|- | |- | ||
!Normal driver | |||
![[File:MKT Icon Level-boostticket1.png|60px]] | |||
|15 | |||
|1,000 | |||
|1,200 | |||
|1,400 | |||
|3 | |||
|- | |- | ||
!Super glider | |||
![[File:MKT Icon Level-boostticket6.png|60px]] | |||
|20 | |||
|3,000 | |||
|5,000 | |||
|N/A | |||
|2 | |||
|- | |- | ||
!Super kart | |||
![[File:MKT Icon Level-boostticket5.png|60px]] | |||
|25 | |||
|3,000 | |||
|5,000 | |||
|N/A | |||
|2 | |||
|- | |- | ||
!Super driver | |||
![[File:MKT Icon Level-boostticket4.png|60px]] | |||
|30 | |||
|4,000 | |||
|6,000 | |||
|N/A | |||
|2 | |||
|- | |- | ||
|[[ | !rowspan=3|[[Points-cap ticket]] | ||
!Normal | |||
![[File:MKT Icon Points-capticket1.png|60px]][[File:MKT Icon Points-capticket2.png|60px]][[File:MKT Icon Points-capticket3.png|60px]] | |||
|35 | |||
|2,000 | |||
|N/A | |||
|N/A | |||
|1 | |||
|- | |- | ||
!Super | |||
![[File:MKT Icon Points-capticket4.png|60px]][[File:MKT Icon Points-capticket5.png|60px]][[File:MKT Icon Points-capticket6.png|60px]] | |||
|40 | |||
|5,000 | |||
|N/A | |||
|N/A | |||
|1 | |||
|- | |- | ||
!High-End | |||
![[File:MKT Icon Points-capticket7.png|60px]][[File:MKT Icon Points-capticket8.png|60px]][[File:MKT Icon Points-capticket9.png|60px]] | |||
|45 | |||
| | |20,000 | ||
|N/A | |||
|N/A | |||
|1 | |||
|- | |- | ||
![[ | !rowspan=3|Level-boost ticket | ||
| | !High-End glider | ||
| | ![[File:MKT Icon Level-boostticket9.png|60px]] | ||
| | |50 | ||
|13,000 | |||
|N/A | |||
|N/A | |||
|1 | |||
|- | |- | ||
![[ | !High-End kart | ||
| | ![[File:MKT Icon Level-boostticket8.png|60px]] | ||
| | |55 | ||
| | |13,000 | ||
|N/A | |||
|N/A | |||
|1 | |||
|- | |- | ||
! | !High-End driver | ||
![[File:MKT Icon Level-boostticket7.png|60px]] | |||
|60 | |||
|15,000 | |||
|N/A | |||
![[ | |N/A | ||
|1 | |||
| | |} | ||
| | {{footnote|note|1|Not available anymore since the [[{{Tour80}}]].}} | ||
| | |||
=====Ruby purchase===== | |||
The player can purchase [[Ruby#Pricing|different amounts]] of rubies with real-life currency. | |||
====Profile==== | |||
| | [[File:MKT Profile Screenshot.png|thumb|200px|A profile page showing a badge, favorite drivers and player records.]] | ||
Players can visit profile pages of themselves and their friends. On a profile page, the player can display a badge, choose their eight favorite drivers out of the drivers they own and can see their records, which include the amounts of collected drivers, karts, and gliders, their highest score they earned on a single course in the current tour, their number of Standard Race, Gold Race and Kart Pro wins, their highest multiplayer grade and their highest tier. Additionally, their current level, tier, and multiplayer grade are shown for the player and their friends. | |||
| | |||
| | =====Badges===== | ||
| | The player can collect [[List of badges in Mario Kart Tour|badges]] by completing challenges, by ending in the top 1,000 in the All-Cup ranking, or through other case-specific means (such as a Twitter retweet campaign or winning a team rally). Sometimes badges will also be given in the Gift Box. Out of all their collected badges, the player can choose one that will be visible to other players on their profile, though players can view other players' full badge lists. Standard badges have four different types: common badges, gold badges (obtained by completing Gold Challenges and requires a Gold Pass subscription), expert badges (obtained by completing Expert Challenges), and blue badges (obtained by completing Today's Challenge all fourteen days of a given tour). Gold, expert (red), and blue badges are all recolored versions of common badges in their respective colors. | ||
| | |||
| | |||
| | |||
| | |||
| | |||
| | |||
| | |||
| | |||
Other kinds of badges are grouped separately and obtained by other means. These include badges earned from completing entire Expert Challenge cards, ranking badges, multiplayer badges such as winning a Kart Pro event, top-placement badges, and Team Rally badges. | |||
====Friends==== | |||
The player can become in-game friends with other players, see the points of their friends on the different cups, and invite them to join a multiplayer room. | |||
Since the [[{{Tour13}}]], a cumulative reward is given to the player if the combined total cup points of the week's ranked cup of the player and all of their friends reach certain amounts. In the [[{{Tour17}}]] only, the reward was rubies instead of coins. Since the second week of the [[{{Tour23}}]], the coin amounts have changed. | |||
{|class="wikitable" style="margin:auto; text-align:center" | {|class="wikitable"style="margin:auto;text-align:center" | ||
! | !Total points of player and friends | ||
! | !Coins<br>(until August 5, 2020) | ||
! | !Coins<br>(since August 12, 2020) | ||
! | !Rubies<br>(Flower Tour) | ||
|- | |- | ||
! | !50,000 | ||
| | |100 | ||
| | |100 | ||
|3 | |2 | ||
|- | |- | ||
! | !80,000 | ||
| | |500 | ||
| | |300 | ||
| | |3 | ||
|- | |||
!150,000 | |||
|1000 | |||
|600 | |||
|5 | |||
|} | |} | ||
====News==== | |||
Every time that an announcement is being made, a new part of a tour starts, an update of the game is released, a new special offer or pipe is available or something else has been changed, the player receives a message with detailed information about what is new. Messages regarding known issues also appear here. | |||
====Mii==== | |||
The player can upload [[Mii]] characters from their Nintendo Account or create new ones. Mii characters can also be shared with other players. | |||
The player can collect different Mii Racing Suits for their Miis to wear. Every time the player gets a new Mii Racing Suit, all of their Mii Racing Suits will get ten additional base points. Each Mii Racing Suit that the player owns has to be assigned to a specific Mii of the player's choice. | |||
====Gifts==== | |||
Sometimes the player receives additional gifts, which can be rubies, coins, or badges. Mainly, these gifts are given at celebration occasions such as celebration days, the start of a new tour, or the launch of Multiplayer mode. Sometimes it happens that the player does not receive a reward due to a technical problem in the game. These rewards can appear as gifts at a later time. Gifts remain available for fourteen days. | |||
===Skill level point and points cap raising requirements=== | |||
The following table lists the amount of skill level points needed to bring an acquired driver, kart, or glider to a certain skill level. Raising the skill level of a driver, kart or glider requires obtaining duplicates of them as Tour Gifts, from the Pipe or the Shop, or from using level-boost tickets that match the type and rarity. | |||
{|class="wikitable"style="margin:auto;text-align:center" | |||
!Skill level | |||
!2 | |||
!3 | |||
!4 | |||
!5 | |||
!6 | |||
!7 | |||
!8 | |||
| | |||
! | |||
|- | |- | ||
! | !Normal | ||
|2 | |||
|5 | |||
| | |8 | ||
| | |11 | ||
| | |14 | ||
| | |20 | ||
| | |40 | ||
| | |||
| | |||
|- | |- | ||
! | !Super | ||
|1 | |||
| | |2 | ||
| | |3 | ||
|4 | |||
| | |5 | ||
| | |8 | ||
| | |16 | ||
| | |||
| | |||
|- | |- | ||
! | !High-End | ||
| | |1 | ||
| | |1 | ||
| | |2 | ||
|2 | |||
| | |3 | ||
| | |5 | ||
| | |8 | ||
| | |} | ||
| | The following table lists the amount of points-cap tickets needed to raise the maximum amount of base points of a driver, kart or glider to a higher cap. | ||
{|class="wikitable"style="margin:auto;text-align:center" | |||
!Cap | |||
!1 | |||
!2 | |||
| | !3 | ||
!4 | |||
|- | |- | ||
! | !Amount of tickets | ||
|[[ | |1 | ||
|[[ | |5 | ||
| | |10 | ||
|12 | |||
|} | |||
|[[ | |||
| | ==Courses== | ||
| | {{see also|List of favored and favorite courses in Mario Kart Tour}} | ||
| | ===Race courses=== | ||
''Mario Kart Tour'' features 103 different race courses (136 if each route is counted for courses with multiple re-routes), the most out of all ''Mario Kart'' games. Until the [[Anniversary Tour (2023)]], at least one additional course was added at the start of almost every tour. Notably, ''Mario Kart Tour'' introduces course variants,{{footnote|main|note}} with courses having up to three variants in addition to the normal one: | |||
*Courses marked with "R" (Reverse), labeled "SI" (Sens inverse) in French, are driven in reverse orientation, and mostly just have alterations to make this possible if necessary or to add in some course elements. Every race course in the game has an R variant. | |||
*Courses marked with "T" (Trick),<ref>mariokarttourEN (November 14, 2019). [https://twitter.com/mariokarttourEN/status/1194766898094891008 #MarioKartTour has grown significantly since launch…and it's not over yet! We're upping the variety with some nail-biting, high-flying Trick courses. Get your gliders ready and buckle in!] ''Twitter''. Retrieved December 12, 2020. ([http://web.archive.org/web/20191114000800/https://twitter.com/mariokarttourEN/status/1194766898094891008 Archived] November 14, 2019, 00:08:00 UTC via Internet Archive: Wayback Machine.)</ref><ref>mariokarttourEN (April 17, 2020). [https://twitter.com/mariokarttourEN/status/1251148410285109248 The Yoshi Tour is ending soon. But don't worry, there's another terrific tour on the way. Starting Apr. 21, 11 PM PT, the Trick Tour kicks off in #MarioKartTour! Hope you're ready to rack up some points, because every course included will be the Trick variant!] ''Twitter''. Retrieved December 12, 2020. ([http://web.archive.org/web/20200418153408if_/https://twitter.com/mariokarttourEN/status/1251148410285109248 Archived] April 18, 2020, 15:34:08 UTC via Internet Archive: Wayback Machine.)</ref> labeled "A" (Acrobatique) in French and "X" (Extreme) in all other languages, feature many additional ramps, [[Kanaami Road]]s, and obstacles with which to perform [[Jump Boost]]s, but are usually otherwise the same. Some specific T variants feature other alterations, such as adding Kanaami Roads to replace glider sections (like in [[DS Airship Fortress|DS Airship Fortress T]]), changing the order the course is traversed in (like in [[N64 Kalimari Desert#N64 Kalimari Desert 2|N64 Kalimari Desert 2T]]), or even changing the starting location (like in [[3DS Rock Rock Mountain|3DS Rock Rock Mountain T]]). Every race course in the game except [[GBA Bowser's Castle 4]] has a T variant. | |||
*Courses marked with "R/T" (Reverse/Trick), labeled "SI/A" (Sens inverse/Acrobatique) in French and "RX" (Reverse Extreme) in all other languages, feature the elements of both R and T courses. As such, they go through the course backwards while adding more ramps, Kanaami Roads, and other obstacles with which to perform Jump Boosts and combos. Unlike with R and T variants, many courses were introduced without R/T variants and gained them later on. Originally, R/T variants only appeared for city courses, with them introduced in the same tour as the city course's other variants, but classic courses would start having them as well beginning with the [[Winter Tour (2019)|2019 Winter Tour]], after which every tour has had three to five R/T variants (of any course type). From then to the [[Trick Tour (2020)|2020 Trick Tour]], each tour saw one to three new ones added. Every race course in the game except GBA Bowser's Castle 4 and 3DS Rock Rock Mountain has an R/T variant. | |||
When counting R, T, and R/T variants separately from their normal counterparts, the total number of courses in the game is 541. | |||
Prior to the [[{{Tour80}}]], with some exceptions, city courses were added with all four variants in the same tour, while all other courses were first added without the R/T variant, which would then release in a subsequent tour whose exclusive additions were R/T variants. From the {{Tour80}} onwards, all courses added to the game would debut all four variants at once upon introduction, much like the city courses (with the exception of GBA Bowser's Castle 4, which debuted with only its normal and R variants). | |||
Almost every tour features classic courses and remix courses, while every new course appears exclusively in specific tours. | |||
{{footnote|note|note|"Variant" is the official term used for both the courses designated R, T, or R/T and the numbered, re-routed versions of a particular course.<ref>June 15, 2022. [https://www.nintendo.com/whatsnew/mobilenews-zoom-across-paris-london-amsterdam-and-berlin-in-the-metropolitan-tour/ Zoom across Paris, London, Amsterdam, and Berlin in the Metropolitan Tour]. nintendo.com. Retrieved July 13, 2023. ([https://web.archive.org/web/20230709022407/https://www.nintendo.com/web/20230709022407/https://www.nintendo.com/whatsnew/mobilenews-zoom-across-paris-london-amsterdam-and-berlin-in-the-metropolitan-tour/ Archived] July 9, 2023, 02:24:07 UTC via Wayback Machine.) "''Take to the streets and take in the sights with new variants Berlin Byways, Amsterdam Drift 2, and their R and T variants'' [...]"</ref><ref>December 28, 2022. [https://www.nintendo.com/whatsnew/happy-new-years-tour/ Happy New Year’s Tour!] nintendo.com. Retrieved July 13, 2023. ([https://web.archive.org/web/20230708161033/https://www.nintendo.com/web/20230708161033/https://www.nintendo.com/whatsnew/happy-new-years-tour/ Archived] July 8, 2023, 16:10:33 UTC via Wayback Machine.) "''For this event, the cups are filled to the brim with R/T variants, including six newly added ones: 3DS Piranha Plant Slide R/T, GBA Bowser's Castle 3 R/T, GBA Cheep-Cheep Island R/T, GBA Sky Garden R/T, GCN Baby Park R/T, and Wii Koopa Cape R/T.''"</ref><ref>April 19, 2023. [https://www.nintendo.com/whatsnew/mobilenews-mario-kart-spring-tour/ Enjoy kart-racing antics through antiquity with all-new course, Athens Dash, in the Spring Tour]. nintendo.com. Retrieved July 13, 2023. ([https://web.archive.org/web/20230713122318/https://www.nintendo.com/web/20230713122318/https://www.nintendo.com/whatsnew/mobilenews-mario-kart-spring-tour/ Archived] July 13, 2023, 12:23:18 UTC via Wayback Machine.) "''Tour a crop of Europe’s cultural capitals, including '''brand-new course Athens Dash''' and '''new course variants Paris Promenade B and Berlin Byways R/T'''.''"</ref>}} | |||
====New==== | |||
There are seventeen original courses in ''Mario Kart Tour'', referred to as "[[new course]]s". If each individual route is counted separately, the total increases to forty-seven. | |||
=====City courses===== | |||
44 of the 53 new courses are based on real cities. There are fourteen cities represented in the game, namely [[New York City]], [[Tokyo]], [[Paris]], [[London]], [[Vancouver]], [[Los Angeles]], [[Berlin]], [[Sydney]], [[Singapore]], [[Amsterdam]], [[List of implied locations#Thailand|Bangkok]], [[Athens]], [[Rome]], and [[Madrid]]. These courses each have three unique routes that have the racers going through different areas of the city; additionally, New York Minute and Tokyo Blur each have an additional fourth route that brings together all of the paths from the other three routes into one long lap. | |||
{|class="wikitable"align=center width=100% cellspacing=0 border=1 cellpadding=3 style="border-collapse:collapse; text-align:center;font-size:100%;" | |||
|-style="background:#ABC" | |||
|width=16%|'''Course''' | |||
|width=20%|'''Debut tour<hr />R/T debut tour''' | |||
|width=16%|'''Normal version''' | |||
|width=16%|'''R variation''' | |||
|width=16%|'''T variation''' | |||
|width=16%|'''R/T variation''' | |||
|- | |- | ||
! | ![[Tour New York Minute|New York Minute]] | ||
|[[File:MKT | |[[{{Tour1}}]]||[[File:MKT Icon New York Minute.png|180px]]||[[File:MKT Icon New York Minute R.png|180px]]||[[File:MKT Icon New York Minute T.png|180px]]||[[File:MKT Icon New York Minute RT.png|180px]] | ||
|[[File:MKT Icon | |||
|[[File:MKT Icon | |||
| | |||
|[[New York | |||
|- | |- | ||
! | ![[Tour New York Minute|New York Minute 2]] | ||
|[[File: | |[[{{Tour7}}]]||[[File:MKT Icon New York Minute 2.png|180px]]||[[File:MKT Icon New York Minute 2R.png|180px]]||[[File:MKT Icon New York Minute 2T.png|180px]]||[[File:MKT Icon New York Minute 2RT.png|180px]] | ||
|[[File:MKT Icon | |||
|[[File:MKT Icon | |||
|[[New York | |||
|- | |- | ||
! | ![[Tour New York Minute|New York Minute 3]] | ||
|[[File: | |[[{{Tour28}}]]||[[File:MKT Icon New York Minute 3.png|180px]]||[[File:MKT Icon New York Minute 3R.png|180px]]||[[File:MKT Icon New York Minute 3T.png|180px]]||[[File:MKT Icon New York Minute 3RT.png|180px]] | ||
|[[File:MKT Icon | |||
| | |||
|[[File:MKT Icon | |||
| | |||
|[[New York | |||
|- | |- | ||
! | ![[Tour New York Minute|New York Minute 4]] | ||
|[[File:MKT | |[[{{Tour53}}]]||[[File:MKT Icon New York Minute 4.png|180px]]||[[File:MKT Icon New York Minute 4R.png|180px]]||[[File:MKT Icon New York Minute 4T.png|180px]]||[[File:MKT Icon New York Minute 4RT.png|180px]] | ||
|[[File:MKT Icon | |||
|[[File:MKT Icon | |||
|[[New York | |||
|- | |- | ||
! | ![[Tour Tokyo Blur|Tokyo Blur]] | ||
|[[File: | |[[{{Tour2}}]]||[[File:MKT Icon Tokyo Blur.png|180px]]||[[File:MKT Icon Tokyo Blur R.png|180px]]||[[File:MKT Icon Tokyo Blur T.png|180px]]||[[File:MKT Icon Tokyo Blur RT.png|180px]] | ||
|[[File:MKT Icon | |||
| | |||
|[[File:MKT Icon | |||
| | |||
|[[ | |||
|- | |- | ||
! | ![[Tour Tokyo Blur|Tokyo Blur 2]] | ||
|[[File: | |[[{{Tour8}}]]||[[File:MKT Icon Tokyo Blur 2.png|180px]]||[[File:MKT Icon Tokyo Blur 2R.png|180px]]||[[File:MKT Icon Tokyo Blur 2T.png|180px]]||[[File:MKT Icon Tokyo Blur 2RT.png|180px]] | ||
|[[File:MKT Icon | |||
| | |||
|[[File:MKT Icon | |||
| | |||
|[[ | |||
|- | |- | ||
! | ![[Tour Tokyo Blur|Tokyo Blur 3]] | ||
|[[File: | |[[{{Tour25}}]]<hr />[[{{Tour49}}]]||[[File:MKT Icon Tokyo Blur 3.png|180px]]||[[File:MKT Icon Tokyo Blur 3R.png|180px]]||[[File:MKT Icon Tokyo Blur 3T.png|180px]]||[[File:MKT Icon Tokyo Blur 3RT.png|180px]] | ||
|[[File:MKT Icon | |||
| | |||
|[[File:MKT Icon | |||
| | |||
|[[Tokyo | |||
|- | |- | ||
! | ![[Tour Tokyo Blur|Tokyo Blur 4]] | ||
|[[File: | |[[{{Tour39}}]]||[[File:MKT Icon Tokyo Blur 4.png|180px]]||[[File:MKT Icon Tokyo Blur 4R.png|180px]]||[[File:MKT Icon Tokyo Blur 4T.png|180px]]||[[File:MKT Icon Tokyo Blur 4RT.png|180px]] | ||
|[[File:MKT Icon | |||
| | |||
|[[File:MKT Icon | |||
| | |||
|[[ | |||
|- | |- | ||
! | ![[Tour Paris Promenade|Paris Promenade]] | ||
|[[File:MKT | |[[{{Tour4}}]]||[[File:MKT Icon Paris Promenade.png|180px]]||[[File:MKT Icon Paris Promenade R.png|180px]]||[[File:MKT Icon Paris Promenade T.png|180px]]||[[File:MKT Icon Paris Promenade RT.png|180px]] | ||
|[[File:MKT Icon | |||
| | |||
|[[File:MKT Icon | |||
| | |||
|[[Paris | |||
|- | |- | ||
! | ![[Tour Paris Promenade|Paris Promenade 2]] | ||
|[[File:MKT | |[[{{Tour10}}]]||[[File:MKT Icon Paris Promenade 2.png|180px]]||[[File:MKT Icon Paris Promenade 2R.png|180px]]||[[File:MKT Icon Paris Promenade 2T.png|180px]]||[[File:MKT Icon Paris Promenade 2RT.png|180px]] | ||
|[[File:MKT Icon | |||
| | |||
|[[File:MKT Icon | |||
| | |||
|[[ | |||
|- | |- | ||
! | ![[Tour Paris Promenade|Paris Promenade 3]] | ||
|[[File: | |[[{{Tour46}}]]||[[File:MKT Icon Paris Promenade 3.png|180px]]||[[File:MKT Icon Paris Promenade 3R.png|180px]]||[[File:MKT Icon Paris Promenade 3T.png|180px]]||[[File:MKT Icon Paris Promenade 3RT.png|180px]] | ||
|[[File:MKT Icon | |||
| | |||
|[[File:MKT Icon | |||
| | |||
|[[ | |||
|- | |- | ||
! | ![[Tour London Loop|London Loop]] | ||
|[[File: | |[[{{Tour6}}]]||[[File:MKT Icon London Loop.png|180px]]||[[File:MKT Icon London Loop R.png|180px]]||[[File:MKT Icon London Loop T.png|180px]]||[[File:MKT Icon London Loop RT.png|180px]] | ||
|[[File:MKT Icon | |||
| | |||
|[[File:MKT Icon | |||
| | |||
|[[ | |||
|- | |- | ||
! | ![[Tour London Loop|London Loop 2]] | ||
|[[File: | |[[{{Tour13}}]]||[[File:MKT Icon London Loop 2.png|180px]]||[[File:MKT Icon London Loop 2R.png|180px]]||[[File:MKT Icon London Loop 2T.png|180px]]||[[File:MKT Icon London Loop 2RT.png|180px]] | ||
|[[File:MKT Icon | |||
| | |||
|[[File:MKT Icon | |||
| | |||
|[[ | |||
|- | |- | ||
! | ![[Tour London Loop|London Loop 3]] | ||
|[[File: | |[[{{Tour55}}]]||[[File:MKT Icon London Loop 3.png|180px]]||[[File:MKT Icon London Loop 3R.png|180px]]||[[File:MKT Icon London Loop 3T.png|180px]]||[[File:MKT Icon London Loop 3RT.png|180px]] | ||
|[[File:MKT Icon | |||
| | |||
|[[File:MKT Icon | |||
| | |||
|[[ | |||
|- | |- | ||
! | ![[Tour Vancouver Velocity|Vancouver Velocity]] | ||
|[[File: | |[[{{Tour11}}]]||[[File:MKT Icon Vancouver Velocity.png|180px]]||[[File:MKT Icon Vancouver Velocity R.png|180px]]||[[File:MKT Icon Vancouver Velocity T.png|180px]]||[[File:MKT Icon Vancouver Velocity RT.png|180px]] | ||
|[[File:MKT Icon | |||
| | |||
|[[File:MKT Icon | |||
| | |||
|[[ | |||
|- | |- | ||
! | ![[Tour Vancouver Velocity|Vancouver Velocity 2]] | ||
|[[File: | |[[{{Tour59}}]]||[[File:MKT Icon Vancouver Velocity 2.png|180px]]||[[File:MKT Icon Vancouver Velocity 2R.png|180px]]||[[File:MKT Icon Vancouver Velocity 2T.png|180px]]||[[File:MKT Icon Vancouver Velocity 2RT.png|180px]] | ||
|[[File:MKT Icon | |||
| | |||
|[[File:MKT Icon | |||
| | |||
|[[ | |||
|- | |- | ||
! | ![[Tour Vancouver Velocity|Vancouver Velocity 3]] | ||
|[[File: | |[[{{Tour82}}]]||[[File:MKT Icon Vancouver Velocity 3.png|180px]]||[[File:MKT Icon Vancouver Velocity 3R.png|180px]]||[[File:MKT Icon Vancouver Velocity 3T.png|180px]]||[[File:MKT Icon Vancouver Velocity 3RT.png|180px]] | ||
|[[File:MKT Icon | |||
| | |||
|[[File:MKT Icon | |||
| | |||
|[[ | |||
|- | |- | ||
! | ![[Tour Los Angeles Laps|Los Angeles Laps]] | ||
|[[File: | |[[{{Tour27}}]]||[[File:MKT Icon Los Angeles Laps.png|180px]]||[[File:MKT Icon Los Angeles Laps R.png|180px]]||[[File:MKT Icon Los Angeles Laps T.png|180px]]||[[File:MKT Icon Los Angeles Laps RT.png|180px]] | ||
|[[File:MKT Icon | |||
| | |||
|[[File:MKT Icon | |||
| | |||
|[[ | |||
|- | |- | ||
! | ![[Tour Los Angeles Laps|Los Angeles Laps 2]] | ||
|[[File:MKT | |[[{{Tour63}}]]||[[File:MKT Icon Los Angeles Laps 2.png|180px]]||[[File:MKT Icon Los Angeles Laps 2R.png|180px]]||[[File:MKT Icon Los Angeles Laps 2T.png|180px]]||[[File:MKT Icon Los Angeles Laps 2RT.png|180px]] | ||
|[[File:MKT Icon | |||
| | |||
|[[File:MKT Icon | |||
| | |||
|[[ | |||
|- | |- | ||
! | ![[Tour Los Angeles Laps|Los Angeles Laps 3]] | ||
|[[File:MKT | |[[{{Tour48}}]]||[[File:MKT Icon Los Angeles Laps 3.png|180px]]||[[File:MKT Icon Los Angeles Laps 3R.png|180px]]||[[File:MKT Icon Los Angeles Laps 3T.png|180px]]||[[File:MKT Icon Los Angeles Laps 3RT.png|180px]] | ||
|[[File:MKT Icon | |||
||[[File:MKT Icon | |||
| | |||
|[[ | |||
|- | |- | ||
! | ![[Tour Berlin Byways|Berlin Byways]] | ||
|[[File: | |[[{{Tour72}}]]<hr />[[{{Tour94}}]]||[[File:MKT Icon Berlin Byways.png|180px]]||[[File:MKT Icon Berlin Byways R.png|180px]]||[[File:MKT Icon Berlin Byways T.png|180px]]||[[File:MKT Icon Berlin Byways RT.png|180px]] | ||
|[[File:MKT Icon | |||
|[[File:MKT Icon | |||
| | |||
|[[ | |||
|- | |- | ||
! | ![[Tour Berlin Byways|Berlin Byways 2]] | ||
|[[File:MKT | |[[{{Tour35}}]]||[[File:MKT Icon Berlin Byways 2.png|180px]]||[[File:MKT Icon Berlin Byways 2R.png|180px]]||[[File:MKT Icon Berlin Byways 2T.png|180px]]||[[File:MKT Icon Berlin Byways 2RT.png|180px]] | ||
|[[File:MKT Icon | |||
||[[File:MKT Icon | |||
| | |||
|[[ | |||
|- | |- | ||
! | ![[Tour Berlin Byways|Berlin Byways 3]] | ||
|[[File:MKT | |[[{{Tour79}}]]<hr />[[{{Tour105}}]]||[[File:MKT Icon Berlin Byways 3.png|180px]]||[[File:MKT Icon Berlin Byways 3R.png|180px]]||[[File:MKT Icon Berlin Byways 3T.png|180px]]||[[File:MKT Icon Berlin Byways 3RT.png|180px]] | ||
|[[File:MKT Icon | |||
|[[File:MKT Icon | |||
| | |||
|[[ | |||
|- | |- | ||
! | ![[Tour Sydney Sprint|Sydney Sprint]] | ||
|[[File: | |[[{{Tour42}}]]||[[File:MKT Icon Sydney Sprint.png|180px]]||[[File:MKT Icon Sydney Sprint R.png|180px]]||[[File:MKT Icon Sydney Sprint T.png|180px]]||[[File:MKT Icon Sydney Sprint RT.png|180px]] | ||
|[[File:MKT Icon | |||
| | |||
|[[File:MKT Icon | |||
| | |||
|[[ | |||
|- | |- | ||
! | ![[Tour Sydney Sprint|Sydney Sprint 2]] | ||
|[[File:MKT | |[[{{Tour52}}]]||[[File:MKT Icon Sydney Sprint 2.png|180px]]||[[File:MKT Icon Sydney Sprint 2R.png|180px]]||[[File:MKT Icon Sydney Sprint 2T.png|180px]]||[[File:MKT Icon Sydney Sprint 2RT.png|180px]] | ||
|[[File:MKT Icon | |||
| | |||
|[[File:MKT Icon | |||
| | |||
|[[ | |||
|- | |- | ||
! | ![[Tour Sydney Sprint|Sydney Sprint 3]] | ||
|[[File:MKT | |[[{{Tour79}}]]<hr />[[{{Tour105}}]]||[[File:MKT Icon Sydney Sprint 3.png|180px]]||[[File:MKT Icon Sydney Sprint 3R.png|180px]]||[[File:MKT Icon Sydney Sprint 3T.png|180px]]||[[File:MKT Icon Sydney Sprint 3RT.png|180px]] | ||
|[[File:MKT Icon | |||
| | |||
|[[File:MKT Icon | |||
| | |||
|[[ | |||
|- | |- | ||
! | ![[Tour Singapore Speedway|Singapore Speedway]] | ||
|[[File:MKT | |[[{{Tour61}}]]||[[File:MKT Icon Singapore Speedway.png|180px]]||[[File:MKT Icon Singapore Speedway R.png|180px]]||[[File:MKT Icon Singapore Speedway T.png|180px]]||[[File:MKT Icon Singapore Speedway RT.png|180px]] | ||
|[[File:MKT Icon | |||
| | |||
|[[File:MKT Icon | |||
| | |||
|[[ | |||
|- | |- | ||
! | ![[Tour Singapore Speedway|Singapore Speedway 2]] | ||
|[[File:MKT | |[[{{Tour75}}]]<hr />[[{{Tour79}}]]||[[File:MKT Icon Singapore Speedway 2.png|180px]]||[[File:MKT Icon Singapore Speedway 2R.png|180px]]||[[File:MKT Icon Singapore Speedway 2T.png|180px]]||[[File:MKT Icon Singapore Speedway 2RT.png|180px]] | ||
|[[File:MKT Icon | |||
| | |||
|[[File:MKT Icon | |||
| | |||
|[[ | |||
|- | |- | ||
! | ![[Tour Singapore Speedway|Singapore Speedway 3]] | ||
|[[File: | |[[{{Tour88}}]]||[[File:MKT Icon Singapore Speedway 3.png|180px]]||[[File:MKT Icon Singapore Speedway 3R.png|180px]]||[[File:MKT Icon Singapore Speedway 3T.png|180px]]||[[File:MKT Icon Singapore Speedway 3RT.png|180px]] | ||
|[[File:MKT Icon | |||
| | |||
|[[File:MKT Icon | |||
| | |||
|[[ | |||
|- | |- | ||
! | ![[Tour Amsterdam Drift|Amsterdam Drift]] | ||
|[[File: | |[[{{Tour68}}]]||[[File:MKT Icon Amsterdam Drift.png|180px]]||[[File:MKT Icon Amsterdam Drift R.png|180px]]||[[File:MKT Icon Amsterdam Drift T.png|180px]]||[[File:MKT Icon Amsterdam Drift RT.png|180px]] | ||
|[[File:MKT Icon | |||
|[[File:MKT Icon | |||
| | |||
|[[ | |||
|- | |- | ||
! | ![[Tour Amsterdam Drift|Amsterdam Drift 2]] | ||
|[[File: | |[[{{Tour72}}]]<hr />[[{{Tour79}}]]||[[File:MKT Icon Amsterdam Drift 2.png|180px]]||[[File:MKT Icon Amsterdam Drift 2R.png|180px]]||[[File:MKT Icon Amsterdam Drift 2T.png|180px]]||[[File:MKT Icon Amsterdam Drift 2RT.png|180px]] | ||
|[[File:MKT Icon | |||
||[[File:MKT Icon | |||
| | |||
|[[ | |||
|- | |- | ||
! | ![[Tour Amsterdam Drift|Amsterdam Drift 3]] | ||
|[[File:MKT | |[[{{Tour84}}]]||[[File:MKT Icon Amsterdam Drift 3.png|180px]]||[[File:MKT Icon Amsterdam Drift 3R.png|180px]]||[[File:MKT Icon Amsterdam Drift 3T.png|180px]]||[[File:MKT Icon Amsterdam Drift 3RT.png|180px]] | ||
|[[File:MKT Icon | |||
||[[File:MKT Icon | |||
| | |||
|[[ | |||
|- | |- | ||
! | ![[Tour Bangkok Rush|Bangkok Rush]] | ||
|[[File:MKT | |[[{{Tour73}}]]||[[File:MKT Icon Bangkok Rush.png|180px]]||[[File:MKT Icon Bangkok Rush R.png|180px]]||[[File:MKT Icon Bangkok Rush T.png|180px]]||[[File:MKT Icon Bangkok Rush RT.png|180px]] | ||
|[[File:MKT Icon | |||
| | |||
|[[File:MKT Icon | |||
| | |||
|[[ | |||
|- | |- | ||
! | ![[Tour Bangkok Rush|Bangkok Rush 2]] | ||
|[[File:MKT | |[[{{Tour88}}]]||[[File:MKT Icon Bangkok Rush 2.png|180px]]||[[File:MKT Icon Bangkok Rush 2R.png|180px]]||[[File:MKT Icon Bangkok Rush 2T.png|180px]]||[[File:MKT Icon Bangkok Rush 2RT.png|180px]] | ||
|[[File:MKT Icon | |||
| | |||
|[[File:MKT Icon | |||
| | |||
|[[ | |||
|- | |- | ||
! | ![[Tour Bangkok Rush|Bangkok Rush 3]] | ||
|[[File:MKT | |[[{{Tour88}}]]||[[File:MKT Icon Bangkok Rush 3.png|180px]]||[[File:MKT Icon Bangkok Rush 3R.png|180px]]||[[File:MKT Icon Bangkok Rush 3T.png|180px]]||[[File:MKT Icon Bangkok Rush 3RT.png|180px]] | ||
|[[File:MKT Icon | |||
| | |||
|[[File:MKT Icon | |||
| | |||
|[[ | |||
|- | |- | ||
! | ![[Tour Athens Dash|Athens Dash]] | ||
|[[File:MKT | |[[{{Tour94}}]]||[[File:MKT Icon Athens Dash.png|180px]]||[[File:MKT Icon Athens Dash R.png|180px]]||[[File:MKT Icon Athens Dash T.png|180px]]||[[File:MKT Icon Athens Dash RT.png|180px]] | ||
|[[File:MKT Icon | |||
| | |||
|[[File:MKT Icon Dash | |||
| | |||
|- | |- | ||
! | ![[Tour Athens Dash|Athens Dash 2]] | ||
|[[File:MKT | |[[{{Tour94}}]]||[[File:MKT Icon Athens Dash 2.png|180px]]||[[File:MKT Icon Athens Dash 2R.png|180px]]||[[File:MKT Icon Athens Dash 2T.png|180px]]||[[File:MKT Icon Athens Dash 2RT.png|180px]] | ||
|[[File:MKT Icon | |||
|[[File:MKT Icon | |||
| | |||
|[[ | |||
|- | |- | ||
! | ![[Tour Athens Dash|Athens Dash 3]] | ||
|[[File:MKT | |[[{{Tour105}}]]||[[File:MKT Icon Athens Dash 3.png|180px]]||[[File:MKT Icon Athens Dash 3R.png|180px]]||[[File:MKT Icon Athens Dash 3T.png|180px]]||[[File:MKT Icon Athens Dash 3RT.png|180px]] | ||
|[[File:MKT Icon | |||
| | |||
|[[File:MKT Icon | |||
| | |||
|[[ | |||
|- | |- | ||
! | ![[Tour Rome Avanti|Rome Avanti]] | ||
|[[File:MKT | |[[{{Tour99}}]]||[[File:MKT Icon Rome Avanti.png|180px]]||[[File:MKT Icon Rome Avanti R.png|180px]]||[[File:MKT Icon Rome Avanti T.png|180px]]||[[File:MKT Icon Rome Avanti RT.png|180px]] | ||
|[[File:MKT Icon | |||
| | |||
|[[File:MKT Icon | |||
| | |||
|[[ | |||
|- | |- | ||
! | ![[Tour Rome Avanti|Rome Avanti 2]] | ||
|[[File:MKT | |[[{{Tour99}}]]||[[File:MKT Icon Rome Avanti 2.png|180px]]||[[File:MKT Icon Rome Avanti 2R.png|180px]]||[[File:MKT Icon Rome Avanti 2T.png|180px]]||[[File:MKT Icon Rome Avanti 2RT.png|180px]] | ||
|[[File:MKT Icon | |||
| | |||
|[[File:MKT Icon | |||
| | |||
|[[ | |||
|- | |- | ||
! | ![[Tour Rome Avanti|Rome Avanti 3]] | ||
|[[File:MKT | |[[{{Tour105}}]]||[[File:MKT Icon Rome Avanti 3.png|180px]]||[[File:MKT Icon Rome Avanti 3R.png|180px]]||[[File:MKT Icon Rome Avanti 3T.png|180px]]||[[File:MKT Icon Rome Avanti 3RT.png|180px]] | ||
|[[File:MKT Icon | |||
| | |||
|[[File:MKT Icon | |||
| | |||
|[[ | |||
|- | |- | ||
! | ![[Tour Madrid Drive|Madrid Drive]] | ||
|[[File:MKT | |[[{{Tour103}}]]||[[File:MKT Icon Madrid Drive.png|180px]]||[[File:MKT Icon Madrid Drive R.png|180px]]||[[File:MKT Icon Madrid Drive T.png|180px]]||[[File:MKT Icon Madrid Drive RT.png|180px]] | ||
|[[File:MKT Icon | |||
| | |||
|[[File:MKT Icon | |||
| | |||
|[[ | |||
|- | |- | ||
! | ![[Tour Madrid Drive|Madrid Drive 2]] | ||
|[[File:MKT | |[[{{Tour103}}]]||[[File:MKT Icon Madrid Drive 2.png|180px]]||[[File:MKT Icon Madrid Drive 2R.png|180px]]||[[File:MKT Icon Madrid Drive 2T.png|180px]]||[[File:MKT Icon Madrid Drive 2RT.png|180px]] | ||
|[[File:MKT Icon | |||
| | |||
|[[File:MKT Icon | |||
| | |||
|[[ | |||
|- | |- | ||
! | ![[Tour Madrid Drive|Madrid Drive 3]] | ||
|[[File:MKT | |[[{{Tour105}}]]||[[File:MKT Icon Madrid Drive 3.png|180px]]||[[File:MKT Icon Madrid Drive 3R.png|180px]]||[[File:MKT Icon Madrid Drive 3T.png|180px]]||[[File:MKT Icon Madrid Drive 3RT.png|180px]] | ||
|[[File:MKT Icon | |} | ||
|[[File:MKT Icon | =====Other courses===== | ||
| | In addition to the city courses are seven original courses that are not based on a real location, one of which has three different routes akin to the game's city courses. Despite the fact that Sky-High Sundae, Yoshi's Island, and Squeaky Clean Sprint officially debuted in the ''[[Mario Kart 8 Deluxe – Booster Course Pass]]'', they are labeled and marketed as new courses for ''Mario Kart Tour'' as well, including in internal data.<ref>A number of internal text strings in ''Mario Kart Tour'' (<tt>ArrowMobyi</tt>, <tt>ArrowSignMobyi</tt>, <tt>FlowerRingMobyi</tt>, <tt>HeyhoMobyi</tt>, <tt>RoadAppearMobyi</tt>, and <tt>RoadPartsMobyi</tt>) refer to map objects that are seen in the Yoshi's Island course; they are referred to as belonging to <tt>Mobyi</tt>, indicating that the course has the <tt>Mob</tt> [[New course#Platform codes|platform code]], used for courses originating from ''Mario Kart Tour''.</ref> | ||
{|class="wikitable"align=center width=100% cellspacing=0 border=1 cellpadding=3 style="border-collapse:collapse;text-align:center;font-size:100%;" | |||
| | |-style="background:#ABC" | ||
| | |width=16%|'''Course''' | ||
| | |width=20%|'''Debut tour<hr />R/T debut tour''' | ||
|width=16%|'''Normal version''' | |||
|width=16%|'''R variation''' | |||
|width=16%|'''T variation''' | |||
|width=16%|'''R/T variation''' | |||
|- | |- | ||
! | ![[Merry Mountain]] | ||
|[[File:MKT | |[[{{Tour32}}]]<hr /> [[{{Tour58}}]]||[[File:MKT Icon Merry Mountain.png|180px]]||[[File:MKT Icon Merry Mountain R.png|180px]]||[[File:MKT Icon Merry Mountain T.png|180px]]||[[File:MKT Icon Merry Mountain RT.png|180px]] | ||
|[[File:MKT Icon | |||
| | |||
|[[File:MKT Icon | |||
| | |||
|[[ | |||
|- | |- | ||
! | ![[Ninja Hideaway]] | ||
|[[File:MKT | |[[{{Tour41}}]]<hr />[[{{Tour49}}]]||[[File:MKT Icon Ninja Hideaway.png|180px]]||[[File:MKT Icon Ninja Hideaway R.png|180px]]||[[File:MKT Icon Ninja Hideaway T.png|180px]]||[[File:MKT Icon Ninja Hideaway RT.png|180px]] | ||
|[[File:MKT Icon | |||
| | |||
|[[File:MKT Icon | |||
| | |||
|[[ | |||
|- | |- | ||
! | ![[Sky-High Sundae]] | ||
|[[File:MKT | |[[{{Tour76}}]]||[[File:MKT Icon Sky-High Sundae.png|180px]]||[[File:MKT Icon Sky-High Sundae R.png|180px]]||[[File:MKT Icon Sky-High Sundae T.png|180px]]||[[File:MKT Icon Sky-High Sundae RT.png|180px]] | ||
|[[File:MKT Icon | |||
|[[File:MKT Icon | |||
| | |||
|[[ | |||
|- | |- | ||
! | ![[Piranha Plant Cove]] | ||
|[[File:MKT | |[[{{Tour89}}]]||[[File:MKT Icon Piranha Plant Cove.png|180px]]||[[File:MKT Icon Piranha Plant Cove R.png|180px]]||[[File:MKT Icon Piranha Plant Cove T.png|180px]]||[[File:MKT Icon Piranha Plant Cove RT.png|180px]] | ||
|[[File:MKT Icon | |||
| | |||
|[[File:MKT Icon | |||
| | |||
|[[ | |||
|- | |- | ||
! | ![[Piranha Plant Cove|Piranha Plant Cove 2]] | ||
|[[File:MKT | |[[{{Tour89}}]]||[[File:MKT Icon Piranha Plant Cove 2.png|180px]]||[[File:MKT Icon Piranha Plant Cove 2R.png|180px]]||[[File:MKT Icon Piranha Plant Cove 2T.png|180px]]||[[File:MKT Icon Piranha Plant Cove 2RT.png|180px]] | ||
|[[File:MKT Icon | |||
|[[File:MKT Icon | |||
| | |||
|[[ | |||
|- | |- | ||
! | ![[Piranha Plant Cove|Piranha Plant Cove 3]] | ||
|[[File:MKT | |[[{{Tour96}}]]||[[File:MKT Icon Piranha Plant Cove 3.png|180px]]||[[File:MKT Icon Piranha Plant Cove 3R.png|180px]]||[[File:MKT Icon Piranha Plant Cove 3T.png|180px]]||[[File:MKT Icon Piranha Plant Cove 3RT.png|180px]] | ||
|[[File:MKT Icon | |||
|[[File:MKT Icon | |||
| | |||
|[[ | |||
|- | |- | ||
! | ![[Yoshi's Island (race course)|Yoshi's Island]] | ||
|[[File:MKT | |[[{{Tour93}}]]||[[File:MKT Icon Yoshi's Island.png|180px]]||[[File:MKT Icon Yoshi's Island R.png|180px]]||[[File:MKT Icon Yoshi's Island T.png|180px]]||[[File:MKT Icon Yoshi's Island RT.png|180px]] | ||
|[[File:MKT Icon | |||
| | |||
|[[File:MKT Icon | |||
| | |||
|[[ | |||
|- | |- | ||
! | ![[Piranha Plant Pipeline]] | ||
|[[File:MKT | |[[{{Tour100}}]]||[[File:MKT Icon Piranha Plant Pipeline.png|180px]]||[[File:MKT Icon Piranha Plant Pipeline R.png|180px]]||[[File:MKT Icon Piranha Plant Pipeline T.png|180px]]||[[File:MKT Icon Piranha Plant Pipeline RT.png|180px]] | ||
|[[File:MKT Icon | |||
| | |||
|[[File:MKT Icon | |||
| | |||
|[[ | |||
|- | |- | ||
! | ![[Squeaky Clean Sprint]] | ||
|[[File:MKT | |[[{{Tour102}}]]||[[File:MKT Icon Squeaky Clean Sprint.png|180px]]||[[File:MKT Icon Squeaky Clean Sprint R.png|180px]]||[[File:MKT Icon Squeaky Clean Sprint T.png|180px]]||[[File:MKT Icon Squeaky Clean Sprint RT.png|180px]] | ||
|[[File:MKT Icon | |} | ||
| | |||
|[[File:MKT Icon | ====Remix==== | ||
| | ''Mario Kart Tour'' introduces a new category of course called [[remix course]]s, which have the "RMX" prefix prepended to their names. These courses have their designs taken from the ''[[Super Mario Kart]]'' course environments (with the exception of RMX Bowser's Castle 1, which is instead based on {{classic-link|GBA|Bowser's Castle 1}}), but feature a completely new layout, with each one centering around a particular obstacle (namely the blocks in RMX Mario Circuit 1, the [[ramp]]s in the RMX Choco Island courses, the [[Ring (Mario Kart series)|Star Ring]]s in RMX Rainbow Road 1, the [[Mushroom Trampoline]]s in RMX Rainbow Road 2, the [[Water Geyser]]s in RMX Vanilla Lake 1, the igloos in RMX Vanilla Lake 2, the stairs in RMX Ghost Valley 1, the conveyor belts in RMX Bowser's Castle 1, and the lily pads in RMX Donut Plains 1). There are ten remix courses in the game. | ||
|[[ | {|class="wikitable"align=center width=100% cellspacing=0 border=1 cellpadding=3 style="border-collapse:collapse;text-align:center;font-size:100%;" | ||
| | |-style="background:#ABC" | ||
|width=16%|'''Course''' | |||
| | |width=20%|'''Debut tour<hr />R/T debut tour''' | ||
|width=16%|'''Normal version''' | |||
|width=16%|'''R variation''' | |||
|width=16%|'''T variation''' | |||
|width=16%|'''R/T variation''' | |||
|- | |- | ||
! | ![[RMX Mario Circuit 1]] | ||
|[[File:MKT | |[[{{Tour12}}]]<hr />[[{{Tour15}}]]||[[File:MKT Icon RMX Mario Circuit 1.png|180px]]||[[File:MKT Icon RMX Mario Circuit 1R.png|180px]]||[[File:MKT Icon RMX Mario Circuit 1T.png|180px]]||[[File:MKT Icon RMX Mario Circuit 1RT.png|180px]] | ||
|[[File:MKT Icon | |||
| | |||
|[[File:MKT Icon | |||
| | |||
|[[ | |||
|- | |- | ||
! | ![[RMX Choco Island 1]] | ||
|[[File: | |[[{{Tour17}}]]<hr />[[{{Tour44}}]]||[[File:MKT Icon RMX Choco Island 1.png|180px]]||[[File:MKT Icon RMX Choco Island 1R.png|180px]]||[[File:MKT Icon RMX Choco Island 1T.png|180px]]||[[File:MKT Icon RMX Choco Island 1RT.png|180px]] | ||
|[[File:MKT Icon | |||
| | |||
|[[File:MKT Icon | |||
| | |||
|[[ | |||
|- | |- | ||
! | ![[RMX Choco Island 2]] | ||
|[[File: | |[[{{Tour37}}]]<hr />[[{{Tour90}}]]||[[File:MKT Icon RMX Choco Island 2.png|180px]]||[[File:MKT Icon RMX Choco Island 2R.png|180px]]||[[File:MKT Icon RMX Choco Island 2T.png|180px]]||[[File:MKT Icon RMX Choco Island 2RT.png|180px]] | ||
|[[File:MKT Icon | |||
|[[File:MKT Icon | |||
| | |||
|[[ | |||
|- | |- | ||
! | ![[RMX Rainbow Road 1]] | ||
|[[File:MKT | |[[{{Tour26}}]]<hr />[[{{Tour31}}]]||[[File:MKT Icon RMX Rainbow Road 1.png|180px]]||[[File:MKT Icon RMX Rainbow Road 1R.png|180px]]||[[File:MKT Icon RMX Rainbow Road 1T.png|180px]]||[[File:MKT Icon RMX Rainbow Road 1RT.png|180px]] | ||
|[[File:MKT Icon | |||
|[[File:MKT Icon | |||
| | |||
|[[ | |||
|- | |- | ||
! | ![[RMX Rainbow Road 2]] | ||
|[[File:MKT | |[[{{Tour34}}]]<hr />[[{{Tour57}}]]||[[File:MKT Icon RMX Rainbow Road 2.png|180px]]||[[File:MKT Icon RMX Rainbow Road 2R.png|180px]]||[[File:MKT Icon RMX Rainbow Road 2T.png|180px]]||[[File:MKT Icon RMX Rainbow Road 2RT.png|180px]] | ||
|[[File:MKT Icon | |||
| | |||
|[[File:MKT Icon | |||
| | |||
|[[ | |||
|- | |- | ||
! | ![[RMX Vanilla Lake 1]] | ||
|[[File:MKT | |[[{{Tour50}}]]<hr />[[{{Tour104}}]]||[[File:MKT Icon RMX Vanilla Lake 1.png|180px]]||[[File:MKT Icon RMX Vanilla Lake 1R.png|180px]]||[[File:MKT Icon RMX Vanilla Lake 1T.png|180px]]||[[File:MKT Icon RMX Vanilla Lake 1RT.png|180px]] | ||
|[[File:MKT Icon | |||
||[[File:MKT Icon | |||
| | |||
|[[ | |||
|- | |- | ||
! | ![[RMX Vanilla Lake 2]] | ||
|[[File:MKT | |[[{{Tour104}}]]||[[File:MKT Icon RMX Vanilla Lake 2.png|180px]]||[[File:MKT Icon RMX Vanilla Lake 2R.png|180px]]||[[File:MKT Icon RMX Vanilla Lake 2T.png|180px]]||[[File:MKT Icon RMX Vanilla Lake 2RT.png|180px]] | ||
|[[File:MKT Icon | |||
||[[File:MKT Icon | |||
| | |||
|[[ | |||
|- | |- | ||
! | ![[RMX Ghost Valley 1]] | ||
|[[File:MKT | |[[{{Tour51}}]]<hr />[[{{Tour56}}]]||[[File:MKT Icon RMX Ghost Valley 1.png|180px]]||[[File:MKT Icon RMX Ghost Valley 1R.png|180px]]||[[File:MKT Icon RMX Ghost Valley 1T.png|180px]]||[[File:MKT Icon RMX Ghost Valley 1RT.png|180px]] | ||
|[[File:MKT Icon | |||
||[[File:MKT Icon | |||
| | |||
|[[ | |||
|- | |- | ||
! | ![[RMX Bowser's Castle 1]] | ||
|[[File: | |[[{{Tour77}}]]<hr />[[{{Tour95}}]]||[[File:MKT Icon RMX Bowser's Castle 1.png|180px]]||[[File:MKT Icon RMX Bowser's Castle 1R.png|180px]]||[[File:MKT Icon RMX Bowser's Castle 1T.png|180px]]||[[File:MKT Icon RMX Bowser's Castle 1RT.png|180px]] | ||
|[[File:MKT Icon | |||
||[[File:MKT Icon | |||
| | |||
|[[ | |||
|- | |- | ||
! | ![[RMX Donut Plains 1]] | ||
|[[File: | |[[{{Tour80}}]]||[[File:MKT Icon RMX Donut Plains 1.png|180px]]||[[File:MKT Icon RMX Donut Plains 1R.png|180px]]||[[File:MKT Icon RMX Donut Plains 1T.png|180px]]||[[File:MKT Icon RMX Donut Plains 1RT.png|180px]] | ||
|[[File:MKT Icon | |} | ||
| | |||
||[[File:MKT Icon | ====Classic==== | ||
| | There are 72 [[classic course]]s in ''Mario Kart Tour'' (73 if counting [[N64 Kalimari Desert|N64 Kalimari Desert 2]] separately from N64 Kalimari Desert). There are no classic courses from ''[[Mario Kart 8]]'', making this the first mainline ''Mario Kart'' game since ''Mario Kart: Double Dash!!'' to not have at least one classic course from every previous mainline ''Mario Kart'' game. Despite this, several classic courses that appeared in ''Mario Kart 8'' retain much of their design and layout from that game's version of the course, though others do not. ''Mario Kart Tour'' features three fifths of all courses featured in the mainline series prior to ''Mario Kart 8''. | ||
| | Like in ''Mario Kart 8'' and ''Mario Kart 8 Deluxe'', the [[Finish line (object)|finish line]] banners for certain classic courses use the classic ''Mario Kart'' logo. The courses from SNES to GCN, as well as remix courses, use an updated version of the classic logo, while the courses from DS to 3DS, as well as the second section of N64 Kalimari Desert 2 and the second banner in the R/T variant of [[GCN Baby Park]], use the current logo. [[GCN DK Mountain|DK Mountain]] is an exception to this, as despite it being a GCN course, the banner uses the current logo instead of the updated classic logo. | ||
| | =====''[[Super Mario Kart]]'' ([[Super Nintendo Entertainment System|SNES]])===== | ||
| | Fifteen courses return from ''Super Mario Kart'', with the only absent courses from this game being [[Bowser Castle 1]], [[Bowser Castle 2]], [[Koopa Beach 1]], [[Mario Circuit 4]], and [[Ghost Valley 3]]. | ||
Mario Circuit 1, Choco Island 2, Donut Plains 1, and Koopa Troopa Beach 2 return as classic courses from ''Mario Kart DS'', Ghost Valley 2 and Mario Circuit 3 return from ''Mario Kart Wii'', Mario Circuit 2 and Rainbow Road return from ''Mario Kart 7'' (with Rainbow Road also returning from ''Mario Kart 8''), Donut Plains 3 returns from ''Mario Kart 8'', and Ghost Valley 1, Choco Island 1, Donut Plains 2, Vanilla Lake 1, Bowser Castle 3, and Vanilla Lake 2 make their 3D debut as classic courses. | |||
{|class="wikitable"align=center width=100% cellspacing=0 border=1 cellpadding=3 style="border-collapse:collapse;text-align:center;font-size:100%;" | |||
|-style="background:#ABC" | |||
|width=16%|'''Course''' | |||
|width=20%|'''Debut tour<hr />R/T debut tour''' | |||
|width=16%|'''Normal version''' | |||
|width=16%|'''R variation''' | |||
|width=16%|'''T variation''' | |||
|width=16%|'''R/T variation''' | |||
|- | |- | ||
! | ![[SNES Mario Circuit 1|Mario Circuit 1]] | ||
|[[File: | |[[{{Tour1}}]]<hr />[[{{Tour7}}]]||[[File:MKT Icon SNES Mario Circuit 1.png|180px]]||[[File:MKT Icon SNES Mario Circuit 1R.png|180px]]||[[File:MKT Icon SNES Mario Circuit 1T.png|180px]]||[[File:MKT Icon SNES Mario Circuit 1RT.png|180px]] | ||
|[[File:MKT Icon | |||
|[[File:MKT Icon | |||
| | |||
|[[ | |||
|- | |- | ||
! | ![[SNES Donut Plains 1|Donut Plains 1]] | ||
|[[File:MKT | |[[{{Tour14}}]]<hr />[[{{Tour15}}]]||[[File:MKT Icon SNES Donut Plains 1.png|180px]]||[[File:MKT Icon SNES Donut Plains 1R.png|180px]]||[[File:MKT Icon SNES Donut Plains 1T.png|180px]]||[[File:MKT Icon SNES Donut Plains 1RT.png|180px]] | ||
|[[File:MKT Icon | |||
|[[File:MKT Icon | |||
| | |||
|[[ | |||
|- | |- | ||
! | ![[SNES Ghost Valley 1|Ghost Valley 1]] | ||
|[[File:MKT | |[[{{Tour3}}]]<hr />[[{{Tour10}}]]||[[File:MKT Icon SNES Ghost Valley 1.png|180px]]||[[File:MKT Icon SNES Ghost Valley 1R.png|180px]]||[[File:MKT Icon SNES Ghost Valley 1T.png|180px]]||[[File:MKT Icon SNES Ghost Valley 1RT.png|180px]] | ||
|[[File:MKT Icon | |||
|[[File:MKT Icon | |||
| | |||
|[[ | |||
|- | |- | ||
! | ![[SNES Mario Circuit 2|Mario Circuit 2]] | ||
|[[File:MKT | |[[{{Tour2}}]]<hr />[[{{Tour8}}]]||[[File:MKT Icon SNES Mario Circuit 2.png|180px]]||[[File:MKT Icon SNES Mario Circuit 2R.png|180px]]||[[File:MKT Icon SNES Mario Circuit 2T.png|180px]]||[[File:MKT Icon SNES Mario Circuit 2RT.png|180px]] | ||
|[[File:MKT Icon | |||
| | |||
|[[File:MKT Icon | |||
| | |||
|[[ | |||
|- | |- | ||
! | ![[SNES Choco Island 1|Choco Island 1]] | ||
|[[File:MKT | |[[{{Tour19}}]]<hr />[[{{Tour54}}]]||[[File:MKT Icon SNES Choco Island 1.png|180px]]||[[File:MKT Icon SNES Choco Island 1R.png|180px]]||[[File:MKT Icon SNES Choco Island 1T.png|180px]]||[[File:MKT Icon SNES Choco Island 1RT.png|180px]] | ||
|[[File:MKT Icon | |||
||[[File:MKT Icon | |||
| | |||
|[[ | |||
|- | |- | ||
! | ![[SNES Ghost Valley 2|Ghost Valley 2]] | ||
|[[File:MKT | |[[{{Tour78}}]]<hr /> [[{{Tour81}}]]||[[File:MKT Icon SNES Ghost Valley 2.png|180px]]||[[File:MKT Icon SNES Ghost Valley 2R.png|180px]]||[[File:MKT Icon SNES Ghost Valley 2T.png|180px]]||[[File:MKT Icon SNES Ghost Valley 2RT.png|180px]] | ||
|[[File:MKT Icon | |||
|[[File:MKT Icon | |||
| | |||
|[[ | |||
|- | |- | ||
! | ![[SNES Donut Plains 2|Donut Plains 2]] | ||
|[[File:MKT | |[[{{Tour36}}]]<hr />[[{{Tour40}}]]||[[File:MKT Icon SNES Donut Plains 2.png|180px]]||[[File:MKT Icon SNES Donut Plains 2R.png|180px]]||[[File:MKT Icon SNES Donut Plains 2T.png|180px]]||[[File:MKT Icon SNES Donut Plains 2RT.png|180px]] | ||
|[[File:MKT Icon | |||
|[[File:MKT Icon | |||
| | |||
|[[ | |||
|- | |- | ||
! | ![[SNES Mario Circuit 3|Mario Circuit 3]] | ||
|[[File: | |[[{{Tour4}}]]<hr />[[{{Tour11}}]]||[[File:MKT Icon SNES Mario Circuit 3.png|180px]]||[[File:MKT Icon SNES Mario Circuit 3R.png|180px]]||[[File:MKT Icon SNES Mario Circuit 3T.png|180px]]||[[File:MKT Icon SNES Mario Circuit 3RT.png|180px]] | ||
|[[File:MKT Icon | |||
||[[File:MKT Icon | |||
| | |||
|[[ | |||
|- | |- | ||
! | ![[SNES Choco Island 2|Choco Island 2]] | ||
|[[File: | |[[{{Tour2}}]]<hr />[[{{Tour9}}]]||[[File:MKT Icon SNES Choco Island 2.png|180px]]||[[File:MKT Icon SNES Choco Island 2R.png|180px]]||[[File:MKT Icon SNES Choco Island 2T.png|180px]]||[[File:MKT Icon SNES Choco Island 2RT.png|180px]] | ||
|[[File:MKT Icon | |||
||[[File:MKT Icon | |||
| | |||
|[[ | |||
|- | |- | ||
! | ![[SNES Vanilla Lake 1|Vanilla Lake 1]] | ||
|[[File:MKT | |[[{{Tour9}}]]<hr />[[{{Tour16}}]]||[[File:MKT Icon SNES Vanilla Lake 1.png|180px]]||[[File:MKT Icon SNES Vanilla Lake 1R.png|180px]]||[[File:MKT Icon SNES Vanilla Lake 1T.png|180px]]||[[File:MKT Icon SNES Vanilla Lake 1RT.png|180px]] | ||
|[[File:MKT Icon | |||
|[[File:MKT Icon | |||
| | |||
|[[ | |||
|- | |- | ||
! | ![[SNES Bowser Castle 3|Bowser Castle 3]] | ||
|[[File:MKT | |[[{{Tour95}}]]||[[File:MKT Icon SNES Bowser Castle 3.png|180px]]||[[File:MKT Icon SNES Bowser Castle 3R.png|180px]]||[[File:MKT Icon SNES Bowser Castle 3T.png|180px]]||[[File:MKT Icon SNES Bowser Castle 3RT.png|180px]] | ||
|[[File:MKT Icon | |||
|[[File:MKT Icon | |||
| | |||
|[[ | |||
|- | |- | ||
! | ![[SNES Donut Plains 3|Donut Plains 3]] | ||
|[[File: | |[[{{Tour81}}]]||[[File:MKT Icon SNES Donut Plains 3.png|180px]]||[[File:MKT Icon SNES Donut Plains 3R.png|180px]]||[[File:MKT Icon SNES Donut Plains 3T.png|180px]]||[[File:MKT Icon SNES Donut Plains 3RT.png|180px]] | ||
|[[File:MKT Icon | |||
| | |||
|[[File:MKT Icon | |||
| | |||
|[[ | |||
|- | |- | ||
! | ![[SNES Koopa Troopa Beach 2|Koopa Troopa Beach 2]] | ||
|[[File: | |[[{{Tour21}}]]<hr />[[{{Tour101}}]]||[[File:MKT Icon SNES Koopa Troopa Beach 2.png|180px]]||[[File:MKT Icon SNES Koopa Troopa Beach 2R.png|180px]]||[[File:MKT Icon SNES Koopa Troopa Beach 2T.png|180px]]||[[File:MKT Icon SNES Koopa Troopa Beach 2RT.png|180px]] | ||
|[[File:MKT Icon | |||
| | |||
|[[File:MKT Icon | |||
|- | |- | ||
! | ![[SNES Vanilla Lake 2|Vanilla Lake 2]] | ||
|[[File:MKT | |[[{{Tour58}}]]<hr />[[{{Tour104}}]]||[[File:MKT Icon SNES Vanilla Lake 2.png|180px]]||[[File:MKT Icon SNES Vanilla Lake 2R.png|180px]]||[[File:MKT Icon SNES Vanilla Lake 2T.png|180px]]||[[File:MKT Icon SNES Vanilla Lake 2RT.png|180px]] | ||
|[[File:MKT Icon | |||
| | |||
|[[File:MKT Icon | |||
|- | |- | ||
! | ![[SNES Rainbow Road|Rainbow Road]] | ||
| | |[[{{Tour2}}]]<hr />[[{{Tour5}}]]||[[File:MKT Icon SNES Rainbow Road.png|180px]]||[[File:MKT Icon SNES Rainbow Road R.png|180px]]||[[File:MKT Icon SNES Rainbow Road T.png|180px]]||[[File:MKT Icon SNES Rainbow Road RT.png|180px]] | ||
| | |||
| | |||
| | |||
| | |||
| | |||
| | |||
| | |||
| | |||
| | |||
| | |||
| | |||
| | |||
| | |||
|} | |} | ||
== | =====''[[Mario Kart 64]]'' ([[Nintendo 64|N64]])===== | ||
{|class=" | Eight courses return from ''Mario Kart 64'', with Frappe Snowland and Choco Mountain returning as classic courses from ''Mario Kart DS'', Mario Raceway returning from ''Mario Kart Wii'', Luigi Raceway, Koopa Troopa Beach, and Kalimari Desert returning from ''Mario Kart 7'', and Royal Raceway and Yoshi Valley returning from ''Mario Kart 8''. This game also notably introduces a second variation of Kalimari Desert known as Kalimari Desert 2, which, despite being a reroute of the original Kalimari Desert new to ''Mario Kart Tour'', is categorized as an N64 course in-game. | ||
|- style="background: # | {|class="wikitable"align=center width=100% cellspacing=0 border=1 cellpadding=3 style="border-collapse:collapse;text-align:center;font-size:100%;" | ||
|-style="background:#ABC" | |||
|width=16%|'''Course''' | |||
|width=20%|'''Debut tour<hr />R/T debut tour''' | |||
|width=16%|'''Normal version''' | |||
|width=16%|'''R variation''' | |||
|width=16%|'''T variation''' | |||
|width=16%|'''R/T variation''' | |||
|- | |- | ||
! | ![[N64 Luigi Raceway|Luigi Raceway]] | ||
|[[File:MKT Icon | |[[{{Tour78}}]]<hr />[[{{Tour91}}]]||[[File:MKT Icon N64 Luigi Raceway.png|180px]]||[[File:MKT Icon N64 Luigi Raceway R.png|180px]]||[[File:MKT Icon N64 Luigi Raceway T.png|180px]]||[[File:MKT Icon N64 Luigi Raceway RT.png|180px]] | ||
|[[ | |||
| | |||
|[[File:MKT Icon | |||
|- | |- | ||
! | ![[N64 Koopa Troopa Beach|Koopa Troopa Beach]] | ||
|[[File:MKT Icon | |[[{{Tour1}}]]<hr />[[{{Tour11}}]]||[[File:MKT Icon N64 Koopa Troopa Beach.png|180px]]||[[File:MKT Icon N64 Koopa Troopa Beach R.png|180px]]||[[File:MKT Icon N64 Koopa Troopa Beach T.png|180px]]||[[File:MKT Icon N64 Koopa Troopa Beach RT.png|180px]] | ||
|[[ | |||
| | |||
|[[File:MKT Icon | |||
|- | |- | ||
! | ![[N64 Kalimari Desert|Kalimari Desert]] | ||
|[[File:MKT Icon | |[[{{Tour2}}]]<hr />[[{{Tour7}}]]||[[File:MKT Icon N64 Kalimari Desert.png|180px]]||[[File:MKT Icon N64 Kalimari Desert R.png|180px]]||[[File:MKT Icon N64 Kalimari Desert T.png|180px]]||[[File:MKT Icon N64 Kalimari Desert RT.png|180px]] | ||
|[[ | |||
| | |||
|[[File:MKT Icon | |||
|- | |- | ||
! | ![[N64 Kalimari Desert#N64 Kalimari Desert 2|Kalimari Desert 2]] | ||
|[[File:MKT Icon | |[[{{Tour23}}]]<hr />[[{{Tour56}}]]||[[File:MKT Icon N64 Kalimari Desert 2.png|180px]]||[[File:MKT Icon N64 Kalimari Desert 2R.png|180px]]||[[File:MKT Icon N64 Kalimari Desert 2T.png|180px]]||[[File:MKT Icon N64 Kalimari Desert 2RT.png|180px]] | ||
|[[ | |||
| | |||
|[[File:MKT Icon | |||
|- | |- | ||
! | ![[N64 Frappe Snowland|Frappe Snowland]] | ||
|[[File:MKT Icon | |[[{{Tour9}}]]<hr />[[{{Tour11}}]]||[[File:MKT Icon N64 Frappe Snowland.png|180px]]||[[File:MKT Icon N64 Frappe Snowland R.png|180px]]||[[File:MKT Icon N64 Frappe Snowland T.png|180px]]||[[File:MKT Icon N64 Frappe Snowland RT.png|180px]] | ||
|[[ | |||
| | |||
|[[File:MKT Icon | |||
|- | |- | ||
! | ![[N64 Choco Mountain|Choco Mountain]] | ||
|[[File:MKT Icon | |[[{{Tour22}}]]<hr />[[{{Tour45}}]]||[[File:MKT Icon N64 Choco Mountain.png|180px]]||[[File:MKT Icon N64 Choco Mountain R.png|180px]]||[[File:MKT Icon N64 Choco Mountain T.png|180px]]||[[File:MKT Icon N64 Choco Mountain RT.png|180px]] | ||
|[[ | |||
| | |||
|[[File:MKT Icon | |||
|- | |- | ||
! | ![[N64 Mario Raceway|Mario Raceway]] | ||
|[[File:MKT Icon | |[[{{Tour98}}]]||[[File:MKT Icon N64 Mario Raceway.png|180px]]||[[File:MKT Icon N64 Mario Raceway R.png|180px]]||[[File:MKT Icon N64 Mario Raceway T.png|180px]]||[[File:MKT Icon N64 Mario Raceway RT.png|180px]] | ||
|[[ | |||
| | |||
|[[File:MKT Icon | |||
|- | |- | ||
! | ![[N64 Royal Raceway|Royal Raceway]] | ||
|[[File:MKT Icon | |[[{{Tour20}}]]<hr />[[{{Tour40}}]]||[[File:MKT Icon N64 Royal Raceway.png|180px]]||[[File:MKT Icon N64 Royal Raceway R.png|180px]]||[[File:MKT Icon N64 Royal Raceway T.png|180px]]||[[File:MKT Icon N64 Royal Raceway RT.png|180px]] | ||
|[[ | |||
| | |||
|[[File:MKT Icon | |||
|- | |- | ||
! | ![[N64 Yoshi Valley|Yoshi Valley]] | ||
|[[File:MKT Icon | |[[{{Tour67}}]]<hr />[[{{Tour93}}]]||[[File:MKT Icon N64 Yoshi Valley.png|180px]]||[[File:MKT Icon N64 Yoshi Valley R.png|180px]]||[[File:MKT Icon N64 Yoshi Valley T.png|180px]]||[[File:MKT Icon N64 Yoshi Valley RT.png|180px]] | ||
|[[ | |} | ||
| style="background: # | |||
| | =====''[[Mario Kart: Super Circuit]]'' ([[Game Boy Advance|GBA]])===== | ||
| | Fourteen courses return from ''Mario Kart: Super Circuit'', with the only absent courses from this game being [[GBA Shy Guy Beach|Shy Guy Beach]], [[GBA Mario Circuit|Mario Circuit]], [[GBA Cheese Land|Cheese Land]], [[GBA Ribbon Road|Ribbon Road]], [[Broken Pier]], and [[Rainbow Road (Mario Kart: Super Circuit)|Rainbow Road]]. | ||
| | |||
Peach Circuit, Bowser's Castle 2, Luigi Circuit, and Sky Garden return as classic courses from ''Mario Kart DS'', Bowser's Castle 3 returns from ''Mario Kart Wii'', Bowser's Castle 1 returns from ''Mario Kart 7'', Snow Land returns from the ''Mario Kart 8 Deluxe – Booster Course Pass'', and Riverside Park, Boo Lake, Cheep-Cheep Island, Sunset Wilds, Yoshi Desert, Lakeside Park, and Bowser's Castle 4 make their debut as classic courses. | |||
{|class="wikitable"align=center width=100% cellspacing=0 border=1 cellpadding=3 style="border-collapse:collapse;text-align:center;font-size:100%;" | |||
|-style="background:#ABC" | |||
|width=16%|'''Course''' | |||
|width=20%|'''Debut tour<hr />R/T debut tour''' | |||
|width=16%|'''Normal version''' | |||
|width=16%|'''R variation''' | |||
|width=16%|'''T variation''' | |||
|width=16%|'''R/T variation''' | |||
|- | |- | ||
! | ![[GBA Peach Circuit|Peach Circuit]] | ||
|[[File:MKT Icon | |[[{{Tour97}}]]||[[File:MKT Icon GBA Peach Circuit.png|180px]]||[[File:MKT Icon GBA Peach Circuit R.png|180px]]||[[File:MKT Icon GBA Peach Circuit T.png|180px]]||[[File:MKT Icon GBA Peach Circuit RT.png|180px]] | ||
|[[ | |||
|[[File:MKT Icon | |||
| | |||
| | |||
|- | |- | ||
! | ![[GBA Riverside Park|Riverside Park]] | ||
|[[File:MKT Icon | |[[{{Tour83}}]]||[[File:MKT Icon GBA Riverside Park.png|180px]]||[[File:MKT Icon GBA Riverside Park R.png|180px]]||[[File:MKT Icon GBA Riverside Park T.png|180px]]||[[File:MKT Icon GBA Riverside Park RT.png|180px]] | ||
|[[ | |||
|[[File:MKT Icon | |||
| | |||
| | |||
|- | |- | ||
! | ![[GBA Bowser's Castle 1|Bowser's Castle 1]] | ||
|[[File:MKT Icon | |[[{{Tour1}}]]<hr />[[{{Tour6}}]]||[[File:MKT Icon GBA Bowser's Castle 1.png|180px]]||[[File:MKT Icon GBA Bowser's Castle 1R.png|180px]]||[[File:MKT Icon GBA Bowser's Castle 1T.png|180px]]||[[File:MKT Icon GBA Bowser's Castle 1RT.png|180px]] | ||
|[[ | |||
|[[File:MKT Icon | |||
| | |||
| | |||
|- | |- | ||
! | ![[GBA Boo Lake|Boo Lake]] | ||
|[[File:MKT Icon | |[[{{Tour81}}]]||[[File:MKT Icon GBA Boo Lake.png|180px]]||[[File:MKT Icon GBA Boo Lake R.png|180px]]||[[File:MKT Icon GBA Boo Lake T.png|180px]]||[[File:MKT Icon GBA Boo Lake RT.png|180px]] | ||
|[[ | |||
| | |||
|[[File:MKT Icon | |||
|- | |- | ||
! | ![[GBA Bowser's Castle 2|Bowser's Castle 2]] | ||
|[[File:MKT Icon | |[[{{Tour14}}]]<hr />[[{{Tour16}}]]||[[File:MKT Icon GBA Bowser's Castle 2.png|180px]]||[[File:MKT Icon GBA Bowser's Castle 2R.png|180px]]||[[File:MKT Icon GBA Bowser's Castle 2T.png|180px]]||[[File:MKT Icon GBA Bowser's Castle 2RT.png|180px]] | ||
|[[ | |||
|[[File:MKT Icon | |||
| | |||
| | |||
|- | |- | ||
! | ![[GBA Luigi Circuit|Luigi Circuit]] | ||
|[[File:MKT Icon | |[[{{Tour98}}]]||[[File:MKT Icon GBA Luigi Circuit.png|180px]]||[[File:MKT Icon GBA Luigi Circuit R.png|180px]]||[[File:MKT Icon GBA Luigi Circuit T.png|180px]]||[[File:MKT Icon GBA Luigi Circuit RT.png|180px]] | ||
|[[ | |||
| | |||
|[[File:MKT Icon | |||
|- | |- | ||
! | ![[GBA Sky Garden|Sky Garden]] | ||
|[[File:MKT Icon | |[[{{Tour64}}]]<hr/>[[{{Tour86}}]]||[[File:MKT Icon GBA Sky Garden.png|180px]]||[[File:MKT Icon GBA Sky Garden R.png|180px]]||[[File:MKT Icon GBA Sky Garden T.png|180px]]||[[File:MKT Icon GBA Sky Garden RT.png|180px]] | ||
|[[ | |||
| | |||
|[[File:MKT Icon | |||
|- | |- | ||
! | ![[GBA Cheep-Cheep Island|Cheep-Cheep Island]] | ||
|[[File:MKT Icon | |[[{{Tour47}}]]<hr/>[[{{Tour86}}]]||[[File:MKT Icon GBA Cheep-Cheep Island.png|180px]]||[[File:MKT Icon GBA Cheep-Cheep Island R.png|180px]]||[[File:MKT Icon GBA Cheep-Cheep Island T.png|180px]]||[[File:MKT Icon GBA Cheep-Cheep Island RT.png|180px]] | ||
|[[ | |||
| | |||
|[[File:MKT Icon | |||
|- | |- | ||
! | ![[GBA Sunset Wilds|Sunset Wilds]] | ||
|[[File:MKT Icon | |[[{{Tour30}}]]<hr />[[{{Tour31}}]]||[[File:MKT Icon GBA Sunset Wilds.png|180px]]||[[File:MKT Icon GBA Sunset Wilds R.png|180px]]||[[File:MKT Icon GBA Sunset Wilds T.png|180px]]||[[File:MKT Icon GBA Sunset Wilds RT.png|180px]] | ||
|[[ | |||
| | |||
|[[File:MKT Icon | |||
|- | |- | ||
! | ![[GBA Snow Land|Snow Land]] | ||
|[[File:MKT Icon | |[[{{Tour85}}]]||[[File:MKT Icon GBA Snow Land.png|180px]]|||[[File:MKT Icon GBA Snow Land R.png|180px]]||[[File:MKT Icon GBA Snow Land T.png|180px]]||[[File:MKT Icon GBA Snow Land RT.png|180px]] | ||
|[[ | |||
| | |||
|[[File:MKT Icon | |||
|- | |- | ||
! | ![[GBA Yoshi Desert|Yoshi Desert]] | ||
|[[File:MKT Icon | |[[{{Tour93}}]]||[[File:MKT Icon GBA Yoshi Desert.png|180px]]||[[File:MKT Icon GBA Yoshi Desert R.png|180px]]||[[File:MKT Icon GBA Yoshi Desert T.png|180px]]||[[File:MKT Icon GBA Yoshi Desert RT.png|180px]] | ||
|[[ | |||
| | |||
|[[File:MKT Icon | |||
| | |||
|Yoshi | |||
|- | |- | ||
! | ![[GBA Bowser's Castle 3|Bowser's Castle 3]] | ||
|[[File:MKT Icon | |[[{{Tour77}}]]<hr/>[[{{Tour86}}]]||[[File:MKT Icon GBA Bowser's Castle 3.png|180px]]||[[File:MKT Icon GBA Bowser's Castle 3R.png|180px]]||[[File:MKT Icon GBA Bowser's Castle 3T.png|180px]]||[[File:MKT Icon GBA Bowser's Castle 3RT.png|180px]] | ||
|[[ | |||
| | |||
|[[File:MKT Icon | |||
|- | |- | ||
! | ![[GBA Lakeside Park|Lakeside Park]] | ||
|[[File:MKT Icon | |[[{{Tour101}}]]||[[File:MKT Icon GBA Lakeside Park.png|180px]]||[[File:MKT Icon GBA Lakeside Park R.png|180px]]||[[File:MKT Icon GBA Lakeside Park T.png|180px]]||[[File:MKT Icon GBA Lakeside Park RT.png|180px]] | ||
|[[ | |||
| | |||
|[[File:MKT Icon | |||
|- | |- | ||
! | ![[GBA Bowser's Castle 4|Bowser's Castle 4]] | ||
|[[File:MKT Icon | |[[{{Tour95}}]] <small>(N and R variants)</small><br>N/A <small>(T variant)</small><hr/>N/A||[[File:MKT Icon GBA Bowser's Castle 4.png|180px]]||[[File:MKT Icon GBA Bowser's Castle 4R.png|180px]]||N/A||N/A | ||
|[[ | |} | ||
| style="background: # | |||
| | =====''[[Mario Kart: Double Dash!!]]'' ([[Nintendo GameCube|GCN]])===== | ||
| | Seven courses return from ''Mario Kart: Double Dash!!'', with Mushroom Bridge returning as a classic course from ''Mario Kart DS'', Waluigi Stadium and DK Mountain returning from ''Mario Kart Wii'' (with Waluigi Stadium also returning from the ''Mario Kart 8 Deluxe – Booster Course Pass''), Daisy Cruiser and Dino Dino Jungle returning from ''Mario Kart 7'', and Baby Park and Yoshi Circuit returning from both ''Mario Kart DS'' and ''Mario Kart 8''. | ||
| | {|class="wikitable"align=center width=100% cellspacing=0 border=1 cellpadding=3 style="border-collapse:collapse;text-align:center;font-size:100%;" | ||
|-style="background:#ABC" | |||
|width=16%|'''Course''' | |||
|width=20%|'''Debut tour<hr />R/T debut tour''' | |||
|width=16%|'''Normal version''' | |||
|width=16%|'''R variation''' | |||
|width=16%|'''T variation''' | |||
|width=16%|'''R/T variation''' | |||
|- | |- | ||
! | ![[GCN Baby Park|Baby Park]] | ||
|[[File:MKT Icon | |[[{{Tour71}}]]<hr/>[[{{Tour86}}]]||[[File:MKT Icon GCN Baby Park.png|180px]]||[[File:MKT Icon GCN Baby Park R.png|180px]]||[[File:MKT Icon GCN Baby Park T.png|180px]]||[[File:MKT Icon GCN Baby Park RT.png|180px]] | ||
|[[ | |||
| | |||
|[[File:MKT Icon | |||
|- | |- | ||
! | ![[GCN Mushroom Bridge|Mushroom Bridge]] | ||
|[[File:MKT Icon | |[[{{Tour96}}]]||[[File:MKT Icon GCN Mushroom Bridge.png|180px]]||[[File:MKT Icon GCN Mushroom Bridge R.png|180px]]||[[File:MKT Icon GCN Mushroom Bridge T.png|180px]]||[[File:MKT Icon GCN Mushroom Bridge RT.png|180px]] | ||
|[[ | |||
| | |||
|[[File:MKT Icon | |||
|- | |- | ||
! | ![[GCN Daisy Cruiser|Daisy Cruiser]] | ||
|[[File:MKT Icon | |[[{{Tour75}}]]<hr />[[{{Tour101}}]]||[[File:MKT Icon GCN Daisy Cruiser.png|180px]]||[[File:MKT Icon GCN Daisy Cruiser R.png|180px]]||[[File:MKT Icon GCN Daisy Cruiser T.png|180px]]||[[File:MKT Icon GCN Daisy Cruiser RT.png|180px]] | ||
|[[ | |||
| | |||
|[[File:MKT Icon | |||
|- | |- | ||
! | ![[GCN Waluigi Stadium|Waluigi Stadium]] | ||
|[[File:MKT Icon | |[[{{Tour98}}]]||[[File:MKT Icon GCN Waluigi Stadium.png|180px]]||[[File:MKT Icon GCN Waluigi Stadium R.png|180px]]||[[File:MKT Icon GCN Waluigi Stadium T.png|180px]]||[[File:MKT Icon GCN Waluigi Stadium RT.png|180px]] | ||
|[[ | |||
| | |||
|[[File:MKT Icon | |||
|- | |- | ||
! | ![[GCN Yoshi Circuit|Yoshi Circuit]] | ||
|[[File:MKT Icon | |[[{{Tour1}}]]<hr />[[{{Tour6}}]]||[[File:MKT Icon GCN Yoshi Circuit.png|180px]]||[[File:MKT Icon GCN Yoshi Circuit R.png|180px]]||[[File:MKT Icon GCN Yoshi Circuit T.png|180px]]||[[File:MKT Icon GCN Yoshi Circuit RT.png|180px]] | ||
|[[ | |||
| | |||
|[[File:MKT Icon | |||
|- | |- | ||
! | ![[GCN DK Mountain|DK Mountain]] | ||
|[[File:MKT Icon | |[[{{Tour83}}]]||[[File:MKT Icon GCN DK Mountain.png|180px]]||[[File:MKT Icon GCN DK Mountain R.png|180px]]||[[File:MKT Icon GCN DK Mountain T.png|180px]]||[[File:MKT Icon GCN DK Mountain RT.png|180px]] | ||
|[[ | |||
| | |||
|[[File:MKT Icon | |||
|- | |- | ||
! | ![[GCN Dino Dino Jungle|Dino Dino Jungle]] | ||
|[[File:MKT Icon | |[[{{Tour1}}]]<hr />[[{{Tour10}}]]||[[File:MKT Icon GCN Dino Dino Jungle.png|180px]]||[[File:MKT Icon GCN Dino Dino Jungle R.png|180px]]||[[File:MKT Icon GCN Dino Dino Jungle T.png|180px]]||[[File:MKT Icon GCN Dino Dino Jungle RT.png|180px]] | ||
|[[ | |} | ||
| style="background: # | |||
| | =====''[[Mario Kart DS]]'' ([[Nintendo DS|DS]])===== | ||
| | Seven courses return from ''Mario Kart DS'', with Peach Gardens returning as a classic course from ''Mario Kart Wii'', Luigi's Mansion, Waluigi Pinball, DK Pass, and Airship Fortress returning from ''Mario Kart 7'', Shroom Ridge returning from the ''Mario Kart 8 Deluxe – Booster Course Pass'', and Mario Circuit making its debut as a classic course. | ||
| | {|class="wikitable"align=center width=100% cellspacing=0 border=1 cellpadding=3 style="border-collapse:collapse; text-align:center;font-size:100%;" | ||
|-style="background:#ABC" | |||
|width=16%|'''Course''' | |||
|width=20%|'''Debut tour<hr />R/T debut tour''' | |||
|width=16%|'''Normal version''' | |||
|width=16%|'''R variation''' | |||
|width=16%|'''T variation''' | |||
|width=16%|'''R/T variation''' | |||
|- | |- | ||
! | ![[DS Luigi's Mansion|Luigi's Mansion]] | ||
|[[File:MKT Icon | |[[{{Tour3}}]]<hr />[[{{Tour6}}]]||[[File:MKT Icon DS Luigi's Mansion.png|180px]]||[[File:MKT Icon DS Luigi's Mansion R.png|180px]]||[[File:MKT Icon DS Luigi's Mansion T.png|180px]]||[[File:MKT Icon DS Luigi's Mansion RT.png|180px]] | ||
|[[ | |||
| | |||
|[[File:MKT Icon | |||
| | |||
| | |||
|- | |- | ||
! | ![[DS Waluigi Pinball|Waluigi Pinball]] | ||
|[[File:MKT Icon | |[[{{Tour3}}]]<hr />[[{{Tour10}}]]||[[File:MKT Icon DS Waluigi Pinball.png|180px]]||[[File:MKT Icon DS Waluigi Pinball R.png|180px]]||[[File:MKT Icon DS Waluigi Pinball T.png|180px]]||[[File:MKT Icon DS Waluigi Pinball RT.png|180px]] | ||
|[[ | |||
| | |||
|[[File:MKT Icon | |||
|- | |- | ||
! | ![[DS Shroom Ridge|Shroom Ridge]] | ||
|[[File:MKT Icon | |[[{{Tour90}}]]||[[File:MKT Icon DS Shroom Ridge.png|180px]]||[[File:MKT Icon DS Shroom Ridge R.png|180px]]||[[File:MKT Icon DS Shroom Ridge T.png|180px]]||[[File:MKT Icon DS Shroom Ridge RT.png|180px]] | ||
|[[ | |||
|[[File:MKT Icon | |||
| | |||
| | |||
|- | |- | ||
! | ![[DS DK Pass|DK Pass]] | ||
|[[File:MKT Icon | |[[{{Tour5}}]]<hr />[[{{Tour9}}]]||[[File:MKT Icon DS DK Pass.png|180px]]||[[File:MKT Icon DS DK Pass R.png|180px]]||[[File:MKT Icon DS DK Pass T.png|180px]]||[[File:MKT Icon DS DK Pass RT.png|180px]] | ||
|[[ | |||
| | |||
|[[File:MKT Icon | |||
| | |||
| | |||
|- | |- | ||
! | ![[DS Mario Circuit|Mario Circuit]] | ||
|[[File:MKT Icon | |[[{{Tour91}}]]||[[File:MKT Icon DS Mario Circuit.png|180px]]||[[File:MKT Icon DS Mario Circuit R.png|180px]]||[[File:MKT Icon DS Mario Circuit T.png|180px]]||[[File:MKT Icon DS Mario Circuit RT.png|180px]] | ||
|[[ | |||
| | |||
|[[File:MKT Icon | |||
|- | |- | ||
! | ![[DS Airship Fortress|Airship Fortress]] | ||
|[[File:MKT Icon | |[[{{Tour24}}]]<hr />[[{{Tour44}}]]||[[File:MKT Icon DS Airship Fortress.png|180px]]||[[File:MKT Icon DS Airship Fortress R.png|180px]]|||[[File:MKT Icon DS Airship Fortress T.png|180px]]||[[File:MKT Icon DS Airship Fortress RT.png|180px]] | ||
|[[ | |||
| | |||
|[[File:MKT Icon | |||
| | |||
| | |||
|- | |- | ||
! | ![[DS Peach Gardens|Peach Gardens]] | ||
|[[File:MKT Icon | |[[{{Tour84}}]]||[[File:MKT Icon DS Peach Gardens.png|180px]]||[[File:MKT Icon DS Peach Gardens R.png|180px]]||[[File:MKT Icon DS Peach Gardens T.png|180px]]||[[File:MKT Icon DS Peach Gardens RT.png|180px]] | ||
|[[ | |} | ||
| | |||
|[[File:MKT Icon | =====''[[Mario Kart Wii]]'' ([[Wii]])===== | ||
| | Nine courses return from ''Mario Kart Wii''. Mushroom Gorge, Coconut Mall, Koopa Cape, and Maple Treeway return as classic courses from ''Mario Kart 7'' (with Coconut Mall also returning from the ''Mario Kart 8 Deluxe – Booster Course Pass''), while DK Summit, Daisy Circuit, Dry Dry Ruins, Moonview Highway, and Rainbow Road make their debut as classic courses. | ||
| | {|class="wikitable"align=center width=100% cellspacing=0 border=1 cellpadding=3 style="border-collapse:collapse;text-align:center;font-size:100%;" | ||
|-style="background:#ABC" | |||
|width=16%|'''Course''' | |||
|width=20%|'''Debut tour<hr />R/T debut tour''' | |||
|width=16%|'''Normal version''' | |||
|width=16%|'''R variation''' | |||
|width=16%|'''T variation''' | |||
|width=16%|'''R/T variation''' | |||
|- | |- | ||
! | ![[Wii Mushroom Gorge|Mushroom Gorge]] | ||
|[[File:MKT Icon | |[[{{Tour65}}]]<hr />[[{{Tour96}}]]||[[File:MKT Icon Wii Mushroom Gorge.png|180px]]||[[File:MKT Icon Wii Mushroom Gorge R.png|180px]]||[[File:MKT Icon Wii Mushroom Gorge T.png|180px]]||[[File:MKT Icon Wii Mushroom Gorge RT.png|180px]] | ||
|[[ | |||
| | |||
|[[File:MKT Icon | |||
|- | |- | ||
! | ![[Wii Coconut Mall|Coconut Mall]] | ||
|[[File:MKT Icon | |[[{{Tour69}}]]<hr />[[{{Tour90}}]]||[[File:MKT Icon Wii Coconut Mall.png|180px]]||[[File:MKT Icon Wii Coconut Mall R.png|180px]]||[[File:MKT Icon Wii Coconut Mall T.png|180px]]||[[File:MKT Icon Wii Coconut Mall RT.png|180px]] | ||
|[[ | |||
| | |||
|[[File:MKT Icon | |||
|- | |- | ||
! | ![[Wii DK Summit|DK Summit]] | ||
|[[File:MKT Icon | |[[{{Tour38}}]]<hr />[[{{Tour85}}]]||[[File:MKT Icon Wii DK Summit.png|180px]]||[[File:MKT Icon Wii DK Summit R.png|180px]]|||[[File:MKT Icon Wii DK Summit T.png|180px]]||[[File:MKT Icon Wii DK Summit RT.png|180px]] | ||
|[[ | |||
| | |||
|[[File:MKT Icon | |||
| | |||
| | |||
|- | |- | ||
! | ![[Wii Daisy Circuit|Daisy Circuit]] | ||
|[[File:MKT Icon | |[[{{Tour97}}]]||[[File:MKT Icon Wii Daisy Circuit.png|180px]]||[[File:MKT Icon Wii Daisy Circuit R.png|180px]]||[[File:MKT Icon Wii Daisy Circuit T.png|180px]]||[[File:MKT Icon Wii Daisy Circuit RT.png|180px]] | ||
|[[ | |||
| | |||
|[[File:MKT Icon | |||
|- | |- | ||
! | ![[Wii Koopa Cape|Koopa Cape]] | ||
|[[File:MKT Icon | |[[{{Tour70}}]]<hr/>[[{{Tour86}}]]||[[File:MKT Icon Wii Koopa Cape.png|180px]]||[[File:MKT Icon Wii Koopa Cape R.png|180px]]||[[File:MKT Icon Wii Koopa Cape T.png|180px]]||[[File:MKT Icon Wii Koopa Cape RT.png|180px]] | ||
|[[ | |||
| | |||
|[[File:MKT Icon | |||
|- | |- | ||
! | ![[Wii Maple Treeway|Maple Treeway]] | ||
|[[File:MKT Icon | |[[{{Tour29}}]]<hr/>[[{{Tour54}}]]||[[File:MKT Icon Wii Maple Treeway.png|180px]]||[[File:MKT Icon Wii Maple Treeway R.png|180px]]|||[[File:MKT Icon Wii Maple Treeway T.png|180px]]||[[File:MKT Icon Wii Maple Treeway RT.png|180px]] | ||
|[[ | |||
| | |||
|[[File:MKT Icon | |||
| | |||
| | |||
|- | |- | ||
! | ![[Wii Dry Dry Ruins|Dry Dry Ruins]] | ||
|[[File:MKT Icon | |[[{{Tour92}}]]||[[File:MKT Icon Wii Dry Dry Ruins.png|180px]]||[[File:MKT Icon Wii Dry Dry Ruins R.png|180px]]||[[File:MKT Icon Wii Dry Dry Ruins T.png|180px]]||[[File:MKT Icon Wii Dry Dry Ruins RT.png|180px]] | ||
|[[ | |||
| | |||
|[[File:MKT Icon | |||
|- | |- | ||
! | ![[Wii Moonview Highway|Moonview Highway]] | ||
|[[File:MKT Icon | |[[{{Tour99}}]]||[[File:MKT Icon Wii Moonview Highway.png|180px]]||[[File:MKT Icon Wii Moonview Highway R.png|180px]]||[[File:MKT Icon Wii Moonview Highway T.png|180px]]||[[File:MKT Icon Wii Moonview Highway RT.png|180px]] | ||
|[[ | |||
| | |||
|[[File:MKT Icon | |||
|- | |- | ||
! | ![[Wii Rainbow Road|Rainbow Road]] | ||
|[[File:MKT Icon | |[[{{Tour87}}]]||[[File:MKT Icon Wii Rainbow Road.png|180px]]||[[File:MKT Icon Wii Rainbow Road R.png|180px]]||[[File:MKT Icon Wii Rainbow Road T.png|180px]]||[[File:MKT Icon Wii Rainbow Road RT.png|180px]] | ||
|[[ | |} | ||
| | |||
|[[File:MKT Icon | =====''[[Mario Kart 7]]'' ([[Nintendo 3DS|3DS]])===== | ||
| | Twelve courses return from ''Mario Kart 7'', with the only absent courses from this game being [[Wuhu Loop]], [[3DS Music Park|Music Park]], [[Maka Wuhu]], and [[3DS DK Jungle|DK Jungle]]. | ||
| | |||
Piranha Plant Slide and Neo Bowser City return as classic courses from ''Mario Kart 8'', while the remaining courses make their debut as classic courses. | |||
{|class="wikitable"align=center width=100% cellspacing=0 border=1 cellpadding=3 style="border-collapse:collapse;text-align:center;font-size:100%;" | |||
|-style="background:#ABC" | |||
|width=16%|'''Course''' | |||
|width=20%|'''Debut tour<hr />R/T debut tour''' | |||
|width=16%|'''Normal version''' | |||
|width=16%|'''R variation''' | |||
|width=16%|'''T variation''' | |||
|width=16%|'''R/T variation''' | |||
|- | |- | ||
! | ![[3DS Toad Circuit|Toad Circuit]] | ||
|[[File:MKT Icon | |[[{{Tour1}}]]<hr />[[{{Tour8}}]]||[[File:MKT Icon 3DS Toad Circuit.png|180px]]||[[File:MKT Icon 3DS Toad Circuit R.png|180px]]||[[File:MKT Icon 3DS Toad Circuit T.png|180px]]||[[File:MKT Icon 3DS Toad Circuit RT.png|180px]] | ||
|[[ | |||
| | |||
|[[File:MKT Icon | |||
|- | |- | ||
! | ![[3DS Daisy Hills|Daisy Hills]] | ||
|[[File:MKT Icon | |[[{{Tour1}}]]<hr />[[{{Tour5}}]]||[[File:MKT Icon 3DS Daisy Hills.png|180px]]||[[File:MKT Icon 3DS Daisy Hills R.png|180px]]||[[File:MKT Icon 3DS Daisy Hills T.png|180px]]||[[File:MKT Icon 3DS Daisy Hills RT.png|180px]] | ||
|[[ | |||
| | |||
|[[File:MKT Icon | |||
|- | |- | ||
! | ![[3DS Cheep Cheep Lagoon|Cheep Cheep Lagoon]] | ||
|[[File:MKT Icon | |[[{{Tour1}}]]<hr />[[{{Tour7}}]]||[[File:MKT Icon 3DS Cheep Cheep Lagoon.png|180px]]||[[File:MKT Icon 3DS Cheep Cheep Lagoon R.png|180px]]||[[File:MKT Icon 3DS Cheep Cheep Lagoon T.png|180px]]||[[File:MKT Icon 3DS Cheep Cheep Lagoon RT.png|180px]] | ||
|[[ | |||
| | |||
|[[File:MKT Icon | |||
|- | |- | ||
! | ![[3DS Shy Guy Bazaar|Shy Guy Bazaar]] | ||
|[[File:MKT Icon | |[[{{Tour1}}]]<hr />[[{{Tour9}}]]||[[File:MKT Icon 3DS Shy Guy Bazaar.png|180px]]||[[File:MKT Icon 3DS Shy Guy Bazaar R.png|180px]]||[[File:MKT Icon 3DS Shy Guy Bazaar T.png|180px]]||[[File:MKT Icon 3DS Shy Guy Bazaar RT.png|180px]] | ||
|[[ | |||
| | |||
|[[File:MKT Icon | |||
|- | |- | ||
! | ![[3DS Mario Circuit|Mario Circuit]] | ||
|[[File:MKT Icon | |[[{{Tour2}}]]<hr />[[{{Tour5}}]]||[[File:MKT Icon 3DS Mario Circuit.png|180px]]||[[File:MKT Icon 3DS Mario Circuit R.png|180px]]||[[File:MKT Icon 3DS Mario Circuit T.png|180px]]||[[File:MKT Icon 3DS Mario Circuit RT.png|180px]] | ||
|[[ | |||
| | |||
|[[File:MKT Icon | |||
|- | |- | ||
! | ![[3DS Rock Rock Mountain|Rock Rock Mountain]] | ||
|[[File:MKT Icon | |[[{{Tour1}}]]<hr />N/A||[[File:MKT Icon 3DS Rock Rock Mountain.png|180px]]||[[File:MKT Icon 3DS Rock Rock Mountain R.png|180px]]||[[File:MKT Icon 3DS Rock Rock Mountain T.png|180px]]||N/A | ||
|[[ | |||
| | |||
|[[File:MKT Icon | |||
| | |||
| | |||
|- | |- | ||
! | ![[3DS Piranha Plant Slide|Piranha Plant Slide]] | ||
|[[File:MKT Icon | |[[{{Tour74}}]]<hr/>[[{{Tour86}}]]||[[File:MKT Icon 3DS Piranha Plant Slide.png|180px]]||[[File:MKT Icon 3DS Piranha Plant Slide R.png|180px]]||[[File:MKT Icon 3DS Piranha Plant Slide T.png|180px]]||[[File:MKT Icon 3DS Piranha Plant Slide RT.png|180px]] | ||
|[[ | |||
| | |||
|[[File:MKT Icon | |||
|- | |- | ||
! | ![[3DS Wario Shipyard|Wario Shipyard]] | ||
|[[File:MKT Icon | |[[{{Tour62}}]]<hr />[[{{Tour66}}]]||[[File:MKT Icon 3DS Wario Shipyard.png|180px]]||[[File:MKT Icon 3DS Wario Shipyard R.png|180px]]||[[File:MKT Icon 3DS Wario Shipyard T.png|180px]]||[[File:MKT Icon 3DS Wario Shipyard RT.png|180px]] | ||
|[[ | |||
| | |||
|[[File:MKT Icon | |||
|- | |- | ||
! | ![[3DS Neo Bowser City|Neo Bowser City]] | ||
|[[File:MKT Icon | |[[{{Tour2}}]]<hr />[[{{Tour8}}]]||[[File:MKT Icon 3DS Neo Bowser City.png|180px]]||[[File:MKT Icon 3DS Neo Bowser City R.png|180px]]||[[File:MKT Icon 3DS Neo Bowser City T.png|180px]]||[[File:MKT Icon 3DS Neo Bowser City RT.png|180px]] | ||
|[[ | |||
| | |||
|[[File:MKT Icon | |||
|- | |- | ||
! | ![[3DS Rosalina's Ice World|Rosalina's Ice World]] | ||
|[[File:MKT Icon | |[[{{Tour33}}]]<hr />[[{{Tour57}}]]||[[File:MKT Icon 3DS Rosalina's Ice World.png|180px]]||[[File:MKT Icon 3DS Rosalina's Ice World R.png|180px]]||[[File:MKT Icon 3DS Rosalina's Ice World T.png|180px]]||[[File:MKT Icon 3DS Rosalina's Ice World RT.png|180px]] | ||
|[[ | |||
| | |||
|[[File:MKT Icon | |||
|- | |- | ||
! | ![[3DS Bowser's Castle|Bowser's Castle]] | ||
|[[File:MKT Icon | |[[{{Tour60}}]]<hr />[[{{Tour66}}]]||[[File:MKT Icon 3DS Bowser's Castle.png|180px]]||[[File:MKT Icon 3DS Bowser's Castle R.png|180px]]||[[File:MKT Icon 3DS Bowser's Castle T.png|180px]]||[[File:MKT Icon 3DS Bowser's Castle RT.png|180px]] | ||
|[[ | |||
| | |||
|[[File:MKT Icon | |||
| | |||
| | |||
|- | |- | ||
! | ![[3DS Rainbow Road|Rainbow Road]] | ||
|[[File:MKT Icon | |[[{{Tour7}}]]<hr />[[{{Tour13}}]]||[[File:MKT Icon 3DS Rainbow Road.png|180px]]||[[File:MKT Icon 3DS Rainbow Road R.png|180px]]||[[File:MKT Icon 3DS Rainbow Road T.png|180px]]||[[File:MKT Icon 3DS Rainbow Road RT.png|180px]] | ||
|[[ | |} | ||
| style="background: # | |||
| | ===Battle courses=== | ||
| | There are five battle courses in the game, consisting of two new courses and three returning from previous installments, including one each from ''Mario Kart: Super Circuit'', ''Mario Kart: Double Dash!!'', and ''Mario Kart DS''. Similar to the battle courses in ''Mario Kart 8'', the new battle courses are repurposed from their corresponding city courses, albeit with more restricted pathways that can be taken. Among the returning courses, Cookie Land and Twilight House return as classic battle courses from ''Mario Kart Wii'' while Battle Course 1 returns from ''Mario Kart 7''. Rather than each battle course having unique background music, they all use ''[[Mario Kart 8 Deluxe]]''{{'}}s arrangement of [[SNES Battle Course 1]]'s music. | ||
| | {|class="wikitable"align=center width=100% cellspacing=0 border=1 cellpadding=3 style="border-collapse:collapse; text-align:center;font-size:100%;" | ||
|-style="background:#ABC" | |||
|colspan=3|'''New''' | |||
|colspan=3|'''Classic''' | |||
|-style="background: #ABC" | |||
|width=16%|'''Course''' | |||
|width=18%|'''Debut tour''' | |||
|width=16%|'''Image''' | |||
|width=16%|'''Course''' | |||
|width=18%|'''Debut tour''' | |||
|width=16%|'''Image''' | |||
|- | |- | ||
! | ![[Tour New York Minute|New York Minute B]] | ||
|[[File:MKT Icon | |[[{{Tour82}}]] | ||
|[[File:MKT Icon New York Minute B.png|180px]] | |||
| | ![[GBA Battle Course 1]] | ||
|[[File:MKT Icon | |[[{{Tour80}}]] | ||
|[[File:MKT Icon GBA Battle Course 1.png|180px]] | |||
|- | |- | ||
! | ![[Tour Paris Promenade|Paris Promenade B]] | ||
|[[File:MKT Icon | |[[{{Tour94}}]] | ||
|[[File:MKT Icon Paris Promenade B.png|180px]] | |||
| | ![[GCN Cookie Land]] | ||
|[[File:MKT Icon | |[[{{Tour80}}]] | ||
|[[File:MKT Icon GCN Cookie Land.png|180px]] | |||
|- | |- | ||
! | | | ||
|[[File:MKT Icon | | | ||
| | | | ||
![[DS Twilight House]] | |||
|[[{{Tour81}}]] | |||
| | |[[File:MKT Icon DS Twilight House.png|180px]] | ||
| | |} | ||
==Tours== | |||
|[[ | {{main|List of tours in Mario Kart Tour}} | ||
Each tour consists of a series of cups, with each cup containing three courses and a bonus challenge. The featured character of the cup has the preference for every course in it increased by one tier. There are also special Team Rally tours that happen once every six or seven tours, during which all drivers are divided into two teams. Each team has a team captain, which is the driver the team is named after. At the start of a Team Rally tour, the player must choose one of the two teams to join. During a Team Rally, players can collect [[event token|team token]]s on courses, with the winning team being whichever collects the most total team tokens by the end of the tour. | |||
==Drivers== | |||
{{main|List of drivers in Mario Kart Tour}} | |||
{{see also|Mario Kart Tour in-game statistics}} | |||
Counting each Mii Racing Suit separately, there are {{MKT drivers}}<!-- If the number is outdated, update the template instead of changing it here --> playable characters in ''Mario Kart Tour'', the largest number of playable characters in a ''[[Super Mario (franchise)|Super Mario]]'' game. Notable new playable characters to the ''[[Mario Kart (series)|Mario Kart]]'' series include [[Peachette]], [[Pauline]], [[Hammer Bro]], [[Boomerang Bro]], [[Fire Bro]], [[Ice Bro]], [[Monty Mole]], [[Dixie Kong]], [[Captain Toad]], [[Nabbit]], [[King Bob-omb]], [[Kamek]], [[Chargin' Chuck]], and [[Poochy]], with Ice Bro and King Bob-omb also making their first appearances overall as playable characters. Some characters return as playable to the series after being absent from multiple installments: [[Donkey Kong Jr.]] is playable for the first time since ''[[Super Mario Kart]]'', [[Petey Piranha]] is playable for the first time since ''[[Mario Kart: Double Dash!!]]'', and [[Diddy Kong]], [[Birdo]], and [[Funky Kong]] are playable for the first time since ''[[Mario Kart Wii]]''. Excluding characters not from the ''Super Mario'' franchise, only two playable characters from previous mainline ''Mario Kart'' games do not return in ''Mario Kart Tour'', namely [[Koopa Paratroopa]] from ''Mario Kart: Double Dash!!'' and [[Honey Queen]] from ''[[Mario Kart 7]]''. | |||
[[Mii]]s also return from previous ''Mario Kart'' games, debuting in the [[Mii Tour (2022)|2022 Mii Tour]]. Like in ''[[Mario Kart 8]]'', they have a multitude of different racing suits they can wear; however, each suit now has its own [[Special skill (Mario Kart Tour)|special skill]]. There are 65 suits, with at least one new suit being added in each tour from the 2022 Mii Tour until the [[Anniversary Tour (2023)|2023 Anniversary Tour]]. | |||
Upon launching the game for the first time, players will be given either [[Toad]] or [[Toadette]]. After the tutorial, they are granted a free [[Pipe Cannon|pipe]] launch which grants Peachette, [[Metal Mario]], or [[Dry Bowser]].<ref>Hydra. (March 8, 2022). [https://cdn.discordapp.com/attachments/841452063128420363/950577582414376980/Screenshot_20220307-211412_Discord.jpg Mario Kart Tour Server]. ''Discord''. Retrieved March 8, 2022.</ref><ref>kaidragon77. (September 27, 2019). [https://youtu.be/Bq45HtNt9yI ''Mario Kart Tour'' - Dry Bowser Gameplay]. ''YouTube''. Retrieved August 17, 2020.</ref> The Red Mii Racing Suit is also given as a free gift for players. [[Gold Mario]] is the only playable character in [[Coin Rush (Mario Kart Tour)|Coin Rush]] mode, which was the only mode in which he was playable until the 2023 Anniversary Tour; he has the unique ability to draw in nearby [[coin]]s to himself, with this having a larger radius in Coin Rush than otherwise. | |||
Unlike in other ''Mario Kart'' games, characters are sorted by the rarity of unlocking them. There are three tiers of rarity: Normal, Super, and High-End. While the Normal characters are easier to unlock, rarer characters have a greater number of starting points and have more [[List of favored and favorite courses in Mario Kart Tour|favored and favorite courses]]. | |||
The only differences between drivers in the main statistics affect acceleration and weight, and depend on the driver's size class.<ref name=Move">[https://docs.google.com/document/d/19Bn-0MvrH4XNvX1nKrnsRETSiPhXacZuFkU_sGUbpYQ/edit?usp=sharing A human readable transcription of the main content of the ''KartParamVehicleMove'' container].</ref> | |||
[[File:MKT character screen.png|thumb|800px|center|The driver selection screen as it appears in-game]] | |||
==Karts, gliders, and tires== | |||
{{main|List of karts in Mario Kart Tour|List of gliders in Mario Kart Tour|Tire#Mario Kart Tour}} | |||
There are a total of {{MKT karts}} [[kart]]s and {{MKT gliders}} [[glider]]s in ''Mario Kart Tour'', the most of any ''Mario Kart'' game. Several karts and gliders return from previous installments, though new ones also appear alongside variants of existing ones; these variants share their in-game model, differing by textures, and are grouped together within the internal files. Like drivers, karts and gliders are organized by three tiers of rarity: Normal, Super, and High-End. Each kart and glider has its own [[Special skill (Mario Kart Tour)|special skill]] that provides specific benefits during a race; karts give bonus points for performing a particular technique while gliders increase the chance of obtaining a particular item from Item Boxes as well as the points gained from using that item. Each kart and glider also has its own favored and favorite courses, and using a kart or glider on such courses increases their bonus points multiplier, or combo bonus and combo-time, respectively. | |||
Unlike in ''[[Mario Kart 7]]'', ''[[Mario Kart 8]]'', and ''[[Mario Kart 8 Deluxe]]'', [[tire]]s are not customizable, being set to a specific kart, and have no effect on stats. | |||
! | |||
In battle mode, a new feature allows the player to customize their balloons that appear during the match. However, unlike karts and gliders, these balloon designs are purely aesthetic. There are 34 balloon designs in ''Mario Kart Tour''. | |||
[[File:MKT kart screen.png|thumb|800px|center|The kart selection screen as it appears in-game]] | |||
|[[ | [[File:MKT glider screen.png|thumb|800px|center|The glider selection screen as it appears in-game]] | ||
==Items== | |||
===Frenzy=== | |||
{{main|Frenzy (Mario Kart Tour)}} | |||
Depending on the selected driver and course they are used on, players can get one to three items at once. In the case that a character gets three of the same item, they will activate the new Frenzy Mode, in which they immediately activate [[Super Star]] power, and can charge all the Mini-Turbo stages much more quickly and can use unlimited supplies of the respective item until the invincibility runs out. Any item can appear in Frenzy Mode, except for the Star, which is exclusive to certain bonus challenges. | |||
The probability of obtaining a Frenzy depends on the current position and lap and on the driver chosen. In particular, the current position and lap define a base probability that is then summed to a bonus depending on the rarity and skill level of the driver chosen. The resulting probability is capped at 50%, even if the sum exceeds said value. | |||
The following is the base probability of a Frenzy in single player races used in the [[Halloween Tour (2020)|2020 Halloween Tour]]:<ref>[https://docs.google.com/document/d/1bruNYtUPwGyNs2qLz7-FeiHYMJyuxVkHY3e6Sj6rgWc/edit?usp=sharing A human-readable transcription of the main content of the ''ItemSlotTable'' container].</ref> | |||
{|class="wikitable"style="margin:auto;text-align:center" | |||
!colspan=9|Base probability of a Frenzy in single-player races | |||
|[[ | |||
| | |||
| | |||
| | |||
|- | |||
|[[ | |||
| | |||
| | |||
| | |||
|- | |- | ||
! | !Position | ||
!1st | |||
!2nd | |||
!3rd | |||
!4th | |||
!5th | |||
!6th | |||
!7th | |||
!8th | |||
|- | |- | ||
! | !First lap | ||
| | |5 | ||
| | |6 | ||
| | |7 | ||
| | |9 | ||
| | |13 | ||
| | |15 | ||
|18 | |||
|22 | |||
|- | |- | ||
! | !Second lap or higher{{footnote|main|c}} | ||
| | |6 | ||
|[ | |7 | ||
| style=" | |11 | ||
|12 | |||
|18 | |||
| | |22 | ||
|29 | |||
|41 | |||
|} | |||
Multiplayer races use different Frenzy probabilities:<ref>[https://docs.google.com/document/d/1j-cD4CppxQG2uVziSRpftkTz5fAwycDYf7hOA5DJbbk/edit?usp=sharing A human-readable transcription of the main content of the ''ItemSlotTableP2P'' container].</ref> | |||
{|class="wikitable"style="margin:auto;text-align:center" | |||
!colspan=9|Base probability of a Frenzy in multiplayer races | |||
|- | |- | ||
! | !Position | ||
!1st | |||
!2nd | |||
!3rd | |||
!4th | |||
!5th | |||
!6th | |||
!7th | |||
!8th | |||
|- | |- | ||
! | !First lap | ||
| | |1 | ||
| | |2 | ||
| | |4 | ||
| | |6 | ||
| | |10 | ||
| | |14 | ||
|17 | |||
|21 | |||
|- | |- | ||
! | !Second lap or higher{{footnote|main|c}} | ||
|3 | |||
|4 | |||
|8 | |||
|9 | |||
|15 | |||
|22 | |||
|32 | |||
|50 | |||
|} | |||
{{footnote|note|c|On 3DS Rainbow Road and its variants, the second lap probabilities are applied from the second segment onward.}} | |||
===Item Box items=== | |||
Items function mostly the same as in previous installments in the series. As in ''[[Mario Kart: Double Dash!!]]'', every character has their own [[Special Item (Mario Kart series)|special item]] that most other characters cannot obtain. By upgrading drivers to certain levels, they can obtain improved special items: Normal drivers to level 7, Super drivers to level 5 or higher, and High-End drivers to level 4 or higher. | |||
The game introduces eleven new items to the series: the [[Double Bob-ombs]], the [[Ice Flower]], the [[Bubble]], the [[Banana Barrels]], the [[Mushroom Cannon]], the [[Coin Box]], the [[Dash Ring]], the [[Bob-omb Cannon]], the [[Giga Bob-omb]], the [[Super Bell]], and the [[Capsule]], all of which are character-exclusive items. Several items also return in this game after a long absence from the series, including [[Bowser's Shell]], [[Yoshi's Egg]]/[[Birdo's Egg]], the [[Giant Banana]], the [[Heart (item)|Heart]], and the [[Mega Mushroom]] from ''[[Mario Kart Wii]]''; the former four (from ''Mario Kart: Double Dash!!'') are all special items, while the lattermost is a regular item. Additionally, the [[Hammer]] item from the ''[[Mario Kart (series)#Arcade games|Mario Kart Arcade GP]]'' series appears in this game for the first time in a non-arcade ''Mario Kart'' game as a special item, though its functions are different. The [[Lucky Seven]] and [[Super Leaf]], which were both absent in ''[[Mario Kart 8]]'' and ''[[Mario Kart 8 Deluxe]]'', also return in this game as special items. | |||
The probabilities used in single player mode outside of Frenzies are reported. It is possible that the first item boxes of the races use different probabilities. The probability of common items can be increased by using gliders with the respective item skill. The actual probability is calculated as (item probability + glider bonus)/(sum of the probabilities of the eligible items); when no item can be obtained, a [[Coin]] is obtained instead. For the detailed probabilities of obtaining an item when an Item Box is opened, see [[Mario Kart Tour item probability distributions|''Mario Kart Tour'' item probability distributions]]. | |||
{|class="wikitable" | |||
|- | |- | ||
! | !rowspan=2|Image | ||
| | !rowspan=2|Name | ||
| | !rowspan=2|Description<!--from Tips & Tricks menu--> | ||
!rowspan=2|Drivers | |||
!colspan=8|Single player base probability | |||
| | |||
| | |||
|- | |- | ||
! | !1st | ||
!2nd | |||
!3rd | |||
!4th | |||
!5th | |||
!6th | |||
!7th | |||
!8th | |||
|- | |- | ||
|align=center|[[File:MKT Icon Banana.png|65x65px]] | |||
|[[File:MKT Icon | |align=center|[[Banana]] | ||
|[[ | |"''Don't let this one give you the slip! Your kart will spin out if you hit one. You can carry one behind your kart to protect yourself from a single attack.''" | ||
| | |align=center|All | ||
| | |35||12||20||15||0||0||0||0 | ||
| | |||
| | |||
|- | |- | ||
|rowspan=2 align=center|[[File:MKT Icon Triple Bananas.png|65x65px]] | |||
|[[File:MKT Icon | |align=center|[[Triple Bananas]] | ||
|"''Three bananas revolve around your kart. Tap the screen to throw them all at once and they'll land all lined up in a nice, tidy row!''" | |||
| | |rowspan=2 align=center|[[File:MKT Icon YellowShyGuy.png|x35px|link=Shy Guy|Yellow Shy Guy]][[File:MKT Icon DaisySwimwear.png|x35px|link=Princess Daisy|Daisy (Swimwear)]][[File:MKT Icon LuigiChef.png|x35px|link=Luigi|Luigi (Chef)]][[File:MKT Icon WaluigiBusDriver.png|x35px|link=Waluigi|Waluigi (Bus Driver)]][[File:MKT Icon DixieKong.png|x35px|link=Dixie Kong]][[File:MKT Icon DonkeyKongJrSNES.png|x35px|link=Donkey Kong Jr.|Donkey Kong Jr. (SNES)]][[File:MKT Icon PastryChefMiiRacingSuit.png|x35px|link=Mii|Pastry Chef Mii Racing Suit]][[File:MKT Icon PokeyMiiRacingSuit.png|x35px|link=Mii|Pokey Mii Racing Suit]][[File:MKT Icon DaisyMiiRacingSuit.png|x35px|link=Mii|Daisy Mii Racing Suit]] | ||
|[[File:MKT Icon | |20||15||35||30||25||0||0||0 | ||
| | |||
| | |||
|- | |- | ||
|align=center|Triple Bananas+ | |||
| | |"''Improved Triple Bananas. The appearance rate of Triple Bananas increases, and the chance to get Triple Bananas in a frenzy is slightly increased as well. The bananas revolve arround your kart at a faster rate and provide better coverage for defense.''" | ||
| | ||||||||||||||| | ||
| | |||
| | |||
| | |||
| | |||
|- | |- | ||
|rowspan=2 align=center|[[File:MKT Icon Giant Banana.png|65x65px]] | |||
|[[File:MKT Icon | |align=center|[[Giant Banana]] | ||
|[[ | |"''Not only does this big banana spin out karts that hit it, but after being struck it breaks into three regular-sized Bananas. The only banana split you'll be sad to see!''" | ||
| | |rowspan=2 align=center|[[File:MKT Icon Morton.png|x35px|link=Morton Koopa Jr.|Morton]][[File:MKT Icon YellowToadPitCrew.png|x35px|link=Toad (species)|Yellow Toad (Pit Crew)]][[File:MKT Icon DonkeyKong.png|x35px|link=Donkey Kong]][[File:MKT Icon MarioSunshine.png|x35px|link=Mario|Mario (Sunshine)]][[File:MKT Icon RosalinaChef.png|x35px|link=Rosalina|Rosalina (Chef)]][[File:MKT Icon WhiteTanookiMario.png|x35px|link=White Tanooki Mario]][[File:MKT Icon PinkShyGuyNinja.png|x35px|link=Shy Guy (Ninja)|Pink Shy Guy (Ninja)]][[File:MKT Icon Wiggler.png|x35px|link=Wiggler]][[File:MKT Icon DonkeyKongMiiRacingSuit.png|x35px|link=Mii|Donkey Kong Mii Racing Suit]][[File:MKT Icon YellowMiiRacingSuit.png|x35px|link=Mii|Yellow Mii Racing Suit]][[File:MKT Icon MortonMiiRacingSuit.png|x35px|link=Mii|Morton Mii Racing Suit]][[File:MKT Icon WigglerMiiRacingSuit.png|x35px|link=Mii|Wiggler Mii Racing Suit]] | ||
|[[File:MKT Icon | |20||15||35||30||25||0||0||0 | ||
| | |||
| | |||
|- | |- | ||
|align=center|Giant Banana+ | |||
| | |"''Improved Giant Banana. The appearance rate of Giant Bananas increases, and the chance to get a Giant Banana in a frenzy is slightly increased as well. It splits into an additional banana.''" | ||
| | ||||||||||||||| | ||
| | |||
| | |||
| | |||
| | |||
|- | |- | ||
|align=center|[[File:MKT Icon Green Shell.png|65x65px]] | |||
|[[File:MKT Icon | |align=center|[[Green Shell]] | ||
|[[ | |"''Flies straight and crashes any kart it hits. Keep it behind your kart to protect yourself from a single attack.''" | ||
| | |align=center|All | ||
| | |20||15||20||18||8||8||0||0 | ||
| | |||
| | |||
|- | |- | ||
|rowspan=2 align=center|[[File:MKT Icon Triple Green Shells.png|65x65px]] | |||
|[[File:MKT Icon | |align=center|[[Triple Green Shells]] | ||
|[[ | |"''Three Green Shells revolve around your kart. Tap the screen to throw all of them at once and they'll fly in a straight line.''" | ||
| | |rowspan=2 align=center|[[File:MKT Icon KoopaTroopa.png|x35px|link=Koopa Troopa]][[File:MKT Icon DryBones.png|x35px|link=Dry Bones]][[File:MKT Icon Iggy.png|x35px|link=Iggy Koopa|Iggy]][[File:MKT Icon GreenToadPitCrew.png|x35px|link=Toad (species)|Green Toad (Pit Crew)]][[File:MKT Icon Lakitu.png|x35px|link=Lakitu]][[File:MKT Icon GreenShyGuy.png|x35px|link=Shy Guy|Green Shy Guy]][[File:MKT Icon KoopaFreerunning.png|x35px|link=Roving Racers|Koopa (Freerunning)]][[File:MKT Icon GreenMiiRacingSuit.png|x35px|link=Mii|Green Mii Racing Suit]][[File:MKT Icon DryBonesMiiRacingSuit.png|x35px|link=Mii|Dry Bones Mii Racing Suit]][[File:MKT Icon IggyMiiRacingSuit.png|x35px|link=Mii|Iggy Mii Racing Suit]] | ||
|[[File:MKT Icon | |0||30||20||25||35||15||0||0 | ||
| | |||
| | |||
|- | |- | ||
|align=center|Triple Green Shells+ | |||
| | |"''Improved Triple Green Shells. The appearance rate of Triple Green Shells, as well the chance of a Triple Green Shells frenzy, slightly increases. The shells revolve around your kart at a faster rate and provide better coverage for defense.''" | ||
| | ||||||||||||||| | ||
| | |||
| | |||
| | |||
| | |||
|- | |- | ||
|align=center|[[File:MKT Icon Red Shell.png|65x65px]] | |||
|[[File:MKT Icon | |align=center|[[Red Shell]] | ||
|[[ | |"''Homes in on a kart in front of you and crashes whatever it hits. Keep it behind your kart to protect yourself from a single attack.''" | ||
| | |align=center|All | ||
| | |0||48||20||20||25||17||0||0 | ||
| | |||
| | |||
|- | |- | ||
|align=center|[[File:MKT Icon Spiny Shell.png|65x65px]] | |||
|[[File:MKT Icon | |align=center|[[Spiny Shell (blue)|Spiny Shell]] | ||
|[[ | |"''Chases down the kart in 1st place, crashing through anyone it hits before reaching its target. This will make you regret being in 1st place! Or even near the kart in 1st place...''" | ||
| | |align=center|All<br>(Does not appear in [[Battle Mode]]) | ||
|[[ | |0||0||0||0||5||5||3||0 | ||
| | |||
| | |||
|- | |- | ||
|rowspan=2 align=center|[[File:MKT Icon Bowser's Shell.png|65x65px]] | |||
|[[File:MKT Icon | |align=center|[[Bowser's Shell]] | ||
|[[ | |"''This big ol' shell on loan from Bowser will crash any karts it hits and keep on going. It can only be thrown forward.''" | ||
| | |rowspan=2 align=center|[[File:MKT Icon Bowser.png|x35px|link=Bowser]][[File:MKT Icon BowserJr.png|x35px|link=Bowser Jr.]][[File:MKT Icon DryBowser.png|x35px|link=Dry Bowser]][[File:MKT Icon BowserMiiRacingSuit.png|x35px|link=Mii|Bowser Mii Racing Suit]][[File:MKT Icon DryBowserMiiRacingSuit.png|x35px|link=Mii|Dry Bowser Mii Racing Suit]][[File:MKT Icon KoopaClownMiiRacingSuit.png|x35px|link=Mii|Koopa Clown Mii Racing Suit]] | ||
|[[File:MKT Icon | |0||0||15||35||40||30||30||0 | ||
| | |||
| | |||
|- | |- | ||
|align=center|Bowser's Shell+ | |||
| | |"''Improved Bowser's Shell. The shell is bigger and a little better at tracking opponents.''" | ||
| | ||||||||||||||| | ||
| | |||
| | |||
| | |||
| | |||
|- | |- | ||
|align=center|[[File:MKT Icon Bob-omb.png|65x65px]] | |||
|[[File:MKT Icon | |align=center|[[Bob-omb]] | ||
|[[ | |"''This will walk towards opponents who get too close, and then explode when it touches a kart or when some time has passed. Karts caught in its blast will crash. In Battles, it explodes on impact with the ground or a wall.''" | ||
| | |align=center|All | ||
| | |1||3||10||15||10||10||0||0 | ||
| | |||
| | |||
|- | |- | ||
|rowspan=2 align=center|[[File:MKT Icon Double Bob-ombs.png|65x65px]] | |||
|[[File:MKT Icon | |align=center|[[Double Bob-ombs]] (new) | ||
|[[ | |"''Two Bob-ombs will revolve around your kart. Tap the screen to throw them both at once. Two is better than one, right?''" | ||
| | |rowspan=2 align=center|[[File:MKT Icon ShyGuy.png|x35px|link=Shy Guy]][[File:MKT Icon Roy.png|x35px|link=Roy Koopa|Roy]][[File:MKT Icon Wario.png|x35px|link=Wario]][[File:MKT Icon Waluigi.png|x35px|link=Waluigi]][[File:MKT Icon PurpleKoopaFreerunning.png|x35px|link=Roving Racers|Purple Koopa (Freerunning)]][[File:MKT Icon OrangeShyGuy.png|x35px|link=Shy Guy|Orange Shy Guy]][[File:MKT Icon MarioMusician.png|x35px|link=Mario|Mario (Musician)]][[File:MKT Icon BlackYoshi.png|x35px|link=Black Yoshi]][[File:MKT Icon ToadetteExplorer.png|x35px|link=Toadette|Toadette (Explorer)]][[File:MKT Icon LuigiGolf.png|x35px|link=Luigi|Luigi (Golf)]][[File:MKT Icon DaisySailor.png|x35px|link=Princess Daisy|Daisy (Sailor)]][[File:MKT Icon WarioMiiRacingSuit.png|x35px|link=Mii|Wario Mii Racing Suit]][[File:MKT Icon ChainChompMiiRacingSuit.png|x35px|link=Mii|Chain Chomp Mii Racing Suit]][[File:MKT Icon GoombaMiiRacingSuit.png|x35px|link=Mii|Goomba Mii Racing Suit]][[File:MKT Icon BlackMiiRacingSuit.png|x35px|link=Mii|Black Mii Racing Suit]][[File:MKT Icon ParaBiddybudMiiRacingSuit.png|x35px|link=Mii|Para-Biddybud Mii Racing Suit]][[File:MKT Icon RoyMiiRacingSuit.png|x35px|link=Mii|Roy Mii Racing Suit]][[File:MKT Icon WaluigiMiiRacingSuit.png|x35px|link=Mii|Waluigi Mii Racing Suit]] | ||
|[[File:MKT Icon | |0||30||20||25||35||15||0||0 | ||
| | |||
| | |||
|- | |- | ||
|align=center|Double Bob-ombs+ | |||
| | |"''Improved Double Bob-ombs. You get an additional Bob-omb.''" | ||
| | ||||||||||||||| | ||
| | |||
| | |||
| | |||
| | |||
|- | |- | ||
|align=center|[[File:MKT Icon Mushroom.png|65x65px]] | |||
|[[File:MKT Icon | |align=center|[[Dash Mushroom|Mushroom]] | ||
|[[ | |"''This classic item gives your kart a speed boost. Doesn't get much simpler than that! In Battles, you can cause your opponents to crash by ramming into them while boosted.''" | ||
| | |align=center|All | ||
| | |5||12||25||29||20||25||30||21 | ||
| | |||
| | |||
|- | |- | ||
|rowspan=2 align=center|[[File:MKT Icon Triple Mushrooms.png|65x65px]] | |||
|[[File:MKT Icon | |align=center|[[Triple Mushrooms]] | ||
|[[ | |"''Why use just one Mushroom when you can use three? Tap the screen to use them all at once for a longer-lasting speed boost.''" | ||
| | |rowspan=2 align=center|[[File:MKT Icon Toad.png|x35px|link=Toad]][[File:MKT Icon Toadette.png|x35px|link=Toadette]][[File:MKT Icon WhiteShyGuy.png|x30px|link=Shy Guy|White Shy Guy]][[File:MKT Icon MarioClassic.png|x35px|link=Mario|Mario (Classic)]][[File:MKT Icon PeachWedding.png|x35px|link=Princess Peach|Peach (Wedding)]][[File:MKT Icon MarioSNES.png|x35px|link=Mario|Mario (SNES)]][[File:MKT Icon LuigiLederhosen.png|x35px|link=Luigi|Luigi (Lederhosen)]][[File:MKT Icon MarioRacing.png|x35px|link=Mario|Mario (Racing)]][[File:MKT Icon WhiteYoshi.png|x35px|link=Yoshi (species)|White Yoshi]][[File:MKT Icon BirdoWhite.png|x35px|link=Birdo|Birdo (White)]][[File:MKT Icon ToadMiiRacingSuit.png|x35px|link=Mii|Toad Mii Racing Suit]][[File:MKT Icon WhiteMiiRacingSuit.png|x35px|link=Mii|White Mii Racing Suit]] | ||
|[[File:MKT Icon | |0||0||15||35||40||30||30||0 | ||
| | |||
| | |||
|- | |- | ||
|align=center|Triple Mushrooms+ | |||
| | |"''Improved Triple Mushrooms. The appearance rate of Triple Mushrooms increases and boost last a bit longer.''" | ||
| | ||||||||||||||| | ||
| | |||
| | |||
| | |||
| | |||
|- | |- | ||
|align=center|[[File:MKT Icon Mega Mushroom.png|65x65px]] | |||
|[[File:MKT Icon | |align=center|[[Mega Mushroom]] | ||
|[[ | |"''Increases your kart's size, allowing you to crash any opponents you hit. You'll return to regular size after some time or when you're hit by an item.''" | ||
| | |align=center|All<br>(Does not appear in Battle Mode) | ||
| | |0||0||0||0||27||30||40||30 | ||
| | |||
| | |||
|- | |- | ||
|align=center|[[File:MKT Icon Bullet Bill.png|65x65px]] | |||
|[[File:MKT Icon | |align=center|[[Bullet Bill]] | ||
|[[ | |"''Transforms you into a Bullet Bill for a set amount of time. You'll dash forward with all the power of a Bullet Bill and crash any opponents that you hit.''" | ||
| | |align=center|All<br>(Does not appear in Battle Mode) | ||
| | |0||0||0||0||0||0||25||40 | ||
| | |||
| | |||
|- | |- | ||
|align=center|[[File:MKT Icon Blooper.png|65x65px]] | |||
|[[File:MKT Icon | |align=center|[[Blooper]] | ||
|[[ | |"''Squirts ink onto the karts in a higher position than yours, blinding the other drivers for a set amount of time. You can wipe the ink off by swiping the screen.''" | ||
| | |align=center|All | ||
| | |0||0||0||3||5||5||0||0 | ||
| | |||
| | |||
| | |||
| | |||
| | |||
| | |||
| | |||
| | |||
| | |||
|- | |- | ||
|align=center|[[File:MKT Icon Lightning.png|65x65px]] | |||
|[[File:MKT Icon | |align=center|[[Lightning]] | ||
|[[ | |"''Calls down lightning to spin out your opponents and destroy the items they hold. Those struck will be smaller and slower for a set amount of time.''" | ||
| | |align=center|All<br>(Does not appear in Battle Mode) | ||
| | |0||0||0||0||0||0||2||9 | ||
| | |||
| | |||
|- | |- | ||
! | |rowspan=2 align=center|[[File:MKT Icon Fire Flower.png|65x65px]] | ||
|[[File:MKT Icon | |align=center|[[Fire Flower]] | ||
|[[ | |"''Three fireballs will revolve around your kart. Tap the screen to throw them all at once, spinning out any kart they hit. You're really burning up the track now!''" | ||
| | |rowspan=2 align=center|[[File:MKT Icon Mario.png|x35px|link=Mario]][[File:MKT Icon Luigi.png|x35px|link=Luigi]][[File:MKT Icon RedToadPitCrew.png|x35px|link=Toad (species)|Red Toad (Pit Crew)]][[File:MKT Icon RedKoopaFreerunning.png|x35px|link=Roving Racers|Red Koopa (Freerunning)]][[File:MKT Icon FireBro.png|x35px|link=Fire Bro]][[File:MKT Icon BirdoGreen.png|x35px|link=Birdo|Birdo (Green)]][[File:MKT Icon MetalMario.png|x35px|link=Metal Mario]][[File:MKT Icon MarioSanta.png|x35px|link=Mario|Mario (Santa)]][[File:MKT Icon WarioCowboy.png|x35px|link=Wario|Wario (Cowboy)]][[File:MKT Icon DaisyYukata.png|x35px|link=Princess Daisy|Daisy (Yukata)]][[File:MKT Icon PeachHalloween.png|x35px|link=Princess Peach|Peach (Halloween)]][[File:MKT Icon FireRosalina.png|x35px|link=Fire Mario|Fire Rosalina]][[File:MKT Icon PaulineRose.png|x35px|link=Pauline|Pauline (Rose)]][[File:MKT Icon GoldMario.png|x35px|link=Gold Mario]][[File:MKT Icon MarioMiiRacingSuit.png|x35px|link=Mii|Mario Mii Racing Suit]][[File:MKT Icon LuigiMiiRacingSuit.png|x35px|link=Mii|Luigi Mii Racing Suit]][[File:MKT Icon PiranhaPlantMiiRacingSuit.png|x35px|link=Mii|Piranha Plant Mii Racing Suit]] | ||
|[[File:MKT Icon | |0||30||20||25||35||15||0||0 | ||
| | |||
| | |||
|- | |- | ||
|align=center|Fire Flower+ | |||
| | |"''Improved Fire Flower. The chance to get a Fire Flower in a frenzy is slightly increased, and you'll get an additional fireball to help strike your opponents.''" | ||
| | ||||||||||||||| | ||
| | |||
| | |||
| | |||
| | |||
|- | |- | ||
|rowspan=2 align=center|[[File:MKT Icon Boomerang Flower.png|65x65px]] | |||
|[[File:MKT Icon | |align=center|[[Boomerang Flower]] | ||
|[[ | |"''Tap the screen to throw a boomerang. Not only will it spin out any karts it hits, but it will collect any surrounding coins for you too. In Battles, it will break if it hits a wall.''" | ||
| | |rowspan=2 align=center|[[File:MKT Icon BabyMario.png|x35px|link=Baby Mario]][[File:MKT Icon BabyLuigi.png|x35px|link=Baby Luigi]][[File:MKT Icon Larry.png|x35px|link=Larry Koopa|Larry]][[File:MKT Icon ToadPitCrew.png|x35px|link=Toad|Toad (Pit Crew)]][[File:MKT Icon BoomerangBro.png|x35px|link=Boomerang Bro]][[File:MKT Icon YoshiKangaroo.png|x35px|link=Yoshi|Yoshi (Kangaroo)]] [[File:MKT Icon LuigiVacation.png|35px|link=Luigi|Luigi (Vacation)]][[File:MKT Icon MarioSamurai.png|x35px|link=Mario|Mario (Samurai)]][[File:MKT Icon RosalinaVolendam.png|35px|link=Rosalina|Rosalina (Volendam)]][[File:MKT Icon LuigiKnight.png|x35px|link=Luigi|Luigi (Knight)]][[File:MKT Icon ToadAstronaut.png|x35px|link=Toad|Toad (Astronaut)]][[File:MKT Icon PaulineCowgirl.png|x35px|link=Pauline|Pauline (Cowgirl)]][[File:MKT Icon ShyGuyNinja.png|x35px|link=Shy Guy (Ninja)|Shy Guy (Ninja)]][[File:MKT Icon PeteyPiranha.png|x35px|link=Petey Piranha]][[File:MKT Icon DonkeyKongGladiator.png|x35px|link=Donkey Kong|Donkey Kong (Gladiator)]][[File:MKT Icon BronzeMiiRacingSuit.png|x35px|link=Mii|Bronze Mii Racing Suit]][[File:MKT Icon PeteyPiranhaMiiRacingSuit.png|x35px|link=Mii|Petey Piranha Mii Racing Suit]][[File:MKT Icon LarryMiiRacingSuit.png|x35px|link=Mii|Larry Mii Racing Suit]] | ||
|[[File:MKT Icon | |0||30||20||25||35||15||0||0 | ||
| | |||
| | |||
|- | |- | ||
|align=center|Boomerang Flower+ | |||
| | |"''Improved Boomerang Flower. The chance to get a Boomerang Flower in a frenzy is slightly increased and you'll get one additional boomerang. Once obtained, the boomerangs will revolve around your kart and provide coverage for defense.''" | ||
| | ||||||||||||||| | ||
| | |||
| | |||
| | |||
| | |||
|- | |- | ||
|rowspan=2 align=center|[[File:MKT Icon Ice Flower.png|65x65px]] | |||
|[[File:MKT Icon | |align=center|[[Ice Flower]] (new) | ||
|[[ | |"''Three balls of ice will revolve around your kart. Tap the screen to throw them all at once and they'll freeze any kart they hit, causing them to slide.''" | ||
| | |rowspan=2 align=center|[[File:MKT Icon LightblueToadPitCrew.png|x35px|Light-blue Toad (Pit Crew)|link=Toad (species)]][[File:MKT Icon IceBro.png|x35px|link=Ice Bro]][[File:MKT Icon BlueKoopaFreerunning.png|x35px|link=Roving Racers|Blue Koopa (Freerunning)]][[File:MKT Icon LightblueShyGuy.png|x35px|link=Shy Guy|Light-blue Shy Guy]][[File:MKT Icon PenguinLuigi.png|x35px|link=Penguin Mario|Penguin Luigi]][[File:MKT Icon IceMario.png|x35px|link=Ice Mario (Super Mario Galaxy)|Ice Mario]][[File:MKT Icon RosalinaAurora.png|x35px|link=Rosalina|Rosalina (Aurora)]][[File:MKT Icon PenguinMario.png|x35px|link=Penguin Mario]][[File:MKT Icon PenguinToadette.png|x35px|link=Penguin Mario|Penguin Toadette]][[File:MKT Icon IceCreamMiiRacingSuit.png|x35px|link=Mii|Ice-Cream Mii Racing Suit]][[File:MKT Icon BlooperMiiRacingSuit.png|x35px|link=Mii|Blooper Mii Racing Suit]][[File:MKT Icon LightBlueMiiRacingSuit.png|x35px|link=Mii|Light Blue Mii Racing Suit]] | ||
|[[File:MKT Icon | |0||30||20||25||35||15||0||0 | ||
| | |||
| | |||
|- | |- | ||
|align=center|Ice Flower+ | |||
| | |"''Improved Ice Flower. The chance to get an Ice Flower in a Frenzy is slightly increased, and you'll get one additional ice ball for a better chance of striking your opponents.''" | ||
| | ||||||||||||||| | ||
| | |||
| | |||
| | |||
| | |||
|- | |- | ||
|align=center|[[File:MKT Icon Super Horn.png|65x65px]] | |||
|[[File:MKT Icon | |align=center|[[Super Horn]] | ||
|[[ | |"''The loudness of this horn will blow away any surrounding items and karts. It can repel Bloopers, and even Spiny Shells!''" | ||
| | |align=center|All | ||
| | |4||0||0||0||0||0||0||0 | ||
| | |||
| | |||
|- | |- | ||
|align=center|[[File:MKT Icon Coin.png|65x65px]] | |||
|[[File:MKT Icon | |align=center|[[Coin]] | ||
|[[ | |"''This gives you two Coins. It's used automatically once you pick it up.''" | ||
| | |align=center|All | ||
|[[File:MKT Icon | |35||10||5||0||0||0||0||0 | ||
| | |- | ||
| | |rowspan=2 align=center|[[File:MKT Icon Heart.png|65x65px]] | ||
|align=center|[[Heart (item)|Heart]] | |||
|"''This protective Heart revolves around your kart for a set amount of time, shielding you from attacks. It will vanish upon taking damage. You can stack up to five at once.''" | |||
|rowspan=2 align=center|[[File:MKT Icon Wendy.png|x35px|link=Wendy O. Koopa|Wendy]][[File:MKT Icon Peach.png|x35px|link=Princess Peach|Peach]][[File:MKT Icon Daisy.png|x35px|link=Princess Daisy|Daisy]][[File:MKT Icon PinkYoshi.png|x35px|link=Yoshi (species)|Pink Yoshi]][[File:MKT Icon PinkToadPitCrew.png|x35px|link=Toad (species|Pink Toad (Pit Crew)]][[File:MKT Icon PinkShyGuy.png|x35px|link=Shy Guy|Pink Shy Guy]][[File:MKT Icon BabyPeachCherub.png|x35px|link=Baby Peach|Baby Peach (Cherub)]][[File:MKT Icon DaisyFairy.png|x35px|link=Princess Daisy|Daisy (Fairy)]][[File:MKT Icon BabyMarioKoala.png|x35px|link=Baby Mario|Baby Mario (Koala)]][[File:MKT Icon PeachMiiRacingSuit.png|x35px|link=Mii|Peach Mii Racing Suit]][[File:MKT Icon PinkMiiRacingSuit.png|x35px|link=Mii|Pink Mii Racing Suit]][[File:MKT Icon WendyMiiRacingSuit.png|x35px|link=Mii|Wendy Mii Racing Suit]] | |||
|0||0||15||35||40||30||30||0 | |||
|- | |||
|align=center|Heart+ | |||
|"''Improved Heart. After use, you immediately get an additional Heart that lasts for six seconds.''" | |||
||||||||||||||| | |||
|- | |||
|rowspan=2 align=center|[[File:MKT Icon Yoshi's Egg.png|65x65px]] | |||
|align=center|[[Yoshi's Egg]] | |||
|"''Homes in on the kart in front of you and crashes once it hits. Three more items will fly out when it breaks. It's the item that keeps on giving!''" | |||
|rowspan=2 align=center|[[File:MKT Icon Yoshi.png|x35px|link=Yoshi]][[File:MKT Icon RedYoshi.png|x35px|link=Yoshi (species)|Red Yoshi]][[File:MKT Icon OrangeYoshi.png|x35px|link=Yoshi (species)|Orange Yoshi]][[File:MKT Icon LightblueYoshi.png|x35px|link=Yoshi (species)|Light-blue Yoshi]][[File:MKT Icon YellowYoshi.png|x35px|link=Yoshi (species)|Yellow Yoshi]][[File:MKT Icon YoshiReindeer.png|x35px|link=Yoshi|Yoshi (Reindeer)]][[File:MKT Icon YoshiEggHunt.png|x35px|link=Yoshi|Yoshi (Egg Hunt)]][[File:MKT Icon YoshiMiiRacingSuit.png|x35px|link=Mii|Yoshi Mii Racing Suit]] | |||
|0||30||20||25||35||15||0||0 | |||
|- | |- | ||
|align=center|Yoshi's Egg+ | |||
|[[File:MKT Icon | |"''Improved Yoshi's Egg. The egg is bigger and it releases four items.''" | ||
|[[ | ||||||||||||||| | ||
| | |- | ||
| | |rowspan=2 align=center|[[File:MKT Icon Birdo's Egg.png|65x65px]] | ||
| | |align=center|[[Birdo's Egg]] | ||
| | |"''Homes in on the kart in front of you and crashes once it hits. Three more items will fly out when it breaks. It's the item that keeps on giving!''" | ||
| | |rowspan=2 align=center|[[File:MKT Icon Birdo.png|x35px|link=Birdo]][[File:MKT Icon BirdoLightBlue.png|x35px|link=Birdo|Birdo (Light Blue)]][[File:MKT Icon BirdoYellow.png|x35px|link=Birdo|Birdo (Yellow)]][[File:MKT Icon BirdoOrange.png|x35px|link=Birdo|Birdo (Orange)]][[File:MKT Icon BirdoRed.png|x35px|link=Birdo|Birdo (Red)]][[File:MKT Icon BirdoMiiRacingSuit.png|x35px|link=Mii|Birdo Mii Racing Suit]] | ||
|0||30||20||25||35||15||0||0 | |||
=== | |||
|- | |- | ||
|align=center|Birdo's Egg+ | |||
| | |"''Improved Birdo's Egg. The egg is bigger and it releases four items.''" | ||
| | ||||||||||||||| | ||
| | |||
| | |||
| | |||
| | |||
|- | |- | ||
! | |rowspan=2 align=center|[[File:MKT Icon Bubble.png|65x65px]] | ||
| | |align=center|[[Bubble]] (new) | ||
| | |"''Briefly envelops your kart and protects you from damage for a set time. While in the bubble, you will get a speed boost and float in the air. Watch out, because it will vanish upon taking damage! In Battles, it can float you over walls.''" | ||
| | |rowspan=2 align=center|[[File:MKT Icon BabyPeach.png|x35px|link=Baby Peach]][[File:MKT Icon BabyDaisy.png|x35px|link=Baby Daisy]][[File:MKT Icon BabyRosalina.png|x35px|link=Baby Rosalina]][[File:MKT Icon Lemmy.png|x35px|link=Lemmy Koopa|Lemmy]][[File:MKT Icon CheepCheepMiiRacingSuit.png|x35px|link=Mii|Cheep Cheep Mii Racing Suit]][[File:MKT Icon LemmyMiiRacingSuit.png|x35px|link=Mii|Lemmy Mii Racing Suit]][[File:MKT Icon FishBoneMiiRacingSuit.png|x35px|link=Mii|Fish Bone Mii Racing Suit]] | ||
| | |0||0||15||35||40||30||30||0 | ||
| | |||
| | |||
|- | |- | ||
|align=center|Bubble+ | |||
| | |"''Improved Bubble. The speed of the bubble is increased.''" | ||
| | ||||||||||||||| | ||
| | |||
| | |||
| | |||
| | |||
| | |||
| | |||
|- | |- | ||
|rowspan=2 align=center|[[File:MKT Icon Banana Barrels.png|65x65px]] | |||
|[[File:MKT Icon | |align=center|[[Banana Barrels]] (new) | ||
|[[ | |"''Arm your kart with two fully-loaded barrels of Bananas! Continually shoots out Bananas in front of your kart for a set time.''" | ||
| | |rowspan=2 align=center|[[File:MKT Icon DiddyKong.png|x35px|link=Diddy Kong]][[File:MKT Icon FunkyKong.png|x35px|link=Funky Kong]][[File:MKT Icon LightGreenMiiRacingSuit.png|x35px|link=Mii|Light Green Mii Racing Suit]] | ||
|[[File:MKT Icon | |0||0||15||35||40||30||30||0 | ||
| | |||
| | |||
|- | |- | ||
|align=center|Banana Barrels+ | |||
| | |"''Improved Banana Barrels. There's a chance that a Giant Banana will be fired instead of a Banana.''" | ||
| | ||||||||||||||| | ||
| | |||
| | |||
| | |||
| | |||
|- | |- | ||
|rowspan=2 align=center|[[File:MKT Icon Mushroom Cannon.png|65x65px]] | |||
|[[File:MKT Icon | |align=center|[[Mushroom Cannon]] (new) | ||
|"''A cannon designed to resemble a Mushroom. Continually shoots out Mushrooms in front of your kart for a set time.''" | |||
| | |rowspan=2 align=center|[[File:MKT Icon MontyMole.png|x35px|link=Monty Mole]][[File:MKT Icon Peachette.png|x35px|link=Peachette]][[File:MKT Icon PeachKimono.png|x35px|link=Princess Peach|Peach (Kimono)]][[File:MKT Icon ToadPartyTime.png|x35px|link=Toad|Toad (Party Time)]][[File:MKT Icon MarioBaseball.png|x35px|link=Mario|Mario (Baseball)]][[File:MKT Icon MarioGolf.png|x35px|link=Mario|Mario (Golf)]][[File:MKT Icon MarioBlackSuit.png|x35px|link=Mario|Mario (Black Suit)]][[File:MKT Icon ToadetteSailor.png|x35px|link=Toadette|Toadette (Sailor)]][[File:MKT Icon ShyGuyPastryChef.png|x35px|link=Shy Guy|Shy Guy (Pastry Chef)]][[File:MKT Icon RedMiiRacingSuit.png|x35px|link=Mii|Red Mii Racing Suit]][[File:MKT Icon MooMooMiiRacingSuit.png|x35px|link=Mii|Moo Moo Mii Racing Suit]][[File:MKT Icon MontyMoleMiiRacingSuit.png|x35px|link=Mii|Monty Mole Mii Racing Suit]] | ||
|[[File:MKT Icon | |0||0||15||35||40||30||30||0 | ||
| | |||
| | |||
|- | |- | ||
|align=center|Mushroom Cannon+ | |||
| | |"''Improved Mushroom Cannon. Mushrooms are fired in three directions.''" | ||
| | ||||||||||||||| | ||
| | |||
| | |||
| | |||
| | |||
|- | |- | ||
|rowspan=2 align=center|[[File:MKT Icon Lucky Seven.png|65x65px]] | |||
|[[File:MKT Icon | |align=center|[[Lucky Seven]] | ||
|[[ | |"''Seven items (Red Shell, Banana, Green Shell, Bob-omb, Super Horn, Mushroom, and Blooper) revolve around your kart. Tap the screen to use all seven items at once.''" | ||
| | |rowspan=2 align=center|[[File:MKT Icon KingBoo.png|x35px|link=King Boo]][[File:MKT Icon Pauline.png|x35px|link=Pauline]][[File:MKT Icon DaisyHolidayCheer.png|x35px|link=Princess Daisy|Daisy (Holiday Cheer)]][[File:MKT Icon LuigiClassic.png|x35px|link=Luigi|Luigi (Classic)]][[File:MKT Icon MarioChef.png|x35px|link=Mario|Mario (Chef)]][[File:MKT Icon MarioHalloween.png|x35px|link=Mario|Mario (Halloween)]][[File:MKT Icon LuigiPainter.png|x35px|link=Luigi]][[File:MKT Icon PeachHappi.png|x35px|link=Princess Peach|Peach (Happi)]][[File:MKT Icon MarioSatellaview.png|x35px|link=Mario|Mario (Satellaview)]][[File:MKT Icon Poochy.png|x35px|link=Poochy]][[File:MKT Icon Nabbit.png|x35px|link=Nabbit]][[File:MKT Icon LakituPartyTime.png|x35px|link=Lakitu (Mario Kart referee)|Lakitu (Party Time)]][[File:MKT Icon CharginChuck.png|x35px|link=Chargin' Chuck]][[File:MKT Icon LightblueShyGuyExplorer.png|x35px|link=Exploring Shy Guy|Light-blue Shy Guy (Explorer)]][[File:MKT Icon SilverMiiRacingSuit.png|x35px|link=Mii|Silver Mii Racing Suit]][[File:MKT Icon KingBooMiiRacingSuit.png|x35px|link=Mii|King Boo Mii Racing Suit]][[File:MKT Icon NabbitMiiRacingSuit.png|x35px|link=Mii|Nabbit Mii Racing Suit]][[File:MKT Icon SantaMiiRacingSuit.png|x35px|link=Mii|Santa Mii Racing Suit]] | ||
|[[File:MKT Icon | |0||0||15||35||40||30||30||0 | ||
| | |||
| | |||
|- | |- | ||
|align=center|Lucky Seven+ | |||
| | |"''Improved Lucky Seven. The chance to get a Lucky Seven in a frenzy is slightly increased. Three coins will appear in addition to the seven items.''" | ||
| | ||||||||||||||| | ||
| | |||
| | |||
| | |||
| | |||
|- | |- | ||
|rowspan=2 align=center|[[File:MKT Icon Coin Box.png|65x65px]] | |||
|[[File:MKT Icon | |align=center|[[Coin Box]] (new) | ||
|[[ | |"''A box with a golden sheen. Generates a large amount of Coins in front of your kart for a set time.''" | ||
| | |rowspan=2 align=center|[[File:MKT Icon MarioHakama.png|x35px|link=Mario|Mario (Hakama)]][[File:MKT Icon PeachVacation.png|x35px|link=Princess Peach|Peach (Vacation)]][[File:MKT Icon PinkGoldPeach.png|x35px|link=Pink Gold Peach]][[File:MKT Icon PaulinePartyTime.png|x35px|link=Pauline|Pauline (Party Time)]][[File:MKT Icon RosalinaSwimwear.png|x35px|link=Rosalina|Rosalina (Swimwear)]][[File:MKT Icon MarioTuxedo.png|x35px|link=Mario|Mario (Tuxedo)]][[File:MKT Icon YoshiGoldEgg.png|x35px|link=Yoshi|Yoshi (Gold Egg)]][[File:MKT Icon DaisyThaiDress.png|x35px|link=Princess Daisy|Daisy (Thai Dress)]][[File:MKT Icon MarioKing.png|x35px|link=Mario|Mario (King)]][[File:MKT Icon LuigiGoldKnight.png|x35px|link=Luigi]][[File:MKT Icon GoldKoopaFreerunning.png|x35px|link=Roving Racers|Gold Koopa (Freerunning)]][[File:MKT Icon DryBonesGold.png|x35px|link=Dry Bones|Dry Bones (Gold)]][[File:MKT Icon KingBooGold.png|x35px|link=King Boo|King Boo (Gold)]][[File:MKT Icon BowserSanta.png|x35px|link=Bowser|Bowser (Santa)]][[File:MKT Icon KingBobombGold.png|x35px|link=King Bob-omb|King Bob-omb (Gold)]][[File:MKT Icon Kamek.png|x35px|link=Kamek]][[File:MKT Icon Meowser.png|x35px|link=Meowser]][[File:MKT Icon CharginChuckGold.png|x35px|link=Chargin' Chuck|Chargin' Chuck (Gold)]][[File:MKT Icon PeteyPiranhaGold.png|x35px|link=Petey Piranha|Petey Piranha (Gold)]][[File:MKT Icon LarryWintertime.png|x35px|link=Larry Koopa|Larry (Wintertime)]][[File:MKT Icon WigglerGold.png|x35px|link=Wiggler|Wiggler (Gold)]][[File:MKT Icon GoldMiiRacingSuit.png|x35px|link=Mii|Gold Mii Racing Suit]][[File:MKT Icon QuestionMarkBlockMiiRacingSuit.png|x35px|link=Mii|? Block Mii Racing Suit]]<br>[[File:MKT Icon GoldMario.png|x35px|link=Gold Mario]] (Coin Rush) | ||
|[[File:MKT Icon | |20||15||35||30||25||0||0||0 | ||
| | |||
| | |||
|- | |- | ||
|align=center|Coin Box+ | |||
| | |"''Improved Coin Box. There's a chance that red coins will appear.''" | ||
| | ||||||||||||||| | ||
| | |||
| | |||
| | |||
| | |||
|- | |- | ||
|rowspan=2 align=center|[[File:MKT Icon Dash Ring.png|65x65px]] | |||
|[[File:MKT Icon | |align=center|[[Dash Ring]] (new) | ||
|[[ | |"''Tosses out three rings in front of you along the track. Pass through them for a speed boost! In Battles, you can cause your opponents to crash by ramming into them while boosted.''" | ||
| | |rowspan=2 align=center|[[File:MKT Icon Ludwig.png|x35px|link=Ludwig von Koopa|Ludwig]][[File:MKT Icon Rosalina.png|x35px|link=Rosalina]][[File:MKT Icon BlueYoshi.png|x35px|link=Yoshi (species)|Blue Yoshi]][[File:MKT Icon BirdoBlue.png|x35px|link=Birdo|Birdo (Blue)]][[File:MKT Icon BlueShyGuy.png|x35px|link=Shy Guy|Blue Shy Guy]][[File:MKT Icon RosalinaHalloween.png|x35px|link=Rosalina|Rosalina (Halloween)]][[File:MKT Icon PeachWintertime.png|x35px|link=Princess Peach|Peach (Wintertime)]][[File:MKT Icon BabyRosalinaDetective.png|x35px|link=Baby Rosalina|Baby Rosalina (Detective)]][[File:MKT Icon MarioSwimwear.png|x35px|link=Mario|Mario (Swimwear)]][[File:MKT Icon PenguinToad.png|x35px|link=Penguin Mario|Penguin Toad]][[File:MKT Icon MarioAviator.png|x35px|link=Mario|Mario (Aviator)]][[File:MKT Icon ToadetteAstronaut.png|x35px|link=Toadette|Toadette (Astronaut)]][[File:MKT Icon RosalinaMiiRacingSuit.png|x35px|link=Mii|Rosalina Mii Racing Suit]][[File:MKT Icon DolphinMiiRacingSuit.png|x35px|link=Mii|Dolphin Mii Racing Suit]][[File:MKT Icon ReindeerMiiRacingSuit.png|x35px|link=Mii|Reindeer Mii Racing Suit]][[File:MKT Icon RoaringRacerMiiRacingSuit.png|x35px|link=Mii|Roaring Racer Mii Racing Suit]][[File:MKT Icon LudwigMiiRacingSuit.png|x35px|link=Mii|Ludwig Mii Racing Suit]] | ||
|[[File:MKT Icon | |0||0||15||35||40||30||30||0 | ||
| | |||
| | |||
|- | |- | ||
|align=center|Dash Ring+ | |||
| | |"''Improved Dash Ring. The chance to get a Dash Ring in a frenzy is slightly increased. Two additional rings are tossed in front of you, and the speed boost when passing through a ring lasts a bit longer.''" | ||
| | ||||||||||||||| | ||
| | |||
| | |||
| | |||
| | |||
|- | |- | ||
|rowspan=2 align=center|[[File:MKT Icon Bob-omb Cannon.png|65x65px]] | |||
|[[File:MKT Icon | |align=center|[[Bob-omb Cannon]] (new) | ||
|[[ | |"''A dangerous cannon fueled by red-hot coals! Continually shoots out Bob-ombs in front of your kart for a set time.''" | ||
| | |rowspan=2 align=center|[[File:MKT Icon BlackShyGuy.png|x35px|link=Black Shy Guy]][[File:MKT Icon MarioHappi.png|x35px|link=Mario|Mario (Happi)]][[File:MKT Icon BuilderToad.png|x35px|link=Builder Mario|Builder Toad]][[File:MKT Icon PeachExplorer.png|x35px|link=Princess Peach|Peach (Explorer)]][[File:MKT Icon KingBooLuigisMansion.png|x35px|link=King Boo|King Boo (Luigi's Mansion)]][[File:MKT Icon WarioHiker.png|x35px|link=Wario|Wario (Hiker)]][[File:MKT Icon DryBowserGold.png|x35px|link=Dry Bowser|Dry Bowser (Gold)]][[File:MKT Icon BowserJrPirate.png|x35px|link=Bowser Jr.|Bowser Jr. (Pirate)]][[File:MKT Icon BirdoBlack.png|x35px|link=Birdo|Birdo (Black)]][[File:MKT Icon WaluigiVampire.png|x35px|link=Waluigi|Waluigi (Vampire)]][[File:MKT Icon CastleMiiRacingSuit.png|x35px|link=Mii|Castle Mii Racing Suit]][[File:MKT Icon BrownMiiRacingSuit.png|x35px|link=Mii|Brown Mii Racing Suit]][[File:MKT Icon SpikeMiiRacingSuit.png|x35px|link=Mii|Spike Mii Racing Suit]] | ||
|[[File:MKT Icon | |0||0||15||35||40||30||30||0 | ||
| | |||
| | |||
|- | |- | ||
|align=center|Bob-omb Cannon+ | |||
| | |"''Improved Bob-omb Cannon. Two cannons that each fire one Bob-omb at a time are equipped.''" | ||
| | ||||||||||||||| | ||
| | |||
| | |||
| | |||
| | |||
|- | |- | ||
|rowspan=2 align=center|[[File:MKT Icon Hammer.png|65x65px]] | |||
|[[File:MKT Icon | |align=center|[[Hammer]] | ||
|[[ | |"''Throws multiple Hammers in an arc aimed at karts in front of yours.''" | ||
| | |rowspan=2 align=center|[[File:MKT Icon HammerBro.png|x35px|link=Hammer Bro]][[File:MKT Icon BuilderMario.png|x35px|link=Builder Mario]][[File:MKT Icon CaptainToad.png|x35px|link=Captain Toad]][[File:MKT Icon BuilderLuigi.png|x35px|link=Builder Mario|Builder Luigi]][[File:MKT Icon BuilderToadette.png|x35px|link=Builder Mario|Builder Toadette]][[File:MKT Icon DaisyFarmer.png|x35px|link=Princess Daisy|Daisy (Farmer)]][[File:MKT Icon YellowShyGuyExplorer.png|x35px|link=Exploring Shy Guy|Yellow Shy Guy (Explorer)]][[File:MKT Icon HammerBroMiiRacingSuit.png|x35px|link=Mii|Hammer Bro Mii Racing Suit]][[File:MKT Icon RockyWrenchMiiRacingSuit.png|x35px|link=Mii|Rocky Wrench Mii Racing Suit]] | ||
|[[File:MKT Icon | |0||30||20||25||35||15||0||0 | ||
| | |||
| | |||
|- | |- | ||
|align=center|Hammer+ | |||
| | |"''Improved Hammer. The chance to get a Hammer in a frenzy is slightly increased. There are two additional hammers, widening the strike zone.''" | ||
| | ||||||||||||||| | ||
| | |||
| | |||
| | |||
| | |||
|- | |- | ||
|rowspan=2 align=center|[[File:MKT Icon Giga Bob-omb.png|65x65px]] | |||
|[[File:MKT Icon | |align=center|[[Giga Bob-omb]] (new) | ||
|[[Mario | |"''This giga-sized Bob-omb can only be thrown forward. after being thrown, it will explode after hitting a kart or bouncing 3 times. It has a larger blast radius than a standard Bob-omb. In Battles, it explodes after bouncing twice.''" | ||
| | |rowspan=2 align=center|[[File:MKT Icon PurpleToadPitCrew.png|x35px|link=Toad (species)|Purple Toad (Pit Crew)]][[File:MKT Icon PeachYukata.png|x35px|link=Princess Peach|Peach (Yukata)]][[File:MKT Icon CatLuigi.png|x35px|link=Cat Mario|Cat Luigi]][[File:MKT Icon KingBobomb.png|x35px|link=King Bob-omb]][[File:MKT Icon ShyGuyGold.png|x35px|link=Shy Guy|Shy Guy (Gold)]][[File:MKT Icon KingBobombMiiRacingSuit.png|x35px|link=Mii|King Bob-omb Mii Racing Suit]][[File:MKT Icon PurpleMiiRacingSuit.png|x35px|link=Mii|Purple Mii Racing Suit]] | ||
|[[File:MKT Icon | |0||0||15||35||40||30||30||0 | ||
| | |||
| | |||
|- | |- | ||
|align=center|Giga Bob-omb+ | |||
| | |"''Improved Giga Bob-omb. The Giga Bob-omb is bigger and its blast radius is a bit wider.''" | ||
| | ||||||||||||||| | ||
| | |||
| | |||
| | |||
| | |||
|- | |- | ||
|rowspan=2 align=center|[[File:MKT Icon Super Bell.png|65x65px]] | |||
|[[File:MKT Icon | |align=center|[[Super Bell]] (new) | ||
|[[ | |"''A bell rings above the driver, knocking away nearby karts and items. The bell rings three consecutive times.''" | ||
|rowspan=2 align=center|[[File:MKT Icon CatPeach.png|x35px|link=Cat Mario|Cat Peach]][[File:MKT Icon CatToad.png|x35px|link=Cat Mario|Cat Toad]] [[File:MKT Icon CatRosalina.png|x35px|link=Cat Mario|Cat Rosalina]][[File:MKT Icon CatMario.png|x35px|link=Cat Mario]][[File:MKT Icon CatMiiRacingSuit.png|x35px|link=Mii|Cat Mii Racing Suit]] | |||
|[[File:MKT Icon | |0||0||15||35||40||30||30||0 | ||
| | |||
| | |||
|- | |- | ||
|align=center|Super Bell+ | |||
| | |"''Improved Super Bell. The bell rings one additional time, and the chance to get a Super Bell in a Frenzy is slightly increased as well.''" | ||
| | ||||||||||||||| | ||
| | |||
| | |||
| | |||
| | |||
|- | |- | ||
|rowspan=2 align=center|[[File:MKT Icon Super Leaf.png|65x65px]] | |||
|[[File:MKT Icon | |align=center|[[Super Leaf]] | ||
|[[ | |"''Wag the Tanooki tail to attack nearby opponents. The tail will collect any surrounding coins for you while it's wagging!''" | ||
| | |rowspan=2 align=center|[[File:MKT Icon TanookiMario.png|x35px|link=Tanooki Mario]][[File:MKT Icon TanookiRosalina.png|x35px|link=Tanooki Mario|Tanooki Rosalina]][[File:MKT Icon KitsuneLuigi.png|x35px|link=Tanooki Mario|Kitsune Luigi]] | ||
|[[File:MKT Icon | |0||0||15||35||40||30||30||0 | ||
| | |||
| | |||
|- | |- | ||
|align=center|Super Leaf+ | |||
| | |"''Improved Super Leaf. Kart speed is increased while tail is wagging.''" | ||
| | ||||||||||||||| | ||
| | |||
| | |||
| | |||
| | |||
|- | |- | ||
|rowspan=2 align=center|[[File:MKT Icon Capsule.png|65x65px]] | |||
|[[File:MKT Icon | |align=center|[[Capsule]] (new) | ||
|"''Three colorful capsules surround your kart. They'll bounce at opponents when thrown.''" | |||
| | |rowspan=2 align=center|[[File:MKT Icon DrMario.png|x35px|link=Dr. Mario]][[File:MKT Icon DrLuigi.png|x35px|link=Luigi|Dr. Luigi]][[File:MKT Icon DrPeach.png|x35px|link=Princess Peach|Dr. Peach]][[File:MKT Icon DrBowser.png|x35px|link=Bowser|Dr. Bowser]] | ||
|[[File:MKT Icon | |0||0||15||35||40||30||30||0 | ||
| | |||
| | |||
|- | |- | ||
|align=center|Capsule+ | |||
| | |"''Improved capsule. You get an additional capsule, and they're a little bigger too.''" | ||
| | ||||||||||||||| | ||
| | |||
| | |||
| | |||
| | |||
|- | |- | ||
|align=center|[[File:MKT Icon Feather.png|65x65px]] | |||
|[[File:MKT Icon | |align=center|[[Cape Feather|Feather]] | ||
|[[ | |"''Jump over items and walls. You'll get a speed boost upon landing, which you can use to ram into your opponents to cause them to crash.''" | ||
| | |align=center|All<br>(Only appears in Battle Mode) | ||
| | ||||||||||||||| | ||
| | |||
| | |||
|- | |- | ||
|align=center rowspan=2|[[File:MKT Icon Star.png|65x65px]] | |||
|[[File:MKT Icon | |align=center rowspan=2|[[Super Star]] | ||
|[[ | |rowspan=2|"''Turns you invincible for a time. Your kart will be faster and any karts you hit will crash.''" | ||
| | |align=center|All<br>(In single-player, appears in certain bonus challenges and Frenzy mode in normal races. In multiplayer, appears in rulesets with less than 3 item slots, and Frenzy mode in rulesets with 3 item slots. Does not appear in Battle Mode.) | ||
| | |align=center rowspan=2 colspan=8|N/A | ||
| | |} | ||
| | |||
===Inventory items=== | |||
These items are collected throughout the course of the game through various means, such as challenges, log-in bonuses, and Tour Gifts. | |||
{|class="wikitable"width=100% | |||
|- | |- | ||
! | !width=25%|Image | ||
| | !width=10%|Name | ||
!Description | |||
|- | |- | ||
|align=center|[[File:MKT Icon Coins.png|65x65px]] [[File:MKT Icon Coins 2.png|65x65px]] [[File:MKT Icon Coins 3.png|65x65px]] | |||
|align=center|[[Coin]] | |||
|Coins gathered during races are used to purchase items and characters in shops. Only 300 coins (or 600 coins for Gold Pass subscribers) can be obtained in normal races per day. Players can obtain additional coins from challenge rewards, Coin Rush, and other methods once the cap has been reached. | |||
| | |||
|- | |- | ||
|align=center|[[File:MKT Icon 1Ruby.png|65x65px]] [[File:MKT Icon Ruby.png|65x65px]] [[File:MKT Icon Ruby 2.png|65x65px]]<br>[[File:MKT Icon Ruby 3.png|65x65px]] [[File:MKT Icon Ruby 4.png|65x65px]] [[File:MKT Icon Ruby 5.png|65x65px]] | |||
|align=center|[[Ruby]] | |||
|Special currency used to play Coin Rush without the Coin Rush ticket or purchase drivers, karts and gliders from the Spotlight Shop. | |||
| | |||
|[[File:MKT Icon | |||
| | |||
|- | |- | ||
|align=center|[[File:MKT Icon Eventtoken.png|65x65px]] | |||
|[[File:MKT Icon | |align=center|[[Event token]] | ||
|Special currency used in Token Shops. | |||
| | |||
|[[ | |||
| | |||
|- | |- | ||
|align=center|[[File:MKT Icon TeamtokenMario.png|65x65px]][[File:MKT Icon TeamtokenLuigi.png|65x65px]][[File:MKT Icon TeamtokenPeach.png|65x65px]] [[File:MKT Icon TeamtokenDaisy.png|65x65px]][[File:MKT Icon TeamtokenBowser.png|65x65px]][[File:MKT Icon TeamtokenDonkeyKong.png|65x65px]][[File:MKT Icon TeamtokenToad.png|65x65px]][[File:MKT Icon TeamtokenToadette.png|65x65px]][[File:MKT Icon TeamtokenWario.png|65x65px]][[File:MKT Icon TeamtokenWaluigi.png|65x65px]][[File:MKT Icon TeamtokenMii.png|65x65px]] | |||
|[[File:MKT Icon | |align=center|[[Event token|Team token]] | ||
|[[ | |Special currency used in Team Rallies and Token Shops. | ||
| | |||
|[[File:MKT Icon | |||
| | |||
| | |||
|- | |- | ||
|align=center|[[File:MKT Icon GrandStar.png|65x65px]] | |||
|[[File:MKT Icon | |align=center|[[Grand Star]] | ||
|Rewards from achieving specified race scores and completing challenges. The more Grand Stars a player obtains, the more cups they can participate in and the more presents they can receive in each tour. If all of the tour gifts have been opened, coins will be awarded instead. Once a tour ends, the total number of Grand Stars resets to zero. | |||
| | |||
| | |||
|- | |- | ||
|align=center|[[File:MKT Icon ItemTicket.png|85x85px]] | |||
|[[File:MKT Icon | |align=center|[[Item ticket]] | ||
|Allows the player to instantaneously receive an Item Box during normal races. Only one ticket can be used per race. | |||
| | |||
| | |||
|- | |- | ||
|align=center|[[File:MKT Icon Point-boostticket1.png|85x85px]][[File:MKT Icon Point-boostticket2.png|85x85px]][[File:MKT Icon Point-boostticket3.png|85x85px]] | |||
|[[File:MKT Icon | |align=center|[[Point-boost ticket]] | ||
|Provides 50 experience points to the base points of drivers, karts or gliders. If the base points of a driver, kart or glider are already at maximum, no more point-boost tickets can be used. | |||
|[[File:MKT Icon | |||
| | |||
|- | |- | ||
|align=center|[[File:MKT Icon Level-boostticket1.png|85x85px]][[File:MKT Icon Level-boostticket2.png|85x85px]][[File:MKT Icon Level-boostticket3.png|85x85px]]<br>[[File:MKT Icon Level-boostticket4.png|85x85px]][[File:MKT Icon Level-boostticket5.png|85x85px]][[File:MKT Icon Level-boostticket6.png|85x85px]]<br>[[File:MKT Icon Level-boostticket7.png|85x85px]][[File:MKT Icon Level-boostticket8.png|85x85px]][[File:MKT Icon Level-boostticket9.png|85x85px]] | |||
|align=center|[[Level-boost ticket]] | |||
|Increases the skill level of drivers, karts or gliders by one unit. The type of ticket must match the rarity. If the skill level of a driver, kart or glider is already Level 8, no more level-boost tickets can be used. | |||
| | |||
|[[File:MKT Icon | |||
| | |||
| | |||
|- | |- | ||
|align=center|[[File:MKT Icon Points-capticket1.png|85x85px]][[File:MKT Icon Points-capticket2.png|85x85px]][[File:MKT Icon Points-capticket3.png|85x85px]]<br>[[File:MKT Icon Points-capticket4.png|85x85px]][[File:MKT Icon Points-capticket5.png|85x85px]][[File:MKT Icon Points-capticket6.png|85x85px]]<br>[[File:MKT Icon Points-capticket7.png|85x85px]][[File:MKT Icon Points-capticket8.png|85x85px]][[File:MKT Icon Points-capticket9.png|85x85px]] | |||
|align=center|[[Points-cap ticket]] | |||
|Increases the cap of the base points of drivers, karts or gliders. The type of ticket must match the rarity. If the maximum base points of a driver, kart or glider can no longer be unlocked, no more points-cap tickets can be used. | |||
| | |||
|[[File:MKT Icon | |||
| | |||
| | |||
|- | |- | ||
|align=center|[[File:MKT Icon CoinRushTicket.png|85x85px]] | |||
|[[File:MKT Icon | |align=center|[[Coin Rush ticket]] | ||
|[[ | |Allows players to participate in the [[Coin Rush (Mario Kart Tour)|Coin Rush]] mode of the current Tour once without spending Rubies. | ||
|[[ | |||
|- | |- | ||
|align=center|[[File:MKT Icon StarTicket.png|85x85px]] | |||
|[[File:MKT Icon | |align=center|[[Star ticket]] | ||
|Grants a Grand Star. | |||
| | |- | ||
|align=center|[[File:MKT Icon QuickTicket.png|85x85px]] | |||
| | |align=center|[[Quick ticket]] | ||
| | |Subtracts a day out of the remaining time needed to unlock locked cups of the current tour, or changes the content of the Daily Selects or Spotlight Shop. | ||
| | |||
|[[File:MKT Icon | |||
| | |||
|[[ | |||
| | |||
|- | |- | ||
|align=center|[[File:MKT Icon BalloonDefault.png|65x65px]][[File:MKT Icon BalloonCircleMario.png|65x65px]][[File:MKT Icon BalloonStar.png|65x65px]][[File:MKT Icon BalloonHeart.png|65x65px]][[File:MKT Icon BalloonBoo.png|65x65px]][[File:MKT Icon BalloonPumpkin.png|65x65px]][[File:MKT Icon BalloonCloud.png|65x65px]] | |||
|[[File:MKT Icon | |align=center|[[Balloon]] | ||
|Item used in [[Battle Mode|Battles]]. | |||
|} | |||
|[[File:MKT Icon | |||
| | ==Course elements== | ||
| | {{rewrite-expand|section=y|include more course, bonus challenges and Coin Rush appearances}} | ||
===Interactable course elements=== | |||
The following table lists elements that slow racers down, crash them, offer them a [[Jump Boost]] and/or simply give them bonus points when interacted with in a certain way. For ways to interact with these elements for bonus points, see [[Mario Kart Tour race points system#Object interactions|''Mario Kart Tour'' race points system § Object interactions]]. | |||
'''Note:''' Statements that an obstacle causes drivers to crash, spin out, or otherwise slow down on contact typically hold only when said drivers are in a default state. In most cases, drivers are unaffected by obstacles if they are undergoing {{wp|Glossary of video game terms#invincibility frames|invincibility frames}} or are under the effects of a [[Frenzy (Mario Kart Tour)|Frenzy]], [[Mega Mushroom]], [[Bullet Bill]], or [[Super Star]]. The only obstacles that can still slow drivers down regardless of their state are those that are solid objects and cannot be taken out by any means ([[Bumper (Mario Kart series)|bumpers]], [[Flipper (Mario Kart series)|flippers]], [[Walking Tree]]s, windmills etc.). | |||
{|border="1"cellpadding="3"style="background:#f5f5f5;text-align:left;border-collapse:collapse;margin-bottom:5px;width:100%;"align=center | |||
|- | |- | ||
! style="background: # | !width="15%"style="background:#dedede"align=center|Subject | ||
!width="20%"style="background:#dedede"align=center|Location | |||
!width="55%"style="background:#dedede"align=center|Description | |||
!width="10%"style="background:#dedede"align=center|Can give bonus points | |||
| | |||
|- | |- | ||
|align=center|[[File:MKT Anchor.jpg|90px]]<br>[[Anchor]] | |||
|[[File:MKT | |align=center|[[3DS Wario Shipyard|3DS Wario Shipyard, R, T, R/T]] | ||
|An obstacle that swings back and forth and acts like a wall. | |||
| | |align=center|<span style="color:green;">Yes</span> | ||
|[[ | |||
| | |||
| | |||
|- | |- | ||
|align=center rowspan=5|[[File:MKT Asteroid.jpg|100px]]<br>Asteroid | |||
|[[File:MKT | |align=center|[[SNES Rainbow Road|SNES Rainbow Road, R, T, R/T]] | ||
| | |rowspan=5|Asteroids appear in the background of Rainbow Road courses. They act as minor obstacles that can block the player's path in 3DS Rainbow Road and RMX Rainbow Road 1's gliding sections. | ||
| | |align=center rowspan=5|<span style="color:red;">No</span> | ||
|[[ | |||
| | |||
| | |||
|- | |- | ||
|align=center|[[Wii Rainbow Road|Wii Rainbow Road, R, T, R/T]] | |||
| | |||
|[[ | |||
|- | |- | ||
|align=center|[[3DS Rainbow Road|3DS Rainbow Road, R, T, R/T]] | |||
| | |||
|[[ | |||
|- | |- | ||
|align=center|[[RMX Rainbow Road 1|RMX Rainbow Road 1, R. T, R/T]] | |||
| | |||
|- | |- | ||
|align=center|[[RMX Rainbow Road 2|RMX Rainbow Road 2, R. T, R/T]] | |||
| | |||
|- | |- | ||
|align=center|[[File:MKT Ball of Fire.jpg|120px]]<br>[[Fireball|Ball of Fire]] | |||
|[[File:MKT | |align=center|[[DS Mario Circuit|DS Mario Circuit, R, T]] | ||
|A fiery projectile spit out by Fire Piranha Plants. Any driver hit by a Ball of Fire spins out. | |||
| | |align=center|<span style="color:green;">Yes</span> | ||
|[[ | |||
| | |||
| | |||
|- | |- | ||
|align=center rowspan=2|[[File:MKT Banzai Bill.jpg|100px]]<br>[[Banzai Bill]] | |||
|[[File:MKT | |align=center|[[DS Airship Fortress|DS Airship Fortress, R, T]] | ||
|rowspan=2|A larger variant of Bullet Bills that travels in a straight line. When a driver collides with a Banzai Bill, they spin out. | |||
| | |align=center rowspan=2|<span style="color:green;">Yes</span> | ||
|[[ | |||
| | |||
| | |||
|- | |- | ||
|align=center|[[Wii Moonview Highway]] (Steer Clear of Obstacles) | |||
|[[ | |||
|- | |- | ||
|align=center rowspan=9|[[File:MKT barrel.png|100px]]<br>[[Barrel]] | |||
|[[File:MKT | |align=center|[[DS Airship Fortress|DS Airship Fortress R, R/T]] | ||
|rowspan=9|An obstacle that breaks upon collision with a racer, slowing them down. | |||
| | |align=center rowspan=9|<span style="color:green;">Yes</span> | ||
|[[ | |||
| | |||
| | |||
|- | |- | ||
|align=center|[[Wii Mushroom Gorge]] (Break Item Boxes) | |||
| | |||
|- | |- | ||
|align=center|[[3DS Cheep Cheep Lagoon]] (Break Item Boxes) | |||
|[[ | |||
|- | |- | ||
|align=center|[[3DS Wario Shipyard|3DS Wario Shipyard, R, T]] | |||
| | |||
|[[ | |||
|- | |- | ||
|align=center|[[Tour London Loop|London Loop, R, T]] | |||
|[[ | |||
| | |||
|- | |- | ||
|align=center|[[Tour London Loop|London Loop 2, R, T]] | |||
|[[ | |||
| | |||
|- | |- | ||
|align=center|[[Tour London Loop|London Loop 3, R, T, R/T]] | |||
|[[ | |||
| | |||
|- | |- | ||
|align=center|[[Tour Singapore Speedway|Singapore Speedway 3, R, T, R/T]] | |||
|[[ | |||
| | |||
|- | |- | ||
|align=center|[[Rome Avanti|Rome Avanti 2, R, T, R/T]] | |||
| | |||
|[[ | |||
|- | |- | ||
|align=center rowspan=13|[[File:MKT Bowser Barrel.png|100px]]<br>[[Barrel Bomb]] | |||
|[[File:MKT | |align=center|[[SNES Mario Circuit 1]] (Goomba Takedown) | ||
|[[ | |rowspan=13|An explosive object that can be triggered by throwing a projectile or by driving into it. Upon exploding, a Barrel Bomb will also cause other Barrel Bombs within range to detonate and defeat any nearby Goombas. Some Barrel Bombs stand on the ground, while others float or fly using propellers. | ||
| style=" | |align=center rowspan=13|<span style="color:green;">Yes</span> | ||
|- | |- | ||
|align=center|[[GBA Bowser's Castle 2|GBA Bowser's Castle 2, R, T]] | |||
| | |||
|[[ | |||
|- | |- | ||
|align=center|[[GBA Sky Garden]] (Steer Clear of Obstacles) | |||
|[[ | |||
|- | |- | ||
|align=center|[[GCN Dino Dino Jungle]] (Goomba Takedown) | |||
| | |||
|- | |- | ||
|align=center|[[DS Luigi's Mansion]] (Goomba Takedown) | |||
| | |||
|[[ | |||
|- | |- | ||
|align=center|[[DS DK Pass]] (Goomba Takedown) | |||
| | |||
|[[ | |||
|- | |- | ||
|align=center|[[DS Airship Fortress]] (Goomba Takedown) | |||
| | |||
|[[ | |||
|- | |- | ||
|align=center|[[Wii Maple Treeway]] (Goomba Takedown) | |||
| | |||
|[[ | |||
|- | |- | ||
|align=center|[[3DS Shy Guy Bazaar]] (Steer Clear of Obstacles) | |||
|[[ | |||
|- | |- | ||
|align=center|[[3DS Rock Rock Mountain]] (Steer Clear of Obstacles) | |||
| | |||
|[[ | |||
|- | |- | ||
|align=center|[[3DS Neo Bowser City]] (Goomba Takedown) | |||
| | |||
|- | |- | ||
|align=center|[[Tour London Loop|London Loop 2]] (Steer Clear of Obstacles) | |||
|[[ | |||
| | |||
|- | |- | ||
|align=center|[[RMX Rainbow Road 2]] (Goomba Takedown) | |||
| | |||
|[[ | |||
|- | |- | ||
|align=center|[[File:MKT Bath Bomb.jpg|80px]]<br>[[Bath Bomb]] | |||
|[[File:MKT | |align=center|[[Squeaky Clean Sprint|Squeaky Clean Sprint, R]] | ||
|An underwater object. It releases a soapy cloud that gives drivers a Jump Boost. | |||
| | |align=center|<span style="color:green;">Yes</span> | ||
|[[ | |||
| | |||
| | |||
|- | |- | ||
|align=center|[[File:MKT Big egg.jpg|100px]]<br>[[Giant Egg|Big egg]] | |||
|[[File:MKT | |align=center|[[N64 Yoshi Valley|N64 Yoshi Valley, R, T]] | ||
|A large egg that spins and moves in a circle, crashing any driver that comes into contact with it. | |||
| | |align=center|<span style="color:green;">Yes</span> | ||
|[[ | |||
| | |||
| | |||
|- | |- | ||
|align=center rowspan=5|[[File:MKT Tour Blimp.png|130px]]<br>[[Blimp]] | |||
|[[File:MKT | |align=center|[[GBA Luigi Circuit|GBA Luigi Circuit, R, T, R/T]] | ||
|rowspan=5|A blimp that flies around the course in all variants of GBA Luigi Circuit and GBA Sky Garden, the normal and T variants of Singapore Speedway, and all variants of Singapore Speedway 2. In the R and R/T variants of Singapore Speedway, it is stationary and allows for racers to perform Jump Boosts on it. | |||
| | |align=center rowspan=5|<span style="color:green;">Yes</span><br>(through Jump Boosts) | ||
|[[ | |||
| | |||
| | |||
|- | |- | ||
|align=center|[[GBA Sky Garden|GBA Sky Garden, R, T, R/T]] | |||
| | |||
|[[ | |||
|- | |- | ||
|align=center|[[Tour Singapore Speedway|Singapore Speedway, R, T, R/T]] | |||
|[[ | |||
| | |||
|- | |- | ||
|align=center|[[Tour Singapore Speedway|Singapore Speedway 2, R, T, R/T]] | |||
|[[ | |||
| | |||
|- | |- | ||
|align=center|[[Tour Singapore Speedway|Singapore Speedway 3, R, T, R/T]] | |||
|[[ | |||
| | |||
|- | |- | ||
|align=center rowspan=2|[[File:MKT Bob-omb Car.png|80px]]<br>[[Bob-omb Car]] | |||
| | |align=center|[[GCN Mushroom Bridge|GCN Mushroom Bridge, T]] | ||
| | |rowspan=2|A car resembling a Bob-omb that explodes on contact. Racers can get a Jump Boost if they land on it. | ||
| | |align=center rowspan=2|<span style="color:green;">Yes</span> | ||
| | |||
| | |||
| | |||
|- | |- | ||
|align=center|[[Wii Moonview Highway|Wii Moonview Highway, T]] | |||
| | |||
| | |||
| | |||
|- | |- | ||
|align=center rowspan=2|[[File:MKT Bone Piranha Plant.png|100px]]<br>[[Bone Piranha Plant]] | |||
| | |align=center|[[SNES Bowser Castle 3|SNES Bowser Castle 3, R, T, R/T]] | ||
| | |rowspan=2|A skeletal Piranha Plant that lunges at drivers, spinning them out if it reaches them. | ||
| | |align=center rowspan=2|<span style="color:green;">Yes</span> | ||
| | |||
| | |||
| | |||
|- | |- | ||
|align=center|[[GBA Bowser's Castle 4|GBA Bowser's Castle 4R]] | |||
|- | |- | ||
| | |align=center rowspan=3|[[File:MKT Boost Rings.jpg|90px]]<br>[[Ring (Mario Kart series)|Boost Ring]] | ||
|align=center|[[Tour Singapore Speedway|Singapore Speedway]] | |||
| | |rowspan=3|An object that appears in gliding sections and gives drivers speed boosts. | ||
| | |align=center rowspan=3|<span style="color:green;">Yes</span> | ||
| | |||
|- | |- | ||
| | |align=center|[[Tour Singapore Speedway|Singapore Speedway 2T]] | ||
|- | |- | ||
| | |align=center|[[Tour Singapore Speedway|Singapore Speedway 3T]] | ||
|- | |- | ||
|align=center|[[File:MKT boulder.png|90px]]<br>[[Boulder]] | |||
| | |align=center|[[Tour Sydney Sprint|Sydney Sprint 3, R, T, R/T]] | ||
|An upright obstacle found in grassy portions of the course. It slows down drivers who collide with it. | |||
| | |align=center|<span style="color:green;">Yes</span> | ||
| | |||
|- | |- | ||
| | |align=center|[[File:MKT Bumper.png|100px]]<br>[[Bumper (Mario Kart series)|Bumper]] | ||
|align=center|[[DS Waluigi Pinball|DS Waluigi Pinball, R, T, R/T]] | |||
| | |An object that bounces metal balls and racers off when they collide with it. Some bumpers are stationary, while others move around in circles. Racers can perform a Jump Boost by bouncing on top of a bumper, which is possible in DS Waluigi Pinball T after they drive off a ramp. | ||
| | |align=center|<span style="color:green;">Yes</span><br>(through Jump Boosts) | ||
| | |||
|- | |- | ||
| | |align=center|[[File:MKT Burner.jpg|50px]]<br>[[Burner]] | ||
|align=center|[[DS Airship Fortress|DS Airship Fortress, R, T, R/T]] | |||
| | |A flame-throwing object that slowly moves back and forth, burning and spinning out any drivers that touch its flame. | ||
| | |align=center|<span style="color:red;">No</span> | ||
| | |||
| style=" | |||
|- | |- | ||
| | |align=center|[[File:MKT Bus.jpg|150px]]<br>[[Bus]] | ||
|align=center|[[GCN Mushroom Bridge|GCN Mushroom Bridge, R]] | |||
|A large vehicle. In GCN Mushroom Bridge, buses moves down the road along with the rest of the traffic, causing drivers to simply lose some speed when run into. In GCN Mushroom Bridge R, they are stationed on the side of the road. | |||
|align=center|<span style="color:green;">Yes</span> | |||
|- | |- | ||
|align=center rowspan=12|[[File:MKT Cannon.jpg|100px]]<br>[[Cannon (Mario Kart series)|Cannon]] | |||
|align=center|[[N64 Yoshi Valley]] | |||
|rowspan=12|A large cannon that launches drivers to a much farther portion of a track while activating their gliders. In N64 Yoshi Valley, GCN DK Mountain, Wii DK Summit, and Wii Maple Treeway, cannons take the form of a [[Barrel Cannon]]. In DS Waluigi Pinball, one appears in the form of a pinball launcher. In DS Airship Fortress, it appears as a regular ship cannon. In Wii Rainbow Road, it appears as a large [[Ring (Mario Kart series)|Star Ring]] with a rainbow tunnel. In 3DS Rainbow Road R and Singapore Speedway T, it takes the form of a blue and gray metallic version of a Barrel Cannon. In Vancouver Velocity 2 and the normal and T variants of Singapore Speedway, they take the form of red and blue circus cannons, respectively. | |||
|align=center rowspan=12|<span style="color:green;">Yes</span><br>(through Jump Boosts) | |||
| | |||
|rowspan= | |||
|rowspan= | |||
|- | |- | ||
| | |align=center|[[GCN DK Mountain|GCN DK Mountain, R, T, R/T]] | ||
|- | |- | ||
| | |align=center|[[DS Waluigi Pinball|DS Waluigi Pinball, R, T, R/T]] | ||
|- | |- | ||
| | |align=center|[[DS Airship Fortress|DS Airship Fortress, R, R/T]] | ||
|- | |- | ||
|align=center|[[Wii DK Summit|Wii DK Summit, R, T, R/T]] | |||
|- | |- | ||
| | |align=center|[[Wii Maple Treeway|Wii Maple Treeway, R, T]] | ||
|- | |- | ||
| | |align=center|[[Wii Rainbow Road|Wii Rainbow Road, R, T, R/T]] | ||
|- | |- | ||
| | |align=center|[[3DS Rainbow Road|3DS Rainbow Road R]] | ||
|- | |- | ||
|align=center|[[Vancouver Velocity|Vancouver Velocity 2, R]] | |||
| | |||
| | |||
|- | |- | ||
| | |align=center|[[Tour Singapore Speedway|Singapore Speedway, R, T]] | ||
|- | |- | ||
| | |align=center|[[Athens Dash|Athens Dash, R, T]] | ||
|- | |- | ||
| | |align=center|[[Athens Dash|Athens Dash 2R]] | ||
|- | |- | ||
|align=center rowspan=16|[[File:MKT White Cars.png|100px]]<br>[[Car (obstacle)|Car]] | |||
|align=center|[[GCN Mushroom Bridge|GCN Mushroom Bridge, R, T, R/T]] | |||
|rowspan=18|A course element with different colors and a taxi variant. In most of their appearances, they are stationary, and racers can perform a Jump Boost by bouncing on top of them. In Wii Coconut Mall, two cars appear at the end of the course moving back and forth while other cars appear in the background in the parking lot; in Berlin Byways 3 and Berlin Byways R, cars move along with the traffic. Both types of moving car act as walls that slow down racers. Mushroom-shaped cars appear in GCN Mushroom Bridge and the R and R/T variants of Wii Moonview Highway and release Mushrooms onto the road for drivers to use upon touching them. | |||
| | |align=center rowspan=18|<span style="color:green;">Yes</span> | ||
|rowspan= | |||
|- | |- | ||
| | |align=center|[[DS Shroom Ridge|DS Shroom Ridge, R, T, R/T]] | ||
|- | |- | ||
| | |align=center|[[Wii Coconut Mall|Wii Coconut Mall, R, T, R/T]] | ||
|- | |- | ||
| | |align=center|[[Wii Moonview Highway|Wii Moonview Highway, R, T, R/T]] | ||
|- | |- | ||
|align=center|[[Tour New York Minute|New York Minute 2T]] | |||
|- | |- | ||
| | |align=center|[[Tour New York Minute|New York Minute 3T, R/T]] | ||
|- | |- | ||
| | |align=center|[[Tour New York Minute|New York Minute 4, R, T, R/T]] | ||
|- | |- | ||
| | |align=center|[[Tour Tokyo Blur|Tokyo Blur]] (Ring Race) | ||
|- | |- | ||
|align=center|[[Los Angeles Laps]] (Coin Rush) | |||
|- | |- | ||
| | |align=center|[[Tour Berlin Byways|Berlin Byways, R, R/T]] | ||
|- | |- | ||
| | |align=center|[[Tour Berlin Byways|Berlin Byways 2, R, T, R/T]] | ||
|- | |- | ||
| | |align=center|[[Tour Berlin Byways|Berlin Byways 3, R]] | ||
|- | |- | ||
|align=center|[[Tour Sydney Sprint|Sydney Sprint T]] | |||
| | |||
|- | |- | ||
| | |align=center|[[Tour Amsterdam Drift|Amsterdam Drift 2R/T]] | ||
|- | |- | ||
| | |align=center|[[Tour Bangkok Rush|Bangkok Rush 2, R, T, R/T]] | ||
|- | |- | ||
|align=center|[[Tour Bangkok Rush|Bangkok Rush 3, R, T, R/T]] | |||
|- | |||
|align=center rowspan=2|[[File:MKT Mushroom car.png|100px]]<br>Car (Mushroom) | |||
|align=center|[[GCN Mushroom Bridge|GCN Mushroom Bridge, R, T]] | |||
|- | |- | ||
|align=center|[[Wii Moonview Highway|Wii Moonview Highway R, R/T]] | |||
| | |||
| | |||
| | |||
|- | |- | ||
|align=center|[[File:MKT Shuriken Ceiling.jpg|150px]]<br>[[Ceiling Needle]]s | |||
| | |align=center|[[Ninja Hideaway|Ninja Hideaway, R]] | ||
| | |Shuriken stuck underneath platforms that move up and down. They spin out racers if they touched. The platforms themselves also have trick ramps on the top of them that can be reached by driving on a higher floor of the course. | ||
| | |align=center|<span style="color:red;">No</span> | ||
| | |||
| | |||
| | |||
| | |||
|- | |- | ||
|align=center rowspan=7|[[File:MKT Chain Chomp.png|100px]]<br>[[Chain Chomp]] (chained) | |||
|align=center|[[SNES Mario Circuit 2|SNES Mario Circuit 2T]] | |||
|rowspan=7|A large chained enemy that lunges towards racers who drive past it, flipping them over if it reaches them. | |||
|align=center rowspan=7|<span style="color:green;">Yes</span> | |||
|- | |||
|align=center|[[SNES Mario Circuit 3|SNES Mario Circuit 3R/T]] | |||
|- | |||
|align=center|[[SNES Donut Plains 3|SNES Donut Plains 3T]] | |||
|- | |||
|align=center|[[DS Peach Gardens|DS Peach Gardens T]] | |||
|- | |||
|align=center|[[Tour London Loop|London Loop, R, T, R/T]] | |||
|- | |||
|align=center|[[Tour London Loop|London Loop 2, R, T]] | |||
|- | |||
|align=center|[[Tour London Loop|London Loop 3, R, R/T]] | |||
|- | |||
|align=center rowspan=2|[[File:MKT Chomp.jpg|100px]]<br>Chain Chomp (unchained) | |||
|align=center|[[DS Peach Gardens|DS Peach Gardens, R, T, R/T]] | |||
|rowspan=2|A large obstacle that rolls around in circles, flipping any drivers over when they roll into them. | |||
|align=center rowspan=2|<span style="color:green;">Yes</span> | |||
|- | |- | ||
|align=center|[[3DS Rainbow Road]] | |||
| | |||
| | |||
|- | |- | ||
|align=center rowspan=8|[[File:MKT Cheep Cheep.png|100px]]<br>[[Cheep Cheep]] | |||
| | |align=center|[[SNES Donut Plains 3|SNES Donut Plains 3R/T]] | ||
| | |rowspan=8|A fish that swims around in a body of water or flops about on land. When bumped into, Cheep Cheeps simply cause drivers to lose some speed. | ||
| | |align=center rowspan=8|<span style="color:green;">Yes</span> | ||
| | |- | ||
| | |align=center|[[SNES Koopa Troopa Beach 2|SNES Koopa Troopa Beach 2, R]] | ||
| | |- | ||
| | |align=center|[[GBA Cheep-Cheep Island|GBA Cheep-Cheep Island, R, R/T]] | ||
| | |||
| | |||
|- | |- | ||
|align=center|[[Wii Koopa Cape|Wii Koopa Cape, R, T, R/T]] | |||
|- | |- | ||
|align=center|[[3DS Cheep Cheep Lagoon|3DS Cheep Cheep Lagoon, R, T, R/T]] | |||
|- | |- | ||
|align=center|[[ | |align=center|[[Tour Amsterdam Drift|Amsterdam Drift 2R/T]] | ||
|- | |- | ||
|align=center|[[ | |align=center|[[Piranha Plant Cove|Piranha Plant Cove 2]] | ||
|- | |- | ||
|align=center|[[ | |align=center|[[RMX Donut Plains 1|RMX Donut Plains 1, R, T, R/T]] | ||
|- | |- | ||
|align=center|[[File:MKT | |align=center rowspan=4|[[File:MKT Clampy.png|100px]]<br>[[Clampy]] | ||
|align=center|[[ | |align=center|[[GCN Daisy Cruiser]] | ||
| | |rowspan=4|An oyster enemy that periodically opens and closes its valves to reveal objects such as coins and Item Boxes that racers can drive into to collect. If a Clampy closes its valves in on a racer, it will flip them over. | ||
|align=center| | |align=center rowspan=4|<span style="color:green;">Yes</span> | ||
|- | |- | ||
|align=center|[[ | |align=center|[[3DS Cheep Cheep Lagoon|3DS Cheep Cheep Lagoon, R, T]] | ||
|- | |- | ||
|align=center|[[ | |align=center|[[Piranha Plant Cove|Piranha Plant Cove 2, R, T, R/T]] | ||
|- | |- | ||
|align=center|[[ | |align=center|[[Piranha Plant Cove|Piranha Plant Cove 3, R, T]] | ||
|- | |- | ||
|align=center|[[File:MKT | |align=center rowspan=5|[[File:MKT Conveyor Belts.jpg|100px]]<br>[[Conveyor Belt]] | ||
|align=center|[[ | |align=center|[[DS Peach Gardens|DS Peach Gardens T]] | ||
| | |rowspan=5|A section of moving floor with arrows on it that are colored either green or red. Driving on green conveyor belts speeds drivers up while driving on red conveyor belts slows them down. In Wii Coconut Mall, the conveyor belts change directions on the second lap. In Singapore Speedway 2, small ramps can be found on the conveyor belts allowing for drivers to perform Jump Boosts. | ||
|align=center | |align=center rowspan=5|<span style="color:red;">No</span> | ||
|- | |- | ||
|align=center|[[ | |align=center|[[Wii Coconut Mall|Wii Coconut Mall, R, T, R/T]] | ||
|- | |- | ||
|align=center|[[ | |align=center|[[Tour Singapore Speedway|Singapore Speedway 2, R, T, R/T]] | ||
|- | |- | ||
|align=center|[[ | |align=center|[[RMX Bowser's Castle 1|RMX Bowser's Castle 1, R, T, R/T]] | ||
|- | |- | ||
|align=center|[[ | |align=center|[[Piranha Plant Cove|Piranha Plant Cove 3R/T]] | ||
|- | |- | ||
|align=center|[[File:MKT | |align=center rowspan=3|[[File:MKT crates.png|100px]]<br>[[Crate]] | ||
|align=center|[[ | |align=center|[[DS Airship Fortress|DS Airship Fortress, R, T, R/T]] | ||
| | |rowspan=3|An object that slows down any racer that collides with it. When hit, crates break and release an item such as a Banana or Mushroom. | ||
|align=center| | |align=center rowspan=3|<span style="color:green;">Yes</span> | ||
|- | |- | ||
|align=center|[[ | |align=center|[[Tour London Loop|London Loop, R, T]] | ||
|- | |- | ||
|align=center|[[File:MKT | |align=center|[[Tour London Loop|London Loop 3, R, T, R/T]] | ||
|align=center|[[ | |- | ||
| | |align=center rowspan=8|[[File:MKT Current.jpg|120px]]<br>[[Current]] | ||
|align=center| | |align=center|[[GCN Daisy Cruiser|GCN Daisy Cruiser T]] | ||
|rowspan=8|An underwater air current that pushes drivers away. In 3DS Piranha Plant Slide, 3DS Wario Shipyard, and Amsterdam Drift 2, currents are released from pipes, while in Piranha Plant Cove courses, they are released from cracks in the ground which allow players to perform Jump Boosts. | |||
|align=center rowspan=8|<span style="color:green;">Yes</span><br>(through Jump Boosts) | |||
|- | |- | ||
|align=center|[[ | |align=center|[[3DS Piranha Plant Slide|3DS Piranha Plant Slide, R, T]] | ||
|- | |- | ||
|align=center|[[ | |align=center|[[3DS Wario Shipyard|3DS Wario Shipyard, R, T, R/T]] | ||
|- | |- | ||
|align=center|[[ | |align=center|[[Tour Amsterdam Drift|Amsterdam Drift 2, R, T, R/T]] | ||
|- | |- | ||
|align=center|[[ | |align=center|[[Piranha Plant Cove|Piranha Plant Cove, R, R/T]] | ||
|- | |- | ||
|align=center|[[ | |align=center|[[Piranha Plant Cove|Piranha Plant Cove 2, R, T, R/T]] | ||
|- | |- | ||
|align=center|[[ | |align=center|[[Piranha Plant Cove|Piranha Plant Cove 3, R, T]] | ||
|- | |- | ||
|align=center|[[ | |align=center|[[Squeaky Clean Sprint|Squeaky Clean Sprint R]] | ||
|- | |- | ||
|align=center|[[File:MKT | |align=center rowspan=9|[[File:MKT Dash panel ramp trucks.png|100px]]<br>[[Dash panel ramp truck]] | ||
|align=center|[[ | |align=center|[[GCN Mushroom Bridge|GCN Mushroom Bridge R/T]] | ||
|rowspan= | |rowspan=9|A stationary vehicle that can be used as a ramp. | ||
|align=center | |align=center rowspan=9|<span style="color:green;">Yes</span><br>(through Jump Boosts) | ||
|- | |- | ||
|align=center|[[ | |align=center|[[DS Shroom Ridge]] (Do Jump Boosts) | ||
|- | |- | ||
|align=center|[[ | |align=center|[[Wii Coconut Mall|Wii Coconut Mall R/T]] | ||
|- | |- | ||
|align=center|[[ | |align=center|[[Wii Moonview Highway|Wii Moonview Highway R/T]] | ||
|- | |- | ||
|align=center|[[ | |align=center|[[Tour New York Minute|New York Minute T]] | ||
|- | |- | ||
|align=center|[[ | |align=center|[[Tour New York Minute|New York Minute 4]] | ||
|- | |- | ||
|align=center|[[ | |align=center|[[Tour Sydney Sprint|Sydney Sprint T]] | ||
|- | |- | ||
|align=center|[[ | |align=center|[[Tour Berlin Byways|Berlin Byways 3T]] | ||
|- | |- | ||
|align=center|[[ | |align=center|[[Tour Amsterdam Drift|Amsterdam Drift R/T]] | ||
|- | |- | ||
|align=center | |align=center|[[File:MKT Drain Pipe.jpg|100px]]<br>[[Drain Pipe]] | ||
|align=center | |align=center|[[3DS Piranha Plant Slide|3DS Piranha Plant Slide, R, T, R/T]] | ||
| | |A pipe that sticks out of a wall, causing drivers that bump into it to lose some speed. Unlike in previous ''Mario Kart'' games, gliding into the water that flows from a Drain Pipe does not affect drivers. | ||
|align=center|<span style="color:red;">No</span> | |||
|align=center | |||
|- | |- | ||
|align=center| | |align=center|[[File:MKT Exploring Shy Guy yellow.jpg|100px]]<br>[[Exploring Shy Guy]] | ||
|align=center|[[GBA Sunset Wilds|GBA Sunset Wilds, R, T, R/T]] | |||
|An enemy that moves back and forth across the track, causing any drivers that come into contact with it to spin out. | |||
|align=center|<span style="color:green;">Yes</span> | |||
|- | |- | ||
|align=center|[[File:MKT | |align=center rowspan=3|[[File:MKT Wii Dry Dry Ruins Falling Pillar upright.jpg|30px]][[File:MKT Wii Dry Dry Ruins Falling Pillar down.jpg|100px]]<br>[[File:MKT Falling Pillar upright.jpg|30px]][[File:MKT Falling Pillar down.jpg|100px]]<br>[[Falling Pillar]] | ||
|align=center|[[Wii Dry Dry Ruins|Wii Dry Dry Ruins, R, T, R/T]] | |||
|rowspan=3|A stone pillar that appears upright on the first lap of a course, but falls to the ground on the second lap, acting as a ramp that allows drivers to perform Jump Boosts. | |||
|align=center rowspan=3|<span style="color:green;">Yes</span> (through Jump Boosts) | |||
| | |||
|- | |- | ||
|align=center|[[ | |align=center|[[Piranha Plant Cove|Piranha Plant Cove, R]] | ||
|- | |- | ||
|align=center|[[Piranha Plant Cove|Piranha Plant Cove 2, R]] | |||
|- | |- | ||
|align=center|[[File:MKT | |align=center|[[File:MKT festive tree.png|100px]]<br>[[Festive tree]] | ||
|align=center|[[ | |align=center|See [[Festive tree#Festive tree locations|Festive tree § Festive tree locations]]. | ||
| | |A decorative element added to courses during tours that occur around the holiday season. Festive trees give bonus points when hit with a shell or a Bob-omb or by driving into them while invincible or Mega. | ||
|align=center|<span style="color:green;">Yes</span> | |||
|- | |- | ||
|align=center|[[File:MKT | |align=center|[[File:MKT Fire Bar.jpg|100px]]<br>[[Fire Bar]] | ||
|align=center|[[ | |align=center|[[GCN Waluigi Stadium|GCN Waluigi Stadium, R, T, R/T]] | ||
| | |A set of rotating, fiery bars that spin out drivers upon contact. | ||
|align=center|<span style="color:red;">No</span> | |||
|- | |- | ||
|align=center|[[File:MKT | |align=center|[[File:MKT Fire Chain.jpg|100px]]<br>[[Fire Chain]] | ||
|align=center|[[ | |align=center|[[GCN Waluigi Stadium|GCN Waluigi Stadium, R, T, R/T]] | ||
| | |A rotating ring of fireballs that spin out drivers upon contact. | ||
|align=center|<span style="color:red;">No</span> | |||
|- | |- | ||
|align=center|[[File:MKT | |align=center|[[File:MKT Fire Piranha Plant.jpg|120px]]<br>[[Fire Piranha Plant]] | ||
|align=center|[[ | |align=center|[[DS Mario Circuit|DS Mario Circuit, R, T]] | ||
| | |A Piranha Plant that spits out Balls of Fire onto the road, spinning out drivers upon contact. | ||
|align=center|<span style="color:green;">Yes</span> | |||
|- | |- | ||
|align=center|[[File:MKT | |align=center rowspan=3|[[File:MKT Fish Bone.jpg|100px]]<br>[[Fish Bone]] | ||
|align=center|[[ | |align=center|{{anchor|Fish Bone A}}[[GBA Boo Lake|GBA Boo Lake, R, T, R/T]] | ||
| | |rowspan=3|A skeletal fish that acts as an obstacle in underwater sections, slowing drivers down slightly when bumped into. Non-interactable Fish Bones [[#Fish Bone B|also appear in N64 Choco Mountain and its variants as decorations]]. | ||
|align=center rowspan=3|<span style="color:green;">Yes</span> | |||
|- | |- | ||
|align=center|[[ | |align=center|[[3DS Wario Shipyard|3DS Wario Shipyard, R, T, R/T]] | ||
|- | |- | ||
|align=center|[[ | |align=center|[[Piranha Plant Cove|Piranha Plant Cove 3, R, T]] | ||
|- | |- | ||
|align=center|[[File:MKT | |align=center|[[File:MKT Flipper.png|100px]]<br>[[Flipper (Mario Kart series)|Flipper]] | ||
|align=center| | |align=center|[[DS Waluigi Pinball|DS Waluigi Pinball, R, T, R/T]] | ||
|An object that sends metal balls in another direction when they collide with it. Racers that drive into a flipper will crash. | |||
|align=center|<span style="color:red;">No</span> | |||
|- | |- | ||
|align=center|[[File:MKT | |align=center rowspan=2|[[File:MKT Goomba floaty.jpg|90px]]<br>Floaty | ||
|align=center|[[ | |align=center|[[GCN Daisy Cruiser]] (Do Jump Boosts) | ||
| | |rowspan=2|An object used by [[Innertube Goomba]]s to float on the surface of the water. Floaties bounce away drivers while repelling various projectiles, such as Green Shells and fireballs. | ||
|align=center rowspan=2|<span style="color:green;">Yes</span> | |||
|- | |- | ||
|align=center|[[ | |align=center|[[Tour Singapore Speedway|Singapore Speedway, R]] | ||
|- | |- | ||
|align=center|[[File:MKT | |align=center|[[File:MKT Flying Shy Guy.png|100px]]<br>[[Flying Shy Guy]] | ||
|align=center|[[ | |align=center|[[3DS Shy Guy Bazaar|3DS Shy Guy Bazaar, R, T, R/T]] | ||
| | |A Shy Guy that uses a magic carpet to fly around. Flying Shy Guys appear above the glider section. Colliding with a Flying Shy Guy causes drivers to lose their speed in the air. | ||
|align=center|<span style="color:green;">Yes</span> | |||
|- | |- | ||
|align=center rowspan=2|[[File:MarioKartTour Fuzzies.png|120px]]<br>[[Fuzzy]] | |||
|align=center|[[Rome Avanti|Rome Avanti R/T]] | |||
|rowspan=2|A furry black creature that moves along a [[track]], spinning out drivers upon contact. | |||
|align=center rowspan=2|<span style="color:green;">Yes</span> | |||
|- | |- | ||
|align=center | |align=center|[[Piranha Plant Pipeline|Piranha Plant Pipeline, R, R/T]] | ||
|- | |- | ||
|align=center|[[ | |align=center|[[File:MKT Goal Ring.jpg|100px]]<br>[[Goal Ring]] | ||
|align=center|[[Yoshi's Island (race course)|Yoshi's Island, T]] | |||
|A ring with [[Smiley Flower]]s floating above the ground just before the finish line. It can be reached via a pathway produced by a Winged Cloud encountered prior. When passed through, the Goal Ring gives bonus points. | |||
|align=center|<span style="color:green;">Yes</span> | |||
|- | |- | ||
|align=center|[[ | |align=center rowspan=2|[[File:MKT goat.png|100px]]<br>[[Goat]] | ||
|align=center|[[3DS Daisy Hills|3DS Daisy Hills, R, T, R/T]] | |||
|rowspan=2|An obstacle that walks around the track slowly. Drivers that collide with a goat spin out. | |||
|align=center rowspan=2|<span style="color:green;">Yes</span> | |||
|- | |- | ||
|align=center | |align=center|[[Tour Amsterdam Drift|Amsterdam Drift 3R]] | ||
|- | |- | ||
|align=center|[[ | |align=center rowspan=22|[[File:MKT Goomba.png|100px]]<br>[[Goomba]] | ||
|align=center|Any course where a Goomba Takedown bonus challenge takes place | |||
|rowspan=22|A short enemy that stands in the racers' way or walks left and right. Goombas can be taken out with an offensive item or by simply driving into them, although the latter will also cause the racer to spin out. They can also be defeated by landing on them while gliding or after driving off a ramp, which gives the racer a Jump Boost. | |||
|align=center rowspan=22|<span style="color:green;">Yes</span> | |||
|- | |- | ||
|align=center|[[ | |align=center|[[N64 Mario Raceway|N64 Mario Raceway, R, T, R/T]] | ||
|- | |- | ||
|align=center|[[ | |align=center|[[GCN Daisy Cruiser]] (Do Jump Boosts) | ||
|- | |- | ||
|align=center|[[ | |align=center|[[GCN Yoshi Circuit]] (Do Jump Boosts) | ||
|- | |- | ||
|align=center|[[ | |align=center|[[DS Luigi's Mansion]] (Steer Clear of Obstacles) | ||
|- | |- | ||
|align=center|[[ | |align=center|[[DS Waluigi Pinball]] (Steer Clear of Obstacles) | ||
|- | |- | ||
|align=center|[[ | |align=center|[[DS DK Pass]] (Do Jump Boosts) | ||
|- | |- | ||
|align=center | |align=center|[[DS Mario Circuit|DS Mario Circuit, T]] | ||
|- | |- | ||
|align=center|[[ | |align=center|[[Wii Mushroom Gorge|Wii Mushroom Gorge, R, T, R/T]] | ||
|- | |- | ||
|align=center | |align=center|[[Wii Koopa Cape|Wii Koopa Cape, T]] | ||
|- | |- | ||
|align=center|[[ | |align=center|[[Wii Maple Treeway]] (Goomba Takedown) | ||
|- | |- | ||
|align=center|[[ | |align=center|[[3DS Toad Circuit|3DS Toad Circuit R, R/T]] | ||
|- | |- | ||
|align=center|[[ | |align=center|[[3DS Mario Circuit|3DS Mario Circuit, R]] | ||
|- | |- | ||
|align=center|[[ | |align=center|[[3DS Piranha Plant Slide]] | ||
|- | |- | ||
|align=center|[[ | |align=center|[[Tour Tokyo Blur|Tokyo Blur]] (Do Jump Boosts) | ||
|- | |- | ||
|align=center|[[Paris Promenade | |align=center|[[Tour Paris Promenade|Paris Promenade]] | ||
|- | |- | ||
|align=center|[[ | |align=center|[[Tour Paris Promenade|Paris Promenade 2]] | ||
|- | |- | ||
|align=center|[[ | |align=center|[[Tour Paris Promenade|Paris Promenade 3]] | ||
|- | |- | ||
|align=center|[[RMX Mario Circuit 1|RMX Mario Circuit 1, R, T, R/T]] | |||
|align=center|[[Mario Circuit | |||
|- | |- | ||
|align=center|[[ | |align=center|[[Tour Singapore Speedway|Singapore Speedway, R]] | ||
|- | |- | ||
|align=center|[[ | |align=center|[[Tour Amsterdam Drift|Amsterdam Drift T]] | ||
|- | |- | ||
|align=center|[[ | |align=center|[[Athens Dash|Athens Dash 2]] | ||
|- | |- | ||
|align=center|[[ | |align=center rowspan=16|[[File:MKT Goomba Tower.png|100px]]<br>[[Goomba Tower]] | ||
|align=center|[[SNES Mario Circuit 1]] (Goomba Takedown) | |||
|rowspan=16|A stack of Goombas that can be defeated the same way as an individual Goomba. If the Goomba at the bottom of a tower is defeated, all of the ones above it collapse and are defeated as well. | |||
|align=center rowspan=16|TBD | |||
|- | |- | ||
|align=center|[[ | |align=center|[[SNES Ghost Valley 1]] (Goomba Takedown, Steer Clear of Obstacles) | ||
|- | |- | ||
|align=center|[[ | |align=center|[[SNES Ghost Valley 2]] (Glider Challenge) | ||
|- | |- | ||
|align=center | |align=center|[[SNES Choco Island 2]] (Goomba Takedown) | ||
|- | |- | ||
|align=center|[[ | |align=center|[[SNES Vanilla Lake 1]] (Goomba Takedown) | ||
|- | |- | ||
|align=center|[[ | |align=center|[[SNES Rainbow Road]] (Goomba Takedown) | ||
|- | |- | ||
|align=center|[[ | |align=center|[[GCN Dino Dino Jungle]] (Goomba Takedown) | ||
|- | |- | ||
|align=center | |align=center|[[DS Luigi's Mansion]] (Goomba Takedown) | ||
|- | |- | ||
|align=center|[[ | |align=center|[[DS Airship Fortress]] (Goomba Takedown) | ||
|- | |- | ||
|align=center|[[ | |align=center|[[Wii Maple Treeway]] (Goomba Takedown) | ||
|- | |- | ||
|align=center|[[ | |align=center|[[3DS Shy Guy Bazaar]] (Goomba Takedown) | ||
|- | |- | ||
|align=center|[[ | |align=center|[[3DS Neo Bowser City]] (Goomba Takedown) | ||
|- | |- | ||
|align=center|[[ | |align=center|[[Tour Paris Promenade|Paris Promenade 2]] (Goomba Takedown) | ||
|- | |- | ||
|align=center | |align=center|[[Los Angeles Laps]] (Goomba Takedown) | ||
|- | |- | ||
|align=center|[[ | |align=center|[[RMX Mario Circuit 1]] (Goomba Takedown) | ||
|- | |- | ||
|align=center|[[ | |align=center|[[RMX Rainbow Road 2]] (Goomba Takedown) | ||
|- | |- | ||
|align=center|[[ | |align=center rowspan=12|[[File:MKT half-pipe.jpg|100px]]<br>[[Half-pipe (object)|Half-pipe]] | ||
|align=center|[[N64 Yoshi Valley|N64 Yoshi Valley, R, T, R/T]] | |||
|rowspan=13|A ramp on the side of the track that drivers can jump off of for Jump Boosts. | |||
|align=center rowspan=13|<span style="color:green;">Yes</span> | |||
|- | |- | ||
|align=center|[[ | |align=center|[[GCN Waluigi Stadium|GCN Waluigi Stadium, R, T, R/T]] | ||
|- | |- | ||
|align=center|[[ | |align=center|[[GCN DK Mountain|GCN DK Mountain, R, T, R/T]] | ||
|- | |- | ||
|align=center|[[ | |align=center|[[Wii DK Summit|Wii DK Summit, R, T, R/T]] | ||
|- | |- | ||
|align=center|[[ | |align=center|[[Wii Koopa Cape|Wii Koopa Cape, R, T, R/T]] | ||
|- | |- | ||
|align=center|[[ | |align=center|[[Wii Maple Treeway|Wii Maple Treeway, R, T, R/T]] | ||
|- | |- | ||
|align=center | |align=center|[[Wii Dry Dry Ruins|Wii Dry Dry Ruins, R, T, R/T]] | ||
|- | |- | ||
|align=center|[[ | |align=center|[[Wii Rainbow Road|Wii Rainbow Road, R, T, R/T]] | ||
|- | |- | ||
|align=center|[[ | |align=center|[[Athens Dash|Athens Dash, R, T, R/T]] | ||
|- | |- | ||
|align=center|[[ | |align=center|[[Athens Dash|Athens Dash 2, R, T, R/T]] | ||
|- | |- | ||
|align=center|[[ | |align=center|[[Piranha Plant Pipeline|Piranha Plant Pipeline, R, T]] | ||
|- | |- | ||
|align=center|[[ | |align=center|[[Squeaky Clean Sprint|Squeaky Clean Sprint, R, T, R/T]] | ||
|- | |- | ||
|align=center|[[ | |align=center|[[File:MKT Super half-pipe.jpg|100px]]<br>[[Half-pipe (object)|Super half-pipe]] | ||
|align=center|[[Merry Mountain|Merry Mountain, R, T, R/T]] | |||
|- | |- | ||
|align=center|[[ | |align=center rowspan=18|[[File:Hot air balloon MKT.png|100px]]<br>[[Hot-air balloon]] | ||
|align=center|[[N64 Luigi Raceway|N64 Luigi Raceway, R, T, R/T]] | |||
|rowspan=18|An obstacle that floats in one place. Hot-air balloons cause racers who glide into them to bounce back. However, if a racer lands on top of a hot air balloon, they receive a Jump Boost. In N64 Luigi Raceway, a hot-air balloon provides an [[Item Box]] in the second lap. In N64 Mario Raceway and N64 Yoshi Valley, hot-air balloons appear as background elements high above the courses. | |||
|align=center rowspan=18|<span style="color:green;">Yes</span><br>(through Jump Boosts) | |||
|- | |- | ||
|align=center|[[ | |align=center|[[N64 Koopa Troopa Beach|N64 Koopa Troopa Beach R]] | ||
|- | |- | ||
|align=center | |align=center|[[N64 Mario Raceway|N64 Mario Raceway, R, T, R/T]] | ||
|- | |- | ||
|align=center|[[ | |align=center|[[N64 Royal Raceway|N64 Royal Raceway, T]] | ||
|- | |- | ||
|align=center|[[Yoshi | |align=center|[[N64 Yoshi Valley|N64 Yoshi Valley, R, T, R/T]] | ||
|- | |- | ||
|align=center|[[ | |align=center|[[GBA Peach Circuit|GBA Peach Circuit, R, T, R/T]] | ||
|- | |- | ||
|align=center|[[ | |align=center|[[GCN Mushroom Bridge|GCN Mushroom Bridge T, R/T]] | ||
|- | |- | ||
|align=center|[[ | |align=center|[[GCN Yoshi Circuit|GCN Yoshi Circuit T]] (Glider Challenge) | ||
|- | |- | ||
|align=center|[[ | |align=center|[[DS Shroom Ridge|DS Shroom Ridge T]] | ||
|- | |- | ||
|align=center|[[ | |align=center|[[DS DK Pass|DS DK Pass R/T]] (Do Jump Boosts) | ||
|- | |- | ||
|align=center|[[ | |align=center|[[DS Peach Gardens|DS Peach Gardens, R, T, R/T]] | ||
|- | |- | ||
|align=center|[[ | |align=center|[[Wii Mushroom Gorge|Wii Mushroom Gorge R/T]] | ||
|- | |- | ||
|align=center | |align=center|[[Wii Koopa Cape|Wii Koopa Cape R, R/T]] | ||
|- | |- | ||
|align=center|[[ | |align=center|[[Wii Maple Treeway|Wii Maple Treeway T]] | ||
|- | |- | ||
|align=center|[[ | |align=center|[[3DS Daisy Hills|3DS Daisy Hills, R, T, R/T]] | ||
|- | |- | ||
|align=center | |align=center|[[3DS Rock Rock Mountain|3DS Rock Rock Mountain R]] | ||
|- | |- | ||
|align=center|[[ | |align=center|[[Tour Paris Promenade|Paris Promenade, R, T, R/T]] | ||
|- | |- | ||
|align=center|[[ | |align=center|[[Vancouver Velocity|Vancouver Velocity R]] | ||
|- | |- | ||
|align=center|[[File:MKT | |align=center|[[File:MKT Icicle.jpg|80px]]<br>[[Icicle]] | ||
|align=center|[[ | |align=center|[[3DS Rosalina's Ice World|3DS Rosalina's Ice World, R, T, R/T]] | ||
| | |An obstacle that breaks when driven into, slowing down the responsible driver. | ||
|align=center|<span style="color:green;">Yes</span> | |||
|- | |- | ||
|align=center rowspan= | |align=center rowspan=3|[[File:MKT Inky Piranha Plant.jpg|80px]]<br>[[Inky Piranha Plant]] | ||
|align=center|[[ | |align=center|[[Tour Bangkok Rush|Bangkok Rush, R, R/T]] | ||
|rowspan= | |rowspan=3|A type of Piranha Plant that spits piles of black ink on the road as an obstacle for racers. Racers who drive into an ink pile spin out, and human players additionally have their screen briefly covered with ink. | ||
|align=center rowspan=3|<span style="color:green;">Yes</span> | |||
|- | |- | ||
|align=center|[[ | |align=center|[[Tour Bangkok Rush|Bangkok Rush 2, R]] | ||
|- | |- | ||
|align=center|[[ | |align=center|[[DS Peach Gardens|DS Peach Gardens R/T]] | ||
|- | |- | ||
|align=center|[[ | |align=center|[[File:MKT jack-o'-lanterns.jpg|100px]]<br>[[Jack-o'-lantern]] | ||
|align=center|See [[Jack-o'-lantern#Course appearances|Jack-o'-lantern § Course appearances]] for a list of courses that feature Jack-o'-lanterns. | |||
|Jack-o'-lanterns appear during tours that occur around Halloween. Those found on the drivable portion of a course can be knocked away by driving into them or hitting them with an item, giving bonus points in the process. Jack-o'-lanterns that appear on a track's sidelines or in the background usually come in larger sizes and can be interacted with but not knocked away. | |||
|align=center|<span style="color:green;">Yes</span> | |||
|- | |- | ||
|align=center|[[ | |align=center|[[File:MKT jars.png|100px]]<br>[[Jar]] / Snake jar | ||
|align=center|[[3DS Shy Guy Bazaar|3DS Shy Guy Bazaar, R, T, R/T]] | |||
|An object found on the track. Jars will break upon collision with an item or a racer. Running into a jar will slow the racer down. Some jars, referred to as snake jars, move around and release small snakes when broken. | |||
|align=center|<span style="color:green;">Yes</span> | |||
|- | |- | ||
|align=center | |align=center|[[File:MKT Jellybeam.jpg|100px]]<br>[[Jellybeam]] | ||
|align=center|[[ | |align=center|[[Piranha Plant Cove|Piranha Plant Cove 2]] | ||
|A jellyfish enemy that floats in place in underwater segments. Players can bump into Jellybeams or hit them with an item to obtain bonus points. They can also land on top of a Jellybeam's head to get a Jump Boost. | |||
|align=center|<span style="color:green;">Yes</span> | |||
|- | |- | ||
|align=center|[[ | |align=center rowspan=4|[[File:MKT Jump Boost field.png|100px]]<br>[[Jump Boost field]] | ||
|align=center|[[Wii Rainbow Road|Wii Rainbow Road R]] | |||
|rowspan=4|An upward force that gives drivers a Jump Boost. | |||
|align=center rowspan=4|<span style="color:green;">Yes</span><br>(through Jump Boosts) | |||
|- | |- | ||
|align=center|[[ | |align=center|[[3DS Rainbow Road|3DS Rainbow Road R, R/T]] | ||
|- | |- | ||
|align=center|[[ | |align=center|[[Tour Singapore Speedway|Singapore Speedway 3R/T]] | ||
|- | |- | ||
|align=center | |align=center|[[RMX Rainbow Road 2|RMX Rainbow Road 2T, R/T]] | ||
|- | |- | ||
|align=center|[[ | |align=center|[[File:MKT Kadomatsu.png|100px]]<br>[[Kadomatsu]] | ||
|align=center|Most courses | |||
|A decorative element that appears on courses during tours that occur around the New Year. Kadomatsu give bonus points when hit with a shell or a Bob-omb or by driving into them while invincible or Mega. | |||
|align=center|<span style="color:green;">Yes</span><small> (most New Year's tours)</small><br><span style="color:red;">No</span><small> (New Year's 2021 Tour)</small> | |||
|- | |- | ||
|align=center|[[ | |align=center|[[File:MKT Kanaami Road.jpg|120px]]<br>[[Kanaami Road]] | ||
|align=center|Many courses and variants in the game | |||
|align=center|A type of platform that appears in many of the game's T and R/T courses. They are used to create new routes or ramps for the player to drive on, thus giving them more bonus points. | |||
|align=center|<span style="color:green;">Yes</span><br>(through Jump Boosts) | |||
|- | |- | ||
|align=center|[[ | |align=center|[[File:MKT Lava Ball.png|90px]]<br>[[Volcanic debris|Lava Ball]] | ||
|align=center|[[GBA Lakeside Park|GBA Lakeside Park, R, T, R/T]] | |||
|align=center|An obstacle that bounces down the mountainside, forming craters where it lands. Drivers can use these craters to perform Jump Boosts, but they crash if they come into direct contact with a Lava Ball. | |||
|align=center|<span style="color:green;">Yes</span> | |||
|- | |- | ||
|align=center|[[File:MKT | |align=center rowspan=4|[[File:MKT Lava Bubble.png|90px]]<br>[[Lava Bubble|Lava bubble]] | ||
|align=center|[[ | |align=center|[[GBA Bowser's Castle 1|GBA Bowser's Castle 1, R, T, R/T]] | ||
|An | |rowspan=4|An obstacle that jumps out of lava at regular intervals. Drivers spin out if they collide with a Lava bubble. | ||
|align=center rowspan=4|<span style="color:green;">Yes</span> | |||
|- | |- | ||
|align=center | |align=center|[[GBA Bowser's Castle 2|GBA Bowser's Castle 2, R, T, R/T]] | ||
|- | |- | ||
|align=center|[[ | |align=center|[[GBA Bowser's Castle 3|GBA Bowser's Castle 3, R, T, R/T]] | ||
|- | |- | ||
|align=center|[[ | |align=center|[[GBA Bowser's Castle 4|GBA Bowser's Castle 4, R]] | ||
|- | |- | ||
|align=center|[[ | |align=center rowspan=3|[[File:MKT Lava Geyser.jpg|70px]]<br>[[Lava Geyser]] | ||
|align=center|[[GBA Bowser's Castle 4|GBA Bowser's Castle 4, R]] | |||
|rowspan=3|A pillar of lava that rises and lowers at regular intervals. Touching one causes drivers to spin out. | |||
|align=center rowspan=3|<span style="color:red;">No</span> | |||
|- | |- | ||
|align=center|[[ | |align=center|[[3DS Bowser's Castle|3DS Bowser's Castle, R, T, R/T]] | ||
|- | |- | ||
|align=center|[[ | |align=center|[[RMX Bowser's Castle 1|RMX Bowser's Castle 1R/T]] | ||
|- | |- | ||
|align=center|[[ | |align=center|[[File:MKT leaf pile.jpg|100px]]<br>[[Leaf pile]] | ||
|align=center|[[Wii Maple Treeway|Wii Maple Treeway, R, T, R/T]] | |||
|An object that scatters and releases an item such as a Coin, Mushroom, or Banana when driven into. | |||
|align=center|<span style="color:green;">Yes</span> | |||
|- | |- | ||
|align=center|[[ | |align=center|[[File:MKT magic carpets.png|100px]]<br>[[Magic carpet]] | ||
|align=center|[[3DS Shy Guy Bazaar]] (Do Jump Boosts) | |||
|Magic carpets that are not used by Flying Shy Guys can be found floating in one place in mid-air. When a racer lands on a magic carpet, they bounce off of it while receiving a Jump Boost. | |||
|align=center|TBD | |||
|- | |- | ||
|align=center|[[ | |align=center rowspan=4|[[File:MKT Maw-Ray.jpg|180px]]<br>[[Maw-Ray]] | ||
|align=center|[[GCN Daisy Cruiser|GCN Daisy Cruiser, T]] | |||
|rowspan=4|A large moray eel that swims around a body of water. Maw-Rays acts as minor obstacles that can cause drivers who bump into them to lose some speed, albeit drivers can perform Jump Boosts on a Maw-Ray by landing on top of it. | |||
|align=center rowspan=4|<span style="color:red;">No</span> | |||
|- | |- | ||
|align=center|[[ | |align=center|[[Piranha Plant Cove|Piranha Plant Cove, R, R/T]] | ||
|- | |- | ||
|align=center|[[ | |align=center|[[Piranha Plant Cove|Piranha Plant Cove 2, R]] | ||
|- | |- | ||
|align=center|[[ | |align=center|[[Piranha Plant Cove|Piranha Plant Cove 3, R, T]] | ||
|- | |- | ||
|align=center|[[ | |align=center|[[File:MKT Mecha Cheep.jpg|100px]]<br>[[Mecha Cheep]] | ||
|align=center|[[Squeaky Clean Sprint|Squeaky Clean Sprint, R, T, R/T]] | |||
|A Cheep Cheep–like robot that swims around in underwater segments. Like actual Cheep Cheeps, Mecha Cheeps cause drivers who bump into them to simply lose some speed. | |||
|align=center|<span style="color:green;">Yes</span> | |||
|- | |- | ||
|align=center|[[ | |align=center|[[File:MKT Mecha Piranha Plant.jpg|120px]]<br>[[Mecha Piranha Plant]] | ||
|align=center|[[GCN Waluigi Stadium|GCN Waluigi Stadium, R, R/T]] | |||
|A large, fake Piranha Plant that moves in and out of a Warp Pipe–like slot. Mecha Piranha Plants are indestructible and act as walls upon contact. | |||
|align=center|<span style="color:red;">No</span> | |||
|- | |- | ||
|align=center|[[ | |align=center rowspan=2|[[File:MKT metal ball.png|100px]]<br>[[Metal ball]] | ||
|align=center|[[DS Waluigi Pinball|DS Waluigi Pinball, R, T, R/T]] | |||
|rowspan=2|A large rolling obstacle. Metal balls are first seen in the background of the track, traversing the pinball machine that the course is set on. Once they reach the pinball table section, they are bounced around by bumpers and flippers, crashing into any racer that collides with them. | |||
|align=center rowspan=2|<span style="color:green;">Yes</span> | |||
|- | |- | ||
|align=center|[[ | |align=center|[[GBA Bowser's Castle 4]] | ||
|- | |- | ||
|align=center|[[ | |align=center rowspan=6|[[File:MKT Monty Moles.jpg|100px]]<br>[[Monty Mole]] | ||
|align=center|[[SNES Donut Plains 2|SNES Donut Plains 2, R, T, R/T]] | |||
|rowspan=6|A creature that digs holes through the ground. Touching a Monty Mole will spin out drivers while the holes and bumps produced by Monty Moles can be used to perform Jump Boosts. | |||
|align=center rowspan=6|<span style="color:green;">Yes</span> | |||
|- | |- | ||
|align=center|[[ | |align=center|[[SNES Donut Plains 3|SNES Donut Plains 3, R, T, R/T]] | ||
|- | |- | ||
|align=center | |align=center|[[GBA Sunset Wilds|GBA Sunset Wilds R/T]] | ||
|- | |- | ||
|align=center|[[ | |align=center|[[DS Peach Gardens|DS Peach Gardens, R]] | ||
|- | |- | ||
|align=center|[[ | |align=center|[[Tour Amsterdam Drift|Amsterdam Drift, R, R/T]] | ||
|- | |- | ||
|align=center | |align=center|[[Tour Amsterdam Drift|Amsterdam Drift 3T]] | ||
|- | |- | ||
|align=center|[[ | |align=center rowspan=4|[[File:MKT Mushroom Platform.jpg|100px]]<br>[[Mushroom Platform]] | ||
|align=center|[[GBA Sky Garden]] (Smash Small Dry Bones) | |||
|rowspan=4|A large mushroom with a broad cap that acts as normal ground. | |||
|align=center rowspan=4|<span style="color:green;">Yes</span><br>(through Jump Boosts) | |||
|- | |- | ||
|align=center|[[ | |align=center|[[GCN DK Mountain|GCN DK Mountain R/T]] | ||
|- | |- | ||
|align=center|[[ | |align=center|[[DS Shroom Ridge|DS Shroom Ridge R/T]] | ||
|- | |- | ||
|align=center | |align=center|[[Wii Mushroom Gorge|Wii Mushroom Gorge, R, T, R/T]] | ||
|- | |- | ||
|align=center|[[ | |align=center rowspan=19|[[File:MKT Mushroom Trampoline.png|100px]]<br>[[File:MKT Rainbow Mushroom Trampoline.jpg|100px]]<br>[[File:MKT Mushroom Trampoline blue.jpg|100px]]<br>[[Mushroom Trampoline]] | ||
|align=center|[[SNES Donut Plains 2|SNES Donut Plains 2R/T]] | |||
|rowspan=19|A large mushroom that racers can bounce off of to receive a Jump Boost. Apart from the regular Mushroom Trampolines, which are red with white spots or (as seen in 3DS Rainbow Road) white with spots of various colors, there is also a blue variety which activates a driver's glider when bounced off of. | |||
|align=center rowspan=19|<span style="color:green;">Yes</span><br>(through Jump Boosts) | |||
|- | |- | ||
|align=center|[[ | |align=center|[[SNES Rainbow Road|SNES Rainbow Road R/T]] | ||
|- | |- | ||
|align=center | |align=center|[[N64 Mario Raceway|N64 Mario Raceway T, R/T]] | ||
|- | |- | ||
|align=center|[[ | |align=center|[[N64 Royal Raceway|N64 Royal Raceway T, R/T]] | ||
|- | |- | ||
|align=center|[[ | |align=center|[[GBA Peach Circuit|GBA Peach Circuit T, R/T]] | ||
|- | |- | ||
|align=center|[[ | |align=center|[[GBA Riverside Park|GBA Riverside Park T]] | ||
|- | |- | ||
|align=center | |align=center|[[GBA Sky Garden|GBA Sky Garden, R, R/T]] | ||
|- | |- | ||
|align=center|[[ | |align=center|[[GBA Lakeside Park|GBA Lakeside Park T]] | ||
|- | |- | ||
|align=center|[[GCN DK Mountain|GCN DK Mountain R/T]] | |||
|align=center|[[DK | |||
|- | |- | ||
|align=center|[[ | |align=center|[[DS Shroom Ridge|DS Shroom Ridge R/T]] | ||
|- | |- | ||
|align=center|[[ | |align=center|[[DS DK Pass|DS DK Pass R/T]] | ||
|- | |- | ||
|align=center | |align=center|[[Wii Mushroom Gorge|Wii Mushroom Gorge, R, T, R/T]] | ||
|- | |- | ||
|align=center|[[ | |align=center|[[Wii Maple Treeway|Wii Maple Treeway R/T]] | ||
|- | |- | ||
|align=center | |align=center|[[3DS Mario Circuit|3DS Mario Circuit, R, T, R/T]] | ||
|- | |- | ||
|align=center|[[Rainbow Road | |align=center|[[3DS Rainbow Road|3DS Rainbow Road, R, T, R/T]] | ||
|- | |- | ||
|align=center|[[ | |align=center|[[RMX Choco Island 1|RMX Choco Island 1R/T]] | ||
|- | |- | ||
|align=center|[[Rainbow Road | |align=center|[[RMX Rainbow Road 1|RMX Rainbow Road 1R]] | ||
|- | |- | ||
|align=center|[[ | |align=center|[[RMX Rainbow Road 2|RMX Rainbow Road 2, R, T, R/T]] | ||
|- | |- | ||
|align=center|[[ | |align=center|[[RMX Donut Plains 1|RMX Donut Plains 1T]] | ||
|- | |- | ||
|align=center rowspan=4|[[File:MKT | |align=center rowspan=4|[[File:MKT Noshi.png|100px]]<br>[[Noshi]] | ||
|align=center|[[ | |align=center|[[N64 Koopa Troopa Beach|N64 Koopa Troopa Beach T, R/T]] | ||
|rowspan=4| | |rowspan=4|A dinosaur that stomps on the track. Racers caught under its feet are squashed. When on the ground, the feet also act as walls that bounce racers back. If a racer lands on top of a Noshi while gliding, they get a Jump Boost. | ||
|align=center rowspan=4|<span style="color:green;">Yes</span><br>(through Jump Boosts) | |||
|- | |- | ||
|align=center|[[ | |align=center|[[GBA Riverside Park|GBA Riverside Park T, R/T]] | ||
|- | |- | ||
|align=center|[[ | |align=center|[[GCN Dino Dino Jungle|GCN Dino Dino Jungle, R, T, R/T]] | ||
|- | |- | ||
|align=center|[[ | |align=center|[[Tour Tokyo Blur|Tokyo Blur R/T]] | ||
|- | |- | ||
|align=center | |align=center|[[File:MKT Note Blocks.jpg|150px]]<br>[[Note Block]] | ||
|align=center|[[ | |align=center|[[Squeaky Clean Sprint|Squeaky Clean Sprint T, R/T]] | ||
|An object that drivers can bounce on. | |||
|align=center|<span style="color:green;">Yes</span><br>(through Jump Boosts) | |||
|- | |- | ||
|align=center|[[ | |align=center rowspan=8|[[File:MKT Oil Slick.png|100px]]<br>[[Oil slick]] | ||
|align=center|[[SNES Mario Circuit 1|SNES Mario Circuit 1R, R/T]] | |||
|rowspan=8|An obstacle that causes any racer who drives into it to spin out. | |||
|align=center rowspan=8|<span style="color:red;">No</span> | |||
|- | |- | ||
|align=center|[[ | |align=center|[[SNES Mario Circuit 2|SNES Mario Circuit 2, R, T]] | ||
|- | |- | ||
|align=center|[[SNES Mario Circuit 3|SNES Mario Circuit 3, R]] | |||
|align=center|[[Mario Circuit | |||
|- | |- | ||
|align=center|[[ | |align=center|[[GCN Mushroom Bridge|GCN Mushroom Bridge R]] | ||
|- | |- | ||
|align=center|[[ | |align=center|[[Tour New York Minute|New York Minute]] (Steer Clear of Obstacles) | ||
|- | |- | ||
|align=center|[[ | |align=center|[[Tour Tokyo Blur|Tokyo Blur 3R]] | ||
|- | |- | ||
|align=center|[[ | |align=center|[[Tour Tokyo Blur|Tokyo Blur 4, R]] | ||
|- | |- | ||
|align=center|[[ | |align=center|[[Merry Mountain]] (Steer Clear of Obstacles) | ||
|- | |- | ||
|align=center|[[ | |align=center rowspan=5|[[File:MKT Penguin.jpg|100px]]<br>[[Penguin]] | ||
|align=center|[[SNES Vanilla Lake 1]] (Steer Clear of Obstacles) | |||
|rowspan=5|An enemy that waddles in circular or oval patterns. Players who drive into one spin out. | |||
|align=center rowspan=5|<span style="color:green;">Yes</span> | |||
|- | |- | ||
|align=center|[[ | |align=center|[[SNES Vanilla Lake 2]] (Steer Clear of Obstacles) | ||
|- | |- | ||
|align=center|[[ | |align=center|[[GBA Snow Land|GBA Snow Land, R, T, R/T]] | ||
|- | |- | ||
|align=center|[[ | |align=center|[[3DS Rosalina's Ice World|3DS Rosalina's Ice World, R, T, R/T]] | ||
|- | |- | ||
|align=center|[[ | |align=center|[[RMX Vanilla Lake 1|RMX Vanilla Lake 1, R]] | ||
|- | |- | ||
|align=center|[[ | |align=center|[[File:MKT pipe.png|100px]]<br>[[Warp Pipe|Pipe]] | ||
|align=center|See [[Warp Pipe#Mario Kart Tour|Warp Pipe § ''Mario Kart Tour'']] for a list of courses in ''Mario Kart Tour'' that feature pipes. | |||
|{{anchor|Warp Pipe A}}An obstacle that slows down any racer who collides with it. Pipes are spread throughout the track, usually in off-road sections. Piranha Plants and Inky Piranha Plants commonly occupy them, and some [[truck]]s carry Piranha Plants in pipes. Some pipes exhale upward currents which can be used to maintain gliding drivers in the air while offering them a Jump Boost. Most pipes found in the game are green and can be launched in the air, giving bonus points when this is done in courses outside of bonus challenges; however, some pipes, such as those seen in the surroundings of DS Shroom Ridge, [[#Warp Pipe B|come in multiple colors and are entirely cosmetic]]. | |||
|align=center|<span style="color:green;">Yes</span> | |||
|- | |- | ||
|align=center|[[ | |align=center|[[File:MKT Yoshi Circuit Piranha Plant.png|100px]]<br>[[Piranha Plant]] (aggressive) | ||
|align=center|See [[Piranha Plant#Mario Kart Tour|Piranha Plant § ''Mario Kart Tour'']] for a list of courses in ''Mario Kart Tour'' that feature this type of Piranha Plant. | |||
|An enemy that attacks nearby drivers by lunging at them. Drivers that are hit by a Piranha Plant spin out. Piranha Plants appear in [[Big Piranha Plant#Mario Kart Tour|various sizes]]. | |||
|align=center|<span style="color:green;">Yes</span> | |||
|- | |- | ||
|align=center|[[ | |align=center|[[File:MKT Choco Island 2 Piranha Plant.png|100px]]<br>Piranha Plant (passive) | ||
|align=center|See [[Piranha Plant#Mario Kart Tour|Piranha Plant § ''Mario Kart Tour'']] for a list of courses in ''Mario Kart Tour'' that feature this type of Piranha Plant. | |||
|A type of Piranha Plant that lies on the ground, always facing upward. Racers that drive into one spin out. Piranha Plants appear in [[Big Piranha Plant#Mario Kart Tour|various sizes]]. | |||
|align=center|<span style="color:green;">Yes</span> | |||
|- | |- | ||
|align=center|[[ | |align=center|[[File:MKT Pokey.jpg|50px]]<br>[[Pokey]] | ||
|align=center|[[Wii Dry Dry Ruins|Wii Dry Dry Ruins, R, T, R/T]] | |||
|A cactus enemy that moves back in forth on the course. Some Pokeys appear taller and bend sideways attempting to spin out racers. | |||
|align=center|<span style="color:green;">Yes</span><br> | |||
|- | |- | ||
|align=center|[[ | |rowspan=3 align=center|[[File:MKT puddle on track.png|100px]]<br>[[Puddle]] | ||
|align=center|[[GBA Luigi Circuit|GBA Luigi Circuit, R, T]] | |||
|rowspan=3|An obstacle that, like oil slicks, causes drivers who contact it to spin out. | |||
|rowspan=3 align=center|<span style="color:red;">No</span> | |||
|- | |- | ||
|align=center|[[ | |align=center|[[3DS Neo Bowser City|3DS Neo Bowser City, R, T, R/T]] | ||
|- | |- | ||
|align=center | |align=center|[[Squeaky Clean Sprint]] (Precision Gliding) | ||
|- | |- | ||
|align=center|[[ | |align=center|[[File:MKT Pumpjack.jpg|110px]]<br>Pumpjack | ||
|align=center|[[Los Angeles Laps|Los Angeles Laps 2, R, T, R/T]] | |||
|An obstacle that moves up and down on the track, acting as a wall when racers come into contact with it. | |||
|align=center|<span style="color:green;">Yes</span><br>(through Jump Boosts) | |||
|- | |- | ||
|align=center|[[File:MKT | |align=center rowspan=5|[[File:MKT ring.jpg|100px]]<br>[[Ring (Mario Kart series)|Ring]] | ||
|align=center| | |align=center|Any course where a Ring Race bonus challenge takes place | ||
|An | |rowspan=5|An object that provides the driver a short speed boost. | ||
|align=center rowspan=5|<span style="color:green;">Yes</span><ref>HalfHydra (March 5, 2022). [https://youtu.be/cEjL0_2gV5Q?t=30 Ring Race with Combo Counter]. ''YouTube''. Retrieved August 25, 2022.</ref> | |||
|- | |- | ||
|align=center | |align=center|[[SNES Mario Circuit 1]] (Glider Challenge) | ||
|- | |- | ||
|align=center|[[ | |align=center|[[SNES Choco Island 2]] (Break Item Boxes) | ||
|- | |- | ||
|align=center|[[ | |align=center|[[3DS Toad Circuit]] (Break Item Boxes) | ||
|- | |- | ||
|align=center | |align=center|[[3DS Rock Rock Mountain]] (Break Item Boxes) | ||
|- | |- | ||
|align=center|[[ | |align=center rowspan=5|[[File:MKT Rocky Wrench.jpg|100px]]<br>[[Rocky Wrench]] | ||
|align=center|[[DS Airship Fortress|DS Airship Fortress, R, T, R/T]] | |||
|rowspan=5|A creature that emerges from manholes. Racers that touch a Rocky Wrench are bounced away from it, but its manhole cover can be used to perform a Jump Boost right before it pops out. | |||
|align=center rowspan=5|<span style="color:green;">Yes</span> | |||
|- | |- | ||
|align=center|[[ | |align=center|[[Wii Daisy Circuit|Wii Daisy Circuit T]] | ||
|- | |- | ||
|align=center | |align=center|[[Tour Bangkok Rush|Bangkok Rush T]] | ||
|- | |- | ||
|align=center|[[ | |align=center|[[Rome Avanti|Rome Avanti 2, R, T, R/T]] | ||
|- | |- | ||
|align=center|[[DS Twilight House]] | |||
|- | |- | ||
|align=center rowspan= | |align=center rowspan=4|[[File:MKT rolling rock.png|100px]]<br>[[Boulder|Rolling rock]] | ||
|align=center|[[ | |align=center|[[N64 Choco Mountain|N64 Choco Mountain, R, T, R/T]] | ||
|rowspan= | |rowspan=4|A large obstacle that rolls down on inclines. Colliding with rolling rocks causes racers to be crushed or to spin out. | ||
|align=center rowspan=4|<span style="color:green;">Yes</span> | |||
|- | |- | ||
|align=center|[[ | |align=center|[[GCN DK Mountain|GCN DK Mountain, R, T, R/T]] | ||
|- | |- | ||
|align=center|[[ | |align=center|[[3DS Rock Rock Mountain|3DS Rock Rock Mountain, T]] | ||
| | |||
|- | |- | ||
|align=center|[[Athens Dash|Athens Dash 2]] | |||
| | |||
| | |||
|- | |- | ||
|align=center|[[File:MKT Sand hills.jpg|150px]]<br>Sand hill | |||
| | |align=center|[[Wii Dry Dry Ruins|Wii Dry Dry Ruins, R]] | ||
|Hills of sand that get larger and fill up the room as the race progresses. | |||
|align=center|<span style="color:green;">Yes</span><br>(through Jump Boosts) | |||
|- | |- | ||
|align=center|[[File:GoombaShoeFootball.png|100px]]<br>[[Goomba's Shoe|Shoe]] | |||
| | |align=center|[[Madrid Drive|Madrid Drive, R, T, R/T]] | ||
|An object worn by Goombas to protect themselves against drivers' attacks. Shoes also enable these Goombas to kick Soccer Balls around. | |||
|align=center|<span style="color:green;">Yes</span> | |||
|- | |- | ||
|align=center|[[File:MKT Shy Guy Ninja Obstacles.jpg|100px]]<br>[[File:MKT Shy Guy Ninja Obstacles Flying.jpg|100px]]<br>[[Shy Guy (Ninja)]] | |||
||| | |align=center|[[Ninja Hideaway|Ninja Hideaway, R, T, R/T]] | ||
|An enemy that runs around on the ground and transforms into a single Banana. Another variant of this enemy also appears suspended in the air by kites in glider sections. | |||
|align=center|<span style="color:green;">Yes</span> | |||
|- | |- | ||
|align=center rowspan=11|[[File:MKT Sidestepper.png|100px]]<br>[[Sidestepper]] | |||
||| | |align=center|[[SNES Koopa Troopa Beach 2|SNES Koopa Troopa Beach 2T]] | ||
|rowspan=11|A crab enemy that shuffles from side to side across a track. Racers who come into contact with a Sidestepper spin out. | |||
|align=center rowspan=10|<span style="color:green;">Yes</span> | |||
|- | |- | ||
|align=center|[[N64 Koopa Troopa Beach|N64 Koopa Troopa Beach, R, T, R/T]] | |||
||| | |||
|- | |- | ||
|align=center|[[GBA Cheep-Cheep Island]] (Steer Clear of Obstacles) | |||
|- | |- | ||
|align=center|[[Wii Koopa Cape]] (Glider Challenge) | |||
|| | |||
|- | |- | ||
|align=center|[[3DS Cheep Cheep Lagoon|3DS Cheep Cheep Lagoon, R, T, R/T]] | |||
| | |||
|- | |- | ||
|align=center|[[3DS Wario Shipyard|3DS Wario Shipyard, R]] | |||
||| | |||
|- | |- | ||
|align=center|[[Los Angeles Laps|Los Angeles Laps, R, T, R/T]] | |||
||| | |||
|- | |- | ||
|align=center|[[Tour Singapore Speedway|Singapore Speedway 3, R, T]] | |||
||| | |||
|- | |- | ||
|align=center|[[Piranha Plant Cove|Piranha Plant Cove 2R]] | |||
||| | |||
|- | |- | ||
|align=center|[[Yoshi's Island (race course)|Yoshi's Island, R]] | |||
||| | |||
|- | |- | ||
|align=center|[[Piranha Plant Pipeline]] | |||
|| | |||
|- | |- | ||
|align=center rowspan=3|[[File:MKT Skating Shy Guys.jpg|100px]]<br>[[Skating Shy Guy]] | |||
||| | |align=center|[[GBA Snow Land|GBA Snow Land R]] | ||
|rowspan=3|A Shy Guy that spins out the player when touched. In the R variant on Vancouver Velcocity 2 and the normal and T variants of Vancouver Velocity 3, Skating Shy Guys move around on the ice; in the T variant of Vancouver Velocity 2 they twirl around in one spot; and in the normal and R variants of Vancouver Velocity 3, there are a few that stand in place as spectators. | |||
|align=center rowspan=3|<span style="color:green;">Yes</span> | |||
|- | |- | ||
|align=center|[[Vancouver Velocity|Vancouver Velocity 2R, T]] | |||
||| | |||
|- | |- | ||
|align=center|[[Vancouver Velocity|Vancouver Velocity 3, R, T]] | |||
||| | |||
|- | |- | ||
|align=center rowspan=3|[[File:MKT snow block.png|100px]]<br>[[Snow block]] | |||
||| | |align=center|[[SNES Vanilla Lake 1|SNES Vanilla Lake 1, R, R/T]] | ||
|rowspan=3|An object that, when touched, bounces racers away and disappears. | |||
|align=center rowspan=3|<span style="color:green;">Yes</span> | |||
|- | |- | ||
|align=center|[[SNES Vanilla Lake 2|SNES Vanilla Lake 2, R, T, R/T]] | |||
|||2 | |||
|- | |- | ||
|align=center|[[Vancouver Velocity|Vancouver Velocity 3R]] | |||
||| | |||
|- | |- | ||
|align=center rowspan=3|[[File:MKT snowball.png|100px]]<br>[[Snowball]] | |||
||| | |align=center|[[N64 Frappe Snowland]] (Steer Clear of Obstacles) | ||
|rowspan=3|A large obstacle that rolls down a portion of the track. Racers hit by a snowball crash. | |||
|align=center rowspan=3|<span style="color:green;">Yes</span> | |||
|- | |- | ||
|align=center|[[DS DK Pass|DS DK Pass, R, T, R/T]] | |||
||| | |||
|- | |- | ||
|align=center|[[Merry Mountain]] (Steer Clear of Obstacles) | |||
|| | |||
|- | |- | ||
|align=center|[[File:MKT Snowboarding Shy Guy.png|100px]]<br>[[Snowboarding Shy Guy]] | |||
|[[File:MKT | |align=center|[[Wii DK Summit|Wii DK Summit, R]] | ||
| | |A Shy Guy riding on a snowboard, jumping off the half-pipes on the track. Racers spin out if they touch a Snowboarding Shy Guy without a defensive or speed boosting item. | ||
| | |align=center|<span style="color:green;">Yes</span> | ||
| | |||
|- | |- | ||
|align=center rowspan=6|[[File:MKT snowperson.png|100px]]<br>[[Snowman|Snowperson]] | |||
|[[File:MKT | |align=center|[[N64 Frappe Snowland|N64 Frappe Snowland, R, T, R/T]] | ||
| | |rowspan=6|An obstacle that slows down drivers who collide with it. However, this also gets them destroyed in the process. | ||
| | |align=center rowspan=6|<span style="color:green;">Yes</span> | ||
| | |||
|- | |- | ||
|align=center|[[GBA Snow Land|GBA Snow Land, T, R/T]] | |||
|[[File: | |- | ||
|[[File:MKT | |align=center|[[DS DK Pass|DS DK Pass, R, T, R/T]] | ||
|[[File:MKT | |- | ||
| | |align=center|[[Wii DK Summit]] (Ring Race) | ||
| | |- | ||
|align=center|[[Vancouver Velocity|Vancouver Velocity R]] | |||
|- | |||
|align=center|[[Merry Mountain]] (Coin Rush), R/T | |||
|- | |||
|align=center|[[File:GoombaShoeFootball.png|100px]]<br>[[Soccer Ball]] | |||
|align=center|[[Madrid Drive|Madrid Drive, R, T, R/T]] | |||
|An object that gets kicked around by Goombas in shoes. Drivers who interact with a Soccer Ball in any way obtain bonus points. | |||
|align=center|<span style="color:green;">Yes</span> | |||
|- | |||
|align=center|[[File:MKT Spider Webs.png|100px]]<br>[[Spider Web]] | |||
|align=center|[[Piranha Plant Pipeline|Piranha Plant Pipeline, R]] | |||
|An obstacle that breaks and slows drivers down on contact. | |||
|align=center|<span style="color:green;">Yes</span> | |||
|- | |||
|align=center rowspan=3|[[File:MKT spring egg pink Yoshi's Island.jpg|100px]]<br>[[Spring egg]] | |||
|align=center|[[SNES Choco Island 1|SNES Choco Island 1, R, T, R/T]] | |||
|rowspan=3|Spring eggs appeared in some courses during the 2023 Yoshi Tour. When a player hits one with an item, it gives them bonus points. | |||
|align=center rowspan=3|<span style="color:green;">Yes</span> | |||
|- | |||
|align=center|[[GBA Boo Lake|GBA Boo Lake, R, T, R/T]] | |||
|- | |||
|align=center|[[Yoshi's Island (race course)|Yoshi's Island, R, T, R/T]] | |||
|- | |||
|align=center rowspan=5|[[File:MKT Star Ring.png|100px]]<br>[[Ring (Mario Kart series)|Star Ring]] | |||
|align=center|[[SNES Rainbow Road|SNES Rainbow Road R/T]] | |||
|rowspan=5|An object that gives drivers a speed boost when passed through. | |||
|align=center rowspan=5|<span style="color:green;">Yes</span> | |||
|- | |||
|align=center|[[Wii Rainbow Road|Wii Rainbow Road, R, T, R/T]] | |||
|- | |||
|align=center|[[3DS Rainbow Road|3DS Rainbow Road, R, T, R/T]] | |||
|- | |- | ||
|align=center|[[RMX Rainbow Road 1|RMX Rainbow Road 1, R]] | |||
|- | |- | ||
| | |align=center|[[RMX Rainbow Road 2|RMX Rainbow Road 2T, R/T]] | ||
|- | |- | ||
| | |align=center rowspan=7|[[File:MKT Super Thwomp.png|100px]]<br>[[Star Thwomp]] | ||
| | |align=center|[[SNES Mario Circuit 3]] (Glider Challenge) | ||
| | |rowspan=7|A variation of a Thwomp that creates ripples on the track, which racers can perform Jump Boosts on. In addition to being able to squash drivers like regular Thwomps, Star Thwomps cause drivers to flip out when touched from any side. | ||
| | |align=center rowspan=7|<span style="color:green;">Yes</span> | ||
|- | |- | ||
| | |align=center|[[SNES Rainbow Road|SNES Rainbow Road, R, R/T]] | ||
| | |||
| | |||
|- | |- | ||
| | |align=center|[[GBA Bowser's Castle 1]] (Steer Clear of Obstacles) | ||
| | |||
|- | |- | ||
| | |align=center|[[Wii Rainbow Road|Wii Rainbow Road R/T]] | ||
| | |||
|- | |- | ||
| | |align=center|[[3DS Rainbow Road]] (Glider Challenge) | ||
| | |||
|- | |- | ||
| | |align=center|[[RMX Rainbow Road 1|RMX Rainbow Road 1, R]] | ||
| | |- | ||
| | |align=center|[[RMX Rainbow Road 2|RMX Rainbow Road 2, R, R/T]] | ||
| | |- | ||
|align=center|[[File:MKT Stilt Guy.jpg|100px]]<br>[[Stilt Guy]] | |||
|align=center|[[Yoshi's Island (race course)|Yoshi's Island, R, T, R/T]] | |||
|A Shy Guy walking on stilts. Drivers who run into the stilts spin out. | |||
|align=center|<span style="color:green;">Yes</span> | |||
|- | |||
|align=center rowspan=9|[[File:MKT Swoop.png|100px]]<br>[[Swoop]] | |||
|align=center|[[N64 Choco Mountain|N64 Choco Mountain, R, T, R/T]] | |||
|rowspan=9|A bat enemy that flies in a row of other Swoops along a certain portion of the track, usually coming the opposite way of racers. Racers that bump into a Swoop are bounced away. | |||
|align=center rowspan=9|<span style="color:green;">Yes</span> | |||
|- | |||
|align=center|[[GBA Sunset Wilds|GBA Sunset Wilds, R, T]] | |||
|- | |||
|align=center|[[Wii Dry Dry Ruins|Wii Dry Dry Ruins R]] | |||
|- | |||
|align=center|[[3DS Rock Rock Mountain|3DS Rock Rock Mountain, R, T]] | |||
|- | |||
|align=center|[[Tour Tokyo Blur|Tokyo Blur R/T]] | |||
|- | |||
|align=center|[[Vancouver Velocity|Vancouver Velocity, R, T, R/T]] | |||
|- | |||
|align=center|[[Vancouver Velocity|Vancouver Velocity 3, R, T, R/T]] | |||
|- | |||
|align=center|[[Athens Dash|Athens Dash, R, R/T]] | |||
|- | |||
|align=center|[[Rome Avanti|Rome Avanti, R, T]] | |||
|- | |||
|align=center|[[File:MKT table.png|100px]]<br>[[Table]] | |||
|align=center|[[GCN Daisy Cruiser|GCN Daisy Cruiser, R, T, R/T]] | |||
|An obstacle that slides on the track from side to side, slowing down drivers that collide with it. | |||
|align=center|<span style="color:green;">Yes</span> | |||
|- | |||
|align=center rowspan=18|[[File:MKT Thwomp.png|100px]]<br>[[Thwomp]] | |||
|align=center|[[SNES Mario Circuit 3]] (Do Jump Boosts) | |||
|rowspan=18|An obstacle that falls down on the track repeatedly, squashing any drivers caught underneath. If a racer drives into a Thwomp, they lose some speed. When a racer drives off of a ramp and lands on a Thwomp, they get a Jump Boost. | |||
|align=center rowspan=18|<span style="color:green;">Yes</span> | |||
|- | |- | ||
|align=center|[[SNES Bowser Castle 3|SNES Bowser Castle 3, R, T]] | |||
|- | |- | ||
| | |align=center|[[GBA Bowser's Castle 1|GBA Bowser's Castle 1, R, T, R/T]] | ||
| | |- | ||
| | |align=center|[[GBA Bowser's Castle 2|GBA Bowser's Castle 2, R, T, R/T]] | ||
|- | |||
= | |align=center|[[GBA Snow Land]] (Glider Challenge), [[GBA Snow Land|R/T]] | ||
' | |- | ||
|align=center|[[GBA Bowser's Castle 3|GBA Bowser's Castle 3, R, T, R/T]] | |||
== | |- | ||
|align=center|[[GBA Bowser's Castle 4|GBA Bowser's Castle 4, R]] | |||
|- | |||
|align=center|[[Wii Coconut Mall]] (Steer Clear of Obstacles) | |||
|- | |||
|align=center|[[3DS Bowser's Castle|3DS Bowser's Castle, R, T, R/T]] | |||
|- | |||
|align=center|[[Tour Tokyo Blur|Tokyo Blur 2, R, R/T]] | |||
|- | |||
|align=center|[[Tour Tokyo Blur|Tokyo Blur 3, R/T]] | |||
Mario | |- | ||
|align=center|[[Tour Tokyo Blur|Tokyo Blur 4, R, R/T]] | |||
|- | |||
|align=center|[[Los Angeles Laps|Los Angeles Laps T]] | |||
|- | |||
|align=center|[[Tour Berlin Byways|Berlin Byways, R, T, R/T]] | |||
|- | |||
|align=center|[[Tour Berlin Byways|Berlin Byways 2]] (Steer Clear of Obstacles), [[Tour Berlin Byways|R/T]] | |||
|- | |||
|align=center|[[Piranha Plant Cove|Piranha Plant Cove, R, T, R/T]] | |||
|- | |||
|align=center|[[Athens Dash|Athens Dash 2, R, T]] | |||
|- | |||
|align=center|[[RMX Bowser's Castle 1|RMX Bowser's Castle 1, R, R/T]] | |||
|- | |||
|align=center rowspan=39|[[File:MKT traffic cone.png|100px]]<br>[[Traffic cone]] | |||
|align=center|[[SNES Mario Circuit 1]] (Do Jump Boosts), [[SNES Mario Circuit 1|R, R/T]] | |||
|rowspan=39|An object that gets knocked away when bumped into. | |||
|align=center rowspan=39|<span style="color:green;">Yes</span> | |||
|- | |||
|align=center|[[SNES Ghost Valley 2]] (Glider Challenge) | |||
|- | |||
|align=center|[[SNES Vanilla Lake 1]] (Steer Clear of Obstacles) | |||
|- | |||
= | |align=center|[[N64 Royal Raceway]] (Steer Clear of Obstacles) | ||
|- | |||
|align=center|[[GBA Bowser's Castle 1|GBA Bowser's Castle 1R]] | |||
|- | |||
= | |align=center|[[GBA Cheep-Cheep Island|GBA Cheep-Cheep Island R/T]] | ||
|- | |||
|align=center|[[GCN Mushroom Bridge|GCN Mushroom Bridge R]] | |||
|- | |||
|align=center|[[GCN Yoshi Circuit]] (Steer Clear of Obstacles) | |||
|- | |||
|align=center|[[GCN Dino Dino Jungle]] (Steer Clear of Obstacles) | |||
|- | |||
|align=center|[[DS DK Pass]] (Do Jump Boosts, Steer Clear of Obstacles) | |||
|- | |||
</gallery> | |align=center|[[DS Peach Gardens|DS Peach Gardens T]] | ||
|- | |||
|align=center|[[Wii DK Summit|Wii DK Summit R/T]] | |||
|- | |||
|align=center|[[Wii Daisy Circuit|Wii Daisy Circuit, R, T, R/T]] | |||
|- | |||
|align=center|[[3DS Toad Circuit|3DS Toad Circuit, R, R/T]] | |||
|- | |||
|align=center|[[3DS Daisy Hills|3DS Daisy Hills R, R/T]] | |||
|- | |||
|align=center|[[3DS Rock Rock Mountain|3DS Rock Rock Mountain, T]] | |||
|- | |||
|align=center|[[3DS Neo Bowser City]] (Do Jump Boosts, Steer Clear of Obstacles), [[3DS Neo Bowser City|R, R/T]] | |||
|- | |||
|align=center|[[3DS Rosalina's Ice World]] (Glider Challenge), [[3DS Rosalina's Ice World|R, R/T]] | |||
|- | |||
|align=center|[[3DS Rainbow Road|3DS Rainbow Road R, R/T]] | |||
|- | |||
|align=center|[[Tour New York Minute|New York Minute]] (Steer Clear of Obstacles), [[Tour New York Minute|R]] | |||
|- | |||
|align=center|[[Tour New York Minute|New York Minute 3R]] | |||
|- | |||
|align=center|[[Tour Tokyo Blur|Tokyo Blur]] (Ring Race) | |||
|- | |||
|align=center|[[Tour Tokyo Blur|Tokyo Blur 3, R, T]] | |||
|- | |||
|align=center|[[Tour Tokyo Blur|Tokyo Blur 4, R]] | |||
|- | |||
|align=center|[[Tour Paris Promenade|Paris Promenade, R, T]] | |||
|- | |||
|align=center|[[Tour Paris Promenade|Paris Promenade 2, R, T]] | |||
|- | |||
|align=center|[[Tour Paris Promenade|Paris Promenade 3]] | |||
|- | |||
|align=center|[[Tour London Loop|London Loop 2]] (Steer Clear of Obstacles) | |||
|- | |||
|align=center|[[Vancouver Velocity|Vancouver Velocity 2R, R/T]] | |||
|- | |||
|align=center|[[Los Angeles Laps|Los Angeles Laps R]] | |||
|- | |||
|align=center|[[Tour Berlin Byways|Berlin Byways 2, T]] | |||
|- | |||
|align=center|[[Tour Bangkok Rush|Bangkok Rush 2, R, T, R/T]] | |||
|- | |||
|align=center|[[Tour Amsterdam Drift|Amsterdam Drift T]] | |||
|- | |||
|align=center|[[Tour Amsterdam Drift|Amsterdam Drift 3T]] | |||
|- | |||
|align=center|[[Athens Dash|Athens Dash, R, T, R/T]] | |||
|- | |||
|align=center|[[Rome Avanti|Rome Avanti 2, R, T]] | |||
|- | |||
|align=center|[[RMX Mario Circuit 1|RMX Mario Circuit 1R/T]] | |||
|- | |||
|align=center|[[RMX Choco Island 1]] (Do Jump Boosts) | |||
|- | |||
|align=center|[[Merry Mountain]] (Coin Rush) | |||
|- | |||
|align=center rowspan=4|[[File:MKT train.png|100px]]<br>[[File:MKT Amsterdam Drift Train 1.jpg|100px]]<br>[[File:MKT Amsterdam Drift Train 2.jpg|150px]]<br>[[Train (obstacle)|Train]] | |||
|align=center|[[N64 Kalimari Desert|N64 Kalimari Desert, R, T, R/T]] | |||
|rowspan=4|Trains cross the track in front of racers in N64 Kalimari Desert and N64 Kalimari Desert 2. In Amsterdam Drift, there are two types of trains: one that moves back and forth in the city area and one that travels through a viaduct between the Amsterdam and Zaanse Schans portions. If racers drive into a train, they are thrown upward and receive a Jump Boost. | |||
|align=center rowspan=4|<span style="color:green;">Yes</span> | |||
|- | |||
|align=center|[[N64 Kalimari Desert|N64 Kalimari Desert 2, R, T, R/T]] | |||
|- | |||
|align=center|[[Tour Amsterdam Drift|Amsterdam Drift, R, T, R/T]] | |||
|- | |||
|align=center|[[Tour Amsterdam Drift|Amsterdam Drift 3, R, T]] | |||
|- | |||
|align=center rowspan=4|[[File:MKT truck surfboard.jpg|100px]]<br>[[File:MKT truck Piranha Plant.jpg|100px]]<br>[[Truck]] | |||
|align=center|[[DS Shroom Ridge|DS Shroom Ridge, R, R/T]] | |||
|rowspan=4|A vehicle that moves along a course. Most trucks drag along surfboards which drivers can perform Jump Boosts off of, while one truck found in Berlin Byways 3 carries a Piranha Plant that lunges at passers-by. In the course's R variant, trucks do not have any cargo. Bangkok Rush 3 features stationary trucks with surfboards. In Wii Coconut Mall, they appear in the background in the parking lot. | |||
|align=center rowspan=4|<span style="color:green;">Yes</span> | |||
|- | |||
|align=center|[[Wii Coconut Mall|Wii Coconut Mall, R, T, R/T]] | |||
|- | |||
|align=center|[[Tour Berlin Byways|Berlin Byways 3, R, T]] | |||
|- | |||
|align=center|[[Tour Bangkok Rush|Bangkok Rush 3]] | |||
|- | |||
|align=center rowspan=3|[[File:MKT Turning Floor.jpg|100px]]<br>[[Turning Floor]] | |||
|align=center|[[3DS Bowser's Castle|3DS Bowser's Castle, R, T, R/T]] | |||
|rowspan=3|A rotating wooden tunnel that appears before the underwater section in 3DS Bowser's Castle. The tunnel's top features several objects that block the player when ran into. In 3DS Rainbow Road, a Turning Floor appears after the start of the final section that has several [[Dash Panel]]s and [[Glide Ramp]]s inside of it. | |||
|align=center rowspan=3|<span style="color:green;">Yes</span><br>(through Jump Boosts) | |||
|- | |||
|align=center|[[3DS Rainbow Road|3DS Rainbow Road, R]] | |||
|- | |||
|align=center|[[Yoshi's Island (race course)|Yoshi's Island T]] | |||
|- | |||
|align=center|[[File:MKT Walking Tree.png|100px]]<br>[[Walking Tree]] | |||
|align=center|[[DS Luigi's Mansion|DS Luigi's Mansion, R, T, R/T]] | |||
|An obstacle that shuffles from side to side on the track. If racers drive into one, they lose speed. | |||
|align=center|<span style="color:red;">No</span> | |||
|- | |||
|align=center rowspan=20|[[File:MKT Water Geyser.png|100px]][[File:MKT New York Minute water spout.jpg|100px]]<br>[[Water Geyser]] | |||
|align=center|[[GBA Snow Land|GBA Snow Land T]] | |||
|rowspan=20|A hazard that periodically spouts a column of water. Racers caught by the water are sprung high into the air while doing a Jump Boost. In the New York Minute courses and in Bangkok Rush 3T, water erupts from underneath manhole covers, while in GCN Dino Dino Jungle, 3DS Wario Shipyard T, and RMX Vanilla Lake 1, it emerges from raised cracks in the road. Jump Boosts can be performed when driving over these cracks, while they are only performed over manhole covers when they are shaking. | |||
|align=center rowspan=20|<span style="color:green;">Yes</span><br>(through Jump Boosts) | |||
|- | |||
|align=center|[[GBA Lakeside Park|GBA Lakeside Park R/T]] | |||
|- | |||
|align=center|[[GCN Daisy Cruiser|GCN Daisy Cruiser R/T]] | |||
|- | |||
|align=center|[[GCN Dino Dino Jungle|GCN Dino Dino Jungle, R, T, R/T]] | |||
|- | |||
|align=center|[[Wii Coconut Mall|Wii Coconut Mall R/T]] | |||
|- | |||
|align=center|[[Wii Koopa Cape]] (Ring Race) | |||
|- | |||
|align=center|[[3DS Wario Shipyard|3DS Wario Shipyard T, R/T]] | |||
|- | |||
|align=center|[[Tour New York Minute|New York Minute, T]] | |||
|- | |||
|align=center|[[Tour New York Minute|New York Minute 2, R, R/T]] | |||
|- | |||
|align=center|[[Tour New York Minute|New York Minute 3, T]] | |||
|- | |||
|align=center|[[Tour New York Minute|New York Minute 4, R, T, R/T]] | |||
|- | |||
|align=center|[[Tour Tokyo Blur|Tokyo Blur]] (Do Jump Boosts) | |||
|- | |||
|align=center|[[Tour Paris Promenade|Paris Promenade]] (Do Jump Boosts) | |||
|- | |||
|align=center|[[Tour Singapore Speedway|Singapore Speedway 2, R]] | |||
|- | |||
|align=center|[[Tour Singapore Speedway|Singapore Speedway 3R/T]] | |||
|- | |||
|align=center|[[Tour Bangkok Rush|Bangkok Rush T]] | |||
|- | |||
|align=center|[[Tour Bangkok Rush|Bangkok Rush 3T]] | |||
|- | |||
|align=center|[[Squeaky Clean Sprint|Squeaky Clean Sprint, R, T, R/T]] | |||
|- | |||
|align=center|[[RMX Vanilla Lake 1|RMX Vanilla Lake 1, R, T]] | |||
|- | |||
|align=center|[[RMX Donut Plains 1|RMX Donut Plains 1R/T]] | |||
|- | |||
|align=center rowspan=3|[[File:MKT Whomp.png|80px]]<br>[[Whomp]] | |||
|align=center|[[Tour Berlin Byways|Berlin Byways, R, T, R/T]] | |||
|rowspan=3|An obstacle that falls onto the track, squashing drivers caught underneath it. When a Whomp is lying flat on the ground, drivers can perform Jump Boosts on it. | |||
|align=center rowspan=3|<span style="color:green;">Yes</span> | |||
|- | |||
|align=center|[[Tour Berlin Byways|Berlin Byways 2]] (Steer Clear of Obstacles) | |||
|- | |||
|align=center|[[Madrid Drive|Madrid Drive 3R]] | |||
|- | |||
|align=center rowspan=2|[[File:MKT Wiggler.jpg|100px]]<br>[[Wiggler]] | |||
|align=center|[[DS Shroom Ridge|DS Shroom Ridge T]] | |||
|rowspan=2|An enemy that wanders around, occasionally stopping in place. They cause drivers who touch them to spin out. | |||
|align=center rowspan=2|<span style="color:green;">Yes</span> | |||
|- | |||
|align=center|[[Wii Maple Treeway|Wii Maple Treeway, R, T, R/T]] | |||
|- | |||
|align=center|[[File:MKT Wiggler Wagon.png|120px]]<br>[[Wiggler Wagon]] | |||
|align=center|[[GCN Mushroom Bridge|GCN Mushroom Bridge, T]] | |||
|A large green bus designed after the [[Wiggler (Super Mario Sunshine)|Wiggler]] from ''[[Super Mario Sunshine]]''. It moves along the road with other vehicles. When racers drive into a Wiggler Wagon, they simply lose some speed, and when they land on it, they get a Jump Boost. | |||
|align=center|<span style="color:green;">Yes</span> | |||
|- | |||
|align=center rowspan=37|[[File:MKT Wind Fan.jpg|80px]][[File:MKT Wind Pipe.jpg|80px]]<br>[[Wind]] | |||
|align=center|Any course where a Glider Challenge bonus challenge takes place | |||
|rowspan=37|An air current released from pipes and fans. Wind pushes racers around, giving them a Jump Boost if it travels upwards. | |||
|align=center rowspan=37|<span style="color:green;">Yes</span><br>(through Jump Boosts) | |||
|- | |||
|align=center|[[SNES Mario Circuit 1|SNES Mario Circuit 1R, R/T]] | |||
|- | |||
|align=center|[[SNES Ghost Valley 1]] (Do Jump Boosts) | |||
|- | |||
|align=center|[[SNES Bowser Castle 3|SNES Bowser Castle 3T]] | |||
|- | |||
|align=center|[[N64 Luigi Raceway]] (Goomba Takedown) | |||
|- | |||
|align=center|[[N64 Koopa Troopa Beach|N64 Koopa Troopa Beach R/T]] | |||
|- | |||
|align=center|[[N64 Mario Raceway|N64 Mario Raceway R/T]] | |||
|- | |||
|align=center|[[GBA Peach Circuit]] (Steer Clear of Obstacles) | |||
|- | |||
|align=center|[[GBA Boo Lake|GBA Boo Lake T]] | |||
|- | |||
|align=center|[[GBA Bowser's Castle 2|GBA Bowser's Castle 2T]] | |||
|- | |||
|align=center|[[GBA Luigi Circuit|GBA Luigi Circuit T, R/T]] | |||
|- | |||
|align=center|[[GBA Sky Garden|GBA Sky Garden R]] | |||
|- | |||
|align=center|[[GCN DK Mountain|GCN DK Mountain T]] | |||
|- | |||
|align=center|[[DS Luigi's Mansion]] (Glider Challenge) | |||
|- | |||
|align=center|[[DS Shroom Ridge|DS Shroom Ridge T]] | |||
|- | |||
|align=center|[[DS Mario Circuit|DS Mario Circuit T]] | |||
|- | |||
|align=center|[[DS DK Pass|DS DK Pass R/T]] | |||
|- | |||
|align=center|[[DS Peach Gardens|DS Peach Gardens T]] | |||
|- | |||
|align=center|[[Wii Koopa Cape]] (Do Jump Boosts), [[Wii Koopa Cape|R/T]] | |||
|- | |||
|align=center|[[Wii Maple Treeway|Wii Maple Treeway T]] | |||
|- | |||
|align=center|[[3DS Daisy Hills|3DS Daisy Hills R]] | |||
|- | |||
|align=center|[[3DS Shy Guy Bazaar|3DS Shy Guy Bazaar R, T]] | |||
|- | |||
|align=center|[[3DS Mario Circuit]] | |||
|- | |||
|align=center|[[3DS Rock Rock Mountain|3DS Rock Rock Mountain R, T]] | |||
|- | |||
|align=center|[[3DS Neo Bowser City|3DS Neo Bowser City, T, R/T]] | |||
|- | |||
|align=center|[[Tour Tokyo Blur|Tokyo Blur]] (Do Jump Boosts) | |||
|- | |||
|align=center|[[Vancouver Velocity|Vancouver Velocity 2R/T]] | |||
|- | |||
|align=center|[[Vancouver Velocity|Vancouver Velocity 3R/T]] | |||
|- | |||
|align=center|[[Ninja Hideaway|Ninja Hideaway, R]] | |||
|- | |||
|align=center|[[Tour Singapore Speedway|Singapore Speedway]] | |||
|- | |||
|align=center|[[Tour Amsterdam Drift|Amsterdam Drift T]] | |||
|- | |||
|align=center|[[Tour Amsterdam Drift|Amsterdam Drift 3R/T]] | |||
|- | |||
|align=center|[[Athens Dash|Athens Dash R/T]] | |||
|- | |||
|align=center|[[Athens Dash|Athens Dash 2R/T]] | |||
|- | |||
|align=center|[[Rome Avanti|Rome Avanti T]] | |||
|- | |||
|align=center|[[Piranha Plant Pipeline|Piranha Plant Pipeline T]] | |||
|- | |||
|align=center|[[Squeaky Clean Sprint|Squeaky Clean Sprint T]] | |||
|- | |||
|align=center rowspan=2|[[File:MKT Amsterdam Drift Windmills.jpg|100px]]<br>Windmill | |||
|align=center|[[3DS Daisy Hills|3DS Daisy Hills, R, T, R/T]] | |||
|rowspan=2|A large structure with rotating blades that act as walls for racers, mostly during gliding segments. | |||
|align=center rowspan=2|<span style="color:red;">No</span> | |||
|- | |||
|align=center|[[Tour Amsterdam Drift|Amsterdam Drift, R, T, R/T]] | |||
|- | |||
|align=center|[[File:MKT Winged Cloud.jpg|100px]]<br>[[Winged Cloud]] | |||
|align=center|[[Yoshi's Island (race course)|Yoshi's Island, T]] | |||
|A flying object that, when run into, causes an additional pathway to spawn ahead. The pathway acts as a shortcut towards the finish line and helps drivers reach a Goal Ring. | |||
|align=center|<span style="color:green;">Yes</span> | |||
|- | |||
|align=center rowspan=12|[[File:MKT board.png|100px]]<br>[[Wooden cutout]] (Piranha Plant) | |||
|align=center|[[GBA Bowser's Castle 2|GBA Bowser's Castle 2R/T]] | |||
|rowspan=18|A stationary obstacle that can be destroyed by driving through it. This also causes a driver to spin out. In GBA Bowser's Castle 2R/T, GCN Yoshi Circuit, Wii Maple Treeway R, 3DS Piranha Plant Slide T, Paris Promenade, Paris Promenade 2, Ninja Hideaway, Paris Promenade 3 and Los Angeles Laps 3R, wooden cutouts are made to resemble Piranha Plants, in SNES Ghost Valley 1 and DS Luigi's Mansion, they resemble Boos, in the normal and R variants of 3DS Piranha Plant Slide, they resemble Goombas, and the normal variant of 3DS Piranha Plant Slide exclusively has wooded cutouts that resemble bushes. | |||
|align=center rowspan=18|<span style="color:green;">Yes</span> | |||
|- | |||
|align=center|[[GCN Yoshi Circuit|GCN Yoshi Circuit, R, T]] | |||
|- | |||
|align=center|[[Wii Daisy Circuit|Wii Daisy Circuit, T]] | |||
|- | |||
|align=center|[[Wii Maple Treeway|Wii Maple Treeway R]] | |||
|- | |||
|align=center|[[3DS Piranha Plant Slide|3DS Piranha Plant Slide T, R/T]] | |||
|- | |||
|align=center|[[Tour Paris Promenade|Paris Promenade]] | |||
|- | |||
|align=center|[[Tour Paris Promenade|Paris Promenade 2, R, T]] | |||
|- | |||
|align=center|[[Tour Paris Promenade|Paris Promenade 3]] | |||
|- | |||
|align=center|[[Vancouver Velocity|Vancouver Velocity 2]] (Glider Challenge) | |||
|- | |||
|align=center|[[Los Angeles Laps]] (Ring Race) | |||
|- | |||
|align=center|[[Los Angeles Laps|Los Angeles Laps 3R, T, R/T]] | |||
|- | |||
|align=center|[[Ninja Hideaway|Ninja Hideaway, R, T]] | |||
|- | |||
|align=center rowspan=3|[[File:MKT Boo Wooden Cutout.png|100px]]<br>Wooden cutout (Boos) | |||
|align=center|[[SNES Ghost Valley 1|SNES Ghost Valley 1, R, T, R/T]] | |||
|- | |||
|align=center|[[SNES Ghost Valley 2|SNES Ghost Valley 2, R, T]] | |||
|- | |||
|align=center|[[DS Luigi's Mansion|DS Luigi's Mansion, R, T, R/T]] | |||
|- | |||
|align=center rowspan=2|[[File:MKT Goomba Wooden Cutout.jpg|100px]]<br>Wooden cutout (Goomba) | |||
|align=center|[[3DS Piranha Plant Slide|3DS Piranha Plant Slide, R]] | |||
|- | |||
|align=center|[[Athens Dash|Athens Dash 2, R]] | |||
|- | |||
|align=center|[[File:MKT Bush Wooden Cutout.jpg|100px]]<br>Wooden cutout (bush) | |||
|align=center|[[3DS Piranha Plant Slide|3DS Piranha Plant Slide, R/T]] | |||
|} | |||
===Other course elements=== | |||
The following are only seen as background or intangible elements. | |||
{|border="1"cellpadding="3"style="background:#f5f5f5;text-align:left;border-collapse:collapse;margin-bottom:5px;width:100%;"align=center | |||
|- | |||
!width="15%"style="background:#dedede"align=center|Subject | |||
!width="20%"style="background:#dedede"align=center|Location | |||
!width="65%"style="background:#dedede"align=center|Description | |||
|- | |||
|align=center|[[File:MKT Big Cheep Cheep.jpg|100px]]<br>[[Big Cheep Cheep]] | |||
|align=center|[[GBA Cheep-Cheep Island|GBA Cheep-Cheep Island, R, T, R/T]] | |||
|A Cheeps Cheep that swims and leaps in the sea. | |||
|- | |||
|align=center rowspan=5|[[File:MKT Boo.png|100px]]<br>[[Boo]] | |||
|align=center|[[SNES Ghost Valley 1|SNES Ghost Valley 1, R, T, R/T]] | |||
|rowspan=5|Boos appear and disappear. In DS Luigi's Mansion, they also appear on paintings, of which they occasionally stretch out. | |||
|- | |||
|align=center|[[SNES Ghost Valley 2|SNES Ghost Valley 2, R, T, R/T]] | |||
|- | |||
|align=center|[[GBA Boo Lake|GBA Boo Lake, R, T, R/T]] | |||
|- | |||
|align=center|[[DS Luigi's Mansion|DS Luigi's Mansion, R, T, R/T]] | |||
|- | |||
|align=center|[[RMX Ghost Valley 1|RMX Ghost Valley 1, R, T, R/T]] | |||
|- | |||
|align=center rowspan=3|[[File:MKT Bulber.jpg|100px]]<br>[[Bulber]] | |||
|align=center|[[Piranha Plant Cove|Piranha Plant Cove, R, T, R/T]] | |||
|rowspan=3|An anglerfish that floats in place. Some Bulbers are found above the starting line in the first and third variants of Piranha Plant Cove. | |||
|- | |||
|align=center|[[Piranha Plant Cove|Piranha Plant Cove 2, R, T, R/T]] | |||
|- | |||
|align=center|[[Piranha Plant Cove|Piranha Plant Cove 3, R, T, R/T]] | |||
|- | |||
|align=center|{{anchor|Fish Bone B}}[[File:MKT Fish Bones N64 Choco Mountain.jpg|100px]]<br>[[Fish Bone]] | |||
|align=center|[[N64 Choco Mountain|N64 Choco Mountain, R, T, R/T]] | |||
|<!--Do not merge this entry back with the interactable Fish Bones. The ones described here do not use the same assets and are not programmed to give points.-->Inanimate Fish Bones of various sizes are embedded in a wall at a curve. Unlike the Fish Bones [[#Fish Bone A|found in other courses]], these cannot be interacted with. | |||
|- | |||
|align=center rowspan=2|[[File:MKT Helper Train.jpg|100px]]<br>{{conjectural|Flying Train}} | |||
|align=center|[[3DS Rainbow Road]] (Ring Race, Glider Challenge) | |||
|rowspan=2|A train that circulates around a track. In 3DS Rainbow Road bonus challenges, such trains fly around dropping rings on the track or carrying Star Rings that can be glided through. In Merry Mountain, a sleigh-like train drops coins on the track. | |||
|- | |||
|align=center|[[Merry Mountain|Merry Mountain, R, T, R/T]] | |||
|- | |||
|align=center|[[File:MKT Goonies.jpg|100px]]<br>[[Goonie]] | |||
|align=center|[[Yoshi's Island (race course)|Yoshi's Island, R, T, R/T]] | |||
|A flock of Goonies fly near the snowy segment of the course. | |||
|- | |||
|align=center|[[File:MKT Huffin Puffin.jpg|100px]]<br>[[Huffin Puffin]] | |||
|align=center|[[Yoshi's Island (race course)|Yoshi's Island, R, T, R/T]] | |||
|A group of Huffin Puffins stand on the sidelines in the fields segment of the course. | |||
|- | |||
|align=center|[[File:MKT Incoming Chomps.jpg|100px]]<br>[[Incoming Chomp]] | |||
|align=center|[[Yoshi's Island (race course)|Yoshi's Island, R, T, R/T]] | |||
|A Chain Chomp relative that moves by bouncing around. Incoming Chomps can be seen in various areas in the background. | |||
|- | |||
|align=center|[[File:MKT Nep-Enut.jpg|100px]]<br>[[Nep-Enut]] | |||
|align=center|[[Yoshi's Island (race course)|Yoshi's Island, R, T, R/T]] | |||
|A large water creature roaming back and forth in the ocean | |||
|- | |||
|align=center rowspan=2|[[File:MKT Item Box portal.jpg|100px]]<br>[[Painting]] | |||
|align=center|[[DS Luigi's Mansion]] (Break Item Boxes) | |||
|rowspan=2|A floating portal-like painting that spawns in front of drivers and produces Item Boxes. Portal paintings appear in various sizes. | |||
|- | |||
|align=center|[[RMX Ghost Valley 1]] (Break Item Boxes) | |||
|- | |||
|align=center|[[File:MKT Petal Guys.jpg|100px]]<br>[[Petal Guy]] | |||
|align=center|[[Yoshi's Island (race course)|Yoshi's Island, R, T, R/T]] | |||
|A Shy Guy with flowers on its head. Several Petal Guys act as spectators in the fields segment of the course. | |||
|- | |||
|align=center rowspan=8|{{anchor|Warp Pipe B}}[[File:MKT pipes in scenery.png|100px]]<br>[[Warp Pipe|Pipe]] | |||
|align=center|[[N64 Luigi Raceway|N64 Luigi Raceway, R, T, R/T]] | |||
|rowspan=8|<!--Do not merge this entry back with the interactable pipes. The pipes described here do not use the same assets and are not programmed to give points.-->While most pipes in the game [[#Warp Pipe A|have an effect on gameplay]], some fulfill an entirely cosmetic purpose. These are typically multicolored and are seen in a course's surroundings. In 3DS Wario Shipyard and its variants, such pipes produce currents underwater. | |||
|- | |||
|align=center|[[N64 Mario Raceway|N64 Mario Raceway, R, T, R/T]] | |||
|- | |||
|align=center|[[GBA Peach Circuit|GBA Peach Circuit, R, T, R/T]] | |||
|- | |||
|align=center|[[DS Shroom Ridge|DS Shroom Ridge, R, T, R/T]] | |||
|- | |||
|align=center|[[DS Mario Circuit|DS Mario Circuit, R, T, R/T]] | |||
|- | |||
|align=center|[[3DS Mario Circuit|3DS Mario Circuit, R, T, R/T]] | |||
|- | |||
|align=center|[[3DS Wario Shipyard|3DS Wario Shipyard, R, T, R/T]] | |||
|- | |||
|align=center|[[Piranha Plant Pipeline|Piranha Plant Pipeline, R, T, R/T]] | |||
|- | |||
|align=center|[[File:MKT Snake.png|100px]]<br>{{conjectural|Snake}} | |||
|align=center|[[3DS Shy Guy Bazaar|3DS Shy Guy Bazaar, R, T, R/T]] | |||
|Green snakes come out of snake jars upon breaking them. Given the theme of 3DS Shy Guy Bazaar, they may be a reference to [[Cobrat]]s from ''[[Super Mario Bros. 2]]'', who also hide in jars. | |||
|- | |||
|align=center|[[File:MKT Star Bit blue.jpg|100px]][[File:MKT Star Bit yellow.jpg|100px]][[File:MKT Star Bit red.jpg|100px]]<br>[[Star Bit]]s | |||
|align=center|[[Wii Rainbow Road|Wii Rainbow Road, R, T, R/T]] | |||
|Colorful objects that float around the track. | |||
|- | |||
|align=center|[[File:MKT vase.jpg|100px]]<br>[[Vase]] | |||
|align=center|[[Yoshi's Island (race course)|Yoshi's Island, R, T, R/T]] | |||
|Two vases decorate the window sills in the castle segment of the course. | |||
|} | |||
==Bonus challenges== | |||
Bonus challenges are similar to the Missions mode from ''[[Mario Kart DS]]'' and the [[List of Mario Kart Wii tournaments|tournaments]] from ''[[Mario Kart Wii]]'', and are found at the end of each cup. In contrast to races, these challenges offer 3 Grand Stars instead of 5 when completed with the highest score needed. The game will set the character for the challenge, even if the player has not obtained them yet, and give them the [[Pipe Frame]] and the [[Super Glider]], though this rule does not apply for all Big Reverse Races and Vs. Mega (opponent) challenges. The numbers in the table indicate the number of times that bonus challenge appears in each tour. | |||
{|class="wikitable"width=100% style="text-align:center" | |||
!width=10%| | |||
!width=5.625%|[[Ready, Set, Rocket Start]] | |||
!width=5.625%|[[Time Trial (Mario Kart Tour)|Time Trial]] | |||
!width=5.625%|[[Ring Race]] | |||
!width=5.625%|[[Do Jump Boosts]] | |||
!width=5.625%|[[Big Reverse Race]] | |||
!width=5.625%|[[Goomba Takedown]] | |||
!width=5.625%|[[Glider Challenge]] | |||
!width=5.625%|[[Steer Clear of Obstacles]] | |||
!width=5.625%|[[Break Item Boxes]] | |||
!width=5.625%|[[Smash Small Dry Bones]] | |||
!width=5.625%|[[Vs. Mega|Vs. Mega (opponent)]] | |||
!width=5.625%|[[Combo Attack]] | |||
!width=5.625%|[[Take them out quick!]] | |||
!width=5.625%|[[Snap a Photo]] | |||
!width=5.625%|[[Precision Gliding]] | |||
!width=5.625%|[[Big Reverse Race vs. 100]] | |||
|- | |||
!Description | |||
|"''Pull off a Rocket Start!''" | |||
|"''Go for your best time!''" | |||
|"''Pass through rings!''"{{footnote|main|1}} | |||
|"''Do Jump Boosts!''"{{footnote|main|2}} | |||
|"''Aim for 1st!''" | |||
|"''Take down Goombas!''"{{footnote|main|3}} | |||
|"''Glide as far as you can!''"{{footnote|main|4}} | |||
|"''Don't crash!''" | |||
|"''Break item boxes!''"{{footnote|main|5}} | |||
|"''Smash Dry Bones!''"{{footnote|main|6}} | |||
|"''Aim for 1st!''" | |||
|"''Keep the combo going!''" | |||
|"''Take them out quick!''" | |||
|"''Clear the photo goals!''" | |||
|"''Glide through the targets!''" | |||
|"''Aim for 1st place!''" | |||
|- | |||
!{{Tour1}} | |||
|1||||3||2||1||2||1||2||1||1||2|||||||||| | |||
|- | |||
!{{Tour2}} | |||
|1||||2||3||1||2||1||1||2||1||2|||||||||| | |||
|- | |||
!{{Tour3}} | |||
|||3||2||3||1||1||1||1||1||1||2|||||||||| | |||
|- | |||
!{{Tour4}} | |||
|||3||3||2||1||3||1||1||1||1||2|||||||||| | |||
|- | |||
!{{Tour5}} | |||
|||3||2||2||1||2||1||2||2||1||2|||||||||| | |||
|- | |||
!{{Tour6}} | |||
|||3||2||2||1||3||1||1||2||1||2|||||||||| | |||
|- | |||
!{{Tour7}} | |||
|||2||2||1||1||2||1||2||2||1||2||2|||||||| | |||
|- | |||
!{{Tour8}} | |||
|1||1||2||2||1||2||1||1||2||1||2||2|||||||| | |||
|- | |||
!{{Tour9}} | |||
|||2||2||2||1||1||1||2||2||1||2||2|||||||| | |||
|- | |||
!{{Tour10}} | |||
|||2||2||2||1||2||1||1||2||1||2||2|||||||| | |||
|- | |||
!{{Tour11}} | |||
|||2||3||2||1||2||||1||2||1||2||2|||||||| | |||
|- | |||
!{{Tour12}} | |||
|||2||2||2||1||2||1||2||1||1||2||2|||||||| | |||
|- | |||
!{{Tour13}} | |||
|||1||1||1||1||1||1||1||1||1||1||2|||||||| | |||
|- | |||
!{{Tour14}} | |||
|||2||1||1||1||1||1||1||1||1||1||1|||||||| | |||
|- | |||
!{{Tour15}} | |||
|||2||1||1||1||1||1||1||1||1||1||1|||||||| | |||
|- | |||
!{{Tour16}} | |||
|||2||1||1||1||1||||2||1||1||1||1|||||||| | |||
|- | |||
!{{Tour17}} | |||
|||1||1||1||1||2||||2||1||1||1||1|||||||| | |||
|- | |||
!{{Tour18}} | |||
|||1||1||1||1||1||||2||2||1||1||1|||||||| | |||
|- | |||
!{{Tour19}} | |||
|||2||1||1||1||1||1||1||1||1||1||1|||||||| | |||
|- | |||
!{{Tour20}} | |||
|||2||1||1||1||1||1||1||1||1||1||1|||||||| | |||
|- | |||
!{{Tour21}} | |||
|||2||2||||1||1||1||1||1||1||1||1|||||||| | |||
|- | |||
!{{Tour22}} | |||
|||2||1||1||1||1||1||1||1||1||1||1|||||||| | |||
|- | |||
!{{Tour23}} | |||
|||2||1||1||1||1||1||1||1||1||1||1|||||||| | |||
|- | |||
!{{Tour24}} | |||
|||2||1||1||1||2||||1||1||1||1||1|||||||| | |||
|- | |||
!{{Tour25}} | |||
|||2||1||1||1||1||1||1||1||1||1||1|||||||| | |||
|- | |||
!{{Tour26}} | |||
|||2||2||1||1||1||||1||1||1||1||1|||||||| | |||
|- | |||
!{{Tour27}} | |||
|||1||1||1||1||2||1||1||1||1||1||1|||||||| | |||
|- | |||
!{{Tour28}} | |||
|||1||1||1||1||2||1||1||1||1||1||1|||||||| | |||
|- | |||
!{{Tour29}} | |||
|||2||1||1||1||1||1||1||1||1||1||1|||||||| | |||
|- | |||
!{{Tour30}} | |||
|||2||1||1||1||1||1||1||1||1||1||1|||||||| | |||
|- | |||
!{{Tour31}} | |||
|||2||2||2||||1||1||1||1||1||||1|||||||| | |||
|- | |||
!{{Tour32}} | |||
|||2||2||1||||1||||1||1||1||1||1||1|||||| | |||
|- | |||
!{{Tour33}} | |||
|||2||1||2||||1||1||1||1||1||1||1|||||||| | |||
|- | |||
!{{Tour34}} | |||
|||2||1||1||1||1||1||1||1||1||1||1|||||||| | |||
|- | |||
!{{Tour35}} | |||
|||2||1||2||1||1||||1||1||1||1||1|||||||| | |||
|- | |||
!{{Tour36}} | |||
|||2||1||1||1||1||1||1||1||1||1||1|||||||| | |||
|- | |||
!{{Tour37}} | |||
|||3||1||1||||1||1||1||1||1||||2|||||||| | |||
|- | |||
!{{Tour38}} | |||
|||2||1||1||1||1||1||1||1||1||1||1|||||||| | |||
|- | |||
!{{Tour39}} | |||
|||3||1||1||1||||1||1||1||1||1||1|||||||| | |||
|- | |||
!{{Tour40}} | |||
|||2||1||1||1||1||1||1||1||||1||1||||1|||| | |||
|- | |||
!{{Tour41}} | |||
|||2||1||1||1||1||1||1||1||1||||1||||1|||| | |||
|- | |||
!{{Tour42}} | |||
|||2||1||1||||1||1||1||1||1||1||1||||1|||| | |||
|- | |||
!{{Tour43}} | |||
|||3||2||1||||1||1||1||1||1||||1|||||||| | |||
|- | |||
!{{Tour44}} | |||
|||3||1||1||||1||1||1||1||1||1||1|||||||| | |||
|- | |||
!{{Tour45}} | |||
|||2||1||1||1||1||1||1||1||1||||1||||1|||| | |||
|- | |||
!{{Tour46}} | |||
|||3||1||1||||1||||1||1||1||1||1||||1|||| | |||
|- | |||
!{{Tour47}} | |||
|||2||2||1||1||1||1||1||1||1||||1|||||||| | |||
|- | |||
!{{Tour48}} | |||
|||2||1||1||||1||1||1||1||1||1||1||||1|||| | |||
|- | |||
!{{Tour49}} | |||
|||2||1||1||||2||1||1||1||1||||1||||1|||| | |||
|- | |||
!{{Tour50}} | |||
|||2||1||1||1||1||1||1||1||1||||1||||1|||| | |||
|- | |||
!{{Tour51}} | |||
|||2||1||1||||1||1||1||1||1||1||1||||1|||| | |||
|- | |||
!{{Tour52}} | |||
|||2||1||1||1||2||||1||1||1||||1||||1|||| | |||
|- | |||
!{{Tour53}} | |||
|||2||1||||1||1||1||1||1||1||1||1||||1|||| | |||
|- | |||
!{{Tour54}} | |||
|||2||1||1||1||1||1||1||1||1||||1||||1|||| | |||
|- | |||
!{{Tour55}} | |||
|||2||1||1||||1||1||1||1||1||1||1||||1|||| | |||
|- | |||
!{{Tour56}} | |||
|||3||1||1||||1||1||1||1||1||||1||||1|||| | |||
|- | |||
!{{Tour57}} | |||
|||2||1||1||1||1||1||1||1||1||||1||||1|||| | |||
|- | |||
!{{Tour58}} | |||
|||2||1||1||||1||1||1||1||1||1||1||||1|||| | |||
|- | |||
!{{Tour59}} | |||
|||2||1||1||||1||1||1||1||1||1||1||||1|||| | |||
|- | |||
!{{Tour60}} | |||
|||3||1||1||1||1||||1||1||1||||1||||1|||| | |||
|- | |||
!{{Tour61}} | |||
|||2||1||1||||1||1||1||1||1||1||1||||1|||| | |||
|- | |||
!{{Tour62}} | |||
|||2||1||1||||2||1||1||1||1||||1||||1|||| | |||
|- | |||
!{{Tour63}} | |||
|||2||1||2||1||1||1||1||1||1||||1|||||||| | |||
|- | |||
!{{Tour64}} | |||
|||1||1||1||||1||2||1||1||1||1||1||||1|||| | |||
|- | |||
!{{Tour65}} | |||
|||2||3||1||||1||1||1||1||1||||1||||||||| | |||
|- | |||
!{{Tour66}} | |||
|||2||1||1||||1||1||1||1||1||1||1||||1|||| | |||
|- | |||
!{{Tour67}} | |||
|||2||1||1||1||1||1||1||1||1||||1||||1|||| | |||
|- | |||
!{{Tour68}} | |||
|||2||1||1||||1||1||1||1||1||1||1||||1|||| | |||
|- | |||
!{{Tour69}} | |||
|||2||1||1||1||1||1||1||||1||||1||1||1|||| | |||
|- | |||
!{{Tour70}} | |||
|||2||1||1||||2||1||2||1||1||||1|||||||| | |||
|- | |||
!{{Tour71}} | |||
|||2||1||1||||1||1||1||1||1||1||1||||1|||| | |||
|- | |||
!{{Tour72}} | |||
|||2||1||1||1||1||1||1||1||1||1||1|||||||| | |||
|- | |||
!{{Tour73}} | |||
|||2||1||1||||1||1||1||1||1||1||1||||1|||| | |||
|- | |||
!{{Tour74}} | |||
|||1||1||1||1||1||1||1||1||1||1||1||||1|||| | |||
|- | |||
!{{Tour75}} | |||
|||1||2||1||||1||1||1||1||1||||1||1||1|||| | |||
|- | |||
!{{Tour76}} | |||
|||2||1||1||1||1||1||1||1||1||||1||||1|||| | |||
|- | |||
!{{Tour77}} | |||
|||2||1||1||1||1||1||1||1||1||1||1|||||||| | |||
|- | |||
!{{Tour78}} | |||
|||3||1||1||||1||1||1||1||1||||1||1|||||| | |||
|- | |||
!{{Tour79}} | |||
|||2||2||1||1||1||1||1||1||1||1||||1||||||| | |||
|- | |||
!{{Tour80}} | |||
|||2||1||1||||1||1||1||2||1||1||1||1||1||1|| | |||
|- | |||
!{{Tour81}} | |||
|||1||1||2||1||2||1||1||1||2||1||1||||1|||| | |||
|- | |||
!{{Tour82}} | |||
|||2||2||2||1||1||1||1||1||1||1||2|||||||| | |||
|- | |||
!{{Tour83}} | |||
|||2||2||1||1||1||1||2||1||1||||1||1||1|||| | |||
|- | |||
!{{Tour84}} | |||
|||3||1||1||1||2||1||1||1||2||1||1|||||||| | |||
|- | |||
!{{Tour85}} | |||
|||2||1||1||1||2||1||2||1||1||1||1||1|||||| | |||
|- | |||
!{{Tour86}} | |||
|||2||2||1||1||2||1||2||1||1||1||1|||||||| | |||
|- | |||
!{{Tour87}} | |||
|||2||2||1||1||1||1||1||1||2||1||1||1|||||| | |||
|- | |||
!{{Tour88}} | |||
|||3||2||1||1||1||1||1||1||1||1||1||||||||1 | |||
|- | |||
!{{Tour89}} | |||
|||2||1||1||1||1||2||2||1||1||1||1||1|||||| | |||
|- | |||
!{{Tour90}} | |||
|||2||1||1||1||2||||2||1||1||1||1||1||||||1 | |||
|- | |||
!{{Tour91}} | |||
|||2||1||1||1||2||1||1||1||1||1||1||1||||1|| | |||
|- | |||
!{{Tour92}} | |||
|||2||2||2||1||2||1||2||1||1||1||1|||||||| | |||
|- | |||
!{{Tour93}} | |||
|||2||1||1||1||1||1||1||1||2||1||1||||1||1|| | |||
|- | |||
!{{Tour94}} | |||
|||2||1||1||1||1||2||2||1||1||1||1||||1|||| | |||
|- | |||
!{{Tour95}} | |||
|||2||1||1||1||2||1||2||1||1||1||1||||1|||| | |||
|- | |||
!{{Tour96}} | |||
|||2||1||1||1||1||2||2||1||1||1||1||1|||||| | |||
|- | |||
!{{Tour97}} | |||
|||2||2||1||1||1||1||2||1||1||1||1||||1|||| | |||
|- | |||
!{{Tour98}} | |||
|||1||1||1||1||2||1||1||2||1||1||1||1||||||1 | |||
|- | |||
!{{Tour99}} | |||
|||3||1||1||1||2||1||2||1||1||1||1||||||||1 | |||
|- | |||
!{{Tour100}} | |||
|||2||1||2||1||1||||1||1||2||1||2||1|||||| | |||
|- | |||
!{{Tour101}} | |||
|||2||2||1||1||2||1||1||1||1||1||1||1|||||| | |||
|- | |||
!{{Tour102}} | |||
|||3||1||2||1||1||||1||1||1||1||1||||||1||1 | |||
|- | |||
!{{Tour103}} | |||
|||3||2||2||1||1||||2||1||1||1||1||||||||1 | |||
|- | |||
!{{Tour104}} | |||
|||2||2||1||1||1||2||1||1||1||1||1||1|||||| | |||
|} | |||
{{footnote|note|1|Formerly "''Clear ''(number)'' rings.''"}} | |||
{{footnote|note|2|Formerly "''Do ''(number)'' Jump Boosts.''"}} | |||
{{footnote|note|3|Formerly "''Hit ''(number)'' Goombas.''"}} | |||
{{footnote|note|4|Formerly "''Glide at least ''(distance)''.''"}} | |||
{{footnote|note|5|Formerly "''Hit ''(number)'' Item Boxes.''"}} | |||
{{footnote|note|6|Formerly "''Smash ''(number)'' opponents.''"}} | |||
==Apple Store demo== | |||
A special demo of ''Mario Kart Tour'' was made playable at Apple Store outlets and kiosks.<ref>Ryuk3112 (December 2, 2019). [https://www.reddit.com/r/MarioKartTour/comments/e4j94v/demo_iphones_have_a_demo_version_of_mario_kart/ Demo iPhones have a demo version of Mario Kart Tour]. ''Reddit''. Retrieved December 8, 2019.</ref> Unlike in the full consumer version, the menu and Coin Rush mode are inaccessible, and points cannot be saved when the player quits the app. Additionally, there are only three cups available: | |||
{|align=center width=15% cellspacing=0 border=1 cellpadding=3 style="border-collapse:collapse;font-family:Arial;text-align:center" | |||
|- | |||
![[File:MKT Icon Toad Cup.png|75px]]<br>[[Toad Cup]] | |||
|[[File:MKT Icon New York Minute.png|150px]]<br>[[Tour New York Minute|New York Minute]] | |||
|[[File:MKT Icon Toad Circuit.png|150px]]<br>[[3DS Toad Circuit]] | |||
|[[File:MKT Icon Koopa Troopa Beach.png|150px]]<br>[[N64 Koopa Troopa Beach]] | |||
|'''Do Jump Boosts'''<br><small>Yoshi, New York Minute</small> | |||
|- | |||
![[File:MKT Icon Mario Cup.png|75px]]<br>[[Mario Cup]] | |||
|[[File:MKT Icon Tokyo Blur.png|150px]]<br>[[Tour Tokyo Blur|Tokyo Blur]] | |||
|[[File:MKT Icon 3DS Cheep Cheep Lagoon.png|150px]]<br>[[3DS Cheep Cheep Lagoon]] | |||
|[[File:MKT Icon Rock Rock Mountain.png|150px]]<br>[[3DS Rock Rock Mountain]] | |||
|'''Goomba Takedown'''<br><small>Mario, Tokyo Blur</small> | |||
|- | |||
![[File:MKT Icon Peach Cup.png|75px]]<br>[[Peach Cup]] | |||
|[[File:MKT Icon Paris Promenade.png|150px]]<br>[[Tour Paris Promenade|Paris Promenade]] | |||
|[[File:MKT Icon Daisy Hills.png|150px]]<br>[[3DS Daisy Hills]] | |||
|[[File:MKT Icon Shy Guy Bazaar.png|150px]]<br>[[3DS Shy Guy Bazaar]] | |||
|'''Vs. Mega Bowser'''<br><small>Any character, Paris Promenade</small> | |||
|} | |||
There are only 10 drivers, 7 karts, and 6 gliders available in the demo: | |||
{|align=center width=15% cellspacing=0 border=1 cellpadding=3 style="border-collapse:collapse;font-family:Arial;text-align:center" | |||
|- | |||
!Drivers | |||
!Karts | |||
!Gliders | |||
|- | |||
|[[File:MKT Icon Mario.png|x30px|link=Mario]][[File:MKT Icon Peach.png|x30px|link=Princess Peach|Peach]][[File:MKT Icon Yoshi.png|x30px|link=Yoshi]][[File:MKT Icon Daisy.png|x30px|link=Princess Daisy|Daisy]][[File:MKT Icon Luigi.png|x30px|link=Luigi]][[File:MKT Icon Toad.png|x30px|link=Toad]][[File:MKT Icon Bowser.png|x30px|link=Bowser]][[File:MKT Icon DonkeyKong.png|x30px|link=Donkey Kong]][[File:MKT Icon KoopaTroopa.png|x30px|link=Koopa Troopa]][[File:MKT Icon ShyGuy.png|x30px|link=Shy Guy]] | |||
|[[File:MKT Icon PipeFrameRed.png|x30px|link=Pipe Frame]][[File:MKT Icon BirthdayGirl.png|x30px|link=Birthday Girl]][[File:MKT Icon KoopaDasher.png|x30px|link=Koopa Dasher]][[File:MKT Icon Landship.png|x30px|link=Landship]][[File:MKT Icon Mach8.png|x30px|link=Mach 8]][[File:MKT Icon TurboYoshi.png|x30px|link=Turbo Yoshi]][[File:MKT Icon BarrelTrain.png|x30px|link=Barrel Train]] | |||
|[[File:MKT Icon SuperGliderRed.png|x30px|link=Super Glider]][[File:MKT Icon Parachute.png|x30px|link=Parachute (glider)|Parachute]][[File:MKT Icon Parafoil.png|x30px|link=Parafoil]][[File:MKT Icon PaperGlider.png|x30px|link=Paper Glider]][[File:MKT Icon PeachParasol.png|x30px|link=Peach Parasol (glider)|Peach Parasol]][[File:MKT Icon FlowerGlider.png|x30px|link=Flower Glider]] | |||
|} | |||
==Differences in power-saving mode== | |||
There are some minor and major differences in the game's menus and race courses when it is set to "power-saving" mode, to maintain device performance (in older supported phone models) and decrease battery usage. | |||
;General differences | |||
*Opponents do not have any animations nor do they emit voices. | |||
*The minimap does not appear in races. | |||
*The models for the drivers have low quality textures. | |||
*Course textures are less detailed. | |||
*The sound effect of passing through Dash Rings is present only if they were activated by the player. | |||
*The Shy Guys, Yoshis, and Toads that are normally found along the sidelines of several courses are absent, though they can still be heard. | |||
*The screen has a lower resolution, resulting in slightly pixelated graphics. | |||
*Trees are swapped out for lower-detail models. | |||
*In some courses, models adding extra detail get removed. This is particularly noticeable in [[Tour Tokyo Blur|Tokyo Blur]] right after passing the {{wp|National Diet Building}}, where every building in the background except for one is removed. | |||
;Course-specific differences | |||
*In [[SNES Ghost Valley 1]], [[SNES Ghost Valley 2]], [[DS Luigi's Mansion]], and [[RMX Ghost Valley 1]], the decorative [[Boo]]s in the sky are absent. | |||
*In [[SNES Choco Island 1]], [[SNES Choco Island 2]], [[GBA Sunset Wilds]], DS Luigi's Mansion, [[RMX Choco Island 1]], and [[RMX Choco Island 2]], the brightness of the mud is absent. | |||
*In [[N64 Kalimari Desert]] and N64 Kalimari Desert 2, the sandy wind that normally blows across the desert is absent. | |||
*In [[DS DK Pass]], [[N64 Frappe Snowland]], [[SNES Vanilla Lake 1]], [[Merry Mountain]], [[RMX Vanilla Lake 1]], [[SNES Vanilla Lake 2]], and [[RMX Vanilla Lake 2]], the falling snow is absent. | |||
*In [[3DS Neo Bowser City]] and [[GBA Luigi Circuit]], the rain is absent, including its ground and screen effects. | |||
*In [[Wii Maple Treeway]], the petals on the water and the falling leaves are absent. | |||
*In [[3DS Bowser's Castle]], the volcanic eruption in the background is absent. | |||
*In [[Wii Mushroom Gorge]], the small glowing particles in the cave are absent. | |||
*In [[GCN Daisy Cruiser]], the wind and water visual effects intended to make the ship appear as if it is moving are absent. | |||
*In [[GCN DK Mountain]], both volcanoes are dormant instead of erupting. | |||
*In [[Tour Amsterdam Drift|Amsterdam Drift 3]], the tulips in the flower field are completely absent. | |||
*In [[Wii Rainbow Road]], the pinpricks of light streaming along the course's route are absent. | |||
*In [[Wii Dry Dry Ruins]], every instance of falling sand except for those tied to the rising sand piles is absent. | |||
*In [[Piranha Plant Pipeline]], the interior of the [[Clear Pipe]] section is opaque; however, it remains transparent from the outside. | |||
==Updates== | |||
{{main|Mario Kart Tour update history}} | |||
===Version 3.4.1=== | |||
'''Release date:''' September 28, 2023 | |||
<i><blockquote> | |||
*Addressed known issues. | |||
</blockquote></i> | |||
==Differences from previous ''Mario Kart'' games== | |||
*''Mario Kart Tour'' is the only ''[[Mario Kart (series)|Mario Kart]]'' game where every character must technically be unlocked, and where there is no set starting roster. | |||
*It is also the only game to not have a Grand Prix mode, with every fortnightly Tour containing a reshuffled selection of [[Cup]]s, and Cups containing three courses and one bonus challenge to be played in any order. | |||
*The number of players in each race has reverted back to eight, like in all mainline games up to ''Mario Kart DS'' and in ''Mario Kart 7''. | |||
*Apart from [[GCN Baby Park]] and [[3DS Rainbow Road]], all races consist of two laps/sections, as opposed to the usual three. | |||
*Drivers, karts and gliders can be leveled up. | |||
*The music continues from where it leaves off after the final lap fanfare plays, instead of restarting like in past games. | |||
**The only exception to this is 3DS Rainbow Road, which reuses its final lap music from ''Mario Kart 7'' and always begins at the start of the song. | |||
**On the final lap, for most courses the music's pitch is increased by four semitones rather than one as in the other games since ''Mario Kart: Double Dash!!''. The exceptions are [[Merry Mountain]] and [[Tour Bangkok Rush|Bangkok Rush]], which are pitched up by one, [[Rome Avanti]], which is pitched up by three, and [[Piranha Plant Pipeline]], which is pitched up by two. | |||
*Percussion is not heard in the music when the player is in 1st place like in ''Mario Kart 7'' and ''Mario Kart 8''. | |||
*[[Lakitu (Mario Kart referee)|Lakitu]] does not appear at the beginning of or throughout races. | |||
**Starting from the [[New Year's 2021 Tour]], the Lakitu referee in his festive attire appears as a playable driver known as "Lakitu (Party Time)".<ref>[https://mobile.twitter.com/mariokarttourEN/status/1344168842902315010 Post about the drivers of the New Year's 2021 Tour from the official English ''Mario Kart Tour'' Twitter account]</ref> | |||
*Stars are not obtainable from regular item boxes in single player mode, with [[Frenzy (Mario Kart Tour)|item Frenzies]] having similar effects instead. However, in multiplayer mode, stars appear from item boxes in rulesets with fewer than three item slots (as Frenzies are not obtainable). | |||
*For the first time since ''Super Mario Kart'', [[Triple Red Shells]] are absent. This is likely due to how using multi-items (such as the [[Triple Mushrooms]] or the [[Lucky Seven]]) sends out all of their items at once, which would be useless for items that always lock onto the next racer. | |||
*This is the first ''Mario Kart'' game since ''Mario Kart: Super Circuit'' to have numbered new courses (e.g. Tokyo Blur '''3''') and the first ''Mario Kart'' game to feature numbered variants of classic courses (namely N64 Kalimari Desert '''2'''). | |||
**Unlike in the previous games, these numbered courses take place in the same map, but use a different course layout: the starting line is in the same location (with the exceptions of [[Los Angeles Laps]], [[Tour Berlin Byways|Berlin Byways]], and [[Piranha Plant Cove]]), but the courses split off from each other onto different routes. Some variants, such as [[Vancouver Velocity|Vancouver Velocity 2]] and [[Tour Sydney Sprint|Sydney Sprint 2]], have racers crossing the starting line in the opposite direction of the other variants. | |||
***The remix courses feature numbers in their names as well, though in that case when the number changes the map layout changes as well. | |||
*For the first time since ''Mario Kart: Super Circuit'', the [[Golden Dash Mushroom|Golden Mushroom]] is absent, as it is functionally replaced by the [[Dash Mushroom|Mushroom]] Frenzy. | |||
*Multiple items can be received from a single item box. | |||
*This is the first ''Mario Kart'' game to lack losing themes and animations after races; the same theme and animations play for any placement below 1st. However, losing voice lines for most of the characters can be found in the game's files. | |||
*Courses, karts, and gliders that had different names between American and British English in previous games instead only use their American English names, with the exception of the [[B Dasher Mk. 2]], which only uses its British English name. | |||
*Karts that originally had moving parts (not counting tires), such as the tentacles on the Super Blooper and the blower on the Flame Flyer, no longer have them move. | |||
*If an opponent hits the player with any item, the screen will display the word "Ouch!" with the icon of the opponent's current driver displayed above it. | |||
**Likewise if a player hits the opponent, the side of the screen will display the word "Hit!" with the icon of the opponent's driver and the item they got hit by. | |||
*The item warning sound effects differs between certain items. The warning sound effect from ''Mario Kart 8'' is used when targeted by a homing item (Red Shell, Yoshi's Egg, or Birdo Egg) and when an opponent behind the player is under the effects of a Star, Mega Mushroom, or Bullet Bill. The homing item warning sound effect from ''Mario Kart Wii'' is used when targeted by a [[Spiny Shell (blue)|Spiny Shell]]. | |||
*Various sound effects, such as the item roulette, [[Jump Boost]]s, and when the player's current placement changes, are taken from ''Mario Kart DS'' (for the former), ''Mario Kart Wii'', and ''Mario Kart 7'' rather than from ''Mario Kart 8''. | |||
==Glitches== | |||
===Opponents' drivers get stuck in multiplayer battles=== | |||
Certain connection errors in multiplayer battles cause opponents to dissociate from their players and drive straight into the first wall they encounter, where they remain stuck until the time runs out or the player who experiences this bug strikes them out.<ref>LeastGeneral9415 (November 6, 2022). [https://www.reddit.com/r/mariokarttour/comments/ynqcwd/_/ weird multi-player glitch]. ''Reddit'' (/r/MarioKartTour). Retrieved November 8, 2022.</ref> | |||
==Staff== | |||
===Producer=== | |||
*[[Hideki Konno]]<ref name=DICE/> | |||
===Creative Director=== | |||
*[[Kosuke Yabuki]]<ref name=DICE/> | |||
===Game Directors=== | |||
*Yugo Hayashi<ref name=DICE/> | |||
*Shinya Fujiwara<ref name=DICE/> | |||
===Composer=== | |||
*[[Kenta Nagata]]<ref>Credited on the Canadian Copyright Database entry for the game</ref> | |||
===Characters Voices=== | |||
*[[Charles Martinet]] as [[Mario]]*, [[Luigi]]*, [[Wario]]*, [[Waluigi]]*, [[Baby Mario]]*, [[Baby Luigi]], and [[Metal Mario]]* | |||
*[[Samantha Kelly]] as [[Princess Peach|Peach]]*, [[Toad]]*, [[Toadette]]*, [[Baby Peach]]*, [[Pink Gold Peach]], [[Captain Toad]], and [[Peachette]] | |||
*[[Kazumi Totaka]] as [[Yoshi]]* and [[Birdo]] | |||
*[[Deanna Mustard]] as [[Princess Daisy|Daisy]]* and [[Baby Daisy]] | |||
*[[Laura Faye Smith]] as [[Rosalina]]* and [[Baby Rosalina]]* | |||
*[[Kenny James]] as [[Bowser]]* and [[Dry Bowser]]* | |||
*[[Takashi Nagasako]] as [[Donkey Kong]]* | |||
*[[Katsumi Suzuki]] as [[Diddy Kong]] | |||
*[[Tadd Morgan]] as [[Lakitu]]* | |||
*[[Caety Sagoian]] as [[Bowser Jr.]]* | |||
*[[Motoki Takagi]] as [[Hammer Bro]], [[Boomerang Bro]], [[Fire Bro]], and [[Ice Bro]] | |||
*[[Nate Bihldorff]] as [[Shy Guy]]* | |||
*[[Ryan Higgins]] as {{Iggy}} | |||
*[[Michelle Hippe]] as {{Larry}}* | |||
*[[Carlee McManus]] as {{Lemmy}} | |||
*[[David J. Goldfarb|David Goldfarb]] as {{Ludwig}} | |||
*[[David Cooke]] as {{Morton}} | |||
*[[Dan Falcone]] as {{Roy}} | |||
*[[Ashley Flannegan]] as {{Wendy}} | |||
*[[Kate Higgins]] as [[Pauline]]* | |||
*[[Toshihide Tsuchiya]] as [[Funky Kong]] | |||
*[[Kahoru Sasajima]] as [[Dixie Kong]] | |||
*[[Natsuko Yokoyama]] as [[Nabbit]] | |||
*[[Dolores Rogers]] as [[Wiggler]]* | |||
<small>*-Applies to all variants of that character.</small> | |||
==Reception== | |||
===Critical reception=== | |||
Initial impressions of the beta were mixed. Journalists praised the gameplay and graphics, but criticized the free-to-play gacha elements of the game. Sam Machkovech of Ars Technica compared the game's in-app purchases to Spiny Shells, blowing up the classic ''Mario Kart'' experience. He suggested that "the developers pick a side: attach an annoying economy to a deeper control scheme and more legitimate online options, or make it cheaper and less obnoxious to watch [[Mario]] drive himself".<ref name=Arstechnica>Machkovech, Sam (May 22, 2019). [https://arstechnica.com/gaming/2019/05/mario-kart-tour-beta-hands-on-microtransactions-land-like-a-nasty-blue-shell/ ''Mario Kart Tour'' beta hands-on: Microtransactions land like a nasty blue shell]. ''Ars Technica''. Retrieved May 23, 2019.</ref> Ethan Gach of Kotaku also stated that the game is "a mostly faithful but stripped-down recreation of ''Mario Kart'' decked out with all the microtransactions and lottery mechanics mobile games are infamous for" and also lamented the lack of a multiplayer mode.<ref>Gach, Ethan (May 22, 2019). [https://kotaku.com/mario-kart-tour-is-pretty-good-when-it-s-not-nickel-and-1834948363 ''Mario Kart Tour'' Is Pretty Good When It’s Not Nickel And Diming You.] ''Kotaku''. Retrieved May 23, 2019.</ref> Steven Asarch of Newsweek complained about the game's "freemium greed" and that it is "ruined by microtransactions".<ref>Asarch, Steven (May 23, 2019) [https://www.newsweek.com/mario-kart-tour-microtransactions-emeralds-racers-1434574 ‘''Mario Kart Tour''’ Beta Potential Bogged Down By Microtransactions.] ''Newsweek.'' Retrieved May 23, 2019.</ref> | |||
The game's reception on release was mixed to negative. Andrew Webster of The Verge praised how intuitive using items is, while criticizing the controls, calling them imprecise, and the game's monetization, stating that "The problem is so much of the game feels designed around monetization, as opposed to just being a fun game".<ref>Webster, Andrew (September 26, 2019). [https://www.theverge.com/2019/9/26/20884989/mario-kart-tour-review-android-iphonem ''Mario Kart Tour'' is too cynical to be fun]. ''The Verge''. Retrieved March 31, 2020.</ref> Chris Scullion of Nintendo Life gave a positive review, praising the lack of an energy system, the points system, and the amount of cups, while criticizing the time required to get used to the controls, the gyro controls, and listing the game's monetization as a con, stating that opinions on the game's monetization will vary for each person, while arguing that "It's rubbish to an extent, absolutely, but despite the outrage you may be seeing in some circles, it's no different to any other game with a loot box system; it's always nearly impossible to guarantee you'll get the exact thing you want" when talking about the game's gacha mechanics, and that "More than the gacha system, the Gold Pass is gaining a lot more controversy than it really should be, with some misunderstanding what it does and assuming this subscription service is necessary in some way. To be clear, it really isn't, and absolutely won't be of interest to 99% of the player base." when talking about the game's Gold Pass subscription.<ref>Scullion, Chris (September 26, 2019). [http://www.nintendolife.com/reviews/mobile/mario_kart_tour ''Mario Kart Tour'' Review]. ''Nintendo Life''. Retrieved March 31, 2020.</ref> Michael McWhertor of Polygon gave a negative review, stating that the game "lacks the joy of its fully-featured counterparts", criticizing that the steering feels inconsequential, stating that "the game can feel as if it's playing itself", the lack of difficulty when playing against computers, the lack of motivation to continue playing, and the game's microtransactions.<ref>McWhertor, Micheal (September 27, 2019). [https://www.polygon.com/reviews/2019/9/27/20887100/mario-kart-tour-review-nintendo-iphone-android ''Mario Kart Tour'' review: ''Mario Kart'' just doesn’t feel right on a phone]. ''Polygon''. Retrieved March 31, 2019.</ref> CJ Andriessen of Destructoid gave a negative review, criticizing the game's microtransactions and how the game rarely gives the player Rubies, stating "''[Mario Kart] Tour''{{'}}s fatal flaw is it's continually pushing players into ham-fisted situations where they have to spend money rather than creating a game so exceptional they'll ''want'' to spend money", the limitations on unlocking, collecting, or upgrading certain things, and the game's controls, while praising the variations to courses, though noting that "there is still a bit of disappointment when you wait a day to unlock a new cup only to find it's [[3DS Daisy Hills|Daisy Hills]] ''again''", the [[Tour New York Minute|New York Minute]] track, and that Nintendo at the time of the article's publication planned to add more new tracks to the game, though noting that "One of the great joys of any ''Mario Kart'' title is seeing what types of new courses the developers have designed and that joy just isn't present in ''[Mario Kart] Tour''."<ref>Andriessen, CJ (September 29, 2019). [https://www.destructoid.com/review-mario-kart-tour-568088.phtml Review: ''Mario Kart Tour'']. ''Destructoid''. Retrieved March 31, 2020.</ref> Kyle Hilliard of IGN, in a mixed review, praised the series's transition from consoles to mobile phones, stating that "during those moments where I was speeding down the track expertly launching turtle shells at my opponents I felt like I was playing a real ''Mario Kart'' game", though stating that ''Mario Kart Tour'' is an "undeniable downgrade from ''[[Mario Kart 8]]''", praise was given to how items are used, the game's bonus challenges, and the brevity of the races, cups, and bonus challenges, while criticism was directed at the game launching without multiplayer, the game's microtransactions and their cost, having to wait for later cups to unlock, and the quantity of Grand Stars unlocked being affected by the kart or character the player unlocked.<ref>Hilliard, Kyle (October 1, 2019). [https://ca.ign.com/articles/2019/10/01/mario-kart-tour-review ''Mario Kart Tour'' Review]. ''IGN''. Retrieved March 31, 2020.</ref> Jon Cartwright of GameXplain, in a negative review, stated that "''Mario Kart'' is better than this", stating "Because it's so similar to the core games, it becomes comparable to them, amplifying its faults even further", criticizing the controls, calling them "extremely unintuitive", and "a huge, restrained, letdown" after stating that the controls felt "extremely simplistic"; the game's monetization, stating that "This may be a free game compared to a full sixty dollar release, but money has never felt so intrusive in ''Mario Kart''"; and the track New York Minute, stating that "this track is not good enough for ''Mario Kart''", while praising the game's bonus challenges and the game's Reverse tracks, calling them "really cool ideas", while also praising the game's roster of playable characters and its graphics.<ref>GameXplain (October 2, 2019). [https://www.youtube.com/watch?v=HpsB74smp1o ''Mario Kart Tour'' REVIEW - Free to Play but Money Has Never Been More Intrusive]. ''YouTube''. Retrieved March 31, 2019.</ref> | |||
As of August 26, 2020, ''Mario Kart Tour'' received a mixed Metacritic Metascore of 58, and a negative User Score of 3.8.<ref>[https://www.metacritic.com/game/ios/mario-kart-tour ''Mario Kart Tour'' <small>(iOS)</small>]. ''Metacritic''. Retrieved August 26, 2020.</ref> Despite receiving mixed reviews from critics, as of August 26, 2020, ''Mario Kart Tour'' received an average of 4.1 out of 5 stars on Google Play<ref>[https://play.google.com/store/apps/details?id=com.nintendo.zaka&hl=en ''Mario Kart Tour'']. ''Google Play''. Retrieved May 5, 2020.</ref> and an average of 4.7 out of 5 stars on the App Store.<ref>[https://apps.apple.com/us/app/mario-kart-tour/id1293634699 ''Mario Kart Tour'']. ''App Store''. Retrieved May 5, 2020.</ref> | |||
{|class="wikitable reviews" | |||
!colspan="4"style="font-size:120%;text-align:center;background-color:silver;"|Reviews | |||
|-style="background-color:#E6E6E6" | |||
|Release | |||
|Reviewer, Publication | |||
|Score | |||
|Comment | |||
|- | |||
|Unknown | |||
|Andrew Webster, [https://www.theverge.com/2019/9/26/20884989/mario-kart-tour-review-android-iphone The Verge] | |||
|N/A | |||
|"''This doesn't mean Mario Kart Tour won't be successful. In fact, early signs point to the game having a record-breaking launch. But that success isn't because the game is good, and it's especially disappointing from a company that prides itself on quality. Mobile aside, Nintendo is at a creative high point, regularly launching major Switch games to near-universal acclaim. They're games that sell hardware and help players think differently about what games can be. On console, Nintendo sets its own pace; on mobile, it follows.''" | |||
|- | |||
|Unknown | |||
|Chris Scullion, [https://www.nintendolife.com/reviews/mobile/mario_kart_tour Nintendo Life] | |||
|7/10 | |||
|"''Get used to Mario Kart Tour's unconventional control system and ignore its overpriced and unnecessary subscription service and you're left with a fun, free mobile take on the series. It was never going to replace Mario Kart 8 Deluxe, but by not including an energy system and promising regular new content Nintendo is at least offering a decent alternative to pass the time when you're out and about without your Switch.''" | |||
|- | |||
|iOS | |||
|Michael McWhertor, [https://www.polygon.com/reviews/2019/9/27/20887100/mario-kart-tour-review-nintendo-iphone-android Polygon] | |||
|N/A | |||
|"''Mario Kart Tour stalls right from the starting line. It lacks the competitive thrills of other Mario Kart games, focusing more on an endless series of unlockable virtual things to acquire. | |||
''But it appears that a full multiplayer mode is coming to Mario Kart Tour, which may provide more thrills than chasing AI-controlled kart racers and the daily drip feed of currency. For now, however, this is hardly a vital addition to Nintendo’s library of games, mobile or otherwise.''" | |||
|- | |||
|Unknown | |||
|CJ Andriessen, [https://www.destructoid.com/review-mario-kart-tour-568088.phtml Destructoid] | |||
|4.5/10 | |||
|"''Mario Kart Tour is a blemish on the franchise it shares its name with. The genre-defining creativity found in past entries is completely absent here, replaced by a hollow experience that's simply coasting on the name and goodwill of the games that came before it. I can only hope this is Nintendo's mobile initiative hitting rock bottom, and that it's all uphill from here. Because I can't stand the thought of another one of my favorite series having its reputation dragged the mud{{sic}} in search of a quick buck.''" | |||
|- | |||
|iOS | |||
|Kyle Hilliard, [https://ca.ign.com/articles/2019/10/01/mario-kart-tour-review IGN] | |||
|6.7/10 | |||
|"''The actual gameplay and racing of Mario Kart Tour is well done: controlling the karts feels good, the courses and characters look and sound great, and playing simplified one-handed Mario can be a lot of fun. But the road to a mobile version of Mario Kart is a bumpy one. On top of multiplayer not currently being available at all, Nintendo continues to struggle with how to comfortably monetize a mobile game without hamstringing its gameplay. Tour’s prices are prohibitively high and not getting top honors on a race despite winning first place just because you don’t have the right racer or kart feels unfair.''" | |||
|- | |||
|Unknown | |||
|Jon Cartwright, [https://www.youtube.com/watch?v=HpsB74smp1o GameXplain] | |||
|Disliked | |||
|"''If you're someone who doesn't own a Nintendo console and just want a quick Mario Kart fix, I guess this is it. It comes with a lot of roadblocks, and it isn't anywhere near as fun to control as the console games. And for me it just made me want to play Mario Kart 8 again. I disliked Mario Kart Tour. It looks like a quality Mario Kart game, but it isn't particularly fun to play, and the aggressive monetization is so prominent that it intrudes on the experience. The last new Mario Kart game may have been five years ago with Mario Kart 8 on [[Wii U]], but this isn't even worth a pit stop to me. Mario Kart is better than this.''" | |||
|- | |||
!colspan="4"style="font-size:120%;text-align:center; background-color:silver;"|Aggregators | |||
|-style="background-color:#E6E6E6" | |||
|colspan=2|Compiler | |||
|colspan=2|{{nowrap|Platform / Score}} | |||
|- | |||
|colspan=2|Metacritic | |||
|colspan=2 style="background-color:gold"|iOS: [https://www.metacritic.com/game/ios/mario-kart-tour 58] | |||
|} | |||
===Awards and acknowledgements=== | |||
''Mario Kart Tour'' was nominated for the "User's Choice Game of 2019" from Google Play, losing to ''{{wp|Call of Duty: Mobile}}''.<ref>[https://play.google.com/store/apps/uservoting/GamesBestOf2019UserVotingPage?id=mc_bestof2019_uv_games_page Users’ Choice Game of 2019]. ''Google Play''. Retrieved April 2, 2020.</ref> The game won the "Racing Game of the Year" award at the 23rd annual D.I.C.E Awards.<ref>Academy of Interactive Arts & Sciences (February 14, 2020). [https://twitter.com/Official_AIAS/status/1228178941115912192 Congratulations to @mariokarttourEN for winning Racing Game of the Year! #DICEAwards]. ''Twitter''. Retrieved April 2,2020.</ref> | |||
==Mobile app store description== | |||
<blockquote> | |||
<i> | |||
;Race around the world! | |||
■ Challenge players worldwide in multiplayer!<br> | |||
You can race against up to seven other players, whether they're registered as in-game friends, nearby, or scattered around the world.<br> | |||
Multiplayer races can be customized with a variety of rules, such as individual or team races, kart speed, and number of item slots. You can play however you want! | |||
■ Mario Kart takes a world tour!<br> | |||
Mario and friends go global in this new Mario Kart as they race around courses inspired by real-world cities in addition to classic Mario Kart courses! These destinations will be featured in tours that rotate every two weeks! In addition to courses based on iconic locales, some of your favorite Mario Kart characters will get variations that incorporate the local flavor of cities featured in the game! | |||
■ Endless Mario Kart fun at your fingertips!<br> | |||
The Mario Kart series known and loved by many is ready to take the world by storm – one smart device at a time! With just one finger, you can steer and drift with ease and sling devastating items as you go for the gold in cups filled with new and classic Mario Kart courses. | |||
■ Nab 1st place with items and Frenzy mode!<br> | |||
In Mario Kart Tour you have access to an arsenal of powerful items that can mix things up on the racetrack! Turn up the heat by activating the new Frenzy mode, which gives an unlimited supply of a certain item and makes you invincible! Make the most of the ensuing chaos, as Frenzy mode only lasts a short time! | |||
■ Collect drivers, karts, badges, and more!<br> | |||
Earn Grand Stars by racing or fire off the featured pipe to receive more drivers, karts, and gliders! You can also proudly display badges, earned by completing certain challenges, next to your in-game name! | |||
■ Bonus challenge courses put a twist on traditional races!<br> | |||
In certain races, 1st place isn't always the goal. With names like "Vs. Mega Bowser" and "Goomba Takedown," these bonus challenge courses demand a different approach to gameplay and strategy! | |||
■ Race to increase your online rank!<br> | |||
Boost with the best of 'em! Your high scores will determine how you compare to other players all over the world. Keep practicing and trying out different combinations of drivers, karts, and gliders to increase your score and rise to the top! | |||
Note: A Nintendo Account is required to play Mario Kart Tour.<br> | |||
<nowiki>*</nowiki> Free-to-start; optional in-game purchases available. Persistent Internet, compatible smartphone, and Nintendo Account required. Data charges may apply.<br> | |||
<nowiki>*</nowiki> For information about our ads, please see the "How we use your information" section of the Nintendo Privacy Policy.<br> | |||
<nowiki>*</nowiki> May include advertising. | |||
</i> | |||
</blockquote> | |||
==Pre-release and unused content== | |||
{{main|List of Mario Kart Tour pre-release and unused content}} | |||
The beta version of the game saw multiple changes in the final game. Among them, the stamina element was removed, and the timers restricting access to certain cups can be sped up using [[quick ticket]]s. Additionally, rubies were originally emeralds. | |||
Several of the game's drivers, karts, gliders, and courses had data strings and other files relating to them present in the game's data before they were released, though some of these correspond to content that was never released. The game's data also contains unused versions of some of the course icons that depict the courses less accurately. | |||
==''MKT'' Report== | |||
{{main|MKT Report}} | |||
[[File:MKT Report 2023 Spotlight Shop drivers.jpg|thumb|300px|A ranking of the 20 most purchased drivers in the Spotlight Shop from January to December 2023, published as part of ''MKT'' Report 2023<ref>{{cite | author = mariokarttourEN | date = January 17, 2024 | url = twitter.com/mariokarttourEN/status/1747514339739963597 | title = The first topic for the MKT Report 2023 is here! It's the 20 most purchased drivers in the Spotlight Shop. Next we'll reveal the rankings for the karts! #MarioKartTour | publisher = X | accessdate = February 27, 2024 | archive = archive.ph/OqpPF | archivedate = February 10, 2024, 00:15:16 UTC }}</ref>]] | |||
''MKT'' Report is a yearly series of reports published by Nintendo, meant to offer insights into the statistics and achievements of ''Mario Kart Tour''{{'}}s playerbase throughout a given year. For example, one such report showed that, from January through November 2021, the most popular driver used in multiplayer races was [[Metal Mario]];<ref>{{cite | author = mariokarttourEN | date = December 31, 2021| url = twitter.com/mariokarttourEN/status/1476840574846226451| title = Look back on 2021 in #MarioKartTour with MKT Report 2021, part 3! Here are the most used drivers in multiplayer! #MKTReport | publisher = X | accessdate = February 27, 2024 | archive = web.archive.org/web/20211231090319/https://twitter.com/mariokarttourEN/status/1476840574846226451 }}</ref> another stated that approximately 51.7 billion coins were collected in races during the same time frame (excluding "events such as the Coins Aplenty event").<ref>{{cite | author = mariokarttourEN | date = December 30, 2021| url = twitter.com/mariokarttourEN/status/1476463103902720001| title = Look back on 2021 in #MarioKartTour with MKT Report 2021! Today's reports will be about races. First, here's "The total number of coins collected in races!" Excluding events such as the Coins Aplenty event, there were 51.7 billion coins collected just in races alone! #MKTReport | publisher = X | accessdate = February 27, 2024 | archive = web.archive.org/web/20211230080148/https://twitter.com/mariokarttourEN/status/1476463103902720001 }}</ref> | |||
{{br}} | |||
==Gallery== | |||
{{main-gallery}} | |||
<gallery> | |||
Mario MKT artwork.jpg|[[Mario]] | |||
MKT Peach Artwork.png|[[Princess Peach|Peach]] | |||
MKT Yoshi Artwork.png|[[Yoshi]] | |||
MKT Toad Artwork.png|[[Toad]] | |||
MKT Luigi Artwork.png|[[Luigi]] | |||
MKT Bowser artwork.png|[[Bowser]] | |||
MKT Lakitu artwork.png|[[Lakitu (Mario Kart referee)|Lakitu]] | |||
</gallery> | |||
==Media== | ==Media== | ||
{{main-media}} | {{main-media}} | ||
==References to other games== | ==References to other games== | ||
*''[[Donkey Kong (game)|Donkey Kong]]'': Portions of this game can be seen in Times Square's screens in [[New York Minute | *''[[Donkey Kong (game)|Donkey Kong]]'': Portions of this game can be seen in Times Square's screens in [[Tour New York Minute|New York Minute]] and its variants. The clothing colors of Mario (Classic) reference Mario's original design from this game. | ||
*''[[Super Mario Bros.]]'': The [[8-Bit Jumping Mario]] | *''[[Super Mario Bros.]]'': The [[8-Bit Jumping Mario]] and the [[8-Bit Jumping Luigi]] gliders use Mario and Luigi's jumping sprites from this game, the [[8-Bit Star]] uses the [[Super Star]] sprite from this game, the [[8-Bit Fire Flower]] uses the [[Fire Flower]] sprite from this game, the [[8-Bit Bullet Bill]] uses the [[Bullet Bill]] sprite from this game, the [[8-Bit Super Mushroom]] uses the [[Super Mushroom]] sprite from this game, the [[8-Bit Block Glider]] uses the [[Brick Block]] and [[? Block]] sprites from this game, and the [[8-Bit Goomba]] uses the [[Goomba]] sprite from this game. The game's Japanese logo appears on the [[Super 1]] kart. | ||
*''[[Super Mario Bros.: The Lost Levels]]'': The clothing colors of Luigi (Classic) reference Luigi's artwork from this game. | |||
*''[[Super Mario Bros. 2]]'': Birdo (Green)'s special item is the Fire Flower, in reference to the fact that the green-colored Birdo in this game shot fireballs instead of eggs. | |||
*''[[ | *''[[Famicom Grand Prix: F1 Race]]'': The artwork of Mario in a Formula One car from this game is reused as a badge. | ||
*''[[ | *''[[Dr. Mario (game)|Dr. Mario]]'': One of Dr. Mario's [[Jump Boost]] animations mimics his victory animation at the end of a multiplayer match in this game, complete with the same limited number of frames. | ||
*''[[ | *''[[NES Open Tournament Golf]]'': Mario and Luigi's outfits in this game return as playable variants. | ||
*''[[Mario Kart | *''[[Super Mario Kart]]'': [[SNES Mario Circuit 1|Mario Circuit 1]], [[SNES Donut Plains 1|Donut Plains 1]], [[SNES Ghost Valley 1|Ghost Valley 1]], [[SNES Mario Circuit 2|Mario Circuit 2]], [[SNES Choco Island 1|Choco Island 1]], [[SNES Ghost Valley 2|Ghost Valley 2]], [[SNES Donut Plains 2|Donut Plains 2]], [[SNES Mario Circuit 3|Mario Circuit 3]], [[SNES Choco Island 2|Choco Island 2]], [[SNES Vanilla Lake 1|Vanilla Lake 1]], [[SNES Bowser Castle 3|Bowser Castle 3]], [[SNES Donut Plains 3|Donut Plains 3]], [[SNES Koopa Troopa Beach 2|Koopa Beach 2]], [[SNES Vanilla Lake 2|Vanilla Lake 2]], and [[SNES Rainbow Road|Rainbow Road]] appear as returning race courses. The tires resembling the tires from this game return as the Pipe Frame's assigned tires, as well as other certain karts with these tires. Much of the artwork from ''Super Mario Kart'', such as Yoshi spinning out, is reused in badges from this game, in addition to the cover art of the game being used for the [[Super Mario Kart Glider]]. Additionally, one of the game's commemorative badges says "Since '92", which references the ''Mario Kart'' series having debuted upon this game's release in 1992. Mario and [[Donkey Kong Jr.]]'s sprites are reused from this game as separate playable variants. The sound effects used for the pre-race jingle, item roulette, and post-race jingle are reused from this game exclusively for the two aforementioned characters. The [[Super Mario Kart Tour]] is themed after this game. | ||
*''[[Super Mario World 2: Yoshi's Island]]'': The [[Yoshi's Island (race course)|Yoshi's Island]] course is based on this game. The [[Smiley Flower Glider]] is based on the [[Smiley Flower]], with a similar animation to this game. | |||
*''[[Donkey Kong Country]]'': An [https://youtu.be/2KHE95mBlOU official video] promoting the [[Rambi Rider]] as a commemorative kart for the [[Jungle Tour]] was released, using clips from the opening and gameplay of this game. | |||
*''[[Mario Kart 64]]'': [[N64 Luigi Raceway|Luigi Raceway]], [[N64 Koopa Troopa Beach|Koopa Troopa Beach]], [[N64 Kalimari Desert|Kalimari Desert]], [[N64 Frappe Snowland|Frappe Snowland]], [[N64 Choco Mountain|Choco Mountain]], [[N64 Mario Raceway|Mario Raceway]], [[N64 Royal Raceway|Royal Raceway]], and [[N64 Yoshi Valley|Yoshi Valley]] appear as returning race courses. The results theme is an arrangement of the winning results theme from this game. The new [[N64 Kalimari Desert 2|Kalimari Desert 2]] course allows racers to race inside the train tunnel, similar to how players could go inside Kalimari Desert's train tunnel in ''Mario Kart 64''. | |||
*''[[ | *''[[Yoshi's Story]]'': [[Poochy]]'s voice clips are taken from this game. | ||
*''[[Mario Kart: Super Circuit]]'': [[GBA Peach Circuit|Peach Circuit]], [[GBA Riverside Park|Riverside Park]], [[GBA Bowser's Castle 1|Bowser Castle 1]], [[GBA Boo Lake|Boo Lake]], [[GBA Bowser's Castle 2|Bowser Castle 2]], [[GBA Luigi Circuit|Luigi Circuit]], [[GBA Sky Garden|Sky Garden]], [[GBA Cheep-Cheep Island|Cheep-Cheep Island]], [[GBA Sunset Wilds|Sunset Wilds]], [[GBA Snow Land|Snow Land]], [[GBA Yoshi Desert|Yoshi Desert]], [[GBA Bowser's Castle 3|Bowser Castle 3]], and [[GBA Bowser's Castle 4|Bowser Castle 4]] appear as returning race courses. [[GBA Battle Course 1|Battle Course 1]] appears as a returning battle course. | |||
*''[[ | *''[[Super Mario Sunshine]]'': Mario (Sunshine) wears the [[Shine Sprite]] shirt and sunglasses originating from this game. | ||
*''[[Mario Kart: Double Dash!!]]'': [[Special Item (Mario Kart series)|Special Items]] such as the [[Giant Banana]], [[Bowser's Shell]] and the [[Heart (item)|Heart]] return. [[GCN Baby Park|Baby Park]], [[GCN Mushroom Bridge|Mushroom Bridge]], [[GCN Daisy Cruiser|Daisy Cruiser]], [[GCN Waluigi Stadium|Waluigi Stadium]], [[GCN Yoshi Circuit|Yoshi Circuit]], [[GCN DK Mountain|DK Mountain]], and [[GCN Dino Dino Jungle|Dino Dino Jungle]] appear as returning race courses. [[GCN Cookie Land|Cookie Land]] appears as a returning battle course. The [[Turbo Yoshi]], [[Turbo Birdo]], [[Goo-Goo Buggy]], [[Koopa Dasher]], [[Para-Wing]], [[DK Jumbo]], [[Barrel Train]], [[Koopa King]], [[Bullet Blaster]], [[Piranha Pipes]], and [[Boo Pipes]] return as karts. Birdo's voice clips are reused from this game. | |||
*''[[Mario Party 6]]'': The artwork for Mario (Classic) and Luigi (Classic) is based on Mario and Luigi's profile artwork from this game. | |||
*''[[ | *''[[Mario Kart DS]]'': [[DS Luigi's Mansion|Luigi's Mansion]], [[DS Waluigi Pinball|Waluigi Pinball]], [[DS Shroom Ridge|Shroom Ridge]], [[DS DK Pass|DK Pass]], [[DS Mario Circuit|Mario Circuit]], [[DS Airship Fortress|Airship Fortress]], and [[DS Peach Gardens|Peach Gardens]] appear as returning race courses. [[DS Twilight House|Twilight House]] appears as a returning battle course. The [[B Dasher]], [[Poltergust 4000]], [[Streamliner]], [[Royale]], [[Egg 1]], [[Cucumber]], [[Mushmellow]], [[Rambi Rider]], and [[Dragonfly]] return as karts. Challenges with unique objectives, similar to the missions from this game, appear as the fourth and final race in every cup. Also, the [[Item Box]] pickup and roulette sound effects return. | ||
*''[[Super Mario Strikers]]'': Some of Hammer Bro's voice clips are reused from this game. | |||
*''[[New Super Mario Bros.]]'': Koopa Troopa's artwork is reused from this game. | |||
*''[[Mario Party 8]]'': Dry Bones and Hammer Bro reuse their artwork from this game, and some of the latter's voice clips are also reused from this game. | |||
*''[[ | *''[[Super Mario Galaxy]]'': [[Ice Mario (Super Mario Galaxy)|Ice Mario]] appears as a playable character and reuses his artwork from this game. Bowser Jr. also reuses his artwork from this game. | ||
*''[[Mario Party DS]]'': Diddy Kong's artwork is reused from this game. | |||
*''[[Mario Kart Wii]]'': [[Wii Mushroom Gorge|Mushroom Gorge]], [[Wii Coconut Mall|Coconut Mall]], [[Wii DK Summit|DK Summit]], [[Wii Daisy Circuit|Daisy Circuit]], [[Wii Koopa Cape|Koopa Cape]], [[Wii Maple Treeway|Maple Treeway]], [[Wii Dry Dry Ruins|Dry Dry Ruins]], [[Wii Moonview Highway|Moonview Highway]], and [[Wii Rainbow Road|Rainbow Road]] appear as returning race courses. The [[Cheep Charger]], [[Wild Wing]], [[Super Blooper (kart)|Super Blooper]], [[Daytripper]], [[B Dasher Mk. 2]], [[Offroader]], and [[Flame Flyer]] return as karts. The jingle that plays when obtaining a High-End kart, racer, or glider from the shop, challenge, tour gift, or paid banner, and when obtaining a High-End level-boost ticket or point-cap ticket, is an arrangement of a song from this game. The sound effect used for Jump Boosts is reused from this game. Diddy Kong and Funky Kong reuse their voice clips from this game. This game's music for [[GBA Shy Guy Beach]] is reused for [[GBA Cheep-Cheep Island]]. [[Wii Moo Moo Meadows|Moo Moo Meadows]] is mentioned on a badge available in-game. | |||
*''[[Mario Super Sluggers]]'': Baby Mario, Baby Peach, Baby Daisy, Baby Luigi, Shy Guy, King Boo, Monty Mole, Petey Piranha, and Wiggler reuse their artwork from this game, and the artwork for Black Shy Guy, Pink Shy Guy, Green Shy Guy, Light-blue Shy Guy, Blue Shy Guy, White Shy Guy, Orange Shy Guy, and Yellow Shy Guy is based on Shy Guy's artwork from this game. Artwork of Mario and Bowser from this game appears on billboards in [[Los Angeles Laps|Los Angeles Laps 3]]. | |||
*''[[Mario & Sonic at the Olympic Winter Games]]'': Dry Bowser's artwork is reused from this game. | |||
*''[[New Super Mario Bros. Wii]]'': Peach and all of the Koopalings reuse their artwork from this game, albeit with the magic coming from Iggy's [[magic wand]] in his artwork removed. Penguin Luigi, Penguin Yellow Toad (named simply Penguin Toad), and [[Penguin Mario]] appear as playable characters. | |||
*''[[Super Mario 3D Land]]'': [[Tanooki Mario]] and [[Tanooki Mario|Kitsune Luigi]] reuse their artwork from this game. [[White Tanooki Mario]] appears as a playable character. | |||
*''[[ | *''[[Mario Kart 7]]'': All of this game's race courses except [[Wuhu Loop]], [[3DS Music Park|Music Park]], [[Maka Wuhu]], and [[3DS DK Jungle|DK Jungle]] return as classic courses. The artwork for [[Lakitu]], [[Metal Mario]], and [[Wiggler]] is reused from this game, and Daisy's artwork is an updated version of her artwork from this game. The [[Birthday Girl]], [[Koopa Clown]], [[Soda Jet]], [[Cloud 9]], [[Bumble V]], [[Zucchini]], [[Bruiser]], [[Blue Seven]], [[Bolt Buggy]], and [[Cact-X]] return as karts, and the [[Barrel Train]] retains its design from this game. The [[Swooper (glider)|Swooper]], [[Flower Glider]], [[Peach Parasol (glider)|Peach Parasol]], and [[Gold Glider]] return as gliders. Various kart tires return from this game. The [[Lucky Seven]] and [[Super Leaf]] items reappear. The rankings screen and multiplayer menu use the music from this game's Local Multiplayer and Online Multiplayer menus respectively. Metal Mario's voice clips are reused from this game. [[Honey Queen]]'s [[emblem]] from this game appears as part of the Racer's Soda Lemonade badge. | ||
*''[[Mario Party 9]]'': Birdo's artwork is reused from this game, and the artwork for Birdo (Light Blue), Birdo (Yellow), Birdo (Orange), Birdo (Blue), Birdo (Red), Birdo (Black), and Birdo (White) is based on Birdo's artwork from this game. | |||
*''[[ | *''[[New Super Mario Bros. 2]]'': Gold Mario appears as a playable character in the game's Coin Rush mode and was added later as a playable character in the final update. | ||
*''[[New Super Mario Bros. U]]'' / ''[[New Super Luigi U]]'': [[Nabbit]]'s artwork and emblem are reused from these games. The design for [[track]]s is reused. | |||
*''[[Super Mario | **''[[New Super Mario Bros. U Deluxe]]'': [[Peachette]] and [[Penguin Mario|Penguin Toadette]] appear as playable characters, with the former reusing her artwork from this game and her emblem being a [[Super Crown]]. Nabbit reuses his voice clips from this game. | ||
*''[[ | *''[[Super Mario 3D World]]'': The artwork for the [[Double Cherry]] is reused from this game for the Tropical Grocery badge. [[Fire Mario|Fire Rosalina]], [[Cat Mario|Cat Peach]], [[Cat Mario|Cat Toad]], [[Cat Mario|Cat Rosalina]], [[Cat Mario]], [[Cat Mario|Cat Luigi]], [[Meowser]], and [[Tanooki Mario|Tanooki Rosalina]] appear as playable characters; all cat characters except Cat Luigi use the [[Super Bell]] as their special item, and all of them except Cat Rosalina reuse their artwork from this game. Meowser and White Tanooki Mario also reuse their artwork from this game (though White Tanooki Mario's is modified to remove the sparkling effects). [[Innertube Goomba]]s appear as obstacles in [[Tour Singapore Speedway|Singapore Speedway]]. [[Chargin' Chuck]]'s artwork is a 3D recreation of its [[:File:SM3DW BF Chargin'ChuckStamp.png|stamp]] from this game. | ||
*''[[Mario Party: Island Tour]]'': Luigi's artwork is reused from this game. | |||
*''[[Mario Kart 8]]'': Many characters' animations and voice clips are reused from this game. Metal Mario's voice clips are reused exclusively for Gold Mario. Larry's voice clip when unlocking him from this game is reused for Larry (Wintertime). {{classic|GCN|Yoshi Circuit}}, {{classic|N64|Royal Raceway}}, and {{classic|N64|Yoshi Valley}} retain their designs from this game. The flying train seen in {{classic-link|N64|Rainbow Road}} returns in [[Merry Mountain]] and several other courses. The [[Mach 8]], [[Steel Driver]], [[Cat Cruiser]], [[Circuit Special]], [[Badwagon]], [[Prancer]], [[Biddybuggy]], [[Landship]], [[Sports Coupe]], [[P-Wing (kart)|P-Wing]], [[Tanooki Kart]], [[Sneeker]], and [[Streetle]] return as karts, and the [[Pipe Frame]] and [[B Dasher]] retain their designs from this game. The design of the [[Standard Kart]] from this game is used for the [[Red Standard 8]] and [[Green Standard 8]]. The [[Parafoil]], [[Wario Wing]], [[Cloud Glider]], and [[Paper Glider]] return as gliders, while the Flower Glider and Peach Parasol retain their designs from this game; additionally, the [[Stealth Glider]] and [[Golden Glider]] are both based on the [[Plane Glider]]. Various [[tire]] parts return, assigned to specific karts. The [[Boomerang Flower]] and [[Super Horn]] return as items. Some of the courses from this game are referenced in advertisements and badges, including [[Toad Harbor]], [[Sunshine Airport]], [[Mount Wario]], and [[Super Bell Subway]]. The designs of the icons for the non-DLC cups are reused from this game as badges. Many of the game's sponsors are also reused as badges and in courses. The music for [[Mario Kart TV]]'s review after winning a cup in Grand Prix mode is reused for the tour-ending movie. | |||
**''[[Mario Kart 8 Deluxe]]'': The third-level [[Mini-Turbo]] boost, Ultra Mini-Turbo, returns. The [[Koopa Clown]] retains its design from this game. King Boo’s head icon is reused from this game. [[Sky-High Sundae]], [[Yoshi's Island]], and [[Squeaky Clean Sprint]] from the ''[[Mario Kart 8 Deluxe – Booster Course Pass|Booster Course Pass]]'' also appear. | |||
*''[[Captain Toad: Treasure Tracker]]'': [[Captain Toad]] and Toadette (Explorer) appear and reuse their artwork from this game. The [[Clanky Kart]], [[Clackety Kart]], and [[Gold Clanky Kart]] are based on the [[Mine Cart]]s from this game. | |||
*''[[Donkey Kong Country: Tropical Freeze]]'': Dixie Kong and Funky Kong reuse their artwork from this game. Dixie Kong's emblem is derived from the [[DK Barrel|Dixie Kong Barrel]]'s design in this game. | |||
*''[[Mario Party 10]]'': Yoshi, Bowser, Toad, Waluigi, and Toadette reuse their artwork from this game, and the artwork for Red Yoshi, Blue Yoshi, Pink Yoshi, Orange Yoshi, Black Yoshi, White Yoshi, and Yellow Yoshi is based on Yoshi's artwork from this game. | |||
*''[[Dr. Mario: Miracle Cure]]'': [[Dr. Mario]]'s artwork is reused from this game, albeit without the sparkles coming from the Miracle Cure. | |||
*''[[Super Mario Maker]]'' / ''[[Super Mario Maker 2]]'': [[Builder Mario]], Builder Toad, Builder Luigi, and Builder Toadette appear as playable variants. Builder Mario's artwork is reused from the first game, while Builder Toad and Builder Luigi reuse their artwork from the second game. | |||
*''[[Mario Party: Star Rush]]'': King Bob-omb and Kamek reuse their artwork from this game. Petey Piranha (Gold)'s artwork resembles Petey Piranha's artwork from this game, albeit mirrored and with his tongue sticking out. | |||
*''[[Super Mario Run]]'': Event tokens resemble [[Bonus Medal]]s from this game, emitting the same sound effect when collected. | |||
*''[[Super Mario Odyssey]]'': Many of [[Mario]] and [[Princess Peach|Peach]]'s outfits come from this game. The [[Yellow Taxi]] is based on the [[taxi]]s from this game. Some of Pauline's voice clips reference her singing "[[Jump Up, Super Star!]]" from this game. All five [[Roving Racers]] appear as the playable characters Red Koopa (Freerunning), Blue Koopa (Freerunning), Purple Koopa (Freerunning), Koopa (Freerunning), and Gold Koopa (Freerunning). The [[:File:Mario Kart Tour - Earth art.jpg|artwork]] of [[Earth]], which is used for promotional material and the title screen, resembles the Earth from this game; the [[Metro Kingdom|Metro]], [[Snow Kingdom|Snow]], [[Seaside Kingdom|Seaside]], and [[Luncheon Kingdom]]s are visible in the artwork, as well as inaccurate representations of the [[Cap Kingdom|Cap]] and [[Cascade Kingdom]]s. | |||
*''[[Mario Party: The Top 100]]'': Rosalina and Wario reuse their artwork from this game. | |||
*''[[Mario Tennis Aces]]'': Some of Birdo's voice clips are reused from this game. Petey Piranha's emblem is taken from this game. | |||
*''[[Super Mario Party]]'': Donkey Kong's artwork is reused from this game. Monty Mole's voice clips are also reused from this game. King Bob-omb (Gold)'s artwork is based on King Bob-omb's artwork from this game. Chargin' Chuck's emblem is taken from [[Gridiron Gauntlet]] in this game. Dry Bones (Gold) and Shy Guy (Gold) resemble how Dry Bones and Shy Guy appear when under the effect of a [[Golden Drink]] in this game. | |||
*''[[Dr. Mario World]]'': [[Luigi#Dr. Mario series|Dr. Luigi]], [[Princess Peach#Dr. Mario series|Dr. Peach]], and [[Bowser#Dr. Mario World|Dr. Bowser]] reuse their artwork from this game. Artwork of the red, blue, and yellow [[virus]]es from this game appears on the [[Magniflying Glass]] and [[Pink Magniflying Glass]]. | |||
*''[[Luigi's Mansion 3]]'': King Boo (Luigi's Mansion) uses King Boo's design from this game. | |||
*''[[Mario Kart Live: Home Circuit]]'': A commemorative badge appears of Mario and the [[Standard Kart]], using the kart's design from this game. Luigi (Painter) and Luigi (Knight) are both based on outfits Luigi has in this game. | |||
*''[[Mario Golf: Super Rush]]'': Chargin' Chuck's voice clips and emblem are taken from this game. | |||
==References in other games== | |||
*[https://apps.apple.com/app/ | *''[[Mario Golf: Super Rush]]'': Pauline and King Bob-omb's voice clips are reused in this game. | ||
*[https://play.google.com/store/apps/details?id=com.nintendo.zaka Google Play page] | *''[[Mario Kart 8 Deluxe]]'': The ''[[Mario Kart 8 Deluxe – Booster Course Pass|Booster Course Pass]]'' DLC features the return of [[Tour Paris Promenade|Paris Promenade]], [[Tour Tokyo Blur|Tokyo Blur]], and [[Ninja Hideaway]] as part of the first wave, [[Tour New York Minute|New York Minute]] and [[Tour Sydney Sprint|Sydney Sprint]] as part of the second wave, [[Tour London Loop|London Loop]], [[Tour Berlin Byways|Berlin Byways]], and [[Merry Mountain]] as part of the third wave, [[Tour Amsterdam Drift|Amsterdam Drift]], [[Tour Bangkok Rush|Bangkok Rush]], and [[Tour Singapore Speedway|Singapore Speedway]] as part of the fourth wave, [[Tour Athens Dash|Athens Dash]], [[Tour Los Angeles Laps|Los Angeles Laps]], and [[Tour Vancouver Velocity|Vancouver Velocity]] as part of the fifth wave, and [[Tour Rome Avanti|Rome Avanti]], [[Piranha Plant Cove]], and [[Tour Madrid Drive|Madrid Drive]] as part of the sixth and final wave. The DLC's other classic courses are also based on their designs from ''Mario Kart Tour'', and [[N64 Kalimari Desert]]'s second and third laps are based on N64 Kalimari Desert 2. <!--[[Sky-High Sundae]] also reappears as a course in the second wave, with it having debuted in ''Mario Kart Tour'' less than a week after the second wave's release.-->[[Kamek]], [[Pauline]], and [[Peachette]] reappear as playable characters, and eighteen ''Tour'' Mii Racing Suits were added as part of the sixth wave. | ||
*''[[Super Mario Bros. Wonder]]'': {{media link|SMBW Daisy.png|Daisy's artwork}} uses the same pointing pose as the {{media link|MKT London Tour launch artwork.jpg|launch artwork}} from the [[London Tour]]. | |||
==Names in other languages== | |||
{{foreign names | |||
{{MKT}} | |Jap=マリオカート ツアー | ||
{{ | |JapR=Mario Kāto Tsuā | ||
{{Mobile}} | |JapM=Mario Kart Tour | ||
[[Category:Mario Kart | |ChiS=马力欧卡丁车 巡回赛<ref>''[https://mariokarttour.com/zh-CN mariokarttour.com]'' (simplified Chinese). Retrieved September 2, 2019.</ref> | ||
|ChiSR=Mǎlì'ōu Kǎdīngchē Xúnhuí Sài | |||
|ChiSM=Mario Kart Tour | |||
|ChiT=瑪利歐賽車 巡迴賽<ref>''[https://mariokarttour.com/zh-TW mariokarttour.com]'' (traditional Chinese). Retrieved September 2, 2019.</ref> | |||
|ChiTR=Mǎlì'ōu Sàichē Xúnhuí Sài | |||
|ChiTM=Mario Racing Tour | |||
|Kor=마리오 카트 투어 | |||
|KorR=Malio Kateu Tueo | |||
|KorM=Mario Kart Tour | |||
}} | |||
==References== | |||
<references/> | |||
==External links== | |||
{{NIWA|StrategyWiki=1}} | |||
*[https://mariokarttour.com/ Official website] | |||
*[https://apps.apple.com/app/1293634699 App Store page] | |||
*[https://play.google.com/store/apps/details?id=com.nintendo.zaka Google Play page] | |||
{{MKT}} | |||
{{Super Mario games}} | |||
{{Mobile}} | |||
[[Category:Mario Kart Tour|*]] | |||
[[Category:Games]] | [[Category:Games]] | ||
[[Category:Mobile | [[Category:Mobile games]] | ||
[[Category:2019 games]] | [[Category:2019 games]] | ||
[[Category:Racing games]] | |||
[[it:Mario Kart Tour]] | [[it:Mario Kart Tour]] | ||
[[de:Mario Kart Tour]] | [[de:Mario Kart Tour]] | ||
Latest revision as of 10:47, May 19, 2024
- Not to be confused with Super Mario Kart Tour or Mario Tour.
| Mario Kart Tour | |||||||||||||||
|---|---|---|---|---|---|---|---|---|---|---|---|---|---|---|---|
| Developer | Nintendo EPD[1][2][3] Bandai Namco Studios[4] DeNA[5] | ||||||||||||||
| Publisher | Nintendo | ||||||||||||||
| Platform(s) | iOS, iPadOS, Android | ||||||||||||||
| Release date | September 25, 2019 | ||||||||||||||
| Language(s) | Deutsch English (United States) Español (España) Español (Latinoamérica) Français (France) Italiano Português (Brasil) 한국어 日本語 简体中文 繁體中文 | ||||||||||||||
| Genre | Racing | ||||||||||||||
| Rating(s) | iOS & iPadOS: 4+ - Four years and older Android:
| ||||||||||||||
| Media | Mobile phone:
| ||||||||||||||
| Input | Touch controls | ||||||||||||||
Mario Kart Tour is a mobile game in the Mario Kart series. Unlike Super Mario Run, it is free-to-play from the App Store and Google Play. The game reuses many assets from Mario Kart 7 and Mario Kart 8, though its art style is more simple and cartoony. Gameplay mechanics such as gliding, underwater driving, and character-specific special items return from past entries. In addition, the game introduces some features new to the Mario Kart franchise, such as reverse courses, trick courses, a combo system that grants points based on actions, and the Frenzy mechanic, which allows racers with three item slots to deploy a large amount of any item during a race, including Spiny Shells and Bullet Bills, at random should said item be in all three slots.
The game was first announced during a financial briefing on January 31, 2018.[6] On April 23, 2019, Nintendo opened applications for participating in a closed beta test of the game to Android users in North America and Japan, which began on May 22, 2019, and ended on June 4, 2019.[7] The game officially launched for iOS, iPadOS, and Android devices on September 25, 2019, in 163 territories, which covers nearly the same roster of availability as Super Mario Run, with the exceptions of Belgium and Vietnam, the former of which banned games with loot boxes in 2019 for violating gambling laws.[8] Users who pre-registered acquired the game a day early. Unlike the previous Super Mario mobile games, a Nintendo Account is required for it to be playable.
On October 31, 2019, Nintendo announced the first multiplayer beta test exclusive to Gold Pass members,[9] which began on December 18, 2019, 11:00 p.m. (PT) and ended on December 26, 2019, 9:59 p.m. (PT). On January 21, 2020, Nintendo announced a second multiplayer beta test for all players, regardless of whether they have a Gold Pass subscription or not,[10] which began on January 22, 2020, 11:00 p.m. (PT) and ended on January 28, 2020, 9:59 p.m. (PT). The second multiplayer beta test allowed players to play with each other in their immediate vicinity based on their device's location data. Finally, on March 2, 2020, Nintendo announced that multiplayer would officially be implemented into the game on March 8, 2020, at 8:00 p.m. (PT).[11]
On September 1, 2022, Nintendo announced that Battle Mode would be added to the game on October 5, 2022.[12] It was released in the eponymous Battle Tour.
The tour occurring in the game changes every two weeks, changing the selection of courses available. For four years after the game's release, new content was added at the start of each tour, such as new courses, drivers, karts, and gliders. On September 11, 2023, it was announced that the 2023 Anniversary Tour would be the final tour to introduce new content, with later tours being identical to previous tours from the Battle Tour onwards.
Gameplay

The goal of the game is to be in first place at the end of each race and get a high score, using items obtained by driving through Item Boxes. The game is played in a portrait or landscape position, while the phone's touch controls are used to play the game, such as dragging the finger across the screen to steer the kart. There are three ways the player can make turns. For the phones supporting it, the gyroscope can be used to steer. The player can choose what action is started when tapping and sliding the fingers on the main area of the screen, with the other action being performed by tapping a small circular button at the bottom and then sliding the fingers if needed. The main setting has the driver jumping every time the screen is tapped, allowing the kart to drift by sliding the fingers. In the other configuration, the kart does not jump when tapping the screen, which results in it steering when sliding the fingers on the screen. After steering for a while, the kart starts auto-drifting and charging Mini-Turbos and Super Mini-Turbos, but not Ultra Mini-Turbos that are only charged when drifting. Similarly to Mario Kart 8 Deluxe with auto-accelerate and smart-steering enabled, karts accelerate automatically and can steer players away from walls. The intensity of smart-steering can be changed in the game's settings. If smart-steering is turned off, the player will be able to access most shortcuts without using Mushrooms, albeit slower.
The game's mechanics are based on Mario Kart 7, and many of its courses (both new and retro) return in Mario Kart Tour. A few features from Mario Kart 8 that required substantial changes to the game, such as Bikes, ATVs, anti-gravity, and 12-player races, are missing, while the 200cc class is present. Other features from Mario Kart 8 Deluxe, such as auto-accelerate, smart-steering, and Ultra Mini-Turbos return. Unlike previous games, the player cannot customize their tires.
When a race is completed, the player will be awarded with Grand Stars, experience points for the used driver, kart, and glider whose base points are not maxed out, and coins. If the player finishes in the top three places, the gauge to level up will be filled, while if the placement is 5th or lower, the gauge will be dropped. When the gauge is already empty, however, the player will not level down. Only the points gained in the specific course will be lost, meaning that the first race on each course won't make the player lose experience points even if they arrive in 8th place; similarly, each course has an experience points cap. The more experience points have already been gained on a specific course, the fewer experience points will be awarded by arriving in the first three places until the cap is reached. At that point, only the experience points lost due to arriving in 5th place or lower will be regained when arriving in the first three places. The total amount of experience points gained in a course is never reset and is carried to the following tours, forcing the player to drive in new courses to still keep gaining experience points and leveling up.
Grand Stars are awarded depending on whether a certain point threshold has been reached. Experience points for the driver, kart, and glider are awarded depending on the placement. The coins obtained are those collected during the race, plus one additional coin for every 1,000 points obtained during the race. Each day, it is possible to obtain up to 450 experience points for the drivers, karts, and gliders and up to 300 coins by racing (900 experience points and 600 coins when the player is subscribed to the Gold Pass starting with version 2.4.0). When those limits are reached the player cannot obtain experience points or coins by racing until the next day. In order to continue gaining experience points or collecting coins, the player can use point-boost tickets for the former and can play Coin Rush or get rewards from challenges for the latter. Filling up the gauge to level up gives a reward to the player, increases the points earned when reaching a specific placement in the race and, when level 7 or level 12 are reached, allows the player to buy more items in the shop. Currently, the maximum level the player can reach is 400.
| Placement | Experience points for each non-maxed out driver, kart and glider that was used in the race | ||
|---|---|---|---|
| 50cc | 100cc | 150cc and 200cc | |
| 1 | 8 | 9 | 10 |
| 2 | 7 | 8 | 9 |
| 3 | 6 | 7 | 8 |
| 4 | 5 | 6 | 7 |
| 5 | 4 | 5 | 6 |
| 6 | 3 | 4 | 5 |
| 7 | 2 | 3 | 4 |
| 8 | 1 | 2 | 3 |
Another premium item, bought with real-life currency according to a monthly subscription model, is the Gold Pass, which grants access to the 200cc engine class, Gold Races (and multiplayer ranks S to S+6), additional items from Tour Gifts, and Gold Challenges. Players can gain rewards by renewing their Gold Pass subscription, such as ten rubies every month and a regular high end from a gold pipe for every three months of continuous subscription.
Every driver, kart, and glider has favorite courses, on which they offer advantages if they are used. Each course has three tiers for each driver, kart, and glider. Third-tier drivers receive one item from every Item Box, second-tier drivers receive two items and first-tier drivers receive three items. Second-tier karts give a bonus points multiplier of 1.5 and first-tier karts give a bonus points multiplier of 2. Second-tier gliders increase the time between two point-gaining actions to count as a combo and give a combo bonus multiplier of 2 and first-tier gliders increase the combo-time even longer and give a combo bonus multiplier of 3. The player can enter a Frenzy by obtaining three of the same item at the same time, which allows the player to temporarily use that item an infinite amount of times in addition to granting them invincibility. Super and High-End drivers, karts, and gliders have a higher number of points gained when choosing them and more preferred courses. In addition, drivers have their own special items, similar to Mario Kart: Double Dash!!'s item system. Karts have their own driving-related bonus such as increasing the effectiveness of drifting, while gliders increase the likelihood of obtaining a certain item and the points gained when using said item. All drivers, karts, and gliders can be leveled up, and they all come with upgrades once this occurs. Since the 2.6.0 update, drivers, karts, and gliders are able to upgrade a favored course to a favorite course from being leveled up, with Normal items gaining one after reaching level 6, Super items gaining two after reaching levels 3 and 6, and High-End items gaining four after reaching levels 3 and 6.
The courses the player can play depends on the tour, which changes every two weeks. Since the Battle Tour, each tour has fifteen cups, and adds new drivers, karts, gliders, and courses. Starting with the Baby Rosalina Tour until the 2022 Anniversary Tour, each tour had twelve cups. Starting with the 2019 Paris Tour until the Mario Bros. Tour, each tour had eighteen cups. Starting from the New York Tour until the 2019 Halloween Tour, each tour had sixteen cups. During certain tours, mainly ones themed around real-world locations, the game includes one course that is new to the series. Each cup contains three races and one bonus challenge. Bonus challenges require the player to beat a certain goal with a certain character, kart, and glider. Once each of the courses and the bonus challenge are all played and enough Grand Stars are obtained, the player can move on to the next cup. In later tours, cups are automatically unlocked without any requirements. In Mario Kart Tour, cups are named after the playable characters.
Ranked cup
Every week, one of the tour's cups is a ranked cup. In a ranked cup, the player is placed on a leaderboard based on their overall score in the game against nineteen other players. The player gains a reward for finishing in the top 10 and will increase in tier at the end of the week if their end position is near the top, while they will lose one or two tiers if finishing poorly enough above tier 20. Since the Cooking Tour, tier 25 and up rewards points-cap tickets for the top few positions. These tickets, along with the corresponding point-boost tickets, rotate between driver, kart, and glider tickets on a weekly basis. In some tours, drivers replaced coins in the rewards for moving to a higher tier. Currently, the highest tier the player can reach is 99.
| Placement | Rewards | ||||||||||
|---|---|---|---|---|---|---|---|---|---|---|---|
| From tier 1 | From tier 11 | From tier 21 | From tier 25 | From tier 30 | From tier 35 | From tier 40 | From tier 45 | From tier 50 | From tier 60 | From tier 80 | |
| 1 | Rubies ×20 Coins ×1,000 Point-boost tickets ×3 of each type |
Rubies ×25 Coins ×1,100 Point-boost tickets ×3 of each type |
Rubies ×25 Coins ×1,200 Point-boost tickets ×3 of each type |
Rubies ×25 Coins ×1,200 Point-boost tickets ×3 Points-cap tickets ×1 Normal |
Rubies ×25 Coins ×1,500 Point-boost tickets ×3 Points-cap tickets ×1 Super, ×1 Normal |
Rubies ×25 Coins ×1,500 Points-cap tickets ×2 High-End, ×2 Super, ×2 Normal |
Rubies ×25 Coins ×2,000 Points-cap tickets ×4 High-End, ×4 Super, ×4 Normal |
Rubies ×25 Coins ×2,000 Points-cap tickets ×5 High-End, ×5 Super, x5 Normal |
Rubies ×25 Coins ×2,000 Points-cap tickets ×6 High-End, ×6 Super, ×6 Normal |
Rubies ×25 Coins ×2,000 Points-cap tickets ×7 High-End, ×7 Super, ×7 Normal |
Rubies ×30 Coins ×2,000 Points-cap tickets ×8 High-End, ×8 Super, ×8 Normal |
| 2 | Rubies ×15 Coins ×1,000 Point-boost tickets ×2 of each type |
Rubies ×20 Coins ×1,100 Point-boost tickets ×2 of each type |
Rubies ×20 Coins ×1,200 Point-boost tickets ×2 of each type |
Rubies ×20 Coins ×1,200 Point-boost tickets ×2 Points-cap tickets ×1 Normal |
Rubies ×20 Coins ×1,200 Point-boost tickets ×2 Points-cap tickets ×1 Normal |
Rubies ×20 Coins ×1,200 Point-boost tickets ×3 Points-cap tickets ×1 Super, ×1 Normal |
Rubies ×20 Coins ×1,200 Points-cap tickets ×3 High-End, ×3 Super, ×3 Normal |
Rubies ×20 Coins ×1,200 Points-cap tickets ×4 High-End, ×4 Super, ×4 Normal |
Rubies ×20 Coins ×1,500 Points-cap tickets ×5 High-End, ×5 Super, ×5 Normal |
Rubies ×20 Coins ×1,500 Points-cap tickets ×6 High-End, ×6 Super, ×6 Normal |
Rubies ×20 Coins ×1,500 Points-cap tickets ×7 High-End, ×7 Super, ×7 Normal |
| 3 | Rubies ×10 Coins ×1,000 Point-boost tickets ×1 of each type |
Rubies ×15 Coins ×1,100 Point-boost tickets ×1 of each type |
Rubies ×15 Coins ×1,200 Point-boost tickets ×1 of each type |
Rubies ×15 Coins ×1,200 Point-boost tickets ×1 Points-cap tickets ×1 Normal |
Rubies ×15 Coins ×1,200 Point-boost tickets ×1 Points-cap tickets ×1 Normal |
Rubies ×15 Coins ×1,200 Point-boost tickets ×2 Points-cap tickets ×1 Normal |
Rubies ×15 Coins ×1,200 Points-cap tickets ×2 High-End, ×2 Super, ×2 Normal |
Rubies ×15 Coins ×1,200 Points-cap tickets ×3 High-End, ×3 Super, ×3 Normal |
Rubies ×15 Coins ×1,200 Points-cap tickets ×4 High-End, ×4 Super, ×4 Normal |
Rubies ×15 Coins ×1,200 Points-cap tickets ×5 High-End, ×5 Super, ×5 Normal |
Rubies ×15 Coins ×1,200 Points-cap tickets ×6 High-End, ×6 Super, ×6 Normal |
| 4 | Rubies ×5 Coins ×500 |
Rubies ×10 Coins ×600 |
Rubies ×10 Coins ×600 |
Rubies ×10 Coins ×600 |
Rubies ×10 Coins ×600 Point-boost tickets ×1 |
Rubies ×10 Coins ×600 Point-boost tickets ×1 |
Rubies ×10 Coins ×600 Points-cap tickets ×1 High-End, ×2 Super, ×2 Normal |
Rubies ×10 Coins ×600 Points-cap tickets ×2 High-End, ×2 Super, ×2 Normal |
Rubies ×10 Coins ×600 Points-cap tickets ×3 High-End, ×3 Super, ×3 Normal |
Rubies ×10 Coins ×600 Points-cap tickets ×4 High-End, ×4 Super, ×4 Normal |
Rubies ×10 Coins ×600 Points-cap tickets ×5 High-End, ×5 Super, ×5 Normal |
| 5 | |||||||||||
| 6 | |||||||||||
| 7 | Coins ×300 | Rubies ×5 Coins ×400 |
Rubies ×5 Coins ×400 |
Rubies ×5 Coins ×400 |
Rubies ×5 Coins ×400 |
Rubies ×5 Coins ×400 |
Rubies ×5 Coins ×400 Points-cap tickets ×2 Super, ×2 Normal |
Rubies ×5 Coins ×400 Points-cap tickets x1 High-End, ×1 Super, ×2 Normal |
Rubies ×5 Coins ×400 Points-cap tickets x1 High-End, ×2 Super, ×2 Normal |
Rubies ×5 Coins ×400 Points-cap tickets x2 High-End, ×2 Super, ×2 Normal |
Rubies ×5 Coins ×400 Points-cap tickets ×3 High-End, ×3 Super, ×3 Normal |
| 8 | |||||||||||
| 9 | |||||||||||
| 10 | |||||||||||
| 11–15 | No reward | ? | ? | Points-cap tickets ×1 Normal | Points-cap tickets ×1 Super, ×1 Normal | Points-cap tickets ×1 Super, ×1 Normal | Points-cap tickets ×1 High-end, ×1 Super, ×1 Normal | Points-cap tickets ×1 High-end, ×1 Super, ×1 Normal | |||
| 16–19 | No reward | ||||||||||
| 20 | No reward | ||||||||||
| Placement | Tier change | |||||||
|---|---|---|---|---|---|---|---|---|
| From tier 1 | From tier 21 | From tier 22 | From tier 25 | From tier 30 | From tier 35 | From tier 99 | ||
| 1 | +3 | +3 | +3 | +3 | +2 | +1 | 0 | |
| 2 | +3 | +2 | +2 | +2 | +1 | +1 | 0 | |
| 3 | +3 | +1 | +1 | +1 | +1 | +1 | 0 | |
| 4 | +2 | +1 | +1 | +1 | +1 | 0 | -1 | |
| 5 | +2 | +1 | +1 | +1 | +1 | 0 | -1 | |
| 6 | +2 | +1 | +1 | +1 | 0 | -1 | -1 | |
| 7 | +1 | +1 | +1 | 0 | 0 | -1 | -1 | |
| 8 | +1 | +1 | 0 | 0 | -1 | -1 | -1 | |
| 9 | +1 | 0 | 0 | -1 | -1 | -1 | -1 | |
| 10 | +1 | 0 | -1 | -1 | -1 | -1 | -1 | |
| 11–15 | 0 | -1 | -1 | -1 | -1 | -1 | -1 | |
| 16–19 | 0 | -1 | -1 | -1 | -1 | -1 | -1 | |
| 20 | 0 | -1 | -2 | -2 | -2 | -2 | -2 | |
Points
- See also: Mario Kart Tour race points system
Points are collected during standard races and are used to gain Grand Stars and to rank players, both overall and in ranked cups. There are three ways of obtaining points in races: base points, bonus points, and position points.
Base points
Base points are given at the beginning of the race and are the sum of the base points of the character, kart and glider selected. They range from 800 to 3020 points (3320 points for Mii Racing Suits). The base points can be increased through experience points obtained at the end of the races or through point-boost tickets that provide 50 experience points each. The experience points are used to fill a gauge that when filled will increase the base points until the maximum amount has been reached. The amount of experience points needed to fill the gauge increases every time the gauge is filled. Since the Cooking Tour, points-cap tickets are added to the game, making it possible to raise the maximum amount of base points of a driver, kart, or glider.
| Base points of drivers and kart parts | ||||||
|---|---|---|---|---|---|---|
| Amount | Drivers |
Karts and gliders | ||||
Normal |
Super |
High-End |
Normal |
Super |
High-End | |
| Initial | 400 | 450 | 500 | 200 | 220 | 250 |
| Base cap | 600 | 675 | 800 | 300 | 330 | 400 |
| First raised cap | 648 | 765 | 980 | 324 | 366 | 490 |
| Second raised cap | 704 | 870 | 1190 | 352 | 408 | 595 |
| Top cap (until 2022 Anniversary Tour) | 760 | 975 | 1400 | 380 | 450 | 700 |
| Third raised cap | 768 | 990 | 1430 | 384 | 456 | 715 |
| Top cap (since Battle Tour) | 816 | 1080 | 1610 | 408 | 492 | 805 |
Bonus points

Bonus points are points awarded every time a special event happens during the race. Said event might be a Jump Boost, gliding for a certain amount of time, finishing the lap in a certain position, hitting opponents or hazards, or various other cases. If a further event happens before about two seconds have passed from the previous one, the combo indicator goes up and the points obtained are increased. The actual time that can pass between one event and the next can be increased by choosing a glider of a higher tier in the course, by choosing a glider of higher rarity, or by leveling up the glider. The number of points given is calculated as follows:
- Points: (base points of the event × multiplier due to kart tiering in the course × multiplier due to kart rarity and skill level) + combo bonus + bonus point boosts + eventual increase from kart's special skill + eventual increase from glider's special skill
The combo bonus is calculated as follows:
- Combo bonus: multiplier from glider's tiering in the course × Min{combo count - 1 ; (cc of the engine class) / 10}
For the purpose of the calculation, 200cc is considered the same as 150cc.
The bonus point boost is calculated separately for the driver, kart, and glider chosen that are in the first tier of the course, as follows:
- Bonus point boost: base points × (skill level - 1) × [(cc of the engine class) / 30000]
In this case as well, 200cc is considered the same as 150cc. If more than 200 events happen, the bonus point boost is not applied from the 201st event onward.
Position points
Position points are awarded to the player depending on their placement at the end of the race. They are calculated as follows:
- Position points: [(position points due to the level of the player + engine class bonus) × position multiplier] + bonus point boosts for position
The bonus point boost for position is calculated separately for the driver, kart, and glider chosen that are in the first tier of the course, as follows:
- Bonus point boost for position: base points × (skill level - 1) × number of events that occurred in the race × position multiplier × [(cc of the engine class) / 30000]
As in the other cases, 200cc is considered the same as 150cc.
The engine class bonus is the following:
| Engine class | 50cc |
100cc |
150cc |
200cc |
|---|---|---|---|---|
| Engine class bonus | 0 | 200 | 400 | 400 |
The position multiplier depends on the placement at the end of the race and works as follows:
| Placement | 1 | 2 | 3 | 4 | 5 | 6 | 7 | 8 |
|---|---|---|---|---|---|---|---|---|
| Position multiplier | 1 | 0.85 | 0.75 | 0.65 | 0.55 | 0.45 | 0.35 | 0.2 |
Additional internal data (RaceScoreParam)
The following internal data stems from the Peach Tour.[13]
The engine class affects the obtained points in various other ways, as shown by the internal data:
| Engine class dependent points-related parameters (EngineLevelParams) | ||||
|---|---|---|---|---|
| Parameter | 50cc |
100cc |
150cc |
200cc |
| AddScoreIntervalWhileGlide | 2.5 | 2 | 1.5 | 1.2 |
| AddScoreIntervalWhileWater | 7.5 | 6 | 4.5 | 3.6 |
| AddScoreIntervalWhileItemType018 | 2.5 | 2 | 1.5 | 1.2 |
| AddScoreIntervalWhileDriftKeep | 2.5 | 2 | 1.5 | 1.2 |
| InterimRankBonusRate | 0.5 | 1 | 2 | 2 |
| ComboNumMax | 5 | 10 | 15 | 15 |
The InterimRankBonus multiplied by the InterimRankBonusRate is the amount of points obtained at the end of the first lap or the first two sections of three-sectioned tracks. The InterimRankBonus has the following values:
| InterimRankBonus | ||||||||
|---|---|---|---|---|---|---|---|---|
| Position | 1st | 2nd | 3rd | 4th | 5th | 6th | 7th | 8th |
| Points | 100 | 80 | 60 | 50 | 40 | 30 | 20 | 10 |
Finally, the maximum time between events in a combo depends on the base points given by the last action of the combo, with no effect of the combo count, as shown by this combo-related data:
| Combo-related parameters (Combo) | ||||
|---|---|---|---|---|
| Score | 5 | 10 | 20 | 30 |
| Time | 1.4 | 1.8 | 2.1 | 2.4 |
| ComboScoreAdd | 1 | |||
| ComboScoreRate | 0.1 | |||
The combo time is calculated as follows:
Combo time = Max{Remaining combo time; Combo time of the last action}
where the combo time of the last action is calculated as follows:
Combo time of the last action = Time × multiplier from glider's tiering in the course × multiplier due to glider rarity and skill level
where the multiplier from the tiering is around 1.45 if the course is one of the favorites of the glider and around 1.225 if the course is favored by the glider, being equal to 1 otherwise, and Time is based on the value reported in the table using intermediate values for intermediate scores (i.e. 1.95 seconds for 15 points and 2.25 seconds for 25 points) and either 1.4 seconds or 2.4 seconds for scores smaller than 5 points and greater than 30 points, respectively.
Auto Mode
Introduced in version 2.6.0, Auto mode is a new option in single-player races that allows the player to spectate in a race fully controlled by the AI. The driver, kart and glider chosen by the player will participate in said race and will be the default AI player followed. The player is able to choose the racer followed by the camera and has control on the relative positioning and zoom of the camera. A button at the bottom allows to take screenshots at the rendering resolution of the game rather than the display resolution of the device. Starting with version 2.8.0, seven additional filters can be applied to the camera. When the race ends, the Coins and event tokens (but not team tokens) collected by the chosen driver are given to the player, along with the obtained experience points of the driver, kart and glider. The experience points of the player will instead remain unaffected, regardless of the outcome of the race. One additional filter, the Pop Art filter, has been added at the start of the Princess Tour.
Filters

No Filter
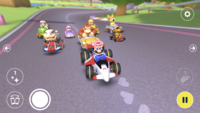
Blur

Blur x2

Sepia
Black and White
Fish-Eye Lens
Smear
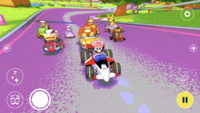
Cartoon
Pop Art


Collectibles and currencies
Grand Stars
Grand Stars are the main collectibles related to individual tours. Up to five of them can be earned by reaching certain point thresholds in each standard race and up to three of them can be earned by clearing specific goals in each bonus challenge. Furthermore, clearing Tour Challenges and Gold Challenges will reward the players with Grand Stars as well. Finally, using a star ticket will reward a Grand Star per ticket used. Up until the Peach vs. Daisy Tour, clearing the daily challenge each day did also warrant a Grand Star.
They are used to unlock gifts. In the past, they were also used to unlock cups. When the last gift is obtained, coins are rewarded in place of Grand Stars, and when a new tour starts, the Grand Stars obtained are reset to zero.
Rubies
Rubies are the main premium currency of Mario Kart Tour. They can be purchased with real-life currency at the Shop, but can also be obtained as daily login bonuses, as a player level up bonus, as part of tour gifts, as a reward for the ranked cup, or as a reward for Standard Challenges, Premium Challenges, or special challenges.
Rubies can be used in three different ways: to buy Spotlight items, to buy Mii Racing Suits, or to play Coin Rush mode.
Coins

Coins are collected during a race and rewarded for the number of points obtained during said race, up to 300 per day (600 if the player has the Gold Pass). In a single race, the amount of coins earned is
Coins earned = coins obtained during the race + floor((total points earned in the race)/1000)
The coins obtained during the race are capped at 99, while no cap on the coins obtained through points is known.
Besides the main way of obtaining coins, they can also be obtained in Coin Rush and in several rewards, such as obtaining three challenges on a challenge card in a row, column or diagonal line, in gifts, as daily login bonuses, as player level up bonuses, as a replacement for Grand Stars or items at the maximum level, while waiting for Multiplayer races, as rewards for ranked cup placements and friend ranking. Also, friends can send five greeting coins to each other every day.
In Coin Rush, the player can spend rubies to obtain a great number of coins. Over 300 coins are found in the course. For each tour, another course is available in Coin Rush. Gold Mario is the regular driver, and the Gold Standard is the regular kart driven. The coins obtained from Coin Rush are multiplied by a certain number, depending on how many rubies a player has spent.
| Coins multiplier | Rubies |
|---|---|
| 2 | 5 |
| 6 | 15 |
| 10 | 25 |
During the Cooking Tour, the Coins Aplenty Event was added to the game. This event gives the player twenty-four hours to obtain a large number of coins from a certain cup, which varies between players. 300 coins are awarded at the end of the first race on each course in the cup during the duration of the event, for a total of 900 guaranteed extra coins from the event; these coins do not count towards the daily cap of 300 coins from races. In addition, the daily cap is ignored on each of these three races, providing three extra opportunities to score coins beyond the cap if it has already been reached. These events are held every Saturday and Tuesdays (the latter day has been added since the Super Mario Kart Tour). Starting from the 2021 Autumn Tour, the number of coins is raised to 500 and held every Saturday, though in the Toad vs. Toadette Tour, the coin amount returned to 300 and the schedule reverted to every Saturday and Tuesday.
Coins are mainly used in the Daily Selects section of the shop.
Tokens
Introduced in the Wild West Tour, event tokens are a special type of coins that can be collected during events. The way to collect event tokens differs from event to event. The different ways to collect event tokens are:
- Collecting from courses.
- Landing hits with shells.
- Landing hits with Bob-ombs.
- Landing hits with bananas.
- Causing opponents to crash.
- Performing Mini-Turbos.
- Keeping combo bonuses.
Some tours feature a Team Rally event, in which the player can collect team tokens. Team tokens can always be collected from courses, when the player races with a driver that is part of the chosen team. At the end of a race with a driver from the player's team, the player will be rewarded with additional team tokens for every 1,000 points they collected during the race. If the player's team has won the race, the player will get even more additional team tokens as a reward.
Since the 2021 Autumn Tour, the Token Aplenty Event is held every Monday (formerly every Tuesday in the 2021 Autumn Tour and the 2021 Halloween Tour). This event is similar to the Coins Aplenty Event, but instead of being rewarded with a fixed amount of coins at the end of the race the player will get a random amount of event tokens (or team tokens, when the event takes place during a Team Rally), ranging from 50 to 300.
Event tokens and team tokens are used in the Token section of the Shop.
Pipes
Pipes can shoot out a driver, kart, or glider, all of which have their own rarities. A pipe contains a determined probability distribution of Normal, Super, and High-End items, all of which are chosen randomly within their class and rarity. It is possible that a player obtains an item from a pipe that already has been obtained; when this happens, the level gauge of that item will be increased by one unit. Usually, if the pipe is about to shoot out a High-End item, it will be golden instead of green (sometimes, however, it might occur that a green pipe shoots out a High-End item).
As of the Wild West Tour, the player can shoot out one random regular High-End item from an All-Clear Pipe once in a tour, as soon as they have finished every cup from the tour. The list below shows all of the available items from the All-Clear Pipe as of the Battle Tour.
As of the Wedding Tour, regular login bonuses are replaced with Today's Challenge in which the player must complete a race on a pre-selected course with a pre-selected driver, kart, and glider. After completing this daily race, the player can shoot out a free pipe launch (except on day 14) which can contain regular items, as well as rubies, coins, and item tickets. The player receives a special blue-colored badge on day 14 as a reward for playing on every day of the given tour. Until the Anniversary Tour (2022), the player received 5 rubies on days 5 and 10, in stead of a free pipe pull.
Since the Samurai Tour, the player can buy pipe launches in the Token Shop. In some tours, also golden pipes can be bought in the Token Shop.
Since the Battle Tour, pipes appear as Tour gifts and Gold Gifts. Some of the pipes that appear as Gold Gifts are golden.
Menu
| Banners | ||
|---|---|---|
| Pipes | Special offers | Gold Pass |
| Main Menu | |||
|---|---|---|---|
| Multiplayer | Challenges | Tour Gifts | Shop |
| Drivers | Karts | Gliders | Tickets |

|
|||
| Profile | Friends | News | Mii |
| Gifts | Settings | ||
Banners
On the top of the menu, players can spend rubies to fire one of the tour's pipes, purchase special offers, or subscribe to the Gold Pass.
Multiplayer
Multiplayer mode was added to Mario Kart Tour on March 8, 2020, where up to eight human players can play against each other. Players race against each other in three courses in a chosen cup of the current tour, with the cup changing every 13 minutes, allowing the player to race in cups that have not yet been unlocked. There are four sets of rules that interchange daily: 100cc with default item slots, 100cc with two item slots, 150cc with default item slots, and 150cc with two item slots. Matches are also periodically set to be Team Games[14] (not to be confused with Team Rallies), wherein players are randomly divided into two teams and their combined standings at the end of a match decide the winning team. In the "With Friends or Others Nearby" mode, the player can set the rules themselves, including the engine class (50cc, 100cc, or 150cc), number of item slots (1, 2, or default), number of teams (none, 2, 3 or 4), number of races (3, 6, or 12), enabling teams, enabling Friendly-Fire Mode for teams, and inclusion of COM racers. The player can also create a Room and invite players to join it with a code.
Introduced in version 3.0.0, Battle Mode is a mode in multiplayer where players must eliminate each other by popping their balloons. A battle ends if there is only one player remaining, or if the time limit is reached. In the "With Friends or Others Nearby" mode, the rules that the player can set include the number of item slots (1, 2, or default), the option to play with Bob-ombs only or Shells only, number of battles (3, 6, or 12), and inclusion of COM racers.
Multiplayer features a grading system ranging from F to A for regular users, and onward from S to S+9 for Gold Pass subscribers. There are separate grading systems for races and battles. Prior to the version 3.0.0 update in September 2022, the maximum grade was S+6. Until version 3.0.0, multiplayer races were split between Gold Races (exclusive Gold Pass subscribers) and standard races. Gold Races featured additional rule variations (150cc with default item slots, 150cc with two item slots, 200cc with default item slots, and 200cc with one item slot). The player's grade is split up with a green grade for races and a purple grade for battles.
When the player is waiting for a multiplayer match to be found, they will earn coins. Up to 100 coins can be earned per day with this method. As of version 3.0.0, the Multiplayer Pipe is available, which the player can fire after having saved up enough points from playing races or battles in Multiplayer mode.
Once every few tours the Kart Pro event will take place (with its first appearance in the Snow Tour), in which the player can earn rewards like badges and rubies by completing challenges on a Kart Pro challenge card, including maintaining a streak of three wins in Standard Races or Gold Races. The amount of rubies the player will get as rewards for completing this challenge card depends on their grade. Grades F to A will receive 5 to 10 rubies, and grades S to S+9 will receive 15 to 21 rubies. As of version 2.9.0, players can maintain their streak if they win 2nd or 3rd place.
Some tours have a 2-Player Challenge event taking place, where the player could team up with another player in the "With Friends or Others Nearby" mode to race against a team of set opponents (such as Rosalina and the five babies in Vs. Rosalina Team) and collect event tokens in a set of three courses.
Challenges
Challenges are objectives the player can complete to earn various badges and rewards depending on the type, of which there are eight: Standard Challenges, long-term challenges the player accomplishes throughout the course of the game; Tier Challenges (added in the Mii Tour (2022)) long-term challenges associated with Ranked Cups; Multiplayer Challenges (added in the Baby Rosalina Tour), which are long-term challenges for multiplayer mode; Multiplayer Battle Challenges (added in the Battle Tour), which are long-term challenges for multiplayer battle mode; Tour, Tour Multiplayer (added in the Summer Tour (2021) as part of the Summertime Challenges, later permanent in the Frost Tour), and Gold Challenges, challenges that last for the duration of the tour, the lattermost of which are exclusive to Gold Pass members; and Expert Challenges (added in the Cooking Tour), which contain challenges that are harder to succeed than Tour, Gold, and Standard Challenges, and last for twelve weeks. The first set of Tour Challenges unlocks from the tour's beginning, while the second set unlocks after the first week. Some special event challenges are one-offs, such as the their Anniversary Challenges in the 1st Anniversary Tour, while other challenges last for three tours, such as the Summertime Challenges. Completing Standard and Multiplayer Challenges award the player with rubies, while Tour and Gold Challenges award extra Grand Stars and Expert Challenges reward the player only with badges. Completing special event challenges award the player with high amount of rubies or a High-End driver. Each challenge card holds nine challenges aligned in a 3×3 grid, and for every bingo the player acquires (i.e. any horizontal, vertical, or diagonal match), they earn a certain amount of coins. The player also receives a reward upon completing an entire challenge card.
Daily challenges
Each daily challenge rewarded a Grand Star. The player could have up to three daily challenges available at a time, and upon completing one, a new one would not appear until the following day. Upon entering a new tour, players would receive three daily challenges right away, resulting in a maximum of sixteen daily challenges per two-week tour. The daily challenges were selected at random from the following options:
- Do a Rocket Start.
- Get 1st place in a race.
- Perform a Slipstream.
- Activate Frenzy mode.
- Use a Mushroom.
- Land a hit with a Banana.
- Land a hit with a Red Shell.
- Land a hit with a Green Shell.
- Land a hit with a Bob-omb.
- Land a hit with a Super Horn.
- Join a multiplayer race.
From the Snow Tour onwards, daily challenges are no longer featured.
Premium Challenges

As of the Snow Tour, players can purchase a card for $4.99 USD with additional challenges every tour, with the reward for completing all challenges being a High-End driver, kart or glider. Progress on the challenges is shown whether the player has purchased or not, and all completed challenges can be claimed immediately on purchase. Uncompleted challenge cards can be carried over to the next tour, with up to fifteen able to be held at once.
Total Points Challenge
As of the Snow Tour, the player's total points across all cups can be redeemed for rewards, up to 600,000 points. Among the top rewards are points-cap tickets of increasing levels. Starting from the Singapore Tour, the Total Points Challenge features two challenge cards and goes up to 900,000 points, with more rewards. The Battle Tour later increased the final goal to 999,999 points, which was likely done due to the number of cups being changed from twelve to fifteen.
Tour Gifts
Tour Gifts give the player items if enough Grand Stars are obtained, with the top rewards often being level-boost tickets of increasing levels. Part of the rewards can only be claimed by Gold Pass subscribers.
Since the Baby Rosalina Tour, the player could also unlock free pipe launches from the regular pipes of the current tour, if enough Grand Stars were obtained. Since the Battle Tour, these are no longer available, due to the pipes being replaced by the Spotlight Shop.
As of version 2.10.0, players who started the game for the first time can unlock these characters in the currently-played tour.

|
![Artwork of Donkey Kong in Super Mario Party (also used for Mario Kart Tour and the Nintendo Switch version of Mario vs. Donkey Kong[1])](/File:SuperMarioParty_DonkeyKong.png)
|

|
|||||
| Mario | Peach | Bowser | Luigi | Daisy | Donkey Kong | Wario | Yoshi |
This was revised in version 3.4.1 to include additional characters and items as listed below.
|
|
|
|
||||||||||||
| Mario | Peach | Bowser | Luigi | Daisy | Donkey Kong | Wario | Yoshi | Pipe ×10 | Gold Glider | Pipe ×10 | B Dasher | Pipe ×10 | Metal Mario | Gold Pipe ×10 |
Shop
The shop consists of six different sections.
Spotlight Shop
Introduced in the Battle Tour, the Spotlight section consists of selected drivers, karts, and gliders that are in the Spotlight. Spotlight items are available for one week, after which they are replaced. There is also a Daily Spotlight shop, which contains six High-End drivers, six High-End karts, and six High-End gliders, and is renewed each day. Once a day, the player can use a Quick Ticket to change the items in the Daily Spotlight. The player can buy each item up to three times for the cost of 150 rubies for drivers, and 100 rubies for karts and gliders.
Until the Anniversary Tour (2022), the pipe section was available in the shop. A pipe contained a determined amount of Normal, Super, and High-End items, plus featured items. The items were not ordered, so each item, including the featured ones, could be potentially found in any placement within the pipe. The player could reset the pipe at any moment. A new pipe was introduced each week and, since the 2019 Halloween Tour, the pipes lasted until the end of the tour.
Usually, a pipe contained the following items, with the spotlight items frequently taking the spot of a High-End item, though Super items could also appear in the spotlight.
| Items obtained from a typical new 100 items pipe | ||||||||||||
|---|---|---|---|---|---|---|---|---|---|---|---|---|
| Item | Normal |
Super |
High-End | |||||||||
| Driver | Kart | Glider | Driver | Kart | Glider | Driver | Kart | Glider | ||||
| Amount | 32 | 26 | 16 | 9 | 7 | 4 | 2 | 2 | 2 | |||
Until the 2020 New Year's Tour, the pipe typically contained the following items:
| Items obtained from a new pipe | ||||||||||||
|---|---|---|---|---|---|---|---|---|---|---|---|---|
| Item | Normal |
Super |
High-End |
Featured High-End | ||||||||
| Driver | Kart | Glider | Driver | Kart | Glider | Driver | Kart | Glider | Driver | Kart | Glider | |
| Amount | 32 | 26 | 16 | 9 | 7 | 4 | 1 | 1 | 1 | 1 | 1 | 1 |
Another common variant was the special pipe holding 50 items, used in special events and frequently not featuring any spotlight item, but rather a slightly different distribution of items to take into account the peculiar items that could be obtained in it.
| Items obtained from a typical new 50 items pipe | |||||||||||||||
|---|---|---|---|---|---|---|---|---|---|---|---|---|---|---|---|
| Item | Normal |
Super |
High-End | ||||||||||||
| Driver | Kart | Glider | Driver | Kart | Glider | Driver | Kart | Glider | |||||||
| Amount | 15 | 11 | 9 | 5 | 4 | 3 | 1 | 1 | 1 | ||||||
The probability of obtaining a certain type of item from the pipe is (number of items of that type remaining in the pipe)/(total number of items remaining in the pipe) while the probability of obtaining a specific item is (probability of getting an item of the type of the desired item)/(number of available items of the same type of the desired item).
Mii Racing Suit Shop
Introduced in the Mii Tour (2022), the Mii Racing Suit section consists of 10 different Mii Racing Suits. The player can buy each Mii Racing Suit up to three times for the cost of 100 rubies. However, the first purchase of some selected Mii Racing Suits costs only 70 rubies.
Token Shop
As of the Wild West Tour, the Token Shop (formerly known as the Event Shop) appears during events or Team Rallies. The player can buy items in this shop with event tokens or team tokens. In several tours, the Token Shop is upgraded to feature various High-End items, tickets, and other items. Since the Samurai Tour, pipe launches can be bought as well.
| Token Shop's items | |||||
|---|---|---|---|---|---|
| Item | Pricea | Quantity | Quantity (Team Rally) | ||
| Pipe | 50-500b | 31 | - | ||
| Item ticket | 5 | 10 | - | ||
| Point-boost ticket | 10 | 3 each | - | ||
| Star ticket | 20 | Depends on tour | - | ||
| Coin Rush ticket | 20 | 1 | |||
| Level-boost ticket | Normal | 50 | 2 | 3 each | |
| Super | 100 | 1 | 2 each | ||
| High-End | 250 | - | 1 each | ||
| Points-cap ticket | Normal | 100 | 1 | ||
| Super | 200 | 1 | |||
| High-End | 400 | - | 1 | ||
| Super driver, kart, or glider | Depends on tour | 1 each | Depends on tour | ||
| High-End driver, kart, or glider | Depends on tour | - | Depends on tour | ||
| 500 Coins | 30 | 5 | - | ||
| 1000 Coins | 50 | - | 10 | ||
| 3 Rubies | 30 | 5 | |||
a - In the Token Shop of the Summer Festival Tour, most of the items had lower prices.
b - The cost for the first pipe is 50 event tokens, increasing with 10 tokens for every subsequent pipe until the sixteenth, then with 50 tokens between the seventeenth and the twenty-first pipes. From the twenty-second pipe onwards, the cost is 500 tokens.
As of the Battle Tour, the Token Shop no longer has a regular composition.
| Token Shop's items | ||||
|---|---|---|---|---|
| Item | Price | Quantity | ||
| Balloon | 100c | 1 | ||
| Golden pipe | 200 | 1 | ||
| Pipe | 20-500 | 34 | ||
| 3 Rubies | 15 | 5 | ||
| 500 Coins | 15 | 5 | ||
| Level-boost ticket | Super | 25 | 3 | |
| Super | 50 | 2 | ||
| High-End | 120 | 1 | ||
c - In the Battle Tour, the Token Shop included three different balloons, two of which costed 50 tokens and one 150 tokens.
Daily Selects

The Daily Selects section is renewed each day. It consists of four rows, of which the first three each contain three items. The items in the left column are drivers or driver-related tickets, the items in the center column are karts or kart-related tickets, the items in the right column are gliders or glider-related tickets. The last row allows the player to play Coin Rush. The first row is available to all players and contains only Normal items and point-boost tickets, the second row is available to players level 7 and above and contains Normal and Super items along with item tickets and quick tickets, and the third row is available to players of level 12 and above and contains only Super and High-End items. The first time an item's skill level is maxed out, it is replaced with other items of the same rarity, type and shop rarity until all the items of the corresponding rarity, type and shop rarity have their skill level maxed out, at which point a level-boost ticket or, since the 2022 Mii Tour, a points-cap ticket is sold in place of these items. If the maxed out category has Normal rarity, only Normal tickets will be sold, once a Super item sold in the Daily Selects is maxed out, the tickets will either be Normal or Super, as soon as a High-End item sold in the Daily Selects is maxed out, tickets of all the rarities will be sold. Starting from the 2022 Mii Tour, High-End level-boost tickets can appear on the third row without having to max out items.
| Daily Selects' items | ||||
|---|---|---|---|---|
| Item | Price | |||
| Base set | Additional | |||
| Item ticket | 50 | |||
| Point-boost ticket | 100 | |||
| Quick ticket (no longer available since the Cooking Tour) |
1,000 | N/A | ||
| Normal | Kart or glider | 500 | 1,000 | |
| Driver | 800 | 1,500 | ||
| Super | Kart or glider | 2,000 | 7,500 | |
| Driver | 3,000 | 9,000 | ||
| High-End | Kart or glider | 10,000 | 25,000 | |
| Driver | 12,000 | 30,000 | ||
| Points-cap ticket | Normal | 2,000 | N/A | |
| Super | 5,000 | N/A | ||
| High-End | 20,000 | N/A | ||
Since the 2019 Paris Tour, in addition to tickets, only a subset of non-tour-exclusive items can be found as Daily Selects in all of the Tours, here referred to as "Base set". The listed items are most Normal items from the Tokyo Tour and most items from the New York Tour. The Quick Ticket was removed and more items were added in the Cooking Tour at an increased cost and shop rarity, appearing less frequently in the Daily Selects and being unable to replace the items of the same rarity and type when the skill levels of those were all maxed out. They are marked with an asterisk (*) and referred to here as "Additional". Since the Berlin Tour, "Additional" prices were reduced to the "Base set" price, but their shop rarity appears unchanged, with them still not being able to replace items of the same rarity and price when the skill levels of the latter are maxed out. In the Mii Tour (2022), more items were added in the Daily Selects again; they are marked with two asterisks (**). In the Battle Tour, more items were added in the Daily Selects again; they are marked with three asterisks (***).
Tier Shop
Since the 2020 Halloween Tour, players can buy items in the Tier Shop. The items available in it are replaced every week, and the higher the player's tier, the more items are available for purchase. Until the Anniversary Tour (2022), the top row featured drivers, karts, and gliders that were favorites of at least one course in that week's ranked cup, and often included at least one High-End part. The items unlock based on the player's all-time highest tier and remain unlocked even if their tier drops. Some items can be bought multiple times, though the price increases after the first or second purchase. Previosly, after unlocking super level-boost tickets, there was a chance that High-End level-boost tickets of the same type will appear in place of them. Since the Mii Tour (2022), High-End level-boost tickets will appear separately if the player's all-time highest tier is at least 50.
| Tier Shop's items | |||||||
|---|---|---|---|---|---|---|---|
| Item | Unlock Rank |
Price | |||||
| Initial price | After first purchase | After second purchase | Quantity | ||||
| Driver1 | Normal | N/A | 800 | N/A | N/A | 1 | |
| Super | 3,000 | N/A | N/A | ||||
| High-End | 12,000 | N/A | N/A | ||||
| Kart1 | Normal | N/A | 500 | N/A | N/A | 1 | |
| Super | 2,000 | N/A | N/A | ||||
| High-End | 10,000 | N/A | N/A | ||||
| Glider1 | Normal | N/A | 500 | N/A | N/A | 1 | |
| Super | 2,000 | N/A | N/A | ||||
| High-End | 10,000 | N/A | N/A | ||||
| Level-boost ticket | Normal glider | 5 | 800 | 1,000 | 1,200 | 3 | |
| Normal kart | 10 | 800 | 1,000 | 1,200 | 3 | ||
| Normal driver | 15 | 1,000 | 1,200 | 1,400 | 3 | ||
| Super glider | 20 | 3,000 | 5,000 | N/A | 2 | ||
| Super kart | 25 | 3,000 | 5,000 | N/A | 2 | ||
| Super driver | 30 | 4,000 | 6,000 | N/A | 2 | ||
| Points-cap ticket | Normal | 35 | 2,000 | N/A | N/A | 1 | |
| Super | 40 | 5,000 | N/A | N/A | 1 | ||
| High-End | 45 | 20,000 | N/A | N/A | 1 | ||
| Level-boost ticket | High-End glider | 50 | 13,000 | N/A | N/A | 1 | |
| High-End kart | 55 | 13,000 | N/A | N/A | 1 | ||
| High-End driver | 60 | 15,000 | N/A | N/A | 1 | ||
1 - Not available anymore since the Battle Tour.
Ruby purchase
The player can purchase different amounts of rubies with real-life currency.
Profile

Players can visit profile pages of themselves and their friends. On a profile page, the player can display a badge, choose their eight favorite drivers out of the drivers they own and can see their records, which include the amounts of collected drivers, karts, and gliders, their highest score they earned on a single course in the current tour, their number of Standard Race, Gold Race and Kart Pro wins, their highest multiplayer grade and their highest tier. Additionally, their current level, tier, and multiplayer grade are shown for the player and their friends.
Badges
The player can collect badges by completing challenges, by ending in the top 1,000 in the All-Cup ranking, or through other case-specific means (such as a Twitter retweet campaign or winning a team rally). Sometimes badges will also be given in the Gift Box. Out of all their collected badges, the player can choose one that will be visible to other players on their profile, though players can view other players' full badge lists. Standard badges have four different types: common badges, gold badges (obtained by completing Gold Challenges and requires a Gold Pass subscription), expert badges (obtained by completing Expert Challenges), and blue badges (obtained by completing Today's Challenge all fourteen days of a given tour). Gold, expert (red), and blue badges are all recolored versions of common badges in their respective colors.
Other kinds of badges are grouped separately and obtained by other means. These include badges earned from completing entire Expert Challenge cards, ranking badges, multiplayer badges such as winning a Kart Pro event, top-placement badges, and Team Rally badges.
Friends
The player can become in-game friends with other players, see the points of their friends on the different cups, and invite them to join a multiplayer room.
Since the Baby Rosalina Tour, a cumulative reward is given to the player if the combined total cup points of the week's ranked cup of the player and all of their friends reach certain amounts. In the Flower Tour only, the reward was rubies instead of coins. Since the second week of the Wild West Tour, the coin amounts have changed.
| Total points of player and friends | Coins (until August 5, 2020) |
Coins (since August 12, 2020) |
Rubies (Flower Tour) |
|---|---|---|---|
| 50,000 | 100 | 100 | 2 |
| 80,000 | 500 | 300 | 3 |
| 150,000 | 1000 | 600 | 5 |
News
Every time that an announcement is being made, a new part of a tour starts, an update of the game is released, a new special offer or pipe is available or something else has been changed, the player receives a message with detailed information about what is new. Messages regarding known issues also appear here.
Mii
The player can upload Mii characters from their Nintendo Account or create new ones. Mii characters can also be shared with other players.
The player can collect different Mii Racing Suits for their Miis to wear. Every time the player gets a new Mii Racing Suit, all of their Mii Racing Suits will get ten additional base points. Each Mii Racing Suit that the player owns has to be assigned to a specific Mii of the player's choice.
Gifts
Sometimes the player receives additional gifts, which can be rubies, coins, or badges. Mainly, these gifts are given at celebration occasions such as celebration days, the start of a new tour, or the launch of Multiplayer mode. Sometimes it happens that the player does not receive a reward due to a technical problem in the game. These rewards can appear as gifts at a later time. Gifts remain available for fourteen days.
Skill level point and points cap raising requirements
The following table lists the amount of skill level points needed to bring an acquired driver, kart, or glider to a certain skill level. Raising the skill level of a driver, kart or glider requires obtaining duplicates of them as Tour Gifts, from the Pipe or the Shop, or from using level-boost tickets that match the type and rarity.
| Skill level | 2 | 3 | 4 | 5 | 6 | 7 | 8 |
|---|---|---|---|---|---|---|---|
| Normal | 2 | 5 | 8 | 11 | 14 | 20 | 40 |
| Super | 1 | 2 | 3 | 4 | 5 | 8 | 16 |
| High-End | 1 | 1 | 2 | 2 | 3 | 5 | 8 |
The following table lists the amount of points-cap tickets needed to raise the maximum amount of base points of a driver, kart or glider to a higher cap.
| Cap | 1 | 2 | 3 | 4 |
|---|---|---|---|---|
| Amount of tickets | 1 | 5 | 10 | 12 |
Courses
Race courses
Mario Kart Tour features 103 different race courses (136 if each route is counted for courses with multiple re-routes), the most out of all Mario Kart games. Until the Anniversary Tour (2023), at least one additional course was added at the start of almost every tour. Notably, Mario Kart Tour introduces course variants,note with courses having up to three variants in addition to the normal one:
- Courses marked with "R" (Reverse), labeled "SI" (Sens inverse) in French, are driven in reverse orientation, and mostly just have alterations to make this possible if necessary or to add in some course elements. Every race course in the game has an R variant.
- Courses marked with "T" (Trick),[15][16] labeled "A" (Acrobatique) in French and "X" (Extreme) in all other languages, feature many additional ramps, Kanaami Roads, and obstacles with which to perform Jump Boosts, but are usually otherwise the same. Some specific T variants feature other alterations, such as adding Kanaami Roads to replace glider sections (like in DS Airship Fortress T), changing the order the course is traversed in (like in N64 Kalimari Desert 2T), or even changing the starting location (like in 3DS Rock Rock Mountain T). Every race course in the game except GBA Bowser's Castle 4 has a T variant.
- Courses marked with "R/T" (Reverse/Trick), labeled "SI/A" (Sens inverse/Acrobatique) in French and "RX" (Reverse Extreme) in all other languages, feature the elements of both R and T courses. As such, they go through the course backwards while adding more ramps, Kanaami Roads, and other obstacles with which to perform Jump Boosts and combos. Unlike with R and T variants, many courses were introduced without R/T variants and gained them later on. Originally, R/T variants only appeared for city courses, with them introduced in the same tour as the city course's other variants, but classic courses would start having them as well beginning with the 2019 Winter Tour, after which every tour has had three to five R/T variants (of any course type). From then to the 2020 Trick Tour, each tour saw one to three new ones added. Every race course in the game except GBA Bowser's Castle 4 and 3DS Rock Rock Mountain has an R/T variant.
When counting R, T, and R/T variants separately from their normal counterparts, the total number of courses in the game is 541.
Prior to the Battle Tour, with some exceptions, city courses were added with all four variants in the same tour, while all other courses were first added without the R/T variant, which would then release in a subsequent tour whose exclusive additions were R/T variants. From the Battle Tour onwards, all courses added to the game would debut all four variants at once upon introduction, much like the city courses (with the exception of GBA Bowser's Castle 4, which debuted with only its normal and R variants).
Almost every tour features classic courses and remix courses, while every new course appears exclusively in specific tours.
note - "Variant" is the official term used for both the courses designated R, T, or R/T and the numbered, re-routed versions of a particular course.[17][18][19]
New
There are seventeen original courses in Mario Kart Tour, referred to as "new courses". If each individual route is counted separately, the total increases to forty-seven.
City courses
44 of the 53 new courses are based on real cities. There are fourteen cities represented in the game, namely New York City, Tokyo, Paris, London, Vancouver, Los Angeles, Berlin, Sydney, Singapore, Amsterdam, Bangkok, Athens, Rome, and Madrid. These courses each have three unique routes that have the racers going through different areas of the city; additionally, New York Minute and Tokyo Blur each have an additional fourth route that brings together all of the paths from the other three routes into one long lap.
Other courses
In addition to the city courses are seven original courses that are not based on a real location, one of which has three different routes akin to the game's city courses. Despite the fact that Sky-High Sundae, Yoshi's Island, and Squeaky Clean Sprint officially debuted in the Mario Kart 8 Deluxe – Booster Course Pass, they are labeled and marketed as new courses for Mario Kart Tour as well, including in internal data.[20]
| Course | Debut tour R/T debut tour |
Normal version | R variation | T variation | R/T variation |
| Merry Mountain | Winter Tour (2020) Holiday Tour (2021) |
||||
|---|---|---|---|---|---|
| Ninja Hideaway | Ninja Tour (2021) Mario vs. Peach Tour |
||||
| Sky-High Sundae | Sundae Tour (2022) | ||||
| Piranha Plant Cove | Exploration Tour (2023) | ||||
| Piranha Plant Cove 2 | Exploration Tour (2023) | ||||
| Piranha Plant Cove 3 | Mii Tour (2023) | ||||
| Yoshi's Island | Yoshi Tour (2023) | ||||
| Piranha Plant Pipeline | Pipe Tour | ||||
| Squeaky Clean Sprint | Vacation Tour |
Remix
Mario Kart Tour introduces a new category of course called remix courses, which have the "RMX" prefix prepended to their names. These courses have their designs taken from the Super Mario Kart course environments (with the exception of RMX Bowser's Castle 1, which is instead based on GBA Bowser's Castle 1), but feature a completely new layout, with each one centering around a particular obstacle (namely the blocks in RMX Mario Circuit 1, the ramps in the RMX Choco Island courses, the Star Rings in RMX Rainbow Road 1, the Mushroom Trampolines in RMX Rainbow Road 2, the Water Geysers in RMX Vanilla Lake 1, the igloos in RMX Vanilla Lake 2, the stairs in RMX Ghost Valley 1, the conveyor belts in RMX Bowser's Castle 1, and the lily pads in RMX Donut Plains 1). There are ten remix courses in the game.
Classic
There are 72 classic courses in Mario Kart Tour (73 if counting N64 Kalimari Desert 2 separately from N64 Kalimari Desert). There are no classic courses from Mario Kart 8, making this the first mainline Mario Kart game since Mario Kart: Double Dash!! to not have at least one classic course from every previous mainline Mario Kart game. Despite this, several classic courses that appeared in Mario Kart 8 retain much of their design and layout from that game's version of the course, though others do not. Mario Kart Tour features three fifths of all courses featured in the mainline series prior to Mario Kart 8.
Like in Mario Kart 8 and Mario Kart 8 Deluxe, the finish line banners for certain classic courses use the classic Mario Kart logo. The courses from SNES to GCN, as well as remix courses, use an updated version of the classic logo, while the courses from DS to 3DS, as well as the second section of N64 Kalimari Desert 2 and the second banner in the R/T variant of GCN Baby Park, use the current logo. DK Mountain is an exception to this, as despite it being a GCN course, the banner uses the current logo instead of the updated classic logo.
Super Mario Kart (SNES)
Fifteen courses return from Super Mario Kart, with the only absent courses from this game being Bowser Castle 1, Bowser Castle 2, Koopa Beach 1, Mario Circuit 4, and Ghost Valley 3.
Mario Circuit 1, Choco Island 2, Donut Plains 1, and Koopa Troopa Beach 2 return as classic courses from Mario Kart DS, Ghost Valley 2 and Mario Circuit 3 return from Mario Kart Wii, Mario Circuit 2 and Rainbow Road return from Mario Kart 7 (with Rainbow Road also returning from Mario Kart 8), Donut Plains 3 returns from Mario Kart 8, and Ghost Valley 1, Choco Island 1, Donut Plains 2, Vanilla Lake 1, Bowser Castle 3, and Vanilla Lake 2 make their 3D debut as classic courses.
Mario Kart 64 (N64)
Eight courses return from Mario Kart 64, with Frappe Snowland and Choco Mountain returning as classic courses from Mario Kart DS, Mario Raceway returning from Mario Kart Wii, Luigi Raceway, Koopa Troopa Beach, and Kalimari Desert returning from Mario Kart 7, and Royal Raceway and Yoshi Valley returning from Mario Kart 8. This game also notably introduces a second variation of Kalimari Desert known as Kalimari Desert 2, which, despite being a reroute of the original Kalimari Desert new to Mario Kart Tour, is categorized as an N64 course in-game.
Mario Kart: Super Circuit (GBA)
Fourteen courses return from Mario Kart: Super Circuit, with the only absent courses from this game being Shy Guy Beach, Mario Circuit, Cheese Land, Ribbon Road, Broken Pier, and Rainbow Road.
Peach Circuit, Bowser's Castle 2, Luigi Circuit, and Sky Garden return as classic courses from Mario Kart DS, Bowser's Castle 3 returns from Mario Kart Wii, Bowser's Castle 1 returns from Mario Kart 7, Snow Land returns from the Mario Kart 8 Deluxe – Booster Course Pass, and Riverside Park, Boo Lake, Cheep-Cheep Island, Sunset Wilds, Yoshi Desert, Lakeside Park, and Bowser's Castle 4 make their debut as classic courses.
| Course | Debut tour R/T debut tour |
Normal version | R variation | T variation | R/T variation |
| Peach Circuit | Princess Tour | ||||
|---|---|---|---|---|---|
| Riverside Park | Animal Tour | ||||
| Bowser's Castle 1 | New York Tour London Tour |
||||
| Boo Lake | Halloween Tour (2022) | ||||
| Bowser's Castle 2 | Hammer Bro Tour Trick Tour (2020) |
||||
| Luigi Circuit | Mario vs. Luigi Tour (2023) | ||||
| Sky Garden | Sky Tour New Year's Tour (2023) |
||||
| Cheep-Cheep Island | Summer Tour (2021) New Year's Tour (2023) |
||||
| Sunset Wilds | Sunset Tour Mario vs. Luigi Tour (2020) |
||||
| Snow Land | Holiday Tour (2022) | ||||
| Yoshi Desert | Yoshi Tour (2023) | ||||
| Bowser's Castle 3 | Bowser Tour (2022) New Year's Tour (2023) |
||||
| Lakeside Park | Sunshine Tour | ||||
| Bowser's Castle 4 | Bowser Tour (2023) (N and R variants) N/A (T variant) N/A |
N/A | N/A |
Mario Kart: Double Dash!! (GCN)
Seven courses return from Mario Kart: Double Dash!!, with Mushroom Bridge returning as a classic course from Mario Kart DS, Waluigi Stadium and DK Mountain returning from Mario Kart Wii (with Waluigi Stadium also returning from the Mario Kart 8 Deluxe – Booster Course Pass), Daisy Cruiser and Dino Dino Jungle returning from Mario Kart 7, and Baby Park and Yoshi Circuit returning from both Mario Kart DS and Mario Kart 8.
| Course | Debut tour R/T debut tour |
Normal version | R variation | T variation | R/T variation |
| Baby Park | Cat Tour (2022) New Year's Tour (2023) |
||||
|---|---|---|---|---|---|
| Mushroom Bridge | Mii Tour (2023) | ||||
| Daisy Cruiser | Ocean Tour Sunshine Tour |
||||
| Waluigi Stadium | Mario vs. Luigi Tour (2023) | ||||
| Yoshi Circuit | New York Tour London Tour |
||||
| DK Mountain | Animal Tour | ||||
| Dino Dino Jungle | New York Tour Valentine's Tour |
Mario Kart DS (DS)
Seven courses return from Mario Kart DS, with Peach Gardens returning as a classic course from Mario Kart Wii, Luigi's Mansion, Waluigi Pinball, DK Pass, and Airship Fortress returning from Mario Kart 7, Shroom Ridge returning from the Mario Kart 8 Deluxe – Booster Course Pass, and Mario Circuit making its debut as a classic course.
| Course | Debut tour R/T debut tour |
Normal version | R variation | T variation | R/T variation |
| Luigi's Mansion | Halloween Tour (2019) London Tour |
||||
|---|---|---|---|---|---|
| Waluigi Pinball | Halloween Tour (2019) Valentine's Tour |
||||
| Shroom Ridge | Doctor Tour (2023) | ||||
| DK Pass | Winter Tour (2019) Ice Tour |
||||
| Mario Circuit | Mario Tour (2023) | ||||
| Airship Fortress | Pirate Tour Trick Tour (2021) |
||||
| Peach Gardens | Peach vs. Bowser Tour (November–December 2022) |
Mario Kart Wii (Wii)
Nine courses return from Mario Kart Wii. Mushroom Gorge, Coconut Mall, Koopa Cape, and Maple Treeway return as classic courses from Mario Kart 7 (with Coconut Mall also returning from the Mario Kart 8 Deluxe – Booster Course Pass), while DK Summit, Daisy Circuit, Dry Dry Ruins, Moonview Highway, and Rainbow Road make their debut as classic courses.
| Course | Debut tour R/T debut tour |
Normal version | R variation | T variation | R/T variation |
| Mushroom Gorge | Mii Tour (2022) Mii Tour (2023) |
||||
|---|---|---|---|---|---|
| Coconut Mall | Doctor Tour (2022) Doctor Tour (2023) |
||||
| DK Summit | Snow Tour Holiday Tour (2022) |
||||
| Daisy Circuit | Princess Tour | ||||
| Koopa Cape | Peach vs. Bowser Tour (May 2022) New Year's Tour (2023) |
||||
| Maple Treeway | Halloween Tour (2020) Autumn Tour (2021) |
||||
| Dry Dry Ruins | Ninja Tour (2023) | ||||
| Moonview Highway | Night Tour | ||||
| Rainbow Road | Space Tour (2023) |
Mario Kart 7 (3DS)
Twelve courses return from Mario Kart 7, with the only absent courses from this game being Wuhu Loop, Music Park, Maka Wuhu, and DK Jungle.
Piranha Plant Slide and Neo Bowser City return as classic courses from Mario Kart 8, while the remaining courses make their debut as classic courses.
Battle courses
There are five battle courses in the game, consisting of two new courses and three returning from previous installments, including one each from Mario Kart: Super Circuit, Mario Kart: Double Dash!!, and Mario Kart DS. Similar to the battle courses in Mario Kart 8, the new battle courses are repurposed from their corresponding city courses, albeit with more restricted pathways that can be taken. Among the returning courses, Cookie Land and Twilight House return as classic battle courses from Mario Kart Wii while Battle Course 1 returns from Mario Kart 7. Rather than each battle course having unique background music, they all use Mario Kart 8 Deluxe's arrangement of SNES Battle Course 1's music.
| New | Classic | ||||
| Course | Debut tour | Image | Course | Debut tour | Image |
| New York Minute B | Autumn Tour (2022) | GBA Battle Course 1 | Battle Tour | ||
|---|---|---|---|---|---|
| Paris Promenade B | Spring Tour | GCN Cookie Land | Battle Tour | ||
| DS Twilight House | Halloween Tour (2022) | ||||
Tours
- Main article: List of tours in Mario Kart Tour
Each tour consists of a series of cups, with each cup containing three courses and a bonus challenge. The featured character of the cup has the preference for every course in it increased by one tier. There are also special Team Rally tours that happen once every six or seven tours, during which all drivers are divided into two teams. Each team has a team captain, which is the driver the team is named after. At the start of a Team Rally tour, the player must choose one of the two teams to join. During a Team Rally, players can collect team tokens on courses, with the winning team being whichever collects the most total team tokens by the end of the tour.
Drivers
- Main article: List of drivers in Mario Kart Tour
- See also: Mario Kart Tour in-game statistics
Counting each Mii Racing Suit separately, there are 265 playable characters in Mario Kart Tour, the largest number of playable characters in a Super Mario game. Notable new playable characters to the Mario Kart series include Peachette, Pauline, Hammer Bro, Boomerang Bro, Fire Bro, Ice Bro, Monty Mole, Dixie Kong, Captain Toad, Nabbit, King Bob-omb, Kamek, Chargin' Chuck, and Poochy, with Ice Bro and King Bob-omb also making their first appearances overall as playable characters. Some characters return as playable to the series after being absent from multiple installments: Donkey Kong Jr. is playable for the first time since Super Mario Kart, Petey Piranha is playable for the first time since Mario Kart: Double Dash!!, and Diddy Kong, Birdo, and Funky Kong are playable for the first time since Mario Kart Wii. Excluding characters not from the Super Mario franchise, only two playable characters from previous mainline Mario Kart games do not return in Mario Kart Tour, namely Koopa Paratroopa from Mario Kart: Double Dash!! and Honey Queen from Mario Kart 7.
Miis also return from previous Mario Kart games, debuting in the 2022 Mii Tour. Like in Mario Kart 8, they have a multitude of different racing suits they can wear; however, each suit now has its own special skill. There are 65 suits, with at least one new suit being added in each tour from the 2022 Mii Tour until the 2023 Anniversary Tour.
Upon launching the game for the first time, players will be given either Toad or Toadette. After the tutorial, they are granted a free pipe launch which grants Peachette, Metal Mario, or Dry Bowser.[21][22] The Red Mii Racing Suit is also given as a free gift for players. Gold Mario is the only playable character in Coin Rush mode, which was the only mode in which he was playable until the 2023 Anniversary Tour; he has the unique ability to draw in nearby coins to himself, with this having a larger radius in Coin Rush than otherwise.
Unlike in other Mario Kart games, characters are sorted by the rarity of unlocking them. There are three tiers of rarity: Normal, Super, and High-End. While the Normal characters are easier to unlock, rarer characters have a greater number of starting points and have more favored and favorite courses.
The only differences between drivers in the main statistics affect acceleration and weight, and depend on the driver's size class.[23]

Karts, gliders, and tires
- Main articles: List of karts in Mario Kart Tour, List of gliders in Mario Kart Tour, Tire § Mario Kart Tour
There are a total of 336 karts and 225 gliders in Mario Kart Tour, the most of any Mario Kart game. Several karts and gliders return from previous installments, though new ones also appear alongside variants of existing ones; these variants share their in-game model, differing by textures, and are grouped together within the internal files. Like drivers, karts and gliders are organized by three tiers of rarity: Normal, Super, and High-End. Each kart and glider has its own special skill that provides specific benefits during a race; karts give bonus points for performing a particular technique while gliders increase the chance of obtaining a particular item from Item Boxes as well as the points gained from using that item. Each kart and glider also has its own favored and favorite courses, and using a kart or glider on such courses increases their bonus points multiplier, or combo bonus and combo-time, respectively.
Unlike in Mario Kart 7, Mario Kart 8, and Mario Kart 8 Deluxe, tires are not customizable, being set to a specific kart, and have no effect on stats.
In battle mode, a new feature allows the player to customize their balloons that appear during the match. However, unlike karts and gliders, these balloon designs are purely aesthetic. There are 34 balloon designs in Mario Kart Tour.


Items
Frenzy
- Main article: Frenzy (Mario Kart Tour)
Depending on the selected driver and course they are used on, players can get one to three items at once. In the case that a character gets three of the same item, they will activate the new Frenzy Mode, in which they immediately activate Super Star power, and can charge all the Mini-Turbo stages much more quickly and can use unlimited supplies of the respective item until the invincibility runs out. Any item can appear in Frenzy Mode, except for the Star, which is exclusive to certain bonus challenges.
The probability of obtaining a Frenzy depends on the current position and lap and on the driver chosen. In particular, the current position and lap define a base probability that is then summed to a bonus depending on the rarity and skill level of the driver chosen. The resulting probability is capped at 50%, even if the sum exceeds said value.
The following is the base probability of a Frenzy in single player races used in the 2020 Halloween Tour:[24]
| Base probability of a Frenzy in single-player races | ||||||||
|---|---|---|---|---|---|---|---|---|
| Position | 1st | 2nd | 3rd | 4th | 5th | 6th | 7th | 8th |
| First lap | 5 | 6 | 7 | 9 | 13 | 15 | 18 | 22 |
| Second lap or higherc | 6 | 7 | 11 | 12 | 18 | 22 | 29 | 41 |
Multiplayer races use different Frenzy probabilities:[25]
| Base probability of a Frenzy in multiplayer races | ||||||||
|---|---|---|---|---|---|---|---|---|
| Position | 1st | 2nd | 3rd | 4th | 5th | 6th | 7th | 8th |
| First lap | 1 | 2 | 4 | 6 | 10 | 14 | 17 | 21 |
| Second lap or higherc | 3 | 4 | 8 | 9 | 15 | 22 | 32 | 50 |
c - On 3DS Rainbow Road and its variants, the second lap probabilities are applied from the second segment onward.
Item Box items
Items function mostly the same as in previous installments in the series. As in Mario Kart: Double Dash!!, every character has their own special item that most other characters cannot obtain. By upgrading drivers to certain levels, they can obtain improved special items: Normal drivers to level 7, Super drivers to level 5 or higher, and High-End drivers to level 4 or higher.
The game introduces eleven new items to the series: the Double Bob-ombs, the Ice Flower, the Bubble, the Banana Barrels, the Mushroom Cannon, the Coin Box, the Dash Ring, the Bob-omb Cannon, the Giga Bob-omb, the Super Bell, and the Capsule, all of which are character-exclusive items. Several items also return in this game after a long absence from the series, including Bowser's Shell, Yoshi's Egg/Birdo's Egg, the Giant Banana, the Heart, and the Mega Mushroom from Mario Kart Wii; the former four (from Mario Kart: Double Dash!!) are all special items, while the lattermost is a regular item. Additionally, the Hammer item from the Mario Kart Arcade GP series appears in this game for the first time in a non-arcade Mario Kart game as a special item, though its functions are different. The Lucky Seven and Super Leaf, which were both absent in Mario Kart 8 and Mario Kart 8 Deluxe, also return in this game as special items.
The probabilities used in single player mode outside of Frenzies are reported. It is possible that the first item boxes of the races use different probabilities. The probability of common items can be increased by using gliders with the respective item skill. The actual probability is calculated as (item probability + glider bonus)/(sum of the probabilities of the eligible items); when no item can be obtained, a Coin is obtained instead. For the detailed probabilities of obtaining an item when an Item Box is opened, see Mario Kart Tour item probability distributions.
| Image | Name | Description | Drivers | Single player base probability | |||||||
|---|---|---|---|---|---|---|---|---|---|---|---|
| 1st | 2nd | 3rd | 4th | 5th | 6th | 7th | 8th | ||||
| Banana | "Don't let this one give you the slip! Your kart will spin out if you hit one. You can carry one behind your kart to protect yourself from a single attack." | All | 35 | 12 | 20 | 15 | 0 | 0 | 0 | 0 | |
| Triple Bananas | "Three bananas revolve around your kart. Tap the screen to throw them all at once and they'll land all lined up in a nice, tidy row!" | 20 | 15 | 35 | 30 | 25 | 0 | 0 | 0 | ||
| Triple Bananas+ | "Improved Triple Bananas. The appearance rate of Triple Bananas increases, and the chance to get Triple Bananas in a frenzy is slightly increased as well. The bananas revolve arround your kart at a faster rate and provide better coverage for defense." | ||||||||||
| Giant Banana | "Not only does this big banana spin out karts that hit it, but after being struck it breaks into three regular-sized Bananas. The only banana split you'll be sad to see!" | 20 | 15 | 35 | 30 | 25 | 0 | 0 | 0 | ||
| Giant Banana+ | "Improved Giant Banana. The appearance rate of Giant Bananas increases, and the chance to get a Giant Banana in a frenzy is slightly increased as well. It splits into an additional banana." | ||||||||||
| Green Shell | "Flies straight and crashes any kart it hits. Keep it behind your kart to protect yourself from a single attack." | All | 20 | 15 | 20 | 18 | 8 | 8 | 0 | 0 | |
| Triple Green Shells | "Three Green Shells revolve around your kart. Tap the screen to throw all of them at once and they'll fly in a straight line." | 0 | 30 | 20 | 25 | 35 | 15 | 0 | 0 | ||
| Triple Green Shells+ | "Improved Triple Green Shells. The appearance rate of Triple Green Shells, as well the chance of a Triple Green Shells frenzy, slightly increases. The shells revolve around your kart at a faster rate and provide better coverage for defense." | ||||||||||
| Red Shell | "Homes in on a kart in front of you and crashes whatever it hits. Keep it behind your kart to protect yourself from a single attack." | All | 0 | 48 | 20 | 20 | 25 | 17 | 0 | 0 | |
| Spiny Shell | "Chases down the kart in 1st place, crashing through anyone it hits before reaching its target. This will make you regret being in 1st place! Or even near the kart in 1st place..." | All (Does not appear in Battle Mode) |
0 | 0 | 0 | 0 | 5 | 5 | 3 | 0 | |
| Bowser's Shell | "This big ol' shell on loan from Bowser will crash any karts it hits and keep on going. It can only be thrown forward." | 0 | 0 | 15 | 35 | 40 | 30 | 30 | 0 | ||
| Bowser's Shell+ | "Improved Bowser's Shell. The shell is bigger and a little better at tracking opponents." | ||||||||||
| Bob-omb | "This will walk towards opponents who get too close, and then explode when it touches a kart or when some time has passed. Karts caught in its blast will crash. In Battles, it explodes on impact with the ground or a wall." | All | 1 | 3 | 10 | 15 | 10 | 10 | 0 | 0 | |
| Double Bob-ombs (new) | "Two Bob-ombs will revolve around your kart. Tap the screen to throw them both at once. Two is better than one, right?" | 0 | 30 | 20 | 25 | 35 | 15 | 0 | 0 | ||
| Double Bob-ombs+ | "Improved Double Bob-ombs. You get an additional Bob-omb." | ||||||||||
| Mushroom | "This classic item gives your kart a speed boost. Doesn't get much simpler than that! In Battles, you can cause your opponents to crash by ramming into them while boosted." | All | 5 | 12 | 25 | 29 | 20 | 25 | 30 | 21 | |
| Triple Mushrooms | "Why use just one Mushroom when you can use three? Tap the screen to use them all at once for a longer-lasting speed boost." | 0 | 0 | 15 | 35 | 40 | 30 | 30 | 0 | ||
| Triple Mushrooms+ | "Improved Triple Mushrooms. The appearance rate of Triple Mushrooms increases and boost last a bit longer." | ||||||||||
| Mega Mushroom | "Increases your kart's size, allowing you to crash any opponents you hit. You'll return to regular size after some time or when you're hit by an item." | All (Does not appear in Battle Mode) |
0 | 0 | 0 | 0 | 27 | 30 | 40 | 30 | |
| Bullet Bill | "Transforms you into a Bullet Bill for a set amount of time. You'll dash forward with all the power of a Bullet Bill and crash any opponents that you hit." | All (Does not appear in Battle Mode) |
0 | 0 | 0 | 0 | 0 | 0 | 25 | 40 | |
| Blooper | "Squirts ink onto the karts in a higher position than yours, blinding the other drivers for a set amount of time. You can wipe the ink off by swiping the screen." | All | 0 | 0 | 0 | 3 | 5 | 5 | 0 | 0 | |
| Lightning | "Calls down lightning to spin out your opponents and destroy the items they hold. Those struck will be smaller and slower for a set amount of time." | All (Does not appear in Battle Mode) |
0 | 0 | 0 | 0 | 0 | 0 | 2 | 9 | |
| Fire Flower | "Three fireballs will revolve around your kart. Tap the screen to throw them all at once, spinning out any kart they hit. You're really burning up the track now!" | 0 | 30 | 20 | 25 | 35 | 15 | 0 | 0 | ||
| Fire Flower+ | "Improved Fire Flower. The chance to get a Fire Flower in a frenzy is slightly increased, and you'll get an additional fireball to help strike your opponents." | ||||||||||
| Boomerang Flower | "Tap the screen to throw a boomerang. Not only will it spin out any karts it hits, but it will collect any surrounding coins for you too. In Battles, it will break if it hits a wall." | 0 | 30 | 20 | 25 | 35 | 15 | 0 | 0 | ||
| Boomerang Flower+ | "Improved Boomerang Flower. The chance to get a Boomerang Flower in a frenzy is slightly increased and you'll get one additional boomerang. Once obtained, the boomerangs will revolve around your kart and provide coverage for defense." | ||||||||||
| Ice Flower (new) | "Three balls of ice will revolve around your kart. Tap the screen to throw them all at once and they'll freeze any kart they hit, causing them to slide." | 0 | 30 | 20 | 25 | 35 | 15 | 0 | 0 | ||
| Ice Flower+ | "Improved Ice Flower. The chance to get an Ice Flower in a Frenzy is slightly increased, and you'll get one additional ice ball for a better chance of striking your opponents." | ||||||||||
| Super Horn | "The loudness of this horn will blow away any surrounding items and karts. It can repel Bloopers, and even Spiny Shells!" | All | 4 | 0 | 0 | 0 | 0 | 0 | 0 | 0 | |
| Coin | "This gives you two Coins. It's used automatically once you pick it up." | All | 35 | 10 | 5 | 0 | 0 | 0 | 0 | 0 | |
| Heart | "This protective Heart revolves around your kart for a set amount of time, shielding you from attacks. It will vanish upon taking damage. You can stack up to five at once." | 0 | 0 | 15 | 35 | 40 | 30 | 30 | 0 | ||
| Heart+ | "Improved Heart. After use, you immediately get an additional Heart that lasts for six seconds." | ||||||||||
| Yoshi's Egg | "Homes in on the kart in front of you and crashes once it hits. Three more items will fly out when it breaks. It's the item that keeps on giving!" | 0 | 30 | 20 | 25 | 35 | 15 | 0 | 0 | ||
| Yoshi's Egg+ | "Improved Yoshi's Egg. The egg is bigger and it releases four items." | ||||||||||
| Birdo's Egg | "Homes in on the kart in front of you and crashes once it hits. Three more items will fly out when it breaks. It's the item that keeps on giving!" | 0 | 30 | 20 | 25 | 35 | 15 | 0 | 0 | ||
| Birdo's Egg+ | "Improved Birdo's Egg. The egg is bigger and it releases four items." | ||||||||||
| Bubble (new) | "Briefly envelops your kart and protects you from damage for a set time. While in the bubble, you will get a speed boost and float in the air. Watch out, because it will vanish upon taking damage! In Battles, it can float you over walls." | 0 | 0 | 15 | 35 | 40 | 30 | 30 | 0 | ||
| Bubble+ | "Improved Bubble. The speed of the bubble is increased." | ||||||||||
| Banana Barrels (new) | "Arm your kart with two fully-loaded barrels of Bananas! Continually shoots out Bananas in front of your kart for a set time." | 0 | 0 | 15 | 35 | 40 | 30 | 30 | 0 | ||
| Banana Barrels+ | "Improved Banana Barrels. There's a chance that a Giant Banana will be fired instead of a Banana." | ||||||||||
| Mushroom Cannon (new) | "A cannon designed to resemble a Mushroom. Continually shoots out Mushrooms in front of your kart for a set time." | 0 | 0 | 15 | 35 | 40 | 30 | 30 | 0 | ||
| Mushroom Cannon+ | "Improved Mushroom Cannon. Mushrooms are fired in three directions." | ||||||||||
| Lucky Seven | "Seven items (Red Shell, Banana, Green Shell, Bob-omb, Super Horn, Mushroom, and Blooper) revolve around your kart. Tap the screen to use all seven items at once." | 0 | 0 | 15 | 35 | 40 | 30 | 30 | 0 | ||
| Lucky Seven+ | "Improved Lucky Seven. The chance to get a Lucky Seven in a frenzy is slightly increased. Three coins will appear in addition to the seven items." | ||||||||||
| Coin Box (new) | "A box with a golden sheen. Generates a large amount of Coins in front of your kart for a set time." | 20 | 15 | 35 | 30 | 25 | 0 | 0 | 0 | ||
| Coin Box+ | "Improved Coin Box. There's a chance that red coins will appear." | ||||||||||
| Dash Ring (new) | "Tosses out three rings in front of you along the track. Pass through them for a speed boost! In Battles, you can cause your opponents to crash by ramming into them while boosted." | 0 | 0 | 15 | 35 | 40 | 30 | 30 | 0 | ||
| Dash Ring+ | "Improved Dash Ring. The chance to get a Dash Ring in a frenzy is slightly increased. Two additional rings are tossed in front of you, and the speed boost when passing through a ring lasts a bit longer." | ||||||||||
| Bob-omb Cannon (new) | "A dangerous cannon fueled by red-hot coals! Continually shoots out Bob-ombs in front of your kart for a set time." | 0 | 0 | 15 | 35 | 40 | 30 | 30 | 0 | ||
| Bob-omb Cannon+ | "Improved Bob-omb Cannon. Two cannons that each fire one Bob-omb at a time are equipped." | ||||||||||
| Hammer | "Throws multiple Hammers in an arc aimed at karts in front of yours." | 0 | 30 | 20 | 25 | 35 | 15 | 0 | 0 | ||
| Hammer+ | "Improved Hammer. The chance to get a Hammer in a frenzy is slightly increased. There are two additional hammers, widening the strike zone." | ||||||||||
| Giga Bob-omb (new) | "This giga-sized Bob-omb can only be thrown forward. after being thrown, it will explode after hitting a kart or bouncing 3 times. It has a larger blast radius than a standard Bob-omb. In Battles, it explodes after bouncing twice." | 0 | 0 | 15 | 35 | 40 | 30 | 30 | 0 | ||
| Giga Bob-omb+ | "Improved Giga Bob-omb. The Giga Bob-omb is bigger and its blast radius is a bit wider." | ||||||||||
| Super Bell (new) | "A bell rings above the driver, knocking away nearby karts and items. The bell rings three consecutive times." | 0 | 0 | 15 | 35 | 40 | 30 | 30 | 0 | ||
| Super Bell+ | "Improved Super Bell. The bell rings one additional time, and the chance to get a Super Bell in a Frenzy is slightly increased as well." | ||||||||||
| Super Leaf | "Wag the Tanooki tail to attack nearby opponents. The tail will collect any surrounding coins for you while it's wagging!" | 0 | 0 | 15 | 35 | 40 | 30 | 30 | 0 | ||
| Super Leaf+ | "Improved Super Leaf. Kart speed is increased while tail is wagging." | ||||||||||
| Capsule (new) | "Three colorful capsules surround your kart. They'll bounce at opponents when thrown." | 0 | 0 | 15 | 35 | 40 | 30 | 30 | 0 | ||
| Capsule+ | "Improved capsule. You get an additional capsule, and they're a little bigger too." | ||||||||||
| Feather | "Jump over items and walls. You'll get a speed boost upon landing, which you can use to ram into your opponents to cause them to crash." | All (Only appears in Battle Mode) |
|||||||||
| Super Star | "Turns you invincible for a time. Your kart will be faster and any karts you hit will crash." | All (In single-player, appears in certain bonus challenges and Frenzy mode in normal races. In multiplayer, appears in rulesets with less than 3 item slots, and Frenzy mode in rulesets with 3 item slots. Does not appear in Battle Mode.) |
N/A | ||||||||
Inventory items
These items are collected throughout the course of the game through various means, such as challenges, log-in bonuses, and Tour Gifts.
| Image | Name | Description |
|---|---|---|
| Coin | Coins gathered during races are used to purchase items and characters in shops. Only 300 coins (or 600 coins for Gold Pass subscribers) can be obtained in normal races per day. Players can obtain additional coins from challenge rewards, Coin Rush, and other methods once the cap has been reached. | |
| Ruby | Special currency used to play Coin Rush without the Coin Rush ticket or purchase drivers, karts and gliders from the Spotlight Shop. | |
| Event token | Special currency used in Token Shops. | |
| Team token | Special currency used in Team Rallies and Token Shops. | |
| Grand Star | Rewards from achieving specified race scores and completing challenges. The more Grand Stars a player obtains, the more cups they can participate in and the more presents they can receive in each tour. If all of the tour gifts have been opened, coins will be awarded instead. Once a tour ends, the total number of Grand Stars resets to zero. | |
| Item ticket | Allows the player to instantaneously receive an Item Box during normal races. Only one ticket can be used per race. | |
| Point-boost ticket | Provides 50 experience points to the base points of drivers, karts or gliders. If the base points of a driver, kart or glider are already at maximum, no more point-boost tickets can be used. | |
| Level-boost ticket | Increases the skill level of drivers, karts or gliders by one unit. The type of ticket must match the rarity. If the skill level of a driver, kart or glider is already Level 8, no more level-boost tickets can be used. | |
| Points-cap ticket | Increases the cap of the base points of drivers, karts or gliders. The type of ticket must match the rarity. If the maximum base points of a driver, kart or glider can no longer be unlocked, no more points-cap tickets can be used. | |
| Coin Rush ticket | Allows players to participate in the Coin Rush mode of the current Tour once without spending Rubies. | |
| Star ticket | Grants a Grand Star. | |
| Quick ticket | Subtracts a day out of the remaining time needed to unlock locked cups of the current tour, or changes the content of the Daily Selects or Spotlight Shop. | |
| Balloon | Item used in Battles. |
Course elements
It has been requested that this section be rewritten and expanded to include more information. Reason: include more course, bonus challenges and Coin Rush appearances
Interactable course elements
The following table lists elements that slow racers down, crash them, offer them a Jump Boost and/or simply give them bonus points when interacted with in a certain way. For ways to interact with these elements for bonus points, see Mario Kart Tour race points system § Object interactions.
Note: Statements that an obstacle causes drivers to crash, spin out, or otherwise slow down on contact typically hold only when said drivers are in a default state. In most cases, drivers are unaffected by obstacles if they are undergoing invincibility frames or are under the effects of a Frenzy, Mega Mushroom, Bullet Bill, or Super Star. The only obstacles that can still slow drivers down regardless of their state are those that are solid objects and cannot be taken out by any means (bumpers, flippers, Walking Trees, windmills etc.).
| Subject | Location | Description | Can give bonus points |
|---|---|---|---|
 Anchor |
3DS Wario Shipyard, R, T, R/T | An obstacle that swings back and forth and acts like a wall. | Yes |
 Asteroid |
SNES Rainbow Road, R, T, R/T | Asteroids appear in the background of Rainbow Road courses. They act as minor obstacles that can block the player's path in 3DS Rainbow Road and RMX Rainbow Road 1's gliding sections. | No |
| Wii Rainbow Road, R, T, R/T | |||
| 3DS Rainbow Road, R, T, R/T | |||
| RMX Rainbow Road 1, R. T, R/T | |||
| RMX Rainbow Road 2, R. T, R/T | |||
 Ball of Fire |
DS Mario Circuit, R, T | A fiery projectile spit out by Fire Piranha Plants. Any driver hit by a Ball of Fire spins out. | Yes |
 Banzai Bill |
DS Airship Fortress, R, T | A larger variant of Bullet Bills that travels in a straight line. When a driver collides with a Banzai Bill, they spin out. | Yes |
| Wii Moonview Highway (Steer Clear of Obstacles) | |||
 Barrel |
DS Airship Fortress R, R/T | An obstacle that breaks upon collision with a racer, slowing them down. | Yes |
| Wii Mushroom Gorge (Break Item Boxes) | |||
| 3DS Cheep Cheep Lagoon (Break Item Boxes) | |||
| 3DS Wario Shipyard, R, T | |||
| London Loop, R, T | |||
| London Loop 2, R, T | |||
| London Loop 3, R, T, R/T | |||
| Singapore Speedway 3, R, T, R/T | |||
| Rome Avanti 2, R, T, R/T | |||
 Barrel Bomb |
SNES Mario Circuit 1 (Goomba Takedown) | An explosive object that can be triggered by throwing a projectile or by driving into it. Upon exploding, a Barrel Bomb will also cause other Barrel Bombs within range to detonate and defeat any nearby Goombas. Some Barrel Bombs stand on the ground, while others float or fly using propellers. | Yes |
| GBA Bowser's Castle 2, R, T | |||
| GBA Sky Garden (Steer Clear of Obstacles) | |||
| GCN Dino Dino Jungle (Goomba Takedown) | |||
| DS Luigi's Mansion (Goomba Takedown) | |||
| DS DK Pass (Goomba Takedown) | |||
| DS Airship Fortress (Goomba Takedown) | |||
| Wii Maple Treeway (Goomba Takedown) | |||
| 3DS Shy Guy Bazaar (Steer Clear of Obstacles) | |||
| 3DS Rock Rock Mountain (Steer Clear of Obstacles) | |||
| 3DS Neo Bowser City (Goomba Takedown) | |||
| London Loop 2 (Steer Clear of Obstacles) | |||
| RMX Rainbow Road 2 (Goomba Takedown) | |||
 Bath Bomb |
Squeaky Clean Sprint, R | An underwater object. It releases a soapy cloud that gives drivers a Jump Boost. | Yes |
 Big egg |
N64 Yoshi Valley, R, T | A large egg that spins and moves in a circle, crashing any driver that comes into contact with it. | Yes |
 Blimp |
GBA Luigi Circuit, R, T, R/T | A blimp that flies around the course in all variants of GBA Luigi Circuit and GBA Sky Garden, the normal and T variants of Singapore Speedway, and all variants of Singapore Speedway 2. In the R and R/T variants of Singapore Speedway, it is stationary and allows for racers to perform Jump Boosts on it. | Yes (through Jump Boosts) |
| GBA Sky Garden, R, T, R/T | |||
| Singapore Speedway, R, T, R/T | |||
| Singapore Speedway 2, R, T, R/T | |||
| Singapore Speedway 3, R, T, R/T | |||
 Bob-omb Car |
GCN Mushroom Bridge, T | A car resembling a Bob-omb that explodes on contact. Racers can get a Jump Boost if they land on it. | Yes |
| Wii Moonview Highway, T | |||
 Bone Piranha Plant |
SNES Bowser Castle 3, R, T, R/T | A skeletal Piranha Plant that lunges at drivers, spinning them out if it reaches them. | Yes |
| GBA Bowser's Castle 4R | |||
 Boost Ring |
Singapore Speedway | An object that appears in gliding sections and gives drivers speed boosts. | Yes |
| Singapore Speedway 2T | |||
| Singapore Speedway 3T | |||
 Boulder |
Sydney Sprint 3, R, T, R/T | An upright obstacle found in grassy portions of the course. It slows down drivers who collide with it. | Yes |
 Bumper |
DS Waluigi Pinball, R, T, R/T | An object that bounces metal balls and racers off when they collide with it. Some bumpers are stationary, while others move around in circles. Racers can perform a Jump Boost by bouncing on top of a bumper, which is possible in DS Waluigi Pinball T after they drive off a ramp. | Yes (through Jump Boosts) |
 Burner |
DS Airship Fortress, R, T, R/T | A flame-throwing object that slowly moves back and forth, burning and spinning out any drivers that touch its flame. | No |
 Bus |
GCN Mushroom Bridge, R | A large vehicle. In GCN Mushroom Bridge, buses moves down the road along with the rest of the traffic, causing drivers to simply lose some speed when run into. In GCN Mushroom Bridge R, they are stationed on the side of the road. | Yes |
 Cannon |
N64 Yoshi Valley | A large cannon that launches drivers to a much farther portion of a track while activating their gliders. In N64 Yoshi Valley, GCN DK Mountain, Wii DK Summit, and Wii Maple Treeway, cannons take the form of a Barrel Cannon. In DS Waluigi Pinball, one appears in the form of a pinball launcher. In DS Airship Fortress, it appears as a regular ship cannon. In Wii Rainbow Road, it appears as a large Star Ring with a rainbow tunnel. In 3DS Rainbow Road R and Singapore Speedway T, it takes the form of a blue and gray metallic version of a Barrel Cannon. In Vancouver Velocity 2 and the normal and T variants of Singapore Speedway, they take the form of red and blue circus cannons, respectively. | Yes (through Jump Boosts) |
| GCN DK Mountain, R, T, R/T | |||
| DS Waluigi Pinball, R, T, R/T | |||
| DS Airship Fortress, R, R/T | |||
| Wii DK Summit, R, T, R/T | |||
| Wii Maple Treeway, R, T | |||
| Wii Rainbow Road, R, T, R/T | |||
| 3DS Rainbow Road R | |||
| Vancouver Velocity 2, R | |||
| Singapore Speedway, R, T | |||
| Athens Dash, R, T | |||
| Athens Dash 2R | |||
Car |
GCN Mushroom Bridge, R, T, R/T | A course element with different colors and a taxi variant. In most of their appearances, they are stationary, and racers can perform a Jump Boost by bouncing on top of them. In Wii Coconut Mall, two cars appear at the end of the course moving back and forth while other cars appear in the background in the parking lot; in Berlin Byways 3 and Berlin Byways R, cars move along with the traffic. Both types of moving car act as walls that slow down racers. Mushroom-shaped cars appear in GCN Mushroom Bridge and the R and R/T variants of Wii Moonview Highway and release Mushrooms onto the road for drivers to use upon touching them. | Yes |
| DS Shroom Ridge, R, T, R/T | |||
| Wii Coconut Mall, R, T, R/T | |||
| Wii Moonview Highway, R, T, R/T | |||
| New York Minute 2T | |||
| New York Minute 3T, R/T | |||
| New York Minute 4, R, T, R/T | |||
| Tokyo Blur (Ring Race) | |||
| Los Angeles Laps (Coin Rush) | |||
| Berlin Byways, R, R/T | |||
| Berlin Byways 2, R, T, R/T | |||
| Berlin Byways 3, R | |||
| Sydney Sprint T | |||
| Amsterdam Drift 2R/T | |||
| Bangkok Rush 2, R, T, R/T | |||
| Bangkok Rush 3, R, T, R/T | |||
 Car (Mushroom) |
GCN Mushroom Bridge, R, T | ||
| Wii Moonview Highway R, R/T | |||
 Ceiling Needles |
Ninja Hideaway, R | Shuriken stuck underneath platforms that move up and down. They spin out racers if they touched. The platforms themselves also have trick ramps on the top of them that can be reached by driving on a higher floor of the course. | No |
 Chain Chomp (chained) |
SNES Mario Circuit 2T | A large chained enemy that lunges towards racers who drive past it, flipping them over if it reaches them. | Yes |
| SNES Mario Circuit 3R/T | |||
| SNES Donut Plains 3T | |||
| DS Peach Gardens T | |||
| London Loop, R, T, R/T | |||
| London Loop 2, R, T | |||
| London Loop 3, R, R/T | |||
 Chain Chomp (unchained) |
DS Peach Gardens, R, T, R/T | A large obstacle that rolls around in circles, flipping any drivers over when they roll into them. | Yes |
| 3DS Rainbow Road | |||
 Cheep Cheep |
SNES Donut Plains 3R/T | A fish that swims around in a body of water or flops about on land. When bumped into, Cheep Cheeps simply cause drivers to lose some speed. | Yes |
| SNES Koopa Troopa Beach 2, R | |||
| GBA Cheep-Cheep Island, R, R/T | |||
| Wii Koopa Cape, R, T, R/T | |||
| 3DS Cheep Cheep Lagoon, R, T, R/T | |||
| Amsterdam Drift 2R/T | |||
| Piranha Plant Cove 2 | |||
| RMX Donut Plains 1, R, T, R/T | |||
 Clampy |
GCN Daisy Cruiser | An oyster enemy that periodically opens and closes its valves to reveal objects such as coins and Item Boxes that racers can drive into to collect. If a Clampy closes its valves in on a racer, it will flip them over. | Yes |
| 3DS Cheep Cheep Lagoon, R, T | |||
| Piranha Plant Cove 2, R, T, R/T | |||
| Piranha Plant Cove 3, R, T | |||
 Conveyor Belt |
DS Peach Gardens T | A section of moving floor with arrows on it that are colored either green or red. Driving on green conveyor belts speeds drivers up while driving on red conveyor belts slows them down. In Wii Coconut Mall, the conveyor belts change directions on the second lap. In Singapore Speedway 2, small ramps can be found on the conveyor belts allowing for drivers to perform Jump Boosts. | No |
| Wii Coconut Mall, R, T, R/T | |||
| Singapore Speedway 2, R, T, R/T | |||
| RMX Bowser's Castle 1, R, T, R/T | |||
| Piranha Plant Cove 3R/T | |||
 Crate |
DS Airship Fortress, R, T, R/T | An object that slows down any racer that collides with it. When hit, crates break and release an item such as a Banana or Mushroom. | Yes |
| London Loop, R, T | |||
| London Loop 3, R, T, R/T | |||
 Current |
GCN Daisy Cruiser T | An underwater air current that pushes drivers away. In 3DS Piranha Plant Slide, 3DS Wario Shipyard, and Amsterdam Drift 2, currents are released from pipes, while in Piranha Plant Cove courses, they are released from cracks in the ground which allow players to perform Jump Boosts. | Yes (through Jump Boosts) |
| 3DS Piranha Plant Slide, R, T | |||
| 3DS Wario Shipyard, R, T, R/T | |||
| Amsterdam Drift 2, R, T, R/T | |||
| Piranha Plant Cove, R, R/T | |||
| Piranha Plant Cove 2, R, T, R/T | |||
| Piranha Plant Cove 3, R, T | |||
| Squeaky Clean Sprint R | |||
 Dash panel ramp truck |
GCN Mushroom Bridge R/T | A stationary vehicle that can be used as a ramp. | Yes (through Jump Boosts) |
| DS Shroom Ridge (Do Jump Boosts) | |||
| Wii Coconut Mall R/T | |||
| Wii Moonview Highway R/T | |||
| New York Minute T | |||
| New York Minute 4 | |||
| Sydney Sprint T | |||
| Berlin Byways 3T | |||
| Amsterdam Drift R/T | |||
 Drain Pipe |
3DS Piranha Plant Slide, R, T, R/T | A pipe that sticks out of a wall, causing drivers that bump into it to lose some speed. Unlike in previous Mario Kart games, gliding into the water that flows from a Drain Pipe does not affect drivers. | No |
 Exploring Shy Guy |
GBA Sunset Wilds, R, T, R/T | An enemy that moves back and forth across the track, causing any drivers that come into contact with it to spin out. | Yes |
Falling Pillar |
Wii Dry Dry Ruins, R, T, R/T | A stone pillar that appears upright on the first lap of a course, but falls to the ground on the second lap, acting as a ramp that allows drivers to perform Jump Boosts. | Yes (through Jump Boosts) |
| Piranha Plant Cove, R | |||
| Piranha Plant Cove 2, R | |||
 Festive tree |
See Festive tree § Festive tree locations. | A decorative element added to courses during tours that occur around the holiday season. Festive trees give bonus points when hit with a shell or a Bob-omb or by driving into them while invincible or Mega. | Yes |
 Fire Bar |
GCN Waluigi Stadium, R, T, R/T | A set of rotating, fiery bars that spin out drivers upon contact. | No |
 Fire Chain |
GCN Waluigi Stadium, R, T, R/T | A rotating ring of fireballs that spin out drivers upon contact. | No |
 Fire Piranha Plant |
DS Mario Circuit, R, T | A Piranha Plant that spits out Balls of Fire onto the road, spinning out drivers upon contact. | Yes |
 Fish Bone |
GBA Boo Lake, R, T, R/T | A skeletal fish that acts as an obstacle in underwater sections, slowing drivers down slightly when bumped into. Non-interactable Fish Bones also appear in N64 Choco Mountain and its variants as decorations. | Yes |
| 3DS Wario Shipyard, R, T, R/T | |||
| Piranha Plant Cove 3, R, T | |||
Flipper |
DS Waluigi Pinball, R, T, R/T | An object that sends metal balls in another direction when they collide with it. Racers that drive into a flipper will crash. | No |
 Floaty |
GCN Daisy Cruiser (Do Jump Boosts) | An object used by Innertube Goombas to float on the surface of the water. Floaties bounce away drivers while repelling various projectiles, such as Green Shells and fireballs. | Yes |
| Singapore Speedway, R | |||
 Flying Shy Guy |
3DS Shy Guy Bazaar, R, T, R/T | A Shy Guy that uses a magic carpet to fly around. Flying Shy Guys appear above the glider section. Colliding with a Flying Shy Guy causes drivers to lose their speed in the air. | Yes |
 Fuzzy |
Rome Avanti R/T | A furry black creature that moves along a track, spinning out drivers upon contact. | Yes |
| Piranha Plant Pipeline, R, R/T | |||
 Goal Ring |
Yoshi's Island, T | A ring with Smiley Flowers floating above the ground just before the finish line. It can be reached via a pathway produced by a Winged Cloud encountered prior. When passed through, the Goal Ring gives bonus points. | Yes |
 Goat |
3DS Daisy Hills, R, T, R/T | An obstacle that walks around the track slowly. Drivers that collide with a goat spin out. | Yes |
| Amsterdam Drift 3R | |||
 Goomba |
Any course where a Goomba Takedown bonus challenge takes place | A short enemy that stands in the racers' way or walks left and right. Goombas can be taken out with an offensive item or by simply driving into them, although the latter will also cause the racer to spin out. They can also be defeated by landing on them while gliding or after driving off a ramp, which gives the racer a Jump Boost. | Yes |
| N64 Mario Raceway, R, T, R/T | |||
| GCN Daisy Cruiser (Do Jump Boosts) | |||
| GCN Yoshi Circuit (Do Jump Boosts) | |||
| DS Luigi's Mansion (Steer Clear of Obstacles) | |||
| DS Waluigi Pinball (Steer Clear of Obstacles) | |||
| DS DK Pass (Do Jump Boosts) | |||
| DS Mario Circuit, T | |||
| Wii Mushroom Gorge, R, T, R/T | |||
| Wii Koopa Cape, T | |||
| Wii Maple Treeway (Goomba Takedown) | |||
| 3DS Toad Circuit R, R/T | |||
| 3DS Mario Circuit, R | |||
| 3DS Piranha Plant Slide | |||
| Tokyo Blur (Do Jump Boosts) | |||
| Paris Promenade | |||
| Paris Promenade 2 | |||
| Paris Promenade 3 | |||
| RMX Mario Circuit 1, R, T, R/T | |||
| Singapore Speedway, R | |||
| Amsterdam Drift T | |||
| Athens Dash 2 | |||
 Goomba Tower |
SNES Mario Circuit 1 (Goomba Takedown) | A stack of Goombas that can be defeated the same way as an individual Goomba. If the Goomba at the bottom of a tower is defeated, all of the ones above it collapse and are defeated as well. | TBD |
| SNES Ghost Valley 1 (Goomba Takedown, Steer Clear of Obstacles) | |||
| SNES Ghost Valley 2 (Glider Challenge) | |||
| SNES Choco Island 2 (Goomba Takedown) | |||
| SNES Vanilla Lake 1 (Goomba Takedown) | |||
| SNES Rainbow Road (Goomba Takedown) | |||
| GCN Dino Dino Jungle (Goomba Takedown) | |||
| DS Luigi's Mansion (Goomba Takedown) | |||
| DS Airship Fortress (Goomba Takedown) | |||
| Wii Maple Treeway (Goomba Takedown) | |||
| 3DS Shy Guy Bazaar (Goomba Takedown) | |||
| 3DS Neo Bowser City (Goomba Takedown) | |||
| Paris Promenade 2 (Goomba Takedown) | |||
| Los Angeles Laps (Goomba Takedown) | |||
| RMX Mario Circuit 1 (Goomba Takedown) | |||
| RMX Rainbow Road 2 (Goomba Takedown) | |||
Half-pipe |
N64 Yoshi Valley, R, T, R/T | A ramp on the side of the track that drivers can jump off of for Jump Boosts. | Yes |
| GCN Waluigi Stadium, R, T, R/T | |||
| GCN DK Mountain, R, T, R/T | |||
| Wii DK Summit, R, T, R/T | |||
| Wii Koopa Cape, R, T, R/T | |||
| Wii Maple Treeway, R, T, R/T | |||
| Wii Dry Dry Ruins, R, T, R/T | |||
| Wii Rainbow Road, R, T, R/T | |||
| Athens Dash, R, T, R/T | |||
| Athens Dash 2, R, T, R/T | |||
| Piranha Plant Pipeline, R, T | |||
| Squeaky Clean Sprint, R, T, R/T | |||
Super half-pipe |
Merry Mountain, R, T, R/T | ||
 Hot-air balloon |
N64 Luigi Raceway, R, T, R/T | An obstacle that floats in one place. Hot-air balloons cause racers who glide into them to bounce back. However, if a racer lands on top of a hot air balloon, they receive a Jump Boost. In N64 Luigi Raceway, a hot-air balloon provides an Item Box in the second lap. In N64 Mario Raceway and N64 Yoshi Valley, hot-air balloons appear as background elements high above the courses. | Yes (through Jump Boosts) |
| N64 Koopa Troopa Beach R | |||
| N64 Mario Raceway, R, T, R/T | |||
| N64 Royal Raceway, T | |||
| N64 Yoshi Valley, R, T, R/T | |||
| GBA Peach Circuit, R, T, R/T | |||
| GCN Mushroom Bridge T, R/T | |||
| GCN Yoshi Circuit T (Glider Challenge) | |||
| DS Shroom Ridge T | |||
| DS DK Pass R/T (Do Jump Boosts) | |||
| DS Peach Gardens, R, T, R/T | |||
| Wii Mushroom Gorge R/T | |||
| Wii Koopa Cape R, R/T | |||
| Wii Maple Treeway T | |||
| 3DS Daisy Hills, R, T, R/T | |||
| 3DS Rock Rock Mountain R | |||
| Paris Promenade, R, T, R/T | |||
| Vancouver Velocity R | |||
 Icicle |
3DS Rosalina's Ice World, R, T, R/T | An obstacle that breaks when driven into, slowing down the responsible driver. | Yes |
 Inky Piranha Plant |
Bangkok Rush, R, R/T | A type of Piranha Plant that spits piles of black ink on the road as an obstacle for racers. Racers who drive into an ink pile spin out, and human players additionally have their screen briefly covered with ink. | Yes |
| Bangkok Rush 2, R | |||
| DS Peach Gardens R/T | |||
Jack-o'-lantern |
See Jack-o'-lantern § Course appearances for a list of courses that feature Jack-o'-lanterns. | Jack-o'-lanterns appear during tours that occur around Halloween. Those found on the drivable portion of a course can be knocked away by driving into them or hitting them with an item, giving bonus points in the process. Jack-o'-lanterns that appear on a track's sidelines or in the background usually come in larger sizes and can be interacted with but not knocked away. | Yes |
 Jar / Snake jar |
3DS Shy Guy Bazaar, R, T, R/T | An object found on the track. Jars will break upon collision with an item or a racer. Running into a jar will slow the racer down. Some jars, referred to as snake jars, move around and release small snakes when broken. | Yes |
 Jellybeam |
Piranha Plant Cove 2 | A jellyfish enemy that floats in place in underwater segments. Players can bump into Jellybeams or hit them with an item to obtain bonus points. They can also land on top of a Jellybeam's head to get a Jump Boost. | Yes |
Jump Boost field |
Wii Rainbow Road R | An upward force that gives drivers a Jump Boost. | Yes (through Jump Boosts) |
| 3DS Rainbow Road R, R/T | |||
| Singapore Speedway 3R/T | |||
| RMX Rainbow Road 2T, R/T | |||
 Kadomatsu |
Most courses | A decorative element that appears on courses during tours that occur around the New Year. Kadomatsu give bonus points when hit with a shell or a Bob-omb or by driving into them while invincible or Mega. | Yes (most New Year's tours) No (New Year's 2021 Tour) |
 Kanaami Road |
Many courses and variants in the game | A type of platform that appears in many of the game's T and R/T courses. They are used to create new routes or ramps for the player to drive on, thus giving them more bonus points. | Yes (through Jump Boosts) |
 Lava Ball |
GBA Lakeside Park, R, T, R/T | An obstacle that bounces down the mountainside, forming craters where it lands. Drivers can use these craters to perform Jump Boosts, but they crash if they come into direct contact with a Lava Ball. | Yes |
 Lava bubble |
GBA Bowser's Castle 1, R, T, R/T | An obstacle that jumps out of lava at regular intervals. Drivers spin out if they collide with a Lava bubble. | Yes |
| GBA Bowser's Castle 2, R, T, R/T | |||
| GBA Bowser's Castle 3, R, T, R/T | |||
| GBA Bowser's Castle 4, R | |||
 Lava Geyser |
GBA Bowser's Castle 4, R | A pillar of lava that rises and lowers at regular intervals. Touching one causes drivers to spin out. | No |
| 3DS Bowser's Castle, R, T, R/T | |||
| RMX Bowser's Castle 1R/T | |||
Leaf pile |
Wii Maple Treeway, R, T, R/T | An object that scatters and releases an item such as a Coin, Mushroom, or Banana when driven into. | Yes |
 Magic carpet |
3DS Shy Guy Bazaar (Do Jump Boosts) | Magic carpets that are not used by Flying Shy Guys can be found floating in one place in mid-air. When a racer lands on a magic carpet, they bounce off of it while receiving a Jump Boost. | TBD |
Maw-Ray |
GCN Daisy Cruiser, T | A large moray eel that swims around a body of water. Maw-Rays acts as minor obstacles that can cause drivers who bump into them to lose some speed, albeit drivers can perform Jump Boosts on a Maw-Ray by landing on top of it. | No |
| Piranha Plant Cove, R, R/T | |||
| Piranha Plant Cove 2, R | |||
| Piranha Plant Cove 3, R, T | |||
 Mecha Cheep |
Squeaky Clean Sprint, R, T, R/T | A Cheep Cheep–like robot that swims around in underwater segments. Like actual Cheep Cheeps, Mecha Cheeps cause drivers who bump into them to simply lose some speed. | Yes |
Mecha Piranha Plant |
GCN Waluigi Stadium, R, R/T | A large, fake Piranha Plant that moves in and out of a Warp Pipe–like slot. Mecha Piranha Plants are indestructible and act as walls upon contact. | No |
 Metal ball |
DS Waluigi Pinball, R, T, R/T | A large rolling obstacle. Metal balls are first seen in the background of the track, traversing the pinball machine that the course is set on. Once they reach the pinball table section, they are bounced around by bumpers and flippers, crashing into any racer that collides with them. | Yes |
| GBA Bowser's Castle 4 | |||
 Monty Mole |
SNES Donut Plains 2, R, T, R/T | A creature that digs holes through the ground. Touching a Monty Mole will spin out drivers while the holes and bumps produced by Monty Moles can be used to perform Jump Boosts. | Yes |
| SNES Donut Plains 3, R, T, R/T | |||
| GBA Sunset Wilds R/T | |||
| DS Peach Gardens, R | |||
| Amsterdam Drift, R, R/T | |||
| Amsterdam Drift 3T | |||
 Mushroom Platform |
GBA Sky Garden (Smash Small Dry Bones) | A large mushroom with a broad cap that acts as normal ground. | Yes (through Jump Boosts) |
| GCN DK Mountain R/T | |||
| DS Shroom Ridge R/T | |||
| Wii Mushroom Gorge, R, T, R/T | |||
 Mushroom Trampoline |
SNES Donut Plains 2R/T | A large mushroom that racers can bounce off of to receive a Jump Boost. Apart from the regular Mushroom Trampolines, which are red with white spots or (as seen in 3DS Rainbow Road) white with spots of various colors, there is also a blue variety which activates a driver's glider when bounced off of. | Yes (through Jump Boosts) |
| SNES Rainbow Road R/T | |||
| N64 Mario Raceway T, R/T | |||
| N64 Royal Raceway T, R/T | |||
| GBA Peach Circuit T, R/T | |||
| GBA Riverside Park T | |||
| GBA Sky Garden, R, R/T | |||
| GBA Lakeside Park T | |||
| GCN DK Mountain R/T | |||
| DS Shroom Ridge R/T | |||
| DS DK Pass R/T | |||
| Wii Mushroom Gorge, R, T, R/T | |||
| Wii Maple Treeway R/T | |||
| 3DS Mario Circuit, R, T, R/T | |||
| 3DS Rainbow Road, R, T, R/T | |||
| RMX Choco Island 1R/T | |||
| RMX Rainbow Road 1R | |||
| RMX Rainbow Road 2, R, T, R/T | |||
| RMX Donut Plains 1T | |||
 Noshi |
N64 Koopa Troopa Beach T, R/T | A dinosaur that stomps on the track. Racers caught under its feet are squashed. When on the ground, the feet also act as walls that bounce racers back. If a racer lands on top of a Noshi while gliding, they get a Jump Boost. | Yes (through Jump Boosts) |
| GBA Riverside Park T, R/T | |||
| GCN Dino Dino Jungle, R, T, R/T | |||
| Tokyo Blur R/T | |||
Note Block |
Squeaky Clean Sprint T, R/T | An object that drivers can bounce on. | Yes (through Jump Boosts) |
Oil slick |
SNES Mario Circuit 1R, R/T | An obstacle that causes any racer who drives into it to spin out. | No |
| SNES Mario Circuit 2, R, T | |||
| SNES Mario Circuit 3, R | |||
| GCN Mushroom Bridge R | |||
| New York Minute (Steer Clear of Obstacles) | |||
| Tokyo Blur 3R | |||
| Tokyo Blur 4, R | |||
| Merry Mountain (Steer Clear of Obstacles) | |||
 Penguin |
SNES Vanilla Lake 1 (Steer Clear of Obstacles) | An enemy that waddles in circular or oval patterns. Players who drive into one spin out. | Yes |
| SNES Vanilla Lake 2 (Steer Clear of Obstacles) | |||
| GBA Snow Land, R, T, R/T | |||
| 3DS Rosalina's Ice World, R, T, R/T | |||
| RMX Vanilla Lake 1, R | |||
 Pipe |
See Warp Pipe § Mario Kart Tour for a list of courses in Mario Kart Tour that feature pipes. | An obstacle that slows down any racer who collides with it. Pipes are spread throughout the track, usually in off-road sections. Piranha Plants and Inky Piranha Plants commonly occupy them, and some trucks carry Piranha Plants in pipes. Some pipes exhale upward currents which can be used to maintain gliding drivers in the air while offering them a Jump Boost. Most pipes found in the game are green and can be launched in the air, giving bonus points when this is done in courses outside of bonus challenges; however, some pipes, such as those seen in the surroundings of DS Shroom Ridge, come in multiple colors and are entirely cosmetic. | Yes |
 Piranha Plant (aggressive) |
See Piranha Plant § Mario Kart Tour for a list of courses in Mario Kart Tour that feature this type of Piranha Plant. | An enemy that attacks nearby drivers by lunging at them. Drivers that are hit by a Piranha Plant spin out. Piranha Plants appear in various sizes. | Yes |
 Piranha Plant (passive) |
See Piranha Plant § Mario Kart Tour for a list of courses in Mario Kart Tour that feature this type of Piranha Plant. | A type of Piranha Plant that lies on the ground, always facing upward. Racers that drive into one spin out. Piranha Plants appear in various sizes. | Yes |
 Pokey |
Wii Dry Dry Ruins, R, T, R/T | A cactus enemy that moves back in forth on the course. Some Pokeys appear taller and bend sideways attempting to spin out racers. | Yes |
Puddle |
GBA Luigi Circuit, R, T | An obstacle that, like oil slicks, causes drivers who contact it to spin out. | No |
| 3DS Neo Bowser City, R, T, R/T | |||
| Squeaky Clean Sprint (Precision Gliding) | |||
 Pumpjack |
Los Angeles Laps 2, R, T, R/T | An obstacle that moves up and down on the track, acting as a wall when racers come into contact with it. | Yes (through Jump Boosts) |
 Ring |
Any course where a Ring Race bonus challenge takes place | An object that provides the driver a short speed boost. | Yes[26] |
| SNES Mario Circuit 1 (Glider Challenge) | |||
| SNES Choco Island 2 (Break Item Boxes) | |||
| 3DS Toad Circuit (Break Item Boxes) | |||
| 3DS Rock Rock Mountain (Break Item Boxes) | |||
 Rocky Wrench |
DS Airship Fortress, R, T, R/T | A creature that emerges from manholes. Racers that touch a Rocky Wrench are bounced away from it, but its manhole cover can be used to perform a Jump Boost right before it pops out. | Yes |
| Wii Daisy Circuit T | |||
| Bangkok Rush T | |||
| Rome Avanti 2, R, T, R/T | |||
| DS Twilight House | |||
 Rolling rock |
N64 Choco Mountain, R, T, R/T | A large obstacle that rolls down on inclines. Colliding with rolling rocks causes racers to be crushed or to spin out. | Yes |
| GCN DK Mountain, R, T, R/T | |||
| 3DS Rock Rock Mountain, T | |||
| Athens Dash 2 | |||
 Sand hill |
Wii Dry Dry Ruins, R | Hills of sand that get larger and fill up the room as the race progresses. | Yes (through Jump Boosts) |
Shoe |
Madrid Drive, R, T, R/T | An object worn by Goombas to protect themselves against drivers' attacks. Shoes also enable these Goombas to kick Soccer Balls around. | Yes |
  Shy Guy (Ninja) |
Ninja Hideaway, R, T, R/T | An enemy that runs around on the ground and transforms into a single Banana. Another variant of this enemy also appears suspended in the air by kites in glider sections. | Yes |
 Sidestepper |
SNES Koopa Troopa Beach 2T | A crab enemy that shuffles from side to side across a track. Racers who come into contact with a Sidestepper spin out. | Yes |
| N64 Koopa Troopa Beach, R, T, R/T | |||
| GBA Cheep-Cheep Island (Steer Clear of Obstacles) | |||
| Wii Koopa Cape (Glider Challenge) | |||
| 3DS Cheep Cheep Lagoon, R, T, R/T | |||
| 3DS Wario Shipyard, R | |||
| Los Angeles Laps, R, T, R/T | |||
| Singapore Speedway 3, R, T | |||
| Piranha Plant Cove 2R | |||
| Yoshi's Island, R | |||
| Piranha Plant Pipeline | |||
 Skating Shy Guy |
GBA Snow Land R | A Shy Guy that spins out the player when touched. In the R variant on Vancouver Velcocity 2 and the normal and T variants of Vancouver Velocity 3, Skating Shy Guys move around on the ice; in the T variant of Vancouver Velocity 2 they twirl around in one spot; and in the normal and R variants of Vancouver Velocity 3, there are a few that stand in place as spectators. | Yes |
| Vancouver Velocity 2R, T | |||
| Vancouver Velocity 3, R, T | |||
 Snow block |
SNES Vanilla Lake 1, R, R/T | An object that, when touched, bounces racers away and disappears. | Yes |
| SNES Vanilla Lake 2, R, T, R/T | |||
| Vancouver Velocity 3R | |||
 Snowball |
N64 Frappe Snowland (Steer Clear of Obstacles) | A large obstacle that rolls down a portion of the track. Racers hit by a snowball crash. | Yes |
| DS DK Pass, R, T, R/T | |||
| Merry Mountain (Steer Clear of Obstacles) | |||
 Snowboarding Shy Guy |
Wii DK Summit, R | A Shy Guy riding on a snowboard, jumping off the half-pipes on the track. Racers spin out if they touch a Snowboarding Shy Guy without a defensive or speed boosting item. | Yes |
 Snowperson |
N64 Frappe Snowland, R, T, R/T | An obstacle that slows down drivers who collide with it. However, this also gets them destroyed in the process. | Yes |
| GBA Snow Land, T, R/T | |||
| DS DK Pass, R, T, R/T | |||
| Wii DK Summit (Ring Race) | |||
| Vancouver Velocity R | |||
| Merry Mountain (Coin Rush), R/T | |||
Soccer Ball |
Madrid Drive, R, T, R/T | An object that gets kicked around by Goombas in shoes. Drivers who interact with a Soccer Ball in any way obtain bonus points. | Yes |
 Spider Web |
Piranha Plant Pipeline, R | An obstacle that breaks and slows drivers down on contact. | Yes |
 Spring egg |
SNES Choco Island 1, R, T, R/T | Spring eggs appeared in some courses during the 2023 Yoshi Tour. When a player hits one with an item, it gives them bonus points. | Yes |
| GBA Boo Lake, R, T, R/T | |||
| Yoshi's Island, R, T, R/T | |||
 Star Ring |
SNES Rainbow Road R/T | An object that gives drivers a speed boost when passed through. | Yes |
| Wii Rainbow Road, R, T, R/T | |||
| 3DS Rainbow Road, R, T, R/T | |||
| RMX Rainbow Road 1, R | |||
| RMX Rainbow Road 2T, R/T | |||
 Star Thwomp |
SNES Mario Circuit 3 (Glider Challenge) | A variation of a Thwomp that creates ripples on the track, which racers can perform Jump Boosts on. In addition to being able to squash drivers like regular Thwomps, Star Thwomps cause drivers to flip out when touched from any side. | Yes |
| SNES Rainbow Road, R, R/T | |||
| GBA Bowser's Castle 1 (Steer Clear of Obstacles) | |||
| Wii Rainbow Road R/T | |||
| 3DS Rainbow Road (Glider Challenge) | |||
| RMX Rainbow Road 1, R | |||
| RMX Rainbow Road 2, R, R/T | |||
 Stilt Guy |
Yoshi's Island, R, T, R/T | A Shy Guy walking on stilts. Drivers who run into the stilts spin out. | Yes |
 Swoop |
N64 Choco Mountain, R, T, R/T | A bat enemy that flies in a row of other Swoops along a certain portion of the track, usually coming the opposite way of racers. Racers that bump into a Swoop are bounced away. | Yes |
| GBA Sunset Wilds, R, T | |||
| Wii Dry Dry Ruins R | |||
| 3DS Rock Rock Mountain, R, T | |||
| Tokyo Blur R/T | |||
| Vancouver Velocity, R, T, R/T | |||
| Vancouver Velocity 3, R, T, R/T | |||
| Athens Dash, R, R/T | |||
| Rome Avanti, R, T | |||
 Table |
GCN Daisy Cruiser, R, T, R/T | An obstacle that slides on the track from side to side, slowing down drivers that collide with it. | Yes |
 Thwomp |
SNES Mario Circuit 3 (Do Jump Boosts) | An obstacle that falls down on the track repeatedly, squashing any drivers caught underneath. If a racer drives into a Thwomp, they lose some speed. When a racer drives off of a ramp and lands on a Thwomp, they get a Jump Boost. | Yes |
| SNES Bowser Castle 3, R, T | |||
| GBA Bowser's Castle 1, R, T, R/T | |||
| GBA Bowser's Castle 2, R, T, R/T | |||
| GBA Snow Land (Glider Challenge), R/T | |||
| GBA Bowser's Castle 3, R, T, R/T | |||
| GBA Bowser's Castle 4, R | |||
| Wii Coconut Mall (Steer Clear of Obstacles) | |||
| 3DS Bowser's Castle, R, T, R/T | |||
| Tokyo Blur 2, R, R/T | |||
| Tokyo Blur 3, R/T | |||
| Tokyo Blur 4, R, R/T | |||
| Los Angeles Laps T | |||
| Berlin Byways, R, T, R/T | |||
| Berlin Byways 2 (Steer Clear of Obstacles), R/T | |||
| Piranha Plant Cove, R, T, R/T | |||
| Athens Dash 2, R, T | |||
| RMX Bowser's Castle 1, R, R/T | |||
 Traffic cone |
SNES Mario Circuit 1 (Do Jump Boosts), R, R/T | An object that gets knocked away when bumped into. | Yes |
| SNES Ghost Valley 2 (Glider Challenge) | |||
| SNES Vanilla Lake 1 (Steer Clear of Obstacles) | |||
| N64 Royal Raceway (Steer Clear of Obstacles) | |||
| GBA Bowser's Castle 1R | |||
| GBA Cheep-Cheep Island R/T | |||
| GCN Mushroom Bridge R | |||
| GCN Yoshi Circuit (Steer Clear of Obstacles) | |||
| GCN Dino Dino Jungle (Steer Clear of Obstacles) | |||
| DS DK Pass (Do Jump Boosts, Steer Clear of Obstacles) | |||
| DS Peach Gardens T | |||
| Wii DK Summit R/T | |||
| Wii Daisy Circuit, R, T, R/T | |||
| 3DS Toad Circuit, R, R/T | |||
| 3DS Daisy Hills R, R/T | |||
| 3DS Rock Rock Mountain, T | |||
| 3DS Neo Bowser City (Do Jump Boosts, Steer Clear of Obstacles), R, R/T | |||
| 3DS Rosalina's Ice World (Glider Challenge), R, R/T | |||
| 3DS Rainbow Road R, R/T | |||
| New York Minute (Steer Clear of Obstacles), R | |||
| New York Minute 3R | |||
| Tokyo Blur (Ring Race) | |||
| Tokyo Blur 3, R, T | |||
| Tokyo Blur 4, R | |||
| Paris Promenade, R, T | |||
| Paris Promenade 2, R, T | |||
| Paris Promenade 3 | |||
| London Loop 2 (Steer Clear of Obstacles) | |||
| Vancouver Velocity 2R, R/T | |||
| Los Angeles Laps R | |||
| Berlin Byways 2, T | |||
| Bangkok Rush 2, R, T, R/T | |||
| Amsterdam Drift T | |||
| Amsterdam Drift 3T | |||
| Athens Dash, R, T, R/T | |||
| Rome Avanti 2, R, T | |||
| RMX Mario Circuit 1R/T | |||
| RMX Choco Island 1 (Do Jump Boosts) | |||
| Merry Mountain (Coin Rush) | |||
  Train |
N64 Kalimari Desert, R, T, R/T | Trains cross the track in front of racers in N64 Kalimari Desert and N64 Kalimari Desert 2. In Amsterdam Drift, there are two types of trains: one that moves back and forth in the city area and one that travels through a viaduct between the Amsterdam and Zaanse Schans portions. If racers drive into a train, they are thrown upward and receive a Jump Boost. | Yes |
| N64 Kalimari Desert 2, R, T, R/T | |||
| Amsterdam Drift, R, T, R/T | |||
| Amsterdam Drift 3, R, T | |||
  Truck |
DS Shroom Ridge, R, R/T | A vehicle that moves along a course. Most trucks drag along surfboards which drivers can perform Jump Boosts off of, while one truck found in Berlin Byways 3 carries a Piranha Plant that lunges at passers-by. In the course's R variant, trucks do not have any cargo. Bangkok Rush 3 features stationary trucks with surfboards. In Wii Coconut Mall, they appear in the background in the parking lot. | Yes |
| Wii Coconut Mall, R, T, R/T | |||
| Berlin Byways 3, R, T | |||
| Bangkok Rush 3 | |||
 Turning Floor |
3DS Bowser's Castle, R, T, R/T | A rotating wooden tunnel that appears before the underwater section in 3DS Bowser's Castle. The tunnel's top features several objects that block the player when ran into. In 3DS Rainbow Road, a Turning Floor appears after the start of the final section that has several Dash Panels and Glide Ramps inside of it. | Yes (through Jump Boosts) |
| 3DS Rainbow Road, R | |||
| Yoshi's Island T | |||
 Walking Tree |
DS Luigi's Mansion, R, T, R/T | An obstacle that shuffles from side to side on the track. If racers drive into one, they lose speed. | No |
  Water Geyser |
GBA Snow Land T | A hazard that periodically spouts a column of water. Racers caught by the water are sprung high into the air while doing a Jump Boost. In the New York Minute courses and in Bangkok Rush 3T, water erupts from underneath manhole covers, while in GCN Dino Dino Jungle, 3DS Wario Shipyard T, and RMX Vanilla Lake 1, it emerges from raised cracks in the road. Jump Boosts can be performed when driving over these cracks, while they are only performed over manhole covers when they are shaking. | Yes (through Jump Boosts) |
| GBA Lakeside Park R/T | |||
| GCN Daisy Cruiser R/T | |||
| GCN Dino Dino Jungle, R, T, R/T | |||
| Wii Coconut Mall R/T | |||
| Wii Koopa Cape (Ring Race) | |||
| 3DS Wario Shipyard T, R/T | |||
| New York Minute, T | |||
| New York Minute 2, R, R/T | |||
| New York Minute 3, T | |||
| New York Minute 4, R, T, R/T | |||
| Tokyo Blur (Do Jump Boosts) | |||
| Paris Promenade (Do Jump Boosts) | |||
| Singapore Speedway 2, R | |||
| Singapore Speedway 3R/T | |||
| Bangkok Rush T | |||
| Bangkok Rush 3T | |||
| Squeaky Clean Sprint, R, T, R/T | |||
| RMX Vanilla Lake 1, R, T | |||
| RMX Donut Plains 1R/T | |||
 Whomp |
Berlin Byways, R, T, R/T | An obstacle that falls onto the track, squashing drivers caught underneath it. When a Whomp is lying flat on the ground, drivers can perform Jump Boosts on it. | Yes |
| Berlin Byways 2 (Steer Clear of Obstacles) | |||
| Madrid Drive 3R | |||
 Wiggler |
DS Shroom Ridge T | An enemy that wanders around, occasionally stopping in place. They cause drivers who touch them to spin out. | Yes |
| Wii Maple Treeway, R, T, R/T | |||
 Wiggler Wagon |
GCN Mushroom Bridge, T | A large green bus designed after the Wiggler from Super Mario Sunshine. It moves along the road with other vehicles. When racers drive into a Wiggler Wagon, they simply lose some speed, and when they land on it, they get a Jump Boost. | Yes |
  Wind |
Any course where a Glider Challenge bonus challenge takes place | An air current released from pipes and fans. Wind pushes racers around, giving them a Jump Boost if it travels upwards. | Yes (through Jump Boosts) |
| SNES Mario Circuit 1R, R/T | |||
| SNES Ghost Valley 1 (Do Jump Boosts) | |||
| SNES Bowser Castle 3T | |||
| N64 Luigi Raceway (Goomba Takedown) | |||
| N64 Koopa Troopa Beach R/T | |||
| N64 Mario Raceway R/T | |||
| GBA Peach Circuit (Steer Clear of Obstacles) | |||
| GBA Boo Lake T | |||
| GBA Bowser's Castle 2T | |||
| GBA Luigi Circuit T, R/T | |||
| GBA Sky Garden R | |||
| GCN DK Mountain T | |||
| DS Luigi's Mansion (Glider Challenge) | |||
| DS Shroom Ridge T | |||
| DS Mario Circuit T | |||
| DS DK Pass R/T | |||
| DS Peach Gardens T | |||
| Wii Koopa Cape (Do Jump Boosts), R/T | |||
| Wii Maple Treeway T | |||
| 3DS Daisy Hills R | |||
| 3DS Shy Guy Bazaar R, T | |||
| 3DS Mario Circuit | |||
| 3DS Rock Rock Mountain R, T | |||
| 3DS Neo Bowser City, T, R/T | |||
| Tokyo Blur (Do Jump Boosts) | |||
| Vancouver Velocity 2R/T | |||
| Vancouver Velocity 3R/T | |||
| Ninja Hideaway, R | |||
| Singapore Speedway | |||
| Amsterdam Drift T | |||
| Amsterdam Drift 3R/T | |||
| Athens Dash R/T | |||
| Athens Dash 2R/T | |||
| Rome Avanti T | |||
| Piranha Plant Pipeline T | |||
| Squeaky Clean Sprint T | |||
 Windmill |
3DS Daisy Hills, R, T, R/T | A large structure with rotating blades that act as walls for racers, mostly during gliding segments. | No |
| Amsterdam Drift, R, T, R/T | |||
 Winged Cloud |
Yoshi's Island, T | A flying object that, when run into, causes an additional pathway to spawn ahead. The pathway acts as a shortcut towards the finish line and helps drivers reach a Goal Ring. | Yes |
 Wooden cutout (Piranha Plant) |
GBA Bowser's Castle 2R/T | A stationary obstacle that can be destroyed by driving through it. This also causes a driver to spin out. In GBA Bowser's Castle 2R/T, GCN Yoshi Circuit, Wii Maple Treeway R, 3DS Piranha Plant Slide T, Paris Promenade, Paris Promenade 2, Ninja Hideaway, Paris Promenade 3 and Los Angeles Laps 3R, wooden cutouts are made to resemble Piranha Plants, in SNES Ghost Valley 1 and DS Luigi's Mansion, they resemble Boos, in the normal and R variants of 3DS Piranha Plant Slide, they resemble Goombas, and the normal variant of 3DS Piranha Plant Slide exclusively has wooded cutouts that resemble bushes. | Yes |
| GCN Yoshi Circuit, R, T | |||
| Wii Daisy Circuit, T | |||
| Wii Maple Treeway R | |||
| 3DS Piranha Plant Slide T, R/T | |||
| Paris Promenade | |||
| Paris Promenade 2, R, T | |||
| Paris Promenade 3 | |||
| Vancouver Velocity 2 (Glider Challenge) | |||
| Los Angeles Laps (Ring Race) | |||
| Los Angeles Laps 3R, T, R/T | |||
| Ninja Hideaway, R, T | |||
 Wooden cutout (Boos) |
SNES Ghost Valley 1, R, T, R/T | ||
| SNES Ghost Valley 2, R, T | |||
| DS Luigi's Mansion, R, T, R/T | |||
 Wooden cutout (Goomba) |
3DS Piranha Plant Slide, R | ||
| Athens Dash 2, R | |||
 Wooden cutout (bush) |
3DS Piranha Plant Slide, R/T |
Other course elements
The following are only seen as background or intangible elements.
| Subject | Location | Description |
|---|---|---|
 Big Cheep Cheep |
GBA Cheep-Cheep Island, R, T, R/T | A Cheeps Cheep that swims and leaps in the sea. |
 Boo |
SNES Ghost Valley 1, R, T, R/T | Boos appear and disappear. In DS Luigi's Mansion, they also appear on paintings, of which they occasionally stretch out. |
| SNES Ghost Valley 2, R, T, R/T | ||
| GBA Boo Lake, R, T, R/T | ||
| DS Luigi's Mansion, R, T, R/T | ||
| RMX Ghost Valley 1, R, T, R/T | ||
 Bulber |
Piranha Plant Cove, R, T, R/T | An anglerfish that floats in place. Some Bulbers are found above the starting line in the first and third variants of Piranha Plant Cove. |
| Piranha Plant Cove 2, R, T, R/T | ||
| Piranha Plant Cove 3, R, T, R/T | ||
Fish Bone |
N64 Choco Mountain, R, T, R/T | Inanimate Fish Bones of various sizes are embedded in a wall at a curve. Unlike the Fish Bones found in other courses, these cannot be interacted with. |
Flying Train |
3DS Rainbow Road (Ring Race, Glider Challenge) | A train that circulates around a track. In 3DS Rainbow Road bonus challenges, such trains fly around dropping rings on the track or carrying Star Rings that can be glided through. In Merry Mountain, a sleigh-like train drops coins on the track. |
| Merry Mountain, R, T, R/T | ||
 Goonie |
Yoshi's Island, R, T, R/T | A flock of Goonies fly near the snowy segment of the course. |
 Huffin Puffin |
Yoshi's Island, R, T, R/T | A group of Huffin Puffins stand on the sidelines in the fields segment of the course. |
 Incoming Chomp |
Yoshi's Island, R, T, R/T | A Chain Chomp relative that moves by bouncing around. Incoming Chomps can be seen in various areas in the background. |
 Nep-Enut |
Yoshi's Island, R, T, R/T | A large water creature roaming back and forth in the ocean |
 Painting |
DS Luigi's Mansion (Break Item Boxes) | A floating portal-like painting that spawns in front of drivers and produces Item Boxes. Portal paintings appear in various sizes. |
| RMX Ghost Valley 1 (Break Item Boxes) | ||
 Petal Guy |
Yoshi's Island, R, T, R/T | A Shy Guy with flowers on its head. Several Petal Guys act as spectators in the fields segment of the course. |
 Pipe |
N64 Luigi Raceway, R, T, R/T | While most pipes in the game have an effect on gameplay, some fulfill an entirely cosmetic purpose. These are typically multicolored and are seen in a course's surroundings. In 3DS Wario Shipyard and its variants, such pipes produce currents underwater. |
| N64 Mario Raceway, R, T, R/T | ||
| GBA Peach Circuit, R, T, R/T | ||
| DS Shroom Ridge, R, T, R/T | ||
| DS Mario Circuit, R, T, R/T | ||
| 3DS Mario Circuit, R, T, R/T | ||
| 3DS Wario Shipyard, R, T, R/T | ||
| Piranha Plant Pipeline, R, T, R/T | ||
 Snake |
3DS Shy Guy Bazaar, R, T, R/T | Green snakes come out of snake jars upon breaking them. Given the theme of 3DS Shy Guy Bazaar, they may be a reference to Cobrats from Super Mario Bros. 2, who also hide in jars. |
   Star Bits |
Wii Rainbow Road, R, T, R/T | Colorful objects that float around the track. |
 Vase |
Yoshi's Island, R, T, R/T | Two vases decorate the window sills in the castle segment of the course. |
Bonus challenges
Bonus challenges are similar to the Missions mode from Mario Kart DS and the tournaments from Mario Kart Wii, and are found at the end of each cup. In contrast to races, these challenges offer 3 Grand Stars instead of 5 when completed with the highest score needed. The game will set the character for the challenge, even if the player has not obtained them yet, and give them the Pipe Frame and the Super Glider, though this rule does not apply for all Big Reverse Races and Vs. Mega (opponent) challenges. The numbers in the table indicate the number of times that bonus challenge appears in each tour.
| Ready, Set, Rocket Start | Time Trial | Ring Race | Do Jump Boosts | Big Reverse Race | Goomba Takedown | Glider Challenge | Steer Clear of Obstacles | Break Item Boxes | Smash Small Dry Bones | Vs. Mega (opponent) | Combo Attack | Take them out quick! | Snap a Photo | Precision Gliding | Big Reverse Race vs. 100 | |
|---|---|---|---|---|---|---|---|---|---|---|---|---|---|---|---|---|
| Description | "Pull off a Rocket Start!" | "Go for your best time!" | "Pass through rings!"1 | "Do Jump Boosts!"2 | "Aim for 1st!" | "Take down Goombas!"3 | "Glide as far as you can!"4 | "Don't crash!" | "Break item boxes!"5 | "Smash Dry Bones!"6 | "Aim for 1st!" | "Keep the combo going!" | "Take them out quick!" | "Clear the photo goals!" | "Glide through the targets!" | "Aim for 1st place!" |
| New York Tour | 1 | 3 | 2 | 1 | 2 | 1 | 2 | 1 | 1 | 2 | ||||||
| Tokyo Tour | 1 | 2 | 3 | 1 | 2 | 1 | 1 | 2 | 1 | 2 | ||||||
| Halloween Tour (2019) | 3 | 2 | 3 | 1 | 1 | 1 | 1 | 1 | 1 | 2 | ||||||
| Paris Tour (2019) | 3 | 3 | 2 | 1 | 3 | 1 | 1 | 1 | 1 | 2 | ||||||
| Winter Tour (2019) | 3 | 2 | 2 | 1 | 2 | 1 | 2 | 2 | 1 | 2 | ||||||
| London Tour | 3 | 2 | 2 | 1 | 3 | 1 | 1 | 2 | 1 | 2 | ||||||
| Holiday Tour (2019) | 2 | 2 | 1 | 1 | 2 | 1 | 2 | 2 | 1 | 2 | 2 | |||||
| New Year's Tour (2020) | 1 | 1 | 2 | 2 | 1 | 2 | 1 | 1 | 2 | 1 | 2 | 2 | ||||
| Ice Tour | 2 | 2 | 2 | 1 | 1 | 1 | 2 | 2 | 1 | 2 | 2 | |||||
| Valentine's Tour | 2 | 2 | 2 | 1 | 2 | 1 | 1 | 2 | 1 | 2 | 2 | |||||
| Vancouver Tour | 2 | 3 | 2 | 1 | 2 | 1 | 2 | 1 | 2 | 2 | ||||||
| Mario Bros. Tour | 2 | 2 | 2 | 1 | 2 | 1 | 2 | 1 | 1 | 2 | 2 | |||||
| Baby Rosalina Tour | 1 | 1 | 1 | 1 | 1 | 1 | 1 | 1 | 1 | 1 | 2 | |||||
| Hammer Bro Tour | 2 | 1 | 1 | 1 | 1 | 1 | 1 | 1 | 1 | 1 | 1 | |||||
| Yoshi Tour (2020) | 2 | 1 | 1 | 1 | 1 | 1 | 1 | 1 | 1 | 1 | 1 | |||||
| Trick Tour (2020) | 2 | 1 | 1 | 1 | 1 | 2 | 1 | 1 | 1 | 1 | ||||||
| Flower Tour | 1 | 1 | 1 | 1 | 2 | 2 | 1 | 1 | 1 | 1 | ||||||
| Jungle Tour | 1 | 1 | 1 | 1 | 1 | 2 | 2 | 1 | 1 | 1 | ||||||
| Cooking Tour | 2 | 1 | 1 | 1 | 1 | 1 | 1 | 1 | 1 | 1 | 1 | |||||
| Peach Tour | 2 | 1 | 1 | 1 | 1 | 1 | 1 | 1 | 1 | 1 | 1 | |||||
| Marine Tour | 2 | 2 | 1 | 1 | 1 | 1 | 1 | 1 | 1 | 1 | ||||||
| Exploration Tour (2020) | 2 | 1 | 1 | 1 | 1 | 1 | 1 | 1 | 1 | 1 | 1 | |||||
| Wild West Tour | 2 | 1 | 1 | 1 | 1 | 1 | 1 | 1 | 1 | 1 | 1 | |||||
| Pirate Tour | 2 | 1 | 1 | 1 | 2 | 1 | 1 | 1 | 1 | 1 | ||||||
| Summer Festival Tour | 2 | 1 | 1 | 1 | 1 | 1 | 1 | 1 | 1 | 1 | 1 | |||||
| Super Mario Kart Tour | 2 | 2 | 1 | 1 | 1 | 1 | 1 | 1 | 1 | 1 | ||||||
| Los Angeles Tour (2020) | 1 | 1 | 1 | 1 | 2 | 1 | 1 | 1 | 1 | 1 | 1 | |||||
| 1st Anniversary Tour | 1 | 1 | 1 | 1 | 2 | 1 | 1 | 1 | 1 | 1 | 1 | |||||
| Halloween Tour (2020) | 2 | 1 | 1 | 1 | 1 | 1 | 1 | 1 | 1 | 1 | 1 | |||||
| Sunset Tour | 2 | 1 | 1 | 1 | 1 | 1 | 1 | 1 | 1 | 1 | 1 | |||||
| Mario vs. Luigi Tour (2020) | 2 | 2 | 2 | 1 | 1 | 1 | 1 | 1 | 1 | |||||||
| Winter Tour (2020) | 2 | 2 | 1 | 1 | 1 | 1 | 1 | 1 | 1 | 1 | ||||||
| Rosalina Tour | 2 | 1 | 2 | 1 | 1 | 1 | 1 | 1 | 1 | 1 | ||||||
| New Year's 2021 Tour | 2 | 1 | 1 | 1 | 1 | 1 | 1 | 1 | 1 | 1 | 1 | |||||
| Berlin Tour | 2 | 1 | 2 | 1 | 1 | 1 | 1 | 1 | 1 | 1 | ||||||
| Cat Tour (2021) | 2 | 1 | 1 | 1 | 1 | 1 | 1 | 1 | 1 | 1 | 1 | |||||
| Peach vs. Daisy Tour | 3 | 1 | 1 | 1 | 1 | 1 | 1 | 1 | 2 | |||||||
| Snow Tour | 2 | 1 | 1 | 1 | 1 | 1 | 1 | 1 | 1 | 1 | 1 | |||||
| Mario Tour (2021) | 3 | 1 | 1 | 1 | 1 | 1 | 1 | 1 | 1 | 1 | ||||||
| Yoshi Tour (2021) | 2 | 1 | 1 | 1 | 1 | 1 | 1 | 1 | 1 | 1 | 1 | |||||
| Ninja Tour (2021) | 2 | 1 | 1 | 1 | 1 | 1 | 1 | 1 | 1 | 1 | 1 | |||||
| Sydney Tour (April–May 2021) | 2 | 1 | 1 | 1 | 1 | 1 | 1 | 1 | 1 | 1 | 1 | |||||
| Bowser vs. DK Tour | 3 | 2 | 1 | 1 | 1 | 1 | 1 | 1 | 1 | |||||||
| Trick Tour (2021) | 3 | 1 | 1 | 1 | 1 | 1 | 1 | 1 | 1 | 1 | ||||||
| Wedding Tour | 2 | 1 | 1 | 1 | 1 | 1 | 1 | 1 | 1 | 1 | 1 | |||||
| Paris Tour (2021) | 3 | 1 | 1 | 1 | 1 | 1 | 1 | 1 | 1 | 1 | ||||||
| Summer Tour (2021) | 2 | 2 | 1 | 1 | 1 | 1 | 1 | 1 | 1 | 1 | ||||||
| Los Angeles Tour (2021) | 2 | 1 | 1 | 1 | 1 | 1 | 1 | 1 | 1 | 1 | 1 | |||||
| Mario vs. Peach Tour | 2 | 1 | 1 | 2 | 1 | 1 | 1 | 1 | 1 | 1 | ||||||
| Frost Tour | 2 | 1 | 1 | 1 | 1 | 1 | 1 | 1 | 1 | 1 | 1 | |||||
| Kamek Tour | 2 | 1 | 1 | 1 | 1 | 1 | 1 | 1 | 1 | 1 | 1 | |||||
| Sydney Tour (September 2021) | 2 | 1 | 1 | 1 | 2 | 1 | 1 | 1 | 1 | 1 | ||||||
| 2nd Anniversary Tour | 2 | 1 | 1 | 1 | 1 | 1 | 1 | 1 | 1 | 1 | 1 | |||||
| Autumn Tour (2021) | 2 | 1 | 1 | 1 | 1 | 1 | 1 | 1 | 1 | 1 | 1 | |||||
| Halloween Tour (2021) | 2 | 1 | 1 | 1 | 1 | 1 | 1 | 1 | 1 | 1 | 1 | |||||
| Toad vs. Toadette Tour | 3 | 1 | 1 | 1 | 1 | 1 | 1 | 1 | 1 | 1 | ||||||
| Space Tour (2021) | 2 | 1 | 1 | 1 | 1 | 1 | 1 | 1 | 1 | 1 | 1 | |||||
| Holiday Tour (2021) | 2 | 1 | 1 | 1 | 1 | 1 | 1 | 1 | 1 | 1 | 1 | |||||
| Penguin Tour | 2 | 1 | 1 | 1 | 1 | 1 | 1 | 1 | 1 | 1 | 1 | |||||
| New Year's 2022 Tour | 3 | 1 | 1 | 1 | 1 | 1 | 1 | 1 | 1 | 1 | ||||||
| Singapore Tour | 2 | 1 | 1 | 1 | 1 | 1 | 1 | 1 | 1 | 1 | 1 | |||||
| Wario vs. Waluigi Tour | 2 | 1 | 1 | 2 | 1 | 1 | 1 | 1 | 1 | 1 | ||||||
| Los Angeles Tour (2022) | 2 | 1 | 2 | 1 | 1 | 1 | 1 | 1 | 1 | 1 | ||||||
| Sky Tour | 1 | 1 | 1 | 1 | 2 | 1 | 1 | 1 | 1 | 1 | 1 | |||||
| Mii Tour (2022) | 2 | 3 | 1 | 1 | 1 | 1 | 1 | 1 | 1 | |||||||
| Samurai Tour | 2 | 1 | 1 | 1 | 1 | 1 | 1 | 1 | 1 | 1 | 1 | |||||
| Yoshi Tour (2022) | 2 | 1 | 1 | 1 | 1 | 1 | 1 | 1 | 1 | 1 | 1 | |||||
| Amsterdam Tour | 2 | 1 | 1 | 1 | 1 | 1 | 1 | 1 | 1 | 1 | 1 | |||||
| Doctor Tour (2022) | 2 | 1 | 1 | 1 | 1 | 1 | 1 | 1 | 1 | 1 | 1 | |||||
| Peach vs. Bowser Tour (May 2022) | 2 | 1 | 1 | 2 | 1 | 2 | 1 | 1 | 1 | |||||||
| Cat Tour (2022) | 2 | 1 | 1 | 1 | 1 | 1 | 1 | 1 | 1 | 1 | 1 | |||||
| Metropolitan Tour | 2 | 1 | 1 | 1 | 1 | 1 | 1 | 1 | 1 | 1 | 1 | |||||
| Bangkok Tour | 2 | 1 | 1 | 1 | 1 | 1 | 1 | 1 | 1 | 1 | 1 | |||||
| Piranha Plant Tour | 1 | 1 | 1 | 1 | 1 | 1 | 1 | 1 | 1 | 1 | 1 | 1 | ||||
| Ocean Tour | 1 | 2 | 1 | 1 | 1 | 1 | 1 | 1 | 1 | 1 | 1 | |||||
| Sundae Tour (2022) | 2 | 1 | 1 | 1 | 1 | 1 | 1 | 1 | 1 | 1 | 1 | |||||
| Bowser Tour (2022) | 2 | 1 | 1 | 1 | 1 | 1 | 1 | 1 | 1 | 1 | 1 | |||||
| Mario vs. Luigi Tour (2022) | 3 | 1 | 1 | 1 | 1 | 1 | 1 | 1 | 1 | 1 | ||||||
| Anniversary Tour (2022) | 2 | 2 | 1 | 1 | 1 | 1 | 1 | 1 | 1 | 1 | 1 | |||||
| Battle Tour | 2 | 1 | 1 | 1 | 1 | 1 | 2 | 1 | 1 | 1 | 1 | 1 | 1 | |||
| Halloween Tour (2022) | 1 | 1 | 2 | 1 | 2 | 1 | 1 | 1 | 2 | 1 | 1 | 1 | ||||
| Autumn Tour (2022) | 2 | 2 | 2 | 1 | 1 | 1 | 1 | 1 | 1 | 1 | 2 | |||||
| Animal Tour | 2 | 2 | 1 | 1 | 1 | 1 | 2 | 1 | 1 | 1 | 1 | 1 | ||||
| Peach vs. Bowser Tour (November–December 2022) | 3 | 1 | 1 | 1 | 2 | 1 | 1 | 1 | 2 | 1 | 1 | |||||
| Holiday Tour (2022) | 2 | 1 | 1 | 1 | 2 | 1 | 2 | 1 | 1 | 1 | 1 | 1 | ||||
| New Year's Tour (2023) | 2 | 2 | 1 | 1 | 2 | 1 | 2 | 1 | 1 | 1 | 1 | |||||
| Space Tour (2023) | 2 | 2 | 1 | 1 | 1 | 1 | 1 | 1 | 2 | 1 | 1 | 1 | ||||
| Winter Tour (2023) | 3 | 2 | 1 | 1 | 1 | 1 | 1 | 1 | 1 | 1 | 1 | 1 | ||||
| Exploration Tour (2023) | 2 | 1 | 1 | 1 | 1 | 2 | 2 | 1 | 1 | 1 | 1 | 1 | ||||
| Doctor Tour (2023) | 2 | 1 | 1 | 1 | 2 | 2 | 1 | 1 | 1 | 1 | 1 | 1 | ||||
| Mario Tour (2023) | 2 | 1 | 1 | 1 | 2 | 1 | 1 | 1 | 1 | 1 | 1 | 1 | 1 | |||
| Ninja Tour (2023) | 2 | 2 | 2 | 1 | 2 | 1 | 2 | 1 | 1 | 1 | 1 | |||||
| Yoshi Tour (2023) | 2 | 1 | 1 | 1 | 1 | 1 | 1 | 1 | 2 | 1 | 1 | 1 | 1 | |||
| Spring Tour | 2 | 1 | 1 | 1 | 1 | 2 | 2 | 1 | 1 | 1 | 1 | 1 | ||||
| Bowser Tour (2023) | 2 | 1 | 1 | 1 | 2 | 1 | 2 | 1 | 1 | 1 | 1 | 1 | ||||
| Mii Tour (2023) | 2 | 1 | 1 | 1 | 1 | 2 | 2 | 1 | 1 | 1 | 1 | 1 | ||||
| Princess Tour | 2 | 2 | 1 | 1 | 1 | 1 | 2 | 1 | 1 | 1 | 1 | 1 | ||||
| Mario vs. Luigi Tour (2023) | 1 | 1 | 1 | 1 | 2 | 1 | 1 | 2 | 1 | 1 | 1 | 1 | 1 | |||
| Night Tour | 3 | 1 | 1 | 1 | 2 | 1 | 2 | 1 | 1 | 1 | 1 | 1 | ||||
| Pipe Tour | 2 | 1 | 2 | 1 | 1 | 1 | 1 | 2 | 1 | 2 | 1 | |||||
| Sunshine Tour | 2 | 2 | 1 | 1 | 2 | 1 | 1 | 1 | 1 | 1 | 1 | 1 | ||||
| Vacation Tour | 3 | 1 | 2 | 1 | 1 | 1 | 1 | 1 | 1 | 1 | 1 | 1 | ||||
| Summer Tour (2023) | 3 | 2 | 2 | 1 | 1 | 2 | 1 | 1 | 1 | 1 | 1 | |||||
| Sundae Tour (2023) | 2 | 2 | 1 | 1 | 1 | 2 | 1 | 1 | 1 | 1 | 1 | 1 |
1 - Formerly "Clear (number) rings."
2 - Formerly "Do (number) Jump Boosts."
3 - Formerly "Hit (number) Goombas."
4 - Formerly "Glide at least (distance)."
5 - Formerly "Hit (number) Item Boxes."
6 - Formerly "Smash (number) opponents."
Apple Store demo
A special demo of Mario Kart Tour was made playable at Apple Store outlets and kiosks.[27] Unlike in the full consumer version, the menu and Coin Rush mode are inaccessible, and points cannot be saved when the player quits the app. Additionally, there are only three cups available:
Toad Cup |
New York Minute |
3DS Toad Circuit |
N64 Koopa Troopa Beach |
Do Jump Boosts Yoshi, New York Minute |
|---|---|---|---|---|
Mario Cup |
Tokyo Blur |
3DS Cheep Cheep Lagoon |
3DS Rock Rock Mountain |
Goomba Takedown Mario, Tokyo Blur |
Peach Cup |
Paris Promenade |
3DS Daisy Hills |
3DS Shy Guy Bazaar |
Vs. Mega Bowser Any character, Paris Promenade |
There are only 10 drivers, 7 karts, and 6 gliders available in the demo:
| Drivers | Karts | Gliders |
|---|---|---|
Differences in power-saving mode
There are some minor and major differences in the game's menus and race courses when it is set to "power-saving" mode, to maintain device performance (in older supported phone models) and decrease battery usage.
- General differences
- Opponents do not have any animations nor do they emit voices.
- The minimap does not appear in races.
- The models for the drivers have low quality textures.
- Course textures are less detailed.
- The sound effect of passing through Dash Rings is present only if they were activated by the player.
- The Shy Guys, Yoshis, and Toads that are normally found along the sidelines of several courses are absent, though they can still be heard.
- The screen has a lower resolution, resulting in slightly pixelated graphics.
- Trees are swapped out for lower-detail models.
- In some courses, models adding extra detail get removed. This is particularly noticeable in Tokyo Blur right after passing the National Diet Building, where every building in the background except for one is removed.
- Course-specific differences
- In SNES Ghost Valley 1, SNES Ghost Valley 2, DS Luigi's Mansion, and RMX Ghost Valley 1, the decorative Boos in the sky are absent.
- In SNES Choco Island 1, SNES Choco Island 2, GBA Sunset Wilds, DS Luigi's Mansion, RMX Choco Island 1, and RMX Choco Island 2, the brightness of the mud is absent.
- In N64 Kalimari Desert and N64 Kalimari Desert 2, the sandy wind that normally blows across the desert is absent.
- In DS DK Pass, N64 Frappe Snowland, SNES Vanilla Lake 1, Merry Mountain, RMX Vanilla Lake 1, SNES Vanilla Lake 2, and RMX Vanilla Lake 2, the falling snow is absent.
- In 3DS Neo Bowser City and GBA Luigi Circuit, the rain is absent, including its ground and screen effects.
- In Wii Maple Treeway, the petals on the water and the falling leaves are absent.
- In 3DS Bowser's Castle, the volcanic eruption in the background is absent.
- In Wii Mushroom Gorge, the small glowing particles in the cave are absent.
- In GCN Daisy Cruiser, the wind and water visual effects intended to make the ship appear as if it is moving are absent.
- In GCN DK Mountain, both volcanoes are dormant instead of erupting.
- In Amsterdam Drift 3, the tulips in the flower field are completely absent.
- In Wii Rainbow Road, the pinpricks of light streaming along the course's route are absent.
- In Wii Dry Dry Ruins, every instance of falling sand except for those tied to the rising sand piles is absent.
- In Piranha Plant Pipeline, the interior of the Clear Pipe section is opaque; however, it remains transparent from the outside.
Updates
- Main article: Mario Kart Tour update history
Version 3.4.1
Release date: September 28, 2023
- Addressed known issues.
Differences from previous Mario Kart games
- Mario Kart Tour is the only Mario Kart game where every character must technically be unlocked, and where there is no set starting roster.
- It is also the only game to not have a Grand Prix mode, with every fortnightly Tour containing a reshuffled selection of Cups, and Cups containing three courses and one bonus challenge to be played in any order.
- The number of players in each race has reverted back to eight, like in all mainline games up to Mario Kart DS and in Mario Kart 7.
- Apart from GCN Baby Park and 3DS Rainbow Road, all races consist of two laps/sections, as opposed to the usual three.
- Drivers, karts and gliders can be leveled up.
- The music continues from where it leaves off after the final lap fanfare plays, instead of restarting like in past games.
- The only exception to this is 3DS Rainbow Road, which reuses its final lap music from Mario Kart 7 and always begins at the start of the song.
- On the final lap, for most courses the music's pitch is increased by four semitones rather than one as in the other games since Mario Kart: Double Dash!!. The exceptions are Merry Mountain and Bangkok Rush, which are pitched up by one, Rome Avanti, which is pitched up by three, and Piranha Plant Pipeline, which is pitched up by two.
- Percussion is not heard in the music when the player is in 1st place like in Mario Kart 7 and Mario Kart 8.
- Lakitu does not appear at the beginning of or throughout races.
- Starting from the New Year's 2021 Tour, the Lakitu referee in his festive attire appears as a playable driver known as "Lakitu (Party Time)".[28]
- Stars are not obtainable from regular item boxes in single player mode, with item Frenzies having similar effects instead. However, in multiplayer mode, stars appear from item boxes in rulesets with fewer than three item slots (as Frenzies are not obtainable).
- For the first time since Super Mario Kart, Triple Red Shells are absent. This is likely due to how using multi-items (such as the Triple Mushrooms or the Lucky Seven) sends out all of their items at once, which would be useless for items that always lock onto the next racer.
- This is the first Mario Kart game since Mario Kart: Super Circuit to have numbered new courses (e.g. Tokyo Blur 3) and the first Mario Kart game to feature numbered variants of classic courses (namely N64 Kalimari Desert 2).
- Unlike in the previous games, these numbered courses take place in the same map, but use a different course layout: the starting line is in the same location (with the exceptions of Los Angeles Laps, Berlin Byways, and Piranha Plant Cove), but the courses split off from each other onto different routes. Some variants, such as Vancouver Velocity 2 and Sydney Sprint 2, have racers crossing the starting line in the opposite direction of the other variants.
- The remix courses feature numbers in their names as well, though in that case when the number changes the map layout changes as well.
- Unlike in the previous games, these numbered courses take place in the same map, but use a different course layout: the starting line is in the same location (with the exceptions of Los Angeles Laps, Berlin Byways, and Piranha Plant Cove), but the courses split off from each other onto different routes. Some variants, such as Vancouver Velocity 2 and Sydney Sprint 2, have racers crossing the starting line in the opposite direction of the other variants.
- For the first time since Mario Kart: Super Circuit, the Golden Mushroom is absent, as it is functionally replaced by the Mushroom Frenzy.
- Multiple items can be received from a single item box.
- This is the first Mario Kart game to lack losing themes and animations after races; the same theme and animations play for any placement below 1st. However, losing voice lines for most of the characters can be found in the game's files.
- Courses, karts, and gliders that had different names between American and British English in previous games instead only use their American English names, with the exception of the B Dasher Mk. 2, which only uses its British English name.
- Karts that originally had moving parts (not counting tires), such as the tentacles on the Super Blooper and the blower on the Flame Flyer, no longer have them move.
- If an opponent hits the player with any item, the screen will display the word "Ouch!" with the icon of the opponent's current driver displayed above it.
- Likewise if a player hits the opponent, the side of the screen will display the word "Hit!" with the icon of the opponent's driver and the item they got hit by.
- The item warning sound effects differs between certain items. The warning sound effect from Mario Kart 8 is used when targeted by a homing item (Red Shell, Yoshi's Egg, or Birdo Egg) and when an opponent behind the player is under the effects of a Star, Mega Mushroom, or Bullet Bill. The homing item warning sound effect from Mario Kart Wii is used when targeted by a Spiny Shell.
- Various sound effects, such as the item roulette, Jump Boosts, and when the player's current placement changes, are taken from Mario Kart DS (for the former), Mario Kart Wii, and Mario Kart 7 rather than from Mario Kart 8.
Glitches
Opponents' drivers get stuck in multiplayer battles
Certain connection errors in multiplayer battles cause opponents to dissociate from their players and drive straight into the first wall they encounter, where they remain stuck until the time runs out or the player who experiences this bug strikes them out.[29]
Staff
Producer
Creative Director
Game Directors
Composer
Characters Voices
- Charles Martinet as Mario*, Luigi*, Wario*, Waluigi*, Baby Mario*, Baby Luigi, and Metal Mario*
- Samantha Kelly as Peach*, Toad*, Toadette*, Baby Peach*, Pink Gold Peach, Captain Toad, and Peachette
- Kazumi Totaka as Yoshi* and Birdo
- Deanna Mustard as Daisy* and Baby Daisy
- Laura Faye Smith as Rosalina* and Baby Rosalina*
- Kenny James as Bowser* and Dry Bowser*
- Takashi Nagasako as Donkey Kong*
- Katsumi Suzuki as Diddy Kong
- Tadd Morgan as Lakitu*
- Caety Sagoian as Bowser Jr.*
- Motoki Takagi as Hammer Bro, Boomerang Bro, Fire Bro, and Ice Bro
- Nate Bihldorff as Shy Guy*
- Ryan Higgins as Iggy
- Michelle Hippe as Larry*
- Carlee McManus as Lemmy
- David Goldfarb as Ludwig
- David Cooke as Morton
- Dan Falcone as Roy
- Ashley Flannegan as Wendy
- Kate Higgins as Pauline*
- Toshihide Tsuchiya as Funky Kong
- Kahoru Sasajima as Dixie Kong
- Natsuko Yokoyama as Nabbit
- Dolores Rogers as Wiggler*
*-Applies to all variants of that character.
Reception
Critical reception
Initial impressions of the beta were mixed. Journalists praised the gameplay and graphics, but criticized the free-to-play gacha elements of the game. Sam Machkovech of Ars Technica compared the game's in-app purchases to Spiny Shells, blowing up the classic Mario Kart experience. He suggested that "the developers pick a side: attach an annoying economy to a deeper control scheme and more legitimate online options, or make it cheaper and less obnoxious to watch Mario drive himself".[31] Ethan Gach of Kotaku also stated that the game is "a mostly faithful but stripped-down recreation of Mario Kart decked out with all the microtransactions and lottery mechanics mobile games are infamous for" and also lamented the lack of a multiplayer mode.[32] Steven Asarch of Newsweek complained about the game's "freemium greed" and that it is "ruined by microtransactions".[33]
The game's reception on release was mixed to negative. Andrew Webster of The Verge praised how intuitive using items is, while criticizing the controls, calling them imprecise, and the game's monetization, stating that "The problem is so much of the game feels designed around monetization, as opposed to just being a fun game".[34] Chris Scullion of Nintendo Life gave a positive review, praising the lack of an energy system, the points system, and the amount of cups, while criticizing the time required to get used to the controls, the gyro controls, and listing the game's monetization as a con, stating that opinions on the game's monetization will vary for each person, while arguing that "It's rubbish to an extent, absolutely, but despite the outrage you may be seeing in some circles, it's no different to any other game with a loot box system; it's always nearly impossible to guarantee you'll get the exact thing you want" when talking about the game's gacha mechanics, and that "More than the gacha system, the Gold Pass is gaining a lot more controversy than it really should be, with some misunderstanding what it does and assuming this subscription service is necessary in some way. To be clear, it really isn't, and absolutely won't be of interest to 99% of the player base." when talking about the game's Gold Pass subscription.[35] Michael McWhertor of Polygon gave a negative review, stating that the game "lacks the joy of its fully-featured counterparts", criticizing that the steering feels inconsequential, stating that "the game can feel as if it's playing itself", the lack of difficulty when playing against computers, the lack of motivation to continue playing, and the game's microtransactions.[36] CJ Andriessen of Destructoid gave a negative review, criticizing the game's microtransactions and how the game rarely gives the player Rubies, stating "[Mario Kart] Tour's fatal flaw is it's continually pushing players into ham-fisted situations where they have to spend money rather than creating a game so exceptional they'll want to spend money", the limitations on unlocking, collecting, or upgrading certain things, and the game's controls, while praising the variations to courses, though noting that "there is still a bit of disappointment when you wait a day to unlock a new cup only to find it's Daisy Hills again", the New York Minute track, and that Nintendo at the time of the article's publication planned to add more new tracks to the game, though noting that "One of the great joys of any Mario Kart title is seeing what types of new courses the developers have designed and that joy just isn't present in [Mario Kart] Tour."[37] Kyle Hilliard of IGN, in a mixed review, praised the series's transition from consoles to mobile phones, stating that "during those moments where I was speeding down the track expertly launching turtle shells at my opponents I felt like I was playing a real Mario Kart game", though stating that Mario Kart Tour is an "undeniable downgrade from Mario Kart 8", praise was given to how items are used, the game's bonus challenges, and the brevity of the races, cups, and bonus challenges, while criticism was directed at the game launching without multiplayer, the game's microtransactions and their cost, having to wait for later cups to unlock, and the quantity of Grand Stars unlocked being affected by the kart or character the player unlocked.[38] Jon Cartwright of GameXplain, in a negative review, stated that "Mario Kart is better than this", stating "Because it's so similar to the core games, it becomes comparable to them, amplifying its faults even further", criticizing the controls, calling them "extremely unintuitive", and "a huge, restrained, letdown" after stating that the controls felt "extremely simplistic"; the game's monetization, stating that "This may be a free game compared to a full sixty dollar release, but money has never felt so intrusive in Mario Kart"; and the track New York Minute, stating that "this track is not good enough for Mario Kart", while praising the game's bonus challenges and the game's Reverse tracks, calling them "really cool ideas", while also praising the game's roster of playable characters and its graphics.[39]
As of August 26, 2020, Mario Kart Tour received a mixed Metacritic Metascore of 58, and a negative User Score of 3.8.[40] Despite receiving mixed reviews from critics, as of August 26, 2020, Mario Kart Tour received an average of 4.1 out of 5 stars on Google Play[41] and an average of 4.7 out of 5 stars on the App Store.[42]
| Reviews | |||
|---|---|---|---|
| Release | Reviewer, Publication | Score | Comment |
| Unknown | Andrew Webster, The Verge | N/A | "This doesn't mean Mario Kart Tour won't be successful. In fact, early signs point to the game having a record-breaking launch. But that success isn't because the game is good, and it's especially disappointing from a company that prides itself on quality. Mobile aside, Nintendo is at a creative high point, regularly launching major Switch games to near-universal acclaim. They're games that sell hardware and help players think differently about what games can be. On console, Nintendo sets its own pace; on mobile, it follows." |
| Unknown | Chris Scullion, Nintendo Life | 7/10 | "Get used to Mario Kart Tour's unconventional control system and ignore its overpriced and unnecessary subscription service and you're left with a fun, free mobile take on the series. It was never going to replace Mario Kart 8 Deluxe, but by not including an energy system and promising regular new content Nintendo is at least offering a decent alternative to pass the time when you're out and about without your Switch." |
| iOS | Michael McWhertor, Polygon | N/A | "Mario Kart Tour stalls right from the starting line. It lacks the competitive thrills of other Mario Kart games, focusing more on an endless series of unlockable virtual things to acquire.
But it appears that a full multiplayer mode is coming to Mario Kart Tour, which may provide more thrills than chasing AI-controlled kart racers and the daily drip feed of currency. For now, however, this is hardly a vital addition to Nintendo’s library of games, mobile or otherwise." |
| Unknown | CJ Andriessen, Destructoid | 4.5/10 | "Mario Kart Tour is a blemish on the franchise it shares its name with. The genre-defining creativity found in past entries is completely absent here, replaced by a hollow experience that's simply coasting on the name and goodwill of the games that came before it. I can only hope this is Nintendo's mobile initiative hitting rock bottom, and that it's all uphill from here. Because I can't stand the thought of another one of my favorite series having its reputation dragged the mud[sic] in search of a quick buck." |
| iOS | Kyle Hilliard, IGN | 6.7/10 | "The actual gameplay and racing of Mario Kart Tour is well done: controlling the karts feels good, the courses and characters look and sound great, and playing simplified one-handed Mario can be a lot of fun. But the road to a mobile version of Mario Kart is a bumpy one. On top of multiplayer not currently being available at all, Nintendo continues to struggle with how to comfortably monetize a mobile game without hamstringing its gameplay. Tour’s prices are prohibitively high and not getting top honors on a race despite winning first place just because you don’t have the right racer or kart feels unfair." |
| Unknown | Jon Cartwright, GameXplain | Disliked | "If you're someone who doesn't own a Nintendo console and just want a quick Mario Kart fix, I guess this is it. It comes with a lot of roadblocks, and it isn't anywhere near as fun to control as the console games. And for me it just made me want to play Mario Kart 8 again. I disliked Mario Kart Tour. It looks like a quality Mario Kart game, but it isn't particularly fun to play, and the aggressive monetization is so prominent that it intrudes on the experience. The last new Mario Kart game may have been five years ago with Mario Kart 8 on Wii U, but this isn't even worth a pit stop to me. Mario Kart is better than this." |
| Aggregators | |||
| Compiler | Platform / Score | ||
| Metacritic | iOS: 58 | ||
Awards and acknowledgements
Mario Kart Tour was nominated for the "User's Choice Game of 2019" from Google Play, losing to Call of Duty: Mobile.[43] The game won the "Racing Game of the Year" award at the 23rd annual D.I.C.E Awards.[44]
Mobile app store description
- Race around the world!
■ Challenge players worldwide in multiplayer!
You can race against up to seven other players, whether they're registered as in-game friends, nearby, or scattered around the world.
Multiplayer races can be customized with a variety of rules, such as individual or team races, kart speed, and number of item slots. You can play however you want!■ Mario Kart takes a world tour!
Mario and friends go global in this new Mario Kart as they race around courses inspired by real-world cities in addition to classic Mario Kart courses! These destinations will be featured in tours that rotate every two weeks! In addition to courses based on iconic locales, some of your favorite Mario Kart characters will get variations that incorporate the local flavor of cities featured in the game!■ Endless Mario Kart fun at your fingertips!
The Mario Kart series known and loved by many is ready to take the world by storm – one smart device at a time! With just one finger, you can steer and drift with ease and sling devastating items as you go for the gold in cups filled with new and classic Mario Kart courses.■ Nab 1st place with items and Frenzy mode!
In Mario Kart Tour you have access to an arsenal of powerful items that can mix things up on the racetrack! Turn up the heat by activating the new Frenzy mode, which gives an unlimited supply of a certain item and makes you invincible! Make the most of the ensuing chaos, as Frenzy mode only lasts a short time!■ Collect drivers, karts, badges, and more!
Earn Grand Stars by racing or fire off the featured pipe to receive more drivers, karts, and gliders! You can also proudly display badges, earned by completing certain challenges, next to your in-game name!■ Bonus challenge courses put a twist on traditional races!
In certain races, 1st place isn't always the goal. With names like "Vs. Mega Bowser" and "Goomba Takedown," these bonus challenge courses demand a different approach to gameplay and strategy!■ Race to increase your online rank!
Boost with the best of 'em! Your high scores will determine how you compare to other players all over the world. Keep practicing and trying out different combinations of drivers, karts, and gliders to increase your score and rise to the top!Note: A Nintendo Account is required to play Mario Kart Tour.
* Free-to-start; optional in-game purchases available. Persistent Internet, compatible smartphone, and Nintendo Account required. Data charges may apply.
* For information about our ads, please see the "How we use your information" section of the Nintendo Privacy Policy.
* May include advertising.
Pre-release and unused content
- Main article: List of Mario Kart Tour pre-release and unused content
The beta version of the game saw multiple changes in the final game. Among them, the stamina element was removed, and the timers restricting access to certain cups can be sped up using quick tickets. Additionally, rubies were originally emeralds.
Several of the game's drivers, karts, gliders, and courses had data strings and other files relating to them present in the game's data before they were released, though some of these correspond to content that was never released. The game's data also contains unused versions of some of the course icons that depict the courses less accurately.
MKT Report
- Main article: MKT Report

MKT Report is a yearly series of reports published by Nintendo, meant to offer insights into the statistics and achievements of Mario Kart Tour's playerbase throughout a given year. For example, one such report showed that, from January through November 2021, the most popular driver used in multiplayer races was Metal Mario;[46] another stated that approximately 51.7 billion coins were collected in races during the same time frame (excluding "events such as the Coins Aplenty event").[47]
Gallery
- For this subject's image gallery, see Gallery:Mario Kart Tour.


Media
- For a complete list of media for this subject, see List of Mario Kart Tour media.
References to other games
- Donkey Kong: Portions of this game can be seen in Times Square's screens in New York Minute and its variants. The clothing colors of Mario (Classic) reference Mario's original design from this game.
- Super Mario Bros.: The 8-Bit Jumping Mario and the 8-Bit Jumping Luigi gliders use Mario and Luigi's jumping sprites from this game, the 8-Bit Star uses the Super Star sprite from this game, the 8-Bit Fire Flower uses the Fire Flower sprite from this game, the 8-Bit Bullet Bill uses the Bullet Bill sprite from this game, the 8-Bit Super Mushroom uses the Super Mushroom sprite from this game, the 8-Bit Block Glider uses the Brick Block and ? Block sprites from this game, and the 8-Bit Goomba uses the Goomba sprite from this game. The game's Japanese logo appears on the Super 1 kart.
- Super Mario Bros.: The Lost Levels: The clothing colors of Luigi (Classic) reference Luigi's artwork from this game.
- Super Mario Bros. 2: Birdo (Green)'s special item is the Fire Flower, in reference to the fact that the green-colored Birdo in this game shot fireballs instead of eggs.
- Famicom Grand Prix: F1 Race: The artwork of Mario in a Formula One car from this game is reused as a badge.
- Dr. Mario: One of Dr. Mario's Jump Boost animations mimics his victory animation at the end of a multiplayer match in this game, complete with the same limited number of frames.
- NES Open Tournament Golf: Mario and Luigi's outfits in this game return as playable variants.
- Super Mario Kart: Mario Circuit 1, Donut Plains 1, Ghost Valley 1, Mario Circuit 2, Choco Island 1, Ghost Valley 2, Donut Plains 2, Mario Circuit 3, Choco Island 2, Vanilla Lake 1, Bowser Castle 3, Donut Plains 3, Koopa Beach 2, Vanilla Lake 2, and Rainbow Road appear as returning race courses. The tires resembling the tires from this game return as the Pipe Frame's assigned tires, as well as other certain karts with these tires. Much of the artwork from Super Mario Kart, such as Yoshi spinning out, is reused in badges from this game, in addition to the cover art of the game being used for the Super Mario Kart Glider. Additionally, one of the game's commemorative badges says "Since '92", which references the Mario Kart series having debuted upon this game's release in 1992. Mario and Donkey Kong Jr.'s sprites are reused from this game as separate playable variants. The sound effects used for the pre-race jingle, item roulette, and post-race jingle are reused from this game exclusively for the two aforementioned characters. The Super Mario Kart Tour is themed after this game.
- Super Mario World 2: Yoshi's Island: The Yoshi's Island course is based on this game. The Smiley Flower Glider is based on the Smiley Flower, with a similar animation to this game.
- Donkey Kong Country: An official video promoting the Rambi Rider as a commemorative kart for the Jungle Tour was released, using clips from the opening and gameplay of this game.
- Mario Kart 64: Luigi Raceway, Koopa Troopa Beach, Kalimari Desert, Frappe Snowland, Choco Mountain, Mario Raceway, Royal Raceway, and Yoshi Valley appear as returning race courses. The results theme is an arrangement of the winning results theme from this game. The new Kalimari Desert 2 course allows racers to race inside the train tunnel, similar to how players could go inside Kalimari Desert's train tunnel in Mario Kart 64.
- Yoshi's Story: Poochy's voice clips are taken from this game.
- Mario Kart: Super Circuit: Peach Circuit, Riverside Park, Bowser Castle 1, Boo Lake, Bowser Castle 2, Luigi Circuit, Sky Garden, Cheep-Cheep Island, Sunset Wilds, Snow Land, Yoshi Desert, Bowser Castle 3, and Bowser Castle 4 appear as returning race courses. Battle Course 1 appears as a returning battle course.
- Super Mario Sunshine: Mario (Sunshine) wears the Shine Sprite shirt and sunglasses originating from this game.
- Mario Kart: Double Dash!!: Special Items such as the Giant Banana, Bowser's Shell and the Heart return. Baby Park, Mushroom Bridge, Daisy Cruiser, Waluigi Stadium, Yoshi Circuit, DK Mountain, and Dino Dino Jungle appear as returning race courses. Cookie Land appears as a returning battle course. The Turbo Yoshi, Turbo Birdo, Goo-Goo Buggy, Koopa Dasher, Para-Wing, DK Jumbo, Barrel Train, Koopa King, Bullet Blaster, Piranha Pipes, and Boo Pipes return as karts. Birdo's voice clips are reused from this game.
- Mario Party 6: The artwork for Mario (Classic) and Luigi (Classic) is based on Mario and Luigi's profile artwork from this game.
- Mario Kart DS: Luigi's Mansion, Waluigi Pinball, Shroom Ridge, DK Pass, Mario Circuit, Airship Fortress, and Peach Gardens appear as returning race courses. Twilight House appears as a returning battle course. The B Dasher, Poltergust 4000, Streamliner, Royale, Egg 1, Cucumber, Mushmellow, Rambi Rider, and Dragonfly return as karts. Challenges with unique objectives, similar to the missions from this game, appear as the fourth and final race in every cup. Also, the Item Box pickup and roulette sound effects return.
- Super Mario Strikers: Some of Hammer Bro's voice clips are reused from this game.
- New Super Mario Bros.: Koopa Troopa's artwork is reused from this game.
- Mario Party 8: Dry Bones and Hammer Bro reuse their artwork from this game, and some of the latter's voice clips are also reused from this game.
- Super Mario Galaxy: Ice Mario appears as a playable character and reuses his artwork from this game. Bowser Jr. also reuses his artwork from this game.
- Mario Party DS: Diddy Kong's artwork is reused from this game.
- Mario Kart Wii: Mushroom Gorge, Coconut Mall, DK Summit, Daisy Circuit, Koopa Cape, Maple Treeway, Dry Dry Ruins, Moonview Highway, and Rainbow Road appear as returning race courses. The Cheep Charger, Wild Wing, Super Blooper, Daytripper, B Dasher Mk. 2, Offroader, and Flame Flyer return as karts. The jingle that plays when obtaining a High-End kart, racer, or glider from the shop, challenge, tour gift, or paid banner, and when obtaining a High-End level-boost ticket or point-cap ticket, is an arrangement of a song from this game. The sound effect used for Jump Boosts is reused from this game. Diddy Kong and Funky Kong reuse their voice clips from this game. This game's music for GBA Shy Guy Beach is reused for GBA Cheep-Cheep Island. Moo Moo Meadows is mentioned on a badge available in-game.
- Mario Super Sluggers: Baby Mario, Baby Peach, Baby Daisy, Baby Luigi, Shy Guy, King Boo, Monty Mole, Petey Piranha, and Wiggler reuse their artwork from this game, and the artwork for Black Shy Guy, Pink Shy Guy, Green Shy Guy, Light-blue Shy Guy, Blue Shy Guy, White Shy Guy, Orange Shy Guy, and Yellow Shy Guy is based on Shy Guy's artwork from this game. Artwork of Mario and Bowser from this game appears on billboards in Los Angeles Laps 3.
- Mario & Sonic at the Olympic Winter Games: Dry Bowser's artwork is reused from this game.
- New Super Mario Bros. Wii: Peach and all of the Koopalings reuse their artwork from this game, albeit with the magic coming from Iggy's magic wand in his artwork removed. Penguin Luigi, Penguin Yellow Toad (named simply Penguin Toad), and Penguin Mario appear as playable characters.
- Super Mario 3D Land: Tanooki Mario and Kitsune Luigi reuse their artwork from this game. White Tanooki Mario appears as a playable character.
- Mario Kart 7: All of this game's race courses except Wuhu Loop, Music Park, Maka Wuhu, and DK Jungle return as classic courses. The artwork for Lakitu, Metal Mario, and Wiggler is reused from this game, and Daisy's artwork is an updated version of her artwork from this game. The Birthday Girl, Koopa Clown, Soda Jet, Cloud 9, Bumble V, Zucchini, Bruiser, Blue Seven, Bolt Buggy, and Cact-X return as karts, and the Barrel Train retains its design from this game. The Swooper, Flower Glider, Peach Parasol, and Gold Glider return as gliders. Various kart tires return from this game. The Lucky Seven and Super Leaf items reappear. The rankings screen and multiplayer menu use the music from this game's Local Multiplayer and Online Multiplayer menus respectively. Metal Mario's voice clips are reused from this game. Honey Queen's emblem from this game appears as part of the Racer's Soda Lemonade badge.
- Mario Party 9: Birdo's artwork is reused from this game, and the artwork for Birdo (Light Blue), Birdo (Yellow), Birdo (Orange), Birdo (Blue), Birdo (Red), Birdo (Black), and Birdo (White) is based on Birdo's artwork from this game.
- New Super Mario Bros. 2: Gold Mario appears as a playable character in the game's Coin Rush mode and was added later as a playable character in the final update.
- New Super Mario Bros. U / New Super Luigi U: Nabbit's artwork and emblem are reused from these games. The design for tracks is reused.
- New Super Mario Bros. U Deluxe: Peachette and Penguin Toadette appear as playable characters, with the former reusing her artwork from this game and her emblem being a Super Crown. Nabbit reuses his voice clips from this game.
- Super Mario 3D World: The artwork for the Double Cherry is reused from this game for the Tropical Grocery badge. Fire Rosalina, Cat Peach, Cat Toad, Cat Rosalina, Cat Mario, Cat Luigi, Meowser, and Tanooki Rosalina appear as playable characters; all cat characters except Cat Luigi use the Super Bell as their special item, and all of them except Cat Rosalina reuse their artwork from this game. Meowser and White Tanooki Mario also reuse their artwork from this game (though White Tanooki Mario's is modified to remove the sparkling effects). Innertube Goombas appear as obstacles in Singapore Speedway. Chargin' Chuck's artwork is a 3D recreation of its stamp from this game.
- Mario Party: Island Tour: Luigi's artwork is reused from this game.
- Mario Kart 8: Many characters' animations and voice clips are reused from this game. Metal Mario's voice clips are reused exclusively for Gold Mario. Larry's voice clip when unlocking him from this game is reused for Larry (Wintertime). GCN Yoshi Circuit, N64 Royal Raceway, and N64 Yoshi Valley retain their designs from this game. The flying train seen in N64 Rainbow Road returns in Merry Mountain and several other courses. The Mach 8, Steel Driver, Cat Cruiser, Circuit Special, Badwagon, Prancer, Biddybuggy, Landship, Sports Coupe, P-Wing, Tanooki Kart, Sneeker, and Streetle return as karts, and the Pipe Frame and B Dasher retain their designs from this game. The design of the Standard Kart from this game is used for the Red Standard 8 and Green Standard 8. The Parafoil, Wario Wing, Cloud Glider, and Paper Glider return as gliders, while the Flower Glider and Peach Parasol retain their designs from this game; additionally, the Stealth Glider and Golden Glider are both based on the Plane Glider. Various tire parts return, assigned to specific karts. The Boomerang Flower and Super Horn return as items. Some of the courses from this game are referenced in advertisements and badges, including Toad Harbor, Sunshine Airport, Mount Wario, and Super Bell Subway. The designs of the icons for the non-DLC cups are reused from this game as badges. Many of the game's sponsors are also reused as badges and in courses. The music for Mario Kart TV's review after winning a cup in Grand Prix mode is reused for the tour-ending movie.
- Mario Kart 8 Deluxe: The third-level Mini-Turbo boost, Ultra Mini-Turbo, returns. The Koopa Clown retains its design from this game. King Boo’s head icon is reused from this game. Sky-High Sundae, Yoshi's Island, and Squeaky Clean Sprint from the Booster Course Pass also appear.
- Captain Toad: Treasure Tracker: Captain Toad and Toadette (Explorer) appear and reuse their artwork from this game. The Clanky Kart, Clackety Kart, and Gold Clanky Kart are based on the Mine Carts from this game.
- Donkey Kong Country: Tropical Freeze: Dixie Kong and Funky Kong reuse their artwork from this game. Dixie Kong's emblem is derived from the Dixie Kong Barrel's design in this game.
- Mario Party 10: Yoshi, Bowser, Toad, Waluigi, and Toadette reuse their artwork from this game, and the artwork for Red Yoshi, Blue Yoshi, Pink Yoshi, Orange Yoshi, Black Yoshi, White Yoshi, and Yellow Yoshi is based on Yoshi's artwork from this game.
- Dr. Mario: Miracle Cure: Dr. Mario's artwork is reused from this game, albeit without the sparkles coming from the Miracle Cure.
- Super Mario Maker / Super Mario Maker 2: Builder Mario, Builder Toad, Builder Luigi, and Builder Toadette appear as playable variants. Builder Mario's artwork is reused from the first game, while Builder Toad and Builder Luigi reuse their artwork from the second game.
- Mario Party: Star Rush: King Bob-omb and Kamek reuse their artwork from this game. Petey Piranha (Gold)'s artwork resembles Petey Piranha's artwork from this game, albeit mirrored and with his tongue sticking out.
- Super Mario Run: Event tokens resemble Bonus Medals from this game, emitting the same sound effect when collected.
- Super Mario Odyssey: Many of Mario and Peach's outfits come from this game. The Yellow Taxi is based on the taxis from this game. Some of Pauline's voice clips reference her singing "Jump Up, Super Star!" from this game. All five Roving Racers appear as the playable characters Red Koopa (Freerunning), Blue Koopa (Freerunning), Purple Koopa (Freerunning), Koopa (Freerunning), and Gold Koopa (Freerunning). The artwork of Earth, which is used for promotional material and the title screen, resembles the Earth from this game; the Metro, Snow, Seaside, and Luncheon Kingdoms are visible in the artwork, as well as inaccurate representations of the Cap and Cascade Kingdoms.
- Mario Party: The Top 100: Rosalina and Wario reuse their artwork from this game.
- Mario Tennis Aces: Some of Birdo's voice clips are reused from this game. Petey Piranha's emblem is taken from this game.
- Super Mario Party: Donkey Kong's artwork is reused from this game. Monty Mole's voice clips are also reused from this game. King Bob-omb (Gold)'s artwork is based on King Bob-omb's artwork from this game. Chargin' Chuck's emblem is taken from Gridiron Gauntlet in this game. Dry Bones (Gold) and Shy Guy (Gold) resemble how Dry Bones and Shy Guy appear when under the effect of a Golden Drink in this game.
- Dr. Mario World: Dr. Luigi, Dr. Peach, and Dr. Bowser reuse their artwork from this game. Artwork of the red, blue, and yellow viruses from this game appears on the Magniflying Glass and Pink Magniflying Glass.
- Luigi's Mansion 3: King Boo (Luigi's Mansion) uses King Boo's design from this game.
- Mario Kart Live: Home Circuit: A commemorative badge appears of Mario and the Standard Kart, using the kart's design from this game. Luigi (Painter) and Luigi (Knight) are both based on outfits Luigi has in this game.
- Mario Golf: Super Rush: Chargin' Chuck's voice clips and emblem are taken from this game.
References in other games
- Mario Golf: Super Rush: Pauline and King Bob-omb's voice clips are reused in this game.
- Mario Kart 8 Deluxe: The Booster Course Pass DLC features the return of Paris Promenade, Tokyo Blur, and Ninja Hideaway as part of the first wave, New York Minute and Sydney Sprint as part of the second wave, London Loop, Berlin Byways, and Merry Mountain as part of the third wave, Amsterdam Drift, Bangkok Rush, and Singapore Speedway as part of the fourth wave, Athens Dash, Los Angeles Laps, and Vancouver Velocity as part of the fifth wave, and Rome Avanti, Piranha Plant Cove, and Madrid Drive as part of the sixth and final wave. The DLC's other classic courses are also based on their designs from Mario Kart Tour, and N64 Kalimari Desert's second and third laps are based on N64 Kalimari Desert 2. Kamek, Pauline, and Peachette reappear as playable characters, and eighteen Tour Mii Racing Suits were added as part of the sixth wave.
- Super Mario Bros. Wonder: Daisy's artwork uses the same pointing pose as the launch artwork from the London Tour.
Names in other languages
| Language | Name | Meaning |
|---|---|---|
| Japanese | マリオカート ツアー Mario Kāto Tsuā |
Mario Kart Tour |
| Chinese (simplified) | 马力欧卡丁车 巡回赛[48] Mǎlì'ōu Kǎdīngchē Xúnhuí Sài |
Mario Kart Tour |
| Chinese (traditional) | 瑪利歐賽車 巡迴賽[49] Mǎlì'ōu Sàichē Xúnhuí Sài |
Mario Racing Tour |
| Korean | 마리오 카트 투어 Malio Kateu Tueo |
Mario Kart Tour |
References
- ^ a b c d e Academy of Interactive Arts and Science’s entry about Mario Kart Tour. The directors and producer all work for Nintendo Co., Ltd..
- ^ Erika Abe’s post on her work for Mario Kart Tour.
- ^ Yoshiki Tate/(ishi's post on his work for Mario Kart Tour. nintendo.co.jp. Archived December 3, 2021, 05:25:39 UTC from the original via Wayback Machine. Retrieved May 11, 2024.
- ^ PRODUCTS | Bandai Namco Studios Inc.
- ^ Operating results of DeNA for the second quarter of Fiscal Year 2019. According to the corresponding Questions and Answers section, DeNA received a share of the revenue of the game, pointing at them being one of the development teams involved.
- ^ Nine Months Financial Results Briefing for Fiscal Year Ending March 2018 (2018). Nintendo. Retrieved May 24, 2019.
- ^ Romano, Sal (April 24, 2019). Mario Kart Tour Android closed beta test set for May 22 to June 4. Gematsu. Retrieved May 22, 2019.
- ^ Gerken, T. (April 26, 2019). "Video game loot boxes declared illegal under Belgium gambling laws". BBC News. Retrieved November 27, 2020.
- ^ @mariokarttourEN (October 31, 2019). Multiplayer beta test announcement. Twitter. Retrieved October 31, 2019.
- ^ @mariokarttourEN (January 21, 2020). Second multiplayer beta test announcement. Twitter. Retrieved January 21, 2020.
- ^ @mariokarttourEN (March 2, 2020). Multiplayer mode announcement. Twitter. Retrieved March 2, 2020.
- ^ @mariokarttourEN (September 1, 2022) Battle Mode announcement. Twitter. Retrieved September 15, 2022
- ^ A human readable transcription of the main content of the RaceScoreParam container.
- ^ How does the Team Game rule work in multiplayer? faq.mariokarttour.com. Retrieved December 31, 2022. (Archived December 31, 2022, 15:41:10 UTC via archive.today)
- ^ mariokarttourEN (November 14, 2019). #MarioKartTour has grown significantly since launch…and it's not over yet! We're upping the variety with some nail-biting, high-flying Trick courses. Get your gliders ready and buckle in! Twitter. Retrieved December 12, 2020. (Archived November 14, 2019, 00:08:00 UTC via Internet Archive: Wayback Machine.)
- ^ mariokarttourEN (April 17, 2020). The Yoshi Tour is ending soon. But don't worry, there's another terrific tour on the way. Starting Apr. 21, 11 PM PT, the Trick Tour kicks off in #MarioKartTour! Hope you're ready to rack up some points, because every course included will be the Trick variant! Twitter. Retrieved December 12, 2020. (Archived April 18, 2020, 15:34:08 UTC via Internet Archive: Wayback Machine.)
- ^ June 15, 2022. Zoom across Paris, London, Amsterdam, and Berlin in the Metropolitan Tour. nintendo.com. Retrieved July 13, 2023. (Archived July 9, 2023, 02:24:07 UTC via Wayback Machine.) "Take to the streets and take in the sights with new variants Berlin Byways, Amsterdam Drift 2, and their R and T variants [...]"
- ^ December 28, 2022. Happy New Year’s Tour! nintendo.com. Retrieved July 13, 2023. (Archived July 8, 2023, 16:10:33 UTC via Wayback Machine.) "For this event, the cups are filled to the brim with R/T variants, including six newly added ones: 3DS Piranha Plant Slide R/T, GBA Bowser's Castle 3 R/T, GBA Cheep-Cheep Island R/T, GBA Sky Garden R/T, GCN Baby Park R/T, and Wii Koopa Cape R/T."
- ^ April 19, 2023. Enjoy kart-racing antics through antiquity with all-new course, Athens Dash, in the Spring Tour. nintendo.com. Retrieved July 13, 2023. (Archived July 13, 2023, 12:23:18 UTC via Wayback Machine.) "Tour a crop of Europe’s cultural capitals, including brand-new course Athens Dash and new course variants Paris Promenade B and Berlin Byways R/T."
- ^ A number of internal text strings in Mario Kart Tour (ArrowMobyi, ArrowSignMobyi, FlowerRingMobyi, HeyhoMobyi, RoadAppearMobyi, and RoadPartsMobyi) refer to map objects that are seen in the Yoshi's Island course; they are referred to as belonging to Mobyi, indicating that the course has the Mob platform code, used for courses originating from Mario Kart Tour.
- ^ Hydra. (March 8, 2022). Mario Kart Tour Server. Discord. Retrieved March 8, 2022.
- ^ kaidragon77. (September 27, 2019). Mario Kart Tour - Dry Bowser Gameplay. YouTube. Retrieved August 17, 2020.
- ^ A human readable transcription of the main content of the KartParamVehicleMove container.
- ^ A human-readable transcription of the main content of the ItemSlotTable container.
- ^ A human-readable transcription of the main content of the ItemSlotTableP2P container.
- ^ HalfHydra (March 5, 2022). Ring Race with Combo Counter. YouTube. Retrieved August 25, 2022.
- ^ Ryuk3112 (December 2, 2019). Demo iPhones have a demo version of Mario Kart Tour. Reddit. Retrieved December 8, 2019.
- ^ Post about the drivers of the New Year's 2021 Tour from the official English Mario Kart Tour Twitter account
- ^ LeastGeneral9415 (November 6, 2022). weird multi-player glitch. Reddit (/r/MarioKartTour). Retrieved November 8, 2022.
- ^ Credited on the Canadian Copyright Database entry for the game
- ^ Machkovech, Sam (May 22, 2019). Mario Kart Tour beta hands-on: Microtransactions land like a nasty blue shell. Ars Technica. Retrieved May 23, 2019.
- ^ Gach, Ethan (May 22, 2019). Mario Kart Tour Is Pretty Good When It’s Not Nickel And Diming You. Kotaku. Retrieved May 23, 2019.
- ^ Asarch, Steven (May 23, 2019) ‘Mario Kart Tour’ Beta Potential Bogged Down By Microtransactions. Newsweek. Retrieved May 23, 2019.
- ^ Webster, Andrew (September 26, 2019). Mario Kart Tour is too cynical to be fun. The Verge. Retrieved March 31, 2020.
- ^ Scullion, Chris (September 26, 2019). Mario Kart Tour Review. Nintendo Life. Retrieved March 31, 2020.
- ^ McWhertor, Micheal (September 27, 2019). Mario Kart Tour review: Mario Kart just doesn’t feel right on a phone. Polygon. Retrieved March 31, 2019.
- ^ Andriessen, CJ (September 29, 2019). Review: Mario Kart Tour. Destructoid. Retrieved March 31, 2020.
- ^ Hilliard, Kyle (October 1, 2019). Mario Kart Tour Review. IGN. Retrieved March 31, 2020.
- ^ GameXplain (October 2, 2019). Mario Kart Tour REVIEW - Free to Play but Money Has Never Been More Intrusive. YouTube. Retrieved March 31, 2019.
- ^ Mario Kart Tour (iOS). Metacritic. Retrieved August 26, 2020.
- ^ Mario Kart Tour. Google Play. Retrieved May 5, 2020.
- ^ Mario Kart Tour. App Store. Retrieved May 5, 2020.
- ^ Users’ Choice Game of 2019. Google Play. Retrieved April 2, 2020.
- ^ Academy of Interactive Arts & Sciences (February 14, 2020). Congratulations to @mariokarttourEN for winning Racing Game of the Year! #DICEAwards. Twitter. Retrieved April 2,2020.
- ^ mariokarttourEN (January 17, 2024). The first topic for the MKT Report 2023 is here! It's the 20 most purchased drivers in the Spotlight Shop. Next we'll reveal the rankings for the karts! #MarioKartTour. X. Retrieved February 27, 2024. (Archived February 10, 2024, 00:15:16 UTC via archive.today.)
- ^ mariokarttourEN (December 31, 2021). Look back on 2021 in #MarioKartTour with MKT Report 2021, part 3! Here are the most used drivers in multiplayer! #MKTReport. X. Retrieved February 27, 2024. (Archived December 31, 2021, 09:03:19 UTC via Wayback Machine.)
- ^ mariokarttourEN (December 30, 2021). Look back on 2021 in #MarioKartTour with MKT Report 2021! Today's reports will be about races. First, here's "The total number of coins collected in races!" Excluding events such as the Coins Aplenty event, there were 51.7 billion coins collected just in races alone! #MKTReport. X. Retrieved February 27, 2024. (Archived December 30, 2021, 08:01:48 UTC via Wayback Machine.)
- ^ mariokarttour.com (simplified Chinese). Retrieved September 2, 2019.
- ^ mariokarttour.com (traditional Chinese). Retrieved September 2, 2019.
External links
| Mobile games | |
|---|---|
| Super Mario franchise | Super Mario Run (2016) • Dr. Mario World (2019) • Mario Kart Tour (2019) |