List of Super Nintendo World stamps: Difference between revisions
No edit summary |
No edit summary |
||
| Line 5: | Line 5: | ||
==Item stamps== | ==Item stamps== | ||
{| | {| class="wikitable" style="width:100%;text-align:center" | ||
!Icon | |||
! | !Name | ||
! | !Requirement | ||
! | !Repeatable | ||
! | !Coins Earned | ||
! | |||
|- | |- | ||
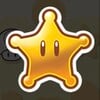
|[[File:SNWGoldenStar.jpg|100px]] | |||
|Golden Star | |||
|Collect all the golden stamps. | |||
|No | |||
|[[File:Coin - 2D art.svg|20px]]200 | |||
|- | |- | ||
|[[File:SNWSuperMushroomIcon.jpg|100px]] | |||
|Super Mushroom | |||
|Collect a [[Super Mushroom]] power-up. | |||
|Yes | |||
|[[File:Coin - 2D art.svg|20px]]35 | |||
|- | |- | ||
|[[File:SNWFireFlowerIcon.jpg|100px]] | |||
|Fire Flower | |||
|Collect a [[Fire Flower]] power-up. | |||
|Yes | |||
|[[File:Coin - 2D art.svg|20px]]35 | |||
|- | |- | ||
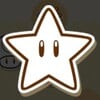
|[[File:SNWSuperStar.jpg|100px]] | |||
|Super Star | |||
|Collect a [[Super Star]] power-up. | |||
|Yes | |||
|[[File:Coin - 2D art.svg|20px]]65 | |||
|- | |- | ||
|[[File:SNWTurnipIcon.jpg|100px]] | |||
|Turnip | |||
|Collect a [[Turnip]] power-up. | |||
|Yes | |||
|[[File:Coin - 2D art.svg|20px]]35 | |||
|- | |- | ||
|[[File:SNWSuperLeafIcon.png|100px]] | |||
|Super Leaf | |||
|Collect a [[Super Leaf]] power-up. | |||
|Yes | |||
|[[File:Coin - 2D art.svg|20px]]35 | |||
|- | |- | ||
|[[File:SNW1UpMushroomIcon.png|100px]] | |||
|1-Up Mushroom | |||
|Collect a [[1-Up Mushroom]] power-up. | |||
|Yes | |||
|[[File:Coin - 2D art.svg|20px]]65 | |||
|- | |- | ||
|[[File:SNWIceFlowerIcon.png|100px]] | |||
|Ice Flower | |||
|Collect an [[Ice Flower]] power-up. | |||
|Yes | |||
|[[File:Coin - 2D art.svg|20px]]35 | |||
|- | |- | ||
|[[File:SNWPWP.png|100px]] | |||
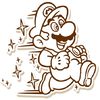
|Playing with Power | |||
|Get all the power-ups. | |||
|No | |||
|[[File:Coin - 2D art.svg|20px]]125 | |||
|- | |- | ||
|[[File:SNWSuperAcornIcon.png|100px]] | |||
|Super Acorn | |||
|Get the [[Super Acorn]] from [[Toad]] | |||
|Yes | |||
|[[File:Coin - 2D art.svg|20px]]35 | |||
|- | |- | ||
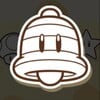
|[[File:SNWSuperBell.jpg|100px]] | |||
|Super Bell | |||
|Get the [[Super Bell]] from Toad. | |||
|Yes | |||
|[[File:Coin - 2D art.svg|20px]]35 | |||
|- | |- | ||
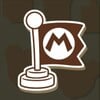
|[[File:SNWCheckpointFlag.jpg|100px]] | |||
|Checkpoint Flag | |||
|Touch the [[Checkpoint Flag]]. | |||
|No | |||
|[[File:Coin - 2D art.svg|20px]]15 | |||
|} | |} | ||
==Coins and Leaderboard stamps== | ==Coins and Leaderboard stamps== | ||
{| | {| class="wikitable" style="width:100%;text-align:center" | ||
!Icon | |||
! | !Name | ||
! | !Requirement | ||
! | !Repeatable | ||
! | !Coins Earned | ||
! | |||
|- | |- | ||
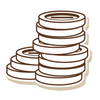
|[[File:SNWMoneybags.png|100px]] | |||
|Moneybags | |||
|Earn 5,000 [[Coin|coins]]. | |||
|No | |||
|[[File:Coin - 2D art.svg|20px]]35 | |||
|- | |- | ||
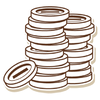
|[[File:CoinCollector.png|100px]] | |||
|Coin Collector | |||
|Earn 25,000 coins. | |||
|No | |||
|[[File:Coin - 2D art.svg|20px]]65 | |||
|- | |- | ||
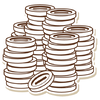
|[[File:SNWTreasureHunter.png|100px]] | |||
|Treasure Hunter | |||
|Earn 100,000 coins. | |||
|No | |||
|[[File:Coin - 2D art.svg|20px]]125 | |||
|- | |- | ||
|[[File:SNWT1000S.png|100px]] | |||
|Top 1000 Score | |||
|Achieve a Top 1000 score on the daily leaderboard. | |||
|Yes | |||
|[[File:Coin - 2D art.svg|20px]]125 | |||
|- | |- | ||
|[[File:SNWT10D.png|100px]] | |||
|Top 10 Daily | |||
|Achieve a Top 10 score on the daily leaderboard. | |||
|Yes | |||
|[[File:Coin - 2D art.svg|20px]]175 | |||
|- | |- | ||
|[[File:SNWWTB.png|100px]] | |||
|Who's the Boss | |||
|Achieve a Top 1000 score on the Bowser Jr. Shadow Showdown leaderboard. | |||
|Yes | |||
|[[File:Coin - 2D art.svg|20px]]125 | |||
|- | |- | ||
|[[File:SNWSuperBoss.png|100px]] | |||
|Super Boss | |||
|Achieve a Top 10 score on the Bowser Jr. Shadow Showdown leaderboard. | |||
|Yes | |||
|[[File:Coin - 2D art.svg|20px]]175 | |||
|- | |- | ||
|[[File:SNWTopRacer2.jpg|100px]] | |||
|Top Racer | |||
|Achieve a Top 1000 score on the Mario Kart leaderboard. | |||
|Yes | |||
|[[File:Coin - 2D art.svg|20px]]125 | |||
|- | |- | ||
|[[File:SNWTopSuperRacer1.png|100px]] | |||
|Top Super Racer | |||
|Achieve a Top 10 score on the Mario Kart leaderboard. | |||
|Yes | |||
|[[File:Coin - 2D art.svg|20px]]175 | |||
|- | |- | ||
|[[File:SNWTeamCrown.jpg|100px]] | |||
|Team Crown | |||
|Win a team crown in the hourly Team Competition. | |||
|Yes | |||
|[[File:Coin - 2D art.svg|20px]]100 | |||
|- | |- | ||
|[[File:SNWRoyalty.jpg|100px]] | |||
|Royalty | |||
|Earn more than 1 crown in a day in the hourly Team Competition. | |||
|Yes | |||
|[[File:Coin - 2D art.svg|20px]]125 | |||
|- | |- | ||
|[[File:SNWLandExplorer.png|100px]] | |||
|Land Explorer | |||
|Complete everything on your Super Mario Land map. | |||
|No | |||
|[[File:Coin - 2D art.svg|20px]]200 | |||
|} | |} | ||
==Seasonal stamps== | ==Seasonal stamps== | ||
{| | {| class="wikitable" style="width:100%;text-align:center" | ||
!Icon | |||
! | !Name | ||
! | !Requirement | ||
! | !Repeatable | ||
! | !Coins Earned | ||
! | |||
|- | |- | ||
|[[File:SNWWinterWonder.png|100px]] | |||
|Winter Wonder | |||
|Visit Super Nintendo World between December 1 and February 29. | |||
|No | |||
|[[File:Coin - 2D art.svg|20px]]15 | |||
|- | |- | ||
|[[File:SNWSpringBreak.png|100px]] | |||
|Spring Break | |||
|Visit Super Nintendo World between March 1 and May 31. | |||
|No | |||
|[[File:Coin - 2D art.svg|20px]]15 | |||
|- | |- | ||
|[[File:SNWSummerSun.png|100px]] | |||
|Summer Sun | |||
|Visit Super Nintendo World between June 1 and August 31. | |||
|No | |||
|[[File:Coin - 2D art.svg|20px]]15 | |||
|- | |- | ||
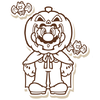
|[[File:SNWHalloweenTreat.png|100px]] | |||
|Halloween Treat | |||
|Visit Super Nintendo World during October. | |||
|No | |||
|[[File:Coin - 2D art.svg|20px]]55 | |||
|- | |- | ||
|[[File:SNWFallFun.jpg|100px]] | |||
|Fall Fun | |||
|Visit Super Nintendo World between September 1 and November 30. | |||
|No | |||
|[[File:Coin - 2D art.svg|20px]]15 | |||
|- | |- | ||
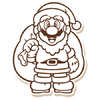
|[[File:SNWHolidayParty.png|100px]] | |||
|Holiday Party | |||
|Visit Super Nintendo World during December. | |||
|No | |||
|[[File:Coin - 2D art.svg|20px]]55 | |||
|- | |- | ||
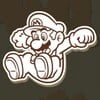
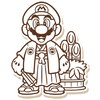
|[[File:SNWHappyNewYear.png|100px]] | |||
|Happy New Year | |||
|Visit Super Nintendo World between January 1 and January 15. | |||
|No | |||
|[[File:Coin - 2D art.svg|20px]]65 | |||
|- | |- | ||
|[[File:SNWOpeningMonth.png|100px]] | |||
|Opening Month | |||
|Visit Super Nintendo World during the opening month. | |||
|No | |||
|[[File:Coin - 2D art.svg|20px]]125 | |||
|- | |- | ||
|} | |} | ||
==8-Bit Secret stamps== | ==8-Bit Secret stamps== | ||
{| | {| class="wikitable" style="width:100%;text-align:center" | ||
!Icon | |||
! | !Name | ||
! | !Requirement | ||
! | !Repeatable | ||
! | !Coins Earned | ||
! | |||
|- | |- | ||
|[[File:SNW8BitGoomba.png|100px]] | |||
|8-Bit Goomba | |||
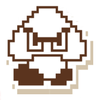
|Find 8-Bit [[Goomba]]. | |||
|No | |||
|[[File:Coin - 2D art.svg|20px]]45 | |||
|- | |- | ||
|[[File:SNW8BitBowser.png|100px]] | |||
|8-Bit Bowser | |||
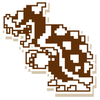
|Find 8-Bit [[Bowser]]. | |||
|No | |||
|[[File:Coin - 2D art.svg|20px]]45 | |||
|- | |- | ||
|[[File:SNW8BitLuigi1.png|100px]] | |||
|8-Bit Luigi | |||
|Find 8-Bit [[Luigi]]. | |||
|No | |||
|[[File:Coin - 2D art.svg|20px]]45 | |||
|- | |- | ||
|[[File:SNW8BitKoopaTroopa.png|100px]] | |||
|8-Bit Koopa Troopa | |||
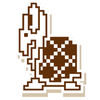
|Find 8-Bit [[Koopa Troopa]]. | |||
|No | |||
|[[File:Coin - 2D art.svg|20px]]45 | |||
|- | |- | ||
|[[File:SNW8BitLakitu.png|100px]] | |||
|8-Bit Lakitu | |||
|Find 8-Bit [[Lakitu]]. | |||
|No | |||
|[[File:Coin - 2D art.svg|20px]]55 | |||
|- | |- | ||
|[[File:SNW8BitToad.png|100px]] | |||
|8-Bit Toad | |||
|Find 8-Bit [[Toad]]. | |||
|No | |||
|[[File:Coin - 2D art.svg|20px]]55 | |||
|- | |- | ||
|[[File:SNW8BitPeach.png|100px]] | |||
|8-Bit Peach | |||
|Find 8-Bit [[Princess Peach|Peach]]. | |||
|No | |||
|[[File:Coin - 2D art.svg|20px]]45 | |||
|- | |- | ||
|[[File:SNW8BitMario1.png|100px]] | |||
|8-Bit Mario | |||
|Find 8-Bit [[Mario]]. | |||
|No | |||
|[[File:Coin - 2D art.svg|20px]]45 | |||
|- | |- | ||
|[[File:SNWPixelPerfect.png|100px]] | |||
|Pixel Perfect | |||
|Find all 8-Bit characters. | |||
|No | |||
|[[File:Coin - 2D art.svg|20px]]100 | |||
|- | |- | ||
|} | |} | ||
==Character stamps== | ==Character stamps== | ||
{| | {| class="wikitable" style="width:100%;text-align:center" | ||
!Icon | |||
! | !Name | ||
! | !Requirement | ||
! | !Repeatable | ||
! | !Coins Earned | ||
! | |||
|- | |- | ||
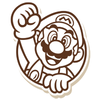
|[[File:SNWMeetMario.png|100px]] | |||
|Meet Mario | |||
|Meet Mario and collect a [[Key Coin|key]]! | |||
|Yes | |||
|[[File:Coin - 2D art.svg|20px]]35 | |||
|- | |- | ||
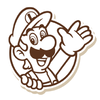
|[[File:SNWMeetLuigi.png|100px]] | |||
|Meet Luigi | |||
|Meet Luigi and collect a key! | |||
|Yes | |||
|[[File:Coin - 2D art.svg|20px]]35 | |||
|- | |- | ||
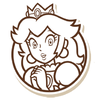
|[[File:SNWMeetPeach1.png|100px]] | |||
|Meet Peach | |||
|Meet Peach and collect a key! | |||
|Yes | |||
|[[File:Coin - 2D art.svg|20px]]35 | |||
|- | |- | ||
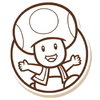
|[[File:SNWMeetToad.png|100px]] | |||
|Meet Toad | |||
|Meet Toad and collect a key! | |||
|Yes | |||
|[[File:Coin - 2D art.svg|20px]]35 | |||
|- | |- | ||
|} | |} | ||
==Note Block Rock stamps== | ==Note Block Rock stamps== | ||
{| | {| class="wikitable" style="width:100%;text-align:center" | ||
!Icon | |||
! | !Name | ||
! | !Requirement | ||
! | !Repeatable | ||
! | !Coins Earned | ||
! | |||
|- | |- | ||
|[[File:SNW Note Block stamp artwork.png|100px]] | |||
|Take Note | |||
|Play any note on Note Block Rock. | |||
|No | |||
|[[File:Coin - 2D art.svg|20px]]15 | |||
|- | |- | ||
|[[File:SNWRedSong.png|100px]] | |||
|Red Song | |||
|Play the Red Song ([[Ground Theme (Super Mario Bros.)|Ground Theme]]) on Note Block Rock. | |||
|Yes | |||
|[[File:Coin - 2D art.svg|20px]]25 | |||
|- | |- | ||
|[[File:SNWCyanSong.png|100px]] | |||
|Cyan Song | |||
|Play the Cyan Song (Water World) on Note Block Rock. | |||
|Yes | |||
|[[File:Coin - 2D art.svg|20px]]25 | |||
|- | |- | ||
|[[File:SNWGreenSong.png|100px]] | |||
|Green Song | |||
|Play the Green Song ([[Ground Theme (Super Mario Bros. 2)|Main Theme]]) on Note Block Rock. | |||
|Yes | |||
|[[File:Coin - 2D art.svg|20px]]25 | |||
|- | |- | ||
|[[File:SNWYellowSong.png|100px]] | |||
|Yellow Song | |||
|Play the Yellow Song ([[Super Mario 64 Main Theme|Bomb-omb Battlefield]]) on Note Block Rock. | |||
|Yes | |||
|[[File:Coin - 2D art.svg|20px]]25 | |||
|- | |- | ||
|[[File:SNWBlueSong.png|100px]] | |||
|Blue Song | |||
|Play the Blue Song ([[Underground Theme|Underground]]) on Note Block Rock. | |||
|Yes | |||
|[[File:Coin - 2D art.svg|20px]]25 | |||
|- | |- | ||
|[[File:SNWPinkSong.png|100px]] | |||
|Pink Song | |||
|Play the Pink Song ([[Athletic Theme (Super Mario World)|Athletic]]) on Note Block Rock. | |||
|Yes | |||
|[[File:Coin - 2D art.svg|20px]]25 | |||
|- | |- | ||
|[[File:SNWMaestro.png|100px]] | |||
|Maestro | |||
|Correctly play all 6 main songs on Note Block Rock. | |||
|No | |||
|[[File:Coin - 2D art.svg|20px]]100 | |||
|- | |- | ||
|[[File:SNWSlider.png|100px]] | |||
|Secret Yellow Song | |||
|Find a secret Yellow Song ([[Slider]]) on Note Block Rock. | |||
|Yes | |||
|[[File:Coin - 2D art.svg|20px]]50 | |||
|- | |- | ||
|[[File:SNWSecretRedSong.png|100px]] | |||
|Secret Red Song | |||
|Find a secret Red Song ([[Ending (Super Mario World)|Ending Theme]]) on Note Block Rock. | |||
|Yes | |||
|[[File:Coin - 2D art.svg|20px]]50 | |||
|- | |- | ||
|[[File:SNWSecretCyanSong.png|100px]] | |||
|Secret Cyan Song | |||
|Find a secret Cyan Song ([[Airship Theme|Airship]]) on Note Block Rock. | |||
|Yes | |||
|[[File:Coin - 2D art.svg|20px]]50 | |||
|- | |- | ||
|} | |} | ||
==Slot Machine stamps== | ==Slot Machine stamps== | ||
{| | {| class="wikitable" style="width:100%;text-align:center" | ||
!Icon | |||
! | !Name | ||
! | !Requirement | ||
! | !Repeatable | ||
! | !Coins Earned | ||
! | |||
|- | |- | ||
|[[File:SNWBeginnersLuck.png|100px]] | |||
|Beginner's Luck | |||
|Play the Slot Machine. | |||
|No | |||
|[[File:Coin - 2D art.svg|20px]]25 | |||
|- | |- | ||
|[[File:SNWHighRoller.png|100px]] | |||
|High Roller | |||
|Play the Slot Machine 7 times. | |||
|No | |||
|[[File:Coin - 2D art.svg|20px]]125 | |||
|- | |- | ||
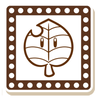
|[[File:SNWLeafMatch.png|100px]] | |||
|Leaf Match | |||
|Match 4 Super Leaf images on the Slot Machine. | |||
|Yes | |||
|[[File:Coin - 2D art.svg|20px]]20 | |||
|- | |- | ||
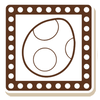
|[[File:SNWEggMatch.png|100px]] | |||
|Egg Match | |||
|Match 4 [[Yoshi's Egg]] images on the Slot Machine. | |||
|Yes | |||
|[[File:Coin - 2D art.svg|20px]]20 | |||
|- | |- | ||
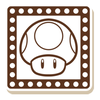
|[[File:SNWMushroomMatch.png|100px]] | |||
|Mushroom Match | |||
|Match 4 Super Mushroom images on the Slot Machine. | |||
|Yes | |||
|[[File:Coin - 2D art.svg|20px]]20 | |||
|- | |- | ||
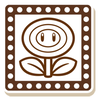
|[[File:SNWFlowerMatch.png|100px]] | |||
|Flower Match | |||
|Match 4 Fire Flower images on the Slot Machine. | |||
|Yes | |||
|[[File:Coin - 2D art.svg|20px]]20 | |||
|- | |- | ||
|[[File:SNWAllStarMatch.png|100px]] | |||
|All-Star Match | |||
|Match 4 Super Star images on the Slot Machine. | |||
|Yes | |||
|[[File:Coin - 2D art.svg|20px]]20 | |||
|- | |- | ||
|} | |} | ||
==Binocular stamps== | ==Binocular stamps== | ||
{| | {| class="wikitable" style="width:100%;text-align:center" | ||
!Icon | |||
! | !Name | ||
! | !Requirement | ||
! | !Repeatable | ||
! | !Coins Earned | ||
! | |||
|- | |- | ||
|[[File:SNWLuigiLookIcon.jpg|100px]] | |||
|Binoculars | |||
|Spot Super Mario Land through the [[Binoculars]]. | |||
|No | |||
|[[File:Coin - 2D art.svg|20px]]25 | |||
|- | |- | ||
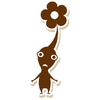
|[[File:SNWPickOutPikmin.png|100px]] | |||
|Pick out Pikmin | |||
|Use the Binoculars to zoom in on [[Pikmin]] on [[Mount Beanpole]]. | |||
|Yes | |||
|[[File:Coin - 2D art.svg|20px]]65 | |||
|- | |- | ||
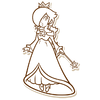
|[[File:SNWCometGetIt.png|100px]] | |||
|Comet Get It | |||
|Use the Binoculars to zoom in on [[Rosalina]]. | |||
|No | |||
|[[File:Coin - 2D art.svg|20px]]65 | |||
|- | |- | ||
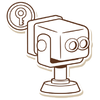
|[[File:SNWHiddenKey.png|100px]] | |||
|Hidden Key | |||
|After you defeat [[Bowser Jr.]], use the Binoculars to find a hidden key. | |||
|Yes | |||
|[[File:Coin - 2D art.svg|20px]]100 | |||
|- | |- | ||
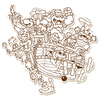
|[[File:SNWSTL.png|100px]] | |||
|Sky's the Limit | |||
|Use the Binoculars to zoom in on the [[Airship|airship]]. | |||
|No | |||
|[[File:Coin - 2D art.svg|20px]]65 | |||
|- | |- | ||
|} | |} | ||
==Key stamps== | ==Key stamps== | ||
{| | {| class="wikitable" style="width:100%;text-align:center" | ||
!Icon | |||
! | !Name | ||
! | !Requirement | ||
! | !Repeatable | ||
! | !Coins Earned | ||
! | |||
|- | |- | ||
|[[File:SNWMasterKey.jpg|100px]] | |||
|Master Key | |||
|Collect all 5 keys from the key challenges. | |||
|No | |||
|[[File:Coin - 2D art.svg|20px]]80 | |||
|- | |- | ||
|[[File:SNWBossBattler.jpg|100px]] | |||
|Boss Battler | |||
|Collect 3 keys to gain access to Bowser Jr.’s Lair. | |||
|No | |||
|[[File:Coin - 2D art.svg|20px]]65 | |||
|- | |- | ||
|[[File:SNWGCC.png|100px]] | |||
|Goomba Crazy Crank | |||
|Play the Goomba Crazy Crank game. | |||
|No | |||
|[[File:Coin - 2D art.svg|20px]]25 | |||
|- | |- | ||
|[[File:SNWGCCS.png|100px]] | |||
|Goomba Crazy Crank Skilled | |||
|Beat Goomba Crazy Crank 2 times on any difficulty level. | |||
|No | |||
|[[File:Coin - 2D art.svg|20px]]55 | |||
|- | |- | ||
|[[File:SNWGCCE.png|100px]] | |||
|Goomba Crazy Crank Expert | |||
|Beat Goomba Crazy Crank 5 times on any difficulty level. | |||
|No | |||
|[[File:Coin - 2D art.svg|20px]]80 | |||
|- | |- | ||
|[[File:SNWGCCM.png|100px]] | |||
|Goomba Crazy Crank Master | |||
|Beat Goomba Crazy Crank on the hardest difficulty level. | |||
|No | |||
|[[File:Coin - 2D art.svg|20px]]80 | |||
|- | |- | ||
|[[File:SNWGCCB.png|100px]] | |||
|Goomba Crazy Crank Bonus | |||
|Beat Goomba Crazy Crank with a bonus. | |||
|Yes | |||
|[[File:Coin - 2D art.svg|20px]]45 | |||
|- | |- | ||
|[[File:SNWGCCK.png|100px]] | |||
|Goomba Crazy Crank Key | |||
|Get the Goomba Crazy Crank Key. | |||
|Yes | |||
|[[File:Coin - 2D art.svg|20px]]35 | |||
|- | |- | ||
|[[File:SNWKTPP.png|100px]] | |||
|Koopa Troopa POWer Punch | |||
|Play Koopa Troopa POWer Punch. | |||
|No | |||
|[[File:Coin - 2D art.svg|20px]]25 | |||
|- | |- | ||
|[[File:SNWKTPPS.png|100px]] | |||
|Koopa Troopa POWer Punch Skilled | |||
|Beat Koopa Troopa POWer Punch 2 times on any difficulty level. | |||
|No | |||
|[[File:Coin - 2D art.svg|20px]]55 | |||
|- | |- | ||
|[[File:SNWKTPPE.png|100px]] | |||
|Koopa Troopa POWer Punch Expert | |||
|Beat Koopa Troopa POWer Punch 5 times on any difficulty level. | |||
|No | |||
|[[File:Coin - 2D art.svg|20px]]80 | |||
|- | |- | ||
|[[File:SNWKTPPM2.png|100px]] | |||
|Koopa Troopa POWer Punch Master | |||
|Beat Koopa Troopa POWer Punch on the hardest difficulty level. | |||
|No | |||
|[[File:Coin - 2D art.svg|20px]]80 | |||
|- | |- | ||
|[[File:SNW-KoopaWashingShell.jpg|100px]] | |||
|Koopa Troopa POWer Punch Bonus | |||
|Beat Koopa Troopa POWer Punch with a bonus. | |||
|Yes | |||
|[[File:Coin - 2D art.svg|20px]]45 | |||
|- | |- | ||
|[[File:SNWKTPPK.png|100px]] | |||
|Koopa Troopa POWer Punch Key | |||
|Get the Koopa Troopa POWer Punch Key. | |||
|Yes | |||
|[[File:Coin - 2D art.svg|20px]]35 | |||
|- | |- | ||
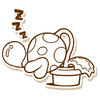
|[[File:SNWPPNM.png|100px]] | |||
|Piranha Plant Nap Mishap | |||
|Play Piranha Plant Nap Mishap. | |||
|No | |||
|[[File:Coin - 2D art.svg|20px]]25 | |||
|- | |- | ||
|[[File:SNWPPNMS.png|100px]] | |||
|Piranha Plant Nap Mishap Skilled | |||
|Beat Piranha Plant Nap Mishap 2 times on any difficulty level. | |||
|No | |||
|[[File:Coin - 2D art.svg|20px]]55 | |||
|- | |- | ||
|[[File:SNWPPNME.png|100px]] | |||
|Piranha Plant Nap Mishap Expert | |||
|Beat Piranha Plant Nap Mishap 5 times on any difficulty level. | |||
|No | |||
|[[File:Coin - 2D art.svg|20px]]80 | |||
|- | |- | ||
|[[File:SNWPPNMM.png|100px]] | |||
|Piranha Plant Nap Mishap Master | |||
|Beat Piranha Plant Nap Mishap on the hardest difficult level. | |||
|No | |||
|[[File:Coin - 2D art.svg|20px]]80 | |||
|- | |- | ||
|[[File:SNWPPNMB.png|100px]] | |||
|Piranha Plant Nap Mishap Bonus | |||
|Beat Piranha Plant Nap Mishap with a bonus | |||
|Yes | |||
|[[File:Coin - 2D art.svg|20px]]45 | |||
|- | |- | ||
|[[File:SNWPPNMK.png|100px]] | |||
|Piranha Plant Nap Mishap Key | |||
|Get the Piranha Plant Nap Mishap key. | |||
|Yes | |||
|[[File:Coin - 2D art.svg|20px]]35 | |||
|- | |- | ||
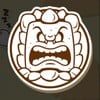
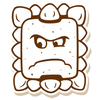
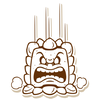
|[[File:SNWThwompPanelPanic.jpg|100px]] | |||
|Thwomp Panel Panic | |||
|Play Thwomp Panel Panic. | |||
|No | |||
|[[File:Coin - 2D art.svg|20px]]25 | |||
|- | |- | ||
|[[File:SNWTPPS.png|100px]] | |||
|Thwomp Panel Panic Skilled | |||
|Beat Thwomp Panel Panic 2 times on any difficulty level. | |||
|No | |||
|[[File:Coin - 2D art.svg|20px]]55 | |||
|- | |- | ||
|[[File:SNWTPPE.png|100px]] | |||
|Thwomp Panel Panic Expert | |||
|Beat Thwomp Panel Panic 5 times on any difficulty level. | |||
|No | |||
|[[File:Coin - 2D art.svg|20px]]80 | |||
|- | |- | ||
|[[File:SNWTPPM.png|100px]] | |||
|Thwomp Panel Panic Master | |||
|Beat Thwomp Panel Panic on the hardest difficult level. | |||
|No | |||
|[[File:Coin - 2D art.svg|20px]]80 | |||
|- | |- | ||
|[[File:SNWThwompPanelPanicBonus.jpg|100px]] | |||
|Thwomp Panel Panic Bonus | |||
|Beat Thwomp Panel Panic with a bonus. | |||
|Yes | |||
|[[File:Coin - 2D art.svg|20px]]45 | |||
|- | |- | ||
|[[File:SNWThwompPanelPanicKey.jpg|100px]] | |||
|Thwomp Panel Panic Key | |||
|Get the Thwomp Panel Panic key. | |||
|Yes | |||
|[[File:Coin - 2D art.svg|20px]]35 | |||
|- | |- | ||
|[[File:SNWBKRM.png|100px]] | |||
|Bob-omb Kaboom Room | |||
|Play Bob-omb Kaboom Room. | |||
|No | |||
|[[File:Coin - 2D art.svg|20px]]25 | |||
|- | |- | ||
|[[File:SNWBKRS.png|100px]] | |||
|Bob-omb Kaboom Room Skilled | |||
|Beat Bob-omb Kaboom Room 2 times on any difficulty level. | |||
|No | |||
|[[File:Coin - 2D art.svg|20px]]55 | |||
|- | |- | ||
|[[File:SNWBKRE.png|100px]] | |||
|Bob-omb Kaboom Room Expert | |||
|Beat Bob-omb Kaboom Room 5 times on any difficulty level. | |||
|No | |||
|[[File:Coin - 2D art.svg|20px]]80 | |||
|- | |- | ||
|[[File:SNWBKRM.png|100px]] | |||
|Bob-omb Kaboom Room Master | |||
|Beat Bob-omb Kaboom Room on the hardest difficult level. | |||
|No | |||
|[[File:Coin - 2D art.svg|20px]]80 | |||
|- | |- | ||
|[[File:SNWBKRB.png|100px]] | |||
|Bob-omb Kaboom Room Bonus | |||
|Beat Bob-omb Kaboom Room with a bonus. | |||
|Yes | |||
|[[File:Coin - 2D art.svg|20px]]45 | |||
|- | |- | ||
|[[File:SNWBKRK.png|100px]] | |||
|Bob-omb Kaboom Room Key | |||
|Get the Bob-omb Kaboom Room key. | |||
|Yes | |||
|[[File:Coin - 2D art.svg|20px]]35 | |||
|- | |- | ||
|} | |} | ||
==Bowser Jr. Shadow Showdown stamps== | ==Bowser Jr. Shadow Showdown stamps== | ||
{| | {| class="wikitable" style="width:100%;text-align:center" | ||
!Icon | |||
! | !Name | ||
! | !Requirement | ||
! | !Repeatable | ||
! | !Coins Earned | ||
! | |||
|- | |- | ||
|[[File:SNWTheGoldenMushroom.jpg|100px]] | |||
|Golden Mushroom | |||
|Defeat Bowser Jr. | |||
|Yes | |||
|[[File:Coin - 2D art.svg|20px]]65 | |||
|- | |- | ||
|[[File:SNWBJS.png|100px]] | |||
|Bowser Jr. Skilled | |||
|Defeat Bowser Jr. 2 times in the Shadow Showdown. | |||
|No | |||
|[[File:Coin - 2D art.svg|20px]]55 | |||
|- | |- | ||
|[[File:SNWBJE.png|100px]] | |||
|Bowser Jr. Expert | |||
|Defeat Bowser Jr. 5 times in the Shadow Showdown. | |||
|No | |||
|[[File:Coin - 2D art.svg|20px]]100 | |||
|- | |- | ||
|[[File:SNWPerfectBattle.png|100px]] | |||
|Perfect Battle | |||
|Win the Bowser Jr. Shadow Showdown without taking damage. | |||
|Yes | |||
|[[File:Coin - 2D art.svg|20px]]175 | |||
|- | |- | ||
|[[File:SNWSpectacularWin.png|100px]] | |||
|Spectacular Win | |||
|Defeat Bowser Jr. with every player in the group earning an average of at least 20 coins. | |||
|Yes | |||
|[[File:Coin - 2D art.svg|20px]]100 | |||
|- | |- | ||
|[[File:SNWBowserJrHero.jpg|100px]] | |||
|Bowser Jr. Hero | |||
|Defeat Bowser Jr. with the highest individual score. | |||
|Yes | |||
|[[File:Coin - 2D art.svg|20px]]125 | |||
|- | |- | ||
|[[File:SNWChestIcon.jpg|100px]] | |||
|Toy Chest | |||
|Unlock Bowser Jr.’s Toy Chest. | |||
|No | |||
|[[File:Coin - 2D art.svg|20px]]35 | |||
|- | |- | ||
|[[File:SNWBowserJrBlockIcon.jpg|100px]] | |||
|First Punch | |||
|Punch the Bowser Jr. Block. | |||
|No | |||
|[[File:Coin - 2D art.svg|20px]]45 | |||
|- | |- | ||
|[[File:SNWFlyingQuestionBlock.jpg|100px]] | |||
|Flying ? Block | |||
|Punch a [[Flying ? Block|flying ? Block]] in Bowser Jr. Shadow Showdown. | |||
|No | |||
|[[File:Coin - 2D art.svg|20px]]25 | |||
|- | |- | ||
|[[File:SNWFireFighterMario.jpg|100px]] | |||
|Fire Fighter | |||
|Destroy something with a [[fireball]] in Bowser Jr. Shadow Showdown. | |||
|No | |||
|[[File:Coin - 2D art.svg|20px]]25 | |||
|- | |- | ||
|[[File:SNWKoopaParatroopaIcon.jpg|100px]] | |||
|Koopa Paratroopa | |||
|Defeat a [[Koopa Paratroopa]] in Bowser Jr. Shadow Showdown. | |||
|No | |||
|[[File:Coin - 2D art.svg|20px]]25 | |||
|- | |- | ||
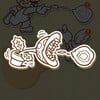
|[[File:SNWPiranhaPlantBJSS.jpg|100px]] | |||
|Piranha Plant | |||
|Defeat a [[Piranha Plant]] in Bowser Jr. Shadow Showdown. | |||
|No | |||
|[[File:Coin - 2D art.svg|20px]]35 | |||
|- | |- | ||
|[[File:SNWMarioJumpIcon.jpg|100px]] | |||
|30 Coins | |||
|Collect 30 or more [[coin]]s in a single battle with Bowser Jr. | |||
|Yes | |||
|[[File:Coin - 2D art.svg|20px]]15 | |||
|- | |- | ||
|[[File:SNW55Coins.png|100px]] | |||
|55 Coins | |||
|Collect 55 or more coins in a single battle with Bowser Jr. | |||
|Yes | |||
|[[File:Coin - 2D art.svg|20px]]40 | |||
|- | |- | ||
|[[File:SNW100Coin.png|100px]] | |||
|100 Coins | |||
|Collect 100 cumulative coins over all your battles with Bowser Jr. | |||
|No | |||
|[[File:Coin - 2D art.svg|20px]]55 | |||
|- | |- | ||
|[[File:SNW300Coins.png|100px]] | |||
|300 Coins | |||
|Collect 300 cumulative coins over all your battles with Bowser Jr. | |||
|No | |||
|[[File:Coin - 2D art.svg|20px]]80 | |||
|- | |- | ||
|} | |} | ||
==Block stamps== | ==Block stamps== | ||
{| | {| class="wikitable" style="width:100%;text-align:center" | ||
!Icon | |||
! | !Name | ||
! | !Requirement | ||
! | !Repeatable | ||
! | !Coins Earned | ||
! | |||
|- | |- | ||
|[[File:SNWBrickBlockIcon.jpg|100px]] | |||
|Brick Block | |||
|Punch any [[Brick Block]]. | |||
|No | |||
|[[File:Coin - 2D art.svg|20px]]15 | |||
|- | |- | ||
|[[File:SNWTinyFists.png|100px]] | |||
|Tiny Fists | |||
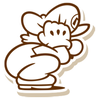
|Punch a [[? Block]] while you’re [[Small Mario|small]]. | |||
|No | |||
|[[File:Coin - 2D art.svg|20px]]35 | |||
|- | |- | ||
|[[File:SNWQuestionBlockIcon.jpg|100px]] | |||
|? Block | |||
|Punch any ? Block. | |||
|No | |||
|[[File:Coin - 2D art.svg|20px]]15 | |||
|- | |- | ||
|[[File:SNWPOWBlockIcon.jpg|100px]] | |||
|POW Block | |||
|Punch a [[POW Block]]. | |||
|No | |||
|[[File:Coin - 2D art.svg|20px]]25 | |||
|- | |- | ||
|[[File:SNWFrostedGlacierBlockIcon.jpg|100px]] | |||
|Frosted Glacier Blocks | |||
|Punch all blocks in [[Frosted Glacier]] area. | |||
|Yes | |||
|[[File:Coin - 2D art.svg|20px]]35 | |||
|- | |- | ||
|[[File:SNWQuestionMaster.png|100px]] | |||
|Question Master | |||
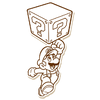
|Punch every ? Block in one day. | |||
|Yes | |||
|[[File:Coin - 2D art.svg|20px]]80 | |||
|- | |- | ||
|[[File:SNWBlockBreaker.png|100px]] | |||
|Block Breaker | |||
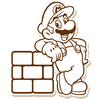
|Punch every block in Super Nintendo World. | |||
|No | |||
|[[File:Coin - 2D art.svg|20px]]100 | |||
|- | |- | ||
|[[File:SNWBlockBust.jpg|100px]] | |||
|Block Buster | |||
|Punch 250 blocks. | |||
|No | |||
|[[File:Coin - 2D art.svg|20px]]100 | |||
|- | |- | ||
|} | |} | ||
| Line 869: | Line 858: | ||
==Mario Kart stamps== | ==Mario Kart stamps== | ||
{{more images|section=yes|Missing stamp icons for "On the Mark" and "Secret Block 2"}} | {{more images|section=yes|Missing stamp icons for "On the Mark" and "Secret Block 2"}} | ||
{| | {| class="wikitable" style="width:100%;text-align:center" | ||
!Icon | |||
! | !Name | ||
! | !Requirement | ||
! | !Repeatable | ||
! | !Coins Earned | ||
! | |||
|- | |- | ||
|[[File:SNWGoldenUniversalCup.jpg|100px]] | |||
|Golden Cup | |||
|Take a ride on Mario Kart. | |||
|No | |||
|[[File:Coin - 2D art.svg|20px]]65 | |||
|- | |- | ||
|[[File:SNWSCB.png|100px]] | |||
|Start Coin Bonus | |||
|Get the Start Coin bonus at the [[Starting Line|starting line]] in Mario Kart. | |||
|Yes | |||
|[[File:Coin - 2D art.svg|20px]]65 | |||
|- | |- | ||
|[[File:SNWMarioKarter.png|100px]] | |||
|Mario Karter | |||
|Ride Mario Kart 2 times. | |||
|No | |||
|[[File:Coin - 2D art.svg|20px]]55 | |||
|- | |- | ||
|[[File:SNWSuperMarioKarter.png|100px]] | |||
|Super Mario Karter | |||
|Ride Mario Kart 5 times. | |||
|No | |||
|[[File:Coin - 2D art.svg|20px]]55 | |||
|- | |- | ||
|[[File:SNWExpertShooter.jpg|100px]] | |||
|Expert Shooter | |||
|Land 3 consecutive hits on enemies. | |||
|Yes | |||
|[[File:Coin - 2D art.svg|20px]]15 | |||
|- | |- | ||
|[[File:SNWSharpShooter.jpg|100px]] | |||
|Sharp Shooter | |||
|Land 10 consecutive hits on enemies. | |||
|Yes | |||
|[[File:Coin - 2D art.svg|20px]]35 | |||
|- | |- | ||
|[[File:Nocoverart.png|100px]] | |||
|On the Mark | |||
|Land 20 consecutive hits on enemies. | |||
|Yes | |||
|[[File:Coin - 2D art.svg|20px]]65 | |||
|- | |- | ||
|[[File:SNWSuperMarioPro.png|100px]] | |||
|Super Mario Pro | |||
|Get to the finish line without shooting any Team Mario racers. | |||
|Yes | |||
|[[File:Coin - 2D art.svg|20px]]100 | |||
|- | |- | ||
|[[File:SNWByeByeBowser.jpg|100px]] | |||
|Bye-Bye, Bowser | |||
|Hit Bowser and all the [[Koopalings]] in a single race on Mario Kart. | |||
|Yes | |||
|[[File:Coin - 2D art.svg|20px]]125 | |||
|- | |- | ||
|[[File:SNWBowserBruiser.png|100px]] | |||
|Bowser Bruiser | |||
|Hit Bowser with a [[Green Shell|shell]] 10 times on Mario Kart. | |||
|No | |||
|[[File:Coin - 2D art.svg|20px]]65 | |||
|- | |- | ||
|[[File:SNWBowserBuster.png|100px]] | |||
|Bowser Buster | |||
|Hit Bowser with a shell 25 times on Mario Kart. | |||
|No | |||
|[[File:Coin - 2D art.svg|20px]]100 | |||
|- | |- | ||
|[[File:SNWBooWho.jpg|100px]] | |||
|Boo Who? | |||
|Defeat 5 [[Boo]]s on Mario Kart. | |||
|No | |||
|[[File:Coin - 2D art.svg|20px]]25 | |||
|- | |- | ||
|[[File:SNWKK.png|100px]] | |||
|Koopa Krunch | |||
|Defeat 5 Koopa Paratroopas on Mario Kart. | |||
|No | |||
|[[File:Coin - 2D art.svg|20px]]25 | |||
|- | |- | ||
|[[File:SNWSB1.png|100px]] | |||
|Secret Block 1 | |||
|Find and hit the secret block in the area where the [[Piranha Plant]]s are. | |||
|No | |||
|[[File:Coin - 2D art.svg|20px]]45 | |||
|- | |- | ||
|[[File:Nocoverart.png|100px]] | |||
|Secret Block 2 | |||
|Find and hit the secret block in the underwater area where the [[Cheep Cheep]]s are | |||
|No | |||
|[[File:Coin - 2D art.svg|20px]]45 | |||
|- | |- | ||
|[[File:SNWSecretBlock3.png|100px]] | |||
|Secret Block 3 | |||
|Find and hit the secret block in the area near the school of [[Fishbone]]s. | |||
|No | |||
|[[File:Coin - 2D art.svg|20px]]45 | |||
|- | |- | ||
|[[File:SNWSecretBlock4.png|100px]] | |||
|Secret Block 4 | |||
|Find and hit the secret block inside the haunted mansion where the Boos are. | |||
|No | |||
|[[File:Coin - 2D art.svg|20px]]45 | |||
|- | |- | ||
|[[File:SNWSecretBlock5.png|100px]] | |||
|Secret Block 5 | |||
|Find and hit the secret block in the clouds where the Koopa Paratroopas are. | |||
|No | |||
|[[File:Coin - 2D art.svg|20px]]45 | |||
|- | |- | ||
|[[File:SNWSecretBlock6.png|100px]] | |||
|Secret Block 6 | |||
|Find and hit the secret block hidden in the volcanic area where [[Lava Bowser]] appears. | |||
|No | |||
|[[File:Coin - 2D art.svg|20px]]45 | |||
|- | |- | ||
|[[File:SNWSBC.png|100px]] | |||
|Secret Block Collector | |||
|Find and hit all of the secret blocks. | |||
|No | |||
|[[File:Coin - 2D art.svg|20px]]125 | |||
|- | |- | ||
|[[File:SNWMegaFishBone.png|100px]] | |||
|Mega Fish Bone | |||
|Hit [[Fish Bone|Mega Fish Bone]] with a shell 20 times on Mario Kart. | |||
|No | |||
|[[File:Coin - 2D art.svg|20px]]100 | |||
|- | |- | ||
|[[File:SNWCheepShot.png|100px]] | |||
|Cheep Shot | |||
|Defeat 5 Cheep Cheeps on Mario Kart. | |||
|No | |||
|[[File:Coin - 2D art.svg|20px]]25 | |||
|- | |- | ||
|[[File:SNWLavaBowser.png|100px]] | |||
|Lava Bowser | |||
|Hit Lava Bowser with a shell 20 times on Mario Kart. | |||
|No | |||
|[[File:Coin - 2D art.svg|20px]]100 | |||
|- | |- | ||
|[[File:SNWDrifter.jpg|100px]] | |||
|Drifter | |||
|Successfully [[drift]] and achieve the maximum number of coins for three turns in a row. | |||
|Yes | |||
|[[File:Coin - 2D art.svg|20px]]15 | |||
|- | |- | ||
|[[File:SNWDriftApprentice.jpg|100px]] | |||
|Drift Apprentice | |||
|Successfully drift each turn in the ride. | |||
|Yes | |||
|[[File:Coin - 2D art.svg|20px]]45 | |||
|- | |- | ||
|[[File:SNWDriftMaster.png|100px]] | |||
|Drift Master | |||
|Successfully drift each turn in the ride and get the maximum number of coins on each one. | |||
|Yes | |||
|[[File:Coin - 2D art.svg|20px]]45 | |||
|- | |- | ||
|[[File:SNWPlaceInTheRace.jpg|100px]] | |||
|Place in the Race | |||
|Finished in… not exactly first place in your race in Mario Kart. | |||
|No | |||
|[[File:Coin - 2D art.svg|20px]]25 | |||
|- | |- | ||
|[[File:SNWPocketChange.jpg|100px]] | |||
|Pocket Change | |||
|Collect 75 or more coins in a single ride on Mario Kart. | |||
|Yes | |||
|[[File:Coin - 2D art.svg|20px]]25 | |||
|- | |- | ||
|[[File:SNWPerfectionist.png|100px]] | |||
|Perfectionist | |||
|Collect 150 or more coins in a single ride on Mario Kart. | |||
|Yes | |||
|[[File:Coin - 2D art.svg|20px]]65 | |||
|- | |- | ||
|[[File:SNWCoinKeeper.png|100px]] | |||
|Coin Keeper | |||
|Collect 500 coins total on Mario Kart. | |||
|No | |||
|[[File:Coin - 2D art.svg|20px]]100 | |||
|- | |- | ||
|[[File:SNWCoinMasterIcon.png|100px]] | |||
|Coin Master | |||
|Collect 1,000 coins in total on Mario Kart. | |||
|No | |||
|[[File:Coin - 2D art.svg|20px]]150 | |||
|- | |- | ||
|[[File:SNWFirstPlace.png|100px]] | |||
|First Place | |||
|Finish in 1st place on Mario Kart. | |||
|No | |||
|[[File:Coin - 2D art.svg|20px]]100 | |||
|- | |- | ||
|[[File:SNWTopKart.jpg|100px]] | |||
|Top Kart | |||
|Get the highest individual coin score in your [[kart]] in Mario Kart. | |||
|Yes | |||
|[[File:Coin - 2D art.svg|20px]]250 | |||
|- | |- | ||
|[[File:SNWTopRacer.jpg|100px]] | |||
|Top Racer | |||
|Get the highest individual coin score between the two Mario Karts in the race. | |||
|Yes | |||
|[[File:Coin - 2D art.svg|20px]]65 | |||
|- | |- | ||
|[[File:SNWTrophyHunter.png|100px]] | |||
|Trophy Hunter | |||
|Finish in 1st place 2 times on Mario Kart. | |||
|No | |||
|[[File:Coin - 2D art.svg|20px]]125 | |||
|- | |- | ||
|[[File:SNWProRacer.png|100px]] | |||
|Pro Racer | |||
|Finish in 1st place 5 times on Mario Kart. | |||
|No | |||
|[[File:Coin - 2D art.svg|20px]]150 | |||
|- | |- | ||
|} | |} | ||
==Yoshi's Adventure stamps== | ==Yoshi's Adventure stamps== | ||
{| | {| class="wikitable" style="width:100%;text-align:center" | ||
!Icon | |||
! | !Name | ||
! | !Requirement | ||
! | !Repeatable | ||
! | !Coins Earned | ||
! | |||
|- | |- | ||
|[[File:SNWFruitBasket.png|100px]] | |||
|Fruit Basket | |||
|Get [[Fruit (Yoshi food)|fruit]] from the basket inside Mt. Beanpole. | |||
|Yes | |||
|[[File:Coin - 2D art.svg|20px]]45 | |||
|- | |- | ||
|[[File:SNWToadTracker1.png|100px]] | |||
|Toad Tracker | |||
|Ride on Yoshi’s Adventure 2 times. | |||
|No | |||
|[[File:Coin - 2D art.svg|20px]]55 | |||
|- | |- | ||
|[[File:SNWToadProtector.png|100px]] | |||
|Toad Protector | |||
|Ride on Yoshi’s Adventure 5 times. | |||
|No | |||
|[[File:Coin - 2D art.svg|20px]]125 | |||
|- | |- | ||
|[[File:SNWGoldenEgg.png|100px]] | |||
|Golden Egg | |||
|Get the golden egg on Yoshi’s Adventure. | |||
|Yes | |||
|[[File:Coin - 2D art.svg|20px]]65 | |||
|- | |- | ||
|[[File:SNWGreenEgg.png|100px]] | |||
|Green Egg | |||
|Get a green egg when you punch the [[Egg Block]] inside Mt. Beanpole. | |||
|Yes | |||
|[[File:Coin - 2D art.svg|20px]]15 | |||
|- | |- | ||
|[[File:SNWBlueEgg.png|100px]] | |||
|Blue Egg | |||
|Get a blue egg when you punch the Egg Block inside Mt. Beanpole. | |||
|Yes | |||
|[[File:Coin - 2D art.svg|20px]]15 | |||
|- | |- | ||
|[[File:SNWPinkEgg.png|100px]] | |||
|Pink Egg | |||
|Get a pink egg when you punch the Egg Block inside Mt. Beanpole. | |||
|Yes | |||
|[[File:Coin - 2D art.svg|20px]]15 | |||
|- | |- | ||
|[[File:SNW-BabyYoshiHatching.png|100px]] | |||
|Purple Egg | |||
|Get a purple egg when you punch the Egg Block inside Mt. Beanpole. | |||
|Yes | |||
|[[File:Coin - 2D art.svg|20px]]15 | |||
|- | |- | ||
|[[File:SNWYellowEgg.png|100px]] | |||
|Yellow Egg | |||
|Get a yellow egg when you punch the Egg Block inside Mt. Beanpole. | |||
|Yes | |||
|[[File:Coin - 2D art.svg|20px]]15 | |||
|- | |- | ||
|[[File:SNW-BabyYoshi.png|100px]] | |||
|Red Egg | |||
|Get a red egg when you punch the Egg Block inside Mt. Beanpole. | |||
|Yes | |||
|[[File:Coin - 2D art.svg|20px]]15 | |||
|- | |- | ||
|[[File:SNWToadTracker.png|100px]] | |||
|Egg-cellent! | |||
|Collect all 6 egg colours when you punch the Egg Block inside Mt. Beanpole. | |||
|No | |||
|[[File:Coin - 2D art.svg|20px]]125 | |||
|} | |} | ||
[[Category:Items]] | [[Category:Items]] | ||
Revision as of 12:24, May 8, 2024
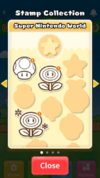
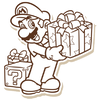
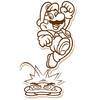
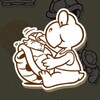
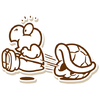
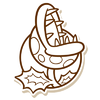
At Super Nintendo World, visitors can complete various challenges and participate in activities to earn digital collectibles referred to as stamps. These may only be obtained with a Power-Up Band linked to the Super Nintendo World section of the official Universal Studios smartphone application found on the App Store and Google Play Store. There are a total of 170 stamps to collect, (131 in Universal Studios Hollywood), all separated into three categories in the app: "Super Nintendo World" (stamps earned by collecting coins, placement on leaderboards, etc.), "Super Mario Land" (stamps linked to physical events or minigames in Super Nintendo World), and "Mario Kart" (stamps earned exclusively in Mario Kart: Bowser's Challenge). Every stamp has its own icon, portraying various characters or objects, and are displayed on the app in the players' Stamp Collection shortly after the stamp's requirement is completed.
The following is a list of stamps that can be obtained at Super Nintendo World.
Item stamps
| Icon | Name | Requirement | Repeatable | Coins Earned |
|---|---|---|---|---|
|
Golden Star | Collect all the golden stamps. | No | |
| Super Mushroom | Collect a Super Mushroom power-up. | Yes | ||
| Fire Flower | Collect a Fire Flower power-up. | Yes | ||
|
Super Star | Collect a Super Star power-up. | Yes | |
| Turnip | Collect a Turnip power-up. | Yes | ||
| Super Leaf | Collect a Super Leaf power-up. | Yes | ||
| 1-Up Mushroom | Collect a 1-Up Mushroom power-up. | Yes | ||
| Ice Flower | Collect an Ice Flower power-up. | Yes | ||
|
Playing with Power | Get all the power-ups. | No | |
| Super Acorn | Get the Super Acorn from Toad | Yes | ||
|
Super Bell | Get the Super Bell from Toad. | Yes | |
|
Checkpoint Flag | Touch the Checkpoint Flag. | No |
Coins and Leaderboard stamps
| Icon | Name | Requirement | Repeatable | Coins Earned |
|---|---|---|---|---|
|
Moneybags | Earn 5,000 coins. | No | |
|
Coin Collector | Earn 25,000 coins. | No | |
|
Treasure Hunter | Earn 100,000 coins. | No | |
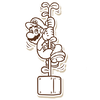
|
Top 1000 Score | Achieve a Top 1000 score on the daily leaderboard. | Yes | |
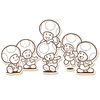
|
Top 10 Daily | Achieve a Top 10 score on the daily leaderboard. | Yes | |
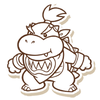
|
Who's the Boss | Achieve a Top 1000 score on the Bowser Jr. Shadow Showdown leaderboard. | Yes | |
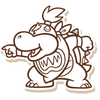
|
Super Boss | Achieve a Top 10 score on the Bowser Jr. Shadow Showdown leaderboard. | Yes | |
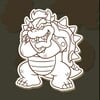
|
Top Racer | Achieve a Top 1000 score on the Mario Kart leaderboard. | Yes | |
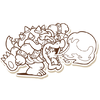
|
Top Super Racer | Achieve a Top 10 score on the Mario Kart leaderboard. | Yes | |
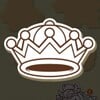
|
Team Crown | Win a team crown in the hourly Team Competition. | Yes | |
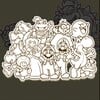
|
Royalty | Earn more than 1 crown in a day in the hourly Team Competition. | Yes | |
|
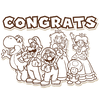
Land Explorer | Complete everything on your Super Mario Land map. | No |
Seasonal stamps
8-Bit Secret stamps
| Icon | Name | Requirement | Repeatable | Coins Earned |
|---|---|---|---|---|
|
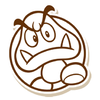
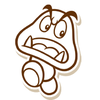
8-Bit Goomba | Find 8-Bit Goomba. | No | |
|
8-Bit Bowser | Find 8-Bit Bowser. | No | |

|
8-Bit Luigi | Find 8-Bit Luigi. | No | |
|
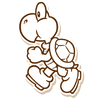
8-Bit Koopa Troopa | Find 8-Bit Koopa Troopa. | No | |
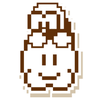
|
8-Bit Lakitu | Find 8-Bit Lakitu. | No | |
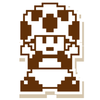
|
8-Bit Toad | Find 8-Bit Toad. | No | |
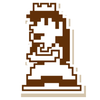
|
8-Bit Peach | Find 8-Bit Peach. | No | |
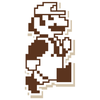
|
8-Bit Mario | Find 8-Bit Mario. | No | |
| Pixel Perfect | Find all 8-Bit characters. | No |
Character stamps
| Icon | Name | Requirement | Repeatable | Coins Earned |
|---|---|---|---|---|
|
Meet Mario | Meet Mario and collect a key! | Yes | |
|
Meet Luigi | Meet Luigi and collect a key! | Yes | |
|
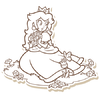
Meet Peach | Meet Peach and collect a key! | Yes | |
|
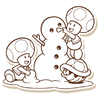
Meet Toad | Meet Toad and collect a key! | Yes |
Note Block Rock stamps
| Icon | Name | Requirement | Repeatable | Coins Earned |
|---|---|---|---|---|

|
Take Note | Play any note on Note Block Rock. | No | |
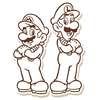
|
Red Song | Play the Red Song (Ground Theme) on Note Block Rock. | Yes | |
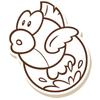
|
Cyan Song | Play the Cyan Song (Water World) on Note Block Rock. | Yes | |
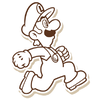
|
Green Song | Play the Green Song (Main Theme) on Note Block Rock. | Yes | |
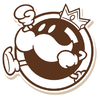
|
Yellow Song | Play the Yellow Song (Bomb-omb Battlefield) on Note Block Rock. | Yes | |
|
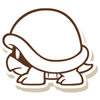
Blue Song | Play the Blue Song (Underground) on Note Block Rock. | Yes | |
|
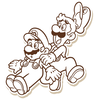
Pink Song | Play the Pink Song (Athletic) on Note Block Rock. | Yes | |
|
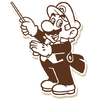
Maestro | Correctly play all 6 main songs on Note Block Rock. | No | |
|
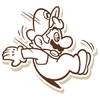
Secret Yellow Song | Find a secret Yellow Song (Slider) on Note Block Rock. | Yes | |
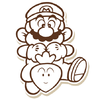
|
Secret Red Song | Find a secret Red Song (Ending Theme) on Note Block Rock. | Yes | |
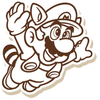
|
Secret Cyan Song | Find a secret Cyan Song (Airship) on Note Block Rock. | Yes |
Slot Machine stamps
| Icon | Name | Requirement | Repeatable | Coins Earned |
|---|---|---|---|---|
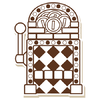
|
Beginner's Luck | Play the Slot Machine. | No | |
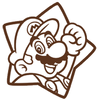
|
High Roller | Play the Slot Machine 7 times. | No | |
|
Leaf Match | Match 4 Super Leaf images on the Slot Machine. | Yes | |
|
Egg Match | Match 4 Yoshi's Egg images on the Slot Machine. | Yes | |
|
Mushroom Match | Match 4 Super Mushroom images on the Slot Machine. | Yes | |
|
Flower Match | Match 4 Fire Flower images on the Slot Machine. | Yes | |

|
All-Star Match | Match 4 Super Star images on the Slot Machine. | Yes |
Binocular stamps
| Icon | Name | Requirement | Repeatable | Coins Earned |
|---|---|---|---|---|
| Binoculars | Spot Super Mario Land through the Binoculars. | No | ||
|
Pick out Pikmin | Use the Binoculars to zoom in on Pikmin on Mount Beanpole. | Yes | |
|
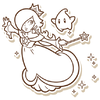
Comet Get It | Use the Binoculars to zoom in on Rosalina. | No | |
|
Hidden Key | After you defeat Bowser Jr., use the Binoculars to find a hidden key. | Yes | |
|
Sky's the Limit | Use the Binoculars to zoom in on the airship. | No |
Key stamps
Bowser Jr. Shadow Showdown stamps
| Icon | Name | Requirement | Repeatable | Coins Earned |
|---|---|---|---|---|
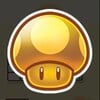
|
Golden Mushroom | Defeat Bowser Jr. | Yes | |
|
Bowser Jr. Skilled | Defeat Bowser Jr. 2 times in the Shadow Showdown. | No | |
|
Bowser Jr. Expert | Defeat Bowser Jr. 5 times in the Shadow Showdown. | No | |
|
Perfect Battle | Win the Bowser Jr. Shadow Showdown without taking damage. | Yes | |
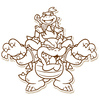
|
Spectacular Win | Defeat Bowser Jr. with every player in the group earning an average of at least 20 coins. | Yes | |
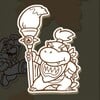
|
Bowser Jr. Hero | Defeat Bowser Jr. with the highest individual score. | Yes | |
| Toy Chest | Unlock Bowser Jr.’s Toy Chest. | No | ||
| First Punch | Punch the Bowser Jr. Block. | No | ||
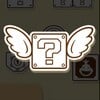
|
Flying ? Block | Punch a flying ? Block in Bowser Jr. Shadow Showdown. | No | |
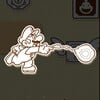
|
Fire Fighter | Destroy something with a fireball in Bowser Jr. Shadow Showdown. | No | |
| Koopa Paratroopa | Defeat a Koopa Paratroopa in Bowser Jr. Shadow Showdown. | No | ||
|
Piranha Plant | Defeat a Piranha Plant in Bowser Jr. Shadow Showdown. | No | |
| 30 Coins | Collect 30 or more coins in a single battle with Bowser Jr. | Yes | ||
|
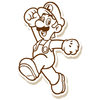
55 Coins | Collect 55 or more coins in a single battle with Bowser Jr. | Yes | |
|
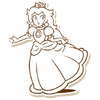
100 Coins | Collect 100 cumulative coins over all your battles with Bowser Jr. | No | |
|
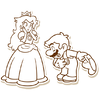
300 Coins | Collect 300 cumulative coins over all your battles with Bowser Jr. | No |
Block stamps
| Icon | Name | Requirement | Repeatable | Coins Earned |
|---|---|---|---|---|
| Brick Block | Punch any Brick Block. | No | ||
|
Tiny Fists | Punch a ? Block while you’re small. | No | |
| ? Block | Punch any ? Block. | No | ||
| POW Block | Punch a POW Block. | No | ||
| Frosted Glacier Blocks | Punch all blocks in Frosted Glacier area. | Yes | ||
|
Question Master | Punch every ? Block in one day. | Yes | |
|
Block Breaker | Punch every block in Super Nintendo World. | No | |
|
Block Buster | Punch 250 blocks. | No |
Mario Kart stamps
| Icon | Name | Requirement | Repeatable | Coins Earned |
|---|---|---|---|---|

|
Golden Cup | Take a ride on Mario Kart. | No | |
|
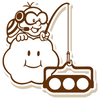
Start Coin Bonus | Get the Start Coin bonus at the starting line in Mario Kart. | Yes | |
|
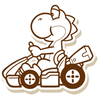
Mario Karter | Ride Mario Kart 2 times. | No | |
|
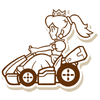
Super Mario Karter | Ride Mario Kart 5 times. | No | |
|
Expert Shooter | Land 3 consecutive hits on enemies. | Yes | |
|
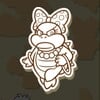
Sharp Shooter | Land 10 consecutive hits on enemies. | Yes | |

|
On the Mark | Land 20 consecutive hits on enemies. | Yes | |
|
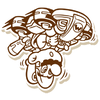
Super Mario Pro | Get to the finish line without shooting any Team Mario racers. | Yes | |
|
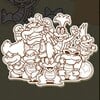
Bye-Bye, Bowser | Hit Bowser and all the Koopalings in a single race on Mario Kart. | Yes | |
|
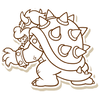
Bowser Bruiser | Hit Bowser with a shell 10 times on Mario Kart. | No | |
|
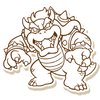
Bowser Buster | Hit Bowser with a shell 25 times on Mario Kart. | No | |
|
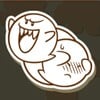
Boo Who? | Defeat 5 Boos on Mario Kart. | No | |
|
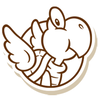
Koopa Krunch | Defeat 5 Koopa Paratroopas on Mario Kart. | No | |
|
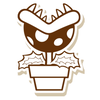
Secret Block 1 | Find and hit the secret block in the area where the Piranha Plants are. | No | |

|
Secret Block 2 | Find and hit the secret block in the underwater area where the Cheep Cheeps are | No | |

|
Secret Block 3 | Find and hit the secret block in the area near the school of Fishbones. | No | |
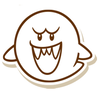
|
Secret Block 4 | Find and hit the secret block inside the haunted mansion where the Boos are. | No | |
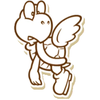
|
Secret Block 5 | Find and hit the secret block in the clouds where the Koopa Paratroopas are. | No | |
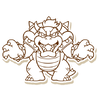
|
Secret Block 6 | Find and hit the secret block hidden in the volcanic area where Lava Bowser appears. | No | |
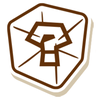
|
Secret Block Collector | Find and hit all of the secret blocks. | No | |
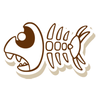
|
Mega Fish Bone | Hit Mega Fish Bone with a shell 20 times on Mario Kart. | No | |
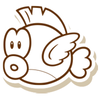
|
Cheep Shot | Defeat 5 Cheep Cheeps on Mario Kart. | No | |
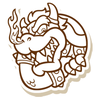
|
Lava Bowser | Hit Lava Bowser with a shell 20 times on Mario Kart. | No | |
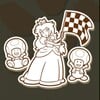
|
Drifter | Successfully drift and achieve the maximum number of coins for three turns in a row. | Yes | |
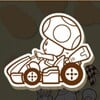
|
Drift Apprentice | Successfully drift each turn in the ride. | Yes | |
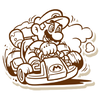
|
Drift Master | Successfully drift each turn in the ride and get the maximum number of coins on each one. | Yes | |
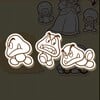
|
Place in the Race | Finished in… not exactly first place in your race in Mario Kart. | No | |
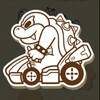
|
Pocket Change | Collect 75 or more coins in a single ride on Mario Kart. | Yes | |
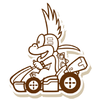
|
Perfectionist | Collect 150 or more coins in a single ride on Mario Kart. | Yes | |
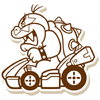
|
Coin Keeper | Collect 500 coins total on Mario Kart. | No | |
| Coin Master | Collect 1,000 coins in total on Mario Kart. | No | ||
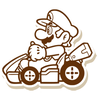
|
First Place | Finish in 1st place on Mario Kart. | No | |
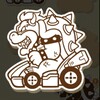
|
Top Kart | Get the highest individual coin score in your kart in Mario Kart. | Yes | |
|
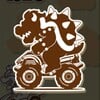
Top Racer | Get the highest individual coin score between the two Mario Karts in the race. | Yes | |
|
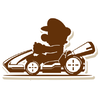
Trophy Hunter | Finish in 1st place 2 times on Mario Kart. | No | |
|
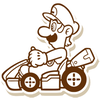
Pro Racer | Finish in 1st place 5 times on Mario Kart. | No |
Yoshi's Adventure stamps
| Icon | Name | Requirement | Repeatable | Coins Earned |
|---|---|---|---|---|
|
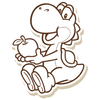
Fruit Basket | Get fruit from the basket inside Mt. Beanpole. | Yes | |
| Toad Tracker | Ride on Yoshi’s Adventure 2 times. | No | ||

|
Toad Protector | Ride on Yoshi’s Adventure 5 times. | No | |
|
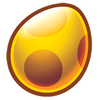
Golden Egg | Get the golden egg on Yoshi’s Adventure. | Yes | |
|
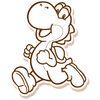
Green Egg | Get a green egg when you punch the Egg Block inside Mt. Beanpole. | Yes | |
|
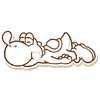
Blue Egg | Get a blue egg when you punch the Egg Block inside Mt. Beanpole. | Yes | |

|
Pink Egg | Get a pink egg when you punch the Egg Block inside Mt. Beanpole. | Yes | |
|
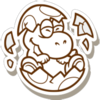
Purple Egg | Get a purple egg when you punch the Egg Block inside Mt. Beanpole. | Yes | |
|
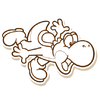
Yellow Egg | Get a yellow egg when you punch the Egg Block inside Mt. Beanpole. | Yes | |

|
Red Egg | Get a red egg when you punch the Egg Block inside Mt. Beanpole. | Yes | |
| Egg-cellent! | Collect all 6 egg colours when you punch the Egg Block inside Mt. Beanpole. | No |
