Summer Tour (2021): Difference between revisions
m (→Courses) |
LinkTheLefty (talk | contribs) mNo edit summary |
||
| (3 intermediate revisions by 3 users not shown) | |||
| Line 1: | Line 1: | ||
{{tour infobox | {{tour infobox | ||
|title=Summer Tour | |title=Summer Tour | ||
| Line 15: | Line 14: | ||
Starting from this tour, the Summertime Celebration event began, which added new [[#Challenges|Multiplayer]] and [[List of challenge cards in Mario Kart Tour#Summertime Challenges|unique Challenges]] and included new and improved [[#Rewards|tour rewards]], including the newly introduced [[Roving Racers|Blue Koopa (Freerunning)]] as a high-ranking ranked cup reward. Additionally, for the duration of the event the [[Lakitu]] referee also wore a summer-themed outfit. The event lasted for three consecutive tours, ending in the [[Mario vs. Peach Tour]]. | Starting from this tour, the Summertime Celebration event began, which added new [[#Challenges|Multiplayer]] and [[List of challenge cards in Mario Kart Tour#Summertime Challenges|unique Challenges]] and included new and improved [[#Rewards|tour rewards]], including the newly introduced [[Roving Racers|Blue Koopa (Freerunning)]] as a high-ranking ranked cup reward. Additionally, for the duration of the event the [[Lakitu]] referee also wore a summer-themed outfit. The event lasted for three consecutive tours, ending in the [[Mario vs. Peach Tour]]. | ||
This tour's [[Coin Rush (Mario Kart Tour)|Coin Rush]] course was [[3DS Daisy Hills]], which was reused from the [[Flower Tour]]. The menu's background featured some rocks with a lighthouse and a house from GBA Cheep-Cheep Island as the landmark for this tour. | This tour's [[Coin Rush (Mario Kart Tour)|Coin Rush]] course was [[3DS Daisy Hills]], which was reused from the [[Flower Tour]]. The menu's background featured some rocks with a lighthouse and a house from GBA Cheep-Cheep Island as the landmark for this tour. This tour's trailer featured rising fizz bubbles during its opening splash screen. | ||
{{br|toc=1}} | {{br|toc=1}} | ||
==Spotlights== | ==Spotlights== | ||
{| align=center width=75% cellspacing=0 border=1 cellpadding=3 style="border-collapse:collapse; font-family:Arial; text-align:center" | {|align=center width=75% cellspacing=0 border=1 cellpadding=3 style="border-collapse:collapse; font-family:Arial;text-align:center" | ||
|-style="background: #89A" | |-style="background: #89A" | ||
|colspan=3|'''Summer Pipe 1'''<br>June 29, 2021, 11:00 p.m. (PT) – <br>July 13, 2021, 10:59 p.m. (PT) | |colspan=3|'''Summer Pipe 1'''<br>June 29, 2021, 11:00 p.m. (PT) – <br>July 13, 2021, 10:59 p.m. (PT) | ||
| Line 26: | Line 24: | ||
|colspan=3|[[File:MKT Tour47 SummerPipe1.png|x150px]] | |colspan=3|[[File:MKT Tour47 SummerPipe1.png|x150px]] | ||
|colspan=3|[[File:MKT Tour47 SummerPipe2.png|x150px]] | |colspan=3|[[File:MKT Tour47 SummerPipe2.png|x150px]] | ||
|-style="background: #ABC" | |-style="background:#ABC" | ||
! style="width: 15%;"|Driver | !style="width:15%;"|Driver | ||
! style="width: 15%;"|Kart | !style="width:15%;"|Kart | ||
! style="width: 15%;"|Glider | !style="width:15%;"|Glider | ||
! style="width: 15%;"|Drivers | !style="width:15%;"|Drivers | ||
! style="width: 15%;"|Karts | !style="width:15%;"|Karts | ||
! style="width: 15%;"|Gliders | !style="width:15%;"|Gliders | ||
|- | |- | ||
|[[File:MKT Artwork DaisySwimwear.png|100x100px]] | |[[File:MKT Artwork DaisySwimwear.png|100x100px]] | ||
| Line 50: | Line 48: | ||
==Special pipe== | ==Special pipe== | ||
{| align=center width=75% cellspacing=0 border=1 cellpadding=3 style="border-collapse:collapse; font-family:Arial; text-align:center" | {|align=center width=75% cellspacing=0 border=1 cellpadding=3 style="border-collapse:collapse; font-family:Arial;text-align:center" | ||
|-style="background: #89A" | |-style="background: #89A" | ||
|colspan=3|'''Pirate Pipe'''<br>July 3, 2021, 11:00 p.m. (PT) – <br>July 8, 2021, 10:59 p.m. (PT) | |colspan=3|'''Pirate Pipe'''<br>July 3, 2021, 11:00 p.m. (PT) – <br>July 8, 2021, 10:59 p.m. (PT) | ||
|- | |- | ||
|colspan=3|[[File:MKT Tour47 PiratePipe.png|x150px]] | |colspan=3|[[File:MKT Tour47 PiratePipe.png|x150px]] | ||
|-style="background: #ABC" | |-style="background:#ABC" | ||
! style="width: 25%;"|Spotlight drivers | !style="width:25%;"|Spotlight drivers | ||
! style="width: 25%;"|Karts | !style="width:25%;"|Karts | ||
! style="width: 25%;"|Gliders | !style="width:25%;"|Gliders | ||
|- | |- | ||
|[[File:MPSR King Bob-omb.png|100x100px]][[File:MKT Artwork BowserJrPirate.png|100x100px]][[File:NabbitNSMBU.png|100x100px]] | |[[File:MPSR King Bob-omb.png|100x100px]][[File:MKT Artwork BowserJrPirate.png|100x100px]][[File:NabbitNSMBU.png|100x100px]] | ||
| Line 68: | Line 66: | ||
|[[Black Great Sail]], [[Blooper Wingtip]], and [[Manta Glider]] | |[[Black Great Sail]], [[Blooper Wingtip]], and [[Manta Glider]] | ||
|} | |} | ||
'''Names in other languages''' | '''Names in other languages''' | ||
{{foreign names | {{foreign names | ||
| Line 76: | Line 73: | ||
==Cups== | ==Cups== | ||
{| align=center width=90% cellspacing=0 border=1 cellpadding=3 style="border-collapse:collapse; font-family:Arial; text-align:center" | {|align=center width=90% cellspacing=0 border=1 cellpadding=3 style="border-collapse:collapse;font-family:Arial;text-align:center" | ||
{{MKT cup table row | {{MKT cup table row | ||
|C=Daisy||Ra=1 | |C=Daisy||Ra=1 | ||
| Line 162: | Line 159: | ||
}} | }} | ||
|} | |} | ||
===Signature kart sets=== | ===Signature kart sets=== | ||
Drivers with a corresponding cup were bumped one rank up in every course of their cup. | Drivers with a corresponding cup were bumped one rank up in every course of their cup. | ||
{| class="wikitable" style="text-align: center" width=50% | {|class="wikitable"style="text-align:center"width=50% | ||
!width=10%|Cup | !width=10%|Cup | ||
!width=20%|Driver | !width=20%|Driver | ||
| Line 249: | Line 245: | ||
==Today's Challenge== | ==Today's Challenge== | ||
Players' most recently used kart and glider are chosen, and favourite and favored ones have extra priority. Opponents are arranged randomly. On day 1 of this tour, players finish a race in [[3DS Rock Rock Mountain|3DS Rock Rock Mountain T]] in the [[Dry Bones Cup]] using [[Yoshi (species)|Black Yoshi]] for a free pipe launch. Starting from day 2, players have to finish a race in the earliest incomplete course that is not in any of the ranked cups using the driver shown on the course's thumbnail every day to obtain the corresponding reward in the table below. Once all of the courses are completed, the courses are selected at random. | Players' most recently used kart and glider are chosen, and favourite and favored ones have extra priority. Opponents are arranged randomly. On day 1 of this tour, players finish a race in [[3DS Rock Rock Mountain|3DS Rock Rock Mountain T]] in the [[Dry Bones Cup]] using [[Yoshi (species)|Black Yoshi]] for a free pipe launch. Starting from day 2, players have to finish a race in the earliest incomplete course that is not in any of the ranked cups using the driver shown on the course's thumbnail every day to obtain the corresponding reward in the table below. Once all of the courses are completed, the courses are selected at random. | ||
{|align=center width=40% cellspacing=0 border=1 cellpadding=3 style="border-collapse:collapse;font-family:Arial;text-align:center" | |||
{| align=center width=40% cellspacing=0 border=1 cellpadding=3 style="border-collapse:collapse; font-family:Arial; text-align:center" | |||
|-style="background: #89A" | |-style="background: #89A" | ||
|'''Day(s)''' | |'''Day(s)''' | ||
| Line 275: | Line 270: | ||
==Rewards== | ==Rewards== | ||
Gold cells indicate rewards that are exclusive to Gold Pass members. | Gold cells indicate rewards that are exclusive to Gold Pass members. | ||
{|class="wikitable" style="margin:auto; text-align:center" | {|class="wikitable"style="margin:auto;text-align:center" | ||
|- | |- | ||
!colspan=2|[[File:MKT Icon GrandStar.png|20x20px]] 15 | !colspan=2|[[File:MKT Icon GrandStar.png|20x20px]] 15 | ||
| Line 299: | Line 294: | ||
|} | |} | ||
<br> | <br> | ||
{|class="wikitable" style="margin:auto; text-align:center" | {|class="wikitable"style="margin:auto;text-align:center" | ||
|- | |- | ||
!Grand Stars!![[File:MKT Icon GrandStar.png|20x20px]]!!15!!20!!25!!30!!35!!40!!50!!60!!70!!85!!100!!115!!130!!145!!160!!180!!200!!215!!230!!240!!250!!255!!260!!265!!Total!!Grand total | !Grand Stars!![[File:MKT Icon GrandStar.png|20x20px]]!!15!!20!!25!!30!!35!!40!!50!!60!!70!!85!!100!!115!!130!!145!!160!!180!!200!!215!!230!!240!!250!!255!!260!!265!!Total!!Grand total | ||
| Line 386: | Line 381: | ||
==Paid banners== | ==Paid banners== | ||
{| align=center width=960px cellspacing=0 border=1 cellpadding=3 style="border-collapse:collapse; font-family:Arial; text-align:center" | {|align=center width=960px cellspacing=0 border=1 cellpadding=3 style="border-collapse:collapse;font-family:Arial;text-align:center" | ||
|-style="background: #ABC" | |-style="background: #ABC" | ||
!Name | !Name | ||
| Line 529: | Line 524: | ||
}} | }} | ||
<br> | <br> | ||
{| align=center width=30% cellspacing=0 border=1 cellpadding=3 style="border-collapse:collapse; font-family:Arial; text-align:center" | {|align=center width=30% cellspacing=0 border=1 cellpadding=3 style="border-collapse:collapse;font-family:Arial;text-align:center" | ||
|- | |- | ||
!colspan=3 style="background: #EEEEFF"|'''Premium Challenges''' | !colspan=3 style="background:#EEEEFF"|'''Premium Challenges''' | ||
|- | |- | ||
|colspan=3 style="background: #EEEEFF"|'''Cost:''' US$4.99 | |colspan=3 style="background:#EEEEFF"|'''Cost:''' US$4.99 | ||
|- | |- | ||
|colspan=3 style="background: #EEEEFF"|'''Three in a row reward:''' [[File:MKT Icon Coins 2.png|70px]] [[Coin|Coins]] ×300 | |colspan=3 style="background:#EEEEFF"|'''Three in a row reward:''' [[File:MKT Icon Coins 2.png|70px]] [[Coin|Coins]] ×300 | ||
|- | |- | ||
|colspan=3 style="background: #EEEEFF"|'''Completion reward:''' [[File:Metal Mario Artwork - Mario Kart 7.png|50x80px]] [[Metal Mario]] ×1 | |colspan=3 style="background:#EEEEFF"|'''Completion reward:''' [[File:Metal Mario Artwork - Mario Kart 7.png|50x80px]] [[Metal Mario]] ×1 | ||
|-style="height: 80px" | |-style="height: 80px" | ||
|width=10% style="background:linear-gradient(#F2E18F,#B9800F)"|[[File:MKT Artwork Mario.png|50x80px]] | |width=10% style="background:linear-gradient(#F2E18F,#B9800F)"|[[File:MKT Artwork Mario.png|50x80px]] | ||
| Line 543: | Line 538: | ||
|width=10% style="background:linear-gradient(#F2E18F,#B9800F)"|[[File:MKT Icon BBIAParafoil.png|50x80px]] | |width=10% style="background:linear-gradient(#F2E18F,#B9800F)"|[[File:MKT Icon BBIAParafoil.png|50x80px]] | ||
|-style="color: #FFF" | |-style="color: #FFF" | ||
|style="background:linear-gradient(#864D00,#A26000); border-top:1px solid #B9800F;"|{{Color-link|Mario|#A1A1FF}} ×1 | |style="background:linear-gradient(#864D00,#A26000);border-top:1px solid #B9800F;"|{{Color-link|Mario|#A1A1FF}} ×1 | ||
|style="background:linear-gradient(#864D00,#A26000); border-top:1px solid #B9800F;"|{{Color-link|Barrel Train|#A1A1FF}} ×1 | |style="background:linear-gradient(#864D00,#A26000);border-top:1px solid #B9800F;"|{{Color-link|Barrel Train|#A1A1FF}} ×1 | ||
|style="background:linear-gradient(#864D00,#A26000); border-top:1px solid #B9800F;"|{{Color-link|BBIA Parafoil|#A1A1FF}} ×1 | |style="background:linear-gradient(#864D00,#A26000);border-top:1px solid #B9800F;"|{{Color-link|BBIA Parafoil|#A1A1FF}} ×1 | ||
|-style="color: #FFF" | |-style="color: #FFF" | ||
|style="background:linear-gradient(#A26000,#C88512); border-top:1px solid #A26000;"|''Land 5 hits with Green Shells.'' | |style="background:linear-gradient(#A26000,#C88512);border-top:1px solid #A26000;"|''Land 5 hits with Green Shells.'' | ||
|style="background:linear-gradient(#A26000,#C88512); border-top:1px solid #A26000;"|''Land 10 hits with Bananas.'' | |style="background:linear-gradient(#A26000,#C88512);border-top:1px solid #A26000;"|''Land 10 hits with Bananas.'' | ||
|style="background:linear-gradient(#A26000,#C88512); border-top:1px solid #A26000;"|''Land 10 hits with Bob-ombs.'' | |style="background:linear-gradient(#A26000,#C88512);border-top:1px solid #A26000;"|''Land 10 hits with Bob-ombs.'' | ||
|-style="height: 80px" | |-style="height: 80px" | ||
|width=10% style="background:linear-gradient(#F2E18F,#B9800F)"|[[File:MKT Icon Coins 3.png|70px]] | |width=10% style="background:linear-gradient(#F2E18F,#B9800F)"|[[File:MKT Icon Coins 3.png|70px]] | ||
| Line 555: | Line 550: | ||
|width=10% style="background:linear-gradient(#F2E18F,#B9800F)"|[[File:MKT Icon Point-boostticket1.png|70px]] | |width=10% style="background:linear-gradient(#F2E18F,#B9800F)"|[[File:MKT Icon Point-boostticket1.png|70px]] | ||
|-style="color: #FFF" | |-style="color: #FFF" | ||
|style="background:linear-gradient(#864D00,#A26000); border-top:1px solid #B9800F;"|{{Color-link|Coins|#A1A1FF}} ×3,000 | |style="background:linear-gradient(#864D00,#A26000);border-top:1px solid #B9800F;"|{{Color-link|Coins|#A1A1FF}} ×3,000 | ||
|style="background:linear-gradient(#864D00,#A26000); border-top:1px solid #B9800F;"|{{Color-link|Ruby|#A1A1FF|Rubies}} ×10 | |style="background:linear-gradient(#864D00,#A26000);border-top:1px solid #B9800F;"|{{Color-link|Ruby|#A1A1FF|Rubies}} ×10 | ||
|style="background:linear-gradient(#864D00,#A26000); border-top:1px solid #B9800F;"|{{Color-link|Point-boost ticket|#A1A1FF}} (Driver) ×3 | |style="background:linear-gradient(#864D00,#A26000);border-top:1px solid #B9800F;"|{{Color-link|Point-boost ticket|#A1A1FF}} (Driver) ×3 | ||
|-style="color: #FFF" | |-style="color: #FFF" | ||
|style="background:linear-gradient(#A26000,#C88512); border-top:1px solid #A26000;"|''Do 50 Jump Boosts.'' | |style="background:linear-gradient(#A26000,#C88512);border-top:1px solid #A26000;"|''Do 50 Jump Boosts.'' | ||
|style="background:linear-gradient(#A26000,#C88512); border-top:1px solid #A26000;"|''Participate in a race.'' | |style="background:linear-gradient(#A26000,#C88512);border-top:1px solid #A26000;"|''Participate in a race.'' | ||
|style="background:linear-gradient(#A26000,#C88512); border-top:1px solid #A26000;"|''Do 100 Mini-Turbo boosts.'' | |style="background:linear-gradient(#A26000,#C88512);border-top:1px solid #A26000;"|''Do 100 Mini-Turbo boosts.'' | ||
|-style="height: 80px" | |-style="height: 80px" | ||
|width=10% style="background:linear-gradient(#F2E18F,#B9800F)"|[[File:MKT Icon Level-boostticket1.png|70px]] | |width=10% style="background:linear-gradient(#F2E18F,#B9800F)"|[[File:MKT Icon Level-boostticket1.png|70px]] | ||
| Line 567: | Line 562: | ||
|width=10% style="background:linear-gradient(#F2E18F,#B9800F)"|[[File:MKT Icon Level-boostticket7.png|70px]] | |width=10% style="background:linear-gradient(#F2E18F,#B9800F)"|[[File:MKT Icon Level-boostticket7.png|70px]] | ||
|-style="color: #FFF" | |-style="color: #FFF" | ||
|style="background:linear-gradient(#864D00,#A26000); border-top:1px solid #B9800F;"|{{Color-link|Level-boost ticket|#A1A1FF}} (Normal driver) ×1 | |style="background:linear-gradient(#864D00,#A26000);border-top:1px solid #B9800F;"|{{Color-link|Level-boost ticket|#A1A1FF}} (Normal driver) ×1 | ||
|style="background:linear-gradient(#864D00,#A26000); border-top:1px solid #B9800F;"|Level-boost ticket (Super driver) ×1 | |style="background:linear-gradient(#864D00,#A26000);border-top:1px solid #B9800F;"|Level-boost ticket (Super driver) ×1 | ||
|style="background:linear-gradient(#864D00,#A26000); border-top:1px solid #B9800F;"|Level-boost ticket (High-End driver) ×1 | |style="background:linear-gradient(#864D00,#A26000);border-top:1px solid #B9800F;"|Level-boost ticket (High-End driver) ×1 | ||
|-style="color: #FFF" | |-style="color: #FFF" | ||
|style="background:linear-gradient(#A26000,#C88512); border-top:1px solid #A26000;"|''Get 1st place in a race 10 times.'' | |style="background:linear-gradient(#A26000,#C88512);border-top:1px solid #A26000;"|''Get 1st place in a race 10 times.'' | ||
|style="background:linear-gradient(#A26000,#C88512); border-top:1px solid #A26000;"|''Get 1st place in a race 15 times.'' | |style="background:linear-gradient(#A26000,#C88512);border-top:1px solid #A26000;"|''Get 1st place in a race 15 times.'' | ||
|style="background:linear-gradient(#A26000,#C88512); border-top:1px solid #A26000;"|''Get 1st place in a race 20 times.'' | |style="background:linear-gradient(#A26000,#C88512);border-top:1px solid #A26000;"|''Get 1st place in a race 20 times.'' | ||
|} | |} | ||
<br> | <br> | ||
{| align=center width=30% cellspacing=0 border=1 cellpadding=3 style="border-collapse:collapse; font-family:Arial; text-align:center" | {|align=center width=30% cellspacing=0 border=1 cellpadding=3 style="border-collapse:collapse;font-family:Arial;text-align:center" | ||
|- | |- | ||
!colspan=3 style="background: #C3F84E"|'''Tour Multiplayer Challenges''' | !colspan=3 style="background:#C3F84E"|'''Tour Multiplayer Challenges''' | ||
|-style="color: #000" | |-style="color: #000" | ||
|colspan=3 style="background: #C3F84E"|'''Three in a row reward:''' [[File:MKT Icon Coins 2.png|60px]] [[Coin|Coins]] ×300 | |colspan=3 style="background:#C3F84E"|'''Three in a row reward:''' [[File:MKT Icon Coins 2.png|60px]] [[Coin|Coins]] ×300 | ||
|-style="color: #000" | |-style="color: #000" | ||
|colspan=3 style="background: #C3F84E"|'''Completion reward:''' [[File:MKT Icon 1Ruby.png|70px]] [[Ruby|Rubies]] ×5 | |colspan=3 style="background:#C3F84E"|'''Completion reward:''' [[File:MKT Icon 1Ruby.png|70px]] [[Ruby|Rubies]] ×5 | ||
|-style="color: #FFF" | |-style="color: #FFF" | ||
|width=10% style="background: #2F5D1C"|[[File:MKT 127CB.png|70px]]<br>[[File:MKT Icon GrandStar.png|15px]] | |width=10% style="background:#2F5D1C"|[[File:MKT 127CB.png|70px]]<br>[[File:MKT Icon GrandStar.png|15px]] | ||
|width=10% style="background: #2F5D1C"|[[File:MKT 067CB.png|70px]]<br>[[File:MKT Icon GrandStar.png|15px]] | |width=10% style="background:#2F5D1C"|[[File:MKT 067CB.png|70px]]<br>[[File:MKT Icon GrandStar.png|15px]] | ||
|width=10% style="background: #2F5D1C"|[[File:MKT 119-2CB.png|70px]]<br>[[File:MKT Icon GrandStar.png|15px]] | |width=10% style="background:#2F5D1C"|[[File:MKT 119-2CB.png|70px]]<br>[[File:MKT Icon GrandStar.png|15px]] | ||
|-style="color: #FFF" | |-style="color: #FFF" | ||
|style="background: #2F5D1C; border-top:1px solid #2F5D1C;"|''Land 3 hits with Green Shells in multiplayer.'' | |style="background:#2F5D1C;border-top:1px solid #2F5D1C;"|''Land 3 hits with Green Shells in multiplayer.'' | ||
|style="background: #2F5D1C; border-top:1px solid #2F5D1C;"|''Land 3 hits with Bananas in multiplayer.'' | |style="background:#2F5D1C;border-top:1px solid #2F5D1C;"|''Land 3 hits with Bananas in multiplayer.'' | ||
|style="background: #2F5D1C; border-top:1px solid #2F5D1C;"|''Do 30 Mini-Turbo boosts in multiplayer.'' | |style="background:#2F5D1C;border-top:1px solid #2F5D1C;"|''Do 30 Mini-Turbo boosts in multiplayer.'' | ||
|-style="color: #FFF" | |-style="color: #FFF" | ||
|width=10% style="background: #2F5D1C"|[[File:MKT 112-3CB.png|70px]]<br>[[File:MKT Icon GrandStar.png|15px]] [[File:MKT Icon GrandStar.png|15px]] | |width=10% style="background:#2F5D1C"|[[File:MKT 112-3CB.png|70px]]<br>[[File:MKT Icon GrandStar.png|15px]] [[File:MKT Icon GrandStar.png|15px]] | ||
|width=10% style="background: #2F5D1C"|[[File:MKT 112-1CB.png|70px]]<br>[[File:MKT Icon GrandStar.png|15px]] [[File:MKT Icon GrandStar.png|15px]] | |width=10% style="background:#2F5D1C"|[[File:MKT 112-1CB.png|70px]]<br>[[File:MKT Icon GrandStar.png|15px]] [[File:MKT Icon GrandStar.png|15px]] | ||
|width=10% style="background: #2F5D1C"|[[File:MKT 112CB.png|70px]]<br>[[File:MKT Icon GrandStar.png|15px]] [[File:MKT Icon GrandStar.png|15px]] | |width=10% style="background:#2F5D1C"|[[File:MKT 112CB.png|70px]]<br>[[File:MKT Icon GrandStar.png|15px]] [[File:MKT Icon GrandStar.png|15px]] | ||
|-style="color: #FFF" | |-style="color: #FFF" | ||
|style="background: #2F5D1C; border-top:1px solid #2F5D1C;"|''Join 3 multiplayer races.'' | |style="background: #2F5D1C;border-top:1px solid #2F5D1C;"|''Join 3 multiplayer races.'' | ||
|style="background: #2F5D1C; border-top:1px solid #2F5D1C;"|''Join 5 multiplayer races.'' | |style="background: #2F5D1C;border-top:1px solid #2F5D1C;"|''Join 5 multiplayer races.'' | ||
|style="background: #2F5D1C; border-top:1px solid #2F5D1C;"|''Join 10 multiplayer races.'' | |style="background: #2F5D1C;border-top:1px solid #2F5D1C;"|''Join 10 multiplayer races.'' | ||
|-style="color: #FFF" | |-style="color: #FFF" | ||
|width=10% style="background: #2F5D1C"|[[File:MKT 130CB.png|70px]]<br>[[File:MKT Icon GrandStar.png|15px]] [[File:MKT Icon GrandStar.png|15px]] | |width=10% style="background:#2F5D1C"|[[File:MKT 130CB.png|70px]]<br>[[File:MKT Icon GrandStar.png|15px]] [[File:MKT Icon GrandStar.png|15px]] | ||
|width=10% style="background: #2F5D1C"|[[File:MKT 131CB.png|70px]]<br>[[File:MKT Icon GrandStar.png|15px]] [[File:MKT Icon GrandStar.png|15px]] | |width=10% style="background:#2F5D1C"|[[File:MKT 131CB.png|70px]]<br>[[File:MKT Icon GrandStar.png|15px]] [[File:MKT Icon GrandStar.png|15px]] | ||
|width=10% style="background: #2F5D1C"|[[File:MKT 129CB.png|70px]]<br>[[File:MKT Icon GrandStar.png|15px]] [[File:MKT Icon GrandStar.png|15px]] | |width=10% style="background:#2F5D1C"|[[File:MKT 129CB.png|70px]]<br>[[File:MKT Icon GrandStar.png|15px]] [[File:MKT Icon GrandStar.png|15px]] | ||
|-style="color: #FFF" | |-style="color: #FFF" | ||
|style="background: #2F5D1C; border-top:1px solid #2F5D1C;"|''Get 3rd place or higher in a multiplayer race.'' | |style="background:#2F5D1C;border-top:1px solid #2F5D1C;"|''Get 3rd place or higher in a multiplayer race.'' | ||
|style="background: #2F5D1C; border-top:1px solid #2F5D1C;"|''Get 3rd place or higher 3 times in a multiplayer race.'' | |style="background:#2F5D1C;border-top:1px solid #2F5D1C;"|''Get 3rd place or higher 3 times in a multiplayer race.'' | ||
|style="background: #2F5D1C; border-top:1px solid #2F5D1C;"|''Get 3rd place or higher 5 times in a multiplayer race.'' | |style="background:#2F5D1C;border-top:1px solid #2F5D1C;"|''Get 3rd place or higher 5 times in a multiplayer race.'' | ||
|} | |} | ||
<br> | <br> | ||
{|class="wikitable" style="margin:auto; text-align:center" width=30% | {|class="wikitable"style="margin:auto;text-align:center"width=30% | ||
!colspan=2|Total Points Challenge | !colspan=2|Total Points Challenge | ||
|- | |- | ||
| Line 649: | Line 644: | ||
===All-Clear Pipe=== | ===All-Clear Pipe=== | ||
The All-Clear Pipe randomly shot out one of the following regular High-End items. | The All-Clear Pipe randomly shot out one of the following regular High-End items. | ||
{|class="wikitable" style="margin:auto; text-align:center" | {|class="wikitable"style="margin:auto;text-align:center" | ||
!colspan=2|High-End items obtainable from the All-Clear Pipe during the Summer Tour | !colspan=2|High-End items obtainable from the All-Clear Pipe during the Summer Tour | ||
|- | |- | ||
| Line 664: | Line 659: | ||
===Summer Pipe 1=== | ===Summer Pipe 1=== | ||
{|class="wikitable" style="margin:auto; text-align:center" | {|class="wikitable"style="margin:auto;text-align:center" | ||
!colspan=16|Items obtained from a new Summer Pipe 1 | !colspan=16|Items obtained from a new Summer Pipe 1 | ||
|- | |- | ||
| Line 701: | Line 696: | ||
|} | |} | ||
<br> | <br> | ||
{|class="wikitable"style="margin:auto;text-align:center" | |||
{|class="wikitable" style="margin:auto; text-align:center" | |||
!Class | !Class | ||
!Parts | !Parts | ||
| Line 732: | Line 726: | ||
|- | |- | ||
!Super drivers | !Super drivers | ||
|[[Donkey Kong]], [[Toad]], [[Bowser]], [[Luigi]], [[Mario]], [[Princess Peach|Peach]], [[Yoshi]], [[Princess Daisy|Daisy]], [[Lakitu]], [[King Boo]], [[Toadette]], [[Bowser Jr.]], [[Waluigi]], [[Wario]], [[Rosalina]], [[Birdo]], [[Diddy Kong]], [[Hammer Bro]], [[Boomerang Bro]], [[Fire Bro]], [[Ice Bro]], [[Red Yoshi]], [[Black Shy Guy]], [[Pink Shy Guy]], [[Toad|Toad (Pit Crew)]], [[Monty Mole]], [[Birdo | |[[Donkey Kong]], [[Toad]], [[Bowser]], [[Luigi]], [[Mario]], [[Princess Peach|Peach]], [[Yoshi]], [[Princess Daisy|Daisy]], [[Lakitu]], [[King Boo]], [[Toadette]], [[Bowser Jr.]], [[Waluigi]], [[Wario]], [[Rosalina]], [[Birdo]], [[Diddy Kong]], [[Hammer Bro]], [[Boomerang Bro]], [[Fire Bro]], [[Ice Bro]], [[Red Yoshi]], [[Black Shy Guy]], [[Pink Shy Guy]], [[Toad|Toad (Pit Crew)]], [[Monty Mole]], [[Birdo|Birdo (Light Blue)]], [[Birdo|Birdo (Yellow)]], [[Roving Racers|Red Koopa (Freerunning)]] | ||
|0.3103% | |0.3103% | ||
|- | |- | ||
| Line 758: | Line 752: | ||
===Summer Pipe 2=== | ===Summer Pipe 2=== | ||
{|class="wikitable" style="margin:auto; text-align:center" | {|class="wikitable"style="margin:auto;text-align:center" | ||
!colspan=16|Items obtained from a new Summer Pipe 2 | !colspan=16|Items obtained from a new Summer Pipe 2 | ||
|- | |- | ||
| Line 795: | Line 789: | ||
|} | |} | ||
<br> | <br> | ||
{|class="wikitable"style="margin:auto;text-align:center" | |||
{|class="wikitable" style="margin:auto; text-align:center" | |||
!Class | !Class | ||
!Parts | !Parts | ||
| Line 826: | Line 819: | ||
|- | |- | ||
!Super drivers | !Super drivers | ||
|[[Donkey Kong]], [[Toad]], [[Bowser]], [[Luigi]], [[Mario]], [[Princess Peach|Peach]], [[Yoshi]], [[Princess Daisy|Daisy]], [[Lakitu]], [[King Boo]], [[Toadette]], [[Bowser Jr.]], [[Waluigi]], [[Wario]], [[Rosalina]], [[Birdo]], [[Diddy Kong]], [[Hammer Bro]], [[Boomerang Bro]], [[Fire Bro]], [[Ice Bro]], [[Red Yoshi]], [[Black Shy Guy]], [[Pink Shy Guy]], [[Toad|Toad (Pit Crew)]], [[Monty Mole]], [[Birdo | |[[Donkey Kong]], [[Toad]], [[Bowser]], [[Luigi]], [[Mario]], [[Princess Peach|Peach]], [[Yoshi]], [[Princess Daisy|Daisy]], [[Lakitu]], [[King Boo]], [[Toadette]], [[Bowser Jr.]], [[Waluigi]], [[Wario]], [[Rosalina]], [[Birdo]], [[Diddy Kong]], [[Hammer Bro]], [[Boomerang Bro]], [[Fire Bro]], [[Ice Bro]], [[Red Yoshi]], [[Black Shy Guy]], [[Pink Shy Guy]], [[Toad|Toad (Pit Crew)]], [[Monty Mole]], [[Birdo|Birdo (Light Blue)]], [[Birdo|Birdo (Yellow)]], [[Roving Racers|Red Koopa (Freerunning)]] | ||
|0.3103% | |0.3103% | ||
|- | |- | ||
| Line 852: | Line 845: | ||
===Pirate Pipe=== | ===Pirate Pipe=== | ||
{|class="wikitable" style="margin:auto; text-align:center" | {|class="wikitable"style="margin:auto;text-align:center" | ||
!colspan=16|Items obtained from a new Pirate Pipe | !colspan=16|Items obtained from a new Pirate Pipe | ||
|- | |- | ||
| Line 889: | Line 882: | ||
|} | |} | ||
<br> | <br> | ||
{|class="wikitable"style="margin:auto;text-align:center" | |||
{|class="wikitable" style="margin:auto; text-align:center" | |||
!Class | !Class | ||
!Parts | !Parts | ||
| Line 908: | Line 900: | ||
|- | |- | ||
!Super drivers | !Super drivers | ||
|[[Donkey Kong]], [[Toad]], [[Bowser]], [[Luigi]], [[Mario]], [[Princess Peach|Peach]], [[Yoshi]], [[Princess Daisy|Daisy]], [[Lakitu]], [[King Boo]], [[Toadette]], [[Bowser Jr.]], [[Waluigi]], [[Wario]], [[Rosalina]], [[Birdo]], [[Diddy Kong]], [[Hammer Bro]], [[Boomerang Bro]], [[Fire Bro]], [[Ice Bro]], [[Red Yoshi]], [[Black Shy Guy]], [[Pink Shy Guy]], [[Toad|Toad (Pit Crew)]], [[Monty Mole]], [[Birdo | |[[Donkey Kong]], [[Toad]], [[Bowser]], [[Luigi]], [[Mario]], [[Princess Peach|Peach]], [[Yoshi]], [[Princess Daisy|Daisy]], [[Lakitu]], [[King Boo]], [[Toadette]], [[Bowser Jr.]], [[Waluigi]], [[Wario]], [[Rosalina]], [[Birdo]], [[Diddy Kong]], [[Hammer Bro]], [[Boomerang Bro]], [[Fire Bro]], [[Ice Bro]], [[Red Yoshi]], [[Black Shy Guy]], [[Pink Shy Guy]], [[Toad|Toad (Pit Crew)]], [[Monty Mole]], [[Birdo|Birdo (Light Blue)]], [[Birdo|Birdo (Yellow)]], [[Roving Racers|Red Koopa (Freerunning)]] | ||
|0.3448% | |0.3448% | ||
|- | |- | ||
| Line 935: | Line 927: | ||
==Token Shop== | ==Token Shop== | ||
The limited-time event where [[event token]]s appeared began on June 30, 2021 and ended on July 13, 2021. Event tokens could be earned from collecting them in courses. | The limited-time event where [[event token]]s appeared began on June 30, 2021 and ended on July 13, 2021. Event tokens could be earned from collecting them in courses. | ||
{|class="wikitable"style="margin:auto;text-align:center"width=50% | |||
{|class="wikitable" style="margin:auto; text-align:center" width=50% | |||
!colspan=3|'''Token Shop''' (June 30, 2021 - July 13, 2021) | !colspan=3|'''Token Shop''' (June 30, 2021 - July 13, 2021) | ||
|- | |- | ||
| Line 982: | Line 973: | ||
==Tier Shop== | ==Tier Shop== | ||
The shop featured a variety of set and randomized items available for purchase. The item slots in the shop are unlocked based on the highest tier of players. | The shop featured a variety of set and randomized items available for purchase. The item slots in the shop are unlocked based on the highest tier of players. | ||
{|class="wikitable"style="margin:auto;text-align:center"width=50% | |||
{| class="wikitable" style="margin:auto; text-align:center" width=50% | |||
!colspan=3|Items available in Tier Shop (June 30, 2021 - July 6, 2021) | !colspan=3|Items available in Tier Shop (June 30, 2021 - July 6, 2021) | ||
|- | |- | ||
Latest revision as of 12:36, January 2, 2024
| Summer Tour | |
|---|---|

| |
| Start date | June 29, 2021 11:00 p.m. (PT) |
| End date | July 13, 2021 10:59 p.m. (PT) |
| Number of cups | 12 |
| Ranked cups | Daisy Cup (week 1) Mario Cup (week 2) |
| Coin Rush course | 3DS Daisy Hills |
| << List of tours >> | |
The Summer Tour was the forty-seventh tour of Mario Kart Tour, which began on June 30, 2021 and ended on July 13, 2021. This tour featured the return of Cheep-Cheep Island from Mario Kart: Super Circuit as a new classic course, making this the first tour to introduce a classic course to the game since the Snow Tour nine tours prior. This tour also introduced a variant of Daisy wearing a swimsuit similar to that of Rosalina (Swimwear), who returned alongside Mario (Swimwear) in the week 2 pipe again since their last pipe appearance together on the April–May 2021 Sydney Tour, with the difference being the gliders Silver Manta Glider and Great Sail.
Starting from this tour, the Summertime Celebration event began, which added new Multiplayer and unique Challenges and included new and improved tour rewards, including the newly introduced Blue Koopa (Freerunning) as a high-ranking ranked cup reward. Additionally, for the duration of the event the Lakitu referee also wore a summer-themed outfit. The event lasted for three consecutive tours, ending in the Mario vs. Peach Tour.
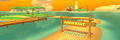
This tour's Coin Rush course was 3DS Daisy Hills, which was reused from the Flower Tour. The menu's background featured some rocks with a lighthouse and a house from GBA Cheep-Cheep Island as the landmark for this tour. This tour's trailer featured rising fizz bubbles during its opening splash screen.
Spotlights[edit]
| Summer Pipe 1 June 29, 2021, 11:00 p.m. (PT) – July 13, 2021, 10:59 p.m. (PT) |
Summer Pipe 2 July 6, 2021, 10:59 p.m. (PT) – July 13, 2021, 10:59 p.m. (PT) | ||||

|

| ||||
| Driver | Kart | Glider | Drivers | Karts | Gliders |
|---|---|---|---|---|---|
 
|
|||||
| Daisy (Swimwear) | Sunny Surf Sailer | Sunny Surf Master | Rosalina (Swimwear) and Mario (Swimwear) | Blue Soda and Cheep Snorkel | Silver Manta Glider and Great Sail |
Special pipe[edit]
| Pirate Pipe July 3, 2021, 11:00 p.m. (PT) – July 8, 2021, 10:59 p.m. (PT) | ||

| ||
| Spotlight drivers | Karts | Gliders |
|---|---|---|
  
|
||
| King Bob-omb, Bowser Jr. (Pirate), and Nabbit | Sushi Racer, Pirate Sushi Racer, and Steel Driver | Black Great Sail, Blooper Wingtip, and Manta Glider |
Names in other languages
| Language | Name | Meaning |
|---|---|---|
| German | Piraten-Röhre |
Pirate Pipe |
Cups[edit]
Daisy Cup Ranked cup (week 1) |
GBA Cheep-Cheep Island |
RMX Choco Island 2R |
3DS Shy Guy Bazaar R |
Ring Race | ||||
 3DS Cheep Cheep Lagoon |
Daisy | |||||||
Dry Bones Cup |
3DS Rock Rock Mountain T |
3DS Cheep Cheep Lagoon R |
SNES Choco Island 1 |
Goomba Takedown | ||||
 3DS Daisy Hills |
Luigi | |||||||
Mario Cup Ranked cup (week 2) |
N64 Koopa Troopa Beach |
GBA Cheep-Cheep Island T |
RMX Rainbow Road 1 |
Time Trial | ||||
 RMX Choco Island 1 |
Baby Daisy | |||||||
Lakitu Cup |
SNES Koopa Troopa Beach 2R |
3DS Daisy Hills R |
3DS Cheep Cheep Lagoon |
Glider Challenge | ||||
 3DS Shy Guy Bazaar |
Shy Guy | |||||||
Donkey Kong Cup |
RMX Rainbow Road 1T |
GBA Cheep-Cheep Island R |
SNES Choco Island 1R |
Ring Race | ||||
 SNES Koopa Troopa Beach 2 |
Pauline | |||||||
Hammer Bro Cup |
RMX Choco Island 2 |
3DS Shy Guy Bazaar T |
N64 Koopa Troopa Beach R |
Smash Small Dry Bones | ||||
 GBA Cheep-Cheep Island |
Rosalina | |||||||
Baby Daisy Cup |
3DS Daisy Hills T |
SNES Choco Island 1T |
GBA Cheep-Cheep Island |
Steer Clear of Obstacles | ||||
 RMX Rainbow Road 1 |
Pauline | |||||||
Metal Mario Cup |
3DS Shy Guy Bazaar |
3DS Cheep Cheep Lagoon T |
SNES Koopa Troopa Beach 2T |
Break Item Boxes | ||||
 RMX Choco Island 2 |
Mario | |||||||
Iggy Cup |
3DS Rock Rock Mountain R |
SNES Donut Plains 2R/T |
GBA Cheep-Cheep Island T |
Combo Attack | ||||
 N64 Koopa Troopa Beach T |
Donkey Kong | |||||||
Monty Mole Cup |
3DS Daisy Hills |
RMX Choco Island 2T |
SNES Koopa Troopa Beach 2 |
Do Jump Boosts | ||||
 SNES Choco Island 1 |
Monty Mole | |||||||
Baby Rosalina Cup |
GBA Cheep-Cheep Island R |
3DS Rock Rock Mountain |
RMX Choco Island 1R/T |
Time Trial | ||||
 DS Airship Fortress R |
Pink Shy Guy | |||||||
Roy Cup |
RMX Rainbow Road 1R |
N64 Koopa Troopa Beach T |
DS Airship Fortress R/T |
Big Reverse Race | ||||
 3DS Rock Rock Mountain |
Any character | |||||||
Signature kart sets[edit]
Drivers with a corresponding cup were bumped one rank up in every course of their cup.
| Cup | Driver | Kart | Glider |
|---|---|---|---|
| First course of every cup | — | — | |
| Second course of every cup | |||
| Third course of every cup | |||
| — | — | ||
| — | — | ||
| — | — | ||
| — | — | ||
| — | — | ||
| — | — | ||
| — | — | ||
| — | — | ||
| — | — | ||
| — | — | ||
| — | — | ||
| — | — |
Today's Challenge[edit]
Players' most recently used kart and glider are chosen, and favourite and favored ones have extra priority. Opponents are arranged randomly. On day 1 of this tour, players finish a race in 3DS Rock Rock Mountain T in the Dry Bones Cup using Black Yoshi for a free pipe launch. Starting from day 2, players have to finish a race in the earliest incomplete course that is not in any of the ranked cups using the driver shown on the course's thumbnail every day to obtain the corresponding reward in the table below. Once all of the courses are completed, the courses are selected at random.
| Day(s) | Reward |
| 1-4, 6-9, 11-13 | Free pipe launch |
|---|---|
| 5, 10 | Rubies ×5 |
| 14 |  Badge |
| Today's Challenge Pipe | |

| |
| Pipe contents | |
| Rubies, coins, driver (Normal/Super/High-End), kart (Normal/Super/High-End), glider (Normal/Super/High-End), item tickets | |
Rewards[edit]
Gold cells indicate rewards that are exclusive to Gold Pass members.
| Piranha Plant Parafoil | Birthday Girl Daisy | Cheep Charger | Flower Glider | Koopa Troopa | Daisy | Gold Cheep Snorkel |
| Grand Stars | 15 | 20 | 25 | 30 | 35 | 40 | 50 | 60 | 70 | 85 | 100 | 115 | 130 | 145 | 160 | 180 | 200 | 215 | 230 | 240 | 250 | 255 | 260 | 265 | Total | Grand total | |
|---|---|---|---|---|---|---|---|---|---|---|---|---|---|---|---|---|---|---|---|---|---|---|---|---|---|---|---|
| Free pipe launch | 1 | 1 | 1 | 1 | 1 | 1 | 6 | ||||||||||||||||||||
| Coin | 300 | 300 | 300 | 300 | 300 | 500 | 1000 | 3000 | 7600 | ||||||||||||||||||
| 1000 | 600 | 1000 | 2000 | 4600 | |||||||||||||||||||||||
| Rubies | 3 | 3 | 5 | 5 | 5 | 21 | 46 | ||||||||||||||||||||
| 5 | 5 | 5 | 5 | 5 | 25 | ||||||||||||||||||||||
| Item tickets | 10 | 10 | 25 | ||||||||||||||||||||||||
| 15 | 15 | ||||||||||||||||||||||||||
| Star tickets | 4 | 4 | 4 | ||||||||||||||||||||||||
| 0 | |||||||||||||||||||||||||||
| Point-boost tickets | 1 | 1 | 1 | 3 | 6 | ||||||||||||||||||||||
| 3 | 3 | ||||||||||||||||||||||||||
| 1 | 1 | 1 | 3 | 6 | |||||||||||||||||||||||
| 3 | 3 | ||||||||||||||||||||||||||
| 1 | 1 | 1 | 3 | 6 | |||||||||||||||||||||||
| 3 | 3 | ||||||||||||||||||||||||||
| Level-boost ticket | 3 | 12 | |||||||||||||||||||||||||
| 9 | |||||||||||||||||||||||||||
New content[edit]
Drivers[edit]

Karts[edit]
Gliders[edit]
Courses[edit]
GBA Cheep-Cheep Island (N, R, T)
Paid banners[edit]
| Name | Availability | Cost | Contents | Banner image |
|---|---|---|---|---|
| Value Pack | June 30, 2021 – July 13, 2021 | US$1.99 |
|

|
| Celebrating the Summer Tour with the Sunset Cloud! | June 30, 2021 – July 13, 2021 | US$3.99 | 
| |
| Dry Bowser Pack | June 30, 2021 – July 13, 2021 | US$19.99 |
|

|
| Gold Cheep Charger Pack | June 30, 2021 – July 13, 2021 | US$39.99 |
|

|
| Polka-Dot Manta Glider Pack | July 7, 2021 – July 13, 2021 | US$19.99 |
|

|
| Mario (SNES) Pack | July 7, 2021 – July 13, 2021 | US$39.99 |
|

|
Challenges[edit]
| Tour Challenges 1 | Tour Challenges 2 | Gold Challenges | ||||||||
|---|---|---|---|---|---|---|---|---|---|---|
| Completion reward: |
Completion reward: |
Completion reward: | ||||||||
 |
 |
 |
 |
 |
 |
 |
 |
 | ||
| Land 3 hits with Green Shells. | Land 5 hits with Red Shells. | Land 3 hits with Bob-ombs. | Do a total of 3 Slipstream boosts. | Use 10 Mushrooms. | Race in auto mode. | Do 100 Jump Boosts. | Land 15 hits with Bananas. | Get a Fantastic combo a total of 5 times. | ||
 |
 |
 |
 |
 |
 |
 |
 |
 | ||
| Activate Frenzy mode 5 times. | Do 10 Mini-Turbo boosts in a single race using a driver wearing earrings. | Get an item from the Tier Shop. | Use point-boost tickets 3 times. | Drive a distance of 15,000 or more using a driver wearing earrings. | Get 1 item from the Daily Selects section of the Shop. | Earn a score of 10,000 or higher on 5 courses. | Do 50 Mini-Turbo boosts using a driver wearing a shell. | Use a level-boost ticket. | ||
 |
 |
 |
 |
 |
 |
 |
 |
 | ||
| Send Greeting Coins to a friend. | Earn a total score of 15,000 or higher in the Donkey Kong Cup. | Cause opponents to crash 3 times while underwater. | Earn a score of 9,000 or higher using a driver wearing gloves. | Earn a total score of 20,000 or higher in the Monty Mole Cup. | Race in every course of every cup, including bonus challenges. | Do 5 Ultra Mini-Turbo boosts using a driver wearing earrings. | Earn a total score of 25,000 or higher in the Baby Daisy Cup. | Take out 5 goats. | ||
| Premium Challenges | ||
|---|---|---|
| Cost: US$4.99 | ||
| Three in a row reward: | ||
Completion reward:  Metal Mario ×1 Metal Mario ×1
| ||
| Mario ×1 | Barrel Train ×1 | BBIA Parafoil ×1 |
| Land 5 hits with Green Shells. | Land 10 hits with Bananas. | Land 10 hits with Bob-ombs. |
| Coins ×3,000 | Rubies ×10 | Point-boost ticket (Driver) ×3 |
| Do 50 Jump Boosts. | Participate in a race. | Do 100 Mini-Turbo boosts. |
| Level-boost ticket (Normal driver) ×1 | Level-boost ticket (Super driver) ×1 | Level-boost ticket (High-End driver) ×1 |
| Get 1st place in a race 10 times. | Get 1st place in a race 15 times. | Get 1st place in a race 20 times. |
| Tour Multiplayer Challenges | ||
|---|---|---|
| Three in a row reward: | ||
| Completion reward: | ||
 |
 |
 |
| Land 3 hits with Green Shells in multiplayer. | Land 3 hits with Bananas in multiplayer. | Do 30 Mini-Turbo boosts in multiplayer. |
 |
 |
 |
| Join 3 multiplayer races. | Join 5 multiplayer races. | Join 10 multiplayer races. |
 |
 |
 |
| Get 3rd place or higher in a multiplayer race. | Get 3rd place or higher 3 times in a multiplayer race. | Get 3rd place or higher 5 times in a multiplayer race. |
| Total Points Challenge | |
|---|---|
| Points | Rewards |
| 600,000 |
|
| 550,000 |
|
| 500,000 |
|
| 400,000 |
|
| 300,000 |
|
| 150,000 |
|
Initial pipe appearance rates[edit]
All-Clear Pipe[edit]
The All-Clear Pipe randomly shot out one of the following regular High-End items.
| High-End items obtainable from the All-Clear Pipe during the Summer Tour | |
|---|---|
| High-End drivers | Dry Bowser, Metal Mario, Pink Gold Peach, Cat Peach, Pauline, Nabbit, King Bob-omb, Peachette, Black Yoshi, Penguin Luigi, Dixie Kong, Funky Kong, Ice Mario |
| High-End karts | B Dasher, Badwagon, Cat Cruiser, Sports Coupe, Circuit Special, Bruiser, Wild Wing, Bumble V, Steel Driver, Macharon, Wildfire Flyer, Red B Dasher, Choco Macharon, P-Wing, Green Apple Kart, Poison Apple Kart, Dozer Dasher, Banana Master, Offroader, Head Honcho, Pink Wing, Koopa King, Cact-X, Sushi Racer, Green Circuit, Crawly Kart, Cact-Ice |
| High-End gliders | Swooper, Cloud Glider, Gold Glider, Pink Gold Paper Glider, Dry Bowser Umbrella, Blizzard Balloons, Starchute, Silver Starchute, Butterfly Wings, Butterfly Sunset, Crimson Crane, Strawberry Donut, Heart Balloons, Great Sail, Toe-Bean Balloons, Tropical Glider, 8-Bit Star, Silver Bells, Cheep Cheep Masks |
Summer Pipe 1[edit]
| Items obtained from a new Summer Pipe 1 | |||||||||||||||
|---|---|---|---|---|---|---|---|---|---|---|---|---|---|---|---|
| Item | Normal |
Super |
High-End |
Featured High-End | |||||||||||
| Driver | Kart | Glider | Driver | Kart | Glider | Driver | Kart | Glider | Driver | Kart | Glider | ||||
| Amount | 32 | 26 | 16 | 9 | 7 | 4 | 1 | 1 | 1 | 1 | 1 | 1 | |||
Summer Pipe 2[edit]
| Items obtained from a new Summer Pipe 2 | |||||||||||||||
|---|---|---|---|---|---|---|---|---|---|---|---|---|---|---|---|
| Item | Normal |
Super |
High-End |
Featured High-End | |||||||||||
| Driver | Kart | Glider | Driver | Kart | Glider | Driver | Kart | Glider | Driver | Kart | Glider | ||||
| Amount | 31 | 25 | 15 | 9 | 7 | 4 | 1 | 1 | 1 | 2 | 2 | 2 | |||
Pirate Pipe[edit]
| Items obtained from a new Pirate Pipe | |||||||||||||||
|---|---|---|---|---|---|---|---|---|---|---|---|---|---|---|---|
| Item | Normal |
Super |
High-End |
Featured High-End | |||||||||||
| Driver | Kart | Glider | Driver | Kart | Glider | Driver | Kart | Glider | Driver | Kart | Glider | ||||
| Amount | 13 | 11 | 9 | 5 | 4 | 3 | 0 | 1 | 1 | 3 | 0 | 0 | |||
Token Shop[edit]
The limited-time event where event tokens appeared began on June 30, 2021 and ended on July 13, 2021. Event tokens could be earned from collecting them in courses.
| Token Shop (June 30, 2021 - July 13, 2021) | ||
|---|---|---|

|
||
| Red Koopa (Freerunning) Amount: 1 |
Para-Wing Amount: 1 |
Mushroom Glider Amount: 1 |
| Ruby ×3 Amount: 5 |
Coin ×500 Amount: 10 |
Coin Rush ticket Amount: 1 |
| Point-boost ticket (driver) Amount: 5 |
Point-boost ticket (kart) Amount: 5 |
Point-boost ticket (glider) Amount: 5 |
| Item ticket Amount: 10 |
Level-boost ticket (Normal glider) Amount: 3 |
Level-boost ticket (Super glider) Amount: 1 |
| Star ticket Amount: 5 |
Points-cap ticket (Normal glider) Amount: 1 |
Points-cap ticket (Super glider) Amount: 1 |
Tier Shop[edit]
The shop featured a variety of set and randomized items available for purchase. The item slots in the shop are unlocked based on the highest tier of players.
| Items available in Tier Shop (June 30, 2021 - July 6, 2021) | ||
|---|---|---|

|
||
| Fire Bro Amount: 1 |
Mach 8 Amount: 1 |
Gold Glider Amount: 1 |
| Items available in Tier Shop (July 7, 2021 - July 13, 2021) | ||

|
||
| Koopa Troopa Amount: 1 |
Green Circuit Amount: 1 |
Waluigi Wing Amount: 1 |
| Items available in Tier Shop (June 30, 2021 - July 13, 2021) | ||
| Level-boost ticket (Normal) Amount: 3 per week |
Level-boost ticket (Normal) Amount: 3 per week |
Level-boost ticket (Normal) Amount: 3 per week |
OR |
OR |
OR |
| Level-boost ticket (Super) Amount: 2 per week OR Level-boost ticket (High-End) Amount: 1 per week |
Level-boost ticket (Super) Amount: 2 per week OR Level-boost ticket (High-End) Amount: 1 per week |
Level-boost ticket (Super) Amount: 2 per week OR Level-boost ticket (High-End) Amount: 1 per week |
OR OR |
OR OR |
OR OR |
| Points-cap ticket (Normal) Amount: 1 per week |
Points-cap ticket (Super) Amount: 1 per week |
Points-cap ticket (High-End) Amount: 1 per week |
Profiles[edit]
- Mario Kart Tour Twitter:
Names in other languages[edit]
| Language | Name | Meaning |
|---|---|---|
| Japanese | サマーツアー Samā Tsuā |
Summer Tour |
| Chinese (simplified) | 夏季巡回赛 Xiàjì Xúnhuísài |
Summer Tour |
| Chinese (traditional) | 夏季巡迴賽 Xiàjì Xúnhuísài |
Summer Tour |
| French | Saison de l'été |
Summer Season |
| German | Tour-Saison Sommer |
Tour Season Summer |
| Italian | Tour estivo |
Summer Tour |
| Korean | 서머 투어 Seomeo Tueo |
Summer Tour |
| Portuguese | Temporada de verão |
Summer Season |
| Spanish | Temporada de verano |
Summer Season |