Wario Land 3
Template:Infobox Wario Land 3, known in Japan as Wario Land 3: Fushigi na Orgel (ワリオランド3 不思議なオルゴ~ル, lit. "Wario Land 3: The Mysterious Music Box"), is a video game for the Game Boy Color released in 2000, and the third installment (fourth, counting Virtual Boy Wario Land) in the Wario Land series. It is about Wario entering a music box, and to get out he needs to collect the five music boxes. In the game he gets nine new abilities.
Story
One day, Wario is flying with his plane over the woods when he crashes. He spends the rest of his afternoon wandering amongst the trees and underbrush until he stumbles upon a mysterious cave. Inside the cave, he discovers a magical music box. He wants to take a closer look, and that causes him to be suddenly sucked into the music box. In the music box, a mysterious figure informs Wario that he is a god who once protected the world inside the music box, until an evil being sealed away his magical powers in five music boxes. In exchange for freeing it, the being promises to send Wario back to his own world and let him keep any treasure he finds. With his mind on the money and the fact he can return to his own world, Wario departs on his quest, in search of the music boxes and the many treasures of this mysterious land. Template:Spoiler After collecting all the music boxes Wario returns to the temple. Once there, the music boxes play a melody together. The song frees the being, who turns out to be the evil Rudy the Clown. The inhabitants of the music box locked his power up in five music boxes; but before he got imprisoned, he turned all of the music box's inhabitants into monsters. Rudy had great plans about again ruling the Music Box World and then the one outside as well. After Wario defeats Rudy, he is met by the inhabitants of the music box, now restored to their former selves. An old man explains that they thought Wario would help Rudy to return to is old form, and tried to stop Wario from causing that catastrophe; they never thought he would defeat Rudy. They thank Wario and transport him back to his world, along with the treasure that he has collected, as promised. Template:Endspoiler
Gameplay
The gameplay in Wario Land 3 is very similar to that of its predecessor, Wario Land 2. Wario is immortal: if Wario touches an enemy, Wario will simply be stunned or transform in one of his many transformations. This Wario Land has a day and night system; after Wario clears a level, day will turn in night or night will turn in day. This has effect on levels. Wario also learns more moves in his adventure. Wario must return multiple times to some levels in order to beat the game, and if the player wants to get all the treasures.
Wario's Transformations
 |
Ball o' String Wario – Wario will roll back and forth across a course, bouncing off walls, until he eventually unravels back into Wario. This can be used to break blocks. |
 |
Bouncy Wario – Wario can jump to new heights. After a amount of time, Wario will return to normal. This form will end immediately if he jumps into water or on spikes. |
 |
Bubble Wario – Wario is trapped inside a bubble, allowing him to endlessly float upward, until he hits something. While inside the bubble, Wario has the ability to resist currents in the water. |
| Crazy Wario – Wario becomes a hard-to-control, dizzy alter-ego. Unlike Wario Land II, Crazy Wario cannot exhale a poisonous gas to kill enemies, and does not change color. Water will revert Wario to a normal state. | |
| Electric Wario – After Wario is hit by a zap of electricity, he is propelled backwards and cannot move for about a second. Any enemies touching him will be immediately defeated. | |
| Fat Wario – With Wario's extra weight, he can easily break through certain blocks which normal Wario can't. As a side-effect, Wario is slow and cant jump as high as normal, but if any enemy runs into him (or if he runs into them) they will instantly be defeated. After a while, Wario will lose weight and return to normal. | |
 |
Flat Wario – When Wario is flattened, he can glide smoothly in the air to reach places previously unattainable, and slip through tiny cracks in walls. Water and some enemies can turn Wario to normal. |
| Hot Wario – Wario starts running around with his pants on fire and will slowly burn more intently until he is reduced to cinders. Wario can break through certain bricks in this form. If Wario makes contact with water or until the time limit is over, he will return to normal. | |
 |
Ice Skatin' Wario – Wario is frozen solid and sent skimming backwards, until he hits a wall. Although a usual inconvenience, he can slide along spikes and other nasty obstacles, as well as defeat most enemies. |
 |
Invisible Wario – Wario is invisible so he can pass through protected doors. However, aside from an occasional glimpse, the player cannot see Wario, either, making this a very difficult transformation. Unlike all other Wario Forms, he can still walk through doorways. When Wario goes through pipes, he reverts to normal. |
| Puffy Wario – When hit by a stinger from an enemy, Wario's head is filled with air. Wario will fload upwards until he hits something. This is a feature of many boss fights throughout the game. | |
 |
Snowman Wario – When Wario is covered in falling snow, he becomes a snowman. If Snowman Wario rolls down a slope, he can break certain blocks. Wario can defeat every enemy in this form. |
 |
Vampire Wario – Wario can defeat every enemy he touches. Plus, by pressing the B Button, Wario will go to Vampire Bat form, when he can fly in short spurts. To turn into his normal self, he must touch a clove of garlic, go into a patch of light, or fall into a pool of water. |
 |
Zombie Wario – Wario is impervious to all enemy damage, can defeat almost all enemies on touch, and fall through thin floors, although he is incredibly slow. Unlike Wario Land II, he is now able to jump, though he cannot jump very high. Water or light will return him to normal Wario. |
Power ups
The nine powerups that can be found during gameplay are as follows:
- Blue overall: By pressing the B-button and down, Wario can now perform a Smash Attack. He can destroy little enemies, fractured blocks and stun big enemies with this overall. (Stunned enemies can be killed when attacking them again)
- Double-finned flippers: With these, Wario will be able to swim. By tapping the B button, he swims faster.
- Spiked helmet: With this item, Wario can destroy both fractured and undamaged blocks when jumping from the bottom on them.
- Red glove: Wario will be able to lift small enemies when walking towards them. He can throw them by pressing the B button. Holding up will throw them upwards, keep the B button pressed to perform a charged throw. In this case, they will be destroyed when touching a wall. There are special blocks that will only break by throwing something against them.
- Garlic: Wario can now also break unfractured blocks with his Dash Attacks, or when rolling. He will break through fractured blocks without being stopped and can also kill large enemies immediately.
- Red overall: Similar to Garlic, Wario's smash attack will now also break unfractured blocks, break through fractured blocks unstopped and kill large enemies immediately. Additionally, it can cause a ground shaker, stunning small enemies.
- Winged boots: Pressing up while jumping will now allow Wario to jump higher. Enemies can also be used to perform high jumps when pressing up while jumping onto them.
- Triple-finned Flippers: With these flippers, Wario will be able to swim against strong currents while tapping the B button.
- Golden gloves: Wario will now be able to lift big enemies as well as normal ones.
List of Levels
This article is under construction. Therefore, please excuse its informal appearance while it is being worked on. We hope to have it completed by the beginning of March 2010.
North
- Out of the Woods
- The Peaceful Village
- The Vast Plain
- Bank of the Wild River
- The Tidal Coast
- Sea Turtle Rocks
West
Enemies
- Spearhead
- Spear-bot
- Hammer-bot
- Mad Scienstein
- Para-Goom
- Silky
- Appleby
- Webber
- Fire Robota
- Beam Robota
- Kobat
- Teruteru
- Doughnuteer
- Brrr Bear
- Pneumo
- Robo-Mouse
- Haridama
- Octohōn
- Prince Froggy
- Count Richtertoffen
- Mr. Moon
Bosses
- Doll Boy
- Wormwould
- Wolfenboss
- Shoot
- Pesce
- Muddee
- Scowler
- Yellow Belly
- Jamano
- Anonster
- Rudy the Clown
Treasures
There are 100 treasures in total Wario can collect, many of which alter the music box world and open new areas to Wario's exploration. However, not all of the treasures are needed to complete the game.
| Image | Name | Location | Purpose |
|---|---|---|---|
| File:WL3 T 001.PNG | First Music Box | The Grasslands | The five magical artefacts needed to complete the game. Together they can break the seal on Rudy the Clown, but each of them has a unique purpose.
|
| File:WL3 T 002.PNG | Second Music Box | A Town in Chaos | |
| File:WL3 T 003.PNG | Third Music Box | Sea Turtle Rocks | |
| File:WL3 T 004.PNG | Fourth Music Box | The Stagnant Swamp | |
| File:WL3 T 005.PNG | Fifth Music Box | Out of the Woods | |
| File:WL3 T 006.PNG | Triple-Finned Flippers | Out of the Woods | Allow Wario to swim faster, so he can traverse currents. |
| File:WL3 T 007.PNG | Double-Finned Flippers | Tower of Revival | Make Wario able to swim and dive in water. |
| File:WL3 T 008.PNG | Winged Boots | The Colossal Hole | Enable Wario to jump high and to step-jump on enemies. |
| File:WL3 T 009.PNG | Golden Gloves | The East Crater | Boost Wario's strengh, so he can lift even heavy enemies. |
| File:WL3 T 010.PNG | Garlic | Tower of Revival | Upgrades Wario's Dash Attack, so he can smash through non-cracked blocks. Also opens the path to Sea Turtle Rocks. |
| Red Gloves | The Steep Canyon | Make Wario able to lift small objects and enemies. | |
| Blue Overalls | The Volcano's Base | Enable Wario to perform a Ground Pound that breaks cracked blocks and defeats enemies. | |
| Red Overalls | Castle of Illusions | Power up Wario's Ground Pound, so he can break non-cracked blocks and stun enemies. | |
| Spiked Helmet | The Frigid Sea | Allows Wario to break blocks with his head by jumping beneath them. | |
| Lamp | The Big Bridge | When brought together, they make the Castle of Illusions appear on the east side. | |
| Fire | The Frigid Sea | ||
| Torch | Castle of Illusions | Opens the path to the Forest of Fear and connects the east sector with the north sector of the world. | |
| Cog Wheel A | The Pool of Rain | When placed into the elevator on the east side, they open the path to The Grasslands. | |
| Cog Wheel B | A Town in Chaos | ||
| Pocket Mirror | Forest of Fear | Makes the Warped Void appear on the east side. | |
| Jar of Rain | Out of the Woods | Summons a rain storm and opens the path to The Pool of Rain. | |
| Map | Tower of Revival | Reveals a secret path through the mountains and opens the path to The East Crater | |
| Blue Spell Book | The Peaceful Village | When brought together, they freeze the water on the east side and open the path to The Frigid Sea. | |
| Ice Rod | The Grasslands | ||
| Key | Tower of Revival | Unlocks the door leading to the tower's top and opens the path to Above the Clouds. | |
| Yellow Spell Book | The Tidal Coast | They create a lighting storm and open the path to The Steep Canyon. | |
| Trident | Bank of the Wild River | ||
| Ax | Out of the Woods | Cuts the big tree on the north side and opens the path to The Peaceful Village and The Vast Plain | |
| Blue Skull Ring | The Pool of Rain | When brought together, they make the Tower of Revival rise from the ground on the south side. | |
| Red Skull Ring | The Vast Plain | ||
| Keystone Fragment (left) | The Peaceful Village | They unlock the gate at the hill on the north side and open the path to the Desert Ruins. | |
| Keystone Fragment (right) | The Vast Plain | ||
| Fan | The Pool of Rain | Blows the mist at the south side away and opens the path to The Stagnant Swamp. | |
| Ancient Document (top) | Desert Ruins | They calm the storm on the west side and open the path to The Volcano's Base. | |
| Ancient Document (bottom) | Desert Ruins | ||
| Conch Artifact (blue) | The Volcano's Base | They cause the volcano to erupt and open the path to The West Crater and The Colossal Hole. | |
| Conch Artifact (red) | The Steep Canyon | ||
| Conch Artifact (green) | The Stagnant Swamp | ||
| Blue Chemical | The Steep Canyon | When brought together, they move the heavy blocks in The Vast Plain and Beneath the Waves out of the way. | |
| Red Chemical | Beneath the Waves | ||
| Air-Pump | The Colossal Hole | Makes the blocks of ice rise in The Pool of Rain and Bank of the Wild River. | |
| Sapling of Growth | A Town in Chaos | Makes the little octopi grow in Tidal Coast and Beneath the Waves. | |
| Binoculars | The East Crater | They illuminate a certain room in Sea Turtle Rocks. | |
| Propeller | The Tidal Coast | Produces currents of air in A Town in Chaos. | |
| Rust-Invoking Agent | Castle of Illusions | Causes the iron walls in The Steep Canyon, Cave of Flames, and The West Crater to rust, making them destroyable. | |
| Wire Wizard | Bank of the Wild River | Produces patches of wire in the Tower of Revival and Tidal Coast, which Wario can use to climb on. | |
| Detonator | Beneath the Waves | Causes bombs in The Stagnant Swamp, Cave of Flames, and The Colossal Hole to explode, opening new paths. | |
| Scissors | Cave of Flames | They cut loose the balloon in Above the Clouds, opening new paths. | |
| Brick | The West Crater | Opens new paths in the Castle of Illusions. | |
| Remote Control | Forest of Fear | Makes the dimensional rifts in The Warped Void disappear, opening new paths. | |
| Key Card (red) | Forest of Fear | They release Para-Gooms in The Warped Void, opening new paths. | |
| Key Card (blue) | Forest of Fear | ||
| Jackhammer | Above the Clouds | Releases a stream of hot air in The East Crater. | |
| Pick-Axe | Above the Clouds | Opens a new area in The East Crater. | |
| Rocket | Bank of the Wild River | This Treasure serves no purpose. | |
| Pokémon Pikachu | The Big Bridge | This Treasure serves no purpose. | |
| Mystery Handle | The Warped Void | Raises a Warp Pipe from the ground in the Forest of Fear, opening new paths. | |
| Magic Potion | The Warped Void | Lets Zombies emerge in a specific area of the Forest of Fear, opening new paths. | |
| Magical Powder | Castle of Illusions | Causes the tree in Out of the Woods to open, creating a new path. | |
| Fighter Mannequin | The Grasslands | This Treasure serves no purpose. | |
| Wheels | The Grasslands | Makes the carriages in The Volcano's Base operational, opening new paths. | |
| Flute | The Stagnant Swamp | Summons snakes in The Peaceful Village, The Vast Plain, and The Volcano's Base. | |
| Stone Foot | The Tidal Coast | Creates an earthquake that opens a new paths in The Volcano's Base and The Steep Canyon, and drains the water of The Stagnant Swamp. | |
| Yellow Snake Eye (left) | Sea Turtle Rocks | Opens the yellow snake door in the Tower of Revival. | |
| Yellow Snake Eye (right) | A Town in Chaos | ||
| Blue Snake Eye (left) | The West Crater | Opens the blue snake door in the Tower of Revival. | |
| Blue Snake Eye (right) | The Colossal Hole | ||
| Staff of Purity | Cave of Flames | Purifies the murky water in The Frigid Sea, Sea Turtle Rocks, and The Big Bridge, opening new paths. | |
| Sun Emblem Fragment (left) | Sea Turtle Rocks | They end the eternal night on the east side of the world, making it possible to access the levels there during the daytime as well. | |
| Sun Emblem Fragment (right) | Desert Ruins | ||
| Twister | The Stagnant Swamp | Causes leaves to fall down in Out of the Woods, opening a new path. | |
| Windbag | Cave of Flames | ||
| Miracle Seed | The Big Bridge | Causes stalks to grow in The Vast Plain, The Pool of Rain, and The Grasslands, opening new paths. | |
| Moon Gong | Sea Turtle Rocks | Summons the Moon in Above the Clouds, opening a new path. | |
| Telephone | The Steep Canyon | This Treasure serves no purpose. | |
| Crown | The Volcano's Base | This Treasure serves no purpose. | |
| Plate of Day and Night | The Peaceful Village | Gives the player the ability to switch between daytime and nighttime at will. | |
| Red Bracelet | The Vast Plain | This Treasure serves no purpose. | |
| Green Bracelet | The Tidal Coast | This Treasure serves no purpose. | |
| Blue Bracelet | The Volcano's Base | This Treasure serves no purpose. | |
| Clubs Crest | Beneath the Waves | This Treasure serves no purpose. | |
| Spades Crest | The West Crater | This Treasure serves no purpose. | |
| Heart Crest | The Warped Void | This Treasure serves no purpose. | |
| Diamonds Crest | The East Crater | This Treasure serves no purpose. | |
| Idol | The East Crater | This Treasure serves no purpose. | |
| Saber | The West Crater | This Treasure serves no purpose. | |
| Goblet | The Peaceful Village | This Treasure serves no purpose. | |
| Tea Pot | The Frigid Sea | This Treasure serves no purpose. | |
| Magnifying Glass | Bank of the Wild River | Allows the player to check which treasures they have already collected, without having to enter the level first. | |
| UFO | The Frigid Sea | This Treasure serves no purpose. | |
| Car | Cave of Flames | This Treasure serves no purpose. | |
| Locomotive | The Colossal Hole | This Treasure serves no purpose. | |
| Fire Drencher | Above the Clouds | Extinguishes the flames in The West Crater, opening a new path. | |
| Red Crayon | Beneath the Waves | A set of seven treasures shaped like crayons. Whenever the player finds one of the crayons, the object will travel to the hill that separates the north side from the west side Depending on the color of it, the crayon will then color a specific aspect of the hill.
Once the entire landscape is colored, the Golf challenge minigame will be unlocked and can be accessed at any time Wario travels from the north side to the west side and vice versa. | |
| Brown Crayon | The Warped Void | ||
| Yellow Crayon | The Pool of Rain | ||
| Green Crayon | Above the Clouds | ||
| Cyan Crayon | The Big Bridge | ||
| Blue Crayon | The Vast Plain | ||
| Pink Crayon | Desert Ruins |
Time Attack
Once a player has opened all 100 Chests, Time Attack mode is activated.
The following message will be displayed from now on when starting the game:
Time Attack
- Compete for time taken to get all 4 keys and clear the course.
- Press START on the Map Screen to see the list of best times.
Thus, the player has try to collect all the four keys the fastest way possible and enter an exit doorway in this mode. The best time will be saved for each world, though saving when playing a world isn't possible. If the player breaks their personal record, Wario will joyfully lift his thumb. Otherwise, he will react as if he wouldn't have opened a chest and entered an exist doorway in the normal mode.
Gallery
Box Art
- Wario Land 3 JAP cover.jpg
Japanese box art
European box art
North American box art


Character Artwork
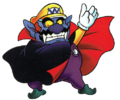
Wario
- Wario victory WL3.png
Wario striking his victory pose
- Electric Wario WL3.png
Vampire Wario (normal form)
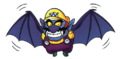
Vampire Wario (bat form)

Enemies


Glitches
- Main article: Wario Land 3/Glitches
Trivia
- The font in this game was borrowed from Template:Bp, and Template:Bp, and was also later used in Template:Bp, and Template:Bp.
External Links
| Game Boy Color games | |
|---|---|
| Super Mario franchise | Super Mario Bros. Deluxe (1999) • Mario Golf (1999) • Mario Tennis (2000) • Mobile Golf (2001) • Mario Family (2001) |
| Donkey Kong franchise | Donkey Kong GB: Dinky Kong & Dixie Kong (2000) • Donkey Kong Country (2000) |
| Wario franchise | Wario Land II* (1998) • Wario Land 3 (2000) |
| Other | Game & Watch Gallery 2* (1998) • The Legend of Zelda: Link's Awakening DX* (1998) • Game & Watch Gallery 3* (1999) |