Gallery:WarioWare, Inc.: Mega Microgame$!: Difference between revisions
(→Stage Select Icons: fixed gallery size) |
m (Text replacement - ""(id|class|style|align|perrow|caption|widths?|heights?|background|bgcolor|border|bordercolor|cellpadding|cellspacing)=" to "" $1=") |
||
| (43 intermediate revisions by 10 users not shown) | |||
| Line 23: | Line 23: | ||
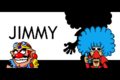
Jimmy T 2 WarioWare Mega Microgames.png|Jimmy T. with [[Jimmy's Cell|his cell phone]] | Jimmy T 2 WarioWare Mega Microgames.png|Jimmy T. with [[Jimmy's Cell|his cell phone]] | ||
WWIMMG Jimmy T Yellow.jpg|Jimmy T. wearing a yellow wig | WWIMMG Jimmy T Yellow.jpg|Jimmy T. wearing a yellow wig | ||
WWIMM Wigless Jimmy T.jpg|Jimmy T. with no wig | |||
Dribble and Spitz WarioWare Mega Microgames.png|[[Dribble & Spitz]] | Dribble and Spitz WarioWare Mega Microgames.png|[[Dribble & Spitz]] | ||
WWIMM Dribble Solo Artwork.png|Dribble | |||
WWIMM Spitz Solo Artwork.png|Spitz | |||
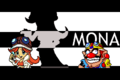
Mona WarioWare Mega Microgames.png|[[Mona]] | Mona WarioWare Mega Microgames.png|[[Mona]] | ||
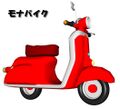
Mona on scooter WWMM art.jpg|Mona driving on [[Mona's scooter|her scooter]] | Mona on scooter WWMM art.jpg|Mona driving on [[Mona's scooter|her scooter]] | ||
| Line 39: | Line 42: | ||
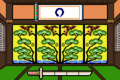
WWIMM key art.jpg|Key art with European logo | WWIMM key art.jpg|Key art with European logo | ||
</gallery> | </gallery> | ||
===Wallpapers=== | ===Wallpapers=== | ||
<gallery | <gallery> | ||
Wario Wallpaper Mega Microgames.png|[[Wario]] | Wario Wallpaper Mega Microgames.png|[[Wario]] | ||
Jimmy T Wallpaper Mega Microgames.png|[[Jimmy T|Jimmy T.]] | Jimmy T Wallpaper Mega Microgames.png|[[Jimmy T|Jimmy T.]] | ||
| Line 52: | Line 56: | ||
==Sprites== | ==Sprites== | ||
===Stage | ===Stage select icons=== | ||
<gallery widths="44" heights="44"> | <gallery widths="44" heights="44"> | ||
Wario Intro Folder MMG.png|[[Wario]] (Intro) | Wario Intro Folder MMG.png|[[Wario]] (Intro) | ||
| Line 65: | Line 69: | ||
Remix 1 Folder MMG.png|Jimmy's Remix No. 1 | Remix 1 Folder MMG.png|Jimmy's Remix No. 1 | ||
Remix 2 Folder MMG.png|Jimmy's Remix No. 2 | Remix 2 Folder MMG.png|Jimmy's Remix No. 2 | ||
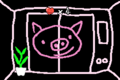
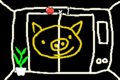
Easy Pig MMG.png|Easy | Staff Credits MMG.png|Staff | ||
Total Boss Pig MMG.png|Total Boss | Easy Pig MMG.png|Easy | ||
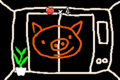
Thrilling Pig MMG.png|Thrilling | Total Boss Pig MMG.png|Total Boss | ||
Hard Pig MMG.png|Hard | Thrilling Pig MMG.png|Thrilling | ||
Hard Pig MMG.png|Hard | |||
Jump Forever MMG.png|[[Jump Forever]] | |||
Skating Board MMG.png|[[Skating Board]] | |||
Paper Plane MMG.png|[[Paper Plane (minigame)|Paper Plane]] | |||
Dr Wario MMG.png|[[Dr. Wario]] | |||
Fly Swatter MMG.png|[[Fly Swatter]] | |||
Sheriff MMG.png|[[Sheriff (minigame)|Sheriff]] | |||
Pyoro MMG.png|[[Pyoro (minigame)|Pyoro]] | |||
Pyoro 2 MMG.png|[[Pyoro 2]] | |||
Chiritorie MMG.png|[[Chiritorie (minigame)|Chiritorie]] | |||
Chicken Race MMG.png|[[Chicken Race (minigame)|Chicken Race]] | |||
VS Dong Dong MMG.png|[[VS Dong Dong]] | |||
VS Hurdle MMG.png|[[VS Hurdle]] | |||
</gallery> | </gallery> | ||
===Stage | ===Stage select screens=== | ||
<gallery> | <gallery> | ||
MMG Introduction Select Animated.gif|[[Wario]] (Intro) | |||
Wario | MMG Wario Select Animated.gif|[[Wario]] | ||
Jimmy T | MMG Jimmy T Select Animated.gif|[[Jimmy T|Jimmy T.]] | ||
MMG Dribble And Spitz Select Animated.gif|[[Dribble & Spitz]] | |||
MMG Mona Select Animated.gif|[[Mona]] | |||
Mona | MMG 9 Volt Select Animated.gif|[[9-Volt]] | ||
9 | MMG Orbulon Select Animated.gif|[[Orbulon]] | ||
Orbulon | MMG Crygor Select Animated.gif|[[Dr. Crygor]] | ||
MMG Kat and Ana Select Animated.gif|[[Kat & Ana]] | |||
Kat | MMG Jimmy T 2 Select Animated.gif|Jimmy's Remix No. 1 | ||
MMG Jimmy T 3 Select Animated.gif|Jimmy's Remix No. 2 | |||
MMG Staff Select.png|Staff | |||
MMG Easy Select.png|Easy | |||
MMG Total Boss Select.png|Total Boss | |||
MMG Thrilling Select.png|Thrilling | |||
MMG Hard Select.png|Hard | |||
MMG Jump Forever Select.png|[[Jump Forever]] | |||
MMG Skating Board Select.png|[[Skating Board]] | |||
MMG Paper Plane Select.png|[[Paper Plane (minigame)|Paper Plane]] | |||
MMG Dr Wario Select.png|[[Dr. Wario]] | |||
MMG Fly Swatter Select.png|[[Fly Swatter]] | |||
MMG Sheriff Select.png|[[Sheriff (minigame)|Sheriff]] | |||
MMG Pyoro Select.png|[[Pyoro (minigame)|Pyoro]] | |||
MMG Pyoro 2 Select.png|[[Pyoro 2]] | |||
MMG Chiritorie Select.png|[[Chiritorie (minigame)|Chiritorie]] | |||
MMG Chicken Race Select.png|[[Chicken Race (minigame)|Chicken Race]] | |||
MMG Dong Dong Select.png|[[VS Dong Dong]] | |||
MMG Hurdle Select.png|[[VS Hurdle]] | |||
</gallery> | </gallery> | ||
===Stage | ===Stage complete sprites=== | ||
<gallery> | <gallery> | ||
Wario-MegaMicrogames.png|[[Wario]] | Wario-MegaMicrogames.png|[[Wario]] | ||
| Line 102: | Line 134: | ||
</gallery> | </gallery> | ||
=== | ===Microgame icons=== | ||
====Intro Games==== | |||
<gallery widths="44" heights="44"> | |||
Crazy Cars Icon.png|[[Crazy Cars]] | |||
Wario Whirled Icon.png|[[Wario Whirled]] | |||
Saving Face Icon.png|[[Saving Face (WarioWare, Inc.: Mega Microgame$!)|Saving Face]] | |||
Diamond Dig Icon.png|[[Diamond Dig]] | |||
Dodge Balls Icon.png|[[Dodge Balls]] | |||
Repellion Icon.png|[[Repellion]] | |||
Wario Wear Icon.png|[[Wario Wear]] | |||
Hectic Highway Icon.png|[[Hectic Highway]] | |||
The Maze That Pays Icon.png|[[The Maze That Pays]] | |||
Super Wario Bros. Icon.png|[[Super Wario Bros.]] | |||
I Spy Icon.png|[[Busted! (WarioWare, Inc.: Mega Microgame$!)|I Spy]] | |||
Mug Shot Icon.png|[[Mug Shot (WarioWare, Inc.: Mega Microgame$!)|Mug Shot]] | |||
Sparring Wario Icon.png|[[Sparring Wario]] (BOSS) | |||
</gallery> | |||
====Sports==== | |||
<gallery widths="44" heights="44"> | |||
Log Chop Icon.png|[[Log Chop]] | |||
Fruit Shoot Icon.png|[[Fruit Shoot]] | |||
Heads Up Icon.png|[[Heads Up]] | |||
Boing! Icon.png|[[Boing! (WarioWare, Inc.: Mega Microgame$!)|Boing!]] | |||
Spare Me Icon.png|[[Spare Me]] | |||
Batter Up Icon.png|[[Batter Up]] | |||
Baseline Bash Icon.png|[[Baseline Bash]] | |||
Butterfly Stroke Icon.png|[[Butterfly Stroke]] | |||
Hammer Toss Icon.png|[[Hammer Toss]] | |||
Balancing Act Icon.png|[[Balancing Act (WarioWare, Inc.: Mega Microgame$!)|Balancing Act]] | |||
Putt for Dough Icon.png|[[Putt for Dough]] | |||
Ski Jump Icon.png|[[Ski Jump]] | |||
Mountain Mountin' Icon.png|[[Mountain Mountin']] | |||
Guy Scraper Icon.png|[[Guy Scraper]] | |||
Lift & Shout Icon.png|[[Lift & Shout]] | |||
Pro Curling Icon.png|[[Pro Curling]] | |||
High Hoops Icon.png|[[High Hoops]] | |||
Hurry Hurdles Icon.png|[[Hurry Hurdles]] | |||
Gifted Goalie! Icon.png|[[Gifted Goalie!]] | |||
Jumpin' Rope Icon.png|[[Jumpin' Rope]] | |||
Ring My Bell Icon.png|[[Ring My Bell]] | |||
Set 'n Spike Icon.png|[[Set 'n Spike]] | |||
City Surfer Icon.png|[[City Surfer]] | |||
Snowboard Slalom Icon.png|[[Snowboard Slalom]] | |||
Punch Out Icon.png|[[Punch Out]] (BOSS) | |||
</gallery> | |||
====Sci-Fi==== | |||
<gallery widths="44" heights="44"> | |||
Alien Ambush Icon.png|[[Alien Ambush]] | |||
Scooter Commuter Icon.png|[[Scooter Commuter]] | |||
Space Fighter Icon.png|[[Space Fighter]] | |||
Stick & Move Icon.png|[[Stick & Move]] | |||
Classic Clash I Icon.png|[[Classic Clash I]] | |||
Bubble Trouble Icon.png|[[Bubble Trouble (microgame)|Bubble Trouble]] | |||
Super Fly Icon.png|[[Super Fly (microgame)|Super Fly]] | |||
Arrow Space Icon.png|[[Arrow Space]] | |||
Manic Mechanic Icon.png|[[Manic Mechanic]] | |||
UFO Assist Icon.png|[[UFO Assist]] | |||
Classic Clash II Icon.png|[[Classic Clash II]] | |||
Mars Ball Destroy Icon.png|[[Mars Ball Destroy]] | |||
Hover for Cover Icon.png|[[Hover for Cover]] | |||
Scoot or Die Icon.png|[[Scoot or Die]] | |||
Word Up Icon.png|[[Word Up]] | |||
Ninja Pipe Cleaner Icon.png|[[Ninja Pipe Cleaner]] | |||
Classic Clash III Icon.png|[[Classic Clash|Classic Clash III]] | |||
Zero to Hero Icon.png|[[Zero to Hero]] | |||
Tidal Cave Icon.png|[[Tidal Cave]] | |||
Mars Jars Icon.png|[[Mars Jars]] | |||
Space Escape Icon.png|[[Space Escape]] | |||
Ninja Vision Icon.png|[[Ninja Vision]] | |||
Slick Wheelie Icon.png|[[Slick Wheelie]] | |||
Bam-Fu Icon.png|[[Bam-Fu]] | |||
Galaxy 2003 Icon.png|[[Galaxy 2003]] (BOSS) | |||
</gallery> | |||
====Strange==== | |||
<gallery widths="44" heights="44"> | |||
Paper Plane Icon.png|[[Ground Control|Paper Plane]] | |||
Dry Eye Icon.png|[[Dry Eye]] | |||
Parking Prowess Icon.png|[[Parking Prowess]] | |||
Butterfingers Icon.png|[[Butterfingers (microgame)|Butterfingers]] | |||
Gold Digger Icon.png|[[Gold Digger]] | |||
Terminal Velocity Icon.png|[[Terminal Velocity]] | |||
Chicken Pinch Icon.png|[[Chicken Pinch]] | |||
Boom Box Icon.png|[[Boom Box (WarioWare, Inc.: Mega Microgame$!)|Boom Box]] | |||
Sloppy Salon Icon.png|[[Sloppy Salon]] | |||
Page Panic Icon.png|[[Page Panic]] | |||
Noodle-Rama Icon.png|[[Noodle-Rama]] | |||
Right in the Eye Icon.png|[[Right in the Eye]] | |||
I Came, I Saw Icon.png|[[I Came, I Saw]] | |||
Douse the House Icon.png|[[Douse the House]] | |||
Sole Man Icon.png|[[Sole Man]] | |||
Nighttime Allergies Icon.png|[[Nighttime Allergies]] | |||
Air Supplies Icon.png|[[Air Supplies]] | |||
Toast the Ghosts Icon.png|[[Toast the Ghosts]] | |||
Tilt-n-Tumble Icon.png|[[Tilt-n-Tumble]] | |||
Pompeii Back Icon.png|[[Pompeii Back]] | |||
Crash Test, Dummy! Icon.png|[[Crash Test, Dummy!]] | |||
Sunny-Side Up Icon.png|[[Sunny-Side Up]] | |||
Fries With That Icon.png|[[Fries With That?]] | |||
The Brush Off Icon.png|[[The Brush Off]] | |||
Nail Call Icon.png|[[Nail Call]] (BOSS) | |||
</gallery> | |||
====Nintendo Classics==== | |||
<gallery widths="44" heights="44"> | |||
Balloon Fight Icon.png|[[Balloon Fight (WarioWare, Inc.: Mega Microgame$!)|Balloon Fight]] | |||
Duck Hunt Icon.png|[[Duck Hunt (WarioWare, Inc.: Mega Microgame$!)|Duck Hunt]] | |||
Game Boy Icon.png|[[Game Boy (microgame)|Game Boy]] | |||
Donkey Kong Icon.png|[[Donkey Kong (WarioWare, Inc.: Mega Microgame$!)|Donkey Kong]] | |||
F-Zero Icon.png|[[F-Zero]] | |||
Family Basic Icon.png|[[Family Basic]] | |||
Super Mario Bros. Icon.png|[[Super Mario Bros. (WarioWare, Inc.: Mega Microgame$!)|Super Mario Bros.]] | |||
Ultra Hand Icon.png|[[Ultra Hand]] | |||
Chiritorie Icon.png|[[Chiritorie (microgame)|Chiritorie]] | |||
Laser Outlaw Icon.png|[[Laser Outlaw]] | |||
Hogan's Alley Icon.png|[[Hogan's Alley (WarioWare, Inc.: Mega Microgame$!)|Hogan's Alley]] | |||
Mario Paint Fly Swatter Icon.png|[[Mario Paint: Fly Swatter]] | |||
Ice Climber Icon.png|[[Ice Climber (WarioWare, Inc.: Mega Microgame$!)|Ice Climber]] | |||
The Legend of Zelda Icon.png|[[The Legend of Zelda (WarioWare, Inc.: Mega Microgame$!)|The Legend of Zelda]] | |||
Sheriff Icon.png|[[Sheriff (microgame)|Sheriff]] | |||
Dr. Mario Icon.png|[[Dr. Mario (WarioWare, Inc.: Mega Microgame$!)|Dr. Mario]] | |||
Racing 112 Icon.png|[[Racing 112]] | |||
Mario Clash Icon.png|[[Mario Clash (microgame)|Mario Clash]] | |||
Helmet Icon.png|[[Helmet (microgame)|Helmet]] | |||
Urban Champion Icon.png|[[Urban Champion]] | |||
Stack-Up Icon.png|[[Stack-Up]] | |||
Metroid Icon.png|[[Metroid (WarioWare, Inc.: Mega Microgame$!)|Metroid]] | |||
Wild Gunman Icon.png|[[Wild Gunman (WarioWare, Inc.: Mega Microgame$!)|Wild Gunman]] | |||
LazerBlazer Icon.png|[[LazerBlazer]] | |||
Ultra Machine Icon.png|[[Ultra Machine]] (BOSS) | |||
</gallery> | |||
====IQ==== | |||
<gallery widths="44" heights="44"> | |||
Praise or Haze II Icon.png|[[Praise or Haze II]] | |||
Code Buster Icon.png|[[Code Buster]] | |||
Noodle Cup Icon.png|[[Noodle Cup]] | |||
Petri Panic Icon.png|[[Petri Panic]] | |||
Maze Daze Icon.png|[[Maze Daze]] | |||
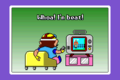
What's the Toadal Icon.png|[[What's the Toadal?]] | |||
Find My Behind Icon.png|[[Find My Behind]] | |||
Cavity Calamity Icon.png|[[Cavity Calamity]] | |||
Sphinx Hijinks Icon.png|[[Sphinx Hijinks]] | |||
Gear Head Fred Icon.png|[[Gear Head Fred]] | |||
Getcha Groove On Icon.png|[[Getcha Groove On]] | |||
Odd Man Out Icon.png|[[Odd Man Out]] | |||
The Great Cover-Cup Icon.png|[[The Great Cover-Cup]] | |||
Four Leaf Hover Icon.png|[[Four Leaf Hover]] | |||
Tip the Scale Icon.png|[[Tip the Scale]] | |||
The Real McCoy Icon.png|[[The Real McCoy]] | |||
Identity Crisis Icon.png|[[Identity Crisis]] | |||
Electric Groove Fish Icon.png|[[Electric Groove Fish]] | |||
Strength in Numbers Icon.png|[[Strength in Numbers]] | |||
Button Masher Icon.png|[[Button Masher (WarioWare, Inc.: Mega Microgame$!)|Button Masher]] | |||
Catterwall Icon.png|[[Catterwall]] | |||
Focus-Pocus Icon.png|[[Focus-Pocus]] | |||
Matchboxes Icon.png|[[Matchboxes]] | |||
Garage Rock Icon.png|[[Garage Rock]] | |||
Dungeon Dilemma Icon.png|[[Dungeon Dilemma]] (BOSS) | |||
</gallery> | |||
====Reality==== | |||
<gallery widths="44" heights="44"> | |||
Banana Munch Icon.png|[[Banana Munch]] | |||
Mirror Mirror Icon.png|[[Mirror Mirror]] | |||
Wrong Way Highway Icon.png|[[Wrong Way Highway]] | |||
Bad Man Bash Icon.png|[[Bad Man Bash]] | |||
Berry Berry Good Icon.png|[[Berry Berry Good]] | |||
Cat Nap Icon.png|[[Cat Nap]] | |||
Make My Clay Icon.png|[[Make My Clay]] | |||
Rough Puff Icon.png|[[Rough Puff]] | |||
Hard Core Icon.png|[[Hard Core]] | |||
Cymbalism Icon.png|[[Cymbalism]] | |||
Mashin' Martians Icon.png|[[Mashin' Martians]] | |||
Body Block Icon.png|[[Body Block]] | |||
Funky Fountain Icon.png|[[Funky Fountain]] | |||
Assembly Line Icon.png|[[Assembly Line]] | |||
What's Your Beef Icon.png|[[What's Your Beef?]] | |||
Spoon Spectacular Icon.png|[[Spoon Spectacular]] | |||
Whoop-De-Doodle Icon.png|[[Whoop-De-Doodle]] | |||
Raging Rhino Icon.png|[[Raging Rhino]] | |||
Veg Out Icon.png|[[Veg Out]] | |||
Quickie Quiz Icon.png|[[Quickie Quiz]] | |||
Cheeky Monkey Icon.png|[[Cheeky Monkey (WarioWare, Inc.: Mega Microgame$!)|Cheeky Monkey]] | |||
Pod Pinch Icon.png|[[Pod Pinch]] | |||
Shake! Icon.png|[[Shake!]] | |||
Kettle Mettle Icon.png|[[Kettle Mettle]] | |||
Alien Laser Hero Icon.png|[[Alien Laser Hero]] (BOSS) | |||
</gallery> | |||
====Nature==== | |||
<gallery widths="44" heights="44"> | |||
Hare Scare Icon.png|[[Hare Scare]] | |||
Munch a Bunch Icon.png|[[Munch a Bunch]] | |||
Lickety-Split Icon.png|[[Lickety-Split]] | |||
Flower Shower Icon WWIMM.png|[[Flower Shower (microgame)|Flower Shower]] | |||
Go Fer the Tater Icon.png|[[Go Fer the Tater]] | |||
Picture Perfect Icon.png|[[Picture Perfect (WarioWare, Inc.: Mega Microgame$!)|Picture Perfect]] | |||
Leafy Greens Icon.png|[[Leafy Greens]] | |||
Crane Game Icon.png|[[Crane Game (microgame)|Crane Game]] | |||
Veggie Might Icon.png|[[Veggie Might]] | |||
Mouse Trap Icon.png|[[Mouse Trap]] | |||
Coconut Catapult Icon.png|[[Coconut Catapult]] | |||
Bug Bite Icon.png|[[Bug Bite]] | |||
Disc O'Dog Icon.png|[[Disc O'Dog]] | |||
Fruit Fall Icon.png|[[Fruit Fall]] | |||
Penguin Shuffle Icon.png|[[Paddle Parade|Penguin Shuffle]] | |||
Two Birds, Big Rocks Icon.png|[[Two Birds, Big Rocks]] | |||
Hoppin' Mad Icon.png|[[Hoppin' Mad]] | |||
Worm Squirm Icon.png|[[Worm Squirm]] | |||
Kitty Cover Icon.png|[[Kitty Cover]] | |||
The Claw Icon.png|[[The Claw]] | |||
Spunky Monkey Icon.png|[[Spunky Monkey]] | |||
Crack Down Icon.png|[[Crack Down]] | |||
Raaaarrrrggghh Icon.png|[[RAAAARRRRGGGHH|Raaaarrrrggghh]] | |||
Blow Hole Bridge Icon.png|[[Blow Hole Bridge]] | |||
The Frog Flap Icon.png|[[The Frog Flap]] (BOSS) | |||
</gallery> | |||
====Anything Goes==== | |||
<gallery widths="44" heights="44"> | |||
Wario Bros. Icon.png|[[Wario Bros.]] | |||
Hot Dog Hog Icon.png|[[Hot Dog Hog]] | |||
Shingle Smasher Icon.png|[[Shingle Smasher]] | |||
Produce Pandemonium Icon.png|[[Produce Pandemonium]] | |||
Laser Vision Icon.png|[[Laser Vision]] | |||
Wario Windsock Icon.png|[[Wario Windsock]] | |||
High Treeson Icon.png|[[High Treeson]] | |||
Rock Paper Scissors Icon.png|[[Rock Paper Scissors]] | |||
Wario Pinball Icon.png|[[Wario Pinball]] | |||
Mix & Match Icon.png|[[Mix & Match]] | |||
Down & Outie Icon.png|[[Down & Outie]] | |||
Thumb Wrestling Icon.png|[[Thumb Wrestling]] | |||
Float Your Boat Icon.png|[[Float Your Boat]] | |||
Vermin Icon.png|[[Vermin (microgame)|Vermin]] | |||
Apple Shrapnel Icon.png|[[Apple Shrapnel]] | |||
Unexcite Bike Icon.png|[[Unexcite Bike]] | |||
Hasty Pastry Icon.png|[[Hasty Pastry]] | |||
Wario Facial Icon.png|[[Wario Facial]] | |||
Grow Wario Grow Icon.png|[[Grow Wario Grow]] | |||
Loot Scoot Icon.png|[[Loot Scoot]] | |||
Airpain Icon.png|[[Airpain]] | |||
Wario Kendo Icon.png|[[Wario Kendo]] | |||
Bug Birdie Icon.png|[[Bug Birdie]] | |||
Sinking Feeling Icon.png|[[Sinking Feeling (WarioWare, Inc.: Mega Microgame$!)|Sinking Feeling]] | |||
Wario's Adventure Icon.png|[[Wario's Adventure]] (BOSS) | |||
</gallery> | |||
====Other==== | |||
<gallery widths="44" heights="44"> | |||
WWIMM Locked Microgame Icon.png|Locked microgame icon | |||
WWIMM Locked Boss Microgame Icon.png|Locked boss microgame icon | |||
</gallery> | |||
===Miscellaneous=== | |||
<gallery> | <gallery> | ||
Made in Wariologfo.png| | Made in Wariologfo.png|Japanese logo | ||
Mona Stand WWI-MM.png|[[Mona]] | Mona Stand WWI-MM.png|[[Mona]] | ||
Mona Gelato WWI-MM.png|Mona | Mona Gelato WWI-MM.png|Mona | ||
Mona Outfit Original WWI-MM.png|Mona | Mona Outfit Original WWI-MM.png|Mona | ||
Mona Outfit Panda.png|Mona | Mona Outfit Formal1 WWI-MM.png|Mona wearing a formal outfit | ||
Mona Outfit ShirtJeans WWI-MM.png|Mona | Mona Outfit Formal2 WWI-MM.png|Mona wearing a formal outfit | ||
Mona Outfit Sports WWI-MM.png|Mona | Mona Outfit Panda.png|Mona wearing a panda outfit | ||
Mona Outfit Wario WWI-MM.png|Mona | Mona Outfit ShirtJeans WWI-MM.png|Mona wearing a shirt and jeans | ||
Mona Outfit Sports WWI-MM.png|Mona wearing an athletic outfit | |||
Mona Outfit Wario WWI-MM.png|Mona wearing a [[Wario]] outfit | |||
Mona Scooter Forward WWI-MM.png|Mona on [[Mona's scooter|her scooter]] | Mona Scooter Forward WWI-MM.png|Mona on [[Mona's scooter|her scooter]] | ||
Mona Scooter Small WWI-MM.png|Mona on her scooter | Mona Scooter Small WWI-MM.png|Mona on her scooter | ||
| Line 136: | Line 424: | ||
==Screenshots== | ==Screenshots== | ||
<gallery> | |||
WWIMM Title Screen.png|Title screen | |||
WWIMM Title Screen JP.png|Title screen (Japanese) | |||
WWIMM Title Screen CH.png|Title screen (Chinese) | |||
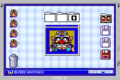
WWIMM Game Select Screen.png|Game select screen | |||
WWIMM Name Entry.png|Name entry screen | |||
WWIMM Language selection.png|Language selection screen (Europe only) | |||
WWIMM Completion.png|All microgames and minigames unlocked in the Games menu | |||
</gallery> | |||
===Cutscenes=== | |||
====Prologue==== | |||
<gallery> | |||
WWIMM Wario Original Clothes.png|[[Wario]] watching TV | |||
WWIMM Calling Jimmy.png|Wario calling [[Jimmy T|Jimmy T.]] | |||
WWIMM Calling Mona.png|Wario calling [[Mona]] | |||
WWIMM Calling Dribble & Spitz.png|Wario calling [[Dribble & Spitz]] | |||
WWIMM Calling Kat & Ana.png|Wario calling [[Kat & Ana]] | |||
WWIMM Calling 9-Volt.png|Wario calling [[9-Volt]] | |||
WWIMM Calling Crygor & Orbulon.png|Wario calling [[Dr. Crygor]] & [[Orbulon]] | |||
</gallery> | |||
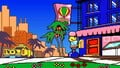
====[[Gelateria]]==== | |||
<gallery> | |||
Gelateria Outside.jpg|The [[Gelateria]] as seen outside | |||
Gelateria Jimmy T.jpg|[[Jimmy T.]] arriving at the Gelateria | |||
Gelateria Dribble & Spitz.jpg|[[Dribble & Spitz]] arriving at the Gelateria via [[Dribble's taxi|their taxi]] | |||
Gelateria Children.jpg|Children arriving at the Gelateria | |||
Gelateria 9-Volt.jpg|[[9-Volt]] arriving at the Gelateria via [[SK8|his skateboard]] | |||
Gelateria Orbulon.jpg|[[Orbulon]] arriving at the Gelateria via [[Oinker|his UFO]] | |||
Gelateria Dr. Crygor.jpg|[[Dr. Crygor]] arriving at the Gelateria via his jetpack | |||
Gelateria Kat & Ana.jpg|[[Kat & Ana]] arriving at the Gelateria | |||
Gelateria Wario.jpg|[[Wario]] arriving at the Gelateria via [[Wario Bike|his motorcycle]] | |||
Gelateria.png|[[WarioWare, Inc.|Everyone]], alongside [[Gelato Joe]], at the Gelateria | |||
</gallery> | |||
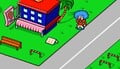
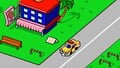
===Character stages=== | ===Character stages=== | ||
<gallery> | <gallery> | ||
MMG Introduction Stage.png|Introduction stage | |||
WWMM Ken TV.png|Introduction Intermission | |||
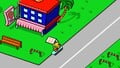
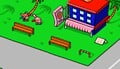
MMG Jimmy T Stage.png|Jimmy's stage | |||
WWMM DribbleSpitzStage.png|Dribble & Spitz's stage | WWMM DribbleSpitzStage.png|Dribble & Spitz's stage | ||
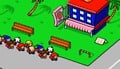
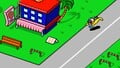
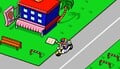
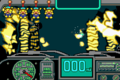
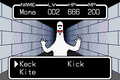
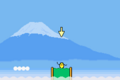
Diamond Police gameplay WWI.png|Mona's stage | |||
MMG 9 Volt Stage.png|9-Volt's stage | |||
MMG Orbulon Stage.png|Orbulon's stage | |||
MMG Crygor Stage.png|Crygor's stage | |||
MMG Kat And Ana Stage.png|Kat & Ana's stage | |||
MMG Wario Stage.png|Wario's stage | |||
MMG Remix 1 Stage.png|Jimmy's Remix No. 1 stage | |||
MMG Remix 2 Stage.png|Jimmy's Remix No. 2 stage | |||
MMG Easy Stage.png|Easy stage | |||
MMG Total Boss Stage.png|Total Boss stage | |||
MMG Thrilling Stage.png|Thrilling stage | |||
MMG Hard Stage.png|Hard stage | |||
</gallery> | </gallery> | ||
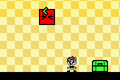
===[[Game Over]]=== | ===[[Game Over]]=== | ||
<gallery> | <gallery> | ||
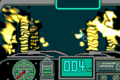
MMG Introduction Game Over.png|Introduction stage | |||
WWIMM Jimmy Game Over.png|Jimmy's stage | WWIMM Jimmy Game Over.png|Jimmy's stage | ||
MMG Dribble And Spitz Game Over.png|Dribble & Spitz's stage | |||
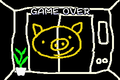
WWIMM Mona Game Over.png|Mona's stage | WWIMM Mona Game Over.png|Mona's stage | ||
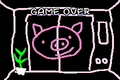
WWIMM Game Over 9-Volt.png|9-Volt's stage | WWIMM Game Over 9-Volt.png|9-Volt's stage | ||
MMG Orbulon Game Over.png|Orbulon's stage | |||
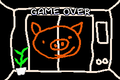
WWIMM Dr Crygor Game Over.png|Dr. Crygor's stage | WWIMM Dr Crygor Game Over.png|Dr. Crygor's stage | ||
WWIMM Game Over Kat & Ana.png|Kat & Ana's stage | |||
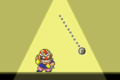
WWIMM Wario Game Over.png|Wario's stage | WWIMM Wario Game Over.png|Wario's stage | ||
WWIMM Game Over Jimmy Remix 1.png|Jimmy's Remix No. 1 stage | |||
WWIMM Game Over Jimmy Remix 2.png|Jimmy's Remix No. 2 stage | |||
WWIMM Game Over Easy.png|Easy | WWIMM Game Over Easy.png|Easy | ||
WWIMM Game Over Thrilling.png|Thrilling | WWIMM Game Over Thrilling.png|Thrilling | ||
| Line 165: | Line 508: | ||
===Microgames=== | ===Microgames=== | ||
==== | ====Intro Games==== | ||
<gallery> | <gallery> | ||
WWIMM CrazyCars.png|[[Crazy Cars]] | WWIMM CrazyCars.png|[[Crazy Cars]] | ||
| Line 179: | Line 522: | ||
I Spy.png|[[Busted! (WarioWare, Inc.: Mega Microgame$!)|I Spy]] | I Spy.png|[[Busted! (WarioWare, Inc.: Mega Microgame$!)|I Spy]] | ||
Mug Shot.png|[[Mug Shot (WarioWare, Inc.: Mega Microgame$!)|Mug Shot]] | Mug Shot.png|[[Mug Shot (WarioWare, Inc.: Mega Microgame$!)|Mug Shot]] | ||
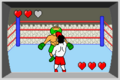
WWIMM SparringWario.png|[[Sparring Wario]] | WWIMM SparringWario.png|[[Sparring Wario]] (BOSS) | ||
</gallery> | </gallery> | ||
| Line 208: | Line 551: | ||
CitySurfer WWIMM.png|[[City Surfer]] | CitySurfer WWIMM.png|[[City Surfer]] | ||
SnowboardSlalom WWIMM.png|[[Snowboard Slalom]] | SnowboardSlalom WWIMM.png|[[Snowboard Slalom]] | ||
Punch Out microgame WWMM.png|[[Punch Out]] | Punch Out microgame WWMM.png|[[Punch Out]] (BOSS) | ||
</gallery> | </gallery> | ||
| Line 237: | Line 580: | ||
WWIMM SlickWheelie.png|[[Slick Wheelie]] | WWIMM SlickWheelie.png|[[Slick Wheelie]] | ||
WWIMM BamFu.png|[[Bam-Fu]] | WWIMM BamFu.png|[[Bam-Fu]] | ||
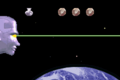
WWIMM Galaxy2003.png|[[Galaxy 2003]] | WWIMM Galaxy2003.png|[[Galaxy 2003]] (BOSS) | ||
</gallery> | </gallery> | ||
| Line 266: | Line 609: | ||
WWIMM FriesWithThat.png|[[Fries With That?]] | WWIMM FriesWithThat.png|[[Fries With That?]] | ||
WWIMM TheBrushOff.png|[[The Brush Off]] | WWIMM TheBrushOff.png|[[The Brush Off]] | ||
WWIMM NailCall.png|[[Nail Call]] | WWIMM NailCall.png|[[Nail Call]] (BOSS) | ||
</gallery> | </gallery> | ||
| Line 295: | Line 638: | ||
Metroid.png|[[Metroid (WarioWare, Inc.: Mega Microgame$!)|Metroid]] | Metroid.png|[[Metroid (WarioWare, Inc.: Mega Microgame$!)|Metroid]] | ||
Wild Gunman.png|[[Wild Gunman (WarioWare, Inc.: Mega Microgame$!)|Wild Gunman]] | Wild Gunman.png|[[Wild Gunman (WarioWare, Inc.: Mega Microgame$!)|Wild Gunman]] | ||
Ultra Machine.png|[[Ultra Machine]] | Ultra Machine.png|[[Ultra Machine]] (BOSS) | ||
</gallery> | </gallery> | ||
| Line 324: | Line 667: | ||
Matchboxes.png|[[Matchboxes]] | Matchboxes.png|[[Matchboxes]] | ||
Garage Rock.png|[[Garage Rock]] | Garage Rock.png|[[Garage Rock]] | ||
DungeonDilemma.png|[[Dungeon Dilemma]] | DungeonDilemma.png|[[Dungeon Dilemma]] (BOSS) | ||
</gallery> | </gallery> | ||
| Line 353: | Line 696: | ||
Shake.png|[[Shake!]] | Shake.png|[[Shake!]] | ||
Kettle Mettle.png|[[Kettle Mettle]] | Kettle Mettle.png|[[Kettle Mettle]] | ||
Alien Laser Hero.png|[[Alien Laser Hero]] | Alien Laser Hero.png|[[Alien Laser Hero]] (BOSS) | ||
</gallery> | </gallery> | ||
| Line 382: | Line 725: | ||
Raaaarrrrggghh.png|[[RAAAARRRRGGGHH|Raaaarrrrggghh]] | Raaaarrrrggghh.png|[[RAAAARRRRGGGHH|Raaaarrrrggghh]] | ||
Blow Hole Bridge.png|[[Blow Hole Bridge]] | Blow Hole Bridge.png|[[Blow Hole Bridge]] | ||
Frog Flap.png|[[The Frog Flap]] | Frog Flap.png|[[The Frog Flap]] (BOSS) | ||
</gallery> | </gallery> | ||
| Line 411: | Line 754: | ||
Bug Birdie.png|[[Bug Birdie]] | Bug Birdie.png|[[Bug Birdie]] | ||
Sinking Feeling.png|[[Sinking Feeling (WarioWare, Inc.: Mega Microgame$!)|Sinking Feeling]] | Sinking Feeling.png|[[Sinking Feeling (WarioWare, Inc.: Mega Microgame$!)|Sinking Feeling]] | ||
WWIMM WariosAdventure.png|[[Wario's Adventure]] | WWIMM WariosAdventure.png|[[Wario's Adventure]] (BOSS) | ||
</gallery> | </gallery> | ||
| Line 424: | Line 767: | ||
==Miscellaneous== | ==Miscellaneous== | ||
<gallery> | |||
NDREAM WWIMMG Guide.jpg|''[[Nintendo DREAM]]'' guide | |||
2005CJCGT WWIMM Showcase.jpg|A photo showing the ''WarioWare, Inc.: Mega Microgame$!'' competition showcase part at the 2005 ChinaJoy CGT booth | |||
</gallery> | |||
===Japanese website=== | |||
<gallery> | <gallery> | ||
WWIMM Kids Trio.jpg|Three children competing for a high score | WWIMM Kids Trio.jpg|Three children competing for a high score | ||
WWIMM Family.jpg|A family playing using a [[Game Boy Player]] | WWIMM Family.jpg|A family playing using a [[Game Boy Player]] | ||
</gallery> | |||
====Jimmy T.==== | |||
<gallery> | |||
Made in Wario site Jimmy cell.gif|Pictogram of [[Jimmy's Cell]] | |||
</gallery> | |||
====9-Volt==== | |||
<gallery> | |||
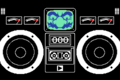
Made in Wario site 9-Volt controller.gif|Pictogram of a [[Family Computer]] controller | |||
Concept art WWMM.jpg|Drawing of several characters at a board | |||
</gallery> | |||
====Dribble & Spitz==== | |||
<gallery> | |||
Made in Wario site Dribble taxi.gif|Pictogram of [[Dribble's taxi]] | |||
Diamond City WWMM.png|Map of [[Diamond City]] | |||
</gallery> | |||
====Dr. Crygor==== | |||
<gallery> | |||
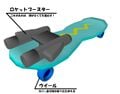
DribbleTaxi3D.jpg|Render of [[Dribble's taxi]] | |||
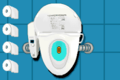
Dribble Taxi 3D 2.jpg|The schematics of Dribble's taxi | |||
Dribble Taxi 3D 3.jpg|The schematics of Dribble's taxi | |||
Dribble Taxi 3D 4.jpg|The schematics of Dribble's taxi | |||
Dribble Taxi 3D 5.jpg|The schematics of Dribble's taxi | |||
Dribble Taxi 3D 6.jpg|The schematics of Dribble's taxi | |||
WWIMM Wario Car Analytic Illustration 1.jpg|The schematics of the [[Wario Car]] | |||
WWIMM Wario Car Analytic Illustration 2.jpg|The schematics of the Wario Car | |||
WWIMM Wario Car Analytic Illustration 3.jpg|The schematics of the Wario Car | |||
WWIMM Wario Car Analytic Illustration 4.jpg|The schematics of the Wario Car | |||
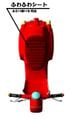
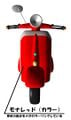
Mona Bike 1.jpg|Render of [[Mona's scooter]] | |||
Mona Bike 2.jpg|The schematics of Mona's scooter | |||
Mona Bike 3.jpg|The schematics of Mona's scooter | |||
Mona Bike 4.jpg|The schematics of Mona's scooter | |||
Yum Yums Render.jpg|The [[Mona's Pets|Yum Yums]] | |||
SK8 1.jpg|Render of the [[SK8]] | |||
SK8 2.jpg|The schematics of the SK8 | |||
Wario bike1.jpg|Render of the [[Wario Bike]] | |||
</gallery> | </gallery> | ||
Latest revision as of 15:25, February 3, 2024
This is a gallery of images for the game WarioWare, Inc.: Mega Microgame$!.
Logos[edit]
North American logo
European logo
Australian logo
Japanese logo
Chinese logo

Artwork[edit]
Character artwork[edit]

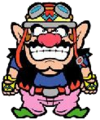
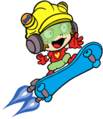
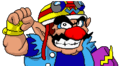
Wario
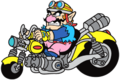
Wario on his Wario Bike

Wario on his Wario Bike
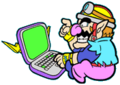
Wario with his computer
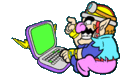
Wario with his computer broken.
Alternate art of Wario.
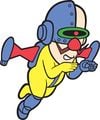
Jimmy T. with his cell phone

Jimmy T. wearing a yellow wig
Jimmy T. with no wig

Dribble
Spitz

Mona driving on her scooter
9-Volt on his SK8
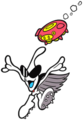
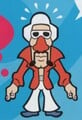
Orbulon with his UFO
Dr. Crygor flying with his jetpack
Paw the Dog and Ana
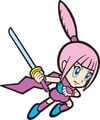
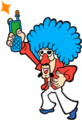
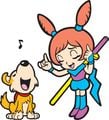
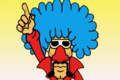
Kat with her sword
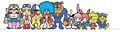
Group art
Key art with Japanese logo
Key art with European logo


Wallpapers[edit]


Sprites[edit]
Stage select icons[edit]

Wario (Intro)

Jimmy's Remix No. 1

Jimmy's Remix No. 2

Staff

Easy

Total Boss

Thrilling

Hard
Stage select screens[edit]

Wario (Intro)

Jimmy's Remix No. 1

Jimmy's Remix No. 2

Staff

Easy

Total Boss

Thrilling

Hard


Stage complete sprites[edit]
Wario
Jimmy T.


Microgame icons[edit]
Intro Games[edit]

Sparring Wario (BOSS)
Sports[edit]

Punch Out (BOSS)
Sci-Fi[edit]

Galaxy 2003 (BOSS)
Strange[edit]

Nail Call (BOSS)
Nintendo Classics[edit]

Ultra Machine (BOSS)
IQ[edit]

Dungeon Dilemma (BOSS)
Reality[edit]

Alien Laser Hero (BOSS)
Nature[edit]

The Frog Flap (BOSS)
Anything Goes[edit]

Wario's Adventure (BOSS)
Other[edit]

Locked microgame icon

Locked boss microgame icon
Miscellaneous[edit]

Japanese logo

Mona

Mona

Mona wearing a formal outfit

Mona wearing a formal outfit

Mona wearing a panda outfit

Mona wearing a shirt and jeans

Mona wearing an athletic outfit

Mona wearing a Wario outfit

Mona on her scooter

Mona on her scooter

Mona on her scooter

9-Volt

Dr. Crygor

Dr. Crygor
Dr. Crygor

Blue Virus

Red Virus

Yellow Virus

Jimmy's Cell emoticon

Jimmy's Cell emoticon

Jimmy's Cell emoticon


Screenshots[edit]
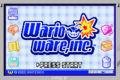
Title screen
Title screen (Japanese)
Title screen (Chinese)
Game select screen

Name entry screen

Language selection screen (Europe only)

All microgames and minigames unlocked in the Games menu


Cutscenes[edit]
Prologue[edit]
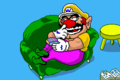
Wario watching TV
Wario calling Jimmy T.
Wario calling Mona
Wario calling Dribble & Spitz

Wario calling Kat & Ana
Wario calling 9-Volt
Wario calling Dr. Crygor & Orbulon


Gelateria[edit]
The Gelateria as seen outside
Jimmy T. arriving at the Gelateria
Dribble & Spitz arriving at the Gelateria via their taxi
Children arriving at the Gelateria
9-Volt arriving at the Gelateria via his skateboard
Dr. Crygor arriving at the Gelateria via his jetpack
Kat & Ana arriving at the Gelateria
Wario arriving at the Gelateria via his motorcycle

Everyone, alongside Gelato Joe, at the Gelateria


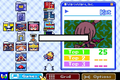
Character stages[edit]
Introduction stage
Introduction Intermission
Jimmy's stage
Dribble & Spitz's stage

Mona's stage
9-Volt's stage
Orbulon's stage
Crygor's stage
Kat & Ana's stage
Wario's stage

Jimmy's Remix No. 1 stage
Jimmy's Remix No. 2 stage
Easy stage
Total Boss stage
Thrilling stage
Hard stage


Game Over[edit]

Introduction stage
Jimmy's stage
Dribble & Spitz's stage

Mona's stage
9-Volt's stage
Orbulon's stage

Dr. Crygor's stage
Kat & Ana's stage
Wario's stage
Jimmy's Remix No. 1 stage
Jimmy's Remix No. 2 stage
Easy
Thrilling
Hard
Total Boss


Microgames[edit]
Intro Games[edit]
Sparring Wario (BOSS)


Sports[edit]
Punch Out (BOSS)


Sci-Fi[edit]

Galaxy 2003 (BOSS)


Strange[edit]
Nail Call (BOSS)


Nintendo Classics[edit]

Ultra Machine (BOSS)


.png)


IQ[edit]
Dungeon Dilemma (BOSS)


Reality[edit]
Alien Laser Hero (BOSS)


Nature[edit]
The Frog Flap (BOSS)


Anything Goes[edit]
Wario's Adventure (BOSS)


Box art[edit]
North American box art
European box art
Australian box art
Japanese box art
Chinese box art


Miscellaneous[edit]
Nintendo DREAM guide

A photo showing the WarioWare, Inc.: Mega Microgame$! competition showcase part at the 2005 ChinaJoy CGT booth


Japanese website[edit]
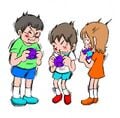
Three children competing for a high score
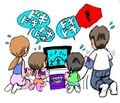
A family playing using a Game Boy Player


Jimmy T.[edit]

Pictogram of Jimmy's Cell

9-Volt[edit]

Pictogram of a Family Computer controller

Drawing of several characters at a board


Dribble & Spitz[edit]

Pictogram of Dribble's taxi

Map of Diamond City


Dr. Crygor[edit]
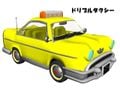
Render of Dribble's taxi
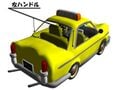
The schematics of Dribble's taxi
The schematics of Dribble's taxi
The schematics of Dribble's taxi
The schematics of Dribble's taxi
The schematics of Dribble's taxi
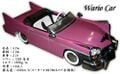
The schematics of the Wario Car
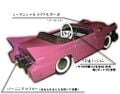
The schematics of the Wario Car
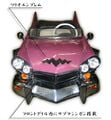
The schematics of the Wario Car
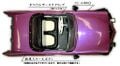
The schematics of the Wario Car
Render of Mona's scooter
The schematics of Mona's scooter
The schematics of Mona's scooter

The schematics of Mona's scooter
The Yum Yums

Render of the SK8
The schematics of the SK8
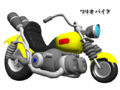
Render of the Wario Bike


| WarioWare, Inc.: Mega Microgame$! / WarioWare, Inc.: Mega Party Game$! | |
|---|---|
| Main characters | Wario • Jimmy T. • Dribble & Spitz • Mona • 9-Volt • Orbulon • Dr. Crygor • Kat & Ana |
| Minor characters | Player • Ken the Reporter • Pyoro • Joe • Mona's Elephant • Mona's Piggy • Mona's Chimp • Diamond Police • Shag • Space Hare • Paw the Dog • Don the Sparrow • Ana's Crew • Boneheads • GB |
| Microgames | Intro Games • Sports • Sci-Fi • Strange • Nintendo Classics • IQ • Reality • Nature • Anything Goes |
| Minigames | Jump Forever • Skating Board • Paper Plane • Dr. Wario • Fly Swatter • Sheriff • Pyoro • Pyoro 2 • Chiritorie • Chicken Race • VS Dong Dong • VS Hurdle |
| Multiplayer minigames (GCN only) | All For One • Balloon Bang • Card-e Cards • Listen to the Doctor! • Milky Way Delirium • Outta My Way • Survival Fever • Wobbly Bobbly |
| Locations | Diamond City • Wario's House • WarioWare, Inc. • Club Sugar • Diamond Taxi • Gelateria • Diamond Elementary • 9-Volt's House • Crygor's Lab • Castle • Restaurant Sora Sora • Variety Towers |
| Objects | Wario Bike • Computer • Bomb • Jimmy's cell phone • Dribble's taxi • Mona's moped • SK8 • Orbulon's UFO |
| Further info | Gallery (GCN) • Media (GCN) • Pre-release and unused content • Sound Room (GCN only) • Staff (GCN) |