This article is under construction. Therefore, please excuse its informal appearance while it is being worked on. We hope to have it completed as soon as possible. This article is currently under construction by Mid188 (talk).
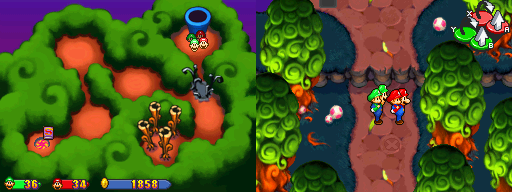
In Mario & Luigi: Partners in Time, Baby Mario and Baby Luigi can collect Beans by coming across beanholes -- X-shaped bean symbols on the ground -- all throughout the Mushroom Kingdom, both present and past times. To retrieve these beans, babies must perform Baby Drill to drill themselves into the beanhole, then by popping out of the ground at the spot, babies will uncover the bean.
There are a total of 167 Beans to collect from beanholes. Hollijolli Village, Koopa Cruiser and Peach's Castle Dungeon (in the present) do not have any beanholes at all.
Beanhole locations
Peach's Castle
| Peach's Castle – 13 Beans
|
| TBA
|
TBA
|
| TBA
|
TBA
|
| TBA
|
TBA
|
| TBA
|
TBA
|
| TBA
|
TBA
|
| TBA
|
TBA
|
| TBA
|
TBA
|
| TBA
|
TBA
|
| TBA
|
TBA
|
| TBA
|
TBA
|
| TBA
|
TBA
|
| TBA
|
TBA
|
| TBA
|
TBA
|
Bowser's Castle
| Bowser's Castle – 8 Beans
|
| First area: In the third room (room with "railings"), beanhole is in the ground at the northeast end of the room.
|
|
| First area: As the Bros. enter the next room, beanhole is seen right away.
|
|
| First area: In the sixth room (dubbed "Koopa Training Gymnasium"), beanhole is in the middle of the room.
|
|
| First area: In the next room (2nd room with bridges), beanhole is in the ground after crossing the first bridge.
|
|
| Second area: As the Bros. enter the second room of the area, beanhole is seen right away.
|
|
| Second area: In the next room, after the Bros. jump across the red platforms, beanhole in seen in the middle of the ground between the platforms and the white bridge.
|
|
| Second area: In the next room, beanhole is near the northeast corner of the room.
|
|
| Third area: In the second room, beanhole is at the east end of the ground level.
|
|
Toadwood Forest
| Toadwood Forest – 4 Beans
|
| First area: As the Bros. enter the last scene of the area, beanhole is right in front of them.
|
|
| First area: In the same scene, next beanhole is to the right of the pipe.
|

|
| Second area: There are 2 beanholes in the first scene of the next area, first southwest and second northeast of the pipe.
|
|
Vim Factory
| Vim Factory – 10 Beans
|
| First area: After using the yellow switch, beanhole is found at the end of the unlocked room.
|
|
| First area: After getting out of the first ventilation shaft, fall down, dig under the left "gate" and go south to the next room, the beanhole is in the northwest corner of the said room.
|
|
| First area: After using the blue switch located in the same room as the yellow switch, beanhole is found at the end of the unlocked room in the northeast corner.
|
|
| First area: In the next room, beanhole is in southeast corner.
|
|
| Second area: After using the blue warp pipe from the previous room, beanhole is in the southwest corner of the room.
|
|
| Second area: In the room with the forcefields, throw the babies up the platform, go to the next room, whack button with Baby Mario, switch to the adults, go to the Simu-Blocks, jump under them to create the bridge, switch to the babies and go over the bridge to the fence. Beanhole is to the right of the said fence.
|
|
| Second area: After opening the doors at the west side of the forcefield room, go through the left one. Beanhole is seen right away in the northeast corner.
|
|
| Second area: Continue through the room into the next one, beanhole is in the southeast corner of the room.
|
|
| Second area: Return to the forcefield room and go through the right unlocked door. In the next room, beanhole is at the end in the northwest corner.
|
|
| Second area: Continue into the next room, throw babies on the platform and go to the next room. Beanhole is in the northwest corner.
|
|
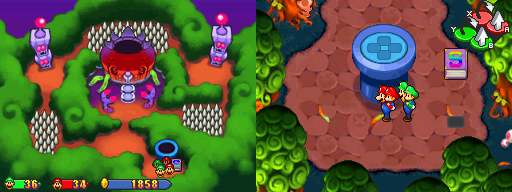
Yoshi's Island
| Yoshi's Island – 22 Beans
|
| TBA
|
TBA
|
| TBA
|
TBA
|
| TBA
|
TBA
|
| TBA
|
TBA
|
| TBA
|
TBA
|
| TBA
|
TBA
|
| TBA
|
TBA
|
| TBA
|
TBA
|
| TBA
|
TBA
|
| TBA
|
TBA
|
| TBA
|
TBA
|
| TBA
|
TBA
|
| TBA
|
TBA
|
| TBA
|
TBA
|
| TBA
|
TBA
|
| TBA
|
TBA
|
| TBA
|
TBA
|
| TBA
|
TBA
|
| TBA
|
TBA
|
| TBA
|
TBA
|
| TBA
|
TBA
|
| TBA
|
TBA
|
Yoob's Belly
| Yoob's Belly – 23 Beans
|
| TBA
|
TBA
|
| TBA
|
TBA
|
| TBA
|
TBA
|
| TBA
|
TBA
|
| TBA
|
TBA
|
| TBA
|
TBA
|
| TBA
|
TBA
|
| TBA
|
TBA
|
| TBA
|
TBA
|
| TBA
|
TBA
|
| TBA
|
TBA
|
| TBA
|
TBA
|
| TBA
|
TBA
|
| TBA
|
TBA
|
| TBA
|
TBA
|
| TBA
|
TBA
|
| TBA
|
TBA
|
| TBA
|
TBA
|
| TBA
|
TBA
|
| TBA
|
TBA
|
| TBA
|
TBA
|
| TBA
|
TBA
|
| TBA
|
TBA
|
Gritzy Desert
| Gritzy Desert – 7 Beans
|
| TBA
|
TBA
|
| TBA
|
TBA
|
| TBA
|
TBA
|
| TBA
|
TBA
|
| TBA
|
TBA
|
| TBA
|
TBA
|
| TBA
|
TBA
|
Koopaseum
Gritzy Caves
| Gritzy Caves – 12 Beans
|
| TBA
|
TBA
|
| TBA
|
TBA
|
| TBA
|
TBA
|
| TBA
|
TBA
|
| TBA
|
TBA
|
| TBA
|
TBA
|
| TBA
|
TBA
|
| TBA
|
TBA
|
| TBA
|
TBA
|
| TBA
|
TBA
|
| TBA
|
TBA
|
| TBA
|
TBA
|
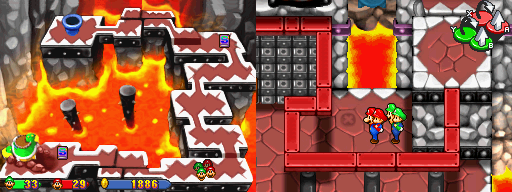
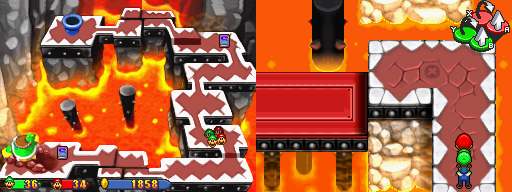
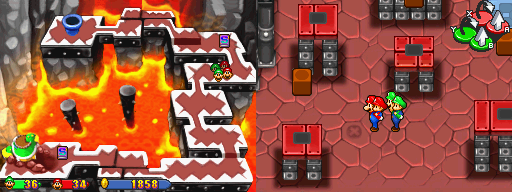
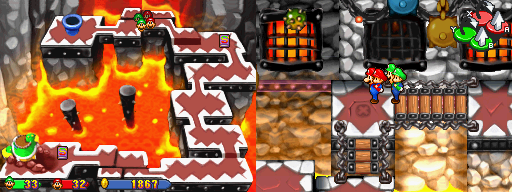
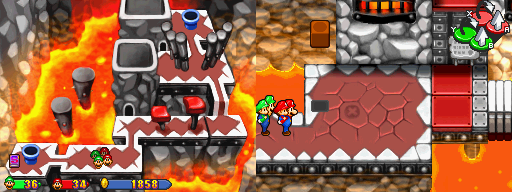
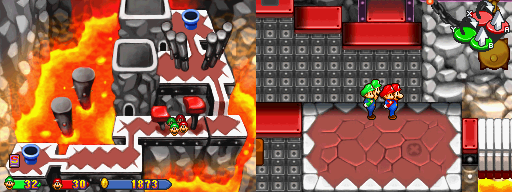
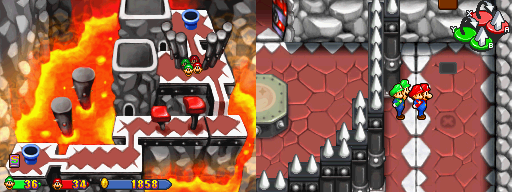
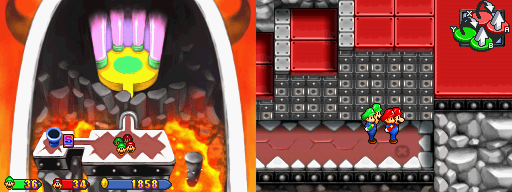
Thwomp Volcano
| Thwomp Volcano – 15 Beans
|
| TBA
|
TBA
|
| TBA
|
TBA
|
| TBA
|
TBA
|
| TBA
|
TBA
|
| TBA
|
TBA
|
| TBA
|
TBA
|
| TBA
|
TBA
|
| TBA
|
TBA
|
| TBA
|
TBA
|
| TBA
|
TBA
|
| TBA
|
TBA
|
| TBA
|
TBA
|
| TBA
|
TBA
|
| TBA
|
TBA
|
| TBA
|
TBA
|
Thwomp Caverns
| Thwomp Caverns – 6 Beans
|
| TBA
|
TBA
|
| TBA
|
TBA
|
| TBA
|
TBA
|
| TBA
|
TBA
|
| TBA
|
TBA
|
| TBA
|
TBA
|
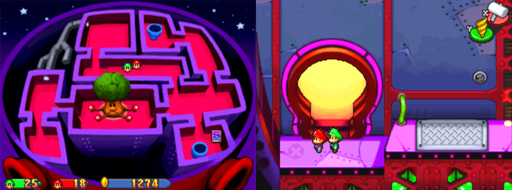
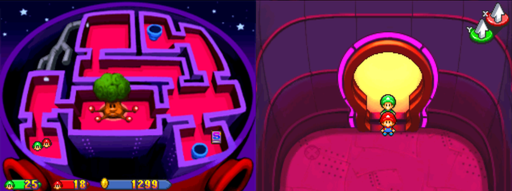
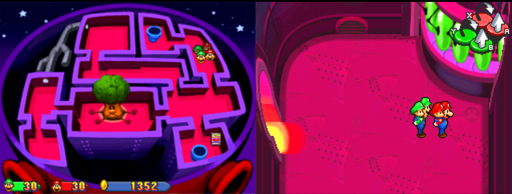
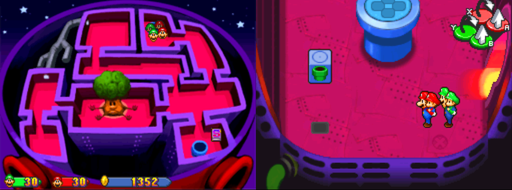
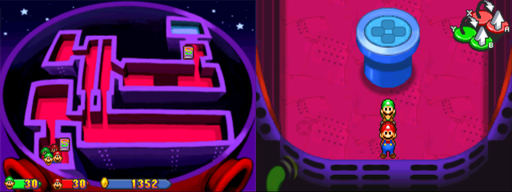
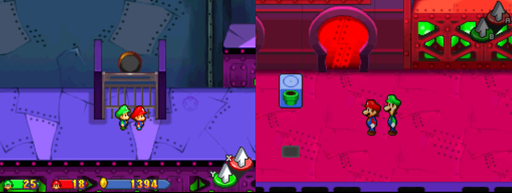
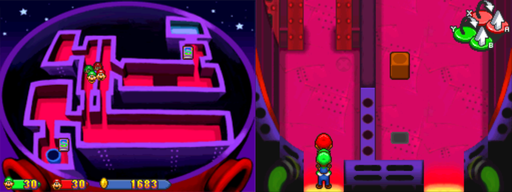
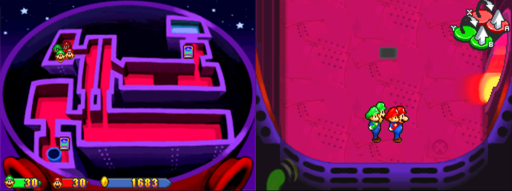
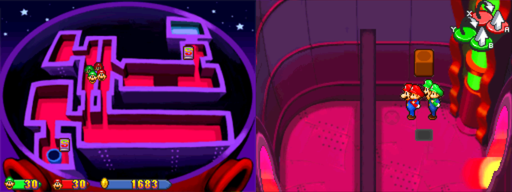
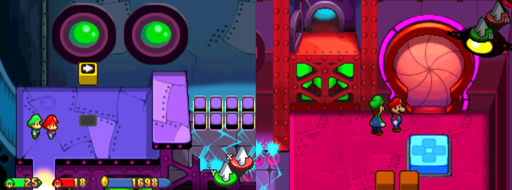
Shroob Mother Ship
| Shroob Mother Ship – 11 Beans
|
| TBA
|
TBA
|
| TBA
|
TBA
|
| TBA
|
TBA
|
| TBA
|
TBA
|
| TBA
|
TBA
|
| TBA
|
TBA
|
| TBA
|
TBA
|
| TBA
|
TBA
|
| TBA
|
TBA
|
| TBA
|
TBA
|
| TBA
|
TBA
|
Toad Town
| Toad Town – 6 Beans
|
| TBA
|
TBA
|
| TBA
|
TBA
|
| TBA
|
TBA
|
| TBA
|
TBA
|
| TBA
|
TBA
|
| TBA
|
TBA
|
Star Hill
Star Shrine
| Star Shrine – 8 Beans
|
| TBA
|
TBA
|
| TBA
|
TBA
|
| TBA
|
TBA
|
| TBA
|
TBA
|
| TBA
|
TBA
|
| TBA
|
TBA
|
| TBA
|
TBA
|
| TBA
|
TBA
|
Shroob Castle
| Shroob Castle – 18 Beans
|
| TBA
|
TBA
|
| TBA
|
TBA
|
| TBA
|
TBA
|
| TBA
|
TBA
|
| TBA
|
TBA
|
| TBA
|
TBA
|
| TBA
|
TBA
|
| TBA
|
TBA
|
| TBA
|
TBA
|
| TBA
|
TBA
|
| TBA
|
TBA
|
| TBA
|
TBA
|
| TBA
|
TBA
|
| TBA
|
TBA
|
| TBA
|
TBA
|
| TBA
|
TBA
|
| TBA
|
TBA
|
| TBA
|
TBA
|
See also


