Forest of Fear: Difference between revisions
LinkTheLefty (talk | contribs) (Undo revision 3741146 by VideoGamePhenomHD (talk)) |
(Revamped Treasures section; Added Musical Coins and Enemies section) |
||
| Line 1: | Line 1: | ||
[[File:Forest of Fear.png|thumb|right|E7 Forest of Fear]] | [[File:Forest of Fear.png|thumb|right|E7 Forest of Fear]] | ||
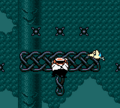
'''Forest of Fear''' is a level found in ''[[Wario Land 3]]''. It is located in the east of the [[music box (world)|music box world]] | '''Forest of Fear''' is a level found in ''[[Wario Land 3]]''. It is located in the east of the [[music box (world)|music box world]]. It is unlocked after the torch from [[Castle of Illusions]]' Red Chest is obtained, which causes the vines to burn down and unlock this level. | ||
This level is a creepy forest where the trees in the background has maliciously grinning faces, [[Kobatto]], [[zombie]]s. There is also a graveyard in one part of the level. Its music is an eerily silent tune not heard elsewhere in the game. | |||
This level is not required to be visited to complete the game, alongside [[Above the Clouds (Wario Land 3)|Above the Clouds]] and [[The Warped Void]]. | |||
==Treasures== | ==Treasures== | ||
===Gray Chest: Warp Compact=== | ===Gray Chest: Warp Compact=== | ||
[[File:mirror.PNG|thumb|left|Wario holding the Warp Compact.]] | [[File:mirror.PNG|thumb|left|Wario holding the Warp Compact.]] | ||
The {{conjectural|Warp Compact}} is in the [[treasure chest|Gray Chest]]. | The {{conjectural|Warp Compact}} is in the [[treasure chest|Gray Chest]]. It is available from the start. | ||
The [[key|Gray Key]] is located to the left of the starting area over a tree trunk. In order to get there, Wario must climb through a series of vines left and up to go over it while avoiding the [[Spike (Wario Land series)|spike]]s and [[bird (Wario Land series)|bird]]s. After going over to the left side, Wario must go down from there. The Gray Key is over a pit to the right under the spikes. | |||
The Warp Compact | After obtaining the Gray Key, Wario falls into the pit where there are [[zombie]]s across a ladder going up the [[Warp Pipe]]. Wario must climb the ladder to the Warp Pipe to get out of there while avoiding the zombies' heads. After Wario exits the pipe, he must climb the vines up and right to go back to the middle in the starting area, and then make his way to the right through the vines to cross the right tree trunk. After that, he must drop from there and then go left to reach the Gray Chest. | ||
The Warp Compact opens up a portal after it is flipped open and its mirror flashes, causing [[The Warped Void]] to be accessible. | |||
{{br}} | {{br}} | ||
===Red Chest: Key Card (red) === | ===Red Chest: Key Card (red) === | ||
[[File:Redcard.PNG|thumb|right|Wario getting the red Key Card]] | [[File:Redcard.PNG|thumb|right|Wario getting the red Key Card]] | ||
The {{conjectural|Key Card}} in the Red Chest requires the Mystery Handle in [[The Warped Void]] | The {{conjectural|Key Card}} in the Red Chest requires the Mystery Handle in [[The Warped Void]]'s Gray Chest, which raises the Warp Pipe on the right side of the level, allowing it to be entered. It also requires the Super Grab Gloves in [[The East Crater]]'s Gray Chest. | ||
{{br}} | |||
The unlocked Warp Pipe is on the right side in the beginning, which requires climbing the vines to reach the upper-right side to cross and then Wario must drop down from there. Under the pipe, there is a door in this area. To get there, Wario must climb up the ladder, cross the platforms while avoiding the birds, climb the ladder at the end to the top, then enter it. In the new area, there is a [[Hammer-bot]] to the right. Wario must carry this Hammer-bot across two bodies of water to trigger [[Bouncy Wario]], and then spring up through the thin platforms to the top, where there is a door to the right. If Wario gets hit by a Zombie's head even as Bouncy Wario, the Zombie Wario reaction will override, necessitating a retry. In this room, there is a [[Spearhead (enemy)|Spearhead]], and to the right is the Red Key. The Red Key can be obtained by going over the obstacle. | |||
After obtaining the Red Key, Wario must exit the room, and then go back down to retrieve the Hammer-bot to put it across the first body of water. After that, he must trigger Bouncy Wario again and spring up over the thin platforms all the way up while avoiding the zombies. The Red Chest is on the topmost platform to the left. | |||
The red Key Card, along with the blue Key Card from this level's Blue Chest, opens up a gate to release a [[Para-Goom]] in The Warped Void. | |||
{{br}} | |||
===Green Chest: Warp Removal Apparatus=== | ===Green Chest: Warp Removal Apparatus=== | ||
[[File:Remote.PNG|thumb|left|The activated Warp Removal Apparatus.]] | [[File:Remote.PNG|thumb|left|The activated Warp Removal Apparatus.]] | ||
The {{conjectural|Warp Removal Apparatus}} is in the Green Chest. Wario | The {{conjectural|Warp Removal Apparatus}} is in the Green Chest requires the Mystery Handle in [[The Warped Void]]'s Gray Chest, which raises the Warp Pipe on the right side of the level, allowing it to be entered. | ||
The unlocked Warp Pipe is on the right side in the beginning, which requires climbing the vines to reach the upper-right side to cross and then Wario must drop down from there. Under the pipe, Wario must go up the ladder and then wait for the Spearhead on the leaf platform to go all the way to right while following it (Wario will fall through this leaf platform). After it made its way to the right, Wario must take it and throw it at the [[Enemy Block]]s to be able to cross it to reach the [[Kobatto]] to use them to trigger [[Vampire Wario]]. As a bat, Wario must fly to the ceiling and then go right to touch the garlic, causing him to return to normal. On the platform, Wario must grab the Spearhead and then carry it across the platforms to the left while avoiding the Kobatto as Vampire Wario will destroy the Spearhead he is carrying. After carrying the Spearhead all the way to the left, it must be thrown at the Enemy Blocks to break them in order to be able to collect the Green Key. | |||
From the Green Key, Wario must make his way back down and right where the first Kobatto is, except he must go past them to jump up the platforms and then go left to go to the Green Chest. | |||
The Warp Removal Apparatus | The Warp Removal Apparatus causes the circle portals to disappear in The Warped Void. | ||
{{br}} | {{br}} | ||
===Blue Chest: Key Card (blue)=== | ===Blue Chest: Key Card (blue)=== | ||
[[File:Bluecard.PNG|thumb|right|The blue Key Card.]] | [[File:Bluecard.PNG|thumb|right|The blue Key Card.]] | ||
The {{conjectural|Key Card}} in the Blue Chest requires the Demon's Blood from the [[The Warped Void]], which summons [[zombie]]s in this level. Wario | The {{conjectural|Key Card}} in the Blue Chest requires the Demon's Blood from the [[The Warped Void]]'s Green Chest, which summons [[zombie]]s in the graveyard within this level. | ||
To get to the graveyard where the key and chest are, Wario must climb the vines in the beginning to the left and up to reach a platform, which has a bird on it. To the left of the bird on the platform is the door leading to the graveyard. In the graveyard, all the thin platforms have zombies. To get to the Blue Key, Wario must go to the fourth thin platform to trigger [[Zombie Wario]] from a zombie, and then fall right to the ground and bypass the spikes to obtain the Blue Key. | |||
The | After restoring back to normal from one of the fire light, Wario must climb the ladder and make his way all the way to the right. On the right side, the zombie must be used to trigger Zombie Wario so that he can fall through the thin platform, and then expose himself to the fire light to return back to normal in order to be able to open the Blue Chest on the right. | ||
The blue Key Card, along with the red Key Card from this level's Red Chest, opens up a gate to release a [[Para-Goom]] in The Warped Void. | |||
{{br}} | {{br}} | ||
==[[Musical Coin]]s== | |||
{|width=60% cellspacing=0 border=2 cellpadding=3 style="border-collapse:collapse;" | |||
|- | |||
!Location | |||
!Description | |||
|- | |||
|[[File:WL3 S ForestOfFear MC1 Loc.png]] | |||
[[File:WL3 S ForestOfFear MC1.png]] | |||
|align="center"|On the left side of the beginning area, Wario must first fall in the pit that the Gray Key is above of. In the pit, a zombie must be used to trigger Zombie Wario, and then Wario must go all the way to the left and jump in order to collapse through a secret thin floor to reach the Musical Coin, which is normally guarded by spikes. | |||
|- | |||
|[[File:WL3 S ForestOfFear MC2.png]] | |||
|align="center"|In the same area as the previous Musical Coin, Wario must climb the ladder to the recess where the topmost zombie is and then wait for it to disappear. After that, he must use a [[Dash Attack]] on the wall to the left to obtain the Musical Coin hidden within the walls. | |||
|- | |||
|[[File:WL3 S ForestOfFear MC3.png]] | |||
|align="center"|Within the graveyard area, which is within the top-left door in the beginning area, there is a Musical Coin under the fifth and sixth thin platforms. | |||
|- | |||
|[[File:WL3 S ForestOfFear MC4.png]] | |||
|align="center"|In the beginning area, to the right outside of the door leading to the graveyard area, a Musical Coin is near the ceiling, reachable by jumping up towards it from the vine. | |||
|- | |||
|[[File:WL3 S ForestOfFear MC5 Loc.png]] | |||
[[File:WL3 S ForestOfFear MC5.png]] | |||
|align="center"|On the right side of the beginning area and under the Warp Pipe, there is a Musical Coin next to the cloves of garlic. To reach it, the Spearhead on the leaf platform must travel to the right, and then Wario must grab it so that it lands on the leaf platform above it. After that, Wario must climb the ladder and wait for that Spearhead to be able to be jumped on, so that Wario can keep bouncing on it while making sure it moves left while doing so, until he reaches the Musical Coin. Alternatively, Wario can wait for the Spearhead to travel all the to the left, and then bounce on the bird above the leftmost thin platform to go above that Spearhead to bounce on, to reach the Musical Coin. | |||
|- | |||
|[[File:WL3 S ForestOfFear MC6.png]] | |||
|align="center"|Within the door in the area where the previous Musical Coin is, the nearby Hammer-bot must be used to trigger Bouncy Wario so that he can spring up through thin platforms to reach the Musical Coin all the way up there. | |||
|- | |||
|[[File:WL3 S ForestOfFear MC7.png]] | |||
|align="center"|In the same area as the previous Musical Coin, Wario must carry the Hammer-bot across two bodies of water, and then use it to trigger Bouncy Wario so that he can spring up through the thin platforms to reach the Musical Coin at top on the right side. | |||
|- | |||
|[[File:WL3 S ForestOfFear MC8 Loc.png]] | |||
[[File:WL3 S ForestOfFear MC8.png]] | |||
|align="center"|Within the area after entering the door near the previous Musical Coin, Wario must bring the Spearhead over the obstacle to the right, so that he can bounce on it to reach the thin platform. From there, he must go all the way left to collect the Musical Coin. | |||
|} | |||
==Enemies== | |||
*[[Bird (Wario Land series)|Bird]] (7) | |||
*[[Zombie]] (16; 9 before Demon Blood's is obtained) | |||
*[[Spearhead (enemy)|Spearhead]] (4) | |||
*[[Kobatto]] (4) | |||
*[[Hammer-bot]] (1) | |||
==Reaction abilities in this level== | ==Reaction abilities in this level== | ||
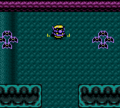
*[[Bouncy Wario]] | *[[Bouncy Wario]] (via Hammer-bot) | ||
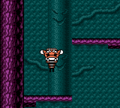
*[[Vampire Wario]] | *[[Vampire Wario]] (via Kobatto) | ||
*[[Zombie Wario]] | *[[Zombie Wario]] (via zombie) | ||
==Gallery== | ==Gallery== | ||
Revision as of 02:16, March 25, 2023

Forest of Fear is a level found in Wario Land 3. It is located in the east of the music box world. It is unlocked after the torch from Castle of Illusions' Red Chest is obtained, which causes the vines to burn down and unlock this level.
This level is a creepy forest where the trees in the background has maliciously grinning faces, Kobatto, zombies. There is also a graveyard in one part of the level. Its music is an eerily silent tune not heard elsewhere in the game.
This level is not required to be visited to complete the game, alongside Above the Clouds and The Warped Void.
Treasures
Gray Chest: Warp Compact

The Warp Compact is in the Gray Chest. It is available from the start.
The Gray Key is located to the left of the starting area over a tree trunk. In order to get there, Wario must climb through a series of vines left and up to go over it while avoiding the spikes and birds. After going over to the left side, Wario must go down from there. The Gray Key is over a pit to the right under the spikes.
After obtaining the Gray Key, Wario falls into the pit where there are zombies across a ladder going up the Warp Pipe. Wario must climb the ladder to the Warp Pipe to get out of there while avoiding the zombies' heads. After Wario exits the pipe, he must climb the vines up and right to go back to the middle in the starting area, and then make his way to the right through the vines to cross the right tree trunk. After that, he must drop from there and then go left to reach the Gray Chest.
The Warp Compact opens up a portal after it is flipped open and its mirror flashes, causing The Warped Void to be accessible.
Red Chest: Key Card (red)

The Key Card in the Red Chest requires the Mystery Handle in The Warped Void's Gray Chest, which raises the Warp Pipe on the right side of the level, allowing it to be entered. It also requires the Super Grab Gloves in The East Crater's Gray Chest.
The unlocked Warp Pipe is on the right side in the beginning, which requires climbing the vines to reach the upper-right side to cross and then Wario must drop down from there. Under the pipe, there is a door in this area. To get there, Wario must climb up the ladder, cross the platforms while avoiding the birds, climb the ladder at the end to the top, then enter it. In the new area, there is a Hammer-bot to the right. Wario must carry this Hammer-bot across two bodies of water to trigger Bouncy Wario, and then spring up through the thin platforms to the top, where there is a door to the right. If Wario gets hit by a Zombie's head even as Bouncy Wario, the Zombie Wario reaction will override, necessitating a retry. In this room, there is a Spearhead, and to the right is the Red Key. The Red Key can be obtained by going over the obstacle.
After obtaining the Red Key, Wario must exit the room, and then go back down to retrieve the Hammer-bot to put it across the first body of water. After that, he must trigger Bouncy Wario again and spring up over the thin platforms all the way up while avoiding the zombies. The Red Chest is on the topmost platform to the left.
The red Key Card, along with the blue Key Card from this level's Blue Chest, opens up a gate to release a Para-Goom in The Warped Void.
Green Chest: Warp Removal Apparatus

The Warp Removal Apparatus is in the Green Chest requires the Mystery Handle in The Warped Void's Gray Chest, which raises the Warp Pipe on the right side of the level, allowing it to be entered.
The unlocked Warp Pipe is on the right side in the beginning, which requires climbing the vines to reach the upper-right side to cross and then Wario must drop down from there. Under the pipe, Wario must go up the ladder and then wait for the Spearhead on the leaf platform to go all the way to right while following it (Wario will fall through this leaf platform). After it made its way to the right, Wario must take it and throw it at the Enemy Blocks to be able to cross it to reach the Kobatto to use them to trigger Vampire Wario. As a bat, Wario must fly to the ceiling and then go right to touch the garlic, causing him to return to normal. On the platform, Wario must grab the Spearhead and then carry it across the platforms to the left while avoiding the Kobatto as Vampire Wario will destroy the Spearhead he is carrying. After carrying the Spearhead all the way to the left, it must be thrown at the Enemy Blocks to break them in order to be able to collect the Green Key.
From the Green Key, Wario must make his way back down and right where the first Kobatto is, except he must go past them to jump up the platforms and then go left to go to the Green Chest.
The Warp Removal Apparatus causes the circle portals to disappear in The Warped Void.
Blue Chest: Key Card (blue)

The Key Card in the Blue Chest requires the Demon's Blood from the The Warped Void's Green Chest, which summons zombies in the graveyard within this level.
To get to the graveyard where the key and chest are, Wario must climb the vines in the beginning to the left and up to reach a platform, which has a bird on it. To the left of the bird on the platform is the door leading to the graveyard. In the graveyard, all the thin platforms have zombies. To get to the Blue Key, Wario must go to the fourth thin platform to trigger Zombie Wario from a zombie, and then fall right to the ground and bypass the spikes to obtain the Blue Key.
After restoring back to normal from one of the fire light, Wario must climb the ladder and make his way all the way to the right. On the right side, the zombie must be used to trigger Zombie Wario so that he can fall through the thin platform, and then expose himself to the fire light to return back to normal in order to be able to open the Blue Chest on the right.
The blue Key Card, along with the red Key Card from this level's Red Chest, opens up a gate to release a Para-Goom in The Warped Void.
Musical Coins
| Location | Description |
|---|---|

|
On the left side of the beginning area, Wario must first fall in the pit that the Gray Key is above of. In the pit, a zombie must be used to trigger Zombie Wario, and then Wario must go all the way to the left and jump in order to collapse through a secret thin floor to reach the Musical Coin, which is normally guarded by spikes. |

|
In the same area as the previous Musical Coin, Wario must climb the ladder to the recess where the topmost zombie is and then wait for it to disappear. After that, he must use a Dash Attack on the wall to the left to obtain the Musical Coin hidden within the walls. |

|
Within the graveyard area, which is within the top-left door in the beginning area, there is a Musical Coin under the fifth and sixth thin platforms. |

|
In the beginning area, to the right outside of the door leading to the graveyard area, a Musical Coin is near the ceiling, reachable by jumping up towards it from the vine. |

|
On the right side of the beginning area and under the Warp Pipe, there is a Musical Coin next to the cloves of garlic. To reach it, the Spearhead on the leaf platform must travel to the right, and then Wario must grab it so that it lands on the leaf platform above it. After that, Wario must climb the ladder and wait for that Spearhead to be able to be jumped on, so that Wario can keep bouncing on it while making sure it moves left while doing so, until he reaches the Musical Coin. Alternatively, Wario can wait for the Spearhead to travel all the to the left, and then bounce on the bird above the leftmost thin platform to go above that Spearhead to bounce on, to reach the Musical Coin. |

|
Within the door in the area where the previous Musical Coin is, the nearby Hammer-bot must be used to trigger Bouncy Wario so that he can spring up through thin platforms to reach the Musical Coin all the way up there. |

|
In the same area as the previous Musical Coin, Wario must carry the Hammer-bot across two bodies of water, and then use it to trigger Bouncy Wario so that he can spring up through the thin platforms to reach the Musical Coin at top on the right side. |

|
Within the area after entering the door near the previous Musical Coin, Wario must bring the Spearhead over the obstacle to the right, so that he can bounce on it to reach the thin platform. From there, he must go all the way left to collect the Musical Coin. |


Enemies
- Bird (7)
- Zombie (16; 9 before Demon Blood's is obtained)
- Spearhead (4)
- Kobatto (4)
- Hammer-bot (1)
Reaction abilities in this level
- Bouncy Wario (via Hammer-bot)
- Vampire Wario (via Kobatto)
- Zombie Wario (via zombie)
Gallery
Wario climbing the vines.
Bouncy Wario.
Vampire Wario near Kobatto.


Names in other languages
| Language | Name | Meaning |
|---|---|---|
| Japanese | 恐怖の森 Kyōfu no Mori |
Forest of Fear |