User:Koopa con Carne/sandbox: Difference between revisions
| Line 1: | Line 1: | ||
{ | <div style="float:none; border:1px dotted red;background:#FDFD96;padding:2px; width:100%; margin: 0 auto;"> | ||
{| | |||
|width=116|[[File:GotchaWrench98.png|center|50px]] | |||
|<big>Anyone can contribute to the projects on this page, just as long as it's done constructively.</big> | |||
|}</div> | |||
Projects that had their genesis in this here place: | |||
*[[List of extras in Donkey Kong Country: Tropical Freeze]] | |||
*[[List of extras in Donkey Kong Country Returns]] | |||
*[[Donkey Kong Country Barrel Maze]] | |||
*[[Special skill (Mario Kart Tour)]] | |||
*[[List of fan-made Super Mario Maker courses highlighted by Nintendo]] | |||
*[[List of fan-made Super Mario Maker 2 courses highlighted by Nintendo]] | |||
=[[Mario Kart 8 Deluxe Tournaments (Australia and New Zealand, 2017)]]= | |||
In 2017, [[Nintendo|Nintendo Australia and New Zealand]] organized weekly online '''''[[Mario Kart 8 Deluxe]]'' Tournaments'''<ref>{{cite|author=NintendoAUNZ|date=July 7, 2017|url=www.facebook.com/NintendoAUNZ/photos/854628924694242/|title=Buckle up Aussie and Kiwi racers with weekly online Mario Kart 8 Deluxe Tournaments! Join in the fun every Fri, Sat and Sun night from 6-10pm. Simply enter the tournament codes in "Online Play" These tournaments are live every week for players to catch up and just have some online fun! Top 3 players will no longer be published weekly. 3-2-1... GO!!! |publisher=Facebook|accessdate=|archive=archive.ph/yrtjv|archivedate=May 10, 2024, 21:46:32 UTC}}</ref> consisting of 150cc races every Friday and Sunday, and battles every Saturday. | |||
= | ==Gallery== | ||
== | <gallery heights=180px widths=320px> | ||
MK8D NintendoAUNZRace1 2017-05-12.jpg | |||
</gallery> | |||
== | =[[Racer ID Maker]]= | ||
{{italic title}} | |||
{{game infobox | |||
|image=[[File:PN Racer ID Maker title.png|300px]]<br>Title screen | |||
|developer= | |||
|publisher=[[Nintendo]] | |||
|platforms=Browser | |||
|release= | |||
|genre= | |||
|ratings=N/A | |||
|modes= | |||
|media= | |||
|input=Pointing device, keyboard | |||
}} | |||
'''''Racer ID Maker''''', designated '''''Make Your Own Mario Kart Live: Home Circuit ID Badge!''''' in the title of its web page, is an [[List of miscellaneous Play Nintendo activities|activity]] on the [[Play Nintendo]] website.<ref>{{cite|url=play.nintendo.com/activities/play/mario-kart-live-home-circuit-badge/|title=Make Your Own Mario Kart Live: Home Circuit ID Badge!|publisher=Play Nintendo|accessdate=April 13, 2024|archive=web.archive.org/web/20201207063655/https://play.nintendo.com/activities/play/mario-kart-live-home-circuit-badge/}}</ref> It was released to promote ''[[Mario Kart Live: Home Circuit]]'' and is an application that enables users to personalize and download their own [[Mario Kart (series)|''Mario Kart'']] racer ID. | |||
The | ==Overview== | ||
The front side of the ''Mario Kart'' racer ID features a place for the user's chosen photograph, a field where the user can write in their own name, an issue date, and an identification number with the format "MKxxxxxxx", where each "x" represents a random digit. The card's back side lists the user's preferred equipment from ''Mario Kart Live: Home Circuit'' under a heading titled "MY STATS". | |||
At the start of the application, the user is asked to add a photograph to their card. They can take a picture using their webcam, browse and upload a picture from their device, or proceed without a picture of their own, in which case a picture of a racer from ''Mario Kart Live: Home Circuit'' is automatically added within the designated frame. If a picture is chosen manually, the user can decorate it with a border and stickers showing characters and items from the game, and can select the "Clear all" button to remove all current decorations on the picture. On the following screen, the user can choose one of three styles for the card, each comprising a unique design and color scheme, and can switch between the front and back side of the card. On the back side, there are three drop-down menus where the user can select their favorite outfit, [[kart]], and horn from the game. The "I'M DONE" button leads the user to a review screen showing both sides of the card alongside an option to download a printable sheet with the card. | |||
==Controls== | |||
When a decorative sticker is added to the picture, it can be highlighted by clicking or tapping on it, then moved around using a pointing device (such as a mouse or touchscreen) or a keyboard. The highlighted sticker displays two buttons, one that removes the sticker when selected and one that can be dragged to simultaneously scale and rotate the sticker. | |||
The keyboard controls are as follows: | |||
{| | |||
|- | |- | ||
|align=center|<span class="nounderlines" style="border: 1px solid #ddd; background-color: #fdfdfd; padding: 1px 1px;">'''+'''</span><span class="nounderlines" style="border: 1px solid #ddd; background-color: #fdfdfd; padding: 1px 1px;">'''-'''</span> | |||
|Bigger/smaller | |||
|- | |- | ||
| align=" | |align=center|<span class="nounderlines" style="border: 1px solid #ddd; background-color: #fdfdfd; padding: 1px 1px;">←</span><span class="nounderlines" style="border: 1px solid #ddd; background-color: #fdfdfd; padding: 1px 1px;">↑</span><span class="nounderlines" style="border: 1px solid #ddd; background-color: #fdfdfd; padding: 1px 1px;">→</span><span class="nounderlines" style="border: 1px solid #ddd; background-color: #fdfdfd; padding: 1px 1px;">↓</span> | ||
|Move | |||
|- | |- | ||
| align=" | |align=center|<span class="nounderlines" style="border: 1px solid #ddd; background-color: #fdfdfd; padding: 1px 1px;">'''<'''</span><span class="nounderlines" style="border: 1px solid #ddd; background-color: #fdfdfd; padding: 1px 1px;">'''>'''</span> | ||
|Rotate | |||
|- | |- | ||
| align=" | |align=center|<span class="nounderlines" style="border: 1px solid #ddd; background-color: #fdfdfd; padding: 1px 1px;">'''['''</span><span class="nounderlines" style="border: 1px solid #ddd; background-color: #fdfdfd; padding: 1px 1px;">''']'''</span> | ||
|Re-order | |||
|- | |- | ||
| align="center" style="background:# | |align=center|<span class="nounderlines" style="border: 1px solid #ddd; background-color: #fdfdfd; padding: 1px 1px;">'''Delete'''</span> | ||
| style="background:# | |Delete | ||
|- | |||
|align=center|<span class="nounderlines" style="border: 1px solid #ddd; background-color: #fdfdfd; padding: 1px 1px;">'''Shift'''</span> + <span class="nounderlines" style="border: 1px solid #ddd; background-color: #fdfdfd; padding: 1px 1px;">'''Any'''</span> | |||
|Modify | |||
|- | |||
|align=center|<span class="nounderlines" style="border: 1px solid #ddd; background-color: #fdfdfd; padding: 1px 1px;">'''W'''</span> | |||
|Align top | |||
|- | |||
|align=center|<span class="nounderlines" style="border: 1px solid #ddd; background-color: #fdfdfd; padding: 1px 1px;">'''A'''</span> | |||
|Align left | |||
|- | |||
|align=center|<span class="nounderlines" style="border: 1px solid #ddd; background-color: #fdfdfd; padding: 1px 1px;">'''S'''</span> | |||
|Align bottom | |||
|- | |||
|align=center|<span class="nounderlines" style="border: 1px solid #ddd; background-color: #fdfdfd; padding: 1px 1px;">'''D'''</span> | |||
|Align right | |||
|- | |||
|align=center|<span class="nounderlines" style="border: 1px solid #ddd; background-color: #fdfdfd; padding: 1px 1px;">'''C'''</span> | |||
|Center horizontally | |||
|- | |||
|align=center|<span class="nounderlines" style="border: 1px solid #ddd; background-color: #fdfdfd; padding: 1px 1px;">'''V'''</span> | |||
|Center vertically | |||
|} | |||
==Decorations== | |||
==Selectable stats== | |||
Below are the options that can be selected for each field on the back of the ID. In addition to the ones listed, each field has a default option labeled "Choose one", which renders the field empty in the downloadable sheet. | |||
{| | |||
| | |||
|- | |- | ||
!FAVORITE OUTFIT | |||
!FAVORITE KART | |||
!FAVORITE HORN | |||
|- | |- | ||
| | |valign=top| | ||
*Classic Outfit | |||
| align=" | *Cowboy Outfit | ||
*Pirate Outfit | |||
*Explorer Outfit | |||
*Swimwear Outfit | |||
*Space Suit | |||
*Santa Outfit | |||
*Chef Suit | |||
*Painter Outfit | |||
*Baseball Uniform | |||
|valign=top| | |||
*Standard Kart | |||
*Cattle Cruiser | |||
*Adventure Buggy | |||
*Scuba Driver | |||
*Rocket Kart | |||
*Candy-Cane Cruiser | |||
*Sweet Ride | |||
*Box Kart | |||
*Fastball | |||
*Quarterback | |||
|valign=top| | |||
*Standard Horn | |||
*Cowbell | |||
*Conch Shell | |||
*Safari Horn | |||
*Dive Alarm | |||
*Cosmic Clamor | |||
*Jingle Bells | |||
*Bike Bell | |||
*Clown Horn | |||
*Rallying Cry | |||
|} | |||
==Official descriptions== | |||
'''''Mario Kart racer ID maker'''<br>You can add a photo and details to create your very own Mario Kart racer ID! This fun activity is inspired by the [https://mklive.nintendo.com/ Mario Kart Live: Home Circuit] game for the Nintendo Switch system. | |||
{|cellspacing=0 | |||
|-style=background:#EE0500;color:white | |||
| | |||
'''''In the driver’s seat'''<br>You can make your own Mario Kart racer ID! | |||
|} | |||
==References== | |||
<references/> | |||
{{Play Nintendo}} | |||
{{MKLHC}} | |||
<!--[[Category:Mario Kart Live: Home Circuit|*]] | |||
[[Category:Play Nintendo activities]]--> | |||
=[[Gallery:Super Smash Bros. Ultimate]]= | |||
The following are screenshots posted on [[Masahiro Sakurai]]'s official {{wp|Twitter}} account that feature elements from the ''[[Super Mario (franchise)|Super Mario]]'', ''[[Donkey Kong (franchise)|Donkey Kong]]'', ''[[Yoshi (franchise)|Yoshi]]'', and/or ''[[Wario (franchise)|Wario]]'' series. | |||
<gallery widths="160" heights="90"> | |||
Twitter Sora Sakurai 2020-12-20.jpg|Mario, Bowser, and a Mii Gunner in the [[Geno]] outfit facing Safer∙Sephiroth | |||
Twitter Sora Sakurai .jpg| | |||
Twitter Sora Sakurai .jpg| | |||
Twitter Sora Sakurai 2022-06-23.jpg|Sonic, Shadow, and Donkey Kong | |||
Twitter Sora Sakurai 2022-06-27.jpg|Daisy with Mewtwo and Mimikyu | |||
Twitter Sora Sakurai 2022-06-28.jpg|Rosalina and Palutena | |||
Twitter Sora Sakurai 2022-07-08.jpg|King K. Rool and several other fighters | |||
Twitter Sora Sakurai 2022-07-12.jpg|Bowser, Mario, and Bowser Jr. on the Mushroom Kingdom stage | |||
Twitter Sora Sakurai 2022-07-15.jpg|Ganondorf, Terry, Duck Hunt, and Pit climbing ladders on the 75 m stage | |||
Twitter Sora Sakurai 2022-07-19.jpg|An area in the background of the Delfino Plaza stage, with Lucario and Bowser Jr. visible offshore | |||
Twitter Sora Sakurai 2022-07-28.jpg|Diddy Kong and Donkey Kong looking at Banjo and Kazooie | |||
Twitter Sora Sakurai 2022-08-08.jpg|Three Piranha Plant fighters surrounding Pac-Man on the Mushroom Kingdom II stage | |||
Twitter Sora Sakurai 2022-08-16.jpg|King K. Rool and other fighters at the entrance to Prism Tower | |||
</gallery> | |||
=[[MKTPerfectShot]]= | |||
'''#MKTPerfectShot''' (Japanese analogue: '''#マリカツショット''') is a hashtag initiated by the official ''[[Mario Kart Tour]]'' social media accounts on {{wp|Twitter|X}} and {{wp|Facebook}}. Using this hashtag, players of ''Mario Kart Tour'' are invited to post screenshots they took in-game. | |||
The following is a gallery of screenshots posted by the official ''Mario Kart Tour'' accounts using this hashtag. The images are grouped by the date of their original posts. | |||
==[date]== | |||
<gallery heights=400px widths=400px> | |||
MKTPerfectShot .jpg | |||
</gallery> | |||
;Original social media posts | |||
*X (English)<ref group="X en">{{cite|url=|title=|accessdate=}}</ref> | |||
*X (Japanese)<ref group="X jp">{{cite|url=|title=|accessdate=}}</ref> | |||
*Facebook (English)<ref group="Facebook">{{cite|url=|title=|accessdate=|archive=|archivedate=}}</ref> | |||
==September 25–26, 2023== | |||
<gallery heights=400px widths=400px> | |||
MKTPerfectShot 2023-09-25a.jpg | |||
MKTPerfectShot 2023-09-25b.jpg | |||
</gallery> | |||
;Original social media posts | |||
*X (English)<ref group="X en">{{cite|url=twitter.com/mariokarttourEN/status/1706549163142586703|title=September 25, 2023|accessdate=|archive=web.archive.org/web/20231008134032/https://twitter.com/mariokarttourEN/status/1706549163142586703}}</ref> | |||
*X (Japanese)<ref group="X jp">{{cite|url=twitter.com/mariokarttourJP/status/1706549161540419609|title=September 25, 2023|accessdate=|archive=web.archive.org/web/20231008134343/https://twitter.com/mariokarttourJP/status/1706549161540419609}}</ref> | |||
*Facebook (English)<ref group="Facebook">{{cite|url=www.facebook.com/mariokarttour/posts/pfbid024XM2ga3kfkHCKu8XWvvbvhwPpT5mkhJUoAipBNqV75AmiWq8dMV4bNrvds5Dx7s3l|title=September 26, 2023|accessdate=|archive=archive.ph/zn1ku|archivedate=October 8, 2023, 13:31:05 UTC}}</ref> | |||
==September 12, 2023== | |||
<gallery heights=225px widths=400px> | |||
MKTPerfectShot 2023-09-12a.jpg | |||
MKTPerfectShot 2023-09-12b.jpg | |||
MKTPerfectShot 2023-09-12c.jpg | |||
</gallery> | |||
;Original social media posts | |||
*X (English)<ref group="X en">{{cite|url=twitter.com/mariokarttourEN/status/1701475733175259366|title=September 12, 2023|accessdate=}}</ref> | |||
*X (Japanese)<ref group="X jp">{{cite|url=twitter.com/mariokarttourJP/status/1701475732588057068|title=September 12, 2023|accessdate=}}</ref> | |||
*Facebook (English)<ref group="Facebook">{{cite|url=www.facebook.com/mariokarttour/posts/pfbid0284sd32MxJnohsebNLmRr33fN4vyvEfdsqkmUeHJUuCrWDYez9zkuFY2AT1FZqgfel|title=September 12, 2023|accessdate=}}</ref> | |||
==August 29, 2023== | |||
<gallery heights=400px widths=400px> | |||
MKTPerfectShot 2023-08-29a.jpg | |||
MKTPerfectShot 2023-08-29b.jpg | |||
MKTPerfectShot 2023-08-29c.jpg | |||
</gallery> | |||
;Original social media posts | |||
*X (English)<ref group="X en">{{cite|url=twitter.com/mariokarttourEN/status/1696402301282652420|title=August 29, 2023|accessdate=}}</ref> | |||
*X (Japanese)<ref group="X jp">{{cite|url=twitter.com/mariokarttourJP/status/1696402300707963161|title=August 29, 2023|accessdate=}}</ref> | |||
*Facebook (English)<ref group="Facebook">{{cite|url=www.facebook.com/mariokarttour/posts/pfbid0gt5XCuPSbVXwj6CGXsdrgMiBJSA3a7XksHawAiKsNcnYvGPuz8DAqpCoGdERwDWPl|title=August 29, 2023|accessdate=|archive=archive.ph/ufGW4|archivedate=April 8, 2024, 15:22:21 UTC}}</ref> | |||
==External links== | |||
;mariokarttourEN (X) | |||
<references group="X en"/> | |||
;mariokarttourJP (X) | |||
<references group="X jp"/> | |||
;mariokarttour (Facebook) | |||
<references group="Facebook"/> | |||
=[[Nintendo Live 2023]]= | |||
==Quizzes== | |||
The event's official website featured four daily quizzes on its home page. Players who were signed into a [[My Nintendo]] account could claim Platinum Points after finishing a quiz, regardless of how many questions they had answered correctly.<ref name="Nintendo Love 2023 website home 2023-09-04">[https://web.archive.org/web/20230904215311/https://www.nintendo.com/nintendo-live/ Home – Nintendo Live 2023]. nintendo.com. Archived September 4, 2023, 21:53:11 UTC from the [https://www.nintendo.com/nintendo-live/ original] via Wayback Machine. Retrieved.</ref> The following are the questions and answers of the Day 3 and Day 4 quizzes, with correct answers highlighted: | |||
{|class="responsive" width="100%" | |||
!align=left colspan=6 style="background:#E70009;color:white"|'''Day 3'''<ref>{{media link|NL2023 site screenshot Day 3 quiz QA.png|Screenshots}} of the questions and answers in Day 3's quiz, with correct answers marked by the website</ref> | |||
|-style="background:#E70009;color:white" | |||
!# | |||
!align=left|Question | |||
!Answer 1 | |||
!Answer 2 | |||
!Answer 3 | |||
!Answer 4 | |||
|-style="background:#80808020" | |||
|1 | |||
|''What transformation does the [[Super Bell]] grant? | |||
|''Elephant | |||
|''Bee | |||
|style="background:#ff9999"|''[[Cat Mario|Cat]] | |||
|''Squid | |||
|- | |- | ||
|2 | |||
|''In which game did the [[Master Sword]] first appear? | |||
|''[[zeldawiki:The Legend of Zelda: Skyward Sword|The Legend of Zelda: Skyward Sword]] | |||
|style="background:#ff9999"|''[[zeldawiki:The Legend of Zelda: A Link to the Past|The Legend of Zelda: A Link to the Past]] | |||
|''[[zeldawiki:The Legend of Zelda: Ocarina of Time|The Legend of Zelda: Ocarina of Time]] | |||
|''[[zeldawiki:The Legend of Zelda: Breath of the Wild|The Legend of Zelda: Breath of the Wild]] | |||
|-style="background:#80808020" | |||
|3 | |||
|''He’s a playable fighter in the [[Super Smash Bros. (series)|Super Smash Bros. series]] and also the main antagonist in the [[Donkey Kong Jr. (game)|Donkey Kong Jr.]] game. What’s his name? | |||
|''[[King K. Rool]] | |||
|''[[Donkey Kong]] | |||
|''[[Luigi]] | |||
|style="background:#ff9999"|''[[Mario]] | |||
|- | |- | ||
|4 | |||
! style="background:# | |''Can you name the [[bulbapedia:Pokémon games|Pokémon]] games where you can explore a vast subterranean world called The Grand Underground? | ||
|''[[bulbapedia:Pokémon Sword and Shield|Pokémon Sword and Pokémon Shield]] | |||
|style="background:#ff9999"|''[[bulbapedia:Pokémon Brilliant Diamond and Shining Pearl|Pokémon Brilliant Diamond and Pokémon Shining Pearl]] | |||
|''[[bulbapedia:Pokémon: Let's Go, Pikachu! and Let's Go, Eevee!|Pokémon: Let’s Go, Pikachu! and Pokémon: Let’s Go, Eevee!]] | |||
|''[[bulbapedia:Pokémon Scarlet and Violet|Pokémon Scarlet and Pokémon Violet]] | |||
|-style="background:#80808020" | |||
|5 | |||
|''In the [[inkipedia:Splatoon 3|Splatoon 3]] game, who can you visit in [[inkipedia:Splatsville|Splatsville]] to get special gear? | |||
|style="background:#ff9999"|''[[inkipedia:Murch|Murch]] | |||
|''[[inkipedia:The Reef|The Reef]] | |||
|''[[inkipedia:Shella Fresh|Shella Fresh]] | |||
|''[[inkipedia:Octo Canyon (location)|Octo Canyon]] | |||
|- | |- | ||
| | |6 | ||
| | |''What is [[Rosalina]] & [[Luma]]’s [[Final Smash]] move in the [[Super Smash Bros. Ultimate]] game? | ||
| | |''[[Hyper Rocketbarrel|Hyper Rocket Barrel]] | ||
|''[[Blast-o-Matic|Blast-O-Matic]] | |||
|style="background:#ff9999"|''[[Grand Star (move)|Grand Star]] | |||
|''Omega Blitz | |||
|- | |- | ||
!align=left colspan=6 style="background:#E70009;color:white"|'''Day 4'''<ref name="Nintendo Love 2023 website home 2023-09-04"/><ref>{{media link|NL2023 site screenshot Day 4 quiz QA.png|Screenshots}} of the questions and answers in Day 4's quiz, with correct answers marked by the website</ref> | |||
| style="background:# | |-style="background:#E70009;color:white" | ||
| | !# | ||
!align=left|Question | |||
!Answer 1 | |||
!Answer 2 | |||
!Answer 3 | |||
!Answer 4 | |||
|-style="background:#80808020" | |||
|1 | |||
|''Luigi is Mario’s…? | |||
|''Dad | |||
|style="background:#ff9999"|''Brother | |||
|''Boss | |||
|''Cousin | |||
|- | |- | ||
| | |2 | ||
| style="background:# | |''Which shop is run by [[inkipedia:Harmony|Harmony]] in the Splatoon 3 game? | ||
| | |style="background:#ff9999"|''[[inkipedia:Hotlantis|Hotlantis]] | ||
|''[[inkipedia:Naut Couture|Naut Couture]] | |||
|''[[inkipedia:Inkopolis|Inkopolis]] | |||
|''[[inkipedia:Crush Station|Crush Station]] | |||
|-style="background:#80808020" | |||
|3 | |||
|''A [[pikipedia:Fiery Blowhog|Fiery Blowhog]] is around the corner. Which [[Pikmin]] should you send to fight this fire enemy? | |||
|''[[pikipedia:Rock Pikmin|Rock Pikmin]] | |||
|''[[pikipedia:Winged Pikmin|Winged Pikmin]] | |||
|style="background:#ff9999"|''[[pikipedia:Red Pikmin|Red Pikmin]] | |||
|''[[pikipedia:Blue Pikmin|Blue Pikmin]] | |||
|- | |- | ||
| | |4 | ||
| style="background:# | |''In the [[wikirby:Kirby and the Forgotten Land|Kirby and the Forgotten World]]''{{sic}}'' game, what is the name of the fierce residents of this strange world? | ||
| | |''The Monster Militia | ||
|''The Baddie Brigade | |||
|style="background:#ff9999"|''The [[wikirby:Beast Pack|Beast Pack]] | |||
|''The Angry Animals | |||
|-style="background:#80808020" | |||
|5 | |||
|''Who originally crafted the Master Sword? | |||
|style="background:#ff9999"|''The [[zeldawiki:Hylia|Goddess Hylia]] | |||
|''[[List of Super Smash Bros. series bosses#Ganon|Ganon]] | |||
|''[[List of fighters debuting in Super Smash Bros. Melee#Zelda|Princess Zelda]] | |||
|''[[zeldawiki:Tingle|Tingle]] | |||
|- | |- | ||
| | |6 | ||
| | |''What color [[Yoshi (species)|Yoshis]] can you discover in the [[Super Mario World]] game? | ||
| | |style="background:#ff9999"|''Green, Yellow, Blue, Red | ||
|''Green, Orange, Purple, Red | |||
|''Red, Blue, Yellow, Purple | |||
|''Green, Yellow, Blue, Pink | |||
|} | |||
==External links== | |||
*[https://www.nintendo.com/nintendo-live/ Home page]. nintendo.com. | |||
*[https://www.nintendo.com/nintendo-live/event-lineup/ Event lineup]. nintendo.com. | |||
*[https://www.nintendo.com/nintendo-live/tournaments/ Tournaments]. nintendo.com. | |||
*[https://www.nintendo.com/nintendo-live/attendee-info/ Attendees]. nintendo.com. | |||
*[https://www.nintendo.com/nintendo-live/attendee-info/faq/ FAQ]. nintendo.com. | |||
==References== | |||
<references/> | |||
=MKT profiles= | |||
<pre> | |||
{{Multilang profile | |||
|type=spotlight | |||
|Eng=<ref>{{media link|MKT Tour Spotlight Shop .jpg|Screenshot}}</ref> | |||
|Jap=<ref>{{media link|MKT Tour Spotlight Shop JA.jpg|Screenshot}}</ref> | |||
|ChiS=<ref>{{media link|MKT Tour Spotlight Shop ZH-CN.jpg|Screenshot}}</ref> | |||
|ChiT=<ref>{{media link|MKT Tour Spotlight Shop ZH-TW.jpg|Screenshot}}</ref> | |||
|Fre=<ref>{{media link|MKT Tour Spotlight Shop FR.jpg|Screenshot}}</ref> | |||
|Ger=<ref>{{media link|MKT Tour Spotlight Shop DE.jpg|Screenshot}}</ref> | |||
|Ita=<ref>{{media link|MKT Tour Spotlight Shop IT.jpg|Screenshot}}</ref> | |||
|Kor=<ref>{{media link|MKT Tour Spotlight Shop KO.jpg|Screenshot}}</ref> | |||
|Por=<ref>{{media link|MKT Tour Spotlight Shop PT.jpg|Screenshot}}</ref> | |||
|SpaA=<ref>{{media link|MKT Tour Spotlight Shop ES-MX.jpg|Screenshot}}</ref> | |||
|SpaE=<ref>{{media link|MKT Tour Spotlight Shop ES-ES.jpg|Screenshot}}</ref> | |||
}} | |||
{{Multilang profile | |||
|type=mii | |||
|Eng=<ref>{{media link|MKT Tour Mii Racing Suit Shop .jpg|Screenshot}}</ref> | |||
|Jap=<ref>{{media link|MKT Tour Mii Racing Suit Shop JA.jpg|Screenshot}}</ref> | |||
|ChiS=<ref>{{media link|MKT Tour Mii Racing Suit Shop ZH-CN.jpg|Screenshot}}</ref> | |||
|ChiT=<ref>{{media link|MKT Tour Mii Racing Suit Shop ZH-TW.jpg|Screenshot}}</ref> | |||
|Fre=<ref>{{media link|MKT Tour Mii Racing Suit Shop FR.jpg|Screenshot}}</ref> | |||
|Ger=<ref>{{media link|MKT Tour Mii Racing Suit Shop DE.jpg|Screenshot}}</ref> | |||
|Ita=<ref>{{media link|MKT Tour Mii Racing Suit Shop IT.jpg|Screenshot}}</ref> | |||
|Kor=<ref>{{media link|MKT Tour Mii Racing Suit Shop KO.jpg|Screenshot}}</ref> | |||
|Por=<ref>{{media link|MKT Tour Mii Racing Suit Shop PT.jpg|Screenshot}}</ref> | |||
|SpaA=<ref>{{media link|MKT Tour Mii Racing Suit Shop ES-MX.jpg|Screenshot}}</ref> | |||
|SpaE=<ref>{{media link|MKT Tour Mii Racing Suit Shop ES-ES.jpg|Screenshot}}</ref> | |||
}} | |||
{{Multilang profile | |||
|type=offer | |||
|Eng=<ref>{{media link|MKT Tour Special Offer .jpg|Screenshot}}</ref> | |||
|Jap=<ref>{{media link|MKT Tour Special Offer JA.jpg|Screenshot}}</ref> | |||
|ChiS=<ref>{{media link|MKT Tour Special Offer ZH-CN.jpg|Screenshot}}</ref> | |||
|ChiT=<ref>{{media link|MKT Tour Special Offer ZH-TW.jpg|Screenshot}}</ref> | |||
|Fre=<ref>{{media link|MKT Tour Special Offer FR.jpg|Screenshot}}</ref> | |||
|Ger=<ref>{{media link|MKT Tour Special Offer DE.jpg|Screenshot}}</ref> | |||
|Ita=<ref>{{media link|MKT Tour Special Offer IT.jpg|Screenshot}}</ref> | |||
|Kor=<ref>{{media link|MKT Tour Special Offer KO.jpg|Screenshot}}</ref> | |||
|Por=<ref>{{media link|MKT Tour Special Offer PT.jpg|Screenshot}}</ref> | |||
|SpaA=<ref>{{media link|MKT Tour Special Offer ES-MX.jpg|Screenshot}}</ref> | |||
|SpaE=<ref>{{media link|MKT Tour Special Offer ES-ES.jpg|Screenshot}}</ref> | |||
}} | |||
</pre> | |||
=Pics to upload= | |||
sources: Nintendo AUNZ and NintendoAmerica official Facebook pages. need to also use twitter counterparts for comprehensive archival. | |||
==America== | |||
#https://www.facebook.com/NintendoSwitch/photos/2489449527817757/ | |||
#https://www.facebook.com/NintendoSwitch/photos/1675294519233266/ | |||
#https://www.facebook.com/NintendoSwitch/posts/pfbid02V69a3MTxAUnisfc9R34w9F4hdRs7BjhKoKrB8sTkiYXfCabMNw7LV8yVqrzZWcLWl | |||
#https://www.facebook.com/NintendoSwitch/photos/2393824120713632/ | |||
#https://www.facebook.com/NintendoAmerica/photos/697662263651563 | |||
#https://www.facebook.com/NintendoAmerica/photos/715927298491726 | |||
#https://www.facebook.com/NintendoAmerica/photos/951329698284817 | |||
#https://www.facebook.com/NintendoAmerica/photos/951840291567091 | |||
#https://twitter.com/NintendoAmerica/status/842782600628322306 | |||
Mario Maker 2 levels acknowledged by NoA | |||
#https://www.facebook.com/NintendoSwitch/photos/2289334887829223/ | |||
#https://www.facebook.com/NintendoSwitch/photos/2277402879022424/ | |||
==AUNZ== | |||
#https://twitter.com/NintendoAUNZ/status/804550935653613569, https://www.facebook.com/NintendoAUNZ/photos/729114507245685 | |||
#https://www.facebook.com/NintendoAUNZ/photos/730221487134987/ | |||
#https://www.facebook.com/NintendoAUNZ/photos/813761082114360/ | |||
#https://www.facebook.com/NintendoAUNZ/photos/815394311951037/ | |||
#https://www.facebook.com/NintendoAUNZ/photos/853806561443145/, https://www.facebook.com/NintendoAUNZ/photos/864838357006632/ | |||
#https://www.facebook.com/NintendoAUNZ/photos/944488735708260/ | |||
MK8D tourneys | |||
#https://www.facebook.com/NintendoAUNZ/photos/821023424721459/ | |||
#https://www.facebook.com/NintendoAUNZ/photos/854628924694242/ | |||
Mario Maker 2 fan levels acknowledged by Nintendo AUNZ | |||
#https://www.facebook.com/NintendoAUNZ/posts/pfbid0P3dVPNyNUu2pB8X3fZRWLjUxx7eTyQLoFS27LRRmCksZPEM4c5fEBxfKqAe8hCXGl ([https://archive.ph/wLIke archive]) | |||
#https://www.facebook.com/NintendoAUNZ/posts/pfbid02f9A48ZYikh23n7D89mTtGrhnCj7G2GB1sVqxFPp81DJKSZhhNbjjwE5ZaqotwPW1l ([https://archive.ph/dyBfL archive]) | |||
#https://twitter.com/NintendoAUNZ/status/1193015446884225024 ([https://web.archive.org/web/20191109041308/https://twitter.com/NintendoAUNZ/status/1193015446884225024 archive]), https://www.facebook.com/NintendoAUNZ/posts/pfbid0dGvxgB9L1X4xTC3BRK5rsEieHVDac4NuvNLgxFtjYuTti4n6ds6BZ7RBq4DAsb97l ([https://archive.ph/YlSXl archive]) | |||
=Mario holiday 2021 products (Hong Kong)= | |||
<ref>December 13, 2021. [https://www.nintendo.com.hk/topics/article/a_211213_01.html Nintendo Switch 2021「冬季特典」活動詳情]. nintendo.com.hk. Retrieved . ([https://web.archive.org/web/20220128224949/https://www.nintendo.com.hk/topics/article/a_211213_01.html Archived] January 28, 2022, 22:49:49 UTC via Wayback Machine.)</ref><ref>Nintendo.hk (December 13, 2021). [https://www.facebook.com/Nintendo.hk/posts/pfbid02v3LPxZr3RdDLF8XBKeszEvaodADuynNgbxcxxa5iBaPioLKP8xVyMqekP9wFDEhql 【香港資訊】 2021年12月17日起香港將舉辦「冬季特典」活動,凡購買一台行貨Nintendo Switch主機,加指定一款行貨盒裝版遊戲軟體,即有機會獲得「SteelBookTM 鐵盒」 1個。 同時,凡購買任何任天堂商品行貨,有機會獲得精美冬季限定紙袋。 活動期間:2021年12月17日起(數量有限,送完即止) 活動詳情:]. ''Facebook''. Retrieved . ([https://archive.ph/LdGfs Archived] February 23, 2023, 00:27:55 UTC via archive.today.)</ref> | |||
=Sequel to the hyphen proposal= | |||
There are cases where the words used in a subject's foreign name are present in the English vocabulary but are not of English origin, as is the case with [[List of Mario names in other languages#Mario (Chef)|Mario (chef)]] (English, Italian and Spanish localisations of ''Mario Kart Tour'') and [[List of Rosalina names in other languages#Rosalina (Aurora)|Rosalina (aurora)]] (most European language localisations of the same game). I explicitly translated the meaning of "Rosalina (aurora)" for each language but put hyphens at "Mario (chef)" on the following bases: | |||
*the Italian and Spanish word "aurora" has the same form as the English word "aurora", but is pronounced differently, making it distinctly part of former two's vocabularies; it's also etymologically not derived from the English counterpart | |||
*"Chef", in all mentioned languages, is an [[wiktionary:Appendix:Glossary#unadapted borrowing|unadapted loanword]] (it's the same in both form ''and'' pronunciation across languages), effectively making it redundant to translate | |||
=[[List of The Adventures of Super Mario Bros. 3 voice actors in other languages]]= | |||
''[some actors are taken from the [https://voice-actors-from-the-world.fandom.com/wiki/The_Adventures_of_Super_Mario_Bros._3 "voice actors of the world" wikia]; i really need to find proper sources for them, if any, otherwise i may have to seek out audio or videos of them talking and present written comparisons between their mario portrayals and their other voicework. if anybody can help with this endeavour, please contact me on my [[User talk:Koopa con Carne|talk page]].]'' | |||
---- | |||
<!--{{italic title|List of ''The Adventures of Super Mario Bros. 3'' voice actors in other languages}}--> | |||
This is a list of actors who have voiced characters in official dubbings of ''[[The Adventures of Super Mario Bros. 3]]''. | |||
==Romanian== | |||
{|class="wikitable" width=75% | |||
|- | |- | ||
!width=30%|Voice actor | |||
!width=70%|Characters portrayed | |||
|- | |- | ||
| align= | |align=center|Claudiu Istodor | ||
| | | | ||
| | {| | ||
|- | |- | ||
| | | | ||
| | *[[Morton Koopa Jr.|Big Mouth Koopa]] | ||
*intro narrator | |||
*[[Bowser|King Koopa]] | |||
*[[King Mackerel]] | |||
*[[Mario]] | |||
*[[Mayor of New York City]] | |||
*TV narrator <small>("[[Misadventure of Mighty Plumber]]")</small> | |||
*Wand maker <small>("[[A Toadally Magical Adventure]]") | |||
|} | |||
|- | |- | ||
|align=center|Oana Avram | |||
| | |||
{| | |||
|- | |- | ||
| | |||
*All female characters | |||
*[[Larry Koopa|Cheatsy Koopa]] <small>("[[Sneaky Lying Cheating Giant Ninja Koopas]]")</small> | |||
*[[Ptooie]] | |||
|} | |||
|} | |||
==Spanish (Latin America)== | |||
{|class="wikitable" width=75% | |||
|- | |- | ||
!width=30%|Voice actor | |||
!width=70%|Characters portrayed | |||
|- | |- | ||
| align= | |align=center|Jesús Brock<ref>Reinik Volta (November 11, 2020). [https://youtu.be/XxGTlZJKs-4?t=29 Las voces de JESÚS BROCK (personajes) 🇲🇽]. ''YouTube''. Retrieved .</ref> | ||
| | |||
| | {| | ||
|- | |- | ||
| | | | ||
| | *intro narrator | ||
*[[Bowser|King Koopa]] | |||
*[[Ludwig von Koopa|Kooky von Koopa]] | |||
*[[Madzilla]] | |||
*[[Prince Hugo]] | |||
|} | |||
|- | |- | ||
| align= | |align=center|Rocío Gallegos | ||
| | |||
| | {| | ||
|- | |- | ||
| | |||
*[[Wendy O. Koopa|Kootie Pie Koopa]] | |||
|} | |||
|- | |- | ||
| align= | |align=center|Rocío Robledo | ||
| | |||
| | {| | ||
|- | |- | ||
| | |||
| | *[[Lemmy Koopa|Hip Koopa]] | ||
*[[Princess Peach|Princess Toadstool]] | |||
|} | |||
|- | |- | ||
| align= | |align=center|Víctor Mares | ||
| | |||
| | {| | ||
|- | |- | ||
| | |||
*[[Larry Koopa|Cheatsy Koopa]] | |||
*[[Mario]] | |||
|} | |||
|} | |||
==Italian<ref>Most of them are credited [https://www.antoniogenna.net/doppiaggio/anim/supermario.htm here], but not correctly: for example the Koopalings are listed with their dubbers from ''SMWTV''</ref>== | |||
{|class="wikitable" width=75% | |||
|- | |- | ||
! | !width=30%|Voice actor | ||
! | !width=70%|Characters portrayed | ||
|- | |- | ||
| align= | |align=center|Tony Fuochi | ||
| | |||
| | {| | ||
|- | |- | ||
| | |[[Mario]] | ||
|} | |||
|- | |- | ||
| align= | |align=center|Enrico Carabelli | ||
| | |||
| | {| | ||
|- | |- | ||
| | |[[Luigi]] | ||
|} | |||
|- | |- | ||
| align= | |align=center|Alessandra Karpoff | ||
| | |||
| | {| | ||
|- | |- | ||
| | |||
| | *[[Princess Peach|Princess Toadstool]] | ||
*[[Missy]] | |||
|} | |||
|- | |- | ||
| align= | |align=center|Veronica Pivetti | ||
| | |||
| | {| | ||
|- | |- | ||
| | |[[Toad]] | ||
|} | |||
|- | |- | ||
|align=center|Antonio Paiola | |||
| | |||
{| | |||
|- | |- | ||
|[[Bowser|King Koopa]] | |||
|} | |||
|- | |- | ||
| align= | |align=center|Sergio Luzi | ||
| | |||
| | {| | ||
|- | |- | ||
| | |[[Larry Koopa|Cheatsy Koopa]] | ||
|} | |||
|- | |- | ||
| align= | |align=center|Diego Sabre | ||
| | |||
| | {| | ||
|- | |- | ||
| | |[[Morton Koopa Jr.|Big Mouth Koopa]] | ||
|} | |||
|- | |- | ||
| align= | |align=center|Graziella Porta | ||
| | |||
| | {| | ||
|- | |- | ||
| | | | ||
*[[Wendy O. Koopa|Kootie Pie Koopa]] | |||
*[[Bud and Missy's mother]] | |||
*[[Holly Mackerel]] | |||
|} | |||
|- | |- | ||
| align= | |align=center|Ilaria Latini | ||
| | |||
| | {| | ||
|- | |- | ||
| | |||
| | *[[Lemmy Koopa|Hip Koopa]] | ||
*[[Iggy Koopa|Hop Koopa]] | |||
|} | |||
|- | |- | ||
|align=center|Giorgio Melazzi | |||
| | |||
{| | |||
|- | |- | ||
|[[Roy Koopa|Bully Koopa]] | |||
|} | |||
|- | |- | ||
| align= | |align=center|Maura Cenciarelli | ||
| | |||
| | {| | ||
|- | |- | ||
| | |[[Ludwig von Koopa|Kooky von Koopa]] | ||
|} | |||
|- | |- | ||
| align= | |align=center|Pietro Ubaldi | ||
| | |||
| | {| | ||
|- | |- | ||
| | | | ||
*[[Emperor Ed]] | |||
*[[Mighty Plumber]] | |||
*[[Crime Wave Clyde]] | |||
|} | |||
|- | |- | ||
| align= | |align=center|Riccardo Peroni | ||
| | |||
| | {| | ||
|- | |- | ||
| | |[[Sultan]] | ||
| style= | |} | ||
| align= | |} | ||
==References== | |||
<references/> | |||
=[[Spooky Trails]]= | |||
==Overview== | |||
After defeating the Phantom, the player can re-enter the Spooky Trails from five different starting points. The path that the heroes follow is described below from each starting point onward. | |||
===Moon Gate=== | |||
The first starting point is in front of the Moon Gate. Behind the gate is the battlefield where the Phantom is fought, and opposite from it is a path that leads to a platform with two pedestals, where the Relics of Goodness have to be retrieved to open the gate. Beyond the pedestals is a stairway to the Spooky Square. | |||
===Spooky Square=== | |||
The second starting point is in Spooky Square. This area has three paths branching out into different directions. There is a deserted village surrounding the plaza, which can be explored for bonuses. | |||
The first available path from the square takes the heroes to a town-like area with many whitewashed buildings and terraces, decorated with banners and carpets displaying a musical note. At the beginning of this area, there is a long pipe leading to a battlefield where Peek-a-Boos are introduced in Chapter 2-2. This area is followed by a series of platforms with Spooky Peek-a-Boo armor stands, rolled carpets and book shelves, with the heroes using pipes to move past chasms. The area ends with a battlefield where Boos first appear in the game as obstacles. Beyond this point is the location of the first Relic of Goodness, and a pipe acts as a shortcut to the beginning of the area. | |||
The second path from the Spooky Square, unlocked after placing the Relic of Goodness on its pedestal near the Moon Gate, leads into a countryside area with wheat fields, Rabbid scarecrows, haystacks and windmills, among others. Here is a battlefield where Toadette has to be escorted to Toad during Chapter 3-3. The main path continues on into the Underwater Village. | |||
===Underwater Village=== | |||
The third starting point is on the trail leading to the Underwater Village. This area is a rainy swamp with many sunken houses, dilapidated barrels, and overgrown stalks. At the start of this area, the heroes encounter a wooden gate, initially closed. To open it, they need to move some platforms around, allowing them to carry a statue over to a pedestal that acts as the gate’s switch. Past the gate is a long pier that leads to paved area, where the heroes encounter another gate which is opened by adjusting several mirrors so they reflect laser rays onto light bulbs. A long, zigzagging path follows, where the group needs to avoid enemy Rabbids as they make it to the end of the path in Chapter 3-4, and a fairground lies afterwards, where Madame Bwahstrella is found. Soon after, a plaza-like area similar to the Spooky Square opens up, and it contains a battlefield and the second Relic of Goodness beside a fountain. From this area, there is a mountain trail which leads back directly to the Moon Gate. | |||
=[[List of chests in Mario + Rabbids Kingdom Battle]]= | |||
<!--{{italic title|List of chests in ''Mario + Rabbids Kingdom Battle''}}--> | |||
note to self: for each chest, add visual markings of every Beep-0 skill you need to access it | |||
;Collectible legend | |||
{| | |||
|- | |||
|[[File:MRKB artwork icon.jpg|50px]][[File:MRKB artwork gold icon.jpg|50px]] | |||
|Artwork | |||
|- | |||
|[[File:MRKB soundtrack icon.jpg|50px]][[File:MRKB soundtrack gold icon.jpg|50px]] | |||
|Soundtrack | |||
|- | |||
|[[File:MRKB 3d model icon.jpg|50px]][[File:MRKB 3d model gold icon.jpg|50px]] | |||
|3D model | |||
|- | |||
|[[File:MRKB tarot icon.jpg|50px]][[File:MRKB tarot gold icon.jpg|50px]] | |||
|Tarot | |||
|- | |||
|[[File:MRKB power orb icon.jpg|50px]] | |||
|Power Orbs | |||
|} | |||
==Peach's Castle== | |||
incomplete | |||
{|class="wikitable" width=100% | |||
!style=background:#440D79 width=10%|<span style=color:white>Image</span> | |||
!style=background:#440D79 width=80%|<span style=color:white>Location</span> | |||
!style=background:#440D79 width=10%|<span style=color:white>Content</span> | |||
|- | |||
|align=center|[[File:MRKB pc chest1.jpg|200px]] | |||
| | |||
|align=center|[[File:MRKB icon.jpg|50px]]<br> | |||
|- | |||
|align=center|[[File:MRKB pc chest2.jpg|200px]] | |||
| | |||
|align=center|[[File:MRKB icon.jpg|50px]]<br> | |||
|- | |||
|align=center|[[File:MRKB pc chest3.jpg|200px]] | |||
| | |||
|align=center|[[File:MRKB icon.jpg|50px]]<br> | |||
|- | |||
|align=center|[[File:MRKB pc chest4.jpg|200px]] | |||
| | |||
|align=center|[[File:MRKB icon.jpg|50px]]<br> | |||
|- | |||
|align=center|[[File:MRKB pc chest5.jpg|200px]] | |||
| | |||
|align=center|[[File:MRKB icon.jpg|50px]]<br> | |||
|- | |- | ||
| align= | |align=center|[[File:MRKB pc chest6.jpg|200px]] | ||
| | |||
| align= | |align=center|[[File:MRKB icon.jpg|50px]]<br> | ||
|- | |- | ||
| align= | |align=center|[[File:MRKB pc chest7.jpg|200px]] | ||
| | |||
| align= | |align=center|[[File:MRKB icon.jpg|50px]]<br> | ||
|- | |- | ||
| align= | |align=center|[[File:MRKB pc chest8.jpg|200px]] | ||
| | |||
| align= | |align=center|[[File:MRKB icon.jpg|50px]]<br> | ||
|- | |- | ||
| align= | |align=center|[[File:MRKB pc chest9.jpg|200px]] | ||
| | |||
| align= | |align=center|[[File:MRKB icon.jpg|50px]]<br> | ||
|- | |- | ||
! | |align=center|[[File:MRKB pc chest10.jpg|200px]] | ||
| | |||
|align=center|[[File:MRKB icon.jpg|50px]]<br> | |||
|} | |||
==Ancient Gardens== | |||
{|class="wikitable" width=100% | |||
!style=background:#440D79 width=10%|<span style=color:white>Image</span> | |||
!style=background:#440D79 width=80%|<span style=color:white>Location</span> | |||
!style=background:#440D79 width=10%|<span style=color:white>Content</span> | |||
|- | |- | ||
|align=center|[[File:MRKB ag chest1.jpg|200px]] | |||
| | |||
|align=center|[[File:MRKB artwork icon.jpg|50px]]<br>Leafy World | |||
|- | |- | ||
| align= | |align=center|[[File:MRKB ag chest2.jpg|200px]] | ||
| | | | ||
|align=center|[[File:MRKB Rumble Bee.png|50px]]<br>[[List of weapons in Mario + Rabbids Kingdom Battle#Rumble Bee|Rumble Bee]] | |||
|- | |- | ||
| align= | |align=center|[[File:MRKB ag chest3.jpg|200px]] | ||
| | | | ||
| align= | |align=center|[[File:MRKB 3d model icon.jpg|50px]]<br>Mario | ||
|- | |- | ||
| align= | |align=center|[[File:MRKB ag chest4.jpg|200px]] | ||
| | | | ||
|align=center|[[File:MRKB 3d model icon.jpg|50px]]<br>[[Rabbid Peach]] | |||
|- | |- | ||
| align= | |align=center|[[File:MRKB ag chest5.jpg|200px]] | ||
| | | | ||
|align=center|[[File:MRKB 3d model icon.jpg|50px]]<br>[[Sunflower]] | |||
|- | |- | ||
| align= | |align=center|[[File:MRKB ag chest6.jpg|200px]] | ||
| | | | ||
| align= | |align=center|[[File:MRKB soundtrack icon.jpg|50px]]<br>The Waterfall Puzzle | ||
|- | |- | ||
| align= | |align=center|[[File:MRKB ag chest7.jpg|200px]] | ||
| | | | ||
| align= | |align=center|[[File:MRKB soundtrack icon.jpg|50px]]<br>A Towering View | ||
|- | |- | ||
|align=center|[[File:MRKB ag chest8.jpg|200px]] | |||
| | |||
|align=center|[[File:MRKB 3d model icon.jpg|50px]]<br>[[Hopper|Garden Hopper]] | |||
|- | |- | ||
|align=center|[[File:MRKB ag chest9.jpg|200px]] | |||
| | |||
|align=center|[[File:MRKB Rainbow Runner.png|50px]]<br>[[List of weapons in Mario + Rabbids Kingdom Battle#Rainbow Runner|Rainbow Runner]] | |||
|- | |- | ||
| align= | |align=center|[[File:MRKB ag chest10.jpg|200px]] | ||
| | |||
| align= | |align=center|[[File:MRKB soundtrack icon.jpg|50px]]<br>Through the Lawns | ||
|- | |- | ||
| align= | |align=center|[[File:MRKB ag chest11.jpg|200px]] | ||
| | |||
| align= | |align=center|[[File:MRKB Turbine.png|50px]]<br>[[List of weapons in Mario + Rabbids Kingdom Battle#Turbine|Turbine]] | ||
|- | |- | ||
| align= | |align=center|[[File:MRKB ag chest12.jpg|200px]] | ||
| | |||
| align= | |align=center|[[File:MRKB Spike Strike.png|50px]]<br>[[List of weapons in Mario + Rabbids Kingdom Battle#Spike Strike|Spike Strike]] | ||
|- | |- | ||
| align= | |align=center|[[File:MRKB ag chest13.jpg|200px]] | ||
| | |||
| align= | |align=center|[[File:MRKB 3d model icon.jpg|50px]]<br>[[Pirabbid Plant]] | ||
|- | |- | ||
| align= | |align=center|[[File:MRKB ag chest14.jpg|200px]] | ||
| | | | ||
|align=center|[[File:MRKB 3d model icon.jpg|50px]]<br>[[Luigi]] | |||
|- | |- | ||
| align= | |align=center|[[File:MRKB ag chest15.jpg|200px]] | ||
| | | | ||
|align=center|[[File:MRKB Killer Extinct.png|50px]]<br>[[List of weapons in Mario + Rabbids Kingdom Battle#Killer Extinct|Killer Extinct]] | |||
|- | |- | ||
| align= | |align=center|[[File:MRKB ag chest17.jpg|200px]] | ||
| | | | ||
|align=center|[[File:MRKB 3d model icon.jpg|50px]]<br>[[Ziggy|Garden Ziggy]] | |||
|- | |- | ||
| align= | |align=center|[[File:MRKB ag chest18.jpg|200px]] | ||
| | | | ||
|align=center|[[File:MRKB soundtrack icon.jpg|50px]]<br>Prologue | |||
|- | |- | ||
| align= | |align=center|[[File:MRKB ag chest19.jpg|200px]] | ||
| | | | ||
|align=center|[[File:MRKB artwork icon.jpg|50px]]<br>Baffling Blocks | |||
|- | |- | ||
| align= | |align=center|[[File:MRKB ag chest20.jpg|200px]] | ||
| | | | ||
|align=center|[[File:MRKB 3d model icon.jpg|50px]]<br>[[Rabbid Luigi]] | |||
|- | |||
|align=center|[[File:MRKB ag chest21.jpg|200px]] | |||
| | |||
|align=center|[[File:MRKB power orb icon.jpg|50px]]<br>10 Power Orbs | |||
|- | |||
|align=center|[[File:MRKB Ag chest16.jpg|200px]] | |||
| | |||
|align=center|[[File:MRKB 3d model icon.jpg|50px]]<br>White [[Rabbid]]s | |||
|- | |||
|align=center|[[File:MRKB ag chest22.jpg|200px]] | |||
| | |||
|align=center|[[File:MRKB 3d model icon.jpg|50px]]<br>[[Toad (species)|Toad]] Friends | |||
|- | |||
|align=center|[[File:MRKB ag chest23.jpg|200px]] | |||
| | |||
|align=center|[[File:MRKB power orb icon.jpg|50px]]<br>5 Power Orbs | |||
|- | |||
|align=center|[[File:MRKB ag chest24.jpg|200px]] | |||
| | |||
|align=center|[[File:MRKB soundtrack icon.jpg|50px]]<br>Ancient Gardens | |||
|- | |||
|align=center|[[File:MRKB ag chest25.jpg|200px]] | |||
| | |||
|align=center|[[File:MRKB Bowser Basher.png|50px]]<br>[[List of weapons in Mario + Rabbids Kingdom Battle#Bowser Basher|Bowser Basher]] | |||
|- | |||
|align=center|[[File:MRKB ag chest26.jpg|200px]] | |||
| | |||
|align=center|[[File:MRKB power orb icon.jpg|50px]]<br>5 Power Orbs | |||
|- | |||
|align=center|[[File:MRKB ag chest27.jpg|200px]] | |||
| | |||
|align=center|[[File:MRKB artwork icon.jpg|50px]]<br>[[Rabbid Kong]] | |||
|- | |||
|align=center|[[File:MRKB ag chest28.jpg|200px]] | |||
| | |||
|align=center|[[File:MRKB soundtrack icon.jpg|50px]]<br>[[Beep-0]]'s Lesson | |||
|- | |||
|align=center|[[File:MRKB ag chest31.jpg|200px]] | |||
| | |||
|align=center|[[File:MRKB power orb icon.jpg|50px]]<br>20 Power Orbs | |||
|- | |||
|align=center|[[File:MRKB ag chest32.jpg|200px]] | |||
| | |||
|align=center|[[File:MRKB 3d model gold icon.jpg|50px]]<br>Rabbid Kong | |||
|- | |||
|align=center|[[File:MRKB ag chest33.jpg|200px]] | |||
| | |||
|align=center|[[File:MRKB soundtrack icon.jpg|50px]]<br>Grand Opening | |||
|- | |||
|align=center|[[File:MRKB ag chest29.jpg|200px]] | |||
| | |||
|align=center|[[File:MRKB artwork icon.jpg|50px]]<br>Piping Session | |||
|- | |||
|align=center|[[File:MRKB ag chest34.jpg|200px]] | |||
| | |||
|align=center|[[File:MRKB soundtrack icon.jpg|50px]]<br>Mystic Journey | |||
|- | |||
|align=center|[[File:MRKB ag chest30.jpg|200px]] | |||
| | |||
|align=center|[[File:MRKB 3d model icon.jpg|50px]]<br>[[Smasher|Garden Smasher]] | |||
|- | |||
|align=center|[[File:MRKB ag chest35.jpg|200px]] | |||
| | |||
|align=center|[[File:MRKB power orb icon.jpg|50px]]<br>5 Power Orbs | |||
|} | |} | ||
== | ==Sherbet Desert== | ||
The | {|class="wikitable" width=100% | ||
!style=background:#440D79 width=10%|<span style=color:white>Image</span> | |||
!style=background:#440D79 width=80%|<span style=color:white>Location</span> | |||
!style=background:#440D79 width=10%|<span style=color:white>Content</span> | |||
|- | |||
|align=center|[[File:MRKB sd chest1.jpg|200px]] | |||
|In the northeastern corner of the starting area | |||
|align=center|[[File:MRKB power orb icon.jpg|50px]]<br>5 Power Orbs | |||
|- | |||
|align=center|[[File:MRKB sd chest2.jpg|200px]] | |||
|Behind an icy wall on one side of the gate in the starting area; accessible after opening the path to [[Undergarment Gulch]] | |||
|align=center|[[File:MRKB artwork icon.jpg|50px]]<br>Banzai Bill | |||
|- | |||
|align=center|[[File:MRKB sd chest3.jpg|200px]] | |||
|Behind a rocky wall on a platform just after the second battlefield of [[Cold Hands, Warm Heart]] | |||
|align=center|[[File:MRKB soundtrack icon.jpg|50px]]<br>The Midboss Theme | |||
|- | |||
|align=center|[[File:MRKB sd chest4.jpg|200px]] | |||
|In a snowy area on the second platform after the second battlefield of Cold Hands, Warm Heart; the chest is initially locked behind a blue gate. In this area, the player must activate a green switch to lower a green block, allowing them to push a movable block down an icy strip. The player must activate the green switch again to rise the aforementioned green block, then push the movable block into it; this allows the player to redirect the movable block onto a blue panel, opening up the gate to the chest. | |||
|align=center|[[File:MRKB power orb icon.jpg|50px]]<br>5 Power Orbs | |||
|- | |||
|align=center|[[File:MRKB sd chest5.jpg|200px]] | |||
| | |||
|align=center|[[File:MRKB icon.jpg|50px]]<br> | |||
|- | |||
|align=center|[[File:MRKB sd chest6.jpg|200px]] | |||
| | |||
|align=center|[[File:MRKB icon.jpg|50px]]<br> | |||
|- | |||
|align=center|[[File:MRKB sd chest7.jpg|200px]] | |||
| | |||
|align=center|[[File:MRKB icon.jpg|50px]]<br> | |||
|- | |||
|align=center|[[File:MRKB sd chest8.jpg|200px]] | |||
| | |||
|align=center|[[File:MRKB icon.jpg|50px]]<br> | |||
|- | |||
|align=center|[[File:MRKB sd chest9.jpg|200px]] | |||
| | |||
|align=center|[[File:MRKB icon.jpg|50px]]<br> | |||
|- | |||
|align=center|[[File:MRKB sd chest10.jpg|200px]] | |||
| | |||
|align=center|[[File:MRKB icon.jpg|50px]]<br> | |||
|- | |||
|align=center|[[File:MRKB sd chest11.jpg|200px]] | |||
| | |||
|align=center|[[File:MRKB icon.jpg|50px]]<br> | |||
|- | |||
|align=center|[[File:MRKB sd chest12.jpg|200px]] | |||
| | |||
|align=center|[[File:MRKB icon.jpg|50px]]<br> | |||
|- | |||
|align=center|[[File:MRKB sd chest13.jpg|200px]] | |||
| | |||
|align=center|[[File:MRKB icon.jpg|50px]]<br> | |||
|- | |||
|align=center|[[File:MRKB sd chest14.jpg|200px]] | |||
| | |||
|align=center|[[File:MRKB icon.jpg|50px]]<br> | |||
|- | |||
|align=center|[[File:MRKB sd chest15.jpg|200px]] | |||
| | |||
|align=center|[[File:MRKB icon.jpg|50px]]<br> | |||
|- | |||
|align=center|[[File:MRKB sd chest16.jpg|200px]] | |||
| | |||
|align=center|[[File:MRKB icon.jpg|50px]]<br> | |||
|- | |||
|align=center|[[File:MRKB sd chest17.jpg|200px]] | |||
| | |||
|align=center|[[File:MRKB icon.jpg|50px]]<br> | |||
|- | |||
|align=center|[[File:MRKB sd chest18.jpg|200px]] | |||
| | |||
|align=center|[[File:MRKB icon.jpg|50px]]<br> | |||
|- | |||
|align=center|[[File:MRKB sd chest19.jpg|200px]] | |||
| | |||
|align=center|[[File:MRKB icon.jpg|50px]]<br> | |||
|- | |||
|align=center|[[File:MRKB sd chest20.jpg|200px]] | |||
| | |||
|align=center|[[File:MRKB icon.jpg|50px]]<br> | |||
|- | |||
|align=center|[[File:MRKB sd chest21.jpg|200px]] | |||
| | |||
|align=center|[[File:MRKB icon.jpg|50px]]<br> | |||
|- | |||
|align=center|[[File:MRKB sd chest22.jpg|200px]] | |||
| | |||
|align=center|[[File:MRKB icon.jpg|50px]]<br> | |||
|- | |||
|align=center|[[File:MRKB sd chest23.jpg|200px]] | |||
| | |||
|align=center|[[File:MRKB icon.jpg|50px]]<br> | |||
|- | |||
|align=center|[[File:MRKB sd chest24.jpg|200px]] | |||
| | |||
|align=center|[[File:MRKB icon.jpg|50px]]<br> | |||
|- | |||
|align=center|[[File:MRKB sd chest25.jpg|200px]] | |||
| | |||
|align=center|[[File:MRKB icon.jpg|50px]]<br> | |||
|- | |||
|align=center|[[File:MRKB sd chest26.jpg|200px]] | |||
| | |||
|align=center|[[File:MRKB icon.jpg|50px]]<br> | |||
|- | |||
|align=center|[[File:MRKB sd chest27.jpg|200px]] | |||
| | |||
|align=center|[[File:MRKB icon.jpg|50px]]<br> | |||
|- | |||
|align=center|[[File:MRKB sd chest28.jpg|200px]] | |||
| | |||
|align=center|[[File:MRKB icon.jpg|50px]]<br> | |||
|- | |||
|align=center|[[File:MRKB sd chest29.jpg|200px]] | |||
| | |||
|align=center|[[File:MRKB icon.jpg|50px]]<br> | |||
|- | |||
|align=center|[[File:MRKB sd chest30.jpg|200px]] | |||
| | |||
|align=center|[[File:MRKB icon.jpg|50px]]<br> | |||
|- | |||
|align=center|[[File:MRKB sd chest31.jpg|200px]] | |||
| | |||
|align=center|[[File:MRKB icon.jpg|50px]]<br> | |||
|- | |||
|align=center|[[File:MRKB sd chest32.jpg|200px]] | |||
| | |||
|align=center|[[File:MRKB icon.jpg|50px]]<br> | |||
|- | |||
|align=center|[[File:MRKB sd chest33.jpg|200px]] | |||
| | |||
|align=center|[[File:MRKB icon.jpg|50px]]<br> | |||
|- | |||
|align=center|[[File:MRKB sd chest34.jpg|200px]] | |||
| | |||
|align=center|[[File:MRKB icon.jpg|50px]]<br> | |||
|- | |||
|align=center|[[File:MRKB sd chest35.jpg|200px]] | |||
| | |||
|align=center|[[File:MRKB icon.jpg|50px]]<br> | |||
|- | |||
|align=center|[[File:MRKB sd chest36.jpg|200px]] | |||
| | |||
|align=center|[[File:MRKB icon.jpg|50px]]<br> | |||
|- | |||
|align=center|[[File:MRKB sd chest37.jpg|200px]] | |||
| | |||
|align=center|[[File:MRKB icon.jpg|50px]]<br> | |||
|- | |||
|align=center|[[File:MRKB sd chest38.jpg|200px]] | |||
| | |||
|align=center|[[File:MRKB icon.jpg|50px]]<br> | |||
|- | |||
|align=center|[[File:MRKB sd chest39.jpg|200px]] | |||
| | |||
|align=center|[[File:MRKB icon.jpg|50px]]<br> | |||
|- | |||
|align=center|[[File:MRKB sd chest40.jpg|200px]] | |||
| | |||
|align=center|[[File:MRKB icon.jpg|50px]]<br> | |||
|- | |||
|align=center|[[File:MRKB sd chest41.jpg|200px]] | |||
| | |||
|align=center|[[File:MRKB icon.jpg|50px]]<br> | |||
|- | |||
|align=center|[[File:MRKB sd chest42.jpg|200px]] | |||
| | |||
|align=center|[[File:MRKB icon.jpg|50px]]<br> | |||
|- | |||
|align=center|[[File:MRKB sd chest43.jpg|200px]] | |||
| | |||
|align=center|[[File:MRKB icon.jpg|50px]]<br> | |||
|- | |||
|align=center|[[File:MRKB sd chest44.jpg|200px]] | |||
| | |||
|align=center|[[File:MRKB icon.jpg|50px]]<br> | |||
|} | |||
== | ==Spooky Trails== | ||
incomplete | |||
<gallery> | |||
MRKB st chest1.jpg|1 | |||
MRKB st chest2.jpg|2 | |||
MRKB st chest3.jpg|3 | |||
MRKB st chest4.jpg|4 | |||
MRKB st chest5.jpg|5 | |||
MRKB st chest6.jpg|6 | |||
MRKB st chest7.jpg|7 | |||
MRKB st chest8.jpg|8 | |||
MRKB st chest9.jpg|9 | |||
MRKB st chest10.jpg|10 | |||
MRKB st chest11.jpg|11 | |||
MRKB st chest12.jpg|12 | |||
MRKB st chest13.jpg|13 | |||
MRKB st chest14.jpg|14 | |||
MRKB st chest15.jpg|15 | |||
MRKB st chest16.jpg|16 | |||
MRKB st chest17.jpg|17 | |||
MRKB st chest18.jpg|18 | |||
MRKB st chest19.jpg|19 | |||
MRKB st chest20.jpg|20 | |||
MRKB st chest21.jpg|21 | |||
MRKB st chest22.jpg|22 | |||
MRKB st chest23.jpg|23 | |||
MRKB st chest24.jpg|24 | |||
MRKB st chest25.jpg|25 | |||
MRKB st chest26.jpg|26 | |||
MRKB st chest31.jpg|31 | |||
MRKB st chest43.jpg|43 | |||
MRKB st chest44.jpg|44 | |||
MRKB st chest45.jpg|45 | |||
MRKB st chest47.jpg|47 | |||
MRKB st chest48.jpg|48 | |||
MRKB st chest49.jpg|49 | |||
MRKB st chest50.jpg|50 | |||
MRKB st chest51.jpg|51 | |||
MRKB st chest52.jpg|52 | |||
</gallery> | |||
< | ==Lava Pit== | ||
{|width=100% cellspacing=0 border=1 cellpadding=3 style=border-collapse:collapse; | |||
!style=background:#440D79 width=10%|<span style=color:white>Image</span> | |||
!style=background:#440D79 width=80%|<span style=color:white>Location</span> | |||
!style=background:#440D79 width=10%|<span style=color:white>Content</span> | |||
|- | |||
|align=center|[[File:MRKB lp chest1.jpg|200px]] | |||
| | |||
|align=center|[[File:MRKB 3d model icon.jpg|50px]]<br>Lava Hopper | |||
|- | |||
|align=center|[[File:MRKB lp chest2.jpg|200px]] | |||
| | |||
|align=center|[[File:MRKB power orb icon.jpg|50px]]<br>10 Power Orbs | |||
|- | |||
|align=center|[[File:MRKB lp chest3.jpg|200px]] | |||
| | |||
|align=center|[[File:MRKB soundtrack icon.jpg|50px]]<br>Combat in the Cemetery | |||
|- | |||
|align=center|[[File:MRKB lp chest4.jpg|200px]] | |||
| | |||
|align=center|[[File:MRKB tarot icon.jpg|50px]]<br> | |||
|- | |||
|align=center|[[File:MRKB lp chest5.jpg|200px]] | |||
| | |||
|align=center|[[File:MRKB soundtrack icon.jpg|50px]]<br>A Stroll in the Cemetery | |||
|- | |||
|align=center|[[File:MRKB lp chest6.jpg|200px]] | |||
| | |||
|align=center|[[File:MRKB tarot icon.jpg|50px]]<br>Blubbernaught | |||
|- | |||
|align=center|[[File:MRKB lp chest7.jpg|200px]] | |||
| | |||
|align=center|[[File:MRKB power orb icon.jpg|50px]]<br>5 Power Orbs | |||
|- | |||
|align=center|[[File:MRKB lp chest8.jpg|200px]] | |||
| | |||
|align=center|[[File:MRKB 3d model icon.jpg|50px]]<br>Lava Smasher | |||
|- | |||
|align=center|[[File:MRKB lp chest9.jpg|200px]] | |||
| | |||
|align=center|[[File:MRKB tarot icon.jpg|50px]]<br>Gymbecile | |||
|- | |||
|align=center|[[File:MRKB lp chest10.jpg|200px]] | |||
| | |||
|align=center|[[File:MRKB soundtrack gold icon.jpg|50px]]<br>Phantom's Theme | |||
|- | |||
|align=center|[[File:MRKB lp chest11.jpg|200px]] | |||
| | |||
|align=center|[[File:MRKB artwork icon.jpg|50px]]<br>Bwaaahr Machines | |||
|- | |||
|align=center|[[File:MRKB lp chest12.jpg|200px]] | |||
| | |||
|align=center|[[File:MRKB 3d model icon.jpg|50px]]<br>Lava Valkyrie | |||
|- | |||
|align=center|[[File:MRKB lp chest13.jpg|200px]] | |||
| | |||
|align=center|[[File:MRKB Ballistic Mystic.png|50px]]<br>[[List of weapons in Mario + Rabbids Kingdom Battle#Ballistic Mystic|Ballistic Mystic]] | |||
|- | |||
|align=center|[[File:MRKB lp chest14.jpg|200px]] | |||
| | |||
|align=center|[[File:MRKB Mushroom Marauder.png|50px]]<br>[[List of weapons in Mario + Rabbids Kingdom Battle#Mushroom Marauder|Mushroom Marauder]] | |||
|- | |||
|align=center|[[File:MRKB lp chest15.jpg|200px]] | |||
| | |||
|align=center|[[File:MRKB The King.png|50px]]<br>[[List of weapons in Mario + Rabbids Kingdom Battle#The King|The King]] | |||
|- | |||
|align=center|[[File:MRKB lp chest16.jpg|200px]] | |||
| | |||
|align=center|[[File:MRKB artwork icon.jpg|50px]]<br>The Mine | |||
|- | |||
|align=center|[[File:MRKB lp chest17.jpg|200px]] | |||
| | |||
|align=center|[[File:MRKB tarot icon.jpg|50px]]<br>Interplanetary Outhouse | |||
|- | |||
|align=center|[[File:MRKB lp chest18.jpg|200px]] | |||
| | |||
|align=center|[[File:MRKB tarot icon.jpg|50px]]<br>Sombrero Vaquero | |||
|- | |||
|align=center|[[File:MRKB lp chest19.jpg|200px]] | |||
| | |||
|align=center|[[File:MRKB 3d model icon.jpg|50px]]<br>Lava Buckler | |||
|- | |||
|align=center|[[File:MRKB lp chest20.jpg|200px]] | |||
| | |||
|align=center|[[File:MRKB power orb icon.jpg|50px]]<br>10 Power Orbs | |||
|- | |||
|align=center|[[File:MRKB lp chest21.jpg|200px]] | |||
| | |||
|align=center| | |||
|- | |||
|align=center|[[File:MRKB lp chest22.jpg|200px]] | |||
| | |||
|align=center| | |||
|- | |||
|align=center|[[File:MRKB lp chest23.jpg|200px]] | |||
| | |||
|align=center| | |||
|- | |||
|align=center|[[File:MRKB lp chest24.jpg|200px]] | |||
| | |||
|align=center| | |||
|- | |||
|align=center|[[File:MRKB lp chest25.jpg|200px]] | |||
| | |||
|align=center| | |||
|- | |||
|align=center|[[File:MRKB lp chest26.jpg|200px]] | |||
| | |||
|align=center| | |||
|- | |||
|align=center|[[File:MRKB lp chest27.jpg|200px]] | |||
| | |||
|align=center| | |||
|- | |||
|align=center|[[File:MRKB lp chest28.jpg|200px]] | |||
| | |||
|align=center| | |||
|- | |||
|align=center|[[File:MRKB lp chest29.jpg|200px]] | |||
| | |||
|align=center| | |||
|- | |||
|align=center|[[File:MRKB lp chest30.jpg|200px]] | |||
| | |||
|align=center| | |||
|- | |||
|align=center|[[File:MRKB lp chest31.jpg|200px]] | |||
| | |||
|align=center| | |||
|- | |||
|align=center|[[File:MRKB lp chest32.jpg|200px]] | |||
| | |||
|align=center| | |||
|- | |||
|align=center|[[File:MRKB lp chest33.jpg|200px]] | |||
| | |||
|align=center| | |||
|- | |||
|align=center|[[File:MRKB lp chest34.jpg|200px]] | |||
| | |||
|align=center| | |||
|- | |||
|align=center|[[File:MRKB lp chest35.jpg|200px]] | |||
| | |||
|align=center| | |||
|- | |||
|align=center|[[File:MRKB lp chest36.jpg|200px]] | |||
| | |||
|align=center| | |||
|- | |||
|align=center|[[File:MRKB lp chest37.jpg|200px]] | |||
| | |||
|align=center| | |||
|- | |||
|align=center|[[File:MRKB lp chest38.jpg|200px]] | |||
| | |||
|align=center| | |||
|- | |||
|align=center|[[File:MRKB lp chest39.jpg|200px]] | |||
| | |||
|align=center| | |||
|- | |||
|align=center|[[File:MRKB lp chest40.jpg|200px]] | |||
| | |||
|align=center| | |||
|- | |||
|align=center|[[File:MRKB lp chest41.jpg|200px]] | |||
| | |||
|align=center| | |||
|- | |||
|align=center|[[File:MRKB lp chest42.jpg|200px]] | |||
| | |||
|align=center| | |||
|- | |||
|align=center|[[File:MRKB lp chest43.jpg|200px]] | |||
| | |||
|align=center| | |||
|- | |||
|align=center|[[File:MRKB lp chest44.jpg|200px]] | |||
| | |||
|align=center| | |||
|- | |||
|align=center|[[File:MRKB lp chest45.jpg|200px]] | |||
| | |||
|align=center| | |||
|- | |||
|align=center|[[File:MRKB lp chest46.jpg|200px]] | |||
| | |||
|align=center| | |||
|- | |||
|align=center|[[File:MRKB lp chest47.jpg|200px]] | |||
| | |||
|align=center| | |||
|- | |||
|align=center|[[File:MRKB lp chest48.jpg|200px]] | |||
| | |||
|align=center| | |||
|- | |||
|align=center|[[File:MRKB lp chest49.jpg|200px]] | |||
| | |||
|align=center| | |||
|- | |||
|align=center|[[File:MRKB lp chest50.jpg|200px]] | |||
| | |||
|align=center| | |||
|- | |||
|align=center|[[File:MRKB lp chest51.jpg|200px]] | |||
| | |||
|align=center| | |||
|- | |||
|align=center|[[File:MRKB lp chest52.jpg|200px]] | |||
| | |||
|align=center| | |||
|- | |||
|align=center|[[File:MRKB lp chest53.jpg|200px]] | |||
| | |||
|align=center| | |||
|- | |||
|align=center|[[File:MRKB lp chest54.jpg|200px]] | |||
| | |||
|align=center| | |||
|- | |||
|align=center|[[File:MRKB lp chest55.jpg|200px]] | |||
| | |||
|align=center| | |||
|- | |||
|align=center|[[File:MRKB lp chest56.jpg|200px]] | |||
| | |||
|align=center| | |||
|- | |||
|align=center|[[File:MRKB lp chest57.jpg|200px]] | |||
| | |||
|align=center| | |||
|- | |||
|align=center|[[File:MRKB lp chest58.jpg|200px]] | |||
| | |||
|align=center| | |||
|- | |||
|align=center|[[File:MRKB lp chest59.jpg|200px]] | |||
| | |||
|align=center| | |||
|- | |||
|align=center|[[File:MRKB lp chest60.jpg|200px]] | |||
| | |||
|align=center| | |||
|- | |||
|align=center|[[File:MRKB lp chest61.jpg|200px]] | |||
| | |||
|align=center| | |||
|- | |||
|align=center|[[File:MRKB lp chest62.jpg|200px]] | |||
| | |||
|align=center| | |||
|} | |||
=List of ' | =[[List of Beep-0's overworld observations in Mario + Rabbids Kingdom Battle]]= | ||
<!--{{italic title|List of Beep-0 overworld observations in ''Mario + Rabbids Kingdom Battle}}--> | |||
This is a list of player-prompted observations made by [[Beep-0]] on various elements of scenery in ''[[Mario + Rabbids Kingdom Battle]]''. | |||
=== | ==[[Peach's Castle]]== | ||
{|class="wikitable" | |||
|- | |||
!width=20%|Object | |||
!width=30%|Beep-0 quote | |||
!width=20%|Location image | |||
!width=30%|Location description | |||
|- | |||
|align=center|[[File:MRKB Peach's Castle Beep-0 text2.jpg|300px]]<br> | |||
|'' | |||
|align=center|[[File:MRKB Peach's Castle Beep-0 loc2.jpg|300px]] | |||
| | |||
|- | |||
|align=center|[[File:MRKB Peach's Castle Beep-0 text14.jpg|300px]]<br> | |||
|'' | |||
|align=center|[[File:MRKB Peach's Castle Beep-0 loc14.jpg|300px]] | |||
| | |||
|- | |||
|align=center|[[File:SpinyFossil.jpg|300px]]<br> | |||
|'' | |||
|align=center|[[File:MRKB Peach's Castle Beep-0 loc3.jpg|300px]] | |||
| | |||
|- | |||
|align=center|[[File:MRKB Peach's Castle Beep-0 text4.jpg|300px]]<br> | |||
|'' | |||
|align=center|[[File:MRKB Peach's Castle Beep-0 loc4.jpg|300px]] | |||
| | |||
|- | |||
|align=center|[[File:MRKB Peach's Castle Beep-0 text5.jpg|300px]]<br> | |||
|'' | |||
|align=center|[[File:MRKB Peach's Castle Beep-0 loc5.jpg|300px]] | |||
| | |||
|- | |||
|align=center|[[File:MRKB Peach's Castle Beep-0 text6.jpg|300px]]<br> | |||
|'' | |||
|align=center|[[File:MRKB Peach's Castle Beep-0 loc6.jpg|300px]] | |||
| | |||
|- | |||
|align=center|[[File:MRKB Peach's Castle Beep-0 text7.jpg|300px]]<br> | |||
|'' | |||
|align=center|[[File:MRKB Peach's Castle Beep-0 loc7.jpg|300px]] | |||
| | |||
|- | |||
|align=center|[[File:MRKB Peach's Castle Beep-0 text1.jpg|300px]]<br> | |||
|'' | |||
|align=center|[[File:MRKB Peach's Castle Beep-0 loc1.jpg|300px]] | |||
| | |||
|- | |||
|align=center|[[File:MRKB Peach's Castle Beep-0 text8.jpg|300px]]<br> | |||
|'' | |||
|align=center|[[File:MRKB Peach's Castle Beep-0 loc8.jpg|300px]] | |||
| | |||
|- | |||
|align=center|[[File:MRKB Peach's Castle Beep-0 text9.jpg|300px]]<br> | |||
|'' | |||
|align=center|[[File:MRKB Peach's Castle Beep-0 loc9.jpg|300px]] | |||
| | |||
|- | |||
|align=center|[[File:MRKB Peach's Castle Beep-0 text10.jpg|300px]]<br> | |||
|'' | |||
|align=center|[[File:MRKB Peach's Castle Beep-0 loc10.jpg|300px]] | |||
| | |||
|- | |||
|align=center|[[File:MRKB Peach's Castle Beep-0 text11.jpg|300px]]<br> | |||
|'' | |||
|align=center|[[File:MRKB Peach's Castle Beep-0 loc11.jpg|300px]] | |||
| | |||
|- | |||
|align=center|[[File:MRKB Peach's Castle Beep-0 text12.jpg|300px]]<br> | |||
|'' | |||
|align=center|[[File:MRKB Peach's Castle Beep-0 loc12.jpg|300px]] | |||
| | |||
|- | |||
|align=center|[[File:MRKB Peach's Castle Beep-0 text13.jpg|300px]]<br> | |||
|'' | |||
|align=center|[[File:MRKB Peach's Castle Beep-0 loc13.jpg|300px]] | |||
| | |||
|} | |||
=== | ==[[Ancient Gardens]]== | ||
{|class="wikitable" | |||
|- | |||
== | !width=20%|Object | ||
< | !width=30%|Beep-0 quote | ||
!width=20%|Location image | |||
!width=30%|Location description | |||
|- | |||
|align=center|[[File:MRKB Ancient Gardens Beep-0 text1.jpg|300px]]<br>A [[Goomba]] stuck in honey | |||
|''A shocking (though admittedly hilarious) example of the chaos wrought by the intrusion of our world into this one. | |||
|align=center|[[File:MRKB Ancient Gardens Beep-0 loc1.jpg|300px]] | |||
|At the start of the area | |||
|- | |||
|align=center|[[File:MRKB Ancient Gardens Beep-0 text2.jpg|300px]]<br>[[Rabbid Kong]]'s toy block tower | |||
|''I recognize those blocks from the basement. I hope they're more structurally sound after the SupaMerge but I doubt it. | |||
|align=center|[[File:MRKB Ancient Gardens Beep-0 loc2.jpg|300px]] | |||
|At a vantage point just after the first battlefield | |||
|- | |||
|align=center|[[File:MRKB Ancient Gardens Beep-0 text3.jpg|300px]]<br> | |||
|'' | |||
|align=center|[[File:MRKB Ancient Gardens Beep-0 loc3.jpg|300px]] | |||
| | |||
|- | |||
|align=center|[[File:MRKB Ancient Gardens Beep-0 text4.jpg|300px]]<br> | |||
|'' | |||
|align=center|[[File:MRKB Ancient Gardens Beep-0 loc4.jpg|300px]] | |||
| | |||
|- | |||
|align=center|[[File:MRKB Ancient Gardens Beep-0 text5.jpg|300px]]<br> | |||
|'' | |||
|align=center|[[File:MRKB Ancient Gardens Beep-0 loc5.jpg|300px]] | |||
| | |||
|- | |||
|align=center|[[File:MRKB Ancient Gardens Beep-0 text6.jpg|300px]]<br> | |||
|'' | |||
|align=center|[[File:MRKB Ancient Gardens Beep-0 loc6.jpg|300px]] | |||
| | |||
|- | |||
|align=center|[[File:MRKB Ancient Gardens Beep-0 text7.jpg|300px]]<br> | |||
|'' | |||
|align=center|[[File:MRKB Ancient Gardens Beep-0 loc7.jpg|300px]] | |||
| | |||
|- | |||
|align=center|[[File:MRKB Ancient Gardens Beep-0 text8.jpg|300px]]<br> | |||
|'' | |||
|align=center|[[File:MRKB Ancient Gardens Beep-0 loc8.jpg|300px]] | |||
| | |||
|- | |||
|align=center|[[File:MRKB Ancient Gardens Beep-0 text9.jpg|300px]]<br> | |||
|'' | |||
|align=center|[[File:MRKB Ancient Gardens Beep-0 loc9.jpg|300px]] | |||
| | |||
|- | |||
|align=center|[[File:MRKB Ancient Gardens Beep-0 text10.jpg|300px]]<br> | |||
|'' | |||
|align=center|[[File:MRKB Ancient Gardens Beep-0 loc10.jpg|300px]] | |||
| | |||
|- | |||
|align=center|[[File:MRKB Ancient Gardens Beep-0 text11.jpg|300px]]<br> | |||
|'' | |||
|align=center|[[File:MRKB Ancient Gardens Beep-0 loc11.jpg|300px]] | |||
| | |||
|- | |||
|align=center|[[File:MRKB Ancient Gardens Beep-0 text12.jpg|300px]]<br> | |||
|'' | |||
|align=center|[[File:MRKB Ancient Gardens Beep-0 loc12.jpg|300px]] | |||
| | |||
|- | |||
|align=center|[[File:MRKB Ancient Gardens Beep-0 text13.jpg|300px]]<br> | |||
|'' | |||
|align=center|[[File:MRKB Ancient Gardens Beep-0 loc13.jpg|300px]] | |||
| | |||
|- | |||
|align=center|[[File:MRKB Ancient Gardens Beep-0 text14.jpg|300px]]<br> | |||
|'' | |||
|align=center|[[File:MRKB Ancient Gardens Beep-0 loc14.jpg|300px]] | |||
| | |||
|- | |||
|align=center|[[File:MRKB Ancient Gardens Beep-0 text15.jpg|300px]]<br> | |||
|'' | |||
|align=center|[[File:MRKB Ancient Gardens Beep-0 loc15.jpg|300px]] | |||
| | |||
|- | |||
|align=center|[[File:MRKB Ancient Gardens Beep-0 text16.jpg|300px]]<br> | |||
|'' | |||
|align=center|[[File:MRKB Ancient Gardens Beep-0 loc16.jpg|300px]] | |||
| | |||
|- | |||
|align=center|[[File:MRKB Ancient Gardens Beep-0 text17.jpg|300px]]<br> | |||
|'' | |||
|align=center|[[File:MRKB Ancient Gardens Beep-0 loc17.jpg|300px]] | |||
| | |||
|- | |||
|align=center|[[File:MRKB Ancient Gardens Beep-0 text18.jpg|300px]]<br> | |||
|'' | |||
|align=center|[[File:MRKB Ancient Gardens Beep-0 loc18.jpg|300px]] | |||
| | |||
|} | |||
Revision as of 18:18, May 10, 2024
 |
Anyone can contribute to the projects on this page, just as long as it's done constructively. |
Projects that had their genesis in this here place:
- List of extras in Donkey Kong Country: Tropical Freeze
- List of extras in Donkey Kong Country Returns
- Donkey Kong Country Barrel Maze
- Special skill (Mario Kart Tour)
- List of fan-made Super Mario Maker courses highlighted by Nintendo
- List of fan-made Super Mario Maker 2 courses highlighted by Nintendo
Mario Kart 8 Deluxe Tournaments (Australia and New Zealand, 2017)
In 2017, Nintendo Australia and New Zealand organized weekly online Mario Kart 8 Deluxe Tournaments[1] consisting of 150cc races every Friday and Sunday, and battles every Saturday.
Gallery

Racer ID Maker
| sandbox | |
|---|---|
| File:PN Racer ID Maker title.png Title screen | |
| Publisher | Nintendo |
| Platform(s) | Browser |
| Rating(s) | N/A |
| Input | Pointing device, keyboard |
Racer ID Maker, designated Make Your Own Mario Kart Live: Home Circuit ID Badge! in the title of its web page, is an activity on the Play Nintendo website.[2] It was released to promote Mario Kart Live: Home Circuit and is an application that enables users to personalize and download their own Mario Kart racer ID.
Overview
The front side of the Mario Kart racer ID features a place for the user's chosen photograph, a field where the user can write in their own name, an issue date, and an identification number with the format "MKxxxxxxx", where each "x" represents a random digit. The card's back side lists the user's preferred equipment from Mario Kart Live: Home Circuit under a heading titled "MY STATS".
At the start of the application, the user is asked to add a photograph to their card. They can take a picture using their webcam, browse and upload a picture from their device, or proceed without a picture of their own, in which case a picture of a racer from Mario Kart Live: Home Circuit is automatically added within the designated frame. If a picture is chosen manually, the user can decorate it with a border and stickers showing characters and items from the game, and can select the "Clear all" button to remove all current decorations on the picture. On the following screen, the user can choose one of three styles for the card, each comprising a unique design and color scheme, and can switch between the front and back side of the card. On the back side, there are three drop-down menus where the user can select their favorite outfit, kart, and horn from the game. The "I'M DONE" button leads the user to a review screen showing both sides of the card alongside an option to download a printable sheet with the card.
Controls
When a decorative sticker is added to the picture, it can be highlighted by clicking or tapping on it, then moved around using a pointing device (such as a mouse or touchscreen) or a keyboard. The highlighted sticker displays two buttons, one that removes the sticker when selected and one that can be dragged to simultaneously scale and rotate the sticker.
The keyboard controls are as follows:
| +- | Bigger/smaller |
| ←↑→↓ | Move |
| <> | Rotate |
| [] | Re-order |
| Delete | Delete |
| Shift + Any | Modify |
| W | Align top |
| A | Align left |
| S | Align bottom |
| D | Align right |
| C | Center horizontally |
| V | Center vertically |
Decorations
Selectable stats
Below are the options that can be selected for each field on the back of the ID. In addition to the ones listed, each field has a default option labeled "Choose one", which renders the field empty in the downloadable sheet.
| FAVORITE OUTFIT | FAVORITE KART | FAVORITE HORN |
|---|---|---|
|
|
|
Official descriptions
Mario Kart racer ID maker
You can add a photo and details to create your very own Mario Kart racer ID! This fun activity is inspired by the Mario Kart Live: Home Circuit game for the Nintendo Switch system.
|
In the driver’s seat |
References
- ^ NintendoAUNZ (July 7, 2017). Buckle up Aussie and Kiwi racers with weekly online Mario Kart 8 Deluxe Tournaments! Join in the fun every Fri, Sat and Sun night from 6-10pm. Simply enter the tournament codes in "Online Play" These tournaments are live every week for players to catch up and just have some online fun! Top 3 players will no longer be published weekly. 3-2-1... GO!!!. Facebook. (Archived May 10, 2024, 21:46:32 UTC via archive.today.)
- ^ Make Your Own Mario Kart Live: Home Circuit ID Badge!. Play Nintendo. Retrieved April 13, 2024. (Archived December 7, 2020, 06:36:55 UTC via Wayback Machine.)
Gallery:Super Smash Bros. Ultimate
The following are screenshots posted on Masahiro Sakurai's official Twitter account that feature elements from the Super Mario, Donkey Kong, Yoshi, and/or Wario series.

Mario, Bowser, and a Mii Gunner in the Geno outfit facing Safer∙Sephiroth
- Twitter Sora Sakurai .jpg
- Twitter Sora Sakurai .jpg
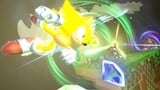
Sonic, Shadow, and Donkey Kong
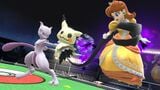
Daisy with Mewtwo and Mimikyu
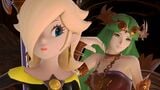
Rosalina and Palutena
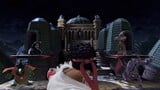
King K. Rool and several other fighters

Bowser, Mario, and Bowser Jr. on the Mushroom Kingdom stage
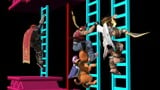
Ganondorf, Terry, Duck Hunt, and Pit climbing ladders on the 75 m stage
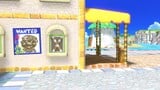
An area in the background of the Delfino Plaza stage, with Lucario and Bowser Jr. visible offshore
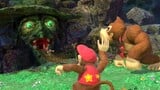
Diddy Kong and Donkey Kong looking at Banjo and Kazooie

Three Piranha Plant fighters surrounding Pac-Man on the Mushroom Kingdom II stage

King K. Rool and other fighters at the entrance to Prism Tower


MKTPerfectShot
#MKTPerfectShot (Japanese analogue: #マリカツショット) is a hashtag initiated by the official Mario Kart Tour social media accounts on X and Facebook. Using this hashtag, players of Mario Kart Tour are invited to post screenshots they took in-game.
The following is a gallery of screenshots posted by the official Mario Kart Tour accounts using this hashtag. The images are grouped by the date of their original posts.
[date]
- MKTPerfectShot .jpg
- Original social media posts
- X (English)[X en 1]
- X (Japanese)[X jp 1]
- Facebook (English)[Facebook 1]
September 25–26, 2023


- Original social media posts
- X (English)[X en 2]
- X (Japanese)[X jp 2]
- Facebook (English)[Facebook 2]
September 12, 2023


- Original social media posts
- X (English)[X en 3]
- X (Japanese)[X jp 3]
- Facebook (English)[Facebook 3]
August 29, 2023


- Original social media posts
- X (English)[X en 4]
- X (Japanese)[X jp 4]
- Facebook (English)[Facebook 4]
External links
- mariokarttourEN (X)
- ^
- ^ September 25, 2023. (Archived October 8, 2023, 13:40:32 UTC via Wayback Machine.)
- ^ September 12, 2023.
- ^ August 29, 2023.
- mariokarttourJP (X)
- ^
- ^ September 25, 2023. (Archived October 8, 2023, 13:43:43 UTC via Wayback Machine.)
- ^ September 12, 2023.
- ^ August 29, 2023.
- mariokarttour (Facebook)
- ^
- ^ September 26, 2023. (Archived October 8, 2023, 13:31:05 UTC via archive.today.)
- ^ September 12, 2023.
- ^ August 29, 2023. (Archived April 8, 2024, 15:22:21 UTC via archive.today.)
Nintendo Live 2023
Quizzes
The event's official website featured four daily quizzes on its home page. Players who were signed into a My Nintendo account could claim Platinum Points after finishing a quiz, regardless of how many questions they had answered correctly.[1] The following are the questions and answers of the Day 3 and Day 4 quizzes, with correct answers highlighted:
| Day 3[2] | |||||
|---|---|---|---|---|---|
| # | Question | Answer 1 | Answer 2 | Answer 3 | Answer 4 |
| 1 | What transformation does the Super Bell grant? | Elephant | Bee | Cat | Squid |
| 2 | In which game did the Master Sword first appear? | The Legend of Zelda: Skyward Sword | The Legend of Zelda: A Link to the Past | The Legend of Zelda: Ocarina of Time | The Legend of Zelda: Breath of the Wild |
| 3 | He’s a playable fighter in the Super Smash Bros. series and also the main antagonist in the Donkey Kong Jr. game. What’s his name? | King K. Rool | Donkey Kong | Luigi | Mario |
| 4 | Can you name the Pokémon games where you can explore a vast subterranean world called The Grand Underground? | Pokémon Sword and Pokémon Shield | Pokémon Brilliant Diamond and Pokémon Shining Pearl | Pokémon: Let’s Go, Pikachu! and Pokémon: Let’s Go, Eevee! | Pokémon Scarlet and Pokémon Violet |
| 5 | In the Splatoon 3 game, who can you visit in Splatsville to get special gear? | Murch | The Reef | Shella Fresh | Octo Canyon |
| 6 | What is Rosalina & Luma’s Final Smash move in the Super Smash Bros. Ultimate game? | Hyper Rocket Barrel | Blast-O-Matic | Grand Star | Omega Blitz |
| Day 4[1][3] | |||||
| # | Question | Answer 1 | Answer 2 | Answer 3 | Answer 4 |
| 1 | Luigi is Mario’s…? | Dad | Brother | Boss | Cousin |
| 2 | Which shop is run by Harmony in the Splatoon 3 game? | Hotlantis | Naut Couture | Inkopolis | Crush Station |
| 3 | A Fiery Blowhog is around the corner. Which Pikmin should you send to fight this fire enemy? | Rock Pikmin | Winged Pikmin | Red Pikmin | Blue Pikmin |
| 4 | In the Kirby and the Forgotten World[sic] game, what is the name of the fierce residents of this strange world? | The Monster Militia | The Baddie Brigade | The Beast Pack | The Angry Animals |
| 5 | Who originally crafted the Master Sword? | The Goddess Hylia | Ganon | Princess Zelda | Tingle |
| 6 | What color Yoshis can you discover in the Super Mario World game? | Green, Yellow, Blue, Red | Green, Orange, Purple, Red | Red, Blue, Yellow, Purple | Green, Yellow, Blue, Pink |
External links
- Home page. nintendo.com.
- Event lineup. nintendo.com.
- Tournaments. nintendo.com.
- Attendees. nintendo.com.
- FAQ. nintendo.com.
References
- ^ a b Home – Nintendo Live 2023. nintendo.com. Archived September 4, 2023, 21:53:11 UTC from the original via Wayback Machine. Retrieved.
- ^ Screenshots of the questions and answers in Day 3's quiz, with correct answers marked by the website
- ^ Screenshots of the questions and answers in Day 4's quiz, with correct answers marked by the website
MKT profiles
{{Multilang profile
|type=spotlight
|Eng=<ref>{{media link|MKT Tour Spotlight Shop .jpg|Screenshot}}</ref>
|Jap=<ref>{{media link|MKT Tour Spotlight Shop  JA.jpg|Screenshot}}</ref>
|ChiS=<ref>{{media link|MKT Tour Spotlight Shop  ZH-CN.jpg|Screenshot}}</ref>
|ChiT=<ref>{{media link|MKT Tour Spotlight Shop  ZH-TW.jpg|Screenshot}}</ref>
|Fre=<ref>{{media link|MKT Tour Spotlight Shop  FR.jpg|Screenshot}}</ref>
|Ger=<ref>{{media link|MKT Tour Spotlight Shop  DE.jpg|Screenshot}}</ref>
|Ita=<ref>{{media link|MKT Tour Spotlight Shop  IT.jpg|Screenshot}}</ref>
|Kor=<ref>{{media link|MKT Tour Spotlight Shop  KO.jpg|Screenshot}}</ref>
|Por=<ref>{{media link|MKT Tour Spotlight Shop  PT.jpg|Screenshot}}</ref>
|SpaA=<ref>{{media link|MKT Tour Spotlight Shop  ES-MX.jpg|Screenshot}}</ref>
|SpaE=<ref>{{media link|MKT Tour Spotlight Shop  ES-ES.jpg|Screenshot}}</ref>
}}
{{Multilang profile
|type=mii
|Eng=<ref>{{media link|MKT Tour Mii Racing Suit Shop .jpg|Screenshot}}</ref>
|Jap=<ref>{{media link|MKT Tour Mii Racing Suit Shop  JA.jpg|Screenshot}}</ref>
|ChiS=<ref>{{media link|MKT Tour Mii Racing Suit Shop  ZH-CN.jpg|Screenshot}}</ref>
|ChiT=<ref>{{media link|MKT Tour Mii Racing Suit Shop  ZH-TW.jpg|Screenshot}}</ref>
|Fre=<ref>{{media link|MKT Tour Mii Racing Suit Shop  FR.jpg|Screenshot}}</ref>
|Ger=<ref>{{media link|MKT Tour Mii Racing Suit Shop  DE.jpg|Screenshot}}</ref>
|Ita=<ref>{{media link|MKT Tour Mii Racing Suit Shop  IT.jpg|Screenshot}}</ref>
|Kor=<ref>{{media link|MKT Tour Mii Racing Suit Shop  KO.jpg|Screenshot}}</ref>
|Por=<ref>{{media link|MKT Tour Mii Racing Suit Shop  PT.jpg|Screenshot}}</ref>
|SpaA=<ref>{{media link|MKT Tour Mii Racing Suit Shop  ES-MX.jpg|Screenshot}}</ref>
|SpaE=<ref>{{media link|MKT Tour Mii Racing Suit Shop  ES-ES.jpg|Screenshot}}</ref>
}}
{{Multilang profile
|type=offer
|Eng=<ref>{{media link|MKT Tour Special Offer .jpg|Screenshot}}</ref>
|Jap=<ref>{{media link|MKT Tour Special Offer  JA.jpg|Screenshot}}</ref>
|ChiS=<ref>{{media link|MKT Tour Special Offer  ZH-CN.jpg|Screenshot}}</ref>
|ChiT=<ref>{{media link|MKT Tour Special Offer  ZH-TW.jpg|Screenshot}}</ref>
|Fre=<ref>{{media link|MKT Tour Special Offer  FR.jpg|Screenshot}}</ref>
|Ger=<ref>{{media link|MKT Tour Special Offer  DE.jpg|Screenshot}}</ref>
|Ita=<ref>{{media link|MKT Tour Special Offer  IT.jpg|Screenshot}}</ref>
|Kor=<ref>{{media link|MKT Tour Special Offer  KO.jpg|Screenshot}}</ref>
|Por=<ref>{{media link|MKT Tour Special Offer  PT.jpg|Screenshot}}</ref>
|SpaA=<ref>{{media link|MKT Tour Special Offer  ES-MX.jpg|Screenshot}}</ref>
|SpaE=<ref>{{media link|MKT Tour Special Offer  ES-ES.jpg|Screenshot}}</ref>
}}
Pics to upload
sources: Nintendo AUNZ and NintendoAmerica official Facebook pages. need to also use twitter counterparts for comprehensive archival.
America
- https://www.facebook.com/NintendoSwitch/photos/2489449527817757/
- https://www.facebook.com/NintendoSwitch/photos/1675294519233266/
- https://www.facebook.com/NintendoSwitch/posts/pfbid02V69a3MTxAUnisfc9R34w9F4hdRs7BjhKoKrB8sTkiYXfCabMNw7LV8yVqrzZWcLWl
- https://www.facebook.com/NintendoSwitch/photos/2393824120713632/
- https://www.facebook.com/NintendoAmerica/photos/697662263651563
- https://www.facebook.com/NintendoAmerica/photos/715927298491726
- https://www.facebook.com/NintendoAmerica/photos/951329698284817
- https://www.facebook.com/NintendoAmerica/photos/951840291567091
- https://twitter.com/NintendoAmerica/status/842782600628322306
Mario Maker 2 levels acknowledged by NoA
- https://www.facebook.com/NintendoSwitch/photos/2289334887829223/
- https://www.facebook.com/NintendoSwitch/photos/2277402879022424/
AUNZ
- https://twitter.com/NintendoAUNZ/status/804550935653613569, https://www.facebook.com/NintendoAUNZ/photos/729114507245685
- https://www.facebook.com/NintendoAUNZ/photos/730221487134987/
- https://www.facebook.com/NintendoAUNZ/photos/813761082114360/
- https://www.facebook.com/NintendoAUNZ/photos/815394311951037/
- https://www.facebook.com/NintendoAUNZ/photos/853806561443145/, https://www.facebook.com/NintendoAUNZ/photos/864838357006632/
- https://www.facebook.com/NintendoAUNZ/photos/944488735708260/
MK8D tourneys
- https://www.facebook.com/NintendoAUNZ/photos/821023424721459/
- https://www.facebook.com/NintendoAUNZ/photos/854628924694242/
Mario Maker 2 fan levels acknowledged by Nintendo AUNZ
- https://www.facebook.com/NintendoAUNZ/posts/pfbid0P3dVPNyNUu2pB8X3fZRWLjUxx7eTyQLoFS27LRRmCksZPEM4c5fEBxfKqAe8hCXGl (archive)
- https://www.facebook.com/NintendoAUNZ/posts/pfbid02f9A48ZYikh23n7D89mTtGrhnCj7G2GB1sVqxFPp81DJKSZhhNbjjwE5ZaqotwPW1l (archive)
- https://twitter.com/NintendoAUNZ/status/1193015446884225024 (archive), https://www.facebook.com/NintendoAUNZ/posts/pfbid0dGvxgB9L1X4xTC3BRK5rsEieHVDac4NuvNLgxFtjYuTti4n6ds6BZ7RBq4DAsb97l (archive)
Mario holiday 2021 products (Hong Kong)
Sequel to the hyphen proposal
There are cases where the words used in a subject's foreign name are present in the English vocabulary but are not of English origin, as is the case with Mario (chef) (English, Italian and Spanish localisations of Mario Kart Tour) and Rosalina (aurora) (most European language localisations of the same game). I explicitly translated the meaning of "Rosalina (aurora)" for each language but put hyphens at "Mario (chef)" on the following bases:
- the Italian and Spanish word "aurora" has the same form as the English word "aurora", but is pronounced differently, making it distinctly part of former two's vocabularies; it's also etymologically not derived from the English counterpart
- "Chef", in all mentioned languages, is an unadapted loanword (it's the same in both form and pronunciation across languages), effectively making it redundant to translate
List of The Adventures of Super Mario Bros. 3 voice actors in other languages
[some actors are taken from the "voice actors of the world" wikia; i really need to find proper sources for them, if any, otherwise i may have to seek out audio or videos of them talking and present written comparisons between their mario portrayals and their other voicework. if anybody can help with this endeavour, please contact me on my talk page.]
This is a list of actors who have voiced characters in official dubbings of The Adventures of Super Mario Bros. 3.
Romanian
| Voice actor | Characters portrayed | |
|---|---|---|
| Claudiu Istodor |
| |
| Oana Avram |
|
Spanish (Latin America)
| Voice actor | Characters portrayed | |
|---|---|---|
| Jesús Brock[3] |
| |
| Rocío Gallegos |
| |
| Rocío Robledo |
| |
| Víctor Mares |
|
Italian[4]
| Voice actor | Characters portrayed | |
|---|---|---|
| Tony Fuochi |
| |
| Enrico Carabelli |
| |
| Alessandra Karpoff |
| |
| Veronica Pivetti |
| |
| Antonio Paiola |
| |
| Sergio Luzi |
| |
| Diego Sabre |
| |
| Graziella Porta |
| |
| Ilaria Latini |
| |
| Giorgio Melazzi |
| |
| Maura Cenciarelli |
| |
| Pietro Ubaldi |
| |
| Riccardo Peroni |
|
References
- ^ December 13, 2021. Nintendo Switch 2021「冬季特典」活動詳情. nintendo.com.hk. Retrieved . (Archived January 28, 2022, 22:49:49 UTC via Wayback Machine.)
- ^ Nintendo.hk (December 13, 2021). 【香港資訊】 2021年12月17日起香港將舉辦「冬季特典」活動,凡購買一台行貨Nintendo Switch主機,加指定一款行貨盒裝版遊戲軟體,即有機會獲得「SteelBookTM 鐵盒」 1個。 同時,凡購買任何任天堂商品行貨,有機會獲得精美冬季限定紙袋。 活動期間:2021年12月17日起(數量有限,送完即止) 活動詳情:. Facebook. Retrieved . (Archived February 23, 2023, 00:27:55 UTC via archive.today.)
- ^ Reinik Volta (November 11, 2020). Las voces de JESÚS BROCK (personajes) 🇲🇽. YouTube. Retrieved .
- ^ Most of them are credited here, but not correctly: for example the Koopalings are listed with their dubbers from SMWTV
Spooky Trails
Overview
After defeating the Phantom, the player can re-enter the Spooky Trails from five different starting points. The path that the heroes follow is described below from each starting point onward.
Moon Gate
The first starting point is in front of the Moon Gate. Behind the gate is the battlefield where the Phantom is fought, and opposite from it is a path that leads to a platform with two pedestals, where the Relics of Goodness have to be retrieved to open the gate. Beyond the pedestals is a stairway to the Spooky Square.
Spooky Square
The second starting point is in Spooky Square. This area has three paths branching out into different directions. There is a deserted village surrounding the plaza, which can be explored for bonuses.
The first available path from the square takes the heroes to a town-like area with many whitewashed buildings and terraces, decorated with banners and carpets displaying a musical note. At the beginning of this area, there is a long pipe leading to a battlefield where Peek-a-Boos are introduced in Chapter 2-2. This area is followed by a series of platforms with Spooky Peek-a-Boo armor stands, rolled carpets and book shelves, with the heroes using pipes to move past chasms. The area ends with a battlefield where Boos first appear in the game as obstacles. Beyond this point is the location of the first Relic of Goodness, and a pipe acts as a shortcut to the beginning of the area.
The second path from the Spooky Square, unlocked after placing the Relic of Goodness on its pedestal near the Moon Gate, leads into a countryside area with wheat fields, Rabbid scarecrows, haystacks and windmills, among others. Here is a battlefield where Toadette has to be escorted to Toad during Chapter 3-3. The main path continues on into the Underwater Village.
Underwater Village
The third starting point is on the trail leading to the Underwater Village. This area is a rainy swamp with many sunken houses, dilapidated barrels, and overgrown stalks. At the start of this area, the heroes encounter a wooden gate, initially closed. To open it, they need to move some platforms around, allowing them to carry a statue over to a pedestal that acts as the gate’s switch. Past the gate is a long pier that leads to paved area, where the heroes encounter another gate which is opened by adjusting several mirrors so they reflect laser rays onto light bulbs. A long, zigzagging path follows, where the group needs to avoid enemy Rabbids as they make it to the end of the path in Chapter 3-4, and a fairground lies afterwards, where Madame Bwahstrella is found. Soon after, a plaza-like area similar to the Spooky Square opens up, and it contains a battlefield and the second Relic of Goodness beside a fountain. From this area, there is a mountain trail which leads back directly to the Moon Gate.
List of chests in Mario + Rabbids Kingdom Battle
note to self: for each chest, add visual markings of every Beep-0 skill you need to access it
- Collectible legend
| Artwork | |
| Soundtrack | |
| 3D model | |
| Tarot | |
| Power Orbs |
Peach's Castle
incomplete


Ancient Gardens
| Image | Location | Content |
|---|---|---|

|
Leafy World | |

|
Rumble Bee | |

|
Mario | |

|
Rabbid Peach | |

|
Sunflower | |

|
The Waterfall Puzzle | |

|
A Towering View | |

|
Garden Hopper | |

|
Rainbow Runner | |

|
Through the Lawns | |

|
Turbine | |

|
Spike Strike | |

|
Pirabbid Plant | |

|
Luigi | |

|
Killer Extinct | |

|
Garden Ziggy | |

|
Prologue | |

|
Baffling Blocks | |

|
Rabbid Luigi | |

|
10 Power Orbs | |

|
White Rabbids | |

|
Toad Friends | |

|
5 Power Orbs | |

|
Ancient Gardens | |

|
 Bowser Basher | |

|
5 Power Orbs | |

|
Rabbid Kong | |

|
Beep-0's Lesson | |

|
20 Power Orbs | |

|
File:MRKB 3d model gold icon.jpg Rabbid Kong | |

|
Grand Opening | |

|
Piping Session | |

|
Mystic Journey | |

|
Garden Smasher | |

|
5 Power Orbs |
Sherbet Desert
| Image | Location | Content |
|---|---|---|

|
In the northeastern corner of the starting area | 5 Power Orbs |

|
Behind an icy wall on one side of the gate in the starting area; accessible after opening the path to Undergarment Gulch | Banzai Bill |

|
Behind a rocky wall on a platform just after the second battlefield of Cold Hands, Warm Heart | The Midboss Theme |

|
In a snowy area on the second platform after the second battlefield of Cold Hands, Warm Heart; the chest is initially locked behind a blue gate. In this area, the player must activate a green switch to lower a green block, allowing them to push a movable block down an icy strip. The player must activate the green switch again to rise the aforementioned green block, then push the movable block into it; this allows the player to redirect the movable block onto a blue panel, opening up the gate to the chest. | 5 Power Orbs |

|
File:MRKB icon.jpg | |

|
File:MRKB icon.jpg | |

|
File:MRKB icon.jpg | |

|
File:MRKB icon.jpg | |

|
File:MRKB icon.jpg | |

|
File:MRKB icon.jpg | |

|
File:MRKB icon.jpg | |

|
File:MRKB icon.jpg | |

|
File:MRKB icon.jpg | |

|
File:MRKB icon.jpg | |

|
File:MRKB icon.jpg | |

|
File:MRKB icon.jpg | |

|
File:MRKB icon.jpg | |

|
File:MRKB icon.jpg | |

|
File:MRKB icon.jpg | |

|
File:MRKB icon.jpg | |

|
File:MRKB icon.jpg | |

|
File:MRKB icon.jpg | |

|
File:MRKB icon.jpg | |

|
File:MRKB icon.jpg | |

|
File:MRKB icon.jpg | |

|
File:MRKB icon.jpg | |

|
File:MRKB icon.jpg | |

|
File:MRKB icon.jpg | |

|
File:MRKB icon.jpg | |

|
File:MRKB icon.jpg | |

|
File:MRKB icon.jpg | |

|
File:MRKB icon.jpg | |

|
File:MRKB icon.jpg | |

|
File:MRKB icon.jpg | |

|
File:MRKB icon.jpg | |

|
File:MRKB icon.jpg | |

|
File:MRKB icon.jpg | |

|
File:MRKB icon.jpg | |

|
File:MRKB icon.jpg | |

|
File:MRKB icon.jpg | |

|
File:MRKB icon.jpg | |

|
File:MRKB icon.jpg | |

|
File:MRKB icon.jpg | |

|
File:MRKB icon.jpg |
Spooky Trails
incomplete
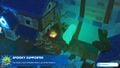
1
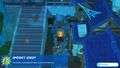
2
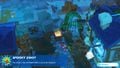
3
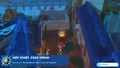
4
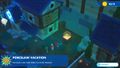
5
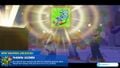
6
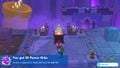
7
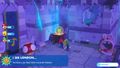
8
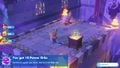
9
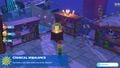
10
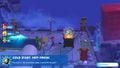
11
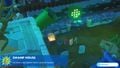
12
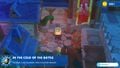
13
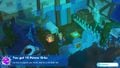
14

15
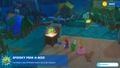
16
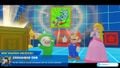
17
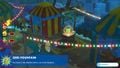
18
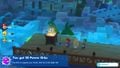
19

20
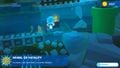
21
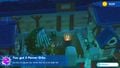
22
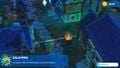
23
24
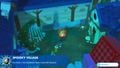
25
26
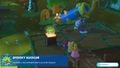
31
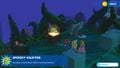
43
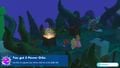
44
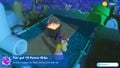
45
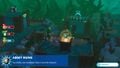
47
48
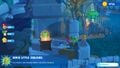
49

50
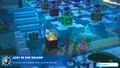
51
52


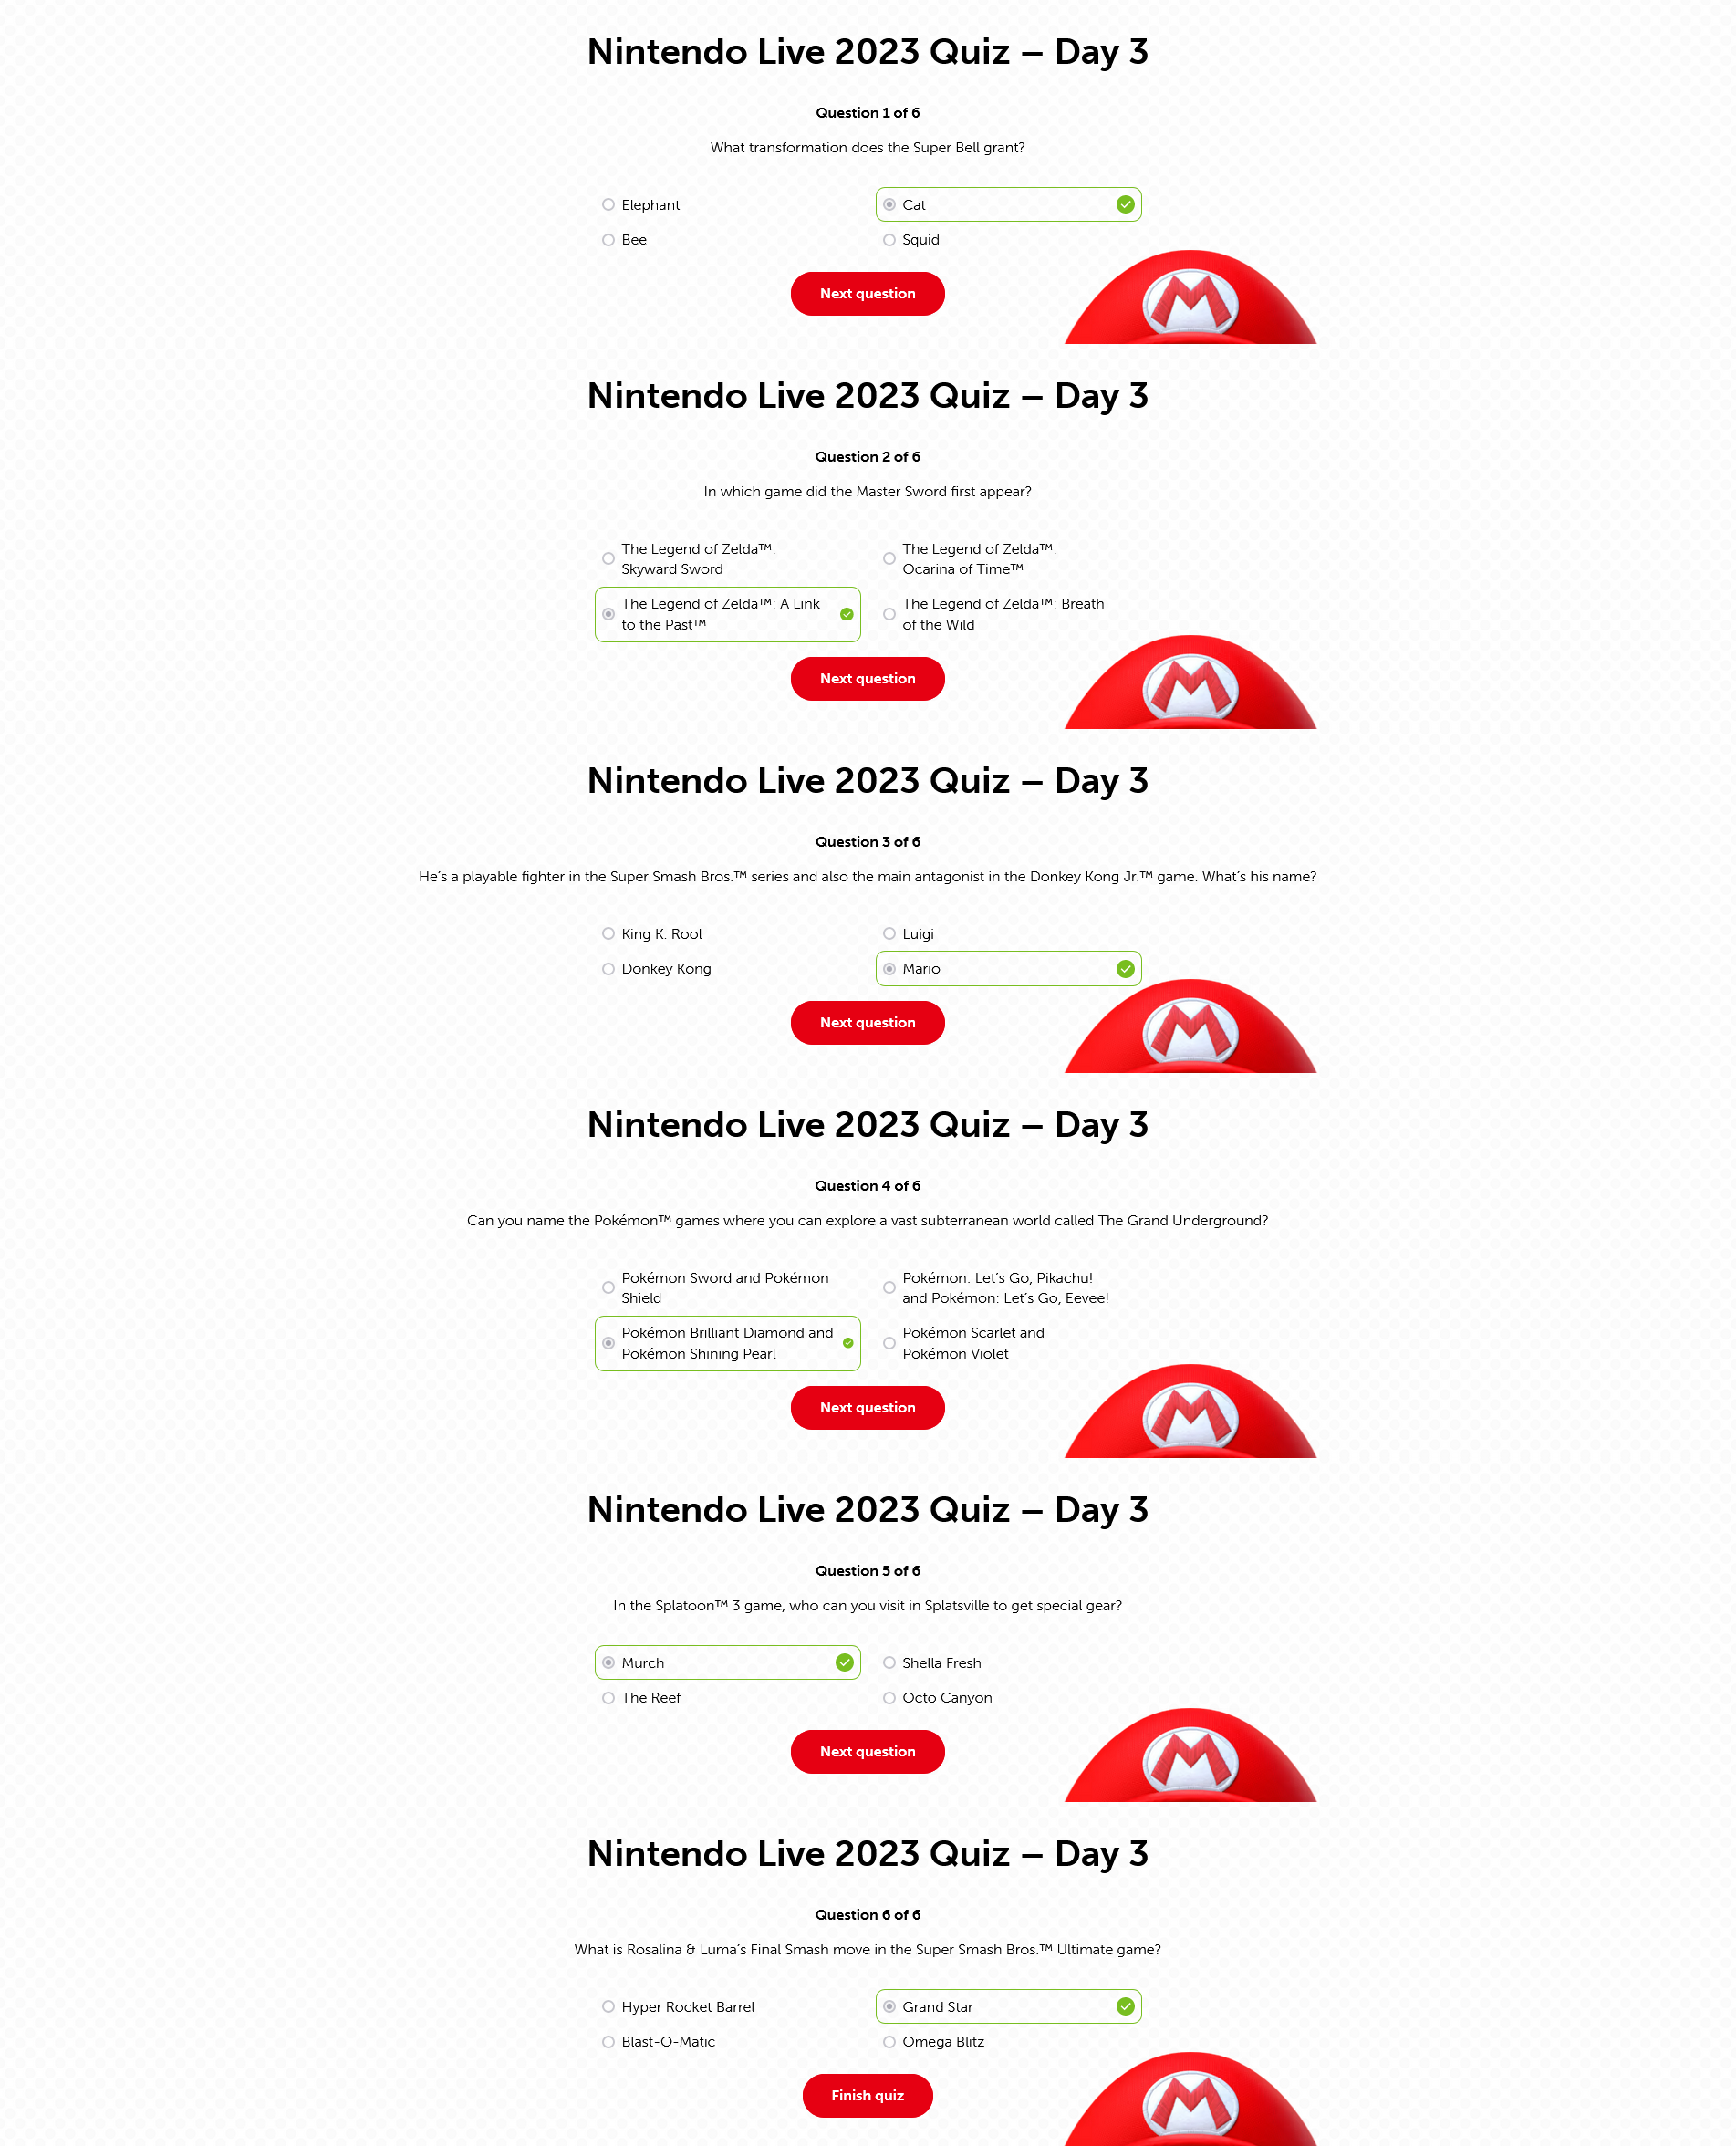
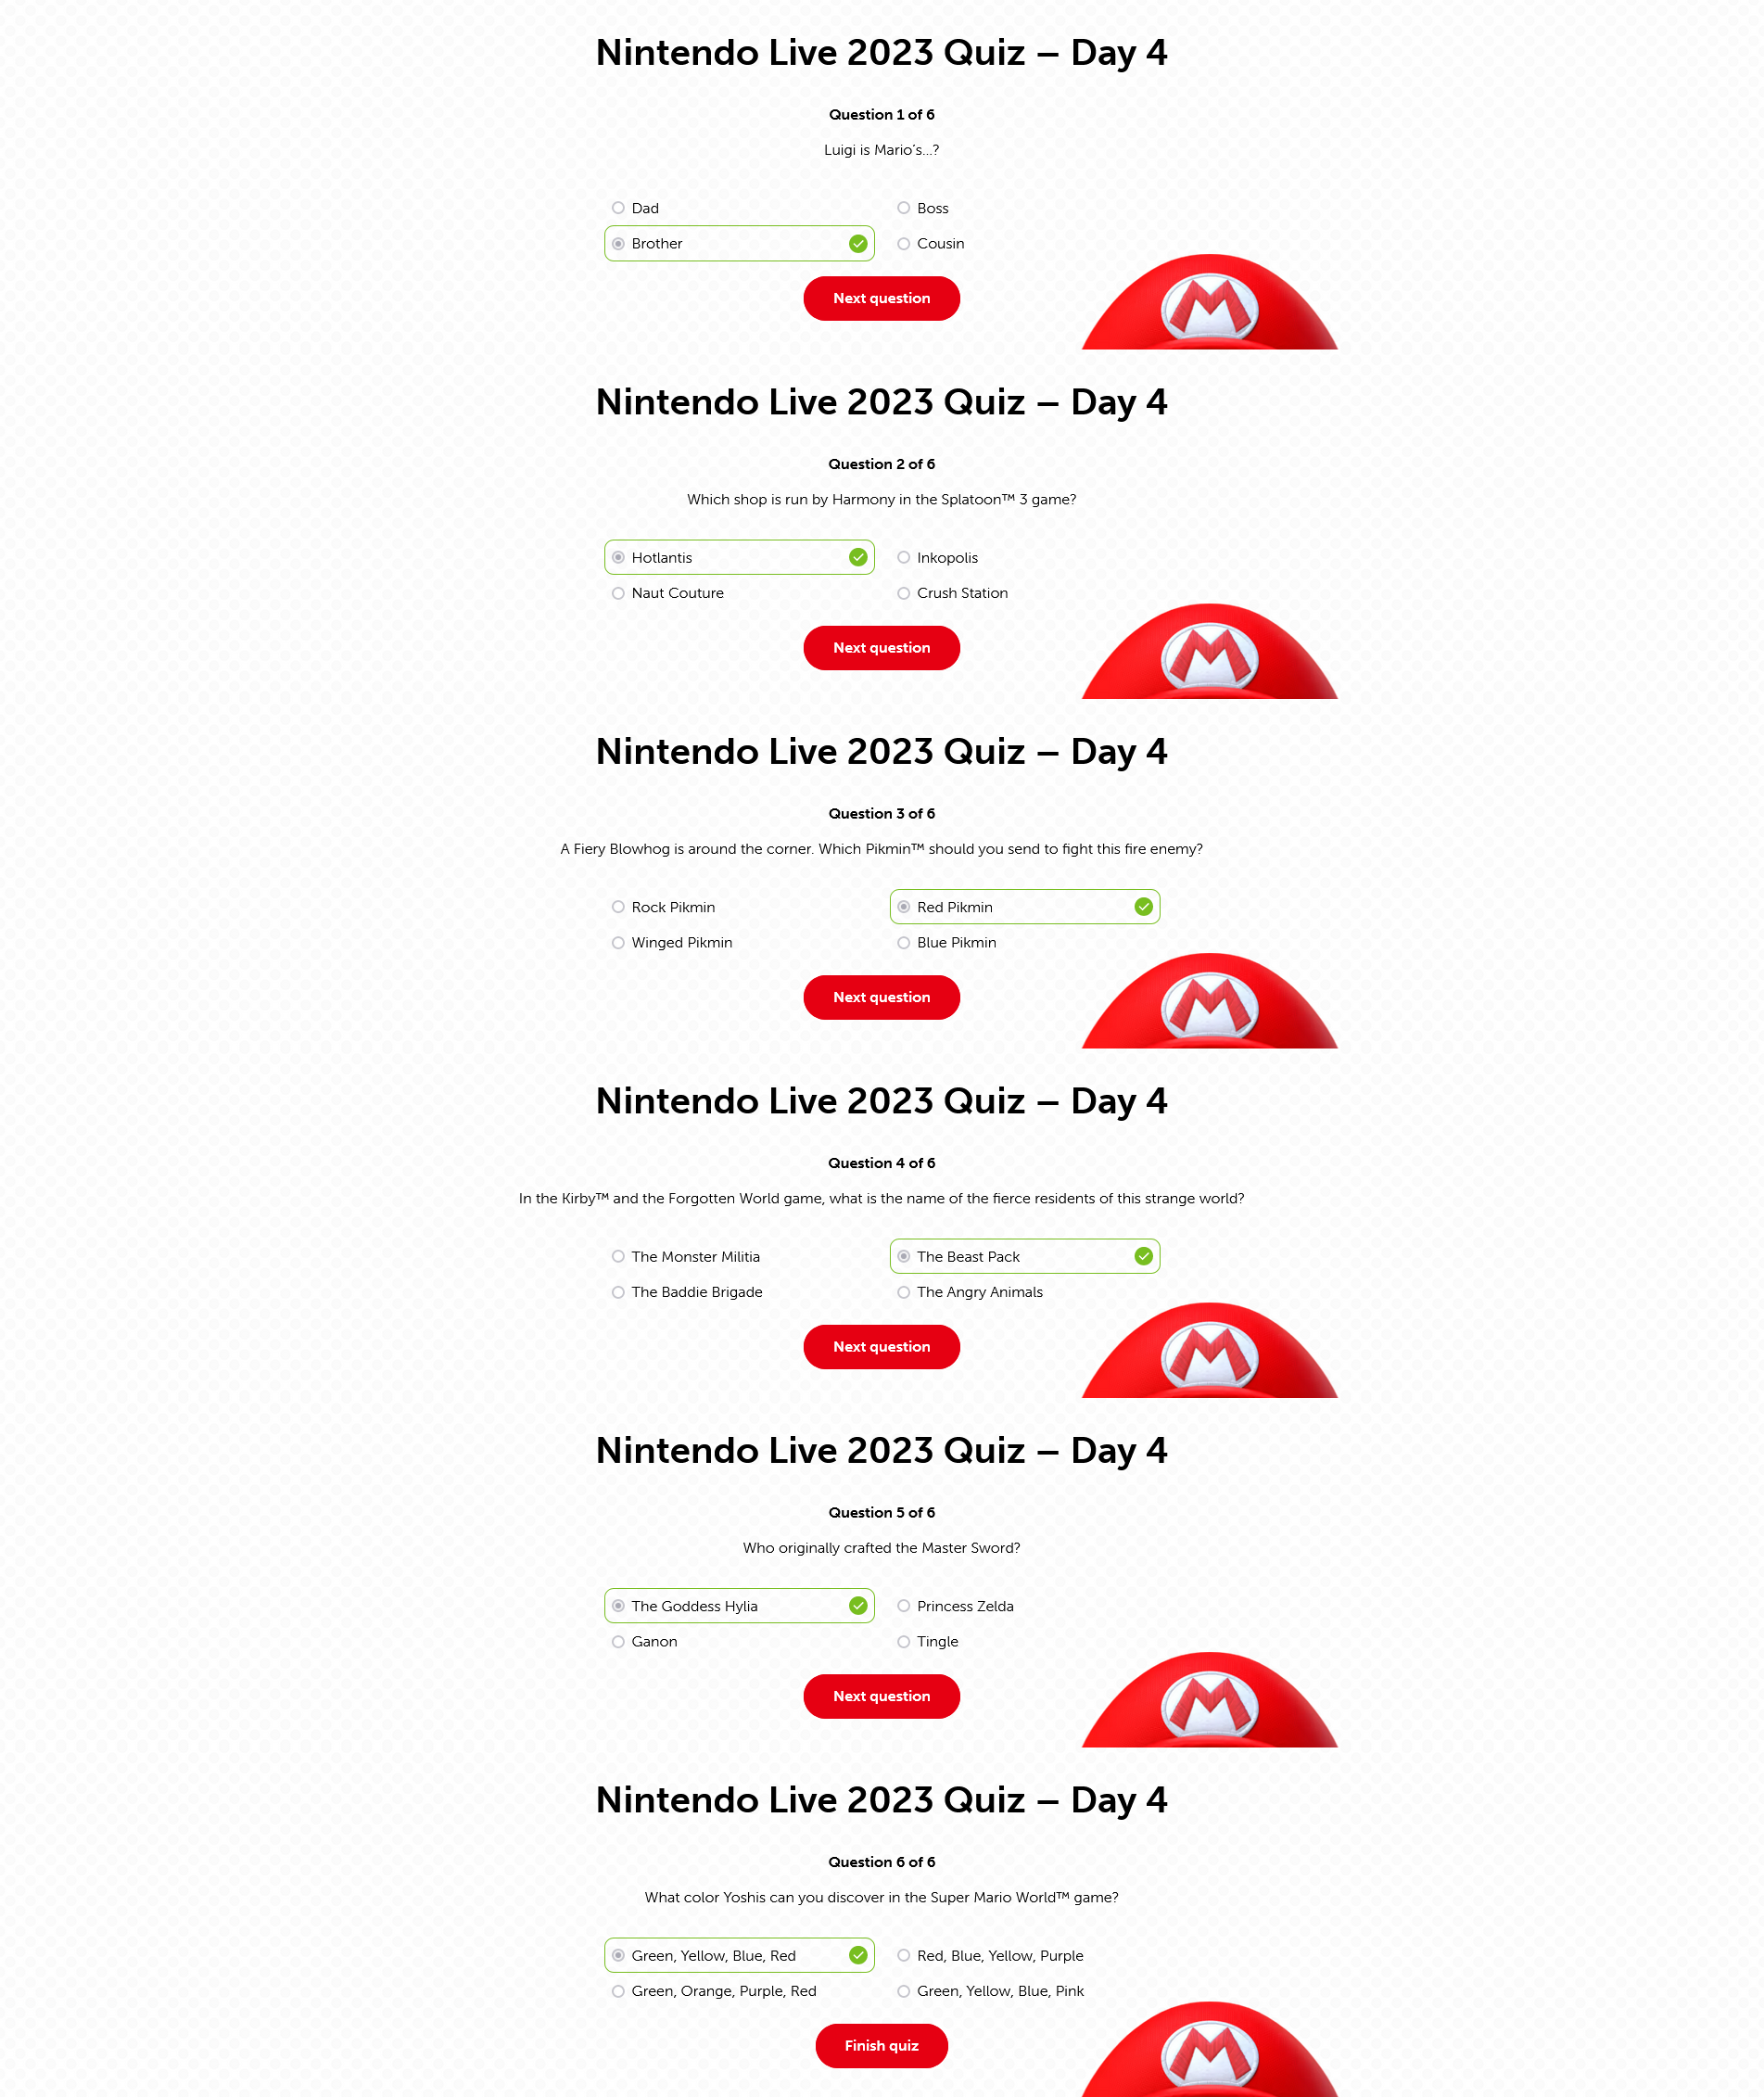
Lava Pit
| Image | Location | Content |
|---|---|---|

|
Lava Hopper | |

|
10 Power Orbs | |

|
Combat in the Cemetery | |

|
||

|
A Stroll in the Cemetery | |

|
Blubbernaught | |

|
5 Power Orbs | |

|
Lava Smasher | |

|
Gymbecile | |

|
Phantom's Theme | |

|
Bwaaahr Machines | |

|
Lava Valkyrie | |

|
Ballistic Mystic | |

|
Mushroom Marauder | |

|
The King | |

|
The Mine | |

|
Interplanetary Outhouse | |

|
Sombrero Vaquero | |

|
Lava Buckler | |

|
10 Power Orbs | |

|
||

|
||

|
||

|
||

|
||

|
||

|
||

|
||

|
||

|
||

|
||

|
||

|
||

|
||

|
||

|
||

|
||

|
||

|
||

|
||

|
||

|
||

|
||

|
||

|
||

|
||

|
||

|
||

|
||

|
||

|
||

|
||

|
||

|
||

|
||

|
||

|
||

|
||

|
||

|
||

|
||

|
List of Beep-0's overworld observations in Mario + Rabbids Kingdom Battle
This is a list of player-prompted observations made by Beep-0 on various elements of scenery in Mario + Rabbids Kingdom Battle.
Peach's Castle
| Object | Beep-0 quote | Location image | Location description |
|---|---|---|---|
 |

|
||
 |
File:MRKB Peach's Castle Beep-0 loc14.jpg | ||
 |

|
||
 |

|
||
 |

|
||
 |

|
||
 |

|
||
 |

|
||
 |

|
||
 |

|
||
 |

|
||
 |

|
||
 |

|
||
 |

|
Ancient Gardens
| Object | Beep-0 quote | Location image | Location description |
|---|---|---|---|
 A Goomba stuck in honey |
A shocking (though admittedly hilarious) example of the chaos wrought by the intrusion of our world into this one. | 
|
At the start of the area |
 Rabbid Kong's toy block tower |
I recognize those blocks from the basement. I hope they're more structurally sound after the SupaMerge but I doubt it. | 
|
At a vantage point just after the first battlefield |
 |

|
||
 |

|
||
 |

|
||
 |

|
||
 |

|
||
 |

|
||
| File:MRKB Ancient Gardens Beep-0 text9.jpg |

|
||
| File:MRKB Ancient Gardens Beep-0 text10.jpg |

|
||
| File:MRKB Ancient Gardens Beep-0 text11.jpg |

|
||
| File:MRKB Ancient Gardens Beep-0 text12.jpg |

|
||
| File:MRKB Ancient Gardens Beep-0 text13.jpg |

|
||
| File:MRKB Ancient Gardens Beep-0 text14.jpg |

|
||
| File:MRKB Ancient Gardens Beep-0 text15.jpg |

|
||
| File:MRKB Ancient Gardens Beep-0 text16.jpg |

|
||
| File:MRKB Ancient Gardens Beep-0 text17.jpg |

|
||
| File:MRKB Ancient Gardens Beep-0 text18.jpg |

|