Back to Hands-On Hall: Difference between revisions
m (Robot: Removing template: BoxTop) |
m (Text replacement - "Fra([AE]?M? *)=" to "Fre$1=") |
||
| (37 intermediate revisions by 28 users not shown) | |||
| Line 1: | Line 1: | ||
{{ | {{level infobox | ||
|image=[[File:Back to Hands-on Hall.jpg|250px]] | |||
|image=[[File:Back to | |||
|code={{world|mushroom2|5}} | |code={{world|mushroom2|5}} | ||
|world=[[World Mushroom (Super Mario 3D World)|World Mushroom]] | |world=[[World Mushroom (Super Mario 3D World)|World Mushroom]] | ||
|game=''[[Super Mario 3D World]]'' | |game=''[[Super Mario 3D World]]''<br>''[[Super Mario 3D World + Bowser's Fury]]'' | ||
|limit=400 seconds | |||
|before=[[Deep-Black Jungle Drift|<<]] | |before=[[Deep-Black Jungle Drift|<<]] | ||
|after=[[Gigantic Seasick Wreck|>>]] | |after=[[Gigantic Seasick Wreck|>>]] | ||
}} | }} | ||
'''Back to Hands-On Hall''', or '''{{world|mushroom2|5}}''', is the | '''Back to Hands-On Hall''', or '''{{world|mushroom2|5}}''', is the fifth level of [[World Mushroom (Super Mario 3D World)|World Mushroom]] in ''[[Super Mario 3D World]]'' and its [[Nintendo Switch]] port ''[[Super Mario 3D World + Bowser's Fury]]''. It is unlocked after completing [[Deep-Black Jungle Drift]], and its own completion unlocks [[Gigantic Seasick Wreck]]. In the original Wii U version, this level can only be played while using the Wii U GamePad. | ||
==Layout== | ==Layout== | ||
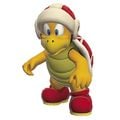
The level is a new version of [[Hands-On Hall]]. Unlike the original level, this version is carried out in the day instead of night. Some interior changes are the inclusion of enemies like [[Fire Bro]]s., [[Hammer Bro]]s. and [[Boomerang Bro]]s. The level also has [[Baseball ( | The level is a new version of [[Hands-On Hall]]. Unlike the original level, this version is carried out in the day instead of night. Some interior changes are the inclusion of enemies like [[Fire Bro]]s., [[Hammer Bro]]s. and [[Boomerang Bro]]s. The level also has [[Baseball (object)|baseball]]s, [[Clear Pipe]]s, [[Spike]]s, and [[Key Coin]]s which must be collected to go to the next area. | ||
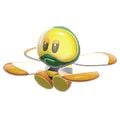
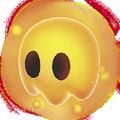
The outside of the building now has [[Flopter]]s, [[Lava | The outside of the building now has [[Flopter]]s, [[Lava Bubble]]s, [[Goomba]]s and a [[Green Ring]]. Also, there are clouds which must be climbed to reach the flying [[Goal Pole]]. | ||
==[[Key Coin]]s== | ==[[Key Coin]]s== | ||
*'''Key Coin 1''': Under the stairs leading to the second floor in the first area. | *'''Key Coin 1''': Under the stairs leading to the second floor in the first area. | ||
*'''Key Coin 2''': Guarded by two [[Hammer Bro]]s. on the second floor. | *'''Key Coin 2''': Guarded by two [[Hammer Bro]]s. on the second floor. | ||
*'''Key Coin 3''': Behind a set of sliding | *'''Key Coin 3''': Behind a set of [[sliding door]]s on the second floor, guarded by [[Goomba]]s. | ||
*'''Key Coin 4''': Behind a set of sliding doors on the third floor, guarded by a Hammer Bro. | *'''Key Coin 4''': Behind a set of sliding doors on the third floor, guarded by a Hammer Bro. | ||
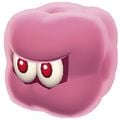
*'''Key Coin 5''': Obtained by striking a | *'''Key Coin 5''': Obtained by striking a [[Gong]] blocked by a wall of [[Blurker]]s. | ||
==[[Green Star]]s== | ==[[Green Star]]s== | ||
*'''Green Star 1:''' In a [[Clear Pipe]] on the third floor. The pipe is blocked by a [[ | *'''Green Star 1:''' In a [[Clear Pipe]] on the third floor. The pipe is blocked by a [[spike ball (seed)|spike ball]], so the player must either throw a [[Baseball (object)|baseball]] into the pipe or use a [[Fire Flower]]. | ||
*'''Green Star 2:''' Obtained by collecting 8 Green Coins near the [[Checkpoint Flag]]. | *'''Green Star 2:''' Obtained by collecting 8 Green Coins near the [[Checkpoint Flag]]. | ||
*'''Green Star 3:''' Inside a small area with piles of coins, accessible by a Warp Box shortly after the Checkpoint Flag. | *'''Green Star 3:''' Inside a small area with piles of coins, accessible by a Warp Box that spawns by striking a gong shortly after the Checkpoint Flag. | ||
==Enemies== | ==Enemies== | ||
<gallery> | |||
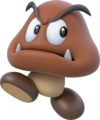
Goomba Artwork - Super Mario 3D World.png|[[Goomba]]s | |||
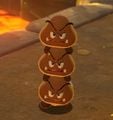
GoombaTowerSM3DW.jpg|[[Goomba Tower]]s | |||
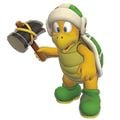
Hammer Bro SM3DW Prima.jpg|[[Hammer Bro]]s. | |||
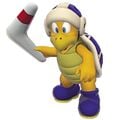
SM3DW Boomerang Bro Prima.jpg|[[Boomerang Bro]]s. | |||
Fire Bro SM3DW Prima.jpg|[[Fire Bro]]s. | |||
Blurker SM3DW Prima.jpg|[[Blurker]]s | |||
Flopter SM3DW Prima.jpg|[[Flopter]]s | |||
Lava Bubble SM3DW Prima.jpg|[[Lava Bubble]]s | |||
FloatingMinesSM3DWorld.jpg|[[Spike ball (seed)|Spike ball]]s | |||
</gallery> | |||
==Names in other languages== | ==Names in other languages== | ||
{{ | {{foreign names | ||
|Jap=もっと!謎のからくり城 | |Jap=もっと!謎のからくり城 | ||
|JapR=Motto! Nazo no karakuri-jō | |JapR=Motto! Nazo no karakuri-jō | ||
|JapM=More! Mysterious Mechanism Castle | |JapM=More! Mysterious Mechanism Castle | ||
| | |Spa=Pelotas y peligros en el castillo | ||
|SpaM=Balls and dangers at the castle | |||
|Fre=Retour au château tactile | |||
| | |FreM=Return to Tactile Castle | ||
|Dut=Huis van de duizend en één schuifdeuren | |||
|DutM=House of the thousand and one sliding doors | |||
|Ita=Castello delle porte scorrevoli di Koopa | |||
|ItaM=Koopa's castle of sliding doors{{footnote|main|1}} | |||
|Por=Regresso ao castelo das portas misteriosas | |||
|PorM=Return to the castle of mysterious doors | |||
|Rus=Снова раскрываем тайны замка | |||
|RusR=Snova raskryvayem tayny zamka | |||
|RusM=Revealing the castle's secrets again | |||
|Chi=更多!謎樣的機關城堡 | |||
|ChiR=Gèngduō! Míyàng de Jīguān Chéngbǎo | |||
|ChiM=More! Mysterious Mechanism Castle | |||
}} | }} | ||
{{footnote|note|1|Despite the name, no regular [[Koopa Troopa]]s appear in this level.}} | |||
{{SM3DW}} | {{SM3DW levels}} | ||
[[Category:Temples]] | |||
[[Category:Super Mario 3D World | [[Category:Super Mario 3D World levels]] | ||
[[de:Zurück im Haus der tausend Touchscreen-Türen]] | |||
Latest revision as of 02:03, January 8, 2024
| Level | |
|---|---|
| Back to Hands-On Hall | |
| |
| Level code | World |
| World | World Mushroom |
| Game | Super Mario 3D World Super Mario 3D World + Bowser's Fury |
| Time limit | 400 seconds |
| << Directory of levels >> | |
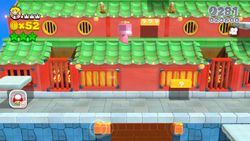
Back to Hands-On Hall, or World ![]() Mushroom-5, is the fifth level of World Mushroom in Super Mario 3D World and its Nintendo Switch port Super Mario 3D World + Bowser's Fury. It is unlocked after completing Deep-Black Jungle Drift, and its own completion unlocks Gigantic Seasick Wreck. In the original Wii U version, this level can only be played while using the Wii U GamePad.
Mushroom-5, is the fifth level of World Mushroom in Super Mario 3D World and its Nintendo Switch port Super Mario 3D World + Bowser's Fury. It is unlocked after completing Deep-Black Jungle Drift, and its own completion unlocks Gigantic Seasick Wreck. In the original Wii U version, this level can only be played while using the Wii U GamePad.
Layout[edit]
The level is a new version of Hands-On Hall. Unlike the original level, this version is carried out in the day instead of night. Some interior changes are the inclusion of enemies like Fire Bros., Hammer Bros. and Boomerang Bros. The level also has baseballs, Clear Pipes, Spikes, and Key Coins which must be collected to go to the next area.
The outside of the building now has Flopters, Lava Bubbles, Goombas and a Green Ring. Also, there are clouds which must be climbed to reach the flying Goal Pole.
Key Coins[edit]
- Key Coin 1: Under the stairs leading to the second floor in the first area.
- Key Coin 2: Guarded by two Hammer Bros. on the second floor.
- Key Coin 3: Behind a set of sliding doors on the second floor, guarded by Goombas.
- Key Coin 4: Behind a set of sliding doors on the third floor, guarded by a Hammer Bro.
- Key Coin 5: Obtained by striking a Gong blocked by a wall of Blurkers.
Green Stars[edit]
- Green Star 1: In a Clear Pipe on the third floor. The pipe is blocked by a spike ball, so the player must either throw a baseball into the pipe or use a Fire Flower.
- Green Star 2: Obtained by collecting 8 Green Coins near the Checkpoint Flag.
- Green Star 3: Inside a small area with piles of coins, accessible by a Warp Box that spawns by striking a gong shortly after the Checkpoint Flag.
Enemies[edit]
Names in other languages[edit]
| Language | Name | Meaning |
|---|---|---|
| Japanese | もっと!謎のからくり城 Motto! Nazo no karakuri-jō |
More! Mysterious Mechanism Castle |
| Chinese | 更多!謎樣的機關城堡 Gèngduō! Míyàng de Jīguān Chéngbǎo |
More! Mysterious Mechanism Castle |
| Dutch | Huis van de duizend en één schuifdeuren |
House of the thousand and one sliding doors |
| French | Retour au château tactile |
Return to Tactile Castle |
| Italian | Castello delle porte scorrevoli di Koopa |
Koopa's castle of sliding doors1 |
| Portuguese | Regresso ao castelo das portas misteriosas |
Return to the castle of mysterious doors |
| Russian | Снова раскрываем тайны замка Snova raskryvayem tayny zamka |
Revealing the castle's secrets again |
| Spanish | Pelotas y peligros en el castillo |
Balls and dangers at the castle |
1 - Despite the name, no regular Koopa Troopas appear in this level.
