|
|
| Line 1: |
Line 1: |
| ==Zones==
| | <gallery> |
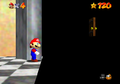
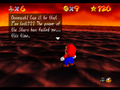
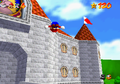
| As the game's title suggests, the game is split into six different worlds, and then a final level where Mario fights Wario, the final boss.
| | File:SM64 TitleScreen NTSC-J-SE.png |
| | File:SM64 TitleScreen NTSC-U NTSC-J-ORG.png |
| | File:SM64 TitleScreen PAL.png |
| | File:SM64 IntroScreen NTSC.png |
| | File:SM64 IntroScreen PAL.png |
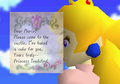
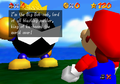
| | File:Peach's message.png |
| | File:SoundComposerSM64.png |
| | </gallery> |
|
| |
|
| {| class="wikitable sortable" border=1 cellpadding=3 style="border-collapse:collapse;width:50%;margin: 0 auto;"
| | <gallery> |
| |-
| | File:Big Bob-omb Battle.png |
| !style="background: #ff8c00"|World
| | File:Blizzard64.png |
| !style="background: #ff8c00"|Coin
| | File:Bob-omb Battlefield 64.png |
| !style="background: #ff8c00"|Levels
| | File:Bomb-omb on air.png |
| |-
| | File:Bowser in the Dark World.png |
| |style="text-align:center"|[[File:Sml2map.PNG|160px]]<br>Overworld
| | File:Bowser in the Sky.png |
| |
| | File:Bowser puzzle.png |
| |
| | File:BowserBossGlitch64.jpg |
| *[[Start]]<ref>Nintendo Power #43 [http://www.superluigibros.com/super-mario-land-2-nintendo-power-43]</ref><ref>"スタート", [[KC Deluxe]] vol. 19 page 1, </ref>
| | File:Bump Jump.png |
| *<!--[[File:Hippo zone.PNG|92px]]<br-->'''[[Hippo (stage)|Hippo]]'''
| | File:Castle 4.PNG |
| *Tenbō-dai kōsu (展望台コース), "Lookout Course"
| | File:Cavern of the Metal Cap.png |
| *[[Casino]]
| | File:Death teleporting.png |
| |-
| | File:Downtown 64.png |
| |style="text-align:center"|[[File:SML2 TreeZoneMap.png|160px]]<br>'''[[Tree Zone]]'''
| | File:Fire Spitter Glitch.PNG |
| |style="text-align:center"|[[File:Treegoldcoin.PNG]]
| | File:Floating Baby Benguin glitch.PNG |
| |
| | File:Floatingminesm64.png |
| *Tree Zone Area 1
| | File:HiddenDoor 2.png |
| *Tree Zone Area 2
| | File:HiddenDoor.png |
| *Tree Zone Area 3
| | File:JRBPaintingCompare.png |
| *Tree Zone Area 4
| | File:Key 64.png |
| *Tree Zone Area 5
| | File:Koopazeroglitch.png |
| *Tree Zone Special Area
| | File:Lakitu glitch.png |
| |-
| | File:Larger Bomb-omb.png |
| |style="text-align:center"|[[File:SpaceZone.png|160px]]<br>'''[[Space Zone]]'''
| | File:LyingOnFloor.png |
| |style="text-align:center"|[[File:Spacegoldcoin.PNG]]
| | File:LyingOnFloor2.png |
| |
| | File:Manta.PNG |
| *Space Zone Area 1
| | File:Mario and haze.PNG |
| *Space Zone Area 2
| | File:Mario holding coin.PNG |
| *Space Zone Special Area
| | File:Mario vs Bowser 64.png |
| |-
| | File:MarioSM64.png |
| |style="text-align:center"|[[File:Macro zone.PNG|160px]]<br>'''[[Macro Zone]]'''
| | File:MomentumGlitch1.png |
| |style="text-align:center"|[[File:Macrogoldcoin.PNG]]
| | File:MomentumGlitch2.png |
| |
| | File:Mr.I.jpg |
| *Macro Zone Area 1
| | File:MysteriousDoor.png |
| *Macro Zone Area 2
| | File:Power SM64.png |
| *Macro Zone Area 3
| | File:Shifting Sand Land 64.png |
| *Macro Zone Area 4
| | File:SM64 - Bub Screenshot.png |
| *Macro Zone Special Area
| | File:SM64 100 Coins Glitch 2.png |
| |-
| | File:SM64 100cglitch.png |
| |style="text-align:center"|[[File:SML2 PumpkinZone.png|160px]]<br>'''[[Pumpkin Zone]]'''
| | File:SM64 Behindgate.png |
| |style="text-align:center"|[[File:Pumpkingoldcoin.PNG]]
| | File:SM64 BitDW M25.png |
| |
| | File:SM64 BoB Cannon.png |
| *Pumpkin Zone Area 1
| | File:SM64 Booback.png |
| *Pumpkin Zone Area 2
| | File:SM64 Booback2.png |
| *Pumpkin Zone Area 3
| | File:SM64 BRoD1.png |
| *Pumpkin Zone Area 4
| | File:SM64 BRoD2.png |
| *Pumpkin Zone Special Area 1
| | File:SM64 BRoD3.png |
| *Pumpkin Zone Special Area 2
| | File:SM64 BRoD4.png |
| |-
| | File:SM64 BRoD5.png |
| |style="text-align:center"|[[File:MarioZone.png|160px]]<br>'''[[Mario Zone]]'''
| | File:SM64 BRoD6.png |
| |style="text-align:center"|[[File:Mariogoldcoin.PNG]]
| | File:SM64 BRoD7.png |
| |
| | File:SM64 BRoD8.png |
| *Mario Zone Area 1
| | File:SM64 BRoD9.png |
| *Mario Zone Area 2
| | File:SM64 Cameraglitch.png |
| *Mario Zone Area 3
| | File:SM64 Capinhand.png |
| *Mario Zone Area 4
| | File:SM64 CG Peachscastle.png |
| |-
| | File:SM64 Cloning.png |
| |style="text-align:center"|[[File:TurtleZone.png|160px]]<br>'''[[Turtle Zone]]'''
| | File:SM64 Crush0dmg.png |
| |style="text-align:center"|[[File:Turtlegoldcoin.PNG]]
| | File:SM64 FireBar.png |
| |
| | File:SM64 Frozen Head.png |
| *Turtle Zone Area 1
| | File:SM64 Hidden Cloud.png |
| *Turtle Zone Area 2
| | File:SM64 Invisible Bowser 2.png |
| *Turtle Zone Area 3
| | File:SM64 Invisible Bowser.png |
| *Turtle Zone Special Area
| | File:Sm64 jrb bright.png |
| |-
| | File:Sm64 jrb dark.png |
| |style="text-align:center"|[[File:Marioland2.png|160px]]<br>'''[[Mario's castle]]'''
| | File:SM64 Killeredge.png |
| |
| | File:SM64 LLL Entrance.jpg |
| |
| | File:SM64 Loadingarea.png |
| |}
| | File:SM64 Logstuck.png |
| </div> | | File:SM64 Notendless.png |
| | File:SM64 Penguin Racer.jpg |
| | File:SM64 Screenshot - Star Door.png |
| | File:SM64 Shindou EasterEgg.png |
| | File:SM64 Snowman's Land Cannon Angle.png |
| | File:SM64 Spiny.png |
| | File:SM64 Stucklava.png |
| | File:SM64 Tall, Tall Mountain.png |
| | File:SM64 TtR.png |
| | File:SM64 VanishCap.JPG |
| | File:SM64 WFswim.png |
| | File:SM64 Zombiedoor.png |
| | File:SM64 Zombiemarioglitch.png |
| | File:SM64-Butterflies.png |
| | File:Sm64bowser.png |
| | File:Sm64easteregg.png |
| | File:Sm64finalbowser.jpg |
| | File:SM64Goomba.png |
| | File:SM64LakituSprite.png |
| | File:Sm64mario.jpg |
| | File:Sm64metalmario.jpg |
| | File:Sm64pyroblock.jpg |
| | File:SM64Somersault.png |
| | File:SM64Whomp.jpg |
| | File:Snowman's Land.png |
| | File:SpinningHeart64.jpg |
| | File:Star Door.PNG |
| | File:Star SM64.png |
| | File:Statue SMB style.png |
| | File:StuckAir.png |
| | File:Super mario 64 reward.png |
| | File:Sushi 64.png |
| | File:The Princess's Secret Slide.png |
| | File:The Secret SM64.png |
| | File:Thwomp 64.png |
| | File:Thwomp64.jpg |
| | File:Tiny-Huge Island 64.png |
| | File:Tower of the Wing Cap.png |
| | File:Unagi64Face.jpg |
| | File:Unagi64Full.jpg |
| | File:UngetableStar.png |
| | File:Vanish Mario.png |
| | File:Venustrapsm64.png |
| | File:Wet-Dry World 64.png |
| | File:Whomp's Fortress 64.png |
| | File:WhompMP5.PNG |
| | File:Wiggler 64.png |
| | File:Wing Mario Over the Rainbow.png |
| | File:WingCapSM64.PNG |
| | </gallery> |
| | <gallery> |
| | File:Climb Slippery Slopes 1.gif |
| | File:Climb Slippery Slopes 2.gif |
| | File:Climb The Castle.gif |
| | File:Expanded Triple Jump SM64.gif |
| | File:Lava Sidekick.gif |
| | File:Normal Triple Jump SM64.gif |
| | File:SM64 Brutal Death.gif |
| | File:SM64 Burn n' Drown glitch.gif |
| | File:SM64 Chasing1Up.gif |
| | File:SM64 EnterLightGlitch.gif |
| | File:SM64 InvisibleWall.gif |
| | File:Zombie Freeze.gif |
| | </gallery> |
|
| |
|
| ==Enemies==
| | <gallery> |
| ===Common Enemies===
| | File:SM64MetalMario.jpg |
| {| class="wikitable sortable" border=1 cellpadding=3 style=border-collapse:collapse;width:100%
| | File:SuperMario64MetalMario.png |
| |-
| | File:Long Jump.PNG |
| !style="background: #ff8c00" width="100"|Image
| | File:Mariobowser.png |
| !style="background: #ff8c00"|Name
| | </gallery> |
| !style="background: #ff8c00"|Found in
| |
| !style="background: #ff8c00"|Description
| |
| |-
| |
| | align="center"|[[File:Ant.png|64x64px]]
| |
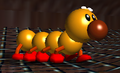
| |[[Ant]]
| |
| |[[Tree Zone]], [[Macro Zone]]
| |
| |Lorem ipsum dolor sit amet, consectetur adipiscing elit, sed do eiusmod tempor incididunt ut labore et dolore magna aliqua. Ut enim ad minim veniam, quis nostrud exercitation ullamco laboris nisi ut aliquip ex ea commodo consequat. Duis aute irure dolor in reprehenderit in voluptate velit esse cillum dolore eu fugiat nulla pariatur. Excepteur sint occaecat cupidatat non proident, sunt in culpa qui officia deserunt mollit anim id est laborum.
| |
| |-
| |
| | align="center"|[[File:Battlebeetleart.PNG|64x64px]]
| |
| |[[Battle Beetle]]
| |
| |Tree Zone, Macro Zone
| |
| |
| |
| |-
| |
| | align="center"|[[File:B furai.png|64x64px]]
| |
| |[[Bē]]
| |
| |Tree Zone, Macro Zone
| |
| |
| |
| |-
| |
| | align="center"|[[File:SML2 Artwork - Blurp.png|64x64px]]
| |
| |[[Blurp]]
| |
| |[[Hippo (stage)|Hippo]], [[Pumpkin Zone]], [[Turtle Zone]]
| |
| |
| |
| |-
| |
| | align="center"|[[File:Bomb bomb.png|64x64px]]
| |
| |[[Bomubomu]]
| |
| |[[Space Zone]], [[Mario Zone]]
| |
| |
| |
| |-
| |
| | align="center"|[[File:SML2 Artwork - Bullet Bill.png|64x64px]]
| |
| |[[Bullet Bill]] & [[Bill Blaster]]
| |
| |Mario Zone, Turtle Zone
| |
| |
| |
| |-
| |
| | align="center"|[[File:SML2 Artwork - Cheep Cheep.png|64x64px]]
| |
| |[[Cheep Cheep]]
| |
| |Macro Zone, Turtle Zone
| |
| |
| |
| |-
| |
| | align="center"|[[File:Dondon.png|64x64px]]
| |
| |[[Dondon]]
| |
| |Hippo, Tree Zone
| |
| |
| |
| |-
| |
| | align="center"|[[File:VenusFireTrap-SML2.png|64x64px]]
| |
| |[[Fire Piranha Plant]]
| |
| |Tree Zone, Macro Zone, Pumpkin Zone
| |
| |
| |
| |-
| |
| | align="center"|[[File:Goomba-SML2.gif|64x64px]]
| |
| |[[Goomba]]
| |
| |[[Start]], Macro Zone, Pumpkin Zone, Mario Zone, Turtle Zone, <Overworld level>
| |
| |
| |
| |-
| |
| | align="center"|[[File:Honebon.gif|64x64px]]
| |
| |[[Honebōn]]
| |
| |Macro Zone, Turtle Zone
| |
| |
| |
| |-
| |
| | align="center"|[[File:SML2 Artwork - Koopa Troopa.png|64x64px]]
| |
| |[[Koopa Troopa]]
| |
| |Start, Tree Zone, Macro Zone, Pumpkin Zone, Mario Zone, Turtle Zone
| |
| |
| |
| |-
| |
| | align="center"|[[File:SML2 Artwork - Paragoomba.png|64x64px]]
| |
| |[[Paragoomba]]
| |
| |Start, Tree Zone, Pumpkin Zone, Mario Zone, Turtle Zone, <Overworld level>
| |
| |
| |
| |-
| |
| | align="center"|[[File:PiranhaPlant-SML2.png|64x64px]]
| |
| |[[Piranha Plant]]
| |
| |Start, Tree Zone, Macro Zone, Pumpkin Zone, Turtle Zone
| |
| |
| |
| |-
| |
| | align="center"|[[File:Unibō.png|64x64px]]
| |
| |[[Unibō]]
| |
| |Hippo, Turtle Zone
| |
| |
| |
| |}
| |
| | |
| ===Tree Zone enemies===
| |
| {| class="wikitable sortable" border=1 cellpadding=3 style=border-collapse:collapse;width:100%
| |
| |-
| |
| !style="background: #ff8c00" width="100"|Image
| |
| !style="background: #ff8c00"|Name
| |
| !style="background: #ff8c00"|Description
| |
| |-
| |
| | align="center"|[[File:Bībī.png|64x64px]]
| |
| |[[Bībī]]
| |
| |Lorem ipsum dolor sit amet, consectetur adipiscing elit, sed do eiusmod tempor incididunt ut labore et dolore magna aliqua. Ut enim ad minim veniam, quis nostrud exercitation ullamco laboris nisi ut aliquip ex ea commodo consequat. Duis aute irure dolor in reprehenderit in voluptate velit esse cillum dolore eu fugiat nulla pariatur. Excepteur sint occaecat cupidatat non proident, sunt in culpa qui officia deserunt mollit anim id est laborum.
| |
| |-
| |
| | align="center"|[[File:Pyonta.png|64x64px]]
| |
| |[[Bopping Toady]]
| |
| |
| |
| |-
| |
| | align="center"|[[File:Būichi.png|64x64px]]
| |
| |[[Būichi]]
| |
| |
| |
| |-
| |
| | align="center"|[[File:Grubby.png|64x64px]]
| |
| |[[Grubby]]
| |
| |
| |
| |-
| |
| | align="center"|[[File:Kyotonbo sml2.png|64x64px]]
| |
| |[[Kyotonbo]]
| |
| |
| |
| |-
| |
| | align="center"|[[File:Mōgyo.png|64x64px]]
| |
| |[[Mōgyo]]
| |
| |
| |
| |-
| |
| | align="center"|[[File:Noko bombette.png|64x64px]]
| |
| |[[Noko Bombette]]
| |
| |
| |
| |-
| |
| | align="center"|[[File:DrillMole.png|64x64px]]
| |
| |[[Ragumo]]
| |
| |
| |
| |-
| |
| | align="center"|[[File:Skeleton Bee SML2.png|64x64px]]
| |
| |[[Skeleton Bee]]
| |
| |
| |
| |-
| |
| | align="center"|[[File:Spikydillo.png|64x64px]]
| |
| |[[Spikey (Super Mario Land 2: 6 Golden Coins)|Spikey]]
| |
| |
| |
| |-
| |
| | align="center"|[[File:Tamara sml2.png|64x64px]]
| |
| |[[Tamara]]
| |
| |
| |
| |-
| |
| | align="center"|[[File:Toriuo.png|64x64px]]
| |
| |[[Toriuo]]
| |
| |
| |
| |-
| |
| | align="center"|[[File:Unera sml2.png|64x64px]]
| |
| |[[Unera]]
| |
| |-
| |
| !align="center"|[[File:Kurosu Super Mario Land 2 6GC.png|100px]]
| |
| !style="text-align:left"|[[Bird (Super Mario Land 2: 6 Golden Coins)|Bird]] (Boss)
| |
| !style="text-align:left"|
| |
| |}
| |
| | |
| ===Space Zone enemies===
| |
| {| class="wikitable sortable" border=1 cellpadding=3 style=border-collapse:collapse;width:100%
| |
| |-
| |
| !style="background: #ff8c00" width="100"|Image
| |
| !style="background: #ff8c00"|Name
| |
| !style="background: #ff8c00"|Description
| |
| |-
| |
| | align="center"|[[File:No.48.png|64x64px]]
| |
| |[[No.48]]
| |
| |Lorem ipsum dolor sit amet, consectetur adipiscing elit, sed do eiusmod tempor incididunt ut labore et dolore magna aliqua. Ut enim ad minim veniam, quis nostrud exercitation ullamco laboris nisi ut aliquip ex ea commodo consequat. Duis aute irure dolor in reprehenderit in voluptate velit esse cillum dolore eu fugiat nulla pariatur. Excepteur sint occaecat cupidatat non proident, sunt in culpa qui officia deserunt mollit anim id est laborum.
| |
| |-
| |
| | align="center"|[[File:Poro.png|64x64px]]
| |
| |[[Poro]]
| |
| |
| |
| |-
| |
| | align="center"|[[File:Sutāzu.png|64x64px]]
| |
| |[[Sutāzu]]
| |
| |
| |
| |-
| |
| | align="center"|[[File:Tōsenbo.png|64x64px]]
| |
| |[[Tōsenbo]]
| |
| |
| |
| |-
| |
| !align="center"|[[File:Tatanga1.PNG|100px]]
| |
| !style="text-align:left"|[[Tatanga]] (Boss)
| |
| !style="text-align:left"|
| |
| |}
| |
| | |
| ===Macro Zone enemies===
| |
| {| class="wikitable sortable" border=1 cellpadding=3 style=border-collapse:collapse;width:100%
| |
| |-
| |
| !style="background: #ff8c00" width="100"|Image
| |
| !style="background: #ff8c00"|Name
| |
| !style="background: #ff8c00"|Description
| |
| |-
| |
| | align="center"|[[File:Chikunto.gif|64x64px]]
| |
| |[[Chikunto]]
| |
| |Lorem ipsum dolor sit amet, consectetur adipiscing elit, sed do eiusmod tempor incididunt ut labore et dolore magna aliqua. Ut enim ad minim veniam, quis nostrud exercitation ullamco laboris nisi ut aliquip ex ea commodo consequat. Duis aute irure dolor in reprehenderit in voluptate velit esse cillum dolore eu fugiat nulla pariatur. Excepteur sint occaecat cupidatat non proident, sunt in culpa qui officia deserunt mollit anim id est laborum.
| |
| |-
| |
| | align="center"|[[File:Dokanto.png|64x64px]]
| |
| |[[Dokanto]]
| |
| |
| |
| |-
| |
| | align="center"|[[File:Goronto.png|64x64px]]
| |
| |[[Goronto]]
| |
| |
| |
| |-
| |
| | align="center"|[[File:Keipu.png|64x64px]]
| |
| |[[Keipu]]
| |
| |
| |
| |-
| |
| !align="center"|[[File:Ricky art SML2.png|100px]]
| |
| !style="text-align:left"|[[Sewer Rat]] (Boss)
| |
| !style="text-align:left"|
| |
| |}
| |
| | |
| ===Pumpkin Zone enemies===
| |
| {| class="wikitable sortable" border=1 cellpadding=3 style=border-collapse:collapse;width:100%
| |
| |-
| |
| !style="background: #ff8c00" width="100"|Image
| |
| !style="background: #ff8c00"|Name
| |
| !style="background: #ff8c00"|Description
| |
| |-
| |
| | align="center"|[[File:Bēro.png|64x64px]]
| |
| |[[Bēro]]
| |
| |Lorem ipsum dolor sit amet, consectetur adipiscing elit, sed do eiusmod tempor incididunt ut labore et dolore magna aliqua. Ut enim ad minim veniam, quis nostrud exercitation ullamco laboris nisi ut aliquip ex ea commodo consequat. Duis aute irure dolor in reprehenderit in voluptate velit esse cillum dolore eu fugiat nulla pariatur. Excepteur sint occaecat cupidatat non proident, sunt in culpa qui officia deserunt mollit anim id est laborum.
| |
| |-
| |
| | align="center"|[[File:Boosprite.PNG|64x64px]]
| |
| |[[Boo]]
| |
| |
| |
| |-
| |
| | align="center"|[[File:F bōi.png|64x64px]]
| |
| |[[F Boy]]
| |
| |
| |
| |-
| |
| | align="center"|[[File:SML2 Artwork - Falling Spike.png|64x64px]]
| |
| |[[Falling Spike]]
| |
| |
| |
| |-
| |
| | align="center"|[[File:Karakara.png|64x64px]]
| |
| |[[Karakara]]
| |
| |
| |
| |-
| |
| | align="center"|[[File:Kurokyura SML2.png|64x64px]]
| |
| |[[Kurokyura]]
| |
| |
| |
| |-
| |
| | align="center"|[[File:Kyororo.png|64x64px]]
| |
| |[[Kyororo]]
| |
| |
| |
| |-
| |
| | align="center"|[[File:Masked ghoul.png|64x64px]]
| |
| |[[Masked Ghoul]]
| |
| |
| |
| |-
| |
| | align="center"|[[File:Pikku.png|64x64px]]
| |
| |[[Pikku]]
| |
| |
| |
| |-
| |
| | align="center"|[[File:Rerere.png|64x64px]]
| |
| |[[Rerere]]
| |
| |
| |
| |-
| |
| | align="center"|[[File:Boombaart.PNG|64x64px]]
| |
| |[[Terekuribō]]
| |
| |
| |
| |-
| |
| !align="center"|[[File:WitchellaPurple.PNG|100px]]
| |
| !style="text-align:left"|[[Witch (Super Mario Land 2: 6 Golden Coins)|Witch]] (Boss)
| |
| !style="text-align:left"|
| |
| |}
| |
| | |
| ===Mario Zone enemies===
| |
| {| class="wikitable sortable" border=1 cellpadding=3 style=border-collapse:collapse;width:100%
| |
| |-
| |
| !style="background: #ff8c00" width="100"|Image
| |
| !style="background: #ff8c00"|Name
| |
| !style="background: #ff8c00"|Description
| |
| |-
| |
| | align="center"|[[File:Ballbear.PNG|64x64px]]
| |
| |[[Bear (enemy)|Bear]]
| |
| |Lorem ipsum dolor sit amet, consectetur adipiscing elit, sed do eiusmod tempor incididunt ut labore et dolore magna aliqua. Ut enim ad minim veniam, quis nostrud exercitation ullamco laboris nisi ut aliquip ex ea commodo consequat. Duis aute irure dolor in reprehenderit in voluptate velit esse cillum dolore eu fugiat nulla pariatur. Excepteur sint occaecat cupidatat non proident, sunt in culpa qui officia deserunt mollit anim id est laborum.
| |
| |-
| |
| | align="center"|[[File:Biroron.png|64x64px]]
| |
| |[[Jack-in-the-Box (enemy)|Jack-in-the-Box]]
| |
| |
| |
| |-
| |
| | align="center"|[[File:Kiddokatto.png|64x64px]]
| |
| |[[Kiddokatto]]
| |
| |
| |
| |-
| |
| | align="center"|[[File:Neijī.png|64x64px]]
| |
| |[[Neijī]]
| |
| |
| |
| |-
| |
| | align="center"|[[File:SML2 Artwork - Satellite.png|64x64px]]
| |
| |[[Satellite]]
| |
| |
| |
| |-
| |
| | align="center"|[[File:Tatenoko.png|64x64px]]
| |
| |[[Tatenoko]]
| |
| |
| |
| |-
| |
| | align="center"|[[File:Wakiri sml2.png|64x64px]]
| |
| |[[Wakiri]]
| |
| |
| |
| |-
| |
| !align="center"|[[File:MarioVsWario-ThreeLittlePigheads.png|100px]]
| |
| !style="text-align:left"|[[Three Little Pigheads]] (Boss)
| |
| !style="text-align:left"|
| |
| |}
| |
| | |
| ===Turtle Zone enemies===
| |
| {| class="wikitable sortable" border=1 cellpadding=3 style=border-collapse:collapse;width:100%
| |
| |-
| |
| !style="background: #ff8c00" width="100"|Image
| |
| !style="background: #ff8c00"|Name
| |
| !style="background: #ff8c00"|Description
| |
| |-
| |
| | align="center"|[[File:Aqua kuribō.png|64x64px]]
| |
| |[[Aqua Kuribō]]
| |
| |Lorem ipsum dolor sit amet, consectetur adipiscing elit, sed do eiusmod tempor incididunt ut labore et dolore magna aliqua. Ut enim ad minim veniam, quis nostrud exercitation ullamco laboris nisi ut aliquip ex ea commodo consequat. Duis aute irure dolor in reprehenderit in voluptate velit esse cillum dolore eu fugiat nulla pariatur. Excepteur sint occaecat cupidatat non proident, sunt in culpa qui officia deserunt mollit anim id est laborum.
| |
| |-
| |
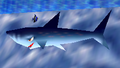
| | align="center"|[[File:Jaw SML2.png|64x64px]]
| |
| |[[Shark]]
| |
| |
| |
| |-
| |
| | align="center"|[[File:SML2 Artwork - Spiny Cheep Cheep.png|64x64px]]
| |
| |[[Spiny Cheep Cheep]]
| |
| |
| |
| |-
| |
| !align="center"|[[File:KCDeluxe-SML2Octopus.png|100px]]
| |
| !style="text-align:left"|[[Octopus (Super Mario Land 2: 6 Golden Coins)|Octopus]] (Boss)
| |
| !style="text-align:left"|
| |
| |}
| |
| | |
| ===Castle enemies===
| |
| {| class="wikitable sortable" border=1 cellpadding=3 style=border-collapse:collapse;width:100%
| |
| |-
| |
| !style="background: #ff8c00" width="100"|Image
| |
| !style="background: #ff8c00"|Name
| |
| !style="background: #ff8c00"|Description
| |
| |-
| |
| | align="center"|[[File:Piranha_Plant_Statues.PNG|64x64px]]
| |
| |[[Fire Pakkun Zō]]
| |
| |Lorem ipsum dolor sit amet, consectetur adipiscing elit, sed do eiusmod tempor incididunt ut labore et dolore magna aliqua. Ut enim ad minim veniam, quis nostrud exercitation ullamco laboris nisi ut aliquip ex ea commodo consequat. Duis aute irure dolor in reprehenderit in voluptate velit esse cillum dolore eu fugiat nulla pariatur. Excepteur sint occaecat cupidatat non proident, sunt in culpa qui officia deserunt mollit anim id est laborum.
| |
| |-
| |
| | align="center"|[[File:Floating face.png|64x64px]]
| |
| |[[Floating Face]]
| |
| |
| |
| |-
| |
| | align="center"|[[File:Genkottsu.png|64x64px]]
| |
| |[[Genkottsu]]
| |
| |
| |
| |-
| |
| | align="center"|[[File:SML2 Artwork - Karamenbo.png|64x64px]]
| |
| |[[Karamenbō]]
| |
| |
| |
| |-
| |
| | align="center"|[[File:SML2-SpikedBallsprite.png|64x64px]]
| |
| |[[Spiked Ball]]
| |
| |
| |
| |-
| |
| !align="center"|[[File:SML2 - Wario Artwork.png|100px]]
| |
| !style="text-align:left"|[[Wario]] (Final Boss)
| |
| !style="text-align:left"|
| |
| |}
| |