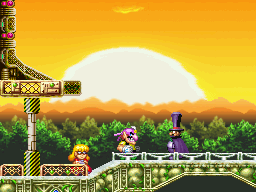
| Wario: Master of Disguise episode | |||
|---|---|---|---|
| Special Episode Part 5 | |||

| |||
| Location | Allergia Gardens | ||
| Boss | None | ||
| Key items | |||
| Guise/Mastery Gems | None | ||
| |||
| << List of episodes >> | |||
- “On my way back to my dimension, I dropped my best gown and my glasses. They're somewhere in this garden. I'll give a gift to whoever finds it first!”
- —Terrormisu, Wario: Master of Disguise
Special Episode Part 5 is the last of the five extra episodes unlocked after completing the final main story episode of Wario: Master of Disguise. It takes place in Allergia Gardens. The objective, as is the case with the other special episodes, is to obtain three treasures in order within a time limit.
PlotEdit
Terrormisu meets Wario and Count Cannoli at the entrance to Allergia Gardens and asks them to find some accessories she dropped on the way back to her home dimension. She promises to give "the most beautiful gem" from her dimension to whoever finds them. After Wario finds them, he brings them to Terrormisu, expecting the gem she promised. However, she reveals that when she said "most beautiful gem", she was not referring to a literal gem, but to herself. She wants him to go back to her dimension with her so that they can conquer it together. Wario opts to run away instead.
LayoutEdit
This episode has the same layout as Episode 10. All of the doors that were locked in Episode 10 are locked again, with the keys being found in the same places they were previously. Though all three keys are obtainable, only the Yellow Key and Red Key are needed to complete the episode. The first treasure is at the top-left corner of the room to the left of the green gear switch, where the Fishin' Hole Fishin' Pole was in Episode 10. The second treasure is on a floating platform in the starting area, where the Prince Redleg Pantaloon was in Episode 10. The player must have the Yellow Key and Red Key to obtain the third treasure, which is in an area accessed by using Dragon Wario to drop below the room to the left of where the Red Key is. The chest is where the Bluebird of Luckiness was in Episode 10.
EnemiesEdit
| Sprite | Name | Count |
|---|---|---|
| Sir Worth-A-Lot | 23 | |
| Sir Steal-A-Lot | 4 | |
| Sir Hop-A-Lot | 7 | |
| Amphibigun | 6 | |
| Scare-Oh! | 2 | |
| Ratfael | 8 |

