User:Nintendo101/flowerpot: Difference between revisions
Nintendo101 (talk | contribs) |
Nintendo101 (talk | contribs) |
||
| (44 intermediate revisions by 4 users not shown) | |||
| Line 1: | Line 1: | ||
{ | ==Enemies and obstacles== | ||
| | ===Enemies=== | ||
| | {|width=100% cellspacing=0 border=1 cellpadding=3 style="border-collapse:collapse;background:#FFFFFF" | ||
| | |-style="background:#FF2400;color:white;" | ||
| | !width=10%|Name | ||
}} | !Description | ||
!width=13%|Locations | |||
!width=6%|Spoils | |||
|- | |||
|align=center|[[File:Goomba Icon SMO.png|100x100px]]<br>[[Goomba]] {{chart icon|SMO-capture}} | |||
|Squat mushroom creatures that chase Mario when he is in their line of sight. Goombas are defeated when stomped. A captured Goomba can stack on top of another one to make a [[Goomba Tower]]. Control is shifted to whichever Goomba is on the bottom. A Goomba Tower can be used to reach high platforms and press [[Goomba button]]s. A captured Goomba also maintains stable footing on ice, and can receive Power Moons from [[Goombette]]s. Most Goombas are members of [[Bowser's Minions|Bowser's army]], but the ones in [[Goomba Woods]] are apparently unaffiliated. [[Yoofoe]] expels Goombas. | |||
|align=center|[[Cascade Kingdom]], [[Sand Kingdom]], [[Lake Kingdom]], [[Wooded Kingdom]], [[Cloud Kingdom]], [[Metro Kingdom]], [[Snow Kingdom]], [[Seaside Kingdom]], [[Luncheon Kingdom]], [[Bowser's Kingdom]], [[Mushroom Kingdom (Super Mario Odyssey)|Mushroom Kingdom]], [[Darker Side]] | |||
|align=center|{{chart icon|SMO-Coin}}×1 | |||
|- | |||
|align=center|[[File:Paragoomba Icon SMO.png|100x100px]]<br>[[Paragoomba]] {{chart icon|SMO-capture}} | |||
|Winged Goombas that fly back and forth in set paths. They are defeated when stomped. A captured Paragoomba can fly like a Parabones. | |||
|align=center|[[Cap Kingdom]], [[Wooded Kingdom]] | |||
|align=center|{{chart icon|SMO-Coin}}×1 | |||
|- | |||
|align=center|[[File:Mini Goomba Icon SMO.png|100x100px]]<br>[[Mini Goomba]] | |||
|Little Goombas. Like normal-sized ones, they charge towards Mario when near. Mini Goombas are usually in groups of eight. In story-related objectives, Mini Goombas appear in the overworld before normal Goombas. They otherwise occur underground in [[glowing spot]]s and inside [[crate]]s. They are defeated when stomped by Mario or struck by Cappy. | |||
|align=center|[[Cap Kingdom]], [[Cascade Kingdom]], [[Sand Kingdom]], [[Lake Kingdom]], [[Wooded Kingdom]], [[Lost Kingdom]], [[Metro Kingdom]], [[Seaside Kingdom]], [[Bowser's Kingdom]], [[Mushroom Kingdom (Super Mario Odyssey)|Mushroom Kingdom]] | |||
|align=center|{{chart icon|SMO-Coin}}×1 | |||
|- | |||
|align=center|[[File:Chain Chomp Icon SMO.png|100x100px]]<br>[[Chain Chomp]] {{chart icon|SMO-capture}} | |||
|Metal enemies with snapping jaws. Chain Chomps are fastened to the ground and lunge towards Mario when near. Jumping on one briefly stuns it, but does not inflict damage. Chain Chomps can only be defeated by a captured T-Rex. A captured Chain Chomp is similar to a {{wp|pullback motor}}. Pulling the Chain Chomp to the farthest extent it can and letting go sends it flying in the opposite direction. This can be used to destroy [[stone wall]]s, strike bull's-eyes, and unseal hidden areas. This action also forces Mario out of the Chain Chomp. | |||
|align=center|[[Cascade Kingdom]] | |||
|align=center|None | |||
|- | |||
|align=center|[[File:Big Chain Chomp Icon SMO.png|100x100px]]<br>[[Big Chain Chomp]] {{chart icon|SMO-capture}} | |||
|The Big Chain Chomp behaves identically to the normal-sized one. Striking a Chain Chomp with the captured Big Chain Chomp can trigger a chain reaction, where it is flung into another nearby Chain Chomp. | |||
|align=center|[[Cascade Kingdom]] | |||
|align=center|None | |||
|- | |||
|align=center|[[File:SMO Broode's Chain Chomp Capture.png|100x100px]]<br>[[Madame Broode|Broode's Chain Chomp]] {{chart icon|SMO-capture}} | |||
|[[Madame Broode]]'s pet, a golden [[Big Chain Chomp]] named Chain Chompikins. It snaps at Mario and pulls Madame Broode forward as it does. She also launches it like a {{wp|yo-yo}} to strike Mario. Capturing Broode's Chain Chomp and pulling it back launches it into the boss. This is the only way to damage her. | |||
|align=center|[[Cascade Kingdom]], [[Moon Kingdom]] | |||
|align=center|None | |||
|- | |||
|align=center|[[File:Burrbo Icon SMO.png|100x100px]]<br>[[Burrbo]] | |||
|Colorful chestnut creatures. They pop out of the ground when Mario draws near and lunge towards him. Burrbos damage Mario on contact, but are defeated when struck by Cappy. They usually occur in groups, and endlessly emerge from the earth if Mario is near. | |||
|align=center|[[Cascade Kingdom]], [[Metro Kingdom]], [[Seaside Kingdom]], [[Bowser's Kingdom]], [[Mushroom Kingdom (Super Mario Odyssey)|Mushroom Kingdom]], [[Dark Side]], [[Darker Side]] | |||
|align=center|{{chart icon|SMO-Coin}}×1 | |||
|- | |||
|align=center|[[File:SMO Artwork Burrbo (Crumbleden).png|100x100px]]<br>Burrbo ([[Ruined Kingdom|Crumbleden]]) | |||
|These Burrbos are embedded into the [[Ruined Dragon]]'s head. They emerge to defend him from Mario. | |||
|align=center|[[Ruined Kingdom]], [[Mushroom Kingdom (Super Mario Odyssey)|Mushroom Kingdom]] | |||
|align=center|{{chart icon|SMO-Coin}}×1 | |||
|- | |||
|align=center|[[File:SMO Artwork T-Rex.png|100x100px]]<br>[[T-Rex]] {{chart icon|SMO-capture}} | |||
|Powerful [[dinosaur]]s that have lived into the modern era. Most T-Rexes are encountered sleeping. This is a harmless state, in which Mario can stand on one's body with no ill effect. However, some T-Rexes are awake. Drawing near a patrolling T-Rex causes it to stop and sniff the ground. If Mario does not move away or hide, it turns to face him, roars, and gives chase with snapping jaws. Running into a wall or large obstacle temporarily dazes it and leaves it open to being captured. A captured T-Rex is indestructible and launches other enemies on contact. Holding {{button|switch|Y}} makes the T-Rex dash, and {{button|switch|B}} makes it bite. Unlike all other captures, Cappy can only hold onto a T-Rex for thirty seconds due to its size. Releasing the capture and reclaiming it before the time runs out allows the player to circumvent this limitation. | |||
|align=center|[[Cascade Kingdom]], [[Wooded Kingdom]], [[Metro Kingdom]] | |||
|align=center|None | |||
|- | |||
|align=center|[[File:SMO 8bit Koopa Troopa.png|100x100px]]<br>[[Koopa Troopa|Koopa]] (Green) | |||
|Green-shelled turtle enemies only found in 2D areas. Stomping a Koopa makes it retract into its [[Koopa Shell|shell]], which can be used as a sliding projectile. Green Koopas walk off the sides of platforms. The Koopas that appear in 3D areas are harmless non-playable characters. | |||
|align=center|[[Cascade Kingdom]], [[Metro Kingdom]], [[Seaside Kingdom]], [[Ruined Kingdom]] | |||
|align=center|{{chart icon|SMO-ShellG}}×1 | |||
|- | |||
|align=center|[[File:SMO 8bit Koopa Troopa Red.png|100x100px]]<br>Koopa (Red) | |||
|Red-shelled Koopas turn around when they reach the edge of a platform. | |||
|align=center|[[Cloud Kingdom]], [[Bowser's Kingdom]] | |||
|align=center|{{chart icon|SMO-ShellR}}×1 | |||
|- | |||
|align=center|[[File:Bullet Bill Icon SMO.png|100x100px]]<br>[[Bullet Bill]] {{chart icon|SMO-capture}} | |||
|Missiles fired from [[Bill Blaster]]. Bullet Bills directly target Mario when he is in close proximity. Mario can lure Bullet Bills towards cages and [[block (Super Mario Odyssey)|blocks]] to destroy them. In 2D areas, Bullet Bills maintain straight trajectories. Within the [[Inverted Pyramid]], these Bullet Bills become 3D when they reach the end of the wall-bound 2D area. A captured Bullet Bill can be used to reach distant areas. Shaking the controller causes it to pickup speed, but it detonates sooner. [[Knucklotec|Knucklotec's Fist]]s function just like Bullet Bills when captured. | |||
|align=center|[[Sand Kingdom]], [[Wooded Kingdom]], [[Cloud Kingdom]], [[Metro Kingdom]], [[Moon Kingdom]], [[Mushroom Kingdom (Super Mario Odyssey)|Mushroom Kingdom]], [[Dark Side]] | |||
|align=center|{{chart icon|SMO-Coin}}×1 | |||
|- | |||
|align=center|[[File:Banzai Bill Icon SMO.png|100x100px]]<br>[[Banzai Bill]] {{chart icon|SMO-capture}} | |||
|Large missile. Banzai Bills slowly swerve off their initial trajectory to home-in on [[Mario]]. They are defeated when [[stomp]]ed. Capturing a Banzai Bill enables Mario to cross wide gaps and blast through obstacles with {{button|switch|Y}}. Shaking the controller causes it to accelerate. A captured Banzai Bill eventually flashes red and self-destructs, forcing Mario out of the capture. | |||
|align=center|[[Wooded Kingdom]], [[Snow Kingdom]], [[Moon Kingdom]], [[Dark Side]] | |||
|align=center|{{chart icon|SMO-Coin}}×6 | |||
|- | |||
|align=center|[[File:Pulse Beam SMO.jpg|100x100px]]<br>[[Pulse Beam]] | |||
|Spiked mechs that discharge shockwaves. Pulse Beams are inert by default, but they discharge when struck by Cappy or another Pulse Beam's shockwave, causing a circular {{wp|feedback|feedback loop}}. This can be used to clear obstacles, but makes an area more dangerous to traverse. Jumping on a Pulse Beam damages Mario. | |||
|align=center|[[Sand Kingdom]], [[Seaside Kingdom]], [[Mushroom Kingdom (Super Mario Odyssey)|Mushroom Kingdom]], [[Darker Side]] | |||
|align=center|{{chart icon|cross}} | |||
|- | |||
|align=center|[[File:Chincho Icon SMO.png|100x100px]]<br>[[Chincho]] | |||
|Undead [[Tostarenan]]s encountered at night and in dimly lit areas. Chinchos emerge from the ground and pursue Mario on sight. If left unattacked, they retreat back into the ground. Failing [[treasure chest]] puzzles causes Chincos to appear. Tossing Cappy at a Chincho briefly stuns it, but it can only be defeated when a stomp. The [[Jaxi]] can defeat hoards of them instantly. | |||
|align=center|[[Sand Kingdom]], [[Wooded Kingdom]], [[Seaside Kingdom]], [[Ruined Kingdom]], [[Mushroom Kingdom (Super Mario Odyssey)|Mushroom Kingdom]] | |||
|align=center|{{chart icon|SMO-Coin}}×1 | |||
|- | |||
|align=center|[[File:Cheep Cheep Icon SMO.png|100x100px]]<br>[[Cheep Cheep]] {{chart icon|SMO-capture}} | |||
|Pudgy red fish. Some swim in circles, while others swim back and forth in set paths. Cheep Cheeps damage Mario on contact. They can be defeated with a ground pound or jump. A captured Cheep Cheep swims faster and is more versatile underwater than Mario, but it flails weakly if brought to land. [[Lakitu]]s fish for Cheep Cheeps, the largest of which hold [[Power Moon]]s. There is a [[Lochlady]] who finds Cheep Cheeps adorable. | |||
|align=center|[[Sand Kingdom]], [[Lake Kingdom]], [[Seaside Kingdom]] | |||
|align=center|{{chart icon|SMO-Coin}}×1<br>{{chart icon|SMO-Moon}}×1 | |||
|- | |||
|align=center|[[File:SMO Artwork Snow Cheep Cheep.png|100x100px]]<br>[[Cheep Cheep|Snow Cheep Cheep]] {{chart icon|SMO-capture}} | |||
|Purple Cheep Cheeps adapted to live in [[freezing water]]. Capturing one is the only way Mario can safely swim in it. They otherwise behave like normal Cheep Cheeps. | |||
|align=center|[[Snow Kingdom]] | |||
|align=center|{{chart icon|SMO-Coin}}×1 | |||
|- | |||
|align=center|[[File:SMO Artwork Komboos.png|100x100px]]<br>[[Komboo]] | |||
|Underwater kelp creatures that rise from the floor of waterbodies. They pursue Mario when he is near. Though defeated when struck by Cappy, Komboos are highly cohesive in most areas and endlessly emerge from the ground, making it easy to be overwhelmed. | |||
|align=center|[[Lake Kingdom]], [[Seaside Kingdom]] | |||
|align=center|{{chart icon|SMO-Coin}}×1 | |||
|- | |||
|align=center|[[File:Poison Piranha Plant Icon SMO.png|100x100px]]<br>[[Poison Piranha Plant]] {{chart icon|SMO-capture}} | |||
|[[Piranha Plant]]s that spit poison. Their heads flash purple before firing. The shot poison pools into puddles that makes the immediate area hazardous. Stomping on a Poison Piranha Plant defeats it. One traps Cappy in its mouth if he is thrown at it. Knocking a [[Rock (Super Mario series)|rock]] into a Poison Piranha Plant's mouth beforehand is the only way to capture it. While captured, it can spit poison in any 360° radius from a fixed position. | |||
|align=center|[[Wooded Kingdom]], [[Metro Kingdom]], [[Dark Side]] | |||
|align=center|{{chart icon|SMO-Coin}}×1 | |||
|- | |||
|align=center|[[File:Big Poison Piranha Plant Icon SMO.png|100x100px]]<br>[[Big Poison Piranha Plant]] | |||
|[[Big Piranha Plant]]s the spit [[Poison (obstacle)|poison]]. The poison pools on the nearby earth like a puddle, making the immediate area more hazardous. [[Cappy]] clears the poisons when tossed. Throwing him directly at a Big Poison Piranha Plant traps him in its mouth, but weighs its head down, leaving it vulnerable to being [[stomp]]ed. | |||
|align=center|[[Wooded Kingdom]], [[Metro Kingdom]], [[Dark Side]] | |||
|align=center|{{chart icon|SMO-Coin}}×6<br>{{chart icon|SMO-Moon}}×1 | |||
|- | |||
|align=center|[[File:Fire Piranha Plant Icon SMO.png|100x100px]]<br>[[Fire Piranha Plant]] {{chart icon|SMO-capture}} | |||
|Carnivorous plants that spit fireballs. Their heads flash orange before firing. A Fire Piranha Plant is defeated when stomped, or when kicked with Cappy trapped in its mouth. Fire Piranha Plants automatically engulf Cappy when he makes contact, and this prevents them from being captured. It only becomes capturable when a [[Rock (Super Mario series)|rock]] is knocked into its mouth first. A captured Fire Piranha Plant spits fireballs in a 360° radius from a fixed position. The fireballs can defeat enemies and light lanterns. | |||
|align=center|[[Lost Kingdom]], [[Metro Kingdom]], [[Luncheon Kingdom]] | |||
|align=center|{{chart icon|SMO-Coin}}×1 | |||
|- | |||
|align=center|[[File:SMO Artwork Uproot.png|100x100px]][[File:Uproot Icon SMO.png|100x100px]]<br>[[Uproot]] {{chart icon|SMO-capture}} | |||
|Bulbs that walk on a pair of extendable feet-like stalks. Uproots emerge from [[Senobi Generate Point|holes of soil]] with flowerpots covering their bodies. One directs itself towards Mario when he is near, extending themselves into the air to drop onto him. Striking an Uproot with Cappy breaks the pot and leaves it open to being stomped or captured. A captured Uproot extends its stalks when {{button|switch|B}} is held, and can walk around as if on stilts. Letting go of {{button|switch|B}} makes the stalks rapidly recede and the Uproot hop. A captured Uproot can reach tall platforms, break Brick Blocks, and shift [[movable cover]]s. However, the extended stalks are part of the captured Uproot's [[MarioWiki:Glossary#Hitbox|hitbox]], so Mario can be hurt by enemies and projectiles beneath the body. Captured Uproots are necessary in the fight against [[Torkdrift]]. | |||
|align=center|[[Wooded Kingdom]], [[Seaside Kingdom]], [[Mushroom Kingdom (Super Mario Odyssey)|Mushroom Kingdom]], [[Darker Side]] | |||
|align=center|{{chart icon|SMO-Coin}}×1 | |||
|- | |||
|align=center|[[File:Fire Bro Icon SMO.png|100x100px]]<br>[[Fire Bro]] {{chart icon|SMO-capture}} | |||
|Helmeted Koopas that toss fireballs. They otherwise behave like Hammer Bros. Shaking the controller as a captured Fire Bro makes it toss a [[fireball]] that can light [[lantern]]s and defeat enemies. A captured Fire Bro also reaches greater heights than Mario when it jumps. | |||
|align=center|[[Wooded Kingdom]], [[Luncheon Kingdom]] | |||
|align=center|{{chart icon|SMO-Coin}}×1 | |||
|- | |||
|align=center|[[File:Hammer Bro Icon SMO.png|100x100px]]<br>[[Hammer Bro]] {{chart icon|SMO-capture}} | |||
|Helmeted Koopas that toss [[hammer]]s and leap across platforms erratically. Hammer Bros are defeated when stomped. A captured Hammer Bro can throw hammers to defeat enemies and break [[Cheese|cheese rock]]s. Hammer Bros in the Luncheon Kingdom toss [[frying pan]]s instead of hammers and wear chef hats. | |||
|align=center|[[Cloud Kingdom]], [[Metro Kingdom]], [[Luncheon Kingdom]], [[Moon Kingdom]], [[Dark Side]] | |||
|align=center|{{chart icon|SMO-Coin}}×1 | |||
|- | |||
|align=center|[[File:Sherm Icon SMO.png|100x100px]]<br>[[Sherm]] {{chart icon|SMO-capture}} | |||
|[[Tank]] enemies that fire damaging bullets. Most wear top hats similar to those of {{wp|Uncle Sam}}. Knocking it away leaves Sherms open to being captured or ground-pounded. A captured Sherm aims its cannon by shifting {{button|switch|rightstick}} and fires with {{button|switch|Y}}. The bullets can defeat enemies, empty blocks, break cages, and destroy rock walls. Maneuvering the Sherm emulates {{wp|tank controls}}. Mario can only damage [[Mechawiggler]]s as a captured Sherm. | |||
|align=center|[[Wooded Kingdom]], [[Metro Kingdom]], [[Moon Kingdom]], [[Mushroom Kingdom (Super Mario Odyssey)|Mushroom Kingdom]], [[Dark Side]] | |||
|align=center|{{chart icon|SMO-Coin}}×1 | |||
|- | |||
|align=center|[[File:Coin Coffer Icon SMO.png|100x100px]]<br>[[Coin Coffer]] {{chart icon|SMO-capture}} | |||
|Purse-like creatures filled with coins. Coin Coffers are nonconfrontational and usually invisible. One becomes exposed when it is bumped into. Jumping on a Coin Coffer makes it spit out one coin, and jumping on it sequentially makes it spit out as many as eight before being defeated. Ground-pounding one makes it release eight all at once. A captured Coin Coffer can fire coins as projectiles, but this depletes Mario's own coin count. Shaking the controller makes it rapidly fire coins in 360°. | |||
|align=center|[[Sand Kingdom]], [[Wooded Kingdom]] | |||
|align=center|{{chart icon|SMO-Coin}}×8 | |||
|- | |||
|align=center|[[File:Fuzzy Icon SMO.png|100x100px]]<br>[[Fuzzy]] | |||
|Prickly creatures that move back and forth along dotted [[track]]s. In some areas, these tracks bring Fuzzies from 2D areas into 3D ones. Fuzzies are usually found in groups. They damage Mario on contact. | |||
|align=center|[[Wooded Kingdom]], [[Cloud Kingdom]], [[Lost Kingdom]], [[Metro Kingdom]], [[Moon Kingdom]], [[Mushroom Kingdom (Super Mario Odyssey)|Mushroom Kingdom]], [[Darker Side]] | |||
|align=center|{{chart icon|cross}} | |||
|- | |||
|align=center|[[File:Yoofoe Icon SMO.png|100x100px]]<br>[[Yoofoe]] | |||
|Mysterious flying objects that appear in kingdoms once the regional boss has been defeated. A Yoofoe hovers above ground with spiked bars spinning around its body. It drops [[Goomba]]s and [[Spike Ball|spiked ball]]s from the hatch on its underside. Capturing a Goomba and forming a [[Goomba Tower|tower]] allows Mario to reach its damageable head. It takes two strikes to defeat. | |||
|align=center|[[Wooded Kingdom]], [[Bowser's Kingdom]], [[Darker Side]] | |||
|align=center|{{chart icon|SMO-Moon}}×1<br>{{chart icon|SMO-HeartL}}×1 | |||
|- | |||
|align=center|[[File:Klepto Icon SMO.png|100x100px]]<br>[[Klepto]] | |||
|A condor that steals hats. Klepto kidnaps Cappy when encountered, depriving Mario of his abilities. It flies away from Mario when he draws near, but periodically stops to roost on a [[Ruin|Rising Stone Pillar]]. Mario must ground-pound it to knock Klepto out and save Cappy. | |||
|align=center|[[Lost Kingdom]] | |||
|align=center|{{chart icon|SMO-Cappy}}×1 | |||
|- | |||
|align=center|[[File:Trapeetle Icon SMO.png|100x100px]]<br>[[Trapeetle]] | |||
|Iridescent beetles. They emerge from little holes in the ground and walk towards Mario with grasping hands. Trapeetles are largely impervious; the spike on one's abdomen damages Mario and prevents it from being stomped. One grabs onto Cappy if he is tossed at it and uses him to launch itself into Mario, exploding on contact. This can be manipulated to make Trapeetles destroy [[Block (Super Mario Odyssey)|block]]s. | |||
|align=center|[[Lost Kingdom]] | |||
|align=center|None | |||
|- | |||
|align=center|[[File:Tropical Wiggler Icon SMO.png|100x100px]]<br>[[Tropical Wiggler]] {{chart icon|SMO-capture}} | |||
|Concertinaing [[Wiggler]]s in tulip hats. They move in set paths, sometimes stretching over disconnected platforms. The spikes on their body segments damage Mario on contact. Knocking the hat off of one leaves it open to being captured. Holding {{button|switch|y}} and moving {{button|switch|leftstick}} as a captured Tropical Wiggler stretches its body like an {{wp|accordian}}. If the first body segment is on solid ground, letting go of {{button|switch|y}} propels the rest of the body towards it. The reverse is true if over empty space. A Tropical Wiggler's body can destroy [[Brick Block]]s and reach areas otherwise too distant for Mario. | |||
|align=center|[[Lost Kingdom]], [[Moon Kingdom]] | |||
|align=center|None | |||
|- | |||
|align=center|[[File:Urban Stingby Icon SMO.png|100x100px]]<br>[[Urban Stingby]] | |||
|Mosquito-like [[Stingby|Stingbies]]. They often occur in groups, slowly flying in circles slightly above ground. When Mario is near, an Urban Stingby locks onto and rapidly launches at him with a straight trajectory. It can defeat other enemies in their path, and explodes upon colliding with a wall or obstacle. Urban Stingbies are defeated when stomped or struck by Cappy. | |||
|align=center|[[Metro Kingdom]], [[Darker Side]] | |||
|align=center|{{chart icon|SMO-Coin}}×1 | |||
|- | |||
|align=center|[[File:Urban Stingby Larva Icon SMO.png|100x100px]]<br>[[Urban Stingby|Urban Stingby Larva]] | |||
|Larval Urban Stingbies sometimes occur in place of adults. They rapidly metamorphosize when Mario is in proximity. The larvae are otherwise nondamaging and slow. They can be knocked away with Cappy, a stomp, or a [[kick]]. | |||
|align=center|[[Metro Kingdom]] | |||
|align=center|{{chart icon|SMO-Coin}}×1 | |||
|- | |||
|align=center|[[File:SMO 8bit Donkey Kong.png|100x100px]]<br>[[Donkey Kong]] | |||
|A great ape that tosses projectile [[barrel]]s down [[girder]]s. He first appears in the final 2D section of the [[A Traditional Festival!|New Donk City Festival]], an area similar to [[25m]]. Donkey Kong is defeated when all four of the [[? Block]]s he is on are struck. Donkey Kong kidnapped [[Pauline|Mayor Pauline]] [[Donkey Kong (game)|many years ago]], something she reflects on during "[[List of Power Moons in the Metro Kingdom|A Request from the Mayor]]". | |||
|align=center|[[Metro Kingdom]], [[Darker Side]] | |||
|align=center|None | |||
|- | |||
|align=center|[[File:SMO Artwork Bitefrost.png|100x100px]]<br>[[Bitefrost]] | |||
|Icy predators that hide underground and snake their way between raised earth. A silhouette of their face appears below the surface and can be tracked. One rises from the earth and snaps its jaw shut if Mario is standing above its silhouette. Only the bite damages Mario; a Bitefrost can otherwise be stood on like a platform. The ones in the Luncheon Kingdom appear pink from having embedded their bodies with salt instead of snow. | |||
|align=center|[[Snow Kingdom]], [[Luncheon Kingdom]] | |||
|align=center|{{chart icon|cross}} | |||
|- | |||
|align=center|[[File:Ty-Foo Icon SMO.png|100x100px]]<br>[[Ty-foo]] {{chart icon|SMO-capture}} | |||
|Giant [[Foo]]-like enemies that blow strong [[wind]]s at consistent intervals. The gusts blow enemies, items, Cappy, and Mario himself off of platforms. There are hidden areas in the Snow Kingdom where Ty-foos blow wooden blocks along stretches of ice that can be used as platforms. A captured Ty-foo can blow wind itself with {{button|switch|Y}} and safely float above hazards. Shaking the controller strengthens the power of the wind. | |||
|align=center|[[Cascade Kingdom]], [[Snow Kingdom]] | |||
|align=center|{{chart icon|cross}} | |||
|- | |||
|align=center|[[File:Gushen Icon SMO.png|100x100px]]<br>[[Gushen]] {{chart icon|SMO-capture}} | |||
|Small octopuses enveloped in water balls of their own making. Gushens fire projectile streams of water when Mario is near, depleting their reserves. A captured Gushen can use the stream as a projectile to hit distant enemies and objects by pressing {{button|switch|Y}}. This also propels it forward at a great speed. Pressing {{button|switch|B}} brings the Gushen into the air. Spraying water reduces the size of the ball, and ultimately leaves the Gushen sickly and weak. Touching a greater body of water restores the water ball. | |||
|align=center|[[Sand Kingdom]], [[Seaside Kingdom]], [[Mushroom Kingdom (Super Mario Odyssey)|Mushroom Kingdom]] | |||
|align=center|{{chart icon|SMO-Coin}}×1 | |||
|- | |||
|align=center|[[File:Maw-Ray Icon SMO.png|100x100px]]<br>[[Maw-Ray]] | |||
|Giant {{wp|moray eel}} enemies that dwell in underwater caves. They quickly lunge towards Mario when he is near. | |||
|align=center|[[Seaside Kingdom]], [[Mushroom Kingdom (Super Mario Odyssey)|Mushroom Kingdom]] | |||
|align=center|{{chart icon|cross}} | |||
|- | |||
|align=center|[[File:Spiny Icon SMO.png|100x100px]]<br>[[Spiny]] | |||
|Squat, spiked Koopas. They chase Mario when he is near. Spinies are briefly stunned and shoved backwards when struck by Cappy, and they damage Mario when jumped on. Spinies are only defeated when knocked off the edge of a platform or when struck by a thrown item, like a [[Seed (Super Mario Odyssey)|seed]]. | |||
|align=center|[[Cap Kingdom]], [[Cloud Kingdom]], [[Snow Kingdom]], [[Seaside Kingdom]], [[Luncheon Kingdom]], [[Bowser's Kingdom]] | |||
|align=center|{{chart icon|SMO-Coin}}×1 | |||
|- | |||
|align=center|[[File:Lava Bubble Icon SMO.png|100x100px]]<br>[[Lava Bubble]] {{chart icon|SMO-capture}} | |||
|Incandescent drops of [[lava]]. Contact burns Mario. They leap vertically from lava and through [[grated platform|Wire Net Platform]]s. A captured Lava Bubble can traverse through lava and use [[lava cannon]]s. Shaking the controller causes it to horizontally leap through the air, twirling. Making contact with solid ground makes the Lava Bubble disappear and forces Mario out of the capture. A captured Lava Bubble can also light lanterns and is used during the battle with [[Cookatiel]]. | |||
|align=center|[[Cloud Kingdom]], [[Lost Kingdom]], [[Luncheon Kingdom]], [[Mushroom Kingdom (Super Mario Odyssey)|Mushroom Kingdom]], [[Darker Side]] | |||
|align=center|None | |||
|- | |||
|align=center|[[File:Magmato Icon SMO.png|100x100px]]<br>[[Magmato]] | |||
|Rolling tomato enemies that home-in on Mario. Striking a Magmato causes it to fall apart into a puddle of molten pulp. A captured [[Lava Bubble]] can swim in these puddles, enabling it to cross large stretches of terrain it normally could not. The puddle otherwise damages Mario on contact. | |||
|align=center|[[Luncheon Kingdom]], [[Darker Side]] | |||
|align=center|{{chart icon|SMO-Coin}}×1 | |||
|- | |||
|align=center|[[File:Pokio Icon SMO.png|100x100px]]<br>[[Pokio]] {{chart icon|SMO-capture}} | |||
|{{wp|Green pheasant}} enemies with protractible beaks. Mario is damaged if struck by one's beak. Pokios can be lured to [[Coin Block]]s and jab at them, and can shatter rocks with one hit. Pokios wear spiked {{wp|Kasa (hat)|jingasa}} that damage Mario if he tries to jump on them. Hitting one with Cappy knocks the jingasa away, leaving it open to being stomped or captured. A Pkio will reappear on a flat stone in an area where they have all been defeated after a few seconds. A captured Pokio can use its beak to strike enemies, [[block]]s, [[firework bomb]]s, and flames. Jabbing into a [[soft wall]] and flicking the {{button|switch|LeftStick}} launches it upward, allowing Mario to access areas only connected by vertical plaster walls. Shaking the controller makes a captured Pokio [[spin]]. Performing this in the air delays its fall. | |||
|align=center|[[Seaside Kingdom]], [[Bowser's Kingdom]], [[Darker Side]] | |||
|align=center|{{chart icon|SMO-Coin}}×1 | |||
|- | |||
|align=center|[[File:Stairface Ogre Icon SMO.png|100x100px]]<br>[[Stairface Ogre]] | |||
|Large {{wp|oni}}-like beings that carry mallets. Stairface Ogres actively pursue Mario but they cannot move perpendicularly, only side-to-side or up-and-down. If in front of a Stairface Ogre, it swings its mallet down to crush him. Contact instantly defeats Mario. If avoided, the mallet can be climbed like a staircase to reach the top of the Stairface Ogre's head, now exposed. Ground-pounding it defeats the enemy. Stairface Ogres are made of wood and can be ascended as a captured Pokio. Jabbing the glowing hole on its forehead also defeats it. | |||
|align=center|[[Metro Kingdom]], [[Bowser's Kingdom]] | |||
|align=center|{{chart icon|SMO-Coin}}×6 | |||
|- | |||
|align=center|[[File:Astro-Lanceur Icon SMO.png|100x100px]]<br>[[Astro-Lanceur]] | |||
|Octopus enemies found on the [[moon]]. Astro-Lanceurs float above the surface and fire projectile shells from their siphons. [[Ground Pound|Ground-pounding]] the starburst-shaped symbol on one's helmet defeats it. Astro-Lanceurs have an implicit relationship with [[Mollusque-Lanceur]]. | |||
|align=center|[[Moon Kingdom]] | |||
|align=center|{{chart icon|SMO-Coin}}×8 | |||
|- | |||
|align=center|[[File:Moonsnake Icon SMO.png|100x100px]]<br>[[Moonsnake]] | |||
|Fixed, geometric axes with arms of rolling rocks. Though moving together as if single bars, the rocks are disconnected from one another, hugging the surface of terrain. The arms of some Moonsnakes are small, while others are long and have a radius that nearly covers the entire area. Both the axis and rocks of a Moonsnake damage Mario when touched. Despite their rocky appearance, Moonsnakes are {{wp|Basal (phylogenetics)|basal}} extraterrestrial lifeforms. | |||
|align=center|[[Seaside Kingdom]], [[Moon Kingdom]], [[Dark Side]], [[Darker Side]] | |||
|align=center|{{chart icon|cross}} | |||
|- | |||
|align=center|[[File:Parabones Icon SMO.png|100x100px]]<br>[[Parabones]] {{chart icon|SMO-capture}} | |||
|Winged [[Dry Bones]]. They pursue Mario on sight, but they cannot ascend or descend, so they can easily be obstructed. Parabones crumble into a pile of bones when stomped, but reassemble after a few seconds. They are only defeated if they crumble above a bottomless [[pit]] or lava. A captured Parabones can fly. Rapidly pressing {{button|switch|A}} makes it flap its wings. | |||
|align=center|[[Bowser's Kingdom]], [[Moon Kingdom]] | |||
|align=center|None | |||
|- | |||
|align=center|[[File:Chargin' Chuck Icon SMO.png|100x100px]]<br>[[Chargin' Chuck]] {{chart icon|SMO-capture}} | |||
|Burly [[Koopa (species)|Koopa]]s in football gear. Chargin' Chucks remain still until Mario is near, who they try to charge through. Knocking-off their helmet leaves them vulnerable to a stomp. A captured Chargin' Chuck can bash through obstacles and enemies without flinching or receiving damage. | |||
|align=center|[[Ruined Kingdom]], [[Moon Kingdom]] | |||
|align=center|{{chart icon|SMO-Coin}}×3 | |||
|} | |||
===Obstacles=== | |||
{|width=100% cellspacing=0 border=1 cellpadding=3 style="border-collapse:collapse;background:#FFFFFF" | |||
|-style="background:#FF2400;color:white;" | |||
!width=10%|Name | |||
!Description | |||
!width=19%|Locations | |||
|- | |||
|- | |||
|align=center|[[File:SMO Asset Model Banzai Bill Cannon.png|100x100px]]<br>[[Banzai Bill Cannon]] | |||
|Giant cannons that shoot [[Banzai Bill]]s. Within the Wooded Kingdom, there is a Banzai Bill Cannon in a subarea that is triggered when [[Mario]] collects a nearby [[key]]. | |||
|align=center|[[Wooded Kingdom]], [[Snow Kingdom]], [[Moon Kingdom]], [[Dark Side]] | |||
|- | |||
|align=center|[[File:SMO 8bit Barrel.png|100x100px]]<br>[[Barrel]] | |||
|Rolling projectiles tossed down [[girder]]s by [[Donkey Kong]]. Contact damages Mario. | |||
|align=center|[[Metro Kingdom]], [[Darker Side]] | |||
|- | |||
|align=center|[[File:SMO Asset Model Bill Blaster.png|100x100px]]<br>[[Bill Blaster]] | |||
|Cannons that shoot [[Bullet Bill]]s. | |||
|align=center|[[Sand Kingdom]], [[Wooded Kingdom]], [[Cloud Kingdom]], [[Metro Kingdom]], [[Moon Kingdom]], [[Mushroom Kingdom (Super Mario Odyssey)|Mushroom Kingdom]], [[Dark Side]] | |||
|- | |||
|align=center|[[File:SMO Screenshot Boulder (Obstacle).jpg|100x100px]]<br>[[Boulder]] / [[Shell (Super Mario Odyssey)|Shell]] / [[Pepper (object)|Pepper]] | |||
|Rolling rocks that damage Mario on contact. They break when they collide with a wall. [[Bowser]] and [[Chargin' Chuck]]s can break them while [[capture]]d. Some boulders release a [[Heart (item)|heart]] when broken. Equivalent obstacles appear in some kingdoms that match the regional topography, such as shells and peppers. | |||
|align=center|[[Cloud Kingdom]], [[Seaside Kingdom]], [[Luncheon Kingdom]], [[Bowser's Kingdom]], [[Moon Kingdom]], [[Darker Side]] | |||
|- | |||
|align=center|[[File:SMO Screenshot Freezing Water.jpg|100x100px]]<br>[[Freezing water]] | |||
|[[Water]] so frigid that it gradually depletes Mario's [[Health Meter|life meter]] if he tries to swim through it. The boarder of the screen gradually becomes encroached with ice the longer Mario stays in the water, obscuring the player's view. A captured [[Cheep Cheep|Snow Cheep Cheep]] can swim in freezing water without being damaged. | |||
|align=center|[[Snow Kingdom]] | |||
|- | |||
|align=center|[[File:SMO Screenshot Ice.jpg|100x100px]]<br>Ice | |||
|Ice reduces Mario's traction and causes him to slide. A captured [[Goomba]] remains sure-footed on ice. | |||
|align=center|[[Sand Kingdom]], [[Snow Kingdom]] | |||
|- | |||
|align=center|[[File:SMO Screenshot Lava.jpg|100x100px]]<br>[[Lava]] | |||
|Molten rock. Direct contact burns Mario and makes him bounce into the air with his hands on his rear. A captured [[Lava Bubble]] can swim through lava. | |||
|align=center|[[Lost Kingdom]], [[Seaside Kingdom]], [[Luncheon Kingdom]], [[Moon Kingdom]], [[Darker Side]] | |||
|- | |||
|align=center style="background:#FFFFFF"|[[File:SMO Screenshot Lava Geyser (Moon Kingdom).jpg|100x100px]]<br>[[Lava Geyser]] | |||
|Lava Geysers rise and fall in set intervals that can be timed. A rise is always proceeded by rapid bubbling on the lava's surface. In some areas, they rise through [[Grated platform|Wire Net Platform]]s. A captured Lava Bubble can utilize Lava Geysers as platforms that brings it to a higher area, similar to [[Sand Geyser]]s. | |||
|align=center|[[Luncheon Kingdom]], [[Moon Kingdom]], [[Darker Side]] | |||
|- | |||
|align=center|[[File:SMO 8bit Oil Drum.png|100x100px]]<br>[[Oil drum]] | |||
|Touching an oil drum damages Mario. They only appear in 2D areas. | |||
|align=center|[[Metro Kingdom]], [[Darker Side]] | |||
|- | |||
|align=center|[[File:SMO Screenshot Poison.jpg|100x100px]]<br>[[Poison (obstacle)|Poison]] | |||
|Touching poison immediately causes Mario to lose a life. The [[Jaxi]] can harmlessly run across it. In a subarea, poison moves in [[poison wave|waves]]. | |||
|align=center|[[Cap Kingdom]], [[Sand Kingdom]], [[Wooded Kingdom]], [[Lost Kingdom]], [[Metro Kingdom]], [[Snow Kingdom]], [[Bowser's Kingdom]] | |||
|- | |||
|align=center|[[File:SMO Screenshot Quicksand.jpg|100x100px]]<br>[[Quicksand]] | |||
|Mario rapidly sinks while on quicksand. [[Jump]]ing keeps him above the surface. In most areas, sinking all the way through quicksand causes Mario to lose a life, but there is a hidden area in [[Tostarena Ruins]] only accessible by sinking through the sand. [[Glydon]] is incapable of sinking through quicksand. | |||
|align=center|[[Sand Kingdom]] | |||
|- | |||
|align=center|[[File:SMO Screenshot Cannon.jpg|100x100px]]<br>[[Rotating defense mechanism]] | |||
|A [[cannon]] above the [[Wooded Kingdom#Secret Flower Field Entrance|Secret Flower Field Entrance]] that fires rolling [[cannonball]]s. Striking each of its panels as a captured [[Sherm]] destroys it. | |||
|align=center|[[Wooded Kingdom]] | |||
|- | |||
|align=center|[[File:Spike Trap SMO render.png|100x100px]]<br>[[Spike Trap]] | |||
|Spike Traps generally appear attached to terrain and shifting objects. Their spikes damage Mario on contact. Some Spike Traps protract their spikes in set intervals that can be timed. A captured [[Jizo]] can travel across beds of spikes without being damaged. | |||
|align=center|[[Lake Kingdom]], [[Metro Kingdom]], [[Bowser's Kingdom]] | |||
|- | |||
|align=center|[[File:SMO Screenshot Turret.jpg|100x100px]]<br>[[Turret]] | |||
|Embronzed cannons around [[Bowser's Castle]]. They perpetually launch [[firework bomb]]s that roll along the ground. These bombs can be knocked into breakable objects by a captured [[Pokio]]. Firework bombs otherwise damage Mario on contact. | |||
|align=center|[[Seaside Kingdom]], [[Bowser's Kingdom]] | |||
|- | |||
|align=center|[[File:Wind SMO.jpg|100x100px]]<br>[[Wind]] | |||
|Billows of wind push Mario or carry him into the air, depending on the orientation of its source. Tossing Cappy into a billow carries him a great distance, sometimes into an otherwise unreachable switch. [[Stump|Post]]s seal wind underground in the Snow Kingdom. It is otherwise expelled by [[Ty-foo]]s and [[Wind Blow Tower|blocky tower]]s in set increments. | |||
|align=center|[[Cascade Kingdom]], [[Snow Kingdom]], [[Darker Side]] | |||
|} | |||
The | ===Bosses=== | ||
[[File:SMO-scrn-Broodals.jpg|thumb|250px|The Broodals aboard their airship, approaching Mario in the Sand Kingdom.]] | |||
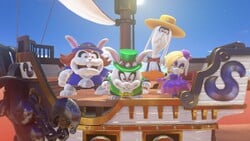
There are thirteen bosses in ''Super Mario Odyssey'', most of which release a [[Multi Moon]] upon defeat. The most recurring bosses are the [[Broodals]]. They are subordinates of the wedding planner Madame Broode and help carryout Bowser's wedding plans, often actively pilfering articles of interest on his behalf. They travel across the world on an [[airship]]. A battle against a Broodal emphasizes utilization of throwing moves with [[Cappy]]. He is needed to knock away projectiles, clear hazards, end attacks early, and make the boss open to being [[stomp]]ed. A subsequent battle with the same Broodal is always harder than the last. They are visually similar to the [[Koopalings]],<ref>{{cite|author=Sakai, Kazuya, kikai, Rachel Roberts, and Jenny Blenk, editors|date=2019|title=''[[The Art of Super Mario Odyssey]]''|format=First English Edition|location=Milwaukie|publisher=[[Dark Horse]]|page=73, 147}}</ref> and are narratively comparable to [[Bowser Jr.]] in ''[[Super Mario Galaxy]]'' and ''[[Super Mario Galaxy 2]]''. The fact that each of them physically recede into their hats during battle is a potential allusion to a {{wp|Hat-trick (magic trick)|magician's hat-trick}}. | |||
'''Large bosses'''<ref>{{cite|author=[[Sho Murata|Murata, Sho]]|date=2019|title="Designer's Note" in "Cascade Kingdom". ''[[The Art of Super Mario Odyssey]]''|format=First English Edition|location=Milwaukie|publisher=[[Dark Horse]]|page=87}}</ref> emphasize the utilization of a [[capture|captured form]] introduced within the same kingdom. For example, the [[Sand Kingdom]] is the first area to include [[Bullet Bill]]s. During the fight with Knucklotec, his fists are capturable and control just like them. [[Mario]] must capture one to punch the boss in the face. For the largest kingdoms, they are usually the second boss battle, following one with a Broodal. Large bosses are aesthetically tied to the regional topography and narratively important to the active conflict. | |||
Unlike prior ''[[Super Mario (series)|Super Mario]]'' games that have [[level]]s or [[mission]]s that can be revisited, most of the completed boss battles cannot be repeated once cleared and there are stretches of the game where they are inaccessible. Scenarios where Mario can fight the bosses again are presented after completing "[[Bowser's Moon Wedding]]", and these ones can be replayed by the player innumerably. The Broodals and RoboBrood are fought on the [[Dark Side]] of the [[moon]]. Most of the large bosses can be found sealed inside [[painting]]s in the [[Mushroom Kingdom (Super Mario Odyssey)|Mushroom Kingdom]]. They are hung inside towers near [[Peach's Castle]]. Both of these scenarios are comparable to [[Boss Blitz Galaxy]] from ''Super Mario Galaxy 2'' and [[Boss Blitz]] from ''[[Super Mario 3D World]]''. Madame Broode can be battled again in the [[Underground Moon Caverns]]. Upon revisit, a painting appears in the [[Wedding Hall]] that brings Mario to a rematch with Bowser and a chance to replay the end of the main campaign. All of these battles are more challenging than the ones from the main campaign. | |||
[[ | Most of the bosses have an explicit or implied relationship with the moon. While normal [[rabbit]]s live on Mario's world, Madame Broode and the Broodals are of a "rabbitish" species that live on the Dark Side. They are conceptually derived from the {{wp|moon rabbit}}s of Japanese folklore.<ref>{{cite|author=----|date=2019|title=''[[The Art of Super Mario Odyssey]]''|format=First English Edition|location=Milwaukie|publisher=[[Dark Horse]]|page=73, 315}}</ref> Torkdrift looks like a {{wp|flying saucer}} and closely resembles the [[UFO|small UFO]] found on Honeylune Ridge.<ref name=drift>{{cite|author=----|date=2019|title="Wooded Kingdom". ''[[The Art of Super Mario Odyssey]]''|format=First English Edition|location=Milwaukie|publisher=[[Dark Horse]]|page=149}}</ref> Though described as the {{wp|Dauphin of France|Dauphin of Bubblaine}}, the local [[Bubblainian]]s do not talk about Mollusque-Lanceur as if they recognize him. His resemblance to the [[Astro-Lanceur]]s of Honeylune Ridge suggests he too may come form the moon.<ref>{{cite|author=----|date=2019|title="Moon Kingdom". ''[[The Art of Super Mario Odyssey]]''|format=First English Edition|location=Milwaukie|publisher=[[Dark Horse]]|page=283}}</ref> | ||
==== | Bosses are listed below in the order that they are first encountered within their respective categories. | ||
{|width=100% cellspacing=0 border=1 cellpadding=3 style="border-collapse:collapse;background:#FFFFFF" | |||
|-style="background:#FF2400;color:white;" | |||
=== | !width=10%|Name | ||
!Description | |||
!width=19%|Locations | |||
|- | |||
!colspan=3 style="background:#FF7733;"|The Broodals | |||
|- | |||
|align=center|[[File:Topper Artwork SMO.jpg|100x100px]]<br>[[Topper]] | |||
|The leader of the Broodals. Topper wears a stack of top hats during battle. He occasionally lies on the ground and whirl in a circle to strike Mario. Hitting him makes one hat fall off his head and slowly spin across the battlefield as a hazard. Knocking away all of Topper's hats leaves his head exposed and vulnerable to being stomped. Once struck, Topper conjures a flurry of top hats and releases them across the field, pulling himself into one in the process. Striking the one with Topper inside causes all of the hats on the field to disappear, but they all look identical to one another. The only "tell" is that Topper can be herd mumbling to himself when Mario draws near the hat he is hidden within. Topper is considered a ruthless and relentless figure. In the English localization, he speaks in a {{wp|Brooklyn accent}}. | |||
|align=center|[[Cap Kingdom]], [[Bowser's Kingdom]], [[Dark Side]] | |||
= | |- | ||
|align=center|[[File:Hariet Artwork SMO.jpg|100x100px]]<br>[[Hariet]] | |||
|Hariet is the "pyrotechnician" of the Broodals. She flings explosive bombs from her braids. The bombs leave pools of [[lava]] after detonating, making the battlefield harder to navigate. Tossing Cappy at a thrown bomb tosses it back at her, knocking off her metal sun hat and leaving her open to a stomp. She recedes into her hat when struck and flies erratically across the battlefield like a UFO, dropping bombs. Striking one of these with Cappy knocks it back into Hariet, ending the onslaught early. Hariet apparently crafted the hat she uses herself,<ref>{{cite|author=----|date=2019|title="Sand Kingdom". ''[[The Art of Super Mario Odyssey]]''|format=First English Edition|location=Milwaukie|publisher=[[Dark Horse]]|page=119}}</ref> and is considered the most erratic member of the Broodals. | |||
|align=center|[[Sand Kingdom]], [[Bowser's Kingdom]], [[Dark Side]] | |||
|- | |||
|align=center|[[File:Spewart Artwork SMO.jpg|100x100px]]<br>[[Spewart]] | |||
|The heavyset Spewart spins and spews [[Poison (obstacle)|poison]] across the battlefield. Cappy clears it when thrown across it. Unlike his compatriots, striking Spewart does not make him flinch, but it is necessary to knock away his hat and leave him open to a stomp. Once hit, Spewart enters his hat and whirls around the field, leaving poison in his wake. | |||
|align=center|[[Wooded Kingdom]], [[Luncheon Kingdom]], [[Dark Side]] | |||
|- | |||
|align=center|[[File:SMO Artwork Rango.png|100x100px]]<br>[[Rango]] | |||
|Rango is the tallest of the Broodals. He tosses his serrated straw hat like a [[boomerang]]. Striking the hat flips it over, revealing it contains a [[Hat Trampoline]] that can be used to [[spin]] high into the air and strike Rango from above. He is otherwise too tall to stomp on from the ground. Hitting Rango causes him to enter his hat, up to his waist, and tromp around the battlefield in an unpredictable manor. Rango is apparently prone to zoning out. He speaks with a {{wp|Drawl|southern drawl}} in the English localization. | |||
|align=center|[[Lake Kingdom]], [[Snow Kingdom]], [[Dark Side]] | |||
|- | |||
= | !colspan=3 style="background:#FF7733;"|Large bosses | ||
|- | |||
|align=center|[[File:Madame Broode Artwork SMO.jpg|100x100px]]<br>[[Madame Broode]] | |||
|The true boss of the Broodals, and the architect of Bowser's wedding. Madame Broode is encountered alongside her pet [[Big Chain Chomp|Chain Chomp]], Chain Chompikins. It lunges at Mario, incrementally pulling Madame Broode with it. [[Capture|Capturing]] Broode's Chain Chomp and launching it back at her is the only way to damage her. Madame Broode becomes enraged as the battle progresses and actively launches Chain Chompikins like a {{wp|yo-yo}} to strike Mario. | |||
|align=center|[[Cascade Kingdom]], [[Moon Kingdom]] | |||
|- | |||
|align=center|[[File:SMO Artwork Knucklotec.png|100x100px]]<br>[[Knucklotec]] | |||
|The stone guardian of the [[Binding Band]]. Knucklotec slams his disembodied hands into the battlefield to hit Mario and actively tracks his position. He periodically causes big [[icicle]]s to fall from the ceiling, which leave hexagonal panels of ice on the ground. Tricking Knucklotec into punching a panel stuns his fist and leaves it open to being captured. A captured Knucklotec's fist controls like a Bullet Bill, and is used to punch the boss's face. This is the only way to damage him. In the subsequent fight with Knucklotec, [[Chincho]]s are on the field. Knucklotec was worshiped as a god in ancient Tostarena, and his likeness is depicted throughout the kingdom on stones and ruins. | |||
|align=center|[[Sand Kingdom]], [[Mushroom Kingdom (Super Mario Odyssey)|Mushroom Kingdom]] | |||
|- | |||
|align=center|[[File:Torkdrift Artwork SMO.jpg|100x100px]]<br>[[Torkdrift]] | |||
|A mechanical [[Spindrift]] with googly eyes. Mario can only damage the boss as a captured [[Uproot]], striking its three flower-like extensions and glass dome. Only striking the dome truly damages Torkdrift, but it is pointed skyward by default. Striking all of the extensions forces Torkdrift to flip over and leaves its dome open to being struck. Torkdrift overwise discharges circular shockwaves that damage Mario on contact. Bowser created Torkdrift himself,<ref name=drift/> and it collects [[Soirée Bouquet]]s for his wedding. | |||
|align=center|[[Wooded Kingdom]], [[Mushroom Kingdom (Super Mario Odyssey)|Mushroom Kingdom]] | |||
= | |- | ||
|align=center|[[File:SMO Art - Bowser.png|100x100px]]<br>[[Bowser]] {{chart icon|SMO-capture}} | |||
|The fire-breathing king of [[Koopa (species)|Koopa]]s. Mirroring Mario himself, Bowser tosses a top hat to strike him. His is fixed with mechanical punching fists. Striking the hat with Cappy allows Mario to briefly appropriate it and punch back at Bowser like a {{wp|Rock 'Em Sock 'Em Robots|Rock 'Em Sock 'Em Robot}}. This is the only way to damage Bowser. He otherwise leaps across the arena, generating damaging shockwaves on impact, and conjures projectile stones to hurl at Mario. Bowser attempts to strike him with his tail when he is near, and guards by raising his forearms over his face. After defeating him in the Moon Kingdom, Mario must capture him to escape the collapsing underground with [[Princess Peach]]. Capturing Bowser allows Mario to swipe his claws with {{button|switch|Y}} and breathe fire by shaking the controller. Bowser is Mario's perennial foe, and he considers himself to be a legitimate rival for Peach's affection.<ref>{{cite|author=----|date=2019|title=''[[The Art of Super Mario Odyssey]]''|format=First English Edition|location=Milwaukie|publisher=[[Dark Horse]]|page=28, 29, 156, 157, 295}}</ref> | |||
|align=center|[[Cloud Kingdom]], [[Moon Kingdom]], [[Darker Side]] | |||
|- | |||
|align=center|[[File:Mechawiggler Artwork SMO.jpg|100x100px]]<br>[[Mechawiggler]] | |||
|Giant, robotic [[Wiggler]]s that scuttle across the sides of skyscrapers. One discharges balls of energy from its body that home-in towards Mario. He can only strike a Mechawiggler as a captured [[Sherm]], with the goal being to to knock out each of its glowing body segments. Doing so causes the Mechawiggler to eventually vanish and remerge from a portal, aiming to quickly bulldoze through Mario. A Mechawiggler is initially encountered leeching energy from New Donk City and causing a blackout. In the second battle, two Mechawigglers appear. | |||
|align=center|[[Metro Kingdom]], [[Mushroom Kingdom (Super Mario Odyssey)|Mushroom Kingdom]] | |||
|- | |||
|align=center|[[File:Mollosque-Lanceur Artwork SMO.jpg|100x100px]]<br>[[Mollusque-Lanceur]] | |||
|The Dauphin of Bubblaine, Brigadier Mollusque-Launceur III. He flies through the air, spitting projectile shells at Mario. Shooting water at Mollusque-Launceur's bulbous head as a captured Gushen is the only way to damage him. Mollusqur-Lauceur rapidly spins once struck, rendering himself temporarily invincible. Mario is damaged when hit by an arm. As the battle progresses, Mollusque-Launceur becomes enraged and secretes a lava-like goop on his head. Mollusque-Launceur is first encountered in the Seaside Kingdom, where he is hoarding [[Sparkle Water]]. | |||
|align=center|[[Seaside Kingdom]], [[Mushroom Kingdom (Super Mario Odyssey)|Mushroom Kingdom]] | |||
|- | |||
< | |align=center|[[File:Cookatiel Artwork SMO.jpg|100x100px]]<br>[[Cookatiel]] | ||
|A big, gluttonous bird that flutters in the air. Cookatiel upchucks projectile vegetables and lava in battle. Mario can only reach and damage him as a captured [[Lava Bubble]], traveling up the stream of lava to get to his strikable head. He is first fought above the giant pot of [[Stupendous Stew]] at the top of [[Mount Volbono]], where he has appropriated the local food. | |||
|align=center|[[Luncheon Kingdom]], [[Mushroom Kingdom (Super Mario Odyssey)|Mushroom Kingdom]] | |||
|- | |||
|align=center|[[File:Ruined Dragon Artwork SMO.jpg|100x100px]]<br>[[Ruined Dragon]] | |||
|The Lord of Lightning — an enormous dragon under the control of Bowser. The Ruined Dragon launches wheel-like electrical projectiles that roll across the battlefield. He lays his head on the field after a barrage, exhausted. This grants Mario access to the {{wp|kabuto|kabuto}} staked to the dragon's head by swords. Throwing Cappy at each of the swords makes the kabuto fall away, and grants Mario access to the strikable glowing bump. Ground-pounding it damages the Ruined Dragon. Bowser uses the dragon to down the [[Odyssey]] in Crumbleden. It is implied that an attack from the Ruined Dragon is what lead the kingdom to ruin. Once defeated, the Ruined Dragon rests his head upon the arena, murmuring about being exhausted. | |||
|align=center|[[Ruined Kingdom]], [[Mushroom Kingdom (Super Mario Odyssey)|Mushroom Kingdom]] | |||
|- | |||
|align=center|[[File:Robobrood Artwork SMO.jpg|100x100px]]<br>[[RoboBrood]] | |||
|A giant firework-launching mech controlled by the Broodals. RoboBrood fires [[firework bomb|bomb]]s and other projectile fireworks onto the arena. It walks around with heavy steps that knock-out Mario on contact. Defeating RoboBrood entails striking each one of its four cockpits, launching the Broodal it contained. The easiest way to reach the cockpit is as a captured Pokio, which can ascend RoboBrood's wooden body. After the strike, the RoboBrood runs across the field with energized feet. In the second battle on Rabbit Ridge, [[Hammer Bro]]s appear in place of Pokios. | |||
|align=center|[[Bowser's Kingdom]], [[Dark Side]] | |||
|} | |||
== | |||
| | |||
| | |||
| | |||
| | |||
= | |||
< | |||
{{ | |||
Latest revision as of 04:01, May 26, 2024
Enemies and obstacles
Enemies
| Name | Description | Locations | Spoils |
|---|---|---|---|
Goomba |
Squat mushroom creatures that chase Mario when he is in their line of sight. Goombas are defeated when stomped. A captured Goomba can stack on top of another one to make a Goomba Tower. Control is shifted to whichever Goomba is on the bottom. A Goomba Tower can be used to reach high platforms and press Goomba buttons. A captured Goomba also maintains stable footing on ice, and can receive Power Moons from Goombettes. Most Goombas are members of Bowser's army, but the ones in Goomba Woods are apparently unaffiliated. Yoofoe expels Goombas. | Cascade Kingdom, Sand Kingdom, Lake Kingdom, Wooded Kingdom, Cloud Kingdom, Metro Kingdom, Snow Kingdom, Seaside Kingdom, Luncheon Kingdom, Bowser's Kingdom, Mushroom Kingdom, Darker Side | |
Paragoomba |
Winged Goombas that fly back and forth in set paths. They are defeated when stomped. A captured Paragoomba can fly like a Parabones. | Cap Kingdom, Wooded Kingdom | |
Mini Goomba |
Little Goombas. Like normal-sized ones, they charge towards Mario when near. Mini Goombas are usually in groups of eight. In story-related objectives, Mini Goombas appear in the overworld before normal Goombas. They otherwise occur underground in glowing spots and inside crates. They are defeated when stomped by Mario or struck by Cappy. | Cap Kingdom, Cascade Kingdom, Sand Kingdom, Lake Kingdom, Wooded Kingdom, Lost Kingdom, Metro Kingdom, Seaside Kingdom, Bowser's Kingdom, Mushroom Kingdom | |
Chain Chomp |
Metal enemies with snapping jaws. Chain Chomps are fastened to the ground and lunge towards Mario when near. Jumping on one briefly stuns it, but does not inflict damage. Chain Chomps can only be defeated by a captured T-Rex. A captured Chain Chomp is similar to a pullback motor. Pulling the Chain Chomp to the farthest extent it can and letting go sends it flying in the opposite direction. This can be used to destroy stone walls, strike bull's-eyes, and unseal hidden areas. This action also forces Mario out of the Chain Chomp. | Cascade Kingdom | None |
Big Chain Chomp |
The Big Chain Chomp behaves identically to the normal-sized one. Striking a Chain Chomp with the captured Big Chain Chomp can trigger a chain reaction, where it is flung into another nearby Chain Chomp. | Cascade Kingdom | None |
 Broode's Chain Chomp |
Madame Broode's pet, a golden Big Chain Chomp named Chain Chompikins. It snaps at Mario and pulls Madame Broode forward as it does. She also launches it like a yo-yo to strike Mario. Capturing Broode's Chain Chomp and pulling it back launches it into the boss. This is the only way to damage her. | Cascade Kingdom, Moon Kingdom | None |
Burrbo |
Colorful chestnut creatures. They pop out of the ground when Mario draws near and lunge towards him. Burrbos damage Mario on contact, but are defeated when struck by Cappy. They usually occur in groups, and endlessly emerge from the earth if Mario is near. | Cascade Kingdom, Metro Kingdom, Seaside Kingdom, Bowser's Kingdom, Mushroom Kingdom, Dark Side, Darker Side | |
 Burrbo (Crumbleden) |
These Burrbos are embedded into the Ruined Dragon's head. They emerge to defend him from Mario. | Ruined Kingdom, Mushroom Kingdom | |
 T-Rex |
Powerful dinosaurs that have lived into the modern era. Most T-Rexes are encountered sleeping. This is a harmless state, in which Mario can stand on one's body with no ill effect. However, some T-Rexes are awake. Drawing near a patrolling T-Rex causes it to stop and sniff the ground. If Mario does not move away or hide, it turns to face him, roars, and gives chase with snapping jaws. Running into a wall or large obstacle temporarily dazes it and leaves it open to being captured. A captured T-Rex is indestructible and launches other enemies on contact. Holding |
Cascade Kingdom, Wooded Kingdom, Metro Kingdom | None |
 Koopa (Green) |
Green-shelled turtle enemies only found in 2D areas. Stomping a Koopa makes it retract into its shell, which can be used as a sliding projectile. Green Koopas walk off the sides of platforms. The Koopas that appear in 3D areas are harmless non-playable characters. | Cascade Kingdom, Metro Kingdom, Seaside Kingdom, Ruined Kingdom | |
 Koopa (Red) |
Red-shelled Koopas turn around when they reach the edge of a platform. | Cloud Kingdom, Bowser's Kingdom | |
Bullet Bill |
Missiles fired from Bill Blaster. Bullet Bills directly target Mario when he is in close proximity. Mario can lure Bullet Bills towards cages and blocks to destroy them. In 2D areas, Bullet Bills maintain straight trajectories. Within the Inverted Pyramid, these Bullet Bills become 3D when they reach the end of the wall-bound 2D area. A captured Bullet Bill can be used to reach distant areas. Shaking the controller causes it to pickup speed, but it detonates sooner. Knucklotec's Fists function just like Bullet Bills when captured. | Sand Kingdom, Wooded Kingdom, Cloud Kingdom, Metro Kingdom, Moon Kingdom, Mushroom Kingdom, Dark Side | |
Banzai Bill |
Large missile. Banzai Bills slowly swerve off their initial trajectory to home-in on Mario. They are defeated when stomped. Capturing a Banzai Bill enables Mario to cross wide gaps and blast through obstacles with |
Wooded Kingdom, Snow Kingdom, Moon Kingdom, Dark Side | |
 Pulse Beam |
Spiked mechs that discharge shockwaves. Pulse Beams are inert by default, but they discharge when struck by Cappy or another Pulse Beam's shockwave, causing a circular feedback loop. This can be used to clear obstacles, but makes an area more dangerous to traverse. Jumping on a Pulse Beam damages Mario. | Sand Kingdom, Seaside Kingdom, Mushroom Kingdom, Darker Side | |
Chincho |
Undead Tostarenans encountered at night and in dimly lit areas. Chinchos emerge from the ground and pursue Mario on sight. If left unattacked, they retreat back into the ground. Failing treasure chest puzzles causes Chincos to appear. Tossing Cappy at a Chincho briefly stuns it, but it can only be defeated when a stomp. The Jaxi can defeat hoards of them instantly. | Sand Kingdom, Wooded Kingdom, Seaside Kingdom, Ruined Kingdom, Mushroom Kingdom | |
Cheep Cheep |
Pudgy red fish. Some swim in circles, while others swim back and forth in set paths. Cheep Cheeps damage Mario on contact. They can be defeated with a ground pound or jump. A captured Cheep Cheep swims faster and is more versatile underwater than Mario, but it flails weakly if brought to land. Lakitus fish for Cheep Cheeps, the largest of which hold Power Moons. There is a Lochlady who finds Cheep Cheeps adorable. | Sand Kingdom, Lake Kingdom, Seaside Kingdom | |
 Snow Cheep Cheep |
Purple Cheep Cheeps adapted to live in freezing water. Capturing one is the only way Mario can safely swim in it. They otherwise behave like normal Cheep Cheeps. | Snow Kingdom | |
Komboo |
Underwater kelp creatures that rise from the floor of waterbodies. They pursue Mario when he is near. Though defeated when struck by Cappy, Komboos are highly cohesive in most areas and endlessly emerge from the ground, making it easy to be overwhelmed. | Lake Kingdom, Seaside Kingdom | |
Poison Piranha Plant |
Piranha Plants that spit poison. Their heads flash purple before firing. The shot poison pools into puddles that makes the immediate area hazardous. Stomping on a Poison Piranha Plant defeats it. One traps Cappy in its mouth if he is thrown at it. Knocking a rock into a Poison Piranha Plant's mouth beforehand is the only way to capture it. While captured, it can spit poison in any 360° radius from a fixed position. | Wooded Kingdom, Metro Kingdom, Dark Side | |
Big Poison Piranha Plant |
Big Piranha Plants the spit poison. The poison pools on the nearby earth like a puddle, making the immediate area more hazardous. Cappy clears the poisons when tossed. Throwing him directly at a Big Poison Piranha Plant traps him in its mouth, but weighs its head down, leaving it vulnerable to being stomped. | Wooded Kingdom, Metro Kingdom, Dark Side | |
Fire Piranha Plant |
Carnivorous plants that spit fireballs. Their heads flash orange before firing. A Fire Piranha Plant is defeated when stomped, or when kicked with Cappy trapped in its mouth. Fire Piranha Plants automatically engulf Cappy when he makes contact, and this prevents them from being captured. It only becomes capturable when a rock is knocked into its mouth first. A captured Fire Piranha Plant spits fireballs in a 360° radius from a fixed position. The fireballs can defeat enemies and light lanterns. | Lost Kingdom, Metro Kingdom, Luncheon Kingdom | |
 Uproot |
Bulbs that walk on a pair of extendable feet-like stalks. Uproots emerge from holes of soil with flowerpots covering their bodies. One directs itself towards Mario when he is near, extending themselves into the air to drop onto him. Striking an Uproot with Cappy breaks the pot and leaves it open to being stomped or captured. A captured Uproot extends its stalks when |
Wooded Kingdom, Seaside Kingdom, Mushroom Kingdom, Darker Side | |
Fire Bro |
Helmeted Koopas that toss fireballs. They otherwise behave like Hammer Bros. Shaking the controller as a captured Fire Bro makes it toss a fireball that can light lanterns and defeat enemies. A captured Fire Bro also reaches greater heights than Mario when it jumps. | Wooded Kingdom, Luncheon Kingdom | |
Hammer Bro |
Helmeted Koopas that toss hammers and leap across platforms erratically. Hammer Bros are defeated when stomped. A captured Hammer Bro can throw hammers to defeat enemies and break cheese rocks. Hammer Bros in the Luncheon Kingdom toss frying pans instead of hammers and wear chef hats. | Cloud Kingdom, Metro Kingdom, Luncheon Kingdom, Moon Kingdom, Dark Side | |
Sherm |
Tank enemies that fire damaging bullets. Most wear top hats similar to those of Uncle Sam. Knocking it away leaves Sherms open to being captured or ground-pounded. A captured Sherm aims its cannon by shifting |
Wooded Kingdom, Metro Kingdom, Moon Kingdom, Mushroom Kingdom, Dark Side | |
Coin Coffer |
Purse-like creatures filled with coins. Coin Coffers are nonconfrontational and usually invisible. One becomes exposed when it is bumped into. Jumping on a Coin Coffer makes it spit out one coin, and jumping on it sequentially makes it spit out as many as eight before being defeated. Ground-pounding one makes it release eight all at once. A captured Coin Coffer can fire coins as projectiles, but this depletes Mario's own coin count. Shaking the controller makes it rapidly fire coins in 360°. | Sand Kingdom, Wooded Kingdom | |
Fuzzy |
Prickly creatures that move back and forth along dotted tracks. In some areas, these tracks bring Fuzzies from 2D areas into 3D ones. Fuzzies are usually found in groups. They damage Mario on contact. | Wooded Kingdom, Cloud Kingdom, Lost Kingdom, Metro Kingdom, Moon Kingdom, Mushroom Kingdom, Darker Side | |
Yoofoe |
Mysterious flying objects that appear in kingdoms once the regional boss has been defeated. A Yoofoe hovers above ground with spiked bars spinning around its body. It drops Goombas and spiked balls from the hatch on its underside. Capturing a Goomba and forming a tower allows Mario to reach its damageable head. It takes two strikes to defeat. | Wooded Kingdom, Bowser's Kingdom, Darker Side | |
Klepto |
A condor that steals hats. Klepto kidnaps Cappy when encountered, depriving Mario of his abilities. It flies away from Mario when he draws near, but periodically stops to roost on a Rising Stone Pillar. Mario must ground-pound it to knock Klepto out and save Cappy. | Lost Kingdom | |
Trapeetle |
Iridescent beetles. They emerge from little holes in the ground and walk towards Mario with grasping hands. Trapeetles are largely impervious; the spike on one's abdomen damages Mario and prevents it from being stomped. One grabs onto Cappy if he is tossed at it and uses him to launch itself into Mario, exploding on contact. This can be manipulated to make Trapeetles destroy blocks. | Lost Kingdom | None |
Tropical Wiggler |
Concertinaing Wigglers in tulip hats. They move in set paths, sometimes stretching over disconnected platforms. The spikes on their body segments damage Mario on contact. Knocking the hat off of one leaves it open to being captured. Holding |
Lost Kingdom, Moon Kingdom | None |
Urban Stingby |
Mosquito-like Stingbies. They often occur in groups, slowly flying in circles slightly above ground. When Mario is near, an Urban Stingby locks onto and rapidly launches at him with a straight trajectory. It can defeat other enemies in their path, and explodes upon colliding with a wall or obstacle. Urban Stingbies are defeated when stomped or struck by Cappy. | Metro Kingdom, Darker Side | |
Urban Stingby Larva |
Larval Urban Stingbies sometimes occur in place of adults. They rapidly metamorphosize when Mario is in proximity. The larvae are otherwise nondamaging and slow. They can be knocked away with Cappy, a stomp, or a kick. | Metro Kingdom | |
 Donkey Kong |
A great ape that tosses projectile barrels down girders. He first appears in the final 2D section of the New Donk City Festival, an area similar to 25m. Donkey Kong is defeated when all four of the ? Blocks he is on are struck. Donkey Kong kidnapped Mayor Pauline many years ago, something she reflects on during "A Request from the Mayor". | Metro Kingdom, Darker Side | None |
 Bitefrost |
Icy predators that hide underground and snake their way between raised earth. A silhouette of their face appears below the surface and can be tracked. One rises from the earth and snaps its jaw shut if Mario is standing above its silhouette. Only the bite damages Mario; a Bitefrost can otherwise be stood on like a platform. The ones in the Luncheon Kingdom appear pink from having embedded their bodies with salt instead of snow. | Snow Kingdom, Luncheon Kingdom | |
Ty-foo |
Giant Foo-like enemies that blow strong winds at consistent intervals. The gusts blow enemies, items, Cappy, and Mario himself off of platforms. There are hidden areas in the Snow Kingdom where Ty-foos blow wooden blocks along stretches of ice that can be used as platforms. A captured Ty-foo can blow wind itself with |
Cascade Kingdom, Snow Kingdom | |
Gushen |
Small octopuses enveloped in water balls of their own making. Gushens fire projectile streams of water when Mario is near, depleting their reserves. A captured Gushen can use the stream as a projectile to hit distant enemies and objects by pressing |
Sand Kingdom, Seaside Kingdom, Mushroom Kingdom | |
Maw-Ray |
Giant moray eel enemies that dwell in underwater caves. They quickly lunge towards Mario when he is near. | Seaside Kingdom, Mushroom Kingdom | |
Spiny |
Squat, spiked Koopas. They chase Mario when he is near. Spinies are briefly stunned and shoved backwards when struck by Cappy, and they damage Mario when jumped on. Spinies are only defeated when knocked off the edge of a platform or when struck by a thrown item, like a seed. | Cap Kingdom, Cloud Kingdom, Snow Kingdom, Seaside Kingdom, Luncheon Kingdom, Bowser's Kingdom | |
Lava Bubble |
Incandescent drops of lava. Contact burns Mario. They leap vertically from lava and through Wire Net Platforms. A captured Lava Bubble can traverse through lava and use lava cannons. Shaking the controller causes it to horizontally leap through the air, twirling. Making contact with solid ground makes the Lava Bubble disappear and forces Mario out of the capture. A captured Lava Bubble can also light lanterns and is used during the battle with Cookatiel. | Cloud Kingdom, Lost Kingdom, Luncheon Kingdom, Mushroom Kingdom, Darker Side | None |
Magmato |
Rolling tomato enemies that home-in on Mario. Striking a Magmato causes it to fall apart into a puddle of molten pulp. A captured Lava Bubble can swim in these puddles, enabling it to cross large stretches of terrain it normally could not. The puddle otherwise damages Mario on contact. | Luncheon Kingdom, Darker Side | |
Pokio |
Green pheasant enemies with protractible beaks. Mario is damaged if struck by one's beak. Pokios can be lured to Coin Blocks and jab at them, and can shatter rocks with one hit. Pokios wear spiked jingasa that damage Mario if he tries to jump on them. Hitting one with Cappy knocks the jingasa away, leaving it open to being stomped or captured. A Pkio will reappear on a flat stone in an area where they have all been defeated after a few seconds. A captured Pokio can use its beak to strike enemies, blocks, firework bombs, and flames. Jabbing into a soft wall and flicking the |
Seaside Kingdom, Bowser's Kingdom, Darker Side | |
Stairface Ogre |
Large oni-like beings that carry mallets. Stairface Ogres actively pursue Mario but they cannot move perpendicularly, only side-to-side or up-and-down. If in front of a Stairface Ogre, it swings its mallet down to crush him. Contact instantly defeats Mario. If avoided, the mallet can be climbed like a staircase to reach the top of the Stairface Ogre's head, now exposed. Ground-pounding it defeats the enemy. Stairface Ogres are made of wood and can be ascended as a captured Pokio. Jabbing the glowing hole on its forehead also defeats it. | Metro Kingdom, Bowser's Kingdom | |
Astro-Lanceur |
Octopus enemies found on the moon. Astro-Lanceurs float above the surface and fire projectile shells from their siphons. Ground-pounding the starburst-shaped symbol on one's helmet defeats it. Astro-Lanceurs have an implicit relationship with Mollusque-Lanceur. | Moon Kingdom | |
Moonsnake |
Fixed, geometric axes with arms of rolling rocks. Though moving together as if single bars, the rocks are disconnected from one another, hugging the surface of terrain. The arms of some Moonsnakes are small, while others are long and have a radius that nearly covers the entire area. Both the axis and rocks of a Moonsnake damage Mario when touched. Despite their rocky appearance, Moonsnakes are basal extraterrestrial lifeforms. | Seaside Kingdom, Moon Kingdom, Dark Side, Darker Side | |
Parabones |
Winged Dry Bones. They pursue Mario on sight, but they cannot ascend or descend, so they can easily be obstructed. Parabones crumble into a pile of bones when stomped, but reassemble after a few seconds. They are only defeated if they crumble above a bottomless pit or lava. A captured Parabones can fly. Rapidly pressing |
Bowser's Kingdom, Moon Kingdom | None |
Chargin' Chuck |
Burly Koopas in football gear. Chargin' Chucks remain still until Mario is near, who they try to charge through. Knocking-off their helmet leaves them vulnerable to a stomp. A captured Chargin' Chuck can bash through obstacles and enemies without flinching or receiving damage. | Ruined Kingdom, Moon Kingdom |
Obstacles
| Name | Description | Locations |
|---|---|---|
 Banzai Bill Cannon |
Giant cannons that shoot Banzai Bills. Within the Wooded Kingdom, there is a Banzai Bill Cannon in a subarea that is triggered when Mario collects a nearby key. | Wooded Kingdom, Snow Kingdom, Moon Kingdom, Dark Side |
 Barrel |
Rolling projectiles tossed down girders by Donkey Kong. Contact damages Mario. | Metro Kingdom, Darker Side |
 Bill Blaster |
Cannons that shoot Bullet Bills. | Sand Kingdom, Wooded Kingdom, Cloud Kingdom, Metro Kingdom, Moon Kingdom, Mushroom Kingdom, Dark Side |
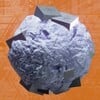 Boulder / Shell / Pepper |
Rolling rocks that damage Mario on contact. They break when they collide with a wall. Bowser and Chargin' Chucks can break them while captured. Some boulders release a heart when broken. Equivalent obstacles appear in some kingdoms that match the regional topography, such as shells and peppers. | Cloud Kingdom, Seaside Kingdom, Luncheon Kingdom, Bowser's Kingdom, Moon Kingdom, Darker Side |
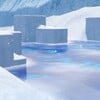 Freezing water |
Water so frigid that it gradually depletes Mario's life meter if he tries to swim through it. The boarder of the screen gradually becomes encroached with ice the longer Mario stays in the water, obscuring the player's view. A captured Snow Cheep Cheep can swim in freezing water without being damaged. | Snow Kingdom |
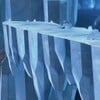 Ice |
Ice reduces Mario's traction and causes him to slide. A captured Goomba remains sure-footed on ice. | Sand Kingdom, Snow Kingdom |
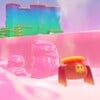 Lava |
Molten rock. Direct contact burns Mario and makes him bounce into the air with his hands on his rear. A captured Lava Bubble can swim through lava. | Lost Kingdom, Seaside Kingdom, Luncheon Kingdom, Moon Kingdom, Darker Side |
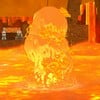 Lava Geyser |
Lava Geysers rise and fall in set intervals that can be timed. A rise is always proceeded by rapid bubbling on the lava's surface. In some areas, they rise through Wire Net Platforms. A captured Lava Bubble can utilize Lava Geysers as platforms that brings it to a higher area, similar to Sand Geysers. | Luncheon Kingdom, Moon Kingdom, Darker Side |
 Oil drum |
Touching an oil drum damages Mario. They only appear in 2D areas. | Metro Kingdom, Darker Side |
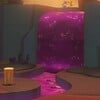 Poison |
Touching poison immediately causes Mario to lose a life. The Jaxi can harmlessly run across it. In a subarea, poison moves in waves. | Cap Kingdom, Sand Kingdom, Wooded Kingdom, Lost Kingdom, Metro Kingdom, Snow Kingdom, Bowser's Kingdom |
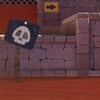 Quicksand |
Mario rapidly sinks while on quicksand. Jumping keeps him above the surface. In most areas, sinking all the way through quicksand causes Mario to lose a life, but there is a hidden area in Tostarena Ruins only accessible by sinking through the sand. Glydon is incapable of sinking through quicksand. | Sand Kingdom |
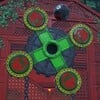 Rotating defense mechanism |
A cannon above the Secret Flower Field Entrance that fires rolling cannonballs. Striking each of its panels as a captured Sherm destroys it. | Wooded Kingdom |
 Spike Trap |
Spike Traps generally appear attached to terrain and shifting objects. Their spikes damage Mario on contact. Some Spike Traps protract their spikes in set intervals that can be timed. A captured Jizo can travel across beds of spikes without being damaged. | Lake Kingdom, Metro Kingdom, Bowser's Kingdom |
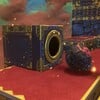 Turret |
Embronzed cannons around Bowser's Castle. They perpetually launch firework bombs that roll along the ground. These bombs can be knocked into breakable objects by a captured Pokio. Firework bombs otherwise damage Mario on contact. | Seaside Kingdom, Bowser's Kingdom |
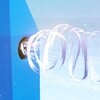 Wind |
Billows of wind push Mario or carry him into the air, depending on the orientation of its source. Tossing Cappy into a billow carries him a great distance, sometimes into an otherwise unreachable switch. Posts seal wind underground in the Snow Kingdom. It is otherwise expelled by Ty-foos and blocky towers in set increments. | Cascade Kingdom, Snow Kingdom, Darker Side |
Bosses
There are thirteen bosses in Super Mario Odyssey, most of which release a Multi Moon upon defeat. The most recurring bosses are the Broodals. They are subordinates of the wedding planner Madame Broode and help carryout Bowser's wedding plans, often actively pilfering articles of interest on his behalf. They travel across the world on an airship. A battle against a Broodal emphasizes utilization of throwing moves with Cappy. He is needed to knock away projectiles, clear hazards, end attacks early, and make the boss open to being stomped. A subsequent battle with the same Broodal is always harder than the last. They are visually similar to the Koopalings,[1] and are narratively comparable to Bowser Jr. in Super Mario Galaxy and Super Mario Galaxy 2. The fact that each of them physically recede into their hats during battle is a potential allusion to a magician's hat-trick.
Large bosses[2] emphasize the utilization of a captured form introduced within the same kingdom. For example, the Sand Kingdom is the first area to include Bullet Bills. During the fight with Knucklotec, his fists are capturable and control just like them. Mario must capture one to punch the boss in the face. For the largest kingdoms, they are usually the second boss battle, following one with a Broodal. Large bosses are aesthetically tied to the regional topography and narratively important to the active conflict.
Unlike prior Super Mario games that have levels or missions that can be revisited, most of the completed boss battles cannot be repeated once cleared and there are stretches of the game where they are inaccessible. Scenarios where Mario can fight the bosses again are presented after completing "Bowser's Moon Wedding", and these ones can be replayed by the player innumerably. The Broodals and RoboBrood are fought on the Dark Side of the moon. Most of the large bosses can be found sealed inside paintings in the Mushroom Kingdom. They are hung inside towers near Peach's Castle. Both of these scenarios are comparable to Boss Blitz Galaxy from Super Mario Galaxy 2 and Boss Blitz from Super Mario 3D World. Madame Broode can be battled again in the Underground Moon Caverns. Upon revisit, a painting appears in the Wedding Hall that brings Mario to a rematch with Bowser and a chance to replay the end of the main campaign. All of these battles are more challenging than the ones from the main campaign.
Most of the bosses have an explicit or implied relationship with the moon. While normal rabbits live on Mario's world, Madame Broode and the Broodals are of a "rabbitish" species that live on the Dark Side. They are conceptually derived from the moon rabbits of Japanese folklore.[3] Torkdrift looks like a flying saucer and closely resembles the small UFO found on Honeylune Ridge.[4] Though described as the Dauphin of Bubblaine, the local Bubblainians do not talk about Mollusque-Lanceur as if they recognize him. His resemblance to the Astro-Lanceurs of Honeylune Ridge suggests he too may come form the moon.[5]
Bosses are listed below in the order that they are first encountered within their respective categories.
| Name | Description | Locations |
|---|---|---|
| The Broodals | ||
 Topper |
The leader of the Broodals. Topper wears a stack of top hats during battle. He occasionally lies on the ground and whirl in a circle to strike Mario. Hitting him makes one hat fall off his head and slowly spin across the battlefield as a hazard. Knocking away all of Topper's hats leaves his head exposed and vulnerable to being stomped. Once struck, Topper conjures a flurry of top hats and releases them across the field, pulling himself into one in the process. Striking the one with Topper inside causes all of the hats on the field to disappear, but they all look identical to one another. The only "tell" is that Topper can be herd mumbling to himself when Mario draws near the hat he is hidden within. Topper is considered a ruthless and relentless figure. In the English localization, he speaks in a Brooklyn accent. | Cap Kingdom, Bowser's Kingdom, Dark Side |
 Hariet |
Hariet is the "pyrotechnician" of the Broodals. She flings explosive bombs from her braids. The bombs leave pools of lava after detonating, making the battlefield harder to navigate. Tossing Cappy at a thrown bomb tosses it back at her, knocking off her metal sun hat and leaving her open to a stomp. She recedes into her hat when struck and flies erratically across the battlefield like a UFO, dropping bombs. Striking one of these with Cappy knocks it back into Hariet, ending the onslaught early. Hariet apparently crafted the hat she uses herself,[6] and is considered the most erratic member of the Broodals. | Sand Kingdom, Bowser's Kingdom, Dark Side |
 Spewart |
The heavyset Spewart spins and spews poison across the battlefield. Cappy clears it when thrown across it. Unlike his compatriots, striking Spewart does not make him flinch, but it is necessary to knock away his hat and leave him open to a stomp. Once hit, Spewart enters his hat and whirls around the field, leaving poison in his wake. | Wooded Kingdom, Luncheon Kingdom, Dark Side |
 Rango |
Rango is the tallest of the Broodals. He tosses his serrated straw hat like a boomerang. Striking the hat flips it over, revealing it contains a Hat Trampoline that can be used to spin high into the air and strike Rango from above. He is otherwise too tall to stomp on from the ground. Hitting Rango causes him to enter his hat, up to his waist, and tromp around the battlefield in an unpredictable manor. Rango is apparently prone to zoning out. He speaks with a southern drawl in the English localization. | Lake Kingdom, Snow Kingdom, Dark Side |
| Large bosses | ||
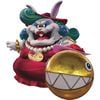 Madame Broode |
The true boss of the Broodals, and the architect of Bowser's wedding. Madame Broode is encountered alongside her pet Chain Chomp, Chain Chompikins. It lunges at Mario, incrementally pulling Madame Broode with it. Capturing Broode's Chain Chomp and launching it back at her is the only way to damage her. Madame Broode becomes enraged as the battle progresses and actively launches Chain Chompikins like a yo-yo to strike Mario. | Cascade Kingdom, Moon Kingdom |
 Knucklotec |
The stone guardian of the Binding Band. Knucklotec slams his disembodied hands into the battlefield to hit Mario and actively tracks his position. He periodically causes big icicles to fall from the ceiling, which leave hexagonal panels of ice on the ground. Tricking Knucklotec into punching a panel stuns his fist and leaves it open to being captured. A captured Knucklotec's fist controls like a Bullet Bill, and is used to punch the boss's face. This is the only way to damage him. In the subsequent fight with Knucklotec, Chinchos are on the field. Knucklotec was worshiped as a god in ancient Tostarena, and his likeness is depicted throughout the kingdom on stones and ruins. | Sand Kingdom, Mushroom Kingdom |
 Torkdrift |
A mechanical Spindrift with googly eyes. Mario can only damage the boss as a captured Uproot, striking its three flower-like extensions and glass dome. Only striking the dome truly damages Torkdrift, but it is pointed skyward by default. Striking all of the extensions forces Torkdrift to flip over and leaves its dome open to being struck. Torkdrift overwise discharges circular shockwaves that damage Mario on contact. Bowser created Torkdrift himself,[4] and it collects Soirée Bouquets for his wedding. | Wooded Kingdom, Mushroom Kingdom |
 Bowser |
The fire-breathing king of Koopas. Mirroring Mario himself, Bowser tosses a top hat to strike him. His is fixed with mechanical punching fists. Striking the hat with Cappy allows Mario to briefly appropriate it and punch back at Bowser like a Rock 'Em Sock 'Em Robot. This is the only way to damage Bowser. He otherwise leaps across the arena, generating damaging shockwaves on impact, and conjures projectile stones to hurl at Mario. Bowser attempts to strike him with his tail when he is near, and guards by raising his forearms over his face. After defeating him in the Moon Kingdom, Mario must capture him to escape the collapsing underground with Princess Peach. Capturing Bowser allows Mario to swipe his claws with |
Cloud Kingdom, Moon Kingdom, Darker Side |
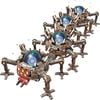 Mechawiggler |
Giant, robotic Wigglers that scuttle across the sides of skyscrapers. One discharges balls of energy from its body that home-in towards Mario. He can only strike a Mechawiggler as a captured Sherm, with the goal being to to knock out each of its glowing body segments. Doing so causes the Mechawiggler to eventually vanish and remerge from a portal, aiming to quickly bulldoze through Mario. A Mechawiggler is initially encountered leeching energy from New Donk City and causing a blackout. In the second battle, two Mechawigglers appear. | Metro Kingdom, Mushroom Kingdom |
 Mollusque-Lanceur |
The Dauphin of Bubblaine, Brigadier Mollusque-Launceur III. He flies through the air, spitting projectile shells at Mario. Shooting water at Mollusque-Launceur's bulbous head as a captured Gushen is the only way to damage him. Mollusqur-Lauceur rapidly spins once struck, rendering himself temporarily invincible. Mario is damaged when hit by an arm. As the battle progresses, Mollusque-Launceur becomes enraged and secretes a lava-like goop on his head. Mollusque-Launceur is first encountered in the Seaside Kingdom, where he is hoarding Sparkle Water. | Seaside Kingdom, Mushroom Kingdom |
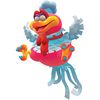 Cookatiel |
A big, gluttonous bird that flutters in the air. Cookatiel upchucks projectile vegetables and lava in battle. Mario can only reach and damage him as a captured Lava Bubble, traveling up the stream of lava to get to his strikable head. He is first fought above the giant pot of Stupendous Stew at the top of Mount Volbono, where he has appropriated the local food. | Luncheon Kingdom, Mushroom Kingdom |
 Ruined Dragon |
The Lord of Lightning — an enormous dragon under the control of Bowser. The Ruined Dragon launches wheel-like electrical projectiles that roll across the battlefield. He lays his head on the field after a barrage, exhausted. This grants Mario access to the kabuto staked to the dragon's head by swords. Throwing Cappy at each of the swords makes the kabuto fall away, and grants Mario access to the strikable glowing bump. Ground-pounding it damages the Ruined Dragon. Bowser uses the dragon to down the Odyssey in Crumbleden. It is implied that an attack from the Ruined Dragon is what lead the kingdom to ruin. Once defeated, the Ruined Dragon rests his head upon the arena, murmuring about being exhausted. | Ruined Kingdom, Mushroom Kingdom |
 RoboBrood |
A giant firework-launching mech controlled by the Broodals. RoboBrood fires bombs and other projectile fireworks onto the arena. It walks around with heavy steps that knock-out Mario on contact. Defeating RoboBrood entails striking each one of its four cockpits, launching the Broodal it contained. The easiest way to reach the cockpit is as a captured Pokio, which can ascend RoboBrood's wooden body. After the strike, the RoboBrood runs across the field with energized feet. In the second battle on Rabbit Ridge, Hammer Bros appear in place of Pokios. | Bowser's Kingdom, Dark Side |
- ^ Sakai, Kazuya, kikai, Rachel Roberts, and Jenny Blenk, editors (2019). The Art of Super Mario Odyssey (First English Edition). Milwaukie: Dark Horse. Page 73, 147.
- ^ Murata, Sho (2019). "Designer's Note" in "Cascade Kingdom". The Art of Super Mario Odyssey (First English Edition). Milwaukie: Dark Horse. Page 87.
- ^ ---- (2019). The Art of Super Mario Odyssey (First English Edition). Milwaukie: Dark Horse. Page 73, 315.
- ^ a b ---- (2019). "Wooded Kingdom". The Art of Super Mario Odyssey (First English Edition). Milwaukie: Dark Horse. Page 149.
- ^ ---- (2019). "Moon Kingdom". The Art of Super Mario Odyssey (First English Edition). Milwaukie: Dark Horse. Page 283.
- ^ ---- (2019). "Sand Kingdom". The Art of Super Mario Odyssey (First English Edition). Milwaukie: Dark Horse. Page 119.
- ^ ---- (2019). The Art of Super Mario Odyssey (First English Edition). Milwaukie: Dark Horse. Page 28, 29, 156, 157, 295.
